Pottery Date Night
 Bring All Your Friends Free Week
 Give a Month of Pottery
 Private Pottery Parties

 The Welcome Booklet
 Your First Ten Sessions
 The Pottery Process
 Finding the Studio
 Your Classes Never Expire
 The Four Tables
 Who’s Who
 The Rewards Program
 Flux Glazes
 The Calculators
 Kiln Tracker
 Holiday Kiln Deadlines

 Beginner’s Tool Set
 Fingernail Clippers
 Mayco Clay Mender
 Epoxy for Kintsugi
 Applicator Bottles
 Large Bead Rack
 Raku Workshop
 Nighttime Raku
 Horsehair and Feather Raku
 The Clay Hole T-Shirt
 Embroidered Crewneck
 Zip-Up Hoodie
 Pre-Made Bisqueware
 Glaze Catchers
 Kiln Cookies
 Clay Cubby Rental
 The Glaze Bible, Printed
 The Book of Molds, Printed
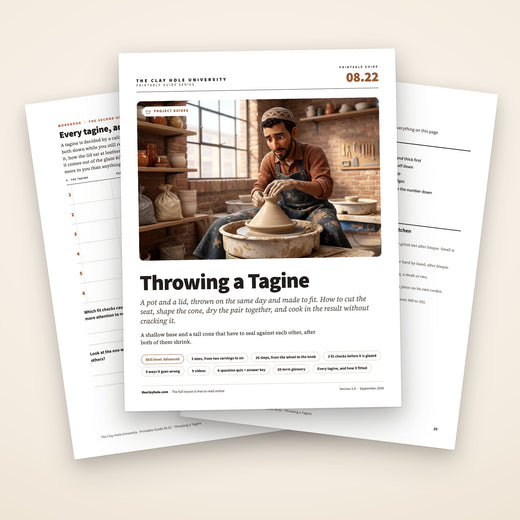
 Printable Pottery Guides
 Free Printable Trackers
 Gifts for Potters
 Christmas Pottery Ideas
 Mother’s Day Gift Ideas
 Pottery Date Night
 Studio Calendar
 2027 Studio Events
 What Should I Do Today?
 How to Throw on the Pottery Wheel
 How to Make a Pinch Pot
 How to Tap Center a Pot
 The Five Stages of Clay
 Is Pottery Hard to Learn?
 Pottery Wheel Practice Drills
 20 Easy Hand-Building Projects
 Everything That Sounds Wrong

 A Beautiful Piece, Every Time
 Slab Roller Tips
 Any Dish as a Slump Mold
 Slab Roller & Slab Mold Certification
 The Pottery Skill Tree
 Clay & Pottery Calculators
 Logging Your Pottery and Glazes
 The Pottery Dictionary
 Why Did My Pottery Do That?
 The Pottery Cone Chart
 Pottery Myths, Fact-Checked
 Is Handmade Pottery Food Safe?
 Incredible Ceramic Artist Videos
 How Dan Throws Giant Pots
 How to Dry Your Pottery
 The Pottery Wheel Introduction
 Pottery by Zodiac Sign
 Personality and the Pottery Wheel
 Pottery for Engineers
 ADHD, Hyperfocus, and Never Running Out
 Hobbies for Burnout
 Screen-Free Hobbies for Adults
 Every Addiction I Ever Had Lost to Art
 Functional Pottery Is Engineering
 How Do We Compare?
 Pottery Classes by City
 Every Pottery Studio in Utah
 Pottery in Draper
 Featured Members
 The Signature Wall
 Making Friends as an Adult Is Brutal
 The Clay Hole Commandments
 2027 Pottery Contests
 2027 Studio Parties
 Gallery Night

 Scream It Into the Void
 Destroy the Glaze Wall
 Daily Affirmation Cards
 Everything That Can Go Wrong
 Subscribe to Our Newsletters
 Contact The Clay Hole
 Corporate Team Building

 Glaze Combinations
 Glazes We Do Not Carry
 Making Glaze Test Tiles
 The Mega Glaze Tool
 How to Use the Mega Glaze Tool

 Glaze Brushing Techniques
 How to Use Underglaze
 How to Use Dipping Glazes
 Glaze Problems, Causes and Fixes
 The Dipping Glaze Guide

 Making a Glaze Catcher
 Fused or Sharp After Firing
 The Signature Wall
 His Viral Videos
 His Own Ceramics
 Meet Mud
Clay Hole University · Project guides
How to throw a tagine, base and cone
A shallow base and a tall cone that have to seal against each other, after both of them shrink. That sentence is the whole problem, and almost everything on this page is a way of solving it.
Two pots, thrown the same day out of the same bag, dried together, fired together, measured three separate times. Get the order right and a tagine is a pleasant afternoon. Get it wrong and you own a nice shallow dish and an unrelated cone.
Jump to a section
The whole thing
A tagine in one page
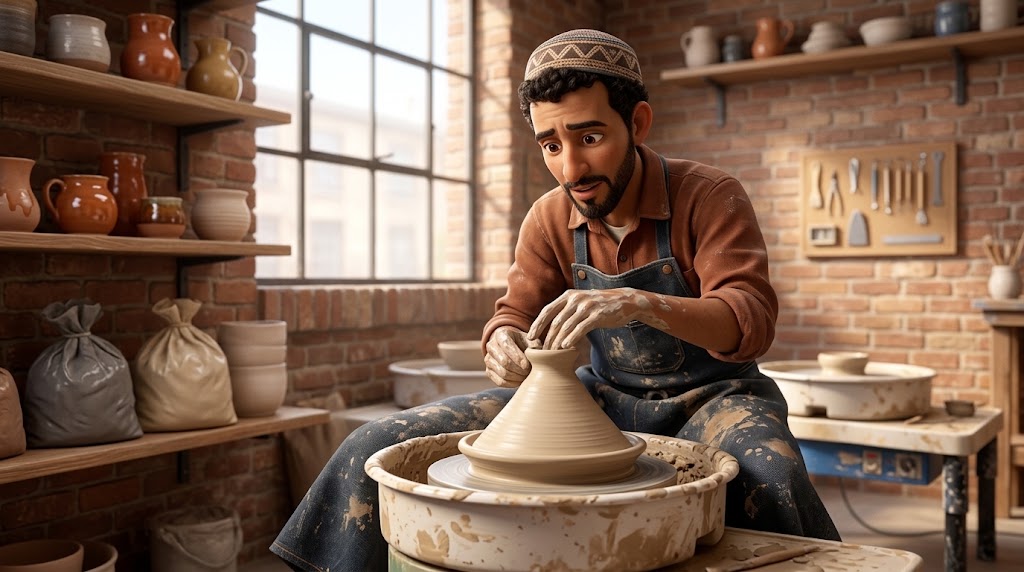
Throw a wide shallow dish and cut a step into its rim. Throw a tall cone upside down, as a very steep bowl on a tiny foot, and open its rim until it matches that step. Dry them together, fire them apart, and check the fit at every stage instead of at the end.
The one sentence that decides it
The lid has to drop into its seat and not rock. It does not have to be airtight, it does not have to be snug, and it is not a jar. A tagine lid that lifts on and off with a little slop is a working tagine. A tagine lid that is a sixteenth of an inch too small is scrap. So when you are unsure, throw the lid rim slightly wide. Wide can be trimmed. Small cannot.
-
Weigh out both balls now, from the same bag
About 4½ pounds for the base and 3½ for the lid gives a tagine roughly ten inches across that will feed three or four people. Same clay body, same bag, same day. Two bodies shrink by different amounts and the fit you measured wet will not be the fit you get.
-
Throw the base as a wide shallow dish, on a bat
Open a floor a good three eighths of an inch thick and compress it twice, once with your fingers and once with a rib. Open out to about an inch under your finished width, then pull a short wall roughly two inches tall and leave the top of it heavy, near half an inch.
-
Cut a step into the rim, and measure it
Press the inner half of that heavy rim down about a quarter of an inch with a fingertip or a wooden rib, so the rim becomes an outer lip with a ledge inside it. That ledge is the seat. Compress both edges, then take calipers to the inside of the outer lip and write the number on the bat.
-
Throw the cone upside down
Open a floor only about three inches across and leave it thick, because it becomes the point of the cone and the knob. Pull the wall up and outward in straight lines rather than curves, keeping the rim thick and compressed on every pull. Rib the outside dead straight.
-
Open the rim to your caliper number, plus a hair
Widen with a rib until the calipers just clear, then go about an eighth of an inch wider. A flared rim pulls up and in as it dries, and the two pots will not shrink identically. Check with the wheel stopped, in two places ninety degrees apart, because a rim can be right on one axis and oval on the other.
-
Dry them together, then test the fit at leather hard
One loose sheet of plastic over both, rims covered, in the same spot. When they are leather hard, sit the lid in the seat. This is your last cheap chance to fix anything: trim the lid rim, or open the gallery, while the clay still cuts.
-
Trim the knob, and put a hole in it
Invert the leather hard lid and turn a knob out of that thick apex. If the knob ends up hollow it needs a vent hole. Water inside it turns to steam in the bisque and takes the top of your cone off with it. An eighth of an inch is plenty.
-
Fire the lid and the base separately, and check the fit again
Bisque is free, so bisque them and then try the fit before you glaze. A tight lid can still be ground down, wet, at this stage. Glaze both pieces inside and out, leaving the foot of the base and the rim of the lid bare, and fire them side by side rather than stacked, and nothing can fuse.
Throwing / Making a Pottery Tagine Tajine on the Wheel
Ingleton Pottery
Base and lid, start to finish. Watch how little the wall of the base moves and how much time goes into the rim.
Why we give you both
A video carries what a sentence cannot: wheel speed, the angle of a rib, how much pressure is actually being used. But video runs at its own pace and your hands are wet.
Reading runs at yours. You can stop on a number, read a line twice, and hold it in your head while you work. Watching teaches the motion, reading fixes the order and the measurements. Most people need both, which is why every page here has both, and a print button.
Do not skip this part
Read the can you cook in it section below before you plan a dinner around this pot. Our pottery is fired to cone 5½ and comes out oven friendly, but it is not flameware and it will crack on a burner.
Before we start
Why this page has words in it as well as videos
A tagine is two pots that have to agree with each other, and the agreement lives in numbers. The words hold the measurements, the videos show the fit. Use both or you will throw it twice.
01
What the cone is actually doing
A tagine is a low water braise. The cone is not a stylistic choice, it is the part that does the work, and once you understand what it is for, every proportion on the pot stops being arbitrary.
Food goes in the shallow base with very little liquid. As it heats, moisture leaves the food as steam and rises into the cone. The top of that cone is a long way from the heat, so it stays comparatively cool. Steam hits it, condenses, and runs back down the inside slope. At the bottom of the slope it arrives at the rim and drips back into the food around the edge rather than in the middle. Then it does it again, for two hours.
That is why a cone and not a dome. A dome collects condensation at its highest point, which is the center, and drips it onto whatever is sitting in the middle of the dish. A cone hands the water down a slope to the perimeter. It is also why height matters more than it looks like it should. A short lid gives the steam nowhere cool to go, and a tagine with a squat lid is a casserole dish with a hat on.

-
The cone, and its height
Aim for a lid about three quarters as tall as the seat is wide. Ten inch seat, roughly eight inch cone. Shorter than that and the condensation cycle weakens.
-
The knob, and the hole through it
Big enough to grab through a folded towel, because it gets hot. If the knob is hollow it needs a vent hole or it can crack in the bisque.
-
The seat, cut into the rim
A ledge about a quarter inch wide, sitting a quarter inch below an outer lip. The lip is what stops the lid sliding off when the pot is carried.
-
The clearance you want
A little. The lid drops in and does not rock. This is not a jar and it does not need a seal, and a tiny gap is what lets the pot breathe instead of rattling.
-
The wall of the base
About two inches of usable depth. Deep enough to hold a stew, shallow enough that the steam has a short trip to the cone.
-
The floor, left thick
Thicker than you would leave a bowl. A wide flat floor is the single most reliable place on this pot to get a crack, and thickness plus compression is the answer.
The two kinds of tagine, and why it confuses people
Traditional Moroccan tagines come in two families that look similar and do different jobs. The plain, unglazed, cheap ones are the cooking pots, made from low fire earthenware and treated as consumable. The heavily decorated glazed ones you see in markets and gift shops are serving pieces and are generally not cooked in at all. What you make here is a third thing: dense high fired stoneware, which is far more durable than either, and which has its own rules. Those are in the cooking section.
02
The numbers to start from
Starting points, not laws. Everyone throws thicker or thinner than everyone else, and after one tagine you will know your own numbers better than we do. Until then, use these.
| Size | Base clay | Lid clay | Seat across | Cone height |
|---|---|---|---|---|
| Small, feeds two | 3 lb | 2½ lb | 8 in | 6 in |
| Standard, feeds three or four | 4½ lb | 3½ lb | 10 in | 8 in |
| Large, feeds five or six | 7 lb | 5 lb | 13 in | 10 in |
The ratios worth memorizing
- Cone height, about 0.75 to 1 times the seat diameter
- Base wall, about 2 to 2½ inches of usable depth
- Base floor, about ⅜ inch thick off the wheel
- Base rim before you cut the seat, about ½ inch thick
- Lid wall, thin, but the rim stays heavy
- Lid clay, roughly three quarters of the base clay
Where the clay actually goes
The base looks like it should need more clay than it does, because it is shallow. Most of its weight ends up in the floor and in that heavy rim, not in the wall.
The lid is the opposite. It looks small and needs more clay than people expect, because you are pulling a lot of height out of a very small foot and the wall has to stay strong enough not to sag while it dries.
If you want to see how proportions get decided in general rather than just for this pot, our page on throwing by the numbers covers wall thickness, ratios, and how to stop guessing.
03
Which clay, and why it matters twice
Clay choice matters more on a tagine than on almost anything else you throw, and for two separate reasons that happen to point the same direction.
Reason one: shrinkage has to match
Two pots that must fit each other after firing need to shrink by the same amount. Different bodies do not. So the rule is not just one clay body, it is the same clay body, ideally from the same bag, thrown on the same day, and dried in the same spot.
Reason two: this pot goes in an oven
Anything that gets heated and cooled repeatedly is happier with some grog or sand in it. Grogged bodies open the structure slightly and cope better with temperature change, and they also fight the warping that wide shallow forms are prone to.
What we would pull off the shelf
B-Mix with Grog, 52 Buff, Speckled Buff or Berlin Gray. B-Mix with Grog and Berlin Gray carry the most grog, which is what reason two is about. All four throw well at this size and are forgiving about a wide flat floor. Any of them will make a good tagine.
We would not make a first tagine in #16 Porcelain. It is beautiful and it is the least forgiving body we carry. A wide flat floor and a tall thin cone are exactly the two things it likes least, and you would be fighting the clay and the form at the same time. Make the second one in porcelain, once you know the shape.
You can see the whole range on the clay collection page.
One more thing that belongs here rather than in the firing section. Even wall thickness is the single biggest thing you control for how long this pot survives. A pot with a thin wall and a thick floor heats at two different rates and puts stress right where they meet. That is true in the kiln and it is true in your oven three years from now. Every time you are deciding whether to trim a bit more off, this is the argument for doing it.
04
Throwing the base
The base is a wide shallow dish with a heavy rim. If you can throw a large low bowl you can throw this, with two differences: the floor stays thicker and the rim stays much thicker.
-
Use a bat, and do not talk yourself out of it
A ten inch shallow dish cannot be lifted off a wheel head without going oval, and going oval is the thing that ruins the fit later. Wire it, leave it on the bat, walk away. Our page on bat or no bat makes the longer argument, but for this form there is no argument.
-
Center low and wide
You are not building height, so do not cone up into a tower and then have to flatten it. Cone once to homogenize the clay, then bring it down into a low broad disc, wider than it is tall. Starting close to the finished footprint saves you a lot of pushing later.
-
Open a floor about three eighths of an inch thick
Thicker than you would leave a bowl. You want material for trimming a foot, and you want the extra thickness because a wide flat floor is where cracks happen. Check it with a needle tool rather than trusting your thumbs.
-
Compress the floor twice
Once with your fingers, working from the center outward with the wheel turning steadily. Then again with a rib, same direction. Two passes, not one. This is the step people skip and then blame the kiln, and it is covered properly on our compressing the floor and rim page.
-
Open out to about an inch under your finished width
Wide shallow forms grow while you work them. If you want a ten inch seat, open to about nine and let the pulls and the ribbing take you the rest of the way.
-
Pull a short wall and keep the top of it heavy
One or two pulls is plenty. Aim for around two inches of wall, close to vertical or leaning out slightly. Do not thin the top. That thick rim, about half an inch, is the material you are going to cut the seat out of, and if you pull it thin now you have nothing to work with.
-
Rib the inside as one continuous curve
Floor into wall with no shelf or crease between them. A crease is a stress line and it is also where food gets stuck for the rest of the pot's life. A flexible metal rib from center to rim, one pass, light pressure.
-
Bevel the outside foot and wire it, twice
An undercut at the base makes trimming easier later. Wire under it, then wire again after a minute, because a wide floor sucks itself back down onto the bat. Leave it on the bat.
How to Throw and Trim a Shallow Stoneware Bowl, Narrated Version
Florian Gadsby
A tagine base is this shape with a heavier rim. The narration is the useful part: he explains what he is doing to the inside curve and why.
How to Throw and Trim a Small Pottery Plate, Narrated Version
Florian Gadsby
A plate is a tagine base with no wall, so all the wide flat floor problems are the same ones. Watch the compression work. That is the bit that keeps floors together.
05
Cutting the seat
There are three ways to seat a tagine lid. We think one of them is clearly better for this form, but it is worth knowing why before you commit, because you cannot change your mind at leather hard.
A flat rim, lid sits on top
Simplest to throw. The lid just rests on a wide flat rim. It also slides, and a cone lid has a high center of gravity, so it slides off the moment somebody carries the pot from the oven to the table. We would not.
A step cut into the rim
Our pick. The rim becomes an outer lip with a ledge inside it. The lid drops into the ledge and the lip stops it going anywhere. It also hides small fit errors, because a slightly loose lid still sits captive.
A lid that caps over the outside
The most forgiving on fit, because the lid only has to be bigger than the base rather than exactly right. But it rocks, it looks wrong on this form, and any drips run down the outside of the base instead of back into the food.
-
Get the rim flat and thick first
Slow the wheel down. Level the top of the wall with a rib or a wooden tool until it is a flat band about half an inch across. Everything after this is easier if you do this properly.
-
Press the inner half down
With the wheel turning slowly, rest a fingertip or the corner of a wooden rib on the inner half of that band and press straight down, about a quarter of an inch. Support the outside of the wall with your other hand. You are not cutting anything away, you are displacing clay downward and slightly outward, which thickens the outer lip. That is a bonus.
-
Square the step up
You want a flat ledge and a fairly upright inner face on the lip, not a rounded valley. A rounded seat lets the lid wander. A square one locates it.
-
Compress both edges
A damp chamois or a fingertip over the top of the lip and over the inner corner of the ledge. Two fresh edges on a wide rim are two places to start a crack while it dries.
-
Measure, and write the number down
Calipers across the inside of the outer lip, which is the diameter the lid rim has to match. Take it with the wheel stopped, then turn the pot ninety degrees and take it again. Write it on the bat in slip or on a piece of tape. You will not remember it.
How to Throw a Storage Jar with a Rolled 'van Gilder Style' Gallery
Bill van Gilder
On a jar rather than a tagine, and it teaches a rolled gallery, a slightly different move from the pressed step in this section, but it is the clearest demonstration of forming a seat we have found, and a rolled gallery makes a stronger one.
How to Throw Lids: A Beginners Guide to Making Jars
NSG
Good on calipers and on which diameter you are actually measuring, which is the thing beginners get backwards. Our lids that fit page covers the same ground in writing.
06
Throwing the cone, upside down
This is the part people find hard, and most of the difficulty disappears once you accept that you are not throwing a lid. You are throwing a very steep bowl on a very small foot, and then turning it over.
There are two routes. You can throw the cone the right way up, which means opening the clay all the way down to the bat so the form has no floor, then collaring the top in until it closes to a point. That gives you a beautifully flat seating rim, because the rim is sitting on the bat. It is also a bottomless form that has to be lifted rather than wired, and collaring a tall cone closed is genuinely difficult.
Or you throw it upside down: a tall conical bowl on a narrow foot, where the foot becomes the point of the cone and the rim becomes the seat. This is what most potters do and it is what we teach, because flaring outward is easier than collaring inward, and because the rim you have to measure is the rim you are holding.
-
Put the caliper number in front of you
Set the calipers to the seat measurement from the base and leave them open, on the wheel tray, where you will see them. Everything in this throw is aimed at that one number.
-
Center on a bat and open a small floor
Only about three inches across, and leave it thick, five eighths of an inch or so. That floor is the apex of the cone and the material your knob gets turned out of. A thin floor here means no knob and a hole in the top of your lid.
-
Pull up and out, in straight lines
Every pull rises and opens the angle a little. Resist making a curve. A cone with a belly in it reads as a mistake even to people who could not tell you why, and a straight slope is what carries condensation cleanly down to the rim.
-
Keep the rim thick, and compress it every single pull
The rim is the widest, thinnest, fastest drying part of the pot, and it is also the part that has to be perfectly round three days from now. Every time your hands leave the pot, compress the rim before they come back.
-
Rib the outside straight
A firm rib held against the outside, from just above the foot to the rim, with your other hand inside for support. This is also where you thin the wall properly, which matters because a thick cone will sag under its own weight while it stiffens.
-
Open the rim out to the calipers, then go a little wider
Widen with the rib until the calipers just clear the rim, then take it about an eighth of an inch wider still. This is deliberate. A wide flared rim tends to pull up and inward as it dries, the two pots will not shrink identically, and a lid that ends up slightly big can be trimmed, or ground wet after the bisque, while a lid that ends up small is firewood.
-
Check in two places, with the wheel stopped
Calipers across, then rotate ninety degrees and again. A rim can be exactly right on one axis and a quarter inch out on the other, and a spinning pot will never tell you that.
-
Wire it and leave it on the bat
Do not pick this up. A wide thin rim on a tall light form will distort from being held. It comes off the bat when it is leather hard and not before. Our page on getting the pot off the wheel has more on this if you have had things go oval on you.
Throwing / Making a Pottery Tagine Tajine on the Wheel
Ingleton Pottery
The whole pot in one sitting. Worth watching once at speed for the shape of the afternoon and once slowly for the rim work.
Throwing a Terracotta Morrocan Tagine
LB Ceramics.
Thrown on a kick wheel in terracotta, which is closer to how these are traditionally made. Different clay, different wheel, same decisions.
Collaring a Narrow Vase Form
Rachel Dorn
Collaring is the skill the right way up route needs. If you want to try it, learn this first, and read our collaring in page alongside it.
A note on the right way up route
We are not telling you not to do it. It produces a better seating rim, and if you already collar comfortably it is a good afternoon.
But know what you are signing up for. Opening to the bat means the form has no floor holding it together, so it distorts easily. Collaring a cone closed at the top thickens the wall exactly where you least want weight. And getting a bottomless form off the bat without an oval rim takes a light touch. Our throwing in sections page covers bottomless throwing properly.
07
The knob, and the hole in it
Two decisions here. What the knob is made of, and whether there is a hole through the top of your lid. The second one is the one that can cost you the pot.
-
Wait for leather hard, then invert the lid
Sit the cone upside down on the wheel, on a pad of foam or nested in a chuck, and tap it true the way you would center anything for trimming. The rim is now on the bottom and the thick apex is pointing up at you.
-
Turn the knob out of the apex
Trim away the surplus from around the thick floor you left, and shape a knob out of what remains. Turning it from the same piece of clay is the strongest option and it can never fall off, which matters on something that gets lifted with a towel while full of hot food.
-
Or throw a knob separately and attach it
Perfectly fine, and it lets you make a much more interesting knob. Score both surfaces properly, use slip made from the same clay, and press it on with a small twist. Our score and slip page has the joins that hold and the ones that do not.
-
Make it bigger than feels necessary
This knob is the only handle on a lid that will be lifted off a hot pot, through a folded towel, with one hand, probably by somebody who is also holding a spoon. A delicate little finial looks great and is miserable to use. Give it a waist you can actually grip.
-
If the knob is hollow, it must have a vent hole
This is the one that ends tagines. A hollow knob is the hardest part of the lid to dry, because the water inside it can only leave through the wall. Whatever is still in there turns to steam in the bisque and has to go somewhere, and where it goes is through the top of your lid. If there is any chance the knob is hollow, put a hole in it, so the inside can dry and the steam has a way out. An eighth of an inch is plenty and it will be invisible in the finished pot.
The traditional hole, and the kiln hole, are two different things
Plenty of traditional tagines have a small hole near the knob, and there is honest disagreement among cooks about whether it does anything. The argument against it is straightforward: the whole point of the cone is to keep the steam, so why let it out. Some cooks who own a holed tagine plug it with a piece of vegetable while it cooks.
The kiln reason is not a matter of opinion. If your knob is hollow, or if your lid encloses any sealed pocket anywhere, the water inside has nowhere to go, so it needs a vent. So the practical answer is that a small hole is cheap insurance in the kiln and makes very little difference on the stove, and if you throw a solid knob you do not need one at all.
Pottery tajine video: How to make a pottery tagine on potter's wheel. #108
Sifounios Pottery
Useful for the knob and the finishing, and for seeing another potter arrive at slightly different proportions than the ones we suggest. Both work.
Trimming the base, while you are set up
The base gets trimmed at the same stage and the same way as any wide shallow form. Keep the foot ring broad, because a narrow foot under a heavy dish concentrates every stress in one small circle.
Trim the floor to roughly the same thickness as the wall rather than leaving it heavy. Even thickness is the whole game on a pot that will be heated and cooled. Full technique on our trimming page.
08
Fit, measured three times
The mistake is not measuring wrong. The mistake is measuring once, at the wettest and least reliable moment, and then finding out how it went four weeks later on the glaze shelf.
Wet, with calipers
The seat, then the lid rim, both taken with the wheel stopped and both taken twice at ninety degrees. This measurement gets you close. It is not the one that decides anything.
Leather hard, by hand
The one that matters. Actually sit the lid in the seat. Clay still cuts at this stage, so this is where a tight lid gets its rim trimmed down or a wide seat gets opened out. Do it before you trim the foot, not after.
After bisque, before glaze
Bisque firing is free, so use it as a checkpoint. A slightly tight lid can still be taken down, wet, with a diamond pad or a silicon carbide stone at this stage. After the glaze firing, your options are worse.
What a good fit feels like
Lift the lid an inch and drop it. It should land in the seat, settle, and stay put when you nudge it sideways. It should not need lining up, it should not wedge, and it should not rock on two points like a bad table leg.
If it rocks, the problem is almost never the diameter. It is that one of the two rims is not flat. Put the lid rim down on a sheet of glass or a flat batt and look for daylight, then take the high spots down.
One more note about ovals, because it is the failure we see most. Wide shallow rims and wide flared rims both go oval, and they go oval from being handled, from drying unevenly, and from being lifted off a bat too early. If the base is oval and the lid is round, no amount of trimming fixes it, because the lid only fits on one axis. The prevention is boring and it works: leave both on their bats, cover the rims, and do not pick anything up until it is stiff.
09
Drying two pots as one
Treat the base and the lid as a single object that happens to be in two pieces. Everything you do to one, do to the other, at the same time, in the same place.
- One loose sheet of plastic over both. Not two sheets, not two shelves, not one in the damp room and one on your shelf. Same air, same speed.
- Cover the rims specifically. The seat on the base and the flared rim on the lid are the thinnest, most exposed parts of each pot, and they are the two parts that have to stay round. A strip of plastic laid over the rims alone is often all the intervention needed.
- Give the base floor time. A wide flat floor dries from the top and the edges while the middle stays wet, and that difference is what tears an S shaped crack across the bottom. Slow is the only fix.
- Once the base is firm, get air underneath it. Move it onto a rack or a couple of battens so the underside can catch up with the top. Not before it is firm enough to hold its shape.
- Do not stack the lid on the base to dry. Tempting, because it looks like the finished pot. It traps moisture in the base and dries the two at different rates, which is the exact opposite of what you want.
- A week is reasonable. Two is better. This is a big shallow object and a tall thin one and neither of them rewards being hurried.
Where to bisque it
Fire both pieces in the same bisque, side by side and upright. Staff load every kiln here, so leave them on the bisque table as two separate pieces, the cone upright beside the base and never nested in it. Nested, they dry and heat differently, and you have just undone all the trouble you took. Bisque firings are free here, every time, so there is no reason to crowd them.
10
Glazing and firing
Here is the good news that people who have wrestled with lidded jars will appreciate: a tagine gets fired with the lid off, so both pieces can be glazed inside and out, and nothing can fuse.
A lidded jar is often fired with its lid on, to hold the rim round, which means waxing the gallery and the lid's contact ring and living with two unglazed bands. A tagine does not need that. The base is stabilized by its own heavy rim and the cone is a naturally rigid shape, so you can fire them separately and glaze everything except the two parts that sit on the shelf, the foot of the base and the rim of the lid.
- Glaze both pieces inside and out, leaving only the foot of the base and the rim of the lid bare, exactly as you would with any other functional pot.
- Fire them side by side, not stacked. If two glazed surfaces never touch, nothing can fuse. Staff load every kiln here, so leave the base and the lid on the glaze firing table as two separate pieces, each on its own kiln cookie or glaze catcher, every time. Then a run of glaze ruins the catcher and not the shelf, and you never end up on our fused and sharp pottery page.
- If you insist on firing the lid on, wax the ledge and the lid rim thoroughly and accept the risk. We would not, on this form.
- Pick a glaze that does not craze. Crazing is a network of fine cracks in the glaze surface, and on a pot that gets filled with hot food it is a genuine weakness rather than a look. The glaze finder will tell you what each of ours does.
- Go easy on runny glazes on the inside of the cone. Anything mobile is going to travel down that slope and pool at the rim, which is exactly where you need a clean flat edge.
What this will cost to fire
Glaze firing here is five cents per cubic inch with a four dollar eighty minimum, measured at the widest points, and bisque is free. A tagine is a big object measured that way, so it is worth knowing the number before you commit rather than after.
A standard sized one, base ten by ten by three inches and lid nine by nine by eight, comes out at three hundred cubic inches plus six hundred and forty eight. That is fifteen dollars for the base and thirty two dollars and forty cents for the lid, so about forty seven dollars for the pair. A small one is roughly half that. You can check your own with the firing calculator.
All of our studio pottery is fired to cone 5½, which is cone 5 with a twelve minute hold at peak, and bisque is cone 05. At that temperature the clay vitrifies and the pot comes out watertight and oven friendly. Whether it is food safe, dishwasher safe and microwave safe is decided by the glaze, glaze by glaze, so look yours up in the Food Safe Lookup at theclayhole.com/pages/glaze-collections/food-safe-glazes before it goes on the inside of a pot that will hold food. What that does not make it is flameware, which is the next section and is the one part of this page we would ask you not to skim.
11
Can you actually cook in it
Yes, in an oven. No, on a burner. That distinction is not us being cautious, it is a property of the clay, and it is the difference between a pot you use for years and a pot that cracks the first time you use it properly.
Everything we fire here goes to cone 5½ and vitrifies, which is why our pottery is durable in a way low fire pottery is not. But vitrified stoneware is ovenware, not flameware, and those are two different classes of material. Flameware is built out of low expansion ingredients specifically so it can take a flame, and it is not something we stock.
What kills a pot on a burner is not heat, it is uneven heat. A gas ring or an electric coil puts a great deal of energy into one small patch of the floor while the rim is still at room temperature. The hot part wants to expand and the cold part will not let it, and stoneware is strong and brittle rather than strong and forgiving, so it cracks.
Use it like this and it will last
- Start cold, in a cold oven. Put the loaded tagine in before you turn the oven on and let them come up together.
- Keep it low. Around 300 to 325 degrees is where this dish wants to live anyway. It is a slow braise, not a roast.
- Never put a hot pot on a cold wet surface. A trivet, a folded towel, a wooden board. Not a stone counter, not a metal sink, and never under a running tap.
- Never take it from the fridge to a hot oven. Let it come up to room temperature on the counter first.
- Lift the lid with a towel. The knob is ceramic and it gets exactly as hot as everything else.
If you want the real thing, the stovetop tagines sold in Morocco are unglazed low fire earthenware, or in some regions a micaceous clay, used over gentle charcoal and often over a diffuser. They are porous, they get seasoned with oil before first use, and they are treated as consumable objects that eventually break. That is a completely different pot from the one you are making, made from a completely different material, for a completely different heat source.
And the reason we keep coming back to even wall thickness is this section. Every stress described above concentrates wherever the pot changes thickness abruptly. A thin wall meeting a heavy untrimmed floor is a fault line you built in on purpose. Trimming that floor down is not about weight or elegance, it is about how many winters this thing sees.
12
Nine ways this goes wrong
Four ways this goes wrong
In roughly the order they happen. Most of them are cheap to prevent and expensive to fix, which is the usual arrangement.
The four that get people on a first attempt. There are five more in the comprehensive version.
-
The lid came out too small
The classic, and it is unfixable. It happens because the caliper measurement was taken wet and optimistic, or because the flared rim pulled inward as it dried. Throw the lid rim about an eighth of an inch wider than the calipers say. Wide can be trimmed at leather hard or ground wet after bisque. Small is scrap.
-
The base went oval
Then the lid fits on one axis and not the other, and nothing can be done. Wide shallow rims go oval from being lifted off the bat early, from being carried by the rim, and from drying faster on one side than the other. Leave it on the bat, cover the rim, move it by the bat.
-
An S shaped crack across the floor
Wide flat floors are the natural home of this crack. It comes from a floor that was not compressed and from drying that was too fast at the edges relative to the middle. Compress twice, leave the floor thick, dry slowly, get air underneath once it is firm.
-
The knob blew off in the bisque
A hollow knob with no vent hole, or any sealed pocket in the lid. Whatever water is still inside turns to steam and leaves through the weakest point, which is the top of your cone. An eighth inch hole almost always prevents it and costs you nothing.
-
The cone sagged or grew a belly
Too much clay left in the wall, or too much water, or a curve that crept in during the pulls. A cone holds itself up by being straight, and a wall with a bulge in it has a hinge. Rib the outside straight and thin the wall properly before you set the rim.
-
The lid rocks
Almost always a rim that is not flat rather than a diameter that is wrong. Test the lid rim on a sheet of glass and look for daylight underneath. Take the high spots down at leather hard with a rib, or after bisque with a diamond pad, used wet.
-
The lid fused to the base in the glaze firing
Only happens if you fired them stacked. Do not. Fire the two pieces side by side, glaze everything except the foot and the lid rim, and this failure mode simply does not exist for you.
-
Glaze pooled in the seat, or ran off the cone
A mobile glaze on the inside of a steep cone travels. It ends up as a thick bead at the rim, which is precisely the flat surface you needed. Keep the coat thinner on the inside of the lid, and keep runny glazes off the seat and the lid rim entirely.
-
It cracked the first time it was used
This is the burner. Or the fridge going straight into a hot oven, or a hot pot set down on a cold wet counter. Read the cooking section above and then read it to whoever else uses your kitchen, because it is usually not the potter who does it.
Making a clay pottery Tagine Moroccan Cooking Pot on the potters wheel throwing demo
Ingleton Pottery
The same potter's earlier go at the form, described by him as a first attempt. Worth watching precisely because it is not a polished demonstration of a shape already solved.
What to expect
A tagine is an advanced project and we have it filed that way in the university. It is two difficult forms that also have to agree with each other, and the fit is decided by decisions you made days earlier.
Most people do not get a working lid on the first one. That is not a sign you have done anything wrong, it is the normal shape of learning this. Throw two bases and two lids in the same session if you have the clay, because the second of anything is always better and it costs you nothing but an hour.
13
Questions we get
Do I actually need calipers?
Yes, and we have them in the studio so you do not need to buy any. You can get a tagine lid roughly right by eye and you will spend the rest of the project wishing you had not. Set them once on the seat and do not touch the setting again until the lid is finished.
Can I hand build the base and throw the lid?
You can, and a slab base over a former works well. Two things to watch. The seat has to end up genuinely circular, which is harder by hand than it sounds, and a hand built base and a thrown lid can dry at different rates, so be even more disciplined about drying them together. If you want a hand built route, our hand built footed serving bowls page is the closest starting point.
How long does the whole project take?
Two to three hours at the wheel across two sessions, then a week or two of drying, then bisque and glaze. Realistically you are three to four weeks from a finished tagine, most of which is waiting. Plan the throwing for a day when you are not rushed, because the measuring is the part that suffers when you hurry.
Should this be my first lidded form?
We would not, and we say that as people who would rather you succeed than be impressed by your own ambition. Throw a lidded jar with a gallery first. It teaches the exact same seat, at a size where a mistake costs you a pound of clay instead of eight, and it takes an afternoon.
My lid is too big. Is it usable?
Usually, and this is exactly why we tell you to err wide. At leather hard you can trim the lid rim down on the wheel until the calipers agree. After bisque you can take a surprising amount off with a diamond pad or a silicon carbide stone, working wet, never dry, in safety glasses and an N95 or better, and checking constantly. After the glaze firing you are into grinding through glaze, wet and with the same glasses and mask, which is possible but rarely pretty.
Does the inside really need to be glazed?
At cone 5½ the clay body itself is vitrified, so an unglazed interior is not going to leak. But a glazed interior is far easier to clean after a two hour braise, and cooking oil that soaks into bare clay eventually goes rancid. Glaze the inside of the base at minimum, with a glaze rated for food, because a tagine holds food for hours. The inside of the cone is more of a preference than a rule.
Can I make one big enough to actually feed people?
Yes. A thirteen inch base takes about seven pounds and a ten inch cone takes about five, and everything on this page still applies, just with less margin for error. Read our throwing large serving bowls page first for the centering, and be aware that a large tagine costs meaningfully more to fire.
What if I want it to work on a stovetop?
Then you need a flameware body, and we do not carry one. It is a real category of clay, formulated with low expansion materials for exactly this, and it is not something you can approximate by throwing a stoneware pot thicker or firing it differently. Make an oven tagine, which is a genuinely lovely thing to own, and buy a cheap earthenware one if you want to cook over a flame.
14
What to read next
A lidded jar with a gallery
The same seat at a size where mistakes are cheap. Do this one first.
Throwing lids that fit
Calipers, clearances, and every kind of lid seat, in one place.
Compressing the floor and the rim
Why wide flat floors crack, and the two passes that stop it.
Throwing large serving bowls
For a tagine big enough to put in the middle of a table.
A butter dish with a domed lid
A base and a lid that have to agree, at a much friendlier scale.
Trimming and turning
Feet, lids, and getting the wall and floor to the same thickness.
One last thing
Two pots, one measurement, and a great deal of patience.
Almost everything difficult about a tagine happens before you can see it. The fit is decided by a caliper reading you took on a Tuesday, by whether you covered two rims with plastic, and by whether you were willing to leave a pot on a bat for four days instead of picking it up to look at it. None of that is skill exactly. It is just deciding in advance that the boring version is the one that works.
And when it does work, you own a pot that does something. Not a mug, not a bowl, but a piece of equipment with a job, that people will ask about, and that will sit in the middle of a table with dinner in it. That is a good thing to have made.
That is the short version, and it is enough to go and throw one tonight. If you want the reasoning behind every number on this page, the failure modes we left out, and eight more videos, switch back to the Comprehensive Version at the top.
Filed under Project Guides in Clay Hole University. Skill level: advanced.
Which version would you like to print?
Videos come out as a labeled box with the title and channel to search for, since paper does not play them.