Pottery Date Night
 Bring All Your Friends Free Week
 Give a Month of Pottery
 Private Pottery Parties

 The Welcome Booklet
 Your First Ten Sessions
 The Pottery Process
 Finding the Studio
 Your Classes Never Expire
 The Four Tables
 Who’s Who
 The Rewards Program
 Flux Glazes
 The Calculators
 Kiln Tracker
 Holiday Kiln Deadlines

 Beginner’s Tool Set
 Fingernail Clippers
 Mayco Clay Mender
 Epoxy for Kintsugi
 Applicator Bottles
 Large Bead Rack
 Raku Workshop
 Nighttime Raku
 Horsehair and Feather Raku
 The Clay Hole T-Shirt
 Embroidered Crewneck
 Zip-Up Hoodie
 Pre-Made Bisqueware
 Glaze Catchers
 Kiln Cookies
 Clay Cubby Rental
 The Glaze Bible, Printed
 The Book of Molds, Printed
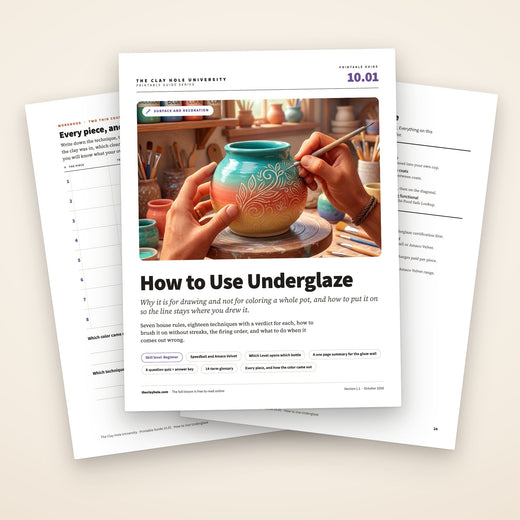
 Printable Pottery Guides
 Free Printable Trackers
 Gifts for Potters
 Christmas Pottery Ideas
 Mother’s Day Gift Ideas
 Pottery Date Night
 Studio Calendar
 2027 Studio Events
 What Should I Do Today?
 How to Throw on the Pottery Wheel
 How to Make a Pinch Pot
 How to Tap Center a Pot
 The Five Stages of Clay
 Is Pottery Hard to Learn?
 Pottery Wheel Practice Drills
 20 Easy Hand-Building Projects
 Everything That Sounds Wrong

 A Beautiful Piece, Every Time
 Slab Roller Tips
 Any Dish as a Slump Mold
 Slab Roller & Slab Mold Certification
 The Pottery Skill Tree
 Clay & Pottery Calculators
 Logging Your Pottery and Glazes
 The Pottery Dictionary
 Why Did My Pottery Do That?
 The Pottery Cone Chart
 Pottery Myths, Fact-Checked
 Is Handmade Pottery Food Safe?
 Incredible Ceramic Artist Videos
 How Dan Throws Giant Pots
 How to Dry Your Pottery
 The Pottery Wheel Introduction
 Pottery by Zodiac Sign
 Personality and the Pottery Wheel
 Pottery for Engineers
 ADHD, Hyperfocus, and Never Running Out
 Hobbies for Burnout
 Screen-Free Hobbies for Adults
 Every Addiction I Ever Had Lost to Art
 Functional Pottery Is Engineering
 How Do We Compare?
 Pottery Classes by City
 Every Pottery Studio in Utah
 Pottery in Draper
 Featured Members
 The Signature Wall
 Making Friends as an Adult Is Brutal
 The Clay Hole Commandments
 2027 Pottery Contests
 2027 Studio Parties
 Gallery Night

 Scream It Into the Void
 Destroy the Glaze Wall
 Daily Affirmation Cards
 Everything That Can Go Wrong
 Subscribe to Our Newsletters
 Contact The Clay Hole
 Corporate Team Building

 Glaze Combinations
 Glazes We Do Not Carry
 Making Glaze Test Tiles
 The Mega Glaze Tool
 How to Use the Mega Glaze Tool

 Glaze Brushing Techniques
 How to Use Underglaze
 How to Use Dipping Glazes
 Glaze Problems, Causes and Fixes
 The Dipping Glaze Guide

 Making a Glaze Catcher
 Fused or Sharp After Firing
 The Signature Wall
 His Viral Videos
 His Own Ceramics
 Meet Mud
Underglaze is not glaze. It is not paint. And it is not a base coat.
It is the stuff you draw with. Line work, carving, illustration, a signature, a face on a mug. That is the whole job.
It is the stuff you draw with. Line work, carving, illustration, a signature, a face on a mug. That is the whole job. When somebody uses it to solidly color an entire pot, they burn through a bottle that costs more than the pot, and then they glaze over the whole thing anyway.
So here is everything, in one place. What it is, what it does, which brands you can reach at your level, the techniques we love, the one rule we never bend, and the fixes for when it goes sideways.
Here is the short version. What it is, what your level gets you, the seven house rules, and how to get it onto a pot without hating the result.

What the stuff in the bottle actually is
It is for drawing on pots, not for coloring them
Glaze is glass. It melts in the kiln, moves a little, pools in your carving, and comes out shiny or satin or matte. Underglaze is basically colored clay with a little flux in it. It barely melts. It stays exactly where you put it, holds a crisp edge, and comes out of the kiln looking like a chalky matte version of the color in the bottle.
That is the entire difference, and it is why each one is good at something the other is terrible at.
Glaze is glass. It melts, moves, and comes out shiny. Underglaze is basically colored clay with a little flux in it, so it barely melts, stays exactly where you put it, and holds a crisp edge. That difference is the whole story.
The question that answers almost everything
Are you drawing on the pot, or coloring the pot? Drawing is a straight yes at Purple Level and up. Coloring a whole pot, or any surface bigger than your hand, needs a yes from a main instructor first, and usually one of the 650+ glazes will do it better, in one coat, for a fraction of the cost. The same goes for Stroke & Coat, which behaves like underglaze and is not the loophole.
Underglaze holds a line
Draw a thin black line and you get a thin black line. It will not run, blur, or wander. This is the only reason it exists.
Glaze moves and glosses
Glaze is the glass on top. It gives you shine, depth, a sealed surface, and all the beautiful breaking and pooling that underglaze cannot do.
You usually want both
Draw with underglaze, then put a clear over it. The drawing stays sharp and the pot gets glassy. Best of both.
- Clear glaze The glassy layer. Goes on last, over fired underglaze, and is what seals a mug, as long as the clear is rated for food. The Food Safe Lookup (opens in a new tab) shows which are.
- Underglaze A thin skin of colored clay. Thin is the point. Two or three thin coats build the color without a thick layer.
- Your clay body Which is why underglaze goes on while the pot is still raw clay. The two shrink together.
Stroke & Coat lives in this same conversation
Stroke & Coat is technically a glaze, but it behaves a lot like underglaze and people reach for it the same way. Same deal: it is for illustration and detail work, not for coloring a whole pot. If you want a solid color everywhere, there is a wall of glaze that does exactly that for a fraction of the cost.
Seven rules, and then you are free
These bottles are the most expensive thing per ounce in the building, and the only way we can keep 150+ colors on an open shelf is if nobody empties one coloring in a planter. Read these once and you will never have to think about them again.
These bottles are the most expensive thing per ounce in the building. Read the seven once and you will never have to think about them again.
Detail work only
Sgraffito, carving, illustration, line work, lettering, washes into texture. If you are drawing, you are fine. If you are filling, stop and read rule two.
Sgraffito, carving, illustration, lettering, washes into texture. If you are drawing, you are fine. If you are filling, read rule two.
Never for broad coverage without a yes
Solidly coloring a pot with underglaze needs approval from a main instructor first. They are the folks in the pink tees with The Clay Hole on them. Ask before you start, not halfway through.
Solidly coloring a pot needs approval from a main instructor first. They are the folks in the pink tees. Ask before you start, not halfway through.
Not on the bottom
Bottoms and feet need approval too, and the answer is almost always no. It costs us a fortune and nobody ever sees it. A signature is a different conversation. Ask.
Bottoms and feet need approval too, and the answer is almost always no. A signature is a different question, so just ask.
Leather hard or bone dry
Underglaze goes on raw clay here. Not on bisque. Your piece should still be unfired when you paint it.
Underglaze goes on raw clay here. Never on bisque. Your piece should still be unfired when you paint it.
It gets fired before it gets glazed
Every piece of underglaze goes through a bisque before any glaze touches it. No exceptions, and the bisque is free, so this costs you time and nothing else.
No exceptions. Unfired underglaze lifts off on the brush and contaminates shared glaze and dipping buckets. Bisque is free, so this costs you time and nothing else.
Thin coats, clean brushes
Two or three thin coats beats one thick one every time. Share brushes with the brush-on glazes if you want, just wash them properly when you are done.
Two or three thin coats beat one thick one every time. Share brushes with the brush-on glazes, just wash them properly.
If it is not on this page, ask
There are a hundred clever things to do with underglaze. Most of them we love. A few of them we cannot afford. When in doubt, one question to a main instructor settles it.
There are a hundred clever things to do with underglaze and most of them we love. One question to a main instructor settles anything this page does not cover.
Speedball and Amaco Velvet
We carry two underglaze lines and they sit on different rungs. Speedball opens at Purple Level. Amaco Velvet is Black Level. That is not a quality ranking, it is a price one. Velvet costs us noticeably more per bottle, and it earns it: denser color, better coverage, and it behaves beautifully under a clear. Whatever your level, every new member also does the free glaze and underglaze certification (opens in a new tab) before touching a bottle: a video, the studio rules, a quick check and a signed agreement.
Speedball opens at Purple Level. Amaco Velvet is Black Level, and it earns the jump with denser color and fewer coats. Green and Yellow Level Members can bring their own, as long as it is one of those two brands. Whatever your level, every new member also does the free glaze and underglaze certification (opens in a new tab) first.
What your level gets you
- Green and Yellow Level Members. Not included, but you can bring your own Speedball or Amaco Velvet. No other brands come through the door.
- Purple Level Members. The full Speedball Underglaze line.
- Black Level Members. Speedball plus the whole Amaco Velvet range, which needs fewer coats and holds its color better under a clear.
The dollar sign next to some colors
A per piece up charge, paid per color on the day you use it. Purple and Black Level Members both pay it. Check the glaze and underglaze index (opens in a new tab) before you commit to a color. The index is always current and this page is a summary.
Green Level Members
Underglaze is not part of Green Level. Nothing personal, it is just the most expensive shelf we have and it sits two rungs up. You can absolutely bring your own, as long as it is Speedball Underglaze or Amaco Velvet Underglaze. No other brands come through the door, because unknown chemistry in our kilns is how studios lose kiln shelves.
What to do instead
- Draw into your clay directly. Carving and texture cost nothing and read beautifully under a glaze that breaks.
- Bring your own Speedball or Velvet bottles if you want color line work now.
- Or upgrade to Purple Level, which is where the whole wall opens up.
Yellow Level Members
Same answer as Green. Yellow Level adds a lot of tools and dozens more glazes, but underglaze still starts at Purple. Bring your own if you want it sooner, and it has to be Speedball Underglaze or Amaco Velvet Underglaze. No other brands.
What to do instead
- Carving and sgraffito straight into the clay is not the same thing, but it scratches the same itch.
- Bring your own Speedball or Velvet bottles.
- Upgrade to Purple Level when you are ready.
Purple Level Members
This is where underglaze unlocks. The full Speedball Underglaze line is included with your level. Amaco Velvet from the wall is Black Level. Some individual Speedball colors carry a per piece up charge, marked with a dollar sign on the glaze index, and those are paid per piece the day you use them.
Worth knowing
- The up charge is per piece, per color. Three marked colors on one pot is three charges.
- Heat guns are open to you, on the heat table only, though natural drying still gives a better result.
- Check the glaze index before you commit to a color, so an up charge is never a surprise at the till.
Black Level Members
Both lines. Every Speedball color and the whole Amaco Velvet range, which is the good stuff: richer pigment, fewer coats, and it survives a clear glaze without going cloudy. If you do a lot of illustration work, Velvet is the reason to be here.
Worth knowing
- Marked up charge colors are still paid per piece at Black Level. The dollar sign applies to everyone who uses that bottle.
- Velvet needs fewer coats than Speedball. Two is usually plenty, and three is often too many.
- Heat guns are open to you, on the heat table only, though natural drying still gives a better result.
| Speedball Underglaze | Amaco Velvet Underglaze | |
|---|---|---|
| Level | Purple Level and up | Black Level only |
| Coats for solid color | Three, sometimes four on dark clay | Two is usually enough |
| Best at | Everyday line work, lettering, sgraffito, learning on | Illustration, portraits, anywhere color depth matters |
| Under a clear | Good. A few brights soften slightly | Excellent. Holds its color and its edges |
| Up charge | Some colors are marked. Paid per piece at every level, Purple and Black alike | Check the glaze index for the dollar sign before you commit |
The glaze index is the source of truth
Colors move levels, up charges get added, and bottles get discontinued. The wall is right and this page is a summary. Before you fall in love with a color, look it up on the glaze and underglaze index (opens in a new tab) , where every color carries its level mark and its up charge mark. Up charges are paid on the glaze up charge page (opens in a new tab) .
Eighteen things to do with a bottle of underglaze
What you can actually do with it
Almost everything on this list is a straight yes. Tap one to get the verdict, how it actually works, and the mistake people make the first time. Two of them are fine on small pieces and not on big ones. Three of them need a quick word with a main instructor before you start.
Almost all of it is a straight yes. Two techniques are fine on small pieces and need a word first on big ones, and three need a word before you start at all.
Thirteen straight yeses
Sgraffito, mishima inlay, carving through color, illustration, line work and lettering, underglaze crayons, washes into texture, slip trailing, stencils and tape resist, sponging and stippling, stamping, banding and rim lines, and leaving it bare on decorative work.
Watercolor washes and marbling
Under six inches, go ahead. Anything bigger needs a main instructor to say yes first, because a wash over a large surface stops being a wash and starts being coverage.
Three to check on
Monoprinting off paper, decorating the inside of a bowl or mug, and any commercial transfer or silkscreen you bring in from outside. None of them are a no. We just want to see the plan first.
If you only learn one, learn sgraffito
Paint underglaze onto leather hard clay, wait until the surface has lost its shine, then scratch your drawing back through it so the clay underneath shows. Too wet and it smears, too dry and it chips instead of cutting. Cut with a loop tool or a needle tool from the tool wall, then brush the crumbs off with a soft dry brush.
Sgraffito
Paint a layer of underglaze onto leather hard clay, let it set up until it is no longer tacky, then scratch your drawing back through it so the clay underneath shows. It is the single best thing underglaze does, and a good first technique to learn.
How it goes right
- Two or three thin coats, each one dry to the touch before the next.
- Wait until the surface has lost its shine. Too wet and it smears, too dry and it chips instead of cutting.
- Use a loop tool, a needle tool, or a proper sgraffito tool. All of them live in the tool wall.
- Brush the crumbs off with a soft dry brush. Do not blow them, and do not wipe with a wet sponge.
Mishima inlay
The opposite of sgraffito. Carve your line into leather hard clay first, flood underglaze into the carved line, let it dry, then scrape the surface back so color survives only inside the groove. You get a drawing that looks inlaid, because it is.
How it goes right
- Carve clean, shallow lines. Deep grooves trap air and fight you later.
- Overfill on purpose. The color shrinks as it dries and a stingy fill leaves gaps.
- Let the fill dry until it goes matte, then scrape back with a metal rib held almost flat while the pot is still leather hard, so you get curls and not dust. Scraping bone dry clay makes silica dust, so dampen it first or wipe the surface back with a wrung-out sponge instead.
- This is one of the few times a heat gun earns its keep, because you are waiting on a thick fill, but only until the fill goes matte. Stop before the pot dries past leather hard, because scraping bone dry clay makes silica dust. Still slower and better to let it dry on its own.
Carving through color
Same family as sgraffito, but you are cutting deeper and treating it as relief rather than drawing. Underglaze on the high spots, bare clay in the cuts, and then a glossy clear over the whole thing to pull it together.
How it goes right
- Keep the wall thickness in mind. Carving through the color is fine, carving through the pot is a different outcome.
- Work while it is leather hard. Bone dry carving makes dust and chips out.
- A satin or gloss clear over the top makes the cut edges pop. A matte flattens the effect.
Painting a picture on your pot
Full illustration. A scene, a portrait, a whole cast of little guys marching around a mug. This is what underglaze was made for and we love seeing it. It is also the one that eats the most time, so bring patience.
How it goes right
- Sketch first in pencil on bone dry clay. It burns away completely in the bisque.
- Work light to dark, the way you would with any paint.
- Let each color dry before the next one touches it, or you will get mud where you wanted an edge.
- Amaco Velvet is worth the Black Level jump if you do a lot of this. Fewer coats, deeper color.
- Background fills for an illustration are still fills. If the background is most of the pot, talk to a main instructor first.
Line work and lettering
Names, dates, quotes, doodles, a tiny joke on the underside of a handle. Underglaze holds a crisp line better than anything else in the building, and a fine liner brush plus a steady hand gets you surprisingly far.
How it goes right
- Thin the underglaze very slightly with water, in your own cup and with an instructor beside you, so it flows off the brush instead of dragging.
- Bone dry clay drinks fast and grabs the brush. Leather hard gives you a smoother line.
- Two passes over the same line reads as solid black. One pass usually reads as gray.
- Practice the letters on a scrap slab first. Everyone thinks they will not need to. Everyone needs to.
Underglaze crayons
We stock these, and they are wonderful for anyone who finds a brush intimidating. You draw with them on bone dry clay exactly like a crayon on paper, and they fire into the surface. Sketchy, textural, a bit loose. Very good on lettering.
How it goes right
- Bone dry only. They skid and smear on leather hard.
- Press harder for more color. It is exactly as intuitive as it sounds.
- They stay a drawing tool. Coloring a whole pot in with a crayon is the same rule as everything else on this page.
- A clear over the top will soften the line slightly. That is normal, and usually flattering.
Wash into texture, then wipe back
Brush thinned underglaze over a textured or carved surface, then wipe the high spots clean with a damp sponge. The color stays down in the recesses and every bit of texture suddenly reads. Cheap, fast, and it makes stamped and rolled surfaces look ten times better.
How it goes right
- Thin it, in your own cup and with an instructor beside you, more than feels right. You want it runny enough to sink into the low spots.
- Leather hard clay only. Bone dry soaks it in and you will never wipe it back off.
- Wipe with a barely damp sponge, rinsing it constantly in a bucket of clean water, or you just move the color around. The bucket goes to The Wash Pit.
- Dark color into pale clay is the classic. Black into speckled buff is very hard to beat.
Slip trailing
Squeeze underglaze straight out of a fine tip bottle to lay down raised lines and dots that you can feel with a thumb. Dot patterns, outlines, little raised borders. It survives a clear glaze beautifully because the ridge catches the glass.
How it goes right
- Applicator bottles with assorted tips are available in the studio. Grab a six pack here (opens in a new tab) .
- Do not thin it. Trailing wants the underglaze thick and straight out of the jar.
- Hold the tip just off the surface and let the bead fall, rather than dragging the tip along.
- Practice on a scrap slab until the line stops blobbing at the start and end.
- Raised dots are fragile until they are fired. Handle the pot by its bare areas.
Stencils and tape resist
Mask off a shape, brush color over the edge, peel the mask, get a crisp hard edge you could never paint freehand. We stock stencils, and ordinary masking tape works fine for stripes and geometric blocks.
How it goes right
- Burnish the tape edge down hard with a fingernail. Every leak happens at a lifted edge.
- Brush from the tape inward, never from the bare clay across onto the tape.
- Peel while the color is still slightly damp. Fully dry underglaze chips at the edge as the tape comes up.
- Masked shapes are still shapes. A stencil of a leaf is detail work. Taping off half a vase and filling it in is coverage, and that needs a yes first.
Sponging and stippling
Dab color on with a natural sponge or a stiff dry brush for a mottled, speckled, atmospheric surface. Great for skies, tree canopies, stone effects, and anything that would look stiff if you painted it flat.
How it goes right
- Offload most of the color onto a paper towel first. A loaded sponge just makes a splat.
- Build in layers with two or three related colors rather than one.
- Turn the sponge between dabs so the same pattern does not repeat and give the game away.
- Sponging over a big area is still covering a big area. Keep it to passages, not the whole pot.
Stamping
Brush underglaze onto a stamp, press it to leather hard clay, lift. You get a repeatable motif with a slightly imperfect handmade edge that always looks good. Works with our stamps, with sponges cut to shape, and with the edge of just about anything.
How it goes right
- Load the stamp thin. Thick underglaze squishes out and loses the detail.
- Press straight down and lift straight up. Any rocking smears it.
- Re-load between every single press. The second impression is always weaker than you expect.
- A slightly damp leather hard surface takes a much cleaner impression than a dry one.
Banding and rim lines
A clean stripe around a rim or a foot. Two minutes of work that makes a plain pot look finished and deliberate. If you can get to a banding wheel or put the pot back on a wheel head, you can lay a perfect line down with a loaded brush and a steady hand.
How it goes right
- Center the pot on the wheel head or banding wheel first. An off center pot gives you an off center stripe.
- Load the brush heavily and rest your hand on something solid. Let the pot move, not the brush.
- Spin slow and steady. Speed makes it thin and patchy.
- Two thin bands with a gap between them looks far more expensive than one thick one.
Leaving it bare with no clear on top
Fired underglaze with nothing over it comes out chalky, soft, and completely matte. On a sculpture or a decorative piece that finish is gorgeous and very hard to get any other way. On anything you eat or drink from, it is not an option.
The condition
- Decorative pieces and sculpture: leave it bare, enjoy it.
- Anything functional, meaning anything food, drink, or your mouth goes near: a clear glaze is required. Bare underglaze is porous and it is not a food safe surface.
- Bare underglaze also marks easily. It will pick up a gray line from a fingernail or a table edge.
Thinned watercolor style washes
With an instructor beside you, water underglaze way down in your own cup and float it on in transparent layers, letting colors bleed and pool the way watercolor does on paper. It is a lovely, soft effect and it looks nothing like anything else on the shelf.
The size rule and how it goes right
- Pieces under six inches: go ahead. Bigger than that, check with a main instructor first, because a wash over a large surface stops being a wash and starts being coverage.
- Thin with water a little at a time, in your own cup and with an instructor beside you. You can always add more water, you cannot take it out.
- Bone dry clay sucks the water out instantly and stops the bleed. Leather hard keeps it moving.
- Expect it to fire lighter than it looks wet. Thin underglaze is genuinely translucent.
Marbling and feathering
Lay down wet color, drop a second color into it, and drag a needle tool through to pull the two into feathered swirls. It is a classic slipware trick and it still stops people in their tracks.
The size rule and how it goes right
- Pieces under six inches: go ahead. Anything bigger needs a main instructor to say yes first, because marbling a large surface burns through a lot of two colors at once.
- Both colors have to be wet at the same time. Once the first one sets you are just drawing lines in it.
- Work flat if you can. A slab before assembly is far easier than a standing pot.
- Drag slowly and in one direction. Scrubbing back and forth turns the whole thing brown.
Monoprint off paper
Paint your image onto newsprint, press the wet paper against soft clay, peel it away, and the color transfers over. It gives you a slightly ghosted, printed looking image that is genuinely beautiful. We have not put it on the open list, so have a quick word before you set up.
Why we want to talk about it first
- It uses a lot more underglaze than a brush does, because most of what you paint stays on the paper.
- It works best on large flat slabs, which is exactly where coverage becomes an issue.
- Done small and deliberately it is a great technique and we are not trying to stop you. We just want to see the plan.
Underglaze inside a bowl or a mug
Decoration inside a vessel is not off limits, but it sits close to the coverage line, because the inside of a bowl is a big area and it is very easy for a small design to turn into a fully painted interior. Check before you start.
Where the conversation usually lands
- A motif, a word, a small drawing at the bottom of a bowl: usually a yes.
- The entire interior in a solid color: that is a glaze job, not an underglaze job.
- Either way, anything you eat or drink from needs a clear glaze over the top.
Commercial transfers and silkscreens
We do not stock underglaze transfers or silkscreens, so anything in this territory is something you would be bringing in yourself. That is a conversation to have before you buy anything, because what goes into our kilns has to be something we know the chemistry of.
Before you buy anything
- Bring the product page or the packaging to a main instructor. Firing range and materials are the whole question.
- We fire cone 5 with a hold. Anything rated for a different range is a real problem, not a rounding error.
- Same rule as bringing your own bottles: known products only, and we would rather say yes with information than no by default.
Plenty of studios hand you underglaze and let you do all of this on bisque, at any size, on any surface. That works fine when a studio stocks a dozen colors and charges per bottle. We stock 150+ and they sit on an open shelf that anybody can reach, and the only way that math holds is if the bottles get used for drawing rather than for painting entire pots. The rules on this page are the price of the shelf.
If you are coloring the whole pot, you have the wrong bottle
This is the thing we run into most, and it is almost never someone being difficult. It is someone who found a perfect sage green underglaze, coated their entire vase in three coats of it, and then put a clear over the top because that is what you do. The pot looks nice. It also cost about eight times what it needed to, and there was a sage green glaze forty feet away that would have done it better in one step.
What actually happens when you cover a pot in underglaze
You use most of a bottle. You spend an hour on three coats. You get a flat chalky surface that then needs a clear glaze over it anyway, which is a second product and a second application. And the end result is a solid colored pot, which is the single easiest thing a normal glaze does on its own.
What to reach for instead
Solid color is what the glossy, satin and matte families are built for. Hundreds of them, one or two coats, done in a fraction of the time, and they come out of the kiln with actual depth and shine instead of a chalk finish under a clear. Same wall, cheaper shelf, better result.
And no, Stroke & Coat is not the loophole
People sometimes hear the underglaze rule and slide sideways into Stroke & Coat instead. Same answer. Stroke & Coat is also reserved for illustrative and detail work here, for exactly the same reason. If the goal is a solidly colored pot, it lives in the glossy, satin and matte families and nowhere else.
The bottoms thing, since it comes up every week
Getting color onto the bottom of a piece with underglaze needs approval from a main instructor, and the answer is almost always no. It is one of the most expensive habits in the studio and it lives on the one surface of the pot nobody ever looks at. If you want your foot ring to read as something other than bare clay, say so and we will talk about what is actually possible. A signature or your initials is a different question, so just ask.
Using underglaze as an all over base coat is genuinely standard practice in a lot of places, and if you learned pottery somewhere else this rule will feel strange for a few weeks. It is not a judgment on the technique. It is a straight budget decision that lets us keep the shelf open instead of keeping the bottles behind a counter.
How to brush it on without hating the result
Underglaze is forgiving right up until it is not. Almost every disappointing result traces back to one of four things: too thick, too wet, too dry, or too impatient. Here is the whole method.
Almost every disappointing result traces back to one of four things: too thick, too wet, too dry, or too impatient. Three habits cover all four.
Stir it properly
Really stir it, scraping up whatever has settled. The pigment sits hard at the bottom and the top third is mostly water. Thirty seconds of stirring is the difference between a strong color and a weak one. Never shake a bottle: color driven into the lid threads dries hard and can cut the next person. Spoon what you need into your own cup and dip the brush in that, not in the bottle.
Thirty seconds of stirring, never shaking. The pigment settles hard and the top third of the bottle is mostly water. Spoon what you need into your own cup. This is the difference between a strong color and a weak one.
Thin coats, in different directions
Two to three thin coats for Speedball, usually two for Velvet. Lay the first one horizontally, the second vertically, the third at an angle. Cross hatching evens out the brush marks so the color reads solid instead of streaky.
Two to three for Speedball, usually two for Velvet. First horizontal, second vertical, third at an angle. Cross hatching kills the streaks.
Dry to the touch between coats
Touch it with the back of a knuckle. If it is cool, it is still wet, and a second coat now will lift the first one straight back off. This is the single most common way a good drawing gets ruined.
Touch it with the back of a knuckle. Cool means still wet, and a second coat now lifts the first one straight back off.
Match the brush to the job
A soft flat for filling shapes, a liner for line work, a fan for washes. You can use the same brushes we keep for the brush-on glazes. Just wash them out thoroughly when you are done so the next person is not painting with your leftovers.
Leather hard or bone dry, nothing else
Leather hard gives you a smoother line and lets color move. Bone dry drinks fast and grabs the brush, which is great for crayons and crisp edges and frustrating for washes. Both are fine. Bisque is not, and that one surprises people.
Heat guns exist, and mostly should not be used
Purple and Black Level Members can use a heat gun on underglaze layers, and we allow it, on the high setting and on the heat table only, never on the mats, which it warps. We also do not recommend it without a real reason. Natural drying gives a better bond and a better surface every single time. If you are waiting on a thick mishima fill, fine. If you are just impatient, put the kettle on instead.
Bone dry clay is the most fragile thing in the building
It has no give at all. A pot that survived being thrown, trimmed and carried across the studio will snap a handle off if you lean on it with a loaded brush. Support the piece with your other hand, work on a banding wheel so you are turning the pot rather than reaching around it, and take the extra thirty seconds. Every potter in here has broken something at exactly this stage.
It has no give at all. Support the piece with your other hand, work on a banding wheel, and take the extra thirty seconds. Every potter in here has snapped a handle off at exactly this stage.
Four steps, two firings
An underglazed piece takes exactly the same number of trips through the kiln as a plain one. The firings are charged the usual way, nothing takes longer than usual, and there is no special queue. All that changes is that your decorating happens before the bisque instead of after it.
Same two firings as any other piece. The firings cost the same and nothing takes longer. Your decorating just happens before the bisque instead of after it.
Underglaze it
Leather hard or bone dry. Draw, carve, trail, stamp, do whatever the piece needs. Then let it dry all the way out.
Leather hard or bone dry. Draw, carve, trail, stamp. Then let it dry all the way out.
Up charge on marked colorsBisque fire
Staff load it, same as any other piece, at cone 05. The bisque sets your underglaze permanently into the surface.
Staff load it, same as any other piece, at cone 05. The bisque sets your underglaze permanently.
Bisque is freeGlaze it
Now the clear goes on, over the top of your fired drawing. Coyote Clear or our dipping clear both work. Or leave it bare if the piece is decorative.
The clear goes on over your fired drawing. Or leave it bare if the piece is decorative.
Standard glaze rulesGlaze fire
We fire to cone 5 with a twelve minute hold, which puts us at about cone five and a half. Out it comes, glassy on top and crisp underneath.
Cone 5 with a twelve minute hold, which puts us at about cone five and a half. Glassy on top, crisp underneath.
Charged by the size of the pieceClear glaze is required on anything functional
Mugs, bowls, plates, spoon rests, anything that touches food or drink or a mouth. Fired underglaze on its own is porous and is not a food safe surface. Use Coyote Clear or our own dipping clear over the top. Not every clear is rated for food, so check the one you pick on the Food Safe Lookup (opens in a new tab). Decorative pieces and sculpture can absolutely be left bare, and that chalky matte finish is genuinely lovely, but the moment a piece becomes something you drink out of it needs the glass layer.
Mugs, bowls, plates, anything food or drink touches. Fired underglaze on its own is porous and is not a food safe surface. Coyote Clear or our dipping clear both work, but not every clear is rated for food, so check yours on the Food Safe Lookup (opens in a new tab). Decorative pieces and sculpture can be left bare.
Underglaze gets fired before glaze goes anywhere near it
This is the one house rule on this page with no exceptions and no judgment calls, so it is worth explaining properly rather than just posting it on the wall.
Your work comes out better
Wet glaze over wet underglaze drags the color. Lines blur, edges soften, and the drawing you spent an hour on goes fuzzy under the brush. Fired underglaze is locked down and completely immune to it. The difference in a finished piece is not subtle.
Our glazes stay clean
Unfired underglaze lifts. It comes off on the brush, goes back into the jar, and now that jar of clear has a swirl of somebody's cobalt in it. Multiply by a few hundred members and a wall of 650+ glazes turns into a wall of murky surprises.
The dipping buckets in particular
Unfired underglaze is one of the things that contaminates a dipping bucket, and some of those buckets run to a couple of thousand dollars to replace. One dip is all it takes. Firing first removes that risk completely, which is the simplest reason of all.
It costs you nothing
Worth repeating, because people assume this rule is going to cost them money or a week. Bisque firings are free and your piece was going into one regardless. Underglaze before the bisque, glaze after it. That is the entire adjustment.
Painting underglaze onto bisque and then putting a clear straight over it in a single glaze firing is one of the most common workflows in ceramics, and it is what most tutorials online will show you. It works. It also puts unfired underglaze in contact with shared glaze, which is a risk a studio with a private glaze cupboard can carry and a studio with an open wall cannot. That is the whole difference, and it is why our path runs through the bisque instead.
When it comes out of the kiln wrong
Seven things go wrong with underglaze, and they go wrong for boringly predictable reasons. Tap whichever one just happened to you.
Three things go wrong far more often than the rest, and all three come down to how thick the coat was and how long you waited.
It came out much paler than the bottle
Coats, almost always. Three thin coats for Speedball, two for Velvet, and stir the bottle for a full thirty seconds first.
It flaked, lifted or peeled off
Too thick. A heavy layer shrinks more than the clay under it. If a coat looks glossy and wet on the surface, it is too thick.
The sgraffito chipped instead of cutting
You waited too long. Cut when the surface goes from wet looking to matte. Once the pot is bone dry, the color and the clay are both brittle.
The color came out much paler than the bottle
Nine times out of ten this is coats. Underglaze is not opaque in one pass, and a single coat on light clay reads as a tint rather than a color. The other cause is a bottle that was not stirred, so you painted with the water sitting on top of the settled pigment.
Next time
- Three thin coats for Speedball, two for Velvet, each dry to the touch before the next.
- Stir the bottle for a full thirty seconds. It matters far more than it sounds like it should.
- On dark clay bodies, expect to need one more coat than you would on white.
This piece
If it has only been bisqued, ask a main instructor before you add coats. Underglaze goes on raw clay at The Clay Hole, so anything added after the bisque needs its own bisque firing before any glaze goes over it. If it is already glazed and fired, the color is where it is going to stay.
It flaked, lifted or peeled off
Almost always too thick. A heavy layer of underglaze shrinks more than the clay under it as it dries, and something has to give. The other usual suspect is dust: underglaze brushed over a dusty bone dry surface never really grabs, and it releases in sheets in the kiln.
Next time
- Thin coats. If a coat looks glossy and wet and sits on the surface, it is too thick.
- Wipe bone dry pieces with a barely damp sponge before you start, and let that dry.
- Do not keep piling coats on to chase a color. Two or three well stirred coats beat five thin desperate ones.
This piece
If it lifted in the bisque, show it to a main instructor before you touch it up, because new color on bisque needs its own bisque firing before any glaze goes over it. If it lifted under the glaze, it is a keeper with a story.
The clear glaze crawled or beaded up over the color
Crawling is glaze pulling away from the surface into islands and leaving bare patches. Over underglaze it usually means the underglaze went on too thick, so the glaze sat on a powdery layer it could not grip. It can also come from oils, which means fingers.
Next time
- Thinner underglaze coats, always the first answer.
- Handle bisqueware by the foot and the rim. Hand lotion is the quiet villain here.
- Flash rinse the bisque in The Wash Pit right before you glaze, a second or two and not a soak, to knock the dust off.
This piece
Crawled pieces can sometimes be filled and refired. Bring it to a main instructor and let them look at it before you do anything to it.
The color came out as a different color entirely
Some pigments do not love our firing. We fire cone 5 with a twelve minute hold, which lands around cone five and a half, and a handful of brights, particularly some reds, oranges and hot pinks, soften or shift at that temperature. It is chemistry, not user error. The other cause is a clear glaze that is not neutral, which can warm or cool everything under it.
Next time
- Look for the test tile before you commit. Most of our colors have been fired onto tiles so you can see what actually comes out.
- If a color is critical to the piece, ask a main instructor whether that one holds at our temperature.
- Try the same color with a different clear. The glaze on top changes the answer more than people expect.
My sgraffito chipped and crumbled instead of cutting
You waited too long. Sgraffito wants the underglaze set but the clay still leather hard. Once the pot goes bone dry, the color is brittle and the clay is brittle, and your tool chips both instead of cutting a clean line.
Next time
- Watch the shine. When the surface goes from wet-looking to matte, that is your window.
- If only the surface has dried and the pot is still cool and damp inside, wrap it in plastic for a few hours to even the moisture back out and try again. A pot that has gone fully bone dry will not come back, so use that one for painted work and try sgraffito on the next.
- A sharp tool cuts, a dull one tears. Swap it out if it is dragging.
You can see every brush mark
Two causes and they usually arrive together. Coats that were too thick, and every coat laid down in the same direction so the ridges stacked on top of each other instead of filling each other in.
Next time
- Cross hatch. Coat one horizontal, coat two vertical, coat three diagonal.
- Use a soft flat brush rather than a stiff one for filling areas.
- Load the brush properly. A dry brush drags and leaves tracks, a loaded one flows.
- A gloss clear over the top hides a multitude of sins. A matte clear hides none of them.
It feels chalky and it picks up marks
That is fired underglaze doing exactly what fired underglaze does. With no glaze over it the surface stays porous and matte, so it takes a gray scuff from a fingernail, a table edge or the bottom of another pot. Nothing has gone wrong.
What to do about it
- If you like the finish, keep it and just accept that it marks. Sculpture and decorative work live happily like this.
- If you do not, a clear glaze and a second firing will fix it entirely, and the piece can go back through.
- If it is functional, it needs the clear regardless. Bare underglaze is not a food safe surface.
Underglaze FAQs
Can I put underglaze on bisque?
Not here. Underglaze goes on leather hard or bone dry clay at The Clay Hole, before the bisque. You will see it done on bisque all over the internet and in a lot of other studios, and it does work, it is just not our path. Ours runs underglaze, bisque, glaze, glaze fire.
Do I have to put a clear glaze over it?
On anything functional, yes. Mugs, bowls, plates, anything food or drink touches. Fired underglaze on its own is porous and is not a food safe surface. On decorative pieces and sculpture you are welcome to leave it bare, and that soft chalky matte is a genuinely beautiful finish.
Which clear should I use over it?
Coyote Clear or our own dipping clear. Both sit well over underglaze without clouding or dragging the color. If you want a specific look, gloss makes the color pop and hides brush marks, matte softens everything and hides nothing. Dipping needs its own certification first.
Why can I not just color my whole pot with it?
Because it is by far the most expensive way to do the easiest thing on the glaze wall. Solid color is what the glossy, satin and matte families are for, and they do it in one or two coats with real depth and shine. Broad coverage in underglaze needs approval from a main instructor first, and it is the fastest way for us to lose the open shelf.
What level do I need to use underglaze?
Purple Level for the Speedball Underglaze line. Black Level adds the Amaco Velvet line on top of it. Green and Yellow Level Members do not have studio underglaze included, though you are welcome to bring your own as long as it is one of those two brands. Every new member also does the free glaze and underglaze certification (opens in a new tab) before touching a bottle.
Can I bring my own underglaze from home?
Yes, if it is Speedball Underglaze or Amaco Velvet Underglaze. Those are the two lines we know, stock and fire every week. No other brands, at any level. Unknown chemistry in a shared kiln is how a studio loses shelves and everybody else's work along with them.
What is the dollar sign next to some colors?
A per piece up charge. Some individual bottles cost us enough that they carry a small fee on top of your level, and it is paid per piece, per color, on the day you use it. Purple and Black Level Members both pay it. Two marked colors on one pot is two charges, and the same color across five pots is five.
Does underglaze cost extra to fire?
No. It goes through the same two firings as any other piece. Bisque is free and the glaze firing is charged the usual way, by the size of the piece. Underglaze changes nothing about the kiln side of things.
Can I use a heat gun to dry it faster?
Purple and Black Level Members can, and we allow it on underglaze layers, on the high setting and on the heat table only, never on the mats. We just rarely recommend it. Natural drying gives a better bond and a better surface, and rushing a piece with a heat gun is a good way to introduce stress into clay that was doing fine on its own. If you are waiting on a thick mishima fill, use it only to bring the fill to matte, and stop before the pot dries past leather hard, because scraping bone dry clay makes silica dust. Otherwise let it sit.
Can I mix underglaze colors together?
Not on your own. Mixing colors needs an instructor beside you, and it never happens in the bottles. Ask a main instructor, then mix on a tile or a palette, and mix a little more than you think you need because matching a custom color again later is close to impossible.
Can I use the same brushes as the brush-on glazes?
Yes. Just wash them thoroughly when you are finished, by hand, so the next person is not painting with the ghost of your cobalt. Underglaze dries hard in a brush faster than glaze does, so rinse before you walk away rather than after.
Who are the main instructors?
The folks in the pink tees with The Clay Hole across them. They are easy to spot and there are several in the room during every instructed class. Anything on this page that says ask first means ask one of them, and ask before you start rather than halfway through.
That is genuinely all of it
Draw with it, do not paint entire pots with it, keep it off the bottoms, put it on raw clay, and let it go through the bisque before any glaze touches it. Five things. Everything else on that wall is yours to play with, and we would much rather be talking you through a technique than talking you out of one.
There is a much longer version of this page, with all eighteen techniques, the level by level breakdown, the firing reasoning and a full FAQ. Switch to the Comprehensive Version at the top.
Colors, levels and up charges change as stock changes. The glaze index is always current, and this page is the summary.
Which version would you like to print?
Whichever you pick, every accordion and every technique panel opens up first, so nothing goes to paper folded shut.