


Required training · Dipping glazes
Get certified to use the dipping glazes.
Dip glazing gives you a smooth, even finish that is hard to get any other way, and it makes short work of a big batch or a shape full of nooks and crannies.
It is not the quick option for one or two pots. The mixing, setup and cleanup all take real time.
Because every bucket is shared by the whole studio, everybody learns the same way first: watch the video, agree to the rules, sign the agreement. At the end you save a certification card to your phone, and that card is what you show an instructor before your first dip.
Takes about 25 minutes to complete (including the video).Do it once and you are certified for as long as you are a member.
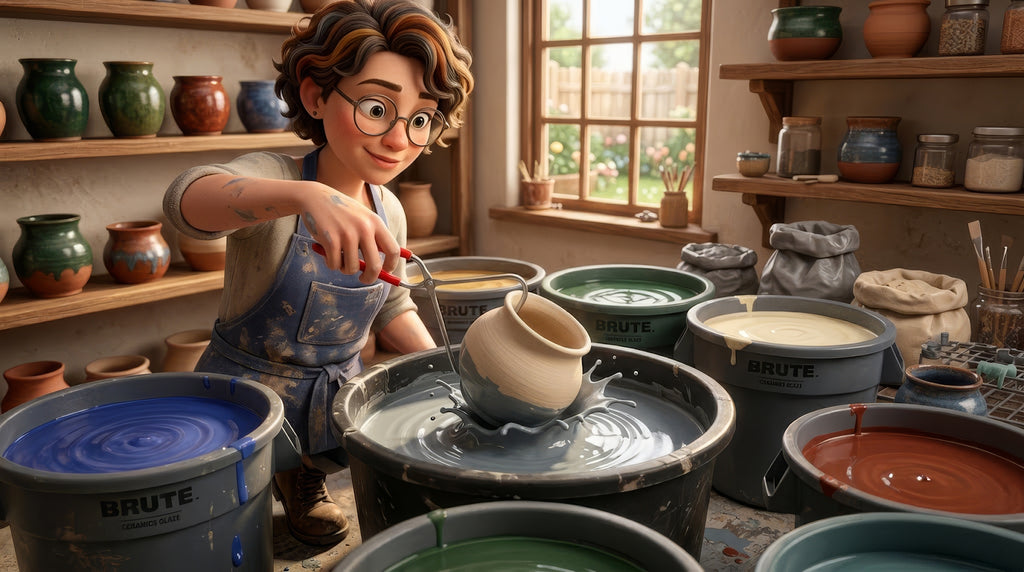
Why we are this thorough about it
Every bucket in the dipping room is shared by hundreds of members. That is the whole reason this exists. When a glaze belongs to everybody, one person’s shortcut lands on everybody else’s pots.
Contamination is also quiet. Nothing looks wrong at the bucket, and often nothing looks wrong when the piece goes on the ware tray. It turns up later, in the kiln, on work that somebody else spent weeks on.
So we would rather spend 25 minutes with you once than stand over the buckets forever. Trained members are the entire reason we can have glazes like these in a community studio at all — and why you never have to hunt down an instructor before every dip once you are certified.
The certification
Let’s get you signed off.
Six steps, about 25 minutes, and most of that is the video. At the end you save a certification card with your name on it — show that to an instructor in pink and you are good to dip.
Welcome back.
Step 1 of 6
First, who are we certifying?
Use the name you signed up with, spelled the way you would want it printed on your certification card.
Step 2 of 6
Watch the whole thing.
Everything you need is in here, including a secret password you will be asked for at the end. There is as much good technique in here as there are rules, so it is worth watching properly.
Watching somewhere else? The tracker only follows the player above. If you watched on YouTube or on the app, type the secret password from the video and we will carry on.
Step 3 of 6
Now agree to the rules.
Five short sets. Read each one, tap to agree, move on. Every rule has a reason next to it, because rules with reasons are the ones people actually remember at the bucket.
1. Before your piece touches glaze
- Wax the bottom first, and let it dry 100%.Wax goes on before you rinse, because it does not adhere well to wet bisqueware. And not mostly dry: wet wax slides off in the glaze and contaminates the whole bucket.
- Then rinse and rub the piece with cold water.Bisqueware holds dust and sanding grit from shelves, hands and life in general. Rinse it or all of that ends up in the bucket.
- Nothing unfired goes in: no unfired underglaze, no brushed-on glaze.Dipping glaze is its own system. Wet or unfired material dissolves into it and it never comes back out.
2. Opening the bucket
- Blow the dust off the closed lid before you open it.Whatever settled on top of that lid falls straight into the glaze the second you lift it. Aim away from any open bucket.
- Use the whisk or paddle assigned to that glaze, and only that glaze.One tool in the wrong bucket contaminates both of them at once. Any tool that moves between glazes gets washed thoroughly first.
- Nothing that touched the floor goes into a bucket.Floor grit is the fastest way to wreck a glaze. Wash it in The Wash Pit first, every time.
3. In the glaze
- Mix for at least 120 seconds, then stir again every few pieces.These glazes settle hard. A quick swirl gives you thin patchy coverage and leaves the bucket wrong for the next person.
- Dip for the time on that glaze’s lid.Every glaze is different and we tested every one of them. The recommended time is printed on the lid of each bucket — use that one, not a number you remember from another glaze.
- Let it drain fully back into the bucket before you walk away.Glaze on the floor is glaze nobody gets to use. Squeegee the bottom if you need to.
- One piece, one dipping glaze.Carrying a wet dipped piece to a second bucket cross-contaminates both of them.
- Dropped something in? Never reach in. Find an instructor wearing pink.Arms carry oils, lotion and skin into a bucket that can cost up to $2,400 to replace. They have a way to get it out. You do not.
4. When you are done
- Set the piece on the correct ware tray, then let the glaze dry fully before you touch anything up.Dipping glaze usually dries fast, and even the slower ones touch up better once they are completely dry. Bare spots and thick ridges are far easier to fix now than after a firing.
- Wash every tool you used in The Wash Pit.Dipping tools, whisks, paddles. A rinsed-looking whisk is not a washed whisk.
- Clean up every drip: floor, trays, platform, bucket sides, walls, tools.Dried glaze turns into dust, and dust travels into other buckets. Leave the dipping area better than you found it.
5. The big rule
- Protect the dipping glazes. That is the whole job.They are shared by hundreds of members, which means every single person using them has to look after them.
- There are no strikes on these rules.Break one and you may lose dipping privileges. Not to be dramatic — because one careless action can take out a bucket the whole studio relies on.
- Ruin a glaze by breaking a rule and you are financially responsible for replacing it.Replacing a bucket can cost up to $2,400. That is what the agreement in step 5 covers.
- Unsure about anything at all? Stop and ask an instructor wearing pink.One question costs nothing. One ruined bucket costs everyone.
Step 4 of 6
Five quick questions.
No score, no pass mark, nothing to be nervous about. Get one wrong and we will tell you why and let you try again.
Step 5 of 6
Read it, then sign it.
This is the part that makes the rules real. Read the whole thing, then sign at the bottom with your finger or your mouse. It all happens right here.
Rules, Acknowledgment, and Financial Responsibility Agreement
1. Purpose of This Agreement
This agreement applies to my use of any dipping glaze, glaze bucket, mixing tool, dipping tool, water bucket, ware tray, ware platform, wash area, or related studio material at The Clay Hole. It remains in effect every time I use the dipping glaze system, not just on the date I sign it.
I understand that this agreement does not replace any membership agreement, waiver, studio safety rule, posted rule, staff instruction, or updated dipping glaze policy. If The Clay Hole updates the dipping glaze rules, I agree to follow the current rules in effect at the time I use the system.
2. The Big Rule
Protect the dipping glazes. The dipping glazes belong to the shared studio system. I agree to use them carefully, cleanly, and only as instructed.
If I am not completely sure about something, I agree to stop before dipping and ask an instructor or staff member wearing PINK.
3. Financial Liability for Rule-Breaking or Contamination
I agree that if my rule-breaking, misuse, negligence, unauthorized use, or failure to follow staff instructions causes or contributes to contamination, damage, waste, or removal from use of The Clay Hole dipping glaze materials, I am responsible for paying the reasonable actual costs The Clay Hole incurs as a result.
- Costs may include replacement glaze materials, replacement buckets, disposal, cleanup, labor, testing, remixing, re-labeling, damaged tools, damaged ware surfaces, damaged kiln shelves, and other reasonable costs directly connected to the issue.
- If contamination or misuse reasonably damages other members’ pottery or creates additional kiln or firing problems, I understand The Clay Hole may include those reasonable related costs when determining what I owe, to the extent permitted by law.
- I authorize The Clay Hole to invoice me and/or charge any payment method I have voluntarily provided to The Clay Hole for these reasonable actual costs, to the extent permitted by law.
- I understand that ordinary glaze variation, normal studio wear, or a glaze result I simply do not like is not the same as contamination or rule-breaking. This financial responsibility section applies to damage, contamination, waste, or loss caused by my conduct.
I understand that glaze contamination may not be visible immediately. The Clay Hole may determine responsibility in good faith based on staff observation, member reports, available video footage, material condition, sequence of events, test results, or other reasonable information.
4. Rules I Must Follow Before Dipping
- My piece must be bisque-fired before it goes into any dipping glaze.
- The bottom of my piece must be waxed where appropriate, before rinsing, because wax does not adhere well to wet bisqueware. The wax must be 100% dry before dipping. Wet wax can come off in the bucket and contaminate the glaze.
- Once the wax is dry, my piece must be thoroughly rinsed and rubbed with cold water before dipping, so dust, crumbs, sanding residue, shelf debris, and other particles do not enter the glaze bucket.
- I will not dip any piece that has unfired underglaze on it.
- I will not dip any piece that already has brushed-on glaze applied.
- Before opening a glaze bucket, I will blow dust off the closed lid so dust does not fall into the glaze.
- I will use only the correct whisk, paddle, or mixing tool assigned to that specific glaze. If a mixing paddle is shared between glazes, I will wash it thoroughly before using it in another glaze.
- I will mix the glaze thoroughly for at least 120 seconds before dipping and stir again between every few pieces so the glaze stays consistent.
5. Rules I Must Follow While Dipping
1. One piece, one dipping glaze: I will not dip the same piece into two different dipping glazes.
2. Recommended dipping time: I will dip my piece for exactly the amount of time recommended for that glaze. I understand that longer dips can create thick glaze, runs, kiln problems, and studio damage.
3. Use approved handling: I will use clean dipping tongs or clean fingers as appropriate, and I will keep dirty tools out of the glaze bucket.
4. Drain fully: After dipping, I will hold the piece over the bucket until it has fully stopped dripping. I will keep glaze in the bucket, not on the floor, tray, wall, bucket side, platform, or my shoes.
5. Quick water dip (optional): If I choose to use the water bucket, I will dip the piece for one second or less. I will not soak it. I understand this step is optional and is a matter of preference.
6. Let it dry before touching it up: I will place the dipped piece on the correct ware tray and let the glaze dry fully before touching anything up, handling the piece as little as possible while the glaze is still wet.
7. Touch up and smooth once dry: When the glaze is completely dry, I will gently dab glaze into tong marks, finger marks, or small bare spots where I handled the piece, and I may gently finger-rub raised, rough, or overly thick patches. I will not aggressively sand, scrape, or create unnecessary glaze dust.
6. Things I Will Never Do
- I will never dip the same piece in two different dipping glazes.
- I will never dip pottery with unfired underglaze.
- I will never dip pottery with brushed-on glaze already applied.
- I will never dip longer than the recommended amount of time.
- I will never put dirty tools, floor tools, contaminated tools, or unknown tools into a glaze bucket.
- I will never switch tools between glazes without washing them thoroughly first.
- I will never reach my arm into a glaze bucket if I drop something. I will stop and get an instructor or staff member wearing PINK.
- I will never leave drips, spills, splashes, or glaze mess behind.
- I will never use dipping glazes without permission, training, or approval from The Clay Hole.
7. Cleanup and Studio Care
- I will wash dipping tools, whisks, and mixing paddles thoroughly in The Wash Pit when finished.
- I will clean all dripped glaze from the floor, ware platform, trays, bucket sides, walls, tools, water buckets, wash area, and anywhere else it landed.
- I will leave the dipping area cleaner than I found it.
- I understand that cleanup is part of using the dipping glaze system, not an optional bonus activity for people with suspicious amounts of free time.
8. Loss of Dipping Privileges and Other Studio Action
I understand there are no strikes with dipping glaze rules. The Clay Hole may immediately suspend or permanently revoke my dipping glaze privileges if I break a dipping glaze rule, use the system carelessly, contaminate or damage materials, ignore staff instructions, or create a risk to the shared glaze system.
Depending on the seriousness of the issue, The Clay Hole may also require retraining, limit my access to certain studio materials, require staff supervision, charge reasonable actual costs under this agreement, or take any other action allowed under studio policy and applicable law.
9. No Guarantee of Glaze Results
I understand that pottery, glaze chemistry, kiln firing, clay bodies, application thickness, and studio conditions can create variation. The Clay Hole does not guarantee that my dipped piece will turn out exactly as expected. I also understand that following the rules is required even when experimenting creatively.
10. Further Agreed Statements
I understand that dipping glazes are shared studio materials and must be protected every time I use them.
I understand that my piece must be bisque-fired, waxed while dry, then rinsed clean, and fully ready before dipping.
I understand that wet wax, unfired underglaze, brushed-on glaze, dirty tools, dust, floor gunk, and cross-contamination can ruin or contaminate glaze.
I understand the dip time is recommended per glaze, that results aren’t guaranteed, and that dipping longer than the recommended amount of time usually leads to failed glaze firings.
I understand that one piece may be dipped in only one dipping glaze.
I understand that if I drop something into a glaze bucket, I must not reach in. I must get an instructor or staff member wearing PINK.
I understand that if I break the rules, contaminate glaze, or damage the system, I may lose dipping privileges immediately.
I understand that if my rule-breaking, misuse, negligence, unauthorized use, or failure to follow staff instructions causes contamination, damage, waste, or loss, I am financially responsible for reasonable actual costs, and some glaze buckets can cost up to $2,400 to replace.
11. Final Acknowledgment and Agreement
By signing below, I confirm that I have read this Dipping Glaze Access Agreement, understand the rules, had the chance to ask questions, and agree to follow The Clay Hole dipping glaze system every time I use it. I understand that dipping glaze access is conditional. I also understand that breaking these rules may result in loss of dipping privileges and financial responsibility for reasonable actual costs caused by my conduct.
— End of agreement —
Scroll to the end of the agreement to carry on.
Your signature, your name and the time you signed are kept with your certification record.
Step 6 of 6
Last thing: the secret password.
The secret password is said out loud in the video, a little after the sixteen-minute mark. Spelling and capitals do not matter.
Missed the secret password? Scrub back to about 16:50 in the video on step 2.
Certified
You are certified. Happy dipping.
Thank you for taking this seriously. Genuinely — the reason we can have premium dipping glazes at all is members who do exactly what you just did.
- 1. Save it nowTap the save button above, or press and hold the card and choose Add to Photos. A screenshot works too.
- 2. Show an instructor in PINKBefore your first dip, show them the card you just saved. They will get you started at the buckets.
- 3. Then dipPurple Level and Black Level Members are all set. Green Level and Yellow Level Members pay the per-piece up-charge.
Keep this card somewhere safe. If you lose it, open this page again on the same device and it will be waiting for you.
The written guide
Everything, spelled out.
The video is the training. This is the reference for the day you are standing at the bucket trying to remember how long to mix.
Before you dip
Make sure your piece is ready
Your pottery must be bisque-fired and completely clean before dipping. Do not dip any piece with unfired underglaze on it, and do not dip a piece that already has brushed-on glaze applied. Dipping glazes are their own system, and mixing them with other wet or unfired materials can contaminate the bucket.
Wax the bottom first
Wax before you rinse. Wax does not adhere well to wet bisqueware, so it goes on the dry piece. Apply wax resist to the bottom of your pot wherever you do not want glaze to stick, then let it dry completely. Not mostly dry. Not “I think it’s probably fine” dry. Completely dry. If the wax is still wet when you dip, it can come off in the bucket and contaminate the glaze.
Rinse your pot
Once the wax is completely dry, thoroughly rinse and rub your pottery with cold water. Bisqueware holds dust, crumbs and little particles from sanding, handling, shelves and life in general. Those do not belong in the glaze bucket. Rinsing also gives you a smoother finished result.
The full process, start to finish
- Wax the bottom and let it dry 100%Wax wherever glaze should not go. This comes before rinsing, because wax does not adhere well to wet bisqueware. Let it dry completely before moving on.
- Rinse your pottery thoroughlyOnce the wax is dry, use cold water to rinse and rub the whole piece, removing dust and loose particles.
- Blow dust off the glaze bucket lidA few quick blows on the closed lid so settled dust does not fall in when you open it. Be careful not to blow dust into an open bucket.
- Mix the glaze thoroughlyUse the whisk or paddle assigned to that specific glaze and mix for at least 120 seconds. Dipping glazes settle heavily and a quick swirl is not enough. Stir again between every few pieces.
- Dip for that glaze’s recommended timeUse dipping tongs or your fingers to submerge the piece. Each glaze has its own recommended dip time printed on the lid of its bucket — get as close to it as you can. Longer is not better; it means too much glaze, more runs and a sad little kiln disaster waiting to happen.
- Let the glaze drain fully back into the bucketHold the piece over the bucket until it stops dripping. Do not walk away mid-drip. Squeegee the bottom if you need to.
- Quickly dip into the water bucket (optional)After the glaze has drained, a dip of one second or less in the water bucket can smooth the surface. This step is entirely optional and feelings about it are genuinely split, here and online — some people swear by it, others never touch it. Try it on a piece and decide for yourself. Do not soak it.
- Set your piece on a ware trayThe correct ware tray. Handle it as little as you can while the glaze is still wet.
- Once it is completely dry, touch up and smoothFinger-dab glaze into tong marks, finger marks and small bare spots, then gently finger-rub any raised, rough or overly thick patches. Wait for fully dry: dipping glaze usually dries fast, and touch-ups go better on dry glaze. You are smoothing, not sanding the whole thing into oblivion.
- Your piece is ready to fireDipped, drained, touched up, dry and properly placed on the ware tray.
Always do these things
- Always protect the glaze bucketA few quick blows on the lid before you remove it so dust does not fall into the glaze.
- Always use the correct mixing toolEach glaze has its own assigned whisk and paddle. Match the tool to the glaze every time, and wash it thoroughly before it goes anywhere near a different glaze.
- Always mix thoroughlyAt least 120 seconds before dipping, and stir again between every few pieces so the glaze stays consistent.
- Always rinse your pot after waxing and before dippingWax first on a dry piece, then rinse and rub with cold water before it goes anywhere near the glaze.
- Always make sure wax is completely dryWet wax can come off in the bucket and contaminate the glaze.
- Always dip for that glaze’s recommended timeWe tested all sorts of dipping times and these are the ones that gave us really nice results. Every glaze is different, and you will find its recommended dipping time on the lid of the bucket.
- Always let glaze drain back into the bucketHold the piece over the bucket until it has stopped dripping. Keep the glaze in the bucket, not on the floor, tray, wall or your shoes.
- The quick water dip is optionalAfter dipping and draining, one second or less in the water bucket. Some members love what it does to the surface and others skip it entirely. Both are fine.
- Always wash your tools when finishedDipping tools, whisks and mixing paddles, thoroughly, in The Wash Pit.
- Always clean up every dripFloor, ware platform, trays, bucket sides, walls, tools, and anywhere else it landed. Leave the dipping area better than you found it.
Never do these things
- Never dip the same piece in two different dipping glazesOne piece, one dipping glaze. Dipping into multiple buckets can cross-contaminate the glazes and damage the system for everyone.
- Never dip pottery with unfired underglazeIf your underglaze has not been fired onto the piece, do not dip it.
- Never dip pottery with brushed-on glaze already appliedDipping glazes should not be combined with wet brushed glazes.
- Never dip longer than that glaze’s recommended timeMore time in the bucket does not make the glaze better. It makes it too thick and creates problems.
- Never put dirty tools into a glaze bucketIf a whisk, paddle or tool touches the floor, it does not go back into the bucket. Wash it thoroughly first.
- Never switch tools between glazes without washing themCross-contamination happens fast. Wash whisks and paddles thoroughly before moving from one glaze to another.
- Never reach into a glaze bucket if you drop somethingDo not put your arm in. Get an instructor wearing PINK and they will help you retrieve it.
- Never leave a mess behindDrips on the floor, buckets, trays, platforms, walls and tools all get cleaned completely.
Who pays for dipping glazes
Dipping glazes are included for Purple Level and Black Level Members. Green Level and Yellow Level Members are welcome to use them by paying the dipping glaze up-charge, per piece.
Certification is the same for everybody. Everyone watches the video, agrees to the rules and signs the agreement, whatever level they are on.
The short version
Once you know the rhythm, it is easy.
Wax bottom. Clean piece. Blow off lid. Mix 120+ seconds. Dip your piece. Let it dry. Touch it up. Clean up.
If you are unsure, ask
Stop and find an instructor wearing PINK. It is always better to ask one question than to accidentally ruin an entire bucket of glaze. Nobody has ever been annoyed by the question.
Not certified yet?
The whole thing takes about 25 minutes and most of that is the video.
One last thing
These glazes only stay this good if we all protect them.
We bought them because this community earned them. Look after them like they are yours, because in every practical sense they are.