Pottery Date Night
 Bring All Your Friends Free Week
 Give a Month of Pottery
 Private Pottery Parties

 The Welcome Booklet
 Your First Ten Sessions
 The Pottery Process
 Finding the Studio
 Your Classes Never Expire
 The Four Tables
 Who’s Who
 The Rewards Program
 Flux Glazes
 The Calculators
 Kiln Tracker
 Holiday Kiln Deadlines

 Beginner’s Tool Set
 Fingernail Clippers
 Mayco Clay Mender
 Epoxy for Kintsugi
 Applicator Bottles
 Large Bead Rack
 Raku Workshop
 Nighttime Raku
 Horsehair and Feather Raku
 The Clay Hole T-Shirt
 Embroidered Crewneck
 Zip-Up Hoodie
 Pre-Made Bisqueware
 Glaze Catchers
 Kiln Cookies
 Clay Cubby Rental
 The Glaze Bible, Printed
 The Book of Molds, Printed
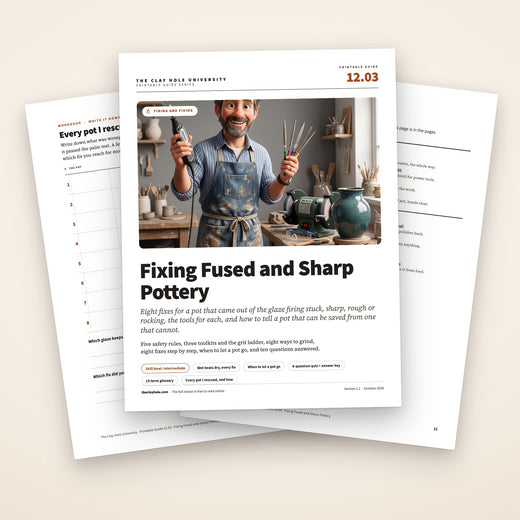
 Printable Pottery Guides
 Free Printable Trackers
 Gifts for Potters
 Christmas Pottery Ideas
 Mother’s Day Gift Ideas
 Pottery Date Night
 Studio Calendar
 2027 Studio Events
 What Should I Do Today?
 How to Throw on the Pottery Wheel
 How to Make a Pinch Pot
 How to Tap Center a Pot
 The Five Stages of Clay
 Is Pottery Hard to Learn?
 Pottery Wheel Practice Drills
 20 Easy Hand-Building Projects
 Everything That Sounds Wrong

 A Beautiful Piece, Every Time
 Slab Roller Tips
 Any Dish as a Slump Mold
 Slab Roller & Slab Mold Certification
 The Pottery Skill Tree
 Clay & Pottery Calculators
 Logging Your Pottery and Glazes
 The Pottery Dictionary
 Why Did My Pottery Do That?
 The Pottery Cone Chart
 Pottery Myths, Fact-Checked
 Is Handmade Pottery Food Safe?
 Incredible Ceramic Artist Videos
 How Dan Throws Giant Pots
 How to Dry Your Pottery
 The Pottery Wheel Introduction
 Pottery by Zodiac Sign
 Personality and the Pottery Wheel
 Pottery for Engineers
 ADHD, Hyperfocus, and Never Running Out
 Hobbies for Burnout
 Screen-Free Hobbies for Adults
 Every Addiction I Ever Had Lost to Art
 Functional Pottery Is Engineering
 How Do We Compare?
 Pottery Classes by City
 Every Pottery Studio in Utah
 Pottery in Draper
 Featured Members
 The Signature Wall
 Making Friends as an Adult Is Brutal
 The Clay Hole Commandments
 2027 Pottery Contests
 2027 Studio Parties
 Gallery Night

 Scream It Into the Void
 Destroy the Glaze Wall
 Daily Affirmation Cards
 Everything That Can Go Wrong
 Subscribe to Our Newsletters
 Contact The Clay Hole
 Corporate Team Building

 Glaze Combinations
 Glazes We Do Not Carry
 Making Glaze Test Tiles
 The Mega Glaze Tool
 How to Use the Mega Glaze Tool

 Glaze Brushing Techniques
 How to Use Underglaze
 How to Use Dipping Glazes
 Glaze Problems, Causes and Fixes
 The Dipping Glaze Guide

 Making a Glaze Catcher
 Fused or Sharp After Firing
 The Signature Wall
 His Viral Videos
 His Own Ceramics
 Meet Mud
Stuck. Sharp. Drippy. Fused.
Fix Your Pottery After a Glaze Firing
Your pot came out of the kiln glued to its cookie, dripping glass past the foot, or sharp enough to open mail. It happens to every potter who fires long enough. Every single one. This page is how you fix it at home: the exact tools, the exact steps, and which pots can be saved.
Your pot came out of the kiln glued to its cookie, dripping glass past the foot, or sharp enough to open mail. Most of it is fixable at home. Here is the short version: the rules that matter, the gear that matters, and five fixes.
Quick jump to:
Bookmark this before you need it. You will need it.

If you read nothing else
The Whole Thing, in Five Lines
- Coarse to remove, fine to finish. 60 or 120 grit takes material off, 240 and 400 make it feel good. Skipping grits doesn’t save time, it just moves the time to the next grit and makes it angrier.
- Water the whole way through. Dry grinding puts silica in the air and then in your lungs, permanently. Wet work traps it in harmless slurry. An N95 covers quick wet sanding; a real session wants a half-face respirator with P100 filters.
- Glasses on, every time. Fired glaze is glass. When it lets go it flies, and it flies at whoever is closest. Face shield any time a power tool spins.
- Slow, light, patient. You are removing glass, not sanding pine. Heavy pressure chips glaze in unplanned directions and the heat can crack a pot outright. If your hand is tired, you’re pushing too hard.
- Grinding fixes surfaces, not structure. A rough foot, a drip, a sharp edge, a fused cookie: winnable. A crack through the wall or a warp: not.
What to buy. A silicon carbide rubbing brick plus 220 and 400 wet/dry sandpaper, about fifteen dollars, handles most of what the kiln does to most people. The one upgrade worth making is diamond hand pads, 60 through 400. The only question that picks your tool is how much glass has to come off: a smear takes a stone, a bead takes a pad or a rotary tool, a puddle takes an angle grinder and a driveway.
Before any tool touches any pot
Read This First
Five rules. They take one minute to read. Eyeballs and lungs take considerably longer to replace, so we’re doing the minute.
Wet beats dry. Always.
Fired clay and glaze are loaded with silica. Grind them dry and that silica goes airborne, where your lungs collect it forever. Silicosis is permanent and incurable, and it is not an exaggeration, and that is the whole speech. Wet grinding traps the dust in harmless slurry. Keep the work wet, and wear an N95 or better anyway.
Eyes first.
Fired glaze is glass. When it breaks free, it does not fall politely. It flies. Safety glasses for every fix on this page, a face shield any time a power tool spins. One of the most common pottery injuries there is happens in the exact second someone thought, “it’s just one little tap.”
Slow, light, patient.
You are removing glass, not sanding pine. Heavy pressure chips glaze in ugly, unplanned directions, and the heat from an aggressive grind, especially one with no water, can crack a pot outright. Let the abrasive do the work. If your hand is tired, you’re pushing too hard.
Lock the pot down.
A damp folded towel under the pot, the pot braced against something solid, and your hands never in the path of the tool. A rotary bit that skates goes wherever it wants. Give it nowhere interesting to go.
Know when to quit.
Some pots are seconds. Some are planters. Some are shard art waiting for permission. Grinding fixes surfaces; it does not fix structure. If a fix on this page tells you to give up, believe it. There’s a whole section for grieving.
The dust talk, specifically.
For quick wet sanding, an N95 is fine. For any real grinding session, always wet, wear a half-face respirator with P100 filters. A cloth mask is a costume. A bandana is a cowboy costume. Neither stops silica, and silica is the dust that stays in your lungs for good once it’s in.
Gear up
The Toolbox
Three tiers. Most pots only need the first one. Buy for the problem in front of you, not the problem you’re afraid of.
About $15
The Rescue Kit
Handles rough bottoms, small drips, burrs, stuck kiln wash and most sharp spots.
- Silicon carbide rubbing brick (sold as a masonry rubbing stone at any hardware store)
- Wet/dry silicon carbide sandpaper, 220 and 400 grit (the black stuff)
- A knife sharpening stone works in a pinch
- Bucket of water and a sponge
- Old towel to work on
- Safety glasses and an N95
$40 to $120
The Serious Kit
For fused cookies, real drips, and bottoms you want to feel like sea glass. This is the setup people who fix pots often end up with.
- Diamond hand pads: 60, 120, 240, 400 grit (add 800 and 1500 for glass-smooth)
- Rotary tool (a Dremel or an honest knockoff) with diamond bits and diamond cutting discs
- Half-face respirator with P100 filters
- Rubber mallet
- Small cold chisel
- Painter’s tape (protects glaze you like)
- Face shield for anything that spins
Power shop
The Heavy Artillery
For thick puddles, welded cookies, and potters fixing pots by the batch. Respect required. Garage or driveway strongly implied.
- Angle grinder (4.5 inch) with a diamond cup wheel: eats thick glaze and cookie remnants fast, outdoors only
- Bench grinder with a silicon carbide wheel: quick work on big sharp edges, outdoors only
- 12-inch adhesive diamond grinding disc stuck to a bat on your wheel, with water dripping on it: the wobbly-pot cure, and dead-flat bottoms by the dozen
The grit ladder, which is the entire secret
Every fix on this page is the same sentence wearing different hats: coarse to remove, fine to finish, water the whole way through. Skipping grits doesn’t save time. It just moves the time to the next grit and makes it angrier.
The popular ways
How Potters Actually Grind
Seven methods, ranked roughly from gentle to gloriously aggressive. The fixes below tell you which one to grab. This is the map.
The hand stone
A silicon carbide rubbing brick or a sharpening stone, dipped in water, worked in small circles. Quiet, cheap, controllable, and older than every one of us.
Best for: rough bottoms, small burrs, drips smaller than a dime.
Watch out: it’s coarse. Finish with sandpaper or a fine pad or the bottom will feel ground, not smooth.
Wet/dry sandpaper
Silicon carbide sandpaper, used soaking wet. 220 to knock things down, 400 to make them nice. Lay it flat on the table for bottoms, fold it for edges.
Best for: final smoothing on everything.
Watch out: fired glaze eats sandpaper for breakfast. Buy more sheets than feels reasonable.
Diamond hand pads
Foam-backed pads with actual diamonds on them, used wet, coarse to fine. The workhorse. They cut faster than sandpaper, last for years, and flex around curves.
Best for: nearly everything on this page. If you buy one upgrade, buy this one.
Watch out: the 60 grit removes material faster than you expect. Check your progress every few passes.
Rotary tool + diamond bits
A Dremel with diamond bits for precision grinding, and thin diamond cutting discs for slicing the bulk off big drips. The surgeon of the group.
Best for: drips, spikes, tight spots, cutting fused seams.
Watch out: dip the bit in water constantly, tape around the target, and never lever a cutting disc sideways. They shatter, and then they fly.
The bench grinder
Fast, loud, and a little too confident. Touch a sharp edge to a silicon carbide wheel and it’s gone. Sometimes along with things you liked.
Best for: knocking big sharp edges down in seconds.
Watch out: it chips glaze, it overshoots, and it makes dry dust like it’s paid to, which breaks the wet rule above. Skip it if you can. If you use one: outdoors only, face shield, a half-face respirator with P100 filters, light touch.
Angle grinder + diamond cup wheel
The heavy artillery. A diamond cup wheel on a 4.5-inch angle grinder flattens thick puddles and welded cookie remnants in slow, even passes.
Best for: fused cookies, thick glaze puddles, flattening a ruined foot.
Watch out: two hands on the tool, pot braced so it cannot move, slow passes, and pauses to keep heat down. Used dry it makes the same silica dust as the bench grinder, so it is an outdoor tool too: face shield and a half-face respirator with P100 filters. Heat cracks pots. So does an angle grinder with an opinion.
The wheel-mounted grinding disc
A 12-inch adhesive diamond disc stuck to a bat, wheel spinning, water dripping on the disc, pot pressed gently foot-down against it. Flat is what it does. It cannot help itself.
Best for: wobbly pots, perfectly flat feet, and whole batches at once.
Watch out: keep it wet, keep your knuckles off the disc, and go easy. It grinds fingernails with the same enthusiasm.
The zero-dollar move
Rub the bare feet of two pots against each other over a bucket of water, in circles, for thirty seconds. Each pot smooths the other. Potters have been doing this since pots had feet. It still works.
Best for: lightly scratchy bottoms when you own nothing else yet.
Watch out: unglazed clay on unglazed clay only. Glaze on glaze just scratches two pots at once, which is efficiency, but the wrong kind.
Pick your problem
The Fixes
Eight problems, eight fixes. Tap yours and it opens. Every one follows the same shape: what happened, what you need, exactly what to do, and when to stop trying.
Five problems, five fixes. Tap yours and it opens. Every one is the same shape: what to do, in order, and when to stop trying.
Your pot is fused to a cookie or glaze catcherSnap it free, then grind the scar.
Glaze ran off the foot, pooled, cooled, and welded your pot and its cookie into one proud object. Flux glazes love doing this. Running Hot Chowder did not get that name by sitting still. The good news: the cookie did its job. Better it than the kiln shelf.
You’ll need:
- Safety glasses
- Folded towel
- Rubber mallet (or hammer + small cold chisel)
- Rotary tool or hand stone
- Wet/dry 120, 240, 400
- Water
- Glasses on. Not negotiable. The break flings glass chips, and it flings them at whoever is closest, which is you.
- Set the pot on a folded towel on a solid table, cookie side toward you.
- Read the seam. A thin glaze bridge between pot and cookie snaps clean. A thick puddle that swallowed the foot does not. Thick puddle? Skip to step 6.
- Tap the cookie, never the pot. Light sideways taps with the rubber mallet, right at the seam, rotating the pot a little between taps. Most thin fuses pop free within a lap or two.
- Still stuck? Bring the chisel. Rest the edge in the seam at a low angle, bevel toward the cookie, never aimed into the pot and never straight down. Light hammer taps, working around the perimeter. Escalate slowly. It lets go all at once, so keep your fingers out of the landing zone.
- Thick puddle or cookie chunks still welded on? Stop tapping. Tapping a thick fuse breaks pots. Grind instead: slice the bulk off with a rotary cutting disc (or an angle grinder cup wheel for the big stuff), then grind the remainder flush.
- Smooth the scar. Wet-sand 120, then 240, then 400.
- Run the palm test. Drag the foot across your palm. Anything you feel, keep sanding.
Pro tips. Score the glaze bridge with a rotary diamond disc before you tap; a shallow groove tells the break where to happen. And when in doubt, sacrifice the cookie. Cookies are cheap. Your pot cost you three weeks and a small piece of your soul.
Let it go when: the fuse climbs up the wall of the pot, or a tap flexes the pot instead of the cookie. Grinding a side wall leaves a scar that never polishes back to pretty.
Hardened drips past the footCut the icicle, grind the stump, sand it kind.
The glaze kept moving after you stopped watching, and now there’s a bead or a full glass icicle hanging below the foot. First, an important distinction: a drip that stops above the foot is decoration. Leave it. Brag about it. This fix is only for glass that hangs past the bottom, catches the table, or draws blood.
You’ll need:
- Safety glasses
- Painter’s tape
- Rotary tool + diamond cutting disc + diamond bit
- Hand stone or 120 pad
- Wet/dry 240, 400
- Water
- Tape around the drip. Two layers of painter’s tape on the glaze you want to keep. A skating bit stops at tape more politely than it stops at glaze.
- Cut the bulk off with the diamond cutting disc, close to the surface but not flush. Slow. Let the disc cut. Do not lever it sideways; thin discs shatter, and shattered discs travel.
- Grind the stump flush with a diamond bit or the corner of a wet hand stone. Dip the bit in water every few seconds. Water is the difference between grinding and cooking.
- Wet-sand the spot smooth. 120 if it’s rough, then 240, then 400.
- Check the foot edge by touch, gently. A drip at the very edge often hides a sharp lip underneath where it curled. Find it with careful fingers, not with next week’s dish towel.
Pro tips. Grind the drip slightly lower than the surrounding surface if you plan to refire; re-melted glaze remembers exactly how much it enjoyed running the first time. And if the ground spot looks dull and sad afterward, that’s not failure. That’s the next fix down.
Let it go when: almost never. Drips are the most fixable problem on this entire page. This is the one you win.
Sharp edges, spikes, and burrsFind every point, then erase it grit by grit.
Glaze beaded up at an edge, a pinhole burst into a tiny crater with a rim like a broken bottle, a bare spot flaked, or a chip left a razor line. Whatever the origin story, the physics are the same: fired glaze is glass, and glass edges want blood. This fix is small, satisfying, and worth doing on every functional piece you make.
You’ll need:
- Cotton ball
- Hand stone or 120/240 diamond pad
- Rotary tool + fine diamond bit (tight spots)
- Wet/dry 400
- Water
- Safety glasses
- Find every sharp spot with a cotton ball. Drag it slowly over rims, handles, edges, and the foot. It snags on anything that would later snag a lip or a finger. Cotton doesn’t lie and cotton doesn’t bleed.
- Knock each point down with a wet 120 stone or pad. Small circles, light pressure, just until the point is gone.
- Chase it with 240, then 400, until your fingertip can’t find where it was.
- Tight spot? Inside a handle, deep in a texture, on a carved edge: use the rotary tool with a small diamond bit, dipped in water, at low speed.
- Rims that meet mouths get the full ladder. Take drinking rims to 800 or beyond. Lips notice everything.
Pro tips. Sanding a glossy surface leaves a matte ghost where the shine was. On a foot, nobody cares. On a rim or a visible wall, polish up through 800 and 1500, or refire to bring the gloss all the way back (covered below).
Let it go when: the sharpness is a whole field of burst blisters across a surface that touches food. A blistered surface is not one to eat from, so this pot retires from food. A few burst blisters elsewhere are different: grind them flat, wet, show the studio team, and refire once with a thin coat of the same glaze. If it comes out of the refire still angry, it has announced its new career as a pen cup.
Rough, sandpaper-feeling bottomThe five-minute fix people actually notice.
The unglazed foot fired with a tooth to it. Groggy clay bodies come out feeling like 60-grit on purpose; even smooth bodies can pick up a little bite. Left alone, that foot will scratch every table it ever meets, and it will start with the one that matters. People pick a pot up, feel the bottom, and quietly decide what kind of potter you are. Rude, but true.
You’ll need:
- Wet/dry 220 + 400 (or diamond pads 240/400/800)
- Water
- Towel
- Bucket
- Optionally: one other pot
- Wet the foot, wet the abrasive. Everything on this fix happens wet.
- Lay the sandpaper flat on the table, grit up, and move the pot on it in circles and figure eights. Thirty to sixty seconds at 220.
- Rinse, feel, repeat at 400. Stop when your fingertips stop filing complaints.
- Want to show off? Keep climbing: 800, then 1500. A foot that feels like sea glass is the quietest flex in pottery.
- The freebie: rub two pots’ bare feet together over the bucket, in circles, thirty seconds. Both come out better. The buddy system, for pottery.
Pro tips. Grog never fully disappears; smooth is the goal, not mirror. And do all of this over a bucket, not your kitchen sink. Clay slurry finds the lowest point of your plumbing and settles down to raise a family.
Let it go when: never. This one always works. Enjoy it.
The wobblerFind the high spot. Remove the high spot. Repeat.
The pot rocks. Tap-tap. Tap-tap. Forever. Usually it’s one of three culprits: an uneven foot, a bead of glaze hiding under the foot ring, or a little warp the kiln threw in for free. The first two grind out beautifully. The third one is the pot’s personality now.
You’ll need:
- A truly flat surface (glass, granite, a good countertop)
- Pencil
- Coarse pad or full sheet of coarse wet/dry, taped down flat
- Wet/dry 240, 400
- Water
- Find the villain. Set the pot on the flat surface and press opposite edges. Where it rocks, look and feel under the foot. Pencil-mark every contact point that’s doing too much.
- If it’s a glaze bead: that’s just a drip in hiding. Grind only the bead (the drip fix), re-test, done.
- If it’s the foot itself: tape coarse wet/dry abrasive dead flat to the table, grit up, wet it and the foot, and grind the foot on it in circles with even downward pressure. The flat abrasive finds the high spots for you. Check every fifteen seconds.
- Batch potter? This is the wheel-mounted diamond disc’s whole reason for existing. Water dripping on the spinning disc, pot pressed gently foot-down. Flat happens.
- Finish 240, then 400, so the newly flat foot is also a newly kind foot.
Pro tips. Test on the same flat surface every time; a wobbly test table gaslights you. And take less than you think between checks. You can always grind more. Ungrinding remains unavailable.
Let it go when: the wall is warped and the pot leans rather than rocks. Grinding can’t un-warp anything. The word you’re looking for is “organic.” Say it with confidence.
Kiln wash, cookie crumbs, or shelf grit stuck to the footThe easiest fix on the page. You’ve earned one.
White crusty patches on the foot, or a few gritty crumbs of cookie that hitched a ride. Kiln wash exists so things don’t stick permanently, which is why this stuff shears right off. This is the fix you do while your coffee is still hot.
You’ll need:
- Damp sponge
- Hand stone or 120 pad
- Wet/dry 240, 400
- Water
- An N95 or better for clearing the loose wash
- Wipe the loose stuff off outside with a damp sponge, in an N95 or better. Most of it surrenders immediately.
- Wet-grind the welded patches with the 120 stone or pad. Kiln wash is soft compared to glaze; it goes fast.
- Finish 240, then 400. Palm test. Done. Look at you.
Let it go when: not applicable. If this one beats you, put the tools down and have a snack. Come back stronger.
The ground spot looks dull and scratchedYou saved the pot. Now save the shine.
Grinding removes gloss. That’s the deal you made. Where the tool touched, glossy glaze is now a matte scar with fine scratches in it. You have two ways back, and one of them involves fire, so obviously it’s the fun one.
You’ll need:
- Route 1: diamond pads 400, 800, 1500 (3000 if you own it)
- Route 2: a dab of the same glaze + a refire
- Water either way
- Route 1: polish it. Wet pads, climbing the ladder: 400, then 800, then 1500. Each grit erases the scratches of the one before it. You’ll land at glossy-adjacent, which on a foot or an underside is plenty.
- Route 2: refire it. Heat re-melts the glaze surface and the gloss comes all the way back. If grinding left a low or bare spot, dab fresh glaze on it first and let it dry fully. Glossy glazes usually heal beautifully in a refire. Mattes are moodier; test one before betting a favorite.
- Refiring at the studio: a refire is just another glaze firing, at our normal cone 5½, and standard firing fees apply: $4.80 for anything 125 cubic inches or under, five cents per cubic inch above that. Ask the studio team first, put it on the drop-off table with a ticket, and set it on a cookie. A dab of dried glaze flakes if it is knocked, so handle it gently. The glaze already ran once. It remembers how.
Pro tips. Before a refire, grind runaway areas a little lower than the surrounding glaze so a second melt doesn’t recreate the original crime scene. And know the trade: every refire carries a small chance of new drips, shifted color, or a surprise blister. Usually it’s fine. Usually.
Let it go when: the scar is mid-wall on a showpiece and neither polish nor refire redeemed it. Congratulations, the pot has texture now. Artists pay for texture.
Two pots fused togetherThe coin flip. Sometimes you win the toss.
Two pieces touched in the fire, or one pot’s drip found a neighbor, and now they’re holding hands in glass. Deep breath before this one: separation works often, but the break chooses which pot pays for it, and it does not take requests.
You’ll need:
- Safety glasses (seriously, this is the fix they were invented for)
- Painter’s tape
- Rotary tool + diamond cutting disc
- Rubber mallet
- Towel-lined workspace, a bucket of water, a face shield and an N95 or better
- Realistic expectations
- Assess the bridge. A small glaze kiss at a rim or edge is beatable. A wide melted seam where two walls leaned together is not. Be honest with yourself here; the next steps can’t be.
- Tape both pieces around the joint. Tape keeps chips local and gives flying fragments something boring to do.
- Score the bridge with the diamond cutting disc, dipped in water often, as deep as you can safely reach. Every bit of glass you remove now is force you won’t need later.
- One light lateral tap with the mallet, at the scored line, pieces supported on the towel. Then look. Then maybe one more. This is a conversation, not an argument.
- When they part, each piece keeps a scar. Grind and smooth it (sharp edges), then polish or refire (dull spots).
Pro tips. Expect the break to take a chip of glaze, and occasionally a chip of wall, from one of the two. Decide before the first tap which pot you’d sacrifice, and aim your scoring to favor the other one. Cold-blooded? Yes. Effective? Also yes.
Let it go when: they fused body-to-body across a real patch of wall. Two pots walked into that kiln and one sculpture walked out. Name it. Put it somewhere people will ask about it.
Fused to a cookie or glaze catcherSnap it free, then grind the scar.
- Glasses on. Set the pot on a folded towel on a solid table, cookie side toward you.
- Read the seam. A thin glaze bridge snaps clean. A thick puddle that swallowed the foot does not, so skip to step 4.
- Tap the cookie, never the pot. Light sideways taps with a rubber mallet at the seam, rotating the pot between taps. Still stuck? Rest a cold chisel in the seam at a low angle, bevel toward the cookie, and escalate slowly.
- Thick fuse? Grind, don’t tap. Tapping a thick fuse breaks pots. Slice the bulk off with a rotary diamond disc, then grind the remainder flush.
- Wet-sand the scar 120, 240, 400. Drag the foot across your palm; anything you feel, keep sanding.
Let it go when: the fuse climbs up the wall of the pot, or a tap flexes the pot instead of the cookie.
Hardened drips past the footCut the icicle, grind the stump, sand it kind.
A drip that stops above the foot is decoration. Leave it. This is only for glass that hangs past the bottom.
- Tape around the drip. Two layers of painter’s tape on the glaze you want to keep. A skating bit stops at tape more politely than it stops at glaze.
- Cut the bulk off with a rotary diamond cutting disc, close but not flush. Never lever it sideways; thin discs shatter, and shattered discs travel.
- Grind the stump flush with a diamond bit, dipped in water every few seconds. Water is the difference between grinding and cooking.
- Wet-sand 120, 240, 400, then check the foot edge by touch for the sharp lip a drip often hides where it curled.
Let it go when: almost never. This is the one you win.
Sharp edges, spikes and burrsFind them with cotton, erase them with grit.
- Drag a cotton ball slowly over rims, handles, edges and the foot. It snags on anything that would later snag a lip. Cotton doesn’t lie and cotton doesn’t bleed.
- Knock each point down with a wet 120 stone or pad. Small circles, light pressure, until the point is gone.
- Chase it with 240, then 400, until your fingertip can’t find it. Drinking rims go to 800. Lips notice everything.
- Tight spots want the rotary tool with a small diamond bit, dipped in water, at low speed.
Let it go when: it’s a whole field of burst blisters on a food surface. A blistered surface is not one to eat from, so this pot retires from food. A few burst blisters elsewhere are different: grind them flat, wet, show the studio team, and refire once with a thin coat of the same glaze.
A rough, gritty or wobbly bottomFlat abrasive, taped down, circles.
- Rough foot: lay 220 wet/dry flat on the table, grit up, wet the paper and the foot, and move the pot on it in circles for thirty to sixty seconds. Rinse, feel, repeat at 400. Climb to 800 for a foot that feels like sea glass.
- Stuck kiln wash or cookie crumbs: wipe the loose stuff off outside with a damp sponge, in an N95 or better, then wet-grind the welded patches with a 120 pad and finish 240 and 400. Kiln wash is soft. It goes fast.
- Wobbler: set the pot on something truly flat, press opposite edges, and pencil-mark the contact points doing too much work. A bead of glaze under the foot ring is a drip in hiding, so grind only the bead.
- If it’s the foot itself, tape coarse wet/dry abrasive dead flat to the table, wet it and the foot, and grind the foot on it in circles with even pressure. Check every fifteen seconds. You can always grind more; ungrinding remains unavailable.
- The free version: rub two pots’ bare feet together over a bucket, in circles, thirty seconds. Unglazed clay on unglazed clay only.
Let it go when: the pot leans rather than rocks. That’s a warp, and grinding can’t un-warp anything.
Two pots fused togetherThe coin flip. Sometimes you win the toss.
- Assess the bridge. A small glaze kiss at a rim is beatable. A wide melted seam where two walls leaned together is not.
- Tape both pieces around the joint, and decide now which pot you’d sacrifice. The break chooses, and it does not take requests.
- Score the bridge with a rotary diamond cutting disc, dipped in water often, as deep as you can safely reach, angled to favor the pot you want to keep.
- One light lateral tap at the scored line, pieces supported on a towel. Then look. Then maybe one more. This is a conversation, not an argument.
- Grind each scar smooth the way you’d handle any sharp edge, then polish or refire.
Let it go when: they fused body-to-body across real wall. Two pots walked into that kiln and one sculpture walked out. Name it.
Afterwards, the ground spot will look dull. Grinding removes gloss; that’s the deal. Polish back up through 400, 800 and 1500, or refire and the gloss comes all the way back. A refire is just another glaze firing at our normal cone 5½, at the usual firing fees. Ask the studio team first and set it on a cookie. Grind runaway areas slightly lower than the surrounding glaze first, or the second melt recreates the original crime scene.
Knowing when to stop
When to Let a Pot Go
Some pots don’t come back. A crack that goes through the wall. A fuse that climbed halfway up the side. A blister field across the one surface that mattered. Grinding fixes surfaces. It does not fix structure, and no tool on this page changes that.
So here’s what we tell every member who meets bad news in a kiln load: the kiln keeps a percentage. It always has. Every potter whose work you admire has a bucket of shards behind the photos. The pot taught you something on the way in. That was the actual product. The mug was the receipt.
The next one is already waiting in the bag.
And a pot that can’t be a mug can still have a glorious second career:
- Planter. A crack through the wall is drainage now. Congratulations on your foresight.
- Pen cup, brush holder, sponge home. Desk objects have low standards and high loyalty.
- Shard art and mosaics. Break it the rest of the way on purpose. Wrap it in a towel first, glasses on, and keep the good pieces.
- Garden markers. Shards labeled with underglaze pencil outlive every plastic tag ever made.
- Kintsugi. Repair the break on purpose and make the scar the point. We sell the 5-minute epoxy for it at the studio. Wear nitrile gloves and eye protection, keep the room ventilated, and keep a repaired piece for display, never for food or drink.
- The shelf of humility. Every potter has one. It is, weirdly, the shelf guests ask about most.
Questions everybody asks
The FAQ
Is my pot still food safe after grinding?
Grinding the foot, the base, or a drip changes nothing about food safety; those spots were never sealing anything. The one case to think about: if you ground through glaze on a surface that holds food or drink, you’ve exposed bare clay there. The clean answer is to dab glaze on the spot and refire, so the surface is sealed glass again. A glaze you dab on yourself has no food rating, so if that surface holds food, choose the glaze from the Food Safe Lookup.
Do I really need a mask if I’m sanding wet?
Wet work keeps almost all the dust down, which is exactly why we push it so hard. Wear at least an N95 anyway. Slurry dries, edges of the work go dry mid-session, and lungs do not offer do-overs. The N95 costs next to nothing. The alternative costs everything else.
Can I do any of this at the studio?
Quiet wet work with your own stone, pads, or sandpaper: yes. Keep it wet, work over a bucket, keep it away from the shared tables, leave the station cleaner than you found it, and save the mallet and chisel for home. Power grinding: no. Dust and flying glass in a room full of other people’s lungs and other people’s greenware is not a neighborly move. That part is a garage-and-driveway sport.
What’s the cheapest setup that handles most of this?
A silicon carbide rubbing brick, a few sheets of 220 and 400 wet/dry sandpaper, a bucket, safety glasses and an N95. Call it fifteen dollars. That kit fixes rough bottoms, small drips, burrs, stuck kiln wash, and most sharp edges, which is most of what the kiln ever does to most people.
Will grinding weaken my pot?
Surface grinding? No. A pot is weakened by cracks and thin walls, not by losing a millimeter of glass off its foot. The real risk is heat: a hard, impatient power grind with no water can heat-shock a crack into existence. Keep it wet, keep it moving, keep it light, and the pot never notices.
Can I use a regular knife sharpening stone?
Yes. A silicon carbide sharpening stone is the same idea as a pottery stone wearing a different label. Use it wet, rinse it well after, or just declare it the pottery stone from now on. Fired glaze wears stones faster than steel does, and stones hold grudges.
Isn’t there a chemical that dissolves glaze? Anything easier?
No. Fired glaze is glass fused to stone, and nothing you can responsibly own dissolves that combination. Mechanical removal is the whole game. The good news is that the mechanical game is very winnable, which is why this page exists.
My drip is gorgeous. Do I have to grind it?
Please don’t. A drip that stops above the foot is decoration, and often the best thing on the pot. Grind only what’s sharp, what wobbles, what scratches tables, or what was never supposed to be attached, like the cookie. Everything else is style.
How do I keep this from happening again?
Glaze thinner near the bottom and leave a dry margin at the foot; running glaze needs somewhere to run out of steam. Fire everything on a cookie. Put a glaze catcher under any piece with flux on the outside; the flux labels aren’t kidding. And look a glaze up in the Glaze Finder before you bet a favorite pot on it. Runny glazes tell on themselves in there.
What do I do with the grinding slurry?
Not the drain. Ever. Let the bucket sit overnight so the solids settle, pour the clear water off outside, and scoop the sludge into the trash. Your pipes will never thank you, because they’ll never know what you spared them, which is exactly how plumbing gratitude works.
The fine print
The Part Where We Protect Ourselves
Let’s be grown-ups for a minute, because this part is funny right up until it isn’t. Everything on this page involves broken glass, spinning tools, silica dust, and pottery that can crack, shatter, chip, or fight back without warning. Those dangers are real. People genuinely get cut, genuinely lose chips of glaze into their eyes, and genuinely damage their lungs doing exactly the things described above without the safety gear described above.
So, in plain English: you do all of this at your own risk. By using anything on this page, you agree that The Clay Hole, its owners, and its team are not responsible for pots that break during a fix, chips, cracks, cuts, flying shards, eye injuries, hand injuries, tool injuries, power tool injuries, injuries from tools used in ways their manufacturers specifically begged you not to, dust exposure you chose not to protect yourself from, ruined tables, scratched countertops, clogged drains, or any other outcome, creative or otherwise. Mud, being a dog, was never legally responsible for anything and would like that noted for the record.
This guide is general information from one pottery studio, not professional advice, and it comes with no guarantee that any particular pot survives any particular fix. Some don’t. There’s a whole section about that up there. Read and follow your tool manufacturers’ instructions, wear the glasses, wear an N95 or better, keep the work wet, and keep fingers out of the path of anything that spins, taps, or snaps. If a step feels beyond your comfort, your experience, or your gear, stop. A pot is not worth a tendon.
Short version, and we mean every word of it. Everything on this page involves broken glass, spinning tools, silica dust, and pottery that can shatter without warning. You do all of this at your own risk. The Clay Hole, its owners and its team are not responsible for pots that break during a fix, cuts, flying shards, eye or lung injuries, ruined tables, or clogged drains. This is general information from one pottery studio, not professional advice, and nothing here guarantees any particular pot survives. Follow your tool manufacturers’ instructions, wear the glasses, wear an N95 or better, keep the work wet. If a step feels beyond your gear or your comfort, stop. A pot is not worth a tendon.
Signed, The Clay Hole.
Witnessed, reluctantly, by Mud.
You’ve got this
Go Save That Pot
Coarse to remove. Fine to finish. Water the whole way. Glasses on. That’s the entire religion. Now go get your pot back.
Coarse to remove. Fine to finish. Water the whole way. Glasses on. That’s the entire religion. Go get your pot back. If you want the long version, with all eight fixes, every method and the full FAQ, the toggle is at the top of the page.
Which version would you like to print?
Every accordion opens itself for the printer, so nothing comes out folded shut, and the site header and footer stay off the page.