Pottery Date Night
 Bring All Your Friends Free Week
 Give a Month of Pottery
 Private Pottery Parties

 The Welcome Booklet
 Your First Ten Sessions
 The Pottery Process
 Finding the Studio
 Your Classes Never Expire
 The Four Tables
 Who’s Who
 The Rewards Program
 Flux Glazes
 The Calculators
 Kiln Tracker
 Holiday Kiln Deadlines

 Beginner’s Tool Set
 Fingernail Clippers
 Mayco Clay Mender
 Epoxy for Kintsugi
 Applicator Bottles
 Large Bead Rack
 Raku Workshop
 Nighttime Raku
 Horsehair and Feather Raku
 The Clay Hole T-Shirt
 Embroidered Crewneck
 Zip-Up Hoodie
 Pre-Made Bisqueware
 Glaze Catchers
 Kiln Cookies
 Clay Cubby Rental
 The Glaze Bible, Printed
 The Book of Molds, Printed
 Printable Pottery Guides
 Free Printable Trackers
 Gifts for Potters
 Christmas Pottery Ideas
 Mother’s Day Gift Ideas
 Pottery Date Night
 Studio Calendar
 2027 Studio Events
 What Should I Do Today?
 How to Throw on the Pottery Wheel
 How to Make a Pinch Pot
 How to Tap Center a Pot
 The Five Stages of Clay
 Is Pottery Hard to Learn?
 Pottery Wheel Practice Drills
 20 Easy Hand-Building Projects
 Everything That Sounds Wrong

 A Beautiful Piece, Every Time
 Slab Roller Tips
 Any Dish as a Slump Mold
 Slab Roller & Slab Mold Certification
 The Pottery Skill Tree
 Clay & Pottery Calculators
 Logging Your Pottery and Glazes
 The Pottery Dictionary
 Why Did My Pottery Do That?
 The Pottery Cone Chart
 Pottery Myths, Fact-Checked
 Is Handmade Pottery Food Safe?
 Incredible Ceramic Artist Videos
 How Dan Throws Giant Pots
 How to Dry Your Pottery
 The Pottery Wheel Introduction
 Pottery by Zodiac Sign
 Personality and the Pottery Wheel
 Pottery for Engineers
 ADHD, Hyperfocus, and Never Running Out
 Hobbies for Burnout
 Screen-Free Hobbies for Adults
 Every Addiction I Ever Had Lost to Art
 Functional Pottery Is Engineering
 How Do We Compare?
 Pottery Classes by City
 Every Pottery Studio in Utah
 Pottery in Draper
 Featured Members
 The Signature Wall
 Making Friends as an Adult Is Brutal
 The Clay Hole Commandments
 2027 Pottery Contests
 2027 Studio Parties
 Gallery Night

 Scream It Into the Void
 Destroy the Glaze Wall
 Daily Affirmation Cards
 Everything That Can Go Wrong
 Subscribe to Our Newsletters
 Contact The Clay Hole
 Corporate Team Building

 Glaze Combinations
 Glazes We Do Not Carry
 Making Glaze Test Tiles
 The Mega Glaze Tool
 How to Use the Mega Glaze Tool

 Glaze Brushing Techniques
 How to Use Underglaze
 How to Use Dipping Glazes
 Glaze Problems, Causes and Fixes
 The Dipping Glaze Guide

 Making a Glaze Catcher
 Fused or Sharp After Firing
 The Signature Wall
 His Viral Videos
 His Own Ceramics
 Meet Mud
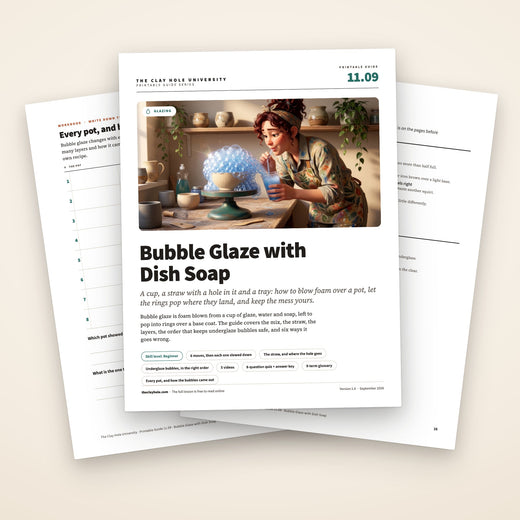
Glazing · Bubble glaze with dish soap
Soap, a straw and a cup of glaze.
Blow the bubbles over the pot and let them pop where they land. Every bubble leaves a ring, and a few layers of dark rings over a light base is a surface no brush can make. It is a cup, a straw with a hole in it, and a tray under the pot.
Four steps with a tick list at each: the base coat and the straw, the cup, the foam, and finishing. Six fixes, most of them about the foam, and five videos from four potters.
This is the short version: the base coat, the hole in the straw, the cup, the foam, each with a tick list. The color notes, the glaze-versus-underglaze reasoning and the questions are in the comprehensive version.

Read it, then watch it
Why this is written down and filmed, both.
Bubble glaze is a recipe and a mess. The recipe is a ratio and a rule about the straw, and those go on a page. The mess is foam rising out of a cup and spilling over a pot, and how fast that happens and how it lands is something you watch once and then know. The videos are for the foam; the page is for the ratio, the hole in the straw and the tray under the pot.
Use both, in this order
Read the recipe and cut the hole in the straw. Watch the foam. Do it on a tile before a pot, at the far end of the table, with the tick list open.
The whole idea
Soap, a straw and a cup of glaze. Blow, spill, let them pop.
About half glaze or underglaze and half water, the cup no more than half full, a good squirt of dish soap, a straw with a hole cut near the top. Blow slowly until the foam rises, spill it over a base-coated pot, let the bubbles pop where they land. Underglaze bubbles go on raw clay, get bisque fired, then one thin clear. Tray under the pot, wiped down wet.
The five-minute version
The whole technique in six moves.
If you already glaze and you just want the shape of it, this is the shape of it. Everything below is these six moves, slowed down and with the places they fail marked.
Before you blow anything
What you need at the table.
Six things, and the straw with the hole is not optional. The tray is what keeps the mess yours.
A throwaway cup, a straw with a hole near the top, dish soap, a dark glaze or underglaze, a base-coated pot on a tray, wax on the foot, a sponge.
Step one
Base coat the pot, wax the foot, cut the hole in the straw.
The rings need something to show against. A bubble leaves a ring the thickness of its skin. So: three coats of a light glaze, dried matte, and dark bubbles over it. Or raw clay with dark underglaze bubbles, bisque fired, and a thin clear over the top, which holds the rings best.
Wax the foot and let it go matte, because foam runs. Then the straw: cut a small slit near the top, just below where your lips go. Air blows out through the straw as normal, and the hole makes it much harder to pull glaze up it. Plenty of people who skipped the hole have had a mouthful of glaze, and the hole is there so it does not happen to you.
Set up at the far end of the glaze table with a tray under the pot and the pot on a banding wheel, so the foam has somewhere to land and the pot can be turned under it. Bubble glaze is the messiest thing on the glaze wall by a distance, and a tray is what keeps it yours.
Step two
Mix the cup: half glaze, half water, more soap than feels right.
Your own cup, from a little poured out of the jar. Never a straw near a jar. A few spoonfuls of a dark glaze or underglaze into a paper cup, about the same of water, a good squirt of dish soap, stirred until the surface foams.
The ratio is a starting point. Thinner gives fainter rings; some strong glazes bubble well with no water at all; stiff matte glazes hardly foam whatever you do. The soap is the part people underdo, and foam that pops before it lands is nearly always a cup that wanted another squirt. Fill the cup no more than half, because the foam needs room to rise.
Dark over light is the rule for the colors: a black, a deep blue or an iron brown over a white or cream base. Two colors of bubbles, one layer each, read as depth. Test on a tile, because every jar on the wall behaves a little differently with soap in it.
Step three
Blow slowly, let the foam spill, let the bubbles pop where they land.
Blow out, slowly, until the foam climbs out of the cup. Hold the cup at the edge of the pot and let the foam fall onto it; poured foam collapses into a puddle. Turn the pot so the foam lands where you want it. Then watch the bubbles pop, each leaving a ring.
Big bubbles for a plate or a wide bowl, blown slowly. Smaller bubbles for a vertical surface, where a big one is mostly water and runs. If the bisque is drinking the bubbles the instant they touch, mist it lightly first. If they will not pop, a gentle breath across them or a fingertip does it.
Hold the pot level until the rings have dried matte, then a second layer, and a third if you want depth, each dried before the next. Two colors, one layer each, is the classic. Little Street Pottery’s video in the Watch it done section covers controlling where the bubbles land, on greenware and on bisque.
Plates against walls
A plate takes big bubbles because the foam has nowhere to run; it sits, pops and dries in place, and the rings overlap into something like a map. A mug or a vase takes smaller bubbles blown gently so the rings land and pop before gravity gets them, one side at a time, turned on the wheel between sides. The same cup does both; the breath is different.
Step four
Bubbles are the top layer. Then clean up wet.
Nothing opaque goes over them. Bubbled glaze is the top layer. Bubbled underglaze is bisque fired first, then gets one thin coat of clear and nothing else. Three coats of anything over bubbles buries them, because a coat of glaze is thicker than a ring.
Sponge the beads off the waxed foot. Then the table: the tray, the banding wheel and the tabletop wiped down wet before you leave, and the cup and the straw in the bin. Foam that dries on a shared table is glaze dust on the next person’s work, and a straw left on the table is a straw somebody else picks up.
The dish soap burns out in the kiln with no trace, like wax, so the firing is the ordinary one. Staff load every kiln here, and every piece sits on a cookie with a naked bottom, which the waxed foot gives you. If the piece will hold food or drink, check the glaze you bubbled with on the Food Safe Lookup first. The rings come out of the kiln crisper from underglaze and softer from glaze, and both are the reason people take a photo.
Watch it done
Now watch four people blow bubbles at pots.
Watch this one, then go cut a hole in a straw.
None of these potters work here. Between them they cover a full instruction, a three-minute version, a twenty-minute walk through, bubbles on greenware and bisque, and a one-minute mix and bubble. Nothing but the still frame loads until you press play.
Twelve minutes: what you need, the technique, and the finished result. The other four videos are in the comprehensive version.
When it goes wrong
Six ways it goes wrong, and what to do about each.
The three failures that happen on the first cup.
Pick the one that looks like your pot.
The bubbles barely showed after firing
The glaze in the cup was too thin, or the bubbles were too small, or there were not enough layers. A bubble leaves a ring the thickness of its skin, and that is not much.
One to one at most, not thinner. Bigger bubbles: blow slowly. Two or three layers, each dried. Or bubble underglaze onto raw clay, bisque fire it, and clear over it with one thin coat, which holds the rings far better.
Fired is fired. A faint pattern under a clear reads as a soft texture, and the next pot gets underglaze bubbles.
The bubbles pop before they land
Not enough soap, or the pot is so dry it drinks the bubble on contact, or you are blowing too hard.
A good squirt of soap, more than feels right. Blow slowly so the foam rises and spills. Mist the bisque lightly first.
Add soap, stir, blow slower. It takes two tries to find the foam that holds.
It ran and dripped down the pot
Too much liquid at once: foam that collapsed into a puddle, bubbles so big they were mostly water, or a pot tilted while the foam was wet.
Spill the foam, never pour it. Smaller bubbles on vertical surfaces, big ones on plates. Pot level until the foam has popped and dried.
A wet run smooths with a damp brush. A dry run is one to show staff. Do not scrape dry glaze, it makes dust. Keep the foot waxed and it stays off the shelf either way.
You got glaze in your mouth
You breathed in through the straw instead of out. It is an easy mistake, and the hole in the straw makes it much harder to repeat.
Cut a small hole in the straw near the top, just below where your lips go. Air blows out fine, and far less can be sucked up. Never blow through a straw that has no hole.
Spit it out, rinse your mouth with water and tell staff. Glaze is not food, and the hole in the straw is the rule from now on.
The pattern vanished under the top coat
Three coats of anything opaque over bubbles buries them. Bubbles are thin rings; a coat of glaze is thicker than the ring.
Bubbles are the top layer or they are under one thin coat of clear. Two colors: a base coat, dried, bubbles in a second color over it, and nothing else. Or underglaze bubbles, bisque fired first, under one coat of clear.
Fired is fired. The next one keeps the bubbles on top.
Foam went everywhere except the pot
A full cup blown hard in the middle of a shared table. Bubble glaze is the messiest thing on the glaze wall by a distance.
A tray under the pot, a half-full cup, the pot on a banding wheel so you can turn it under the foam, and the far end of the table. Wipe down wet when you finish.
Wipe it up wet before it dries. Foam that dries on a shared table is glaze dust on the next person’s work.
How it works here
At The Clay Hole, this is a far-end-of-the-table job with a tray.
This page is written for potters everywhere. A few things are specific to our building, so you know before you start.
Three things to know here
The glaze wall needs the free brush-on glaze and underglaze certification. Underglaze opens at Purple Level (Amaco Velvet at Black Level); at Green and Yellow Level you can bring your own Speedball or Amaco Velvet. Pour a little from a jar into your own cup; never a straw or a soapy brush near a jar, because a contaminated jar is on whoever did it. Tray under the pot, far end of the table, everything wiped down wet before you leave.
The jars
Pour a few spoonfuls from a jar into your cup and put the jar back. A straw, a soapy brush or a soapy cup near a jar contaminates it, the jar is finished, and replacing it is on the member who did it. The glaze wall needs the free brush-on glaze and underglaze certification. Underglaze opens at Purple Level (Amaco Velvet at Black Level); at Green and Yellow Level you can bring your own Speedball or Amaco Velvet.
The table
Far end, a tray under the pot, the pot on a banding wheel. Banding wheels are a studio tool from Yellow up; Green Level Members bring their own. Wax stations are Purple and Black for brush-on work and open to every Level when dipping; for a brushed-on foot at Green and Yellow, bring your own wax.
Leaving it
Tray, wheel and tabletop wiped down wet. Cup and straw in the bin, not the sink. Foam that dries on a table is somebody else’s contamination, and a straw on a table gets picked up.
Firing
Soap burns out in the kiln with no trace. Bisque is cone 05 and free; the glaze firing is cone 5½ at five cents a cubic inch, $4.80 minimum, and every piece sits on a cookie with a naked bottom. Staff load every kiln.
Questions people actually ask
The ones that come up every week.
What is in the cup?
Glaze, water and dish soap. About one part glaze to one part water, then a good squirt of soap, more than feels right, stirred until it foams. Thinner mixes give fainter rings. Some potters skip the water for a strong glaze; test it, because glazes vary in how they bubble.
Glaze or underglaze?
Underglaze bubbled onto raw clay, bisque fired, and covered with one thin coat of clear gives the crispest rings, because underglaze holds detail and clear glaze does not move it. Here underglaze always goes on before the bisque firing and before any glaze, never after. Bubbled glaze works, especially a dark glaze over a light base coat, but the rings are softer. Try both on a tile before a pot.
Which glazes bubble well?
Ones that are fluid enough to foam with soap and dark enough to show against the base: a black, a dark blue, an iron brown, over a white or cream base coat. Stiff matte glazes foam badly. Test on a tile; every jar on the wall behaves a little differently with soap in it.
How do I keep it off my face and out of my lungs?
Blow out, never in, and cut a small hole in the straw near the top so far less can be sucked up. The foam is wet, but popping bubbles can throw fine droplets, so keep your face back. The other risk is a mouthful. Keep it at the far end of the table and away from other people’s work.
Is dish soap safe in the kiln?
Yes. It burns out in the glaze firing with no trace, like wax. The soap in a cup of glaze changes little, and a test tile will show you. Do not put soap in a shared jar; the cup is yours and it goes in the bin when you finish.
Does it need a base coat?
Yes, if you want the rings to read. Three coats of a light glaze, dried, then dark bubbles over it, and nothing on top. Or a raw clay pot with underglaze bubbles, bisque fired, and a clear over. Underglaze bubbles with no clear over them fire dry and rough.
Can I do this at The Clay Hole?
Yes, at the glaze tables, with the free brush-on glaze and underglaze certification, a cup of your own, and a tray under the pot. Pour a little glaze from a jar into your cup; never dip a straw or a soapy brush near a jar. Wipe down wet when you finish, and the cup goes in the bin.
Related lessons
Six lessons that sit next to this one.
Three to read next.
Bubble glaze is a base coat, a banding wheel and a resist with foam on top. These are the pages underneath.
That is the whole technique
Base coat. Hole in the straw. Half and half and soap. Blow slowly. Let them pop. Wipe down wet.
Your first cup will pop before it lands because you were stingy with the soap, and your first plate will have one run down the side because you tilted it. That is normal, and the second plate is the one people ask about. Nothing else on the glaze wall costs a paper cup and looks like it took a week.
If you want the color notes, glaze against underglaze and the answers to the questions everybody asks, switch to the comprehensive version at the top. Otherwise, go find a straw.
Written for potters everywhere. Where our studio does things differently, the page says so.
Which version would you like to print?
Both print clean, with the videos turned into labeled boxes you can search for later.