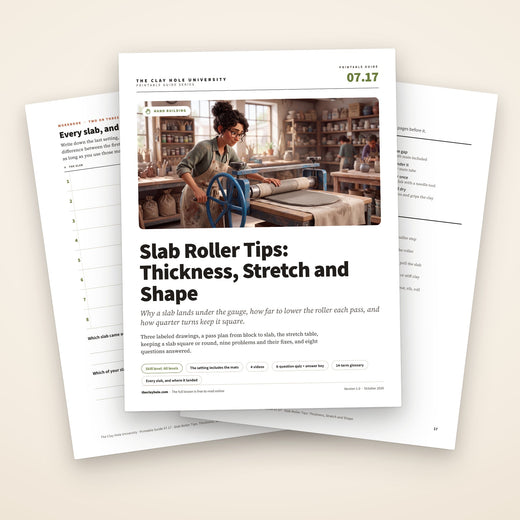
Slab Roller Tips: Thickness, Stretch and Shape
A slab roller does one thing. It squeezes clay into a thinner sheet. Almost every surprise at the machine comes from where that squeezed clay goes, and from the number on the gauge, which is not quite the thickness of your slab. Here is the mechanism, a pass plan that works, and what to do when a slab misbehaves.
Clay keeps its volume, so every pass makes the slab longer in the direction it travels, and the thinner it gets, the further each step stretches it. Lower the roller in shrinking steps, give the slab a quarter turn every pass, flip it once, and remember the mats sit in the gap with the clay.

Jump to a section
Squeezed clay has to go somewhere
A slab roller does not make clay smaller. It moves it. Send a slab under a lower roller and the same clay has to fit into a thinner sheet, so the slab gets longer in the direction it travels. The width barely changes.
That is why thin slabs are touchy. Taking an eighth of an inch off a slab 1 inch thick makes it about a seventh longer. Taking the same eighth off a slab 3/8 inch thick makes it half again as long. Every step bites harder as the slab thins, so the steps have to shrink as you go.
And the number on our gauge is the whole gap under the roller, with both mats in it. Your slab is only the clay between them, so it always lands a shade under the setting.
Seven moves at the roller, in order
- Get the block under three inches. Slam it flat on the table at an angle, turn it, slam again. Too tall and the roller bar cannot come down on it.
- Clay between the two mats, centered. Crank the bar up to about three inches for the first pass, roughly the height of the block.
- Big steps while it is thick, small steps as it thins. Half an inch at a time down to an inch and a half, a quarter at a time down to three quarters, then one eighth at a time. Read the gauge in eighths: the small marks between the big ones are eighths, not quarters.
- A quarter turn between every pass. Lay the long side along the roller bar, so the next pass stretches the short side. That is what keeps a square slab square.
- Flip it at least once. Leave the top mat on, hold both mats together and turn the whole sandwich over. Both faces get the same treatment, and it lets go of a mat it has started to stick to.
- Set the last pass knowing the mats are in the gap. The slab lands a shade under the number. Send the last pass through both ways.
- Peel the mat off the slab, slowly. Lift the top mat straight off and roll the bottom one back away from the clay. Then rib both faces.
Three things that go wrong
It came out thinner than the gauge said
The mats are in the gap. Roll one test slab, measure the clay itself, and the difference between that and the setting is your mats. After that you know exactly where to set the last pass.
The wheel will not turn
The step was too big for how thin the slab already is. Raise the bar back up and take a smaller bite. Never force the wheel. Hard to turn always means the bar is too low.
It came out long and skinny
It went through the same way more than once. The roller only makes a slab longer, so a quarter turn between every pass, long side along the roller, is what brings it back to square.
Clay does not squash. It moves.
Six facts about what happens under the roller. Every tip on this page follows from one of them.
- The amount of clay never changes. Soft clay barely compresses. For every practical purpose, the volume that goes under the roller is the volume that comes out, spread thinner.
- It goes the way the slab travels. Pressed under the roller, the clay is pushed along the slab, not out to the sides. The slab gets longer in the direction of travel and hardly any wider.
- Each pass stretches by a ratio, not an amount. How much longer a slab gets is its old thickness divided by its new one. From 1 inch to 7/8 inch is eight sevenths, about a seventh longer. From 1/2 inch to 3/8 inch is four thirds, a third longer.
- So the same step bites harder as the slab thins. One eighth of an inch off a thick slab is a nudge. The same eighth off a thin one is a shove. That is the whole reason the steps get smaller as you go.
- A big bite pushes back. The thinner the slab, the harder the wheel turns, and a step that asks too much of the clay shows up as a wheel that will not move. Forcing it is how a roller gets damaged. Raise the bar and take a smaller step.
- The particles line up the way it travels. Clay particles are flat, and rolling lays them down in the direction of travel. Clay with its particles all running one way shrinks more one way than the other as it dries and fires. Turning the slab between passes spreads that alignment around, and that is the difference between a slab with a curl built into it and one without.
The sentence worth keeping
The roller cannot make clay disappear. It can only make it longer, so every setting on the gauge is really a decision about how much longer.
The same eighth of an inch is not the same pass
The drawing takes one eighth of an inch off three slabs of the same length. Only the thickness they start from is different.

- A little longer. A slab 1 inch thick taken down to 7/8 inch grows by about a seventh. Barely worth noticing.
- A third longer. The same eighth off a slab 1/2 inch thick, down to 3/8 inch, makes it a third longer.
- Half again as long. From 3/8 inch to 1/4 inch, the same eighth makes the slab half again as long as it was.
- 1/8 inch thinner every time. The step on the gauge is identical in all three. The stretch is not, because it depends on how much of the slab that eighth is.
| One eighth off, from | To | The slab grows by | A slab 12 inches long becomes |
|---|---|---|---|
| 1 inch | 7/8 inch | about a seventh | about 13 3/4 inches |
| 3/4 inch | 5/8 inch | a fifth | about 14 3/8 inches |
| 5/8 inch | 1/2 inch | a quarter | 15 inches |
| 1/2 inch | 3/8 inch | a third | 16 inches |
| 3/8 inch | 1/4 inch | half again | 18 inches |
| 1/4 inch | 1/8 inch | double | 24 inches |
And the mats make it a little worse
These numbers assume the gauge reads the clay. On our rollers it reads the clay plus both mats, so the clay is always thinner than the setting, and each eighth is a slightly bigger share of it than the table shows. The thinner the slab, the bigger that difference gets. A quarter inch off a slab half an inch thick does not make it a little longer. It doubles it.
The setting includes the mats
The most confusing thing about a slab roller, and the easiest to fix once you can see it. The drawing is a slice through the slab as it comes out from under the roller.

- The roller. How high it sits above the bed is what the gauge reports.
- Top mat. It travels through with the clay and takes up part of the gap.
- Your clay. The only layer you get to keep.
- Bottom mat. The same again, underneath.
- The setting measures this whole gap. Roller to bed: top mat, clay and bottom mat together.
- Your slab is only this. The clay between the mats, which is the thickness your piece will actually have.
The number is the gap
On our rollers the gauge reports the space between the roller and the bed. Both mats sit in that space with the clay, so set it to half an inch and the slab lands a little under half an inch. That is true of a lot of rollers.
Not every roller reads it that way
Some makers calibrate the scale to the canvas they ship with the machine, so it reads the clay instead of the gap, and they warn that any other mat throws it off. North Star's instructions are one example. Change the mats and every mark on the gauge means something new.
Find your number once
Roll a test slab at any setting and lift off the top mat. Push a needle tool straight down through the clay until it meets the mat, pinch it at the clay's surface, pull it out and measure against a ruler. The difference between that and the setting is what your mats take. Write it down.
Measure it wet
The thickness that matters is the wet slab coming off the roller. The thicknesses our slab lessons give, 3/8 inch for a tile and a half inch for a big slab mold, are wet numbers.
Two mats, every pass
The clay goes between the two mats, centered, every time. Leave one out and the gauge means something different again, and the bare face of the slab is pressed straight against the roller or the bed.
Keep the mats flat and dry
A damp mat stretches, wrinkles and grips the clay. A wrinkle in a mat goes under the roller and comes out printed across your slab. Smooth both mats flat before every pass.
The sentence worth keeping
The gauge measures the gap. Your slab is whatever is left after the mats take their share.
Shrinking steps: one pass plan that works
Every pass should ask about the same of the clay. That means big steps while the slab is thick and smaller ones as it thins.
| Pass | Set the gauge to | Lowered by | The slab grows by |
|---|---|---|---|
| Pass 1 | 2 1/2 inches | 1/2 inch | a fifth |
| Pass 2 | 2 inches | 1/2 inch | a quarter |
| Pass 3 | 1 1/2 inches | 1/2 inch | a third |
| Pass 4 | 1 1/4 inches | 1/4 inch | a fifth |
| Pass 5 | 1 inch | 1/4 inch | a quarter |
| Pass 6 | 3/4 inch | 1/4 inch | a third |
| Pass 7 | 5/8 inch | 1/8 inch | a fifth |
| Pass 8 | 1/2 inch, both ways | 1/8 inch | a quarter |
- Start where the block is. Crank the bar up to about three inches, roughly the height of a block that has been slammed under three, and follow the table down from there.
- Half inch steps down to an inch and a half, quarter inch steps down to three quarters, eighths from there. That way every pass makes the slab between a fifth and a third longer than it was, and no step is bigger than half an inch, which is also the most North Star tells owners of its rollers to take in a single pass.
- A quarter turn after every pass. The table assumes you turn it each time. Without the turns, eight passes make a strip, not a slab.
- Below half an inch, slow down. From 1/2 to 3/8 is a third longer. From 3/8 to 1/4 is half again. Even the smallest mark on the gauge is a big bite down there, so take one mark at a time, crank steadily and keep the mats flat.
- It is a plan, not a law. Softer clay takes bigger bites without complaint. A shorter block skips the first passes. What matters is that no pass asks much more of the clay than the one before it did.
If the wheel gets hard to turn
Raise the bar back up a mark and go again. Hard to turn means the bar is too low for where the slab is, and pushing through it is how a roller gets damaged.
Turning is what keeps the shape
The roller only ever makes a slab longer. Whether it comes out square, round or as a long strip is decided by which way you feed it. The drawing is the slab seen from above, over two passes.

- The roller bar. Seen from above, across the top of every panel.
- The way it travels. The slab moves away from the bar, and this is the only direction it grows.
- It grows this way only. One pass made the square longer and no wider. The dashed outline is where it started.
- Turn it a quarter turn. Before the next pass, not after a few.
- Long side along the roller. Now the short side is the one running through, and the next pass stretches that.
- Square again, only bigger. Two passes and a quarter turn, and it grew in both directions.
For a square, start square
A square block in, a quarter turn every pass, and it stays square while it grows. Starting from a long, skinny block means spending passes fixing the shape before you can use them to thin it.
Round works the same way
Start with a round pancake and turn it a quarter every pass. Each pass pulls it into an oval, and the next one pulls it back. A round slab saves clay when the piece will be cut round anyway. For draping over a slab mold, roll it square, the way the slab mold lesson teaches.
Measure before the last passes
Put a ruler across it both ways. If one direction is longer, feed it with that long side along the roller and the next pass evens it up. If they match, carry on with a quarter turn each time.
Keep it centered on the mats
A slab that wanders toward one edge runs out of mat as it grows. Center it on the mats before every pass.
Roll bigger, then cut
The roller gets you close. A ruler and a needle tool, or a template, make it exact. For a slab mold, the slab wants the mold's widest point plus at least half an inch, and a full inch is better.
Flip it the safe way
With the top mat still on, hold both mats together at one end and turn the whole sandwich over, with a second pair of hands at the other end for a long slab. Then peel back the mat that is now on top. You never lift the bare slab, so nothing stretches.
Hands, hair and the gap
- Certified first. Our slab rollers need the free slab roller and slab mold certification before you use them. The video here is the training, and the certification page has the rest.
- Fingers stay clear of where the mats feed in. The roller grips whatever reaches the gap and pulls it through. One hand on the wheel, the other on the mats well back from the roller.
- Nothing dangling. Tie back long hair, sleeves and apron strings, and take off anything that hangs from a wrist or a neck. An apron does not cover a sleeve.
- Never force the wheel. Hard to turn means the bar is too low for that pass. Raise it a mark and go again.
Off the roller without undoing it
A perfect slab can be stretched out of shape in the time it takes to lift it. Clay remembers being pulled and flopped around, and the firing brings it back out.
- Lift the top mat straight off. Straight up, not dragged across the clay.
- Rib the face you can see. A soft rib, in two directions. It takes the canvas texture off and compresses the surface.
- Flip it, then peel. Lay the mat or a board back over the slab, turn the lot over, and peel the mat that is now on top back away from the clay, slowly. Pull the clay off the mat instead and the whole slab stretches, or the mat comes up with it.
- Rib the second face. Both faces, because a slab compressed on one side only is a slab with a reason to curl.
- Move it flat and slowly. On a board, or carried flat between your fingers and palm, never pinched up by an edge. Squeezing leaves fingerprints all through it.
- Cut what you need and bag the rest. Trimmings from a fresh slab go straight back into your bag for the next piece.
Where it goes from here
Drying flat, drying slowly and drying evenly are their own lesson. Ceramic Tiles That Stay Flat covers it for anything that has to stay flat, and the slab mold lesson covers draping one.
The struggles nobody mentions
Nine things that catch people out at a slab roller, what each one means, and the fix.
Thinner than the gauge said
The mats are in the gap. Measure one test slab with a needle tool and you know how far under the setting you land, for as long as you use those mats.
Nowhere near the thickness you wanted
The small marks on the gauge are eighths, not quarters. Read them all as quarters and every setting is off. It is the most common mistake on the machine.
The wheel will not turn
Too big a bite for how thin the slab already is. Raise the bar a mark and go again. The thinner the slab, the smaller the step it can take.
A long, skinny strip
It went through the same way more than once. Feed it with the long side along the roller for the next pass or two and it squares back up.
Lines printed across the slab
A mat wrinkled on its way under the roller. Smooth both mats flat before every pass and keep them dry, since a damp mat stretches and wrinkles. The fine weave of the canvas is normal, and a rib takes it off.
Stuck to the mat
Usually a damp mat. Flip the slab the safe way between passes so neither face sits on one mat for the whole run, and always peel the mat back from the clay rather than pulling the clay off the mat.
A soft bump in the slab
A trapped pocket of air. Pierce it once with the tip of a needle tool, press the air out toward the hole with your fingertips or a rib, close it with the rib and roll the slab again.
Torn or cracked edges
The edges were asked to stretch further than they could, usually a big step at the thin end or clay that had started to stiffen. Smaller steps near the end, and fresh, soft clay.
Flat today, warped next week
Rolled the same way every pass, never flipped, pulled off the mat, or ribbed on one face only. Each of those builds in a stretch the clay remembers when it dries and fires.
The ones that come up at the roller
Do I need to wedge clay before it goes through the slab roller?
Not if it comes straight out of a fresh bag. It left the pug mill already wedged, with no air in it, and the roller compresses it all over again. Wedge it anyway if you want it softer and more workable in your hands. Reclaimed or mixed scraps are different: wedge those properly first.
How thick should my slab be?
It depends on what it becomes. Our lessons teach 3/8 inch for a slab mug, 3/8 to 1/2 inch for tiles, a third of an inch for a slab mold around 13 inches across or smaller and half an inch for anything bigger. All wet numbers. Thin slabs warp, so when in doubt, go thicker.
Why does my slab come out thinner than the gauge says?
Because the gauge measures the whole gap under the roller, and both mats sit in it with the clay. Roll one test slab, measure the clay with a needle tool and a ruler, and the difference is what your mats take.
How many passes does a slab take?
From a block a little under three inches to half an inch, about eight, with a quarter turn after each. Fewer if the block starts shorter or the clay is very soft. The number matters less than keeping each pass to roughly the same stretch.
How do I stop a slab from warping later?
Turn it a quarter every pass, flip it at least once, peel the mat off it rather than pulling it off the mat, rib both faces, move it flat and dry it slowly and evenly. Every one of those keeps a stretch from being built in that the firing would bring back out.
How do I move a big slab without stretching it?
Leave it on something flat and move that. If you have to pick it up, carry it flat on your fingers and palms, slowly, and never lift it by an edge. A big slab hanging from one side stretches under its own weight.
What is the texture the canvas leaves?
The weave of the cloth, pressed into the surface. It is normal. A soft rib takes it off and compresses the face at the same time, which is worth doing anyway. Leave it on if you like the look.
Do I need to be certified to use the slab rollers?
Yes. The slab rollers and the slab molds share one free certification, and it comes before you use either. It is a video, the rules and a short sign-off, all on the certification page.
Where to go next
Slab roller and slab mold certification
The free certification for our rollers and slab molds: the training video, the rules and the sign-off.
Read it →Slab molds, hump molds and slump molds
What to do with the slab once it is rolled: draping, paddling, trimming and getting it off the mold.
Read it →Ceramic tiles that stay flat
Compression and slow, even drying for anything made from a slab that has to stay flat.
Read it →Slab mugs and cups
A 3/8 inch slab turned into a mug, plus how to roll that slab by hand when the rollers are busy.
Read it →How much clay do I need?
Starting weights and slab sizes for dozens of forms, so you cut the right block before you roll it.
Read it →Clay Hole University
Every lesson and guide in one place, from the first day at the wheel through firing.
Start there →Every setting is a decision about length
Underneath all of it, a slab roller is a machine for making clay longer. Once that clicks, the rest stops being a list of rules. The steps shrink because thin clay stretches further per step. The quarter turns exist because it only stretches one way. The slab lands under the gauge because the mats are in the gap with it.
Roll one test slab, measure it, and write down what your mats take. It costs one slab, and every slab after it lands where you meant it to.
Clay keeps its volume, so every pass makes the slab longer the way it travels, and thinner slabs stretch further per step. Shrinking steps, a quarter turn every pass, one flip, and a slab that lands a shade under the setting, because the mats are in the gap.
For the full story, why the particles line up, a pass plan with every setting and what to do when a slab misbehaves, switch to the Comprehensive Version at the top of the page.
Which version would you like to print?
Videos come out as a labeled box with the title and channel to search for, since paper does not play them.