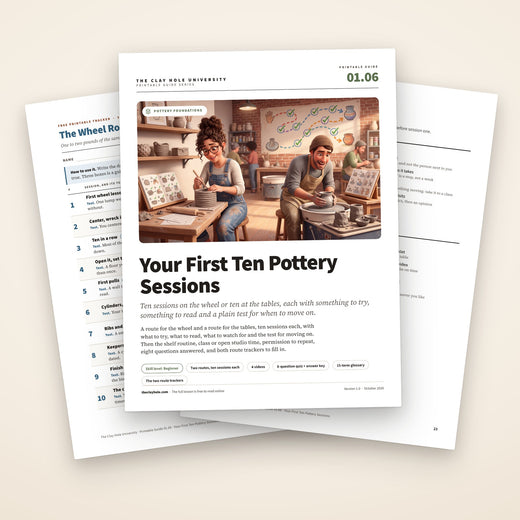
Your First Ten Pottery Sessions
Nobody hands you a syllabus here. Every class is open format: a whole studio, instructors on the floor, and whatever you decide to make. That freedom is the best part of month six and the hardest part of week one. So here is a syllabus you bring yourself, with separate routes for the wheel and the tables, and a plain test at the end of every session for when you are ready to move on.
Ten sessions on the wheel or ten at the tables, each with something to try, something to read, something to watch for and a plain test for moving on. Repeat any session as often as it takes.

Jump to a section
A syllabus you bring with you
There is no curriculum at the studio. In a class, instructors teach whatever you bring. At open studio time, nobody teaches at all. Both are wonderful once you know what to bring, and both are a lot of empty table on a first visit.
So pick a route and bring the next session. The wheel and the tables each get ten sessions, in the order the skills depend on each other. Every session names one thing to try, a lesson to read, something to watch for and a plain test for moving on.
The test decides when you move on, never the calendar. And the shelf decides when a piece gets glazed, never the plan.
Ten sessions on each side of the room
Tick a session when you meet its test, not when you have done it once. The Comprehensive Version has the full card for each one: what to read, what to watch for, and when to repeat it.
The wheel route
- 1. First wheel lesson. One lump goes still under your hands, help counts.
- 2. Center, wreck it, center again. One lump centered on your own.
- 3. Ten in a row. Most of ten centered without help.
- 4. Open it, set the floor. A floor you measured, near a quarter inch.
- 5. First pulls. A wall that rose on every pull, and one cut in half.
- 6. Cylinders, loads of them. Your tallest even wall, written down.
- 7. Ribs and rims. A smooth rim and a ribbed outside.
- 8. Keepers. A cylinder off the wheel and onto your shelf, intact.
- 9. Finish a keeper. Rim smoothed, bottom signed, drying slowly.
- 10. The checkpoint. Two pounds centered inside a couple of minutes, four times out of five.
The hand-building route
- 1. A pinch pot bowl. A bowl on your shelf, lopsided counts.
- 2. Pinch it again, on purpose. A measured floor and a compressed rim.
- 3. Coils that stay round. Four or five coils, blended inside.
- 4. Build it taller. A wall nobody could tell was coiled.
- 5. A slab by hand. One even thickness, and a piece made from it.
- 6. Drape a bowl. A bowl that lifted out without a fold.
- 7. Your first slab mold. Certified, and one piece off the slab mold.
- 8. A slab mug. Every join beaded and blended.
- 9. Your favorite, again. Two versions, and the reason the second is better.
- 10. A piece with a job. Planned before you touched the clay.
Three things that keep it working
Repeating is the plan
A session number is a stop on a route, not a week on a calendar. Session four might be your fourth visit or your ninth. Staying put until the test is met is how the route is meant to be walked.
The shelf comes first
Anything leather hard gets worked before the session starts, because that window closes. Bisque that has come back gets glazed when it is ready, whatever session you are on.
New moves belong in a class
Open studio time has no teaching, by design. Learn a new move in a class, then practice it at open studio time once you have had your first two classes.
How the plan works
The studio runs on open format, and that is on purpose. This page gives the first ten visits a shape without taking the freedom away.
There is no set curriculum at The Clay Hole, in a class or at open studio time. In a class, instructors are on the floor teaching whatever you bring to them. At open studio time, nobody teaches at all. Once you know what you came to make, that is the appeal. A new member, standing in front of a whole studio with a fresh bag of clay, mostly wants to know what to bring.
The Full Pottery Process, Start to Finish already lays out the order a piece moves in, from a bag of clay to something you can drink from. This page turns that order into practice: what to work on during each of your first ten visits, so every one of them builds on the last.
- Two routes, kept apart. The wheel and the tables teach different things in a different order, so each gets its own ten sessions. Pick one as home. Borrowing a session from the other is welcome, and it never resets your own.
- One new thing per session. Each session adds a single move to the ones before it, in the order the skills depend on each other. Centering comes before opening because an opened lump that is off center cannot be fixed from inside.
- Every session has five parts. What to try. What to read first. What to watch for while you work. What counts as progress. And when to repeat it instead of moving on.
- The test decides, not the calendar. A session is finished when its progress line is true, however many visits that takes. The number on a session is a stop on a route, not a week.
- The shelf decides when to glaze. Pieces move through drying and two firings on their own clock. Glazing is not a numbered session; it happens whenever a piece comes back from the bisque, on either route.
- Each session says where it belongs. A new move is marked for a class, where someone can show you. Practice of something you have already been shown is marked for a class or open studio time.
Start with the welcome booklet
Every member gets the printed booklet on the first night. The whole thing is also online, searchable, with the PDF beside it.
The Welcome Booklet follows a pot from wet clay to a kitchen: the first night step by step, your shelf, the clays, the tools, the four tables a piece moves through, and the words for everything. This plan assumes it. Read it once before session one, then keep it open on your phone at the table, because it answers the small questions faster than anyone can walk over.
- Read the booklet. At least the Welcome, Pottery 101 and Make sections before the first visit.
- Pick a route. The wheel or the tables. The next section helps if you are torn.
- Wheel route: watch the wheel video, all the way through. It comes before a first spin, and first wheel lessons happen at the start of class, so being on time matters that night.
- Choose one clay and stay with it. 52 Buff or B-Mix with Grog for the first few bags. Changing clay while learning adds a variable you cannot read yet.
- Bring what your level needs. Green Level Members bring their own tools: sponges, a needle tool, a rib or two and a potter’s knife.
- Print your tracker. One page for the route, one for your pieces and notes. Both are free, further down this page.
Pick a route
Most people arrive wanting the wheel. On a normal class night, most of the room is at the tables. Neither one is the beginner option.
The wheel route
Ten sessions that take you from a lump that will not sit still to a cylinder you meant to make. It is the slower route to a finished piece, because centering has to come first and it takes as long as it takes.
It suits people who like repetition, a single skill drilled until it clicks, and the particular satisfaction of a wall rising between two hands.
The hand-building route
Ten sessions through the four moves every hand-built piece is made of: pinch, coil, slab and drape, then slab molds and a mug. Nearly every session ends with something worth keeping on your shelf.
It suits people who like building things, people who like to plan a shape first, and anyone who wants pieces in the kiln early.
Both, eventually
Most members switch between the wheel and the tables whenever they like. Pick one as home and borrow from the other: a wheel night after three pinch pots, a slab mold when the wheel has been winning.
Give anything three tries, on three separate visits, before deciding it is not for you. The first try is confusion, the second is mechanics, and only the third is an opinion.
The wheel route, session by session
One to two pounds of the same clay every time, and cylinders only. Trimming, handles, lids, bowls and anything heavier all wait until centering is dependable, which is exactly what How to Throw on the Pottery Wheel tells beginners to ignore for now.
Your first wheel lesson
Try. Wedge, then center with an instructor beside you. Nothing made tonight is meant to be kept.
Read first. How to Throw on the Pottery Wheel, the six things to get right before the wheel is switched on. And the wheel video, start to finish.
Watch for. The moment the lump stops pushing your hands around. That stillness is what centered feels like.
Counts as progress. One lump went still under your hands, with help or without.
Repeat it if. You never felt it go still. People center on day three and in month five, and it says nothing about who is good a year later.
Center, wreck it, center again
Try. A one to two pound ball, centered, squashed and centered again, as many times as the session holds.
Read first. How to Center Clay.
Watch for. The eyes-closed finger test. Rest a fingertip on the spinning clay: bumping means not centered, however still it looks.
Counts as progress. You centered a lump on your own at least once.
Repeat it if. Every centered lump still needed an instructor’s hands.
Ten in a row
Try. Center ten lumps one after another without opening any of them. Cone each one up and down at least once.
Read first. Coning Up and Down.
Watch for. How much more a fast wheel and braced elbows do than squeezing harder.
Counts as progress. Most of the ten centered without help. Write the number down; its direction next time matters more than the number itself.
Repeat it if. Most of them still needed help. Centering, wrecking and centering again is the fastest hour you will spend on the wheel.
Open it and set the floor
Try. Center, open, then press the floor flat and compress it. Push a needle tool straight down through the floor, pinch it at the surface and measure.
Read first. Opening the Clay and Setting the Floor and Compressing the Floor and the Rim.
Watch for. How deep you go before stopping. Clay can always come out of a floor and never goes back in, so stop high and measure.
Counts as progress. A floor you measured at about a quarter inch, more than once.
Repeat it if. The needle keeps finding a floor much thicker or thinner than that.
First pulls
Try. Open, compress, then pull the wall two or three times, at about half the speed you used to center. Ask an instructor to watch one pull.
Read first. Pulling Walls Without a Collapse.
Watch for. Cut one cylinder in half from rim to base with the wire and look at the wall. A heavy ring at the bottom means the pulls started too high.
Counts as progress. A wall that rose on every pull, and a cut section you read.
Repeat it if. Walls fold over or twist before the last pull. A collapse is information, so cut that one open too.
Cylinders, loads of them
Try. As many one to two pound cylinders as the session holds. Straight walls, nothing else. Keep one if you love it.
Read first. What to Check When Throwing Goes Wrong.
Watch for. Measure each cylinder’s height before you cut it off and write it down.
Counts as progress. Your tallest cylinder with the wall still even, on paper.
Repeat it if. You want to, as often as you like. Nearly everything thrown is a cylinder that changed its mind.
Ribs and rims
Try. Compress the rim after every pull. Then take the throwing lines off the outside with a rib.
Read first. Using Ribs While You Throw, and the rim half of Compressing the Floor and the Rim.
Watch for. Where a rim splits. An uncompressed rim tears while you pull.
Counts as progress. A cylinder with a smooth, unsplit rim and a ribbed outside.
Repeat it if. Rims keep splitting, or the rib pushes the wall off center.
Keepers, off the wheel cleanly
Try. Two or three cylinders you mean to keep. Wire each one off and get it onto your shelf without a dent.
Read first. Getting the Pot Off the Wheel and When to Throw on a Bat, and When Not To.
Watch for. Where the wire goes and how long you wait before lifting.
Counts as progress. A cylinder on your shelf on a plastic bat, covered, with your name and the date on the bat.
Repeat it if. It warped, tore or folded on the way off.
Finish a keeper
Try. Once a keeper is leather hard, smooth the rim, tidy the base and scratch your maker’s mark into the bottom. Then spend the rest of the session throwing.
Read first. Leather Hard Clay: Soft, Hard and What Each Is For and How to Properly Dry Your Pottery.
Watch for. The firmness: a fingernail dents it and a thumb does not.
Counts as progress. A signed piece, drying slowly on its way to the bisque. Trimming can wait; it is a choice, not a requirement.
Repeat it if. It cracked while drying. Read the drying lesson again before the next one.
The checkpoint
Try. Slam two pounds onto the wheel and center it, five times over, timing each one. Then throw your best cylinder of the ten sessions.
Read first. The Wheel Practice Plan, so you know what comes next.
Watch for. Whether you still hunt around for center, or sit down and find it.
Counts as progress. The line How to Throw on the Pottery Wheel draws for a beginner: two pounds, centered inside a couple of minutes, four times out of five.
Repeat it if. You missed it. Go back to session three, which is the plan working.
The hand-building route, session by session
Pinch, coil, slab and drape are the only four moves there are; everything else combines them. This route takes them in that order, then puts them to work.
A pinch pot bowl
Try. An orange-sized ball, wedged and rolled smooth, pinched into a small bowl from the bottom up, with a small turn after every pinch.
Read first. How to Make a Pinch Pot.
Watch for. Where the wall goes thin first, and how much faster the rim dries than everything below it.
Counts as progress. A bowl on a plastic bat on your shelf, covered, with your name and the date. Lopsided counts.
Repeat it if. You like. Almost nobody makes an even pinch pot first time, and almost everybody makes a good one by the third or fourth.
Pinch it again, on purpose
Try. A second pinch bowl that changes one thing you noticed in the first. If the first is leather hard, compress its rim and sign the bottom before you start.
Read first. The floor check and the rim in How to Make a Pinch Pot.
Watch for. The numbers that lesson teaches: about a quarter inch of wall and three eighths of floor, with the inside corner kept curved.
Counts as progress. A floor you measured with a needle tool and a rim you compressed.
Repeat it if. Either bowl cracked around the bottom, which is the square inside corner showing itself.
Coils that stay round
Try. Roll coils about half an inch thick with long strokes, and cut the first one in half to check it. Then start a coil pot on a flat disc of the same clay: four or five coils, blended inside and out, then wrap the top coil and stop.
Read first. Rolling Even Coils by Hand and How to Coil Build Pottery.
Watch for. The cut end. An oval coil means the strokes were too short to turn it all the way round.
Counts as progress. Four or five coils blended until the lines are gone on the inside.
Repeat it if. The coils came out flat, or the wall leaned as it rose.
Build it taller
Try. Unwrap last session’s coil pot and keep stacking, four or five coils at a time, letting it stiffen between rounds the way the coil lesson describes. Wrap the top coil when you stop.
Read first. Scoring and Slipping a Join.
Watch for. Placement. A coil set an eighth of an inch outside the one below widens the pot; an eighth inside brings it in.
Counts as progress. A wall nobody could tell was coiled, inside or out.
Repeat it if. It slumped. Stacking faster than the clay can hold is the usual cause, and the fix is stopping sooner.
A slab by hand
Try. Roll a slab with the pin riding on two guide sticks, check it with a needle tool in a few places, then make a slab tray or a textured spoon rest from it.
Read first. How to Roll a Perfect Slab Without a Slab Roller, and the slab tray and spoon rest in 20 Easy Projects Beginners Can Hand-Build.
Watch for. Wherever the pin rides on both sticks, the slab is exactly as thick as the sticks.
Counts as progress. A slab the same thickness everywhere you measured, and a piece made from it.
Repeat it if. It warped or curled as it dried. Thin slabs warp, so go thicker.
Drape a bowl
Try. Lay a slab into a shallow, wide dish lined with plastic wrap, let it settle under its own weight, then trim it level with the rim.
Read first. Using Any Dish or Pan as a Slump Mold.
Watch for. The dish’s profile. Its rim has to be its widest point, or the clay is trapped before it has even shrunk.
Counts as progress. A bowl that lifted out without a fold or a tear.
Repeat it if. The slab folded or tore. The lesson’s six fixes cover both.
Your first slab mold
Try. The slab roller and slab mold certification before you come. Then one slab mold at your color or below, a slab from the roller, and your piece off the slab mold before you leave.
Read first. Slab Roller and Slab Mold Certification, How to Use Slab Molds, Step by Step, and The Book of Molds filtered to Beginner.
Watch for. The roller’s gauge. The big marks are quarter inches and the small ones are eighths; almost everybody reads them all as quarters the first time.
Counts as progress. Certified, one piece drying on a plastic bat, and the slab mold back in its exact spot.
Repeat it if. The slab tore or ran short at the edge. Extra clay is cheaper than a short slab.
A slab mug
Try. Wrap a wall, join a floor, and add a handle at the same wetness as the mug.
Read first. How to Make a Slab Mug, and Scoring and Slipping a Join again.
Watch for. The little bead of slip that squeezes out when you press a join together. That bead is the receipt.
Counts as progress. A mug whose every join beaded and was blended across the seam.
Repeat it if. A join opened while it dried.
Your favorite, again
Try. Pick the best piece from sessions one to eight and make it again, changing one thing on purpose: thickness, size, a rim, a texture.
Read first. Whichever lesson taught it, a second time. It reads differently once your hands have done it.
Watch for. The one thing you changed, and nothing else.
Counts as progress. Two versions side by side, and you can say why the second one is better.
Repeat it if. You cannot yet say what changed. That is worth one more try.
A piece with a job
Try. A planter with a drainage hole, coiled or from a wrapped slab, planned before you touch the clay. Clay shrinks between wet and finished, so size up.
Read first. Making Planters Based on What You Are Planting and Sometimes Pottery Needs a Plan.
Watch for. Every place the plan meets the clay and one of them has to give.
Counts as progress. A finished piece you planned first, and a short list of what you want to make next.
Repeat it if. Never required. This one is the start of whatever comes next.
Every visit starts at your shelf
The plan decides what you practice. The shelf decides what has to happen first.
- Leather hard work goes first. Signing, smoothing a rim, attaching, carving and trimming all have a window that closes while you do something else. Do them, then start the session.
- Check the pickup tables. When a piece comes out of a kiln, a card with its pickup deadline goes in or on it. The clock starts when the kiln is unloaded, and there is no email or text, so look every visit.
- Bone dry means truly dry. A finished piece sits a week uncovered before it goes to the bone-dry drop-off table, maker’s mark on the bottom. Hold the bottom to your cheek: cold means it is not dry yet.
- Bisque back means glaze day for that piece. Do the brush-on glaze certification before your first glaze. Glaze it during whatever session you are on, wipe the bottom bare, pay for the firing, and set it on the glaze table with a kiln cookie under it and a kiln ticket. Then go back to the route.
- Cover what you leave. Plastic is a brake. Squeeze the air out of the bag and the piece is still soft next week; leave a little air and it is leather hard by next class. Plastic bats only, with your name and the date.
Allow weeks, not days
A first piece usually takes a month or two from wet clay to a kitchen, and staff load and unload every kiln. Once a piece is on a table, your part is done until it comes back. Keep making the next thing.
Class or open studio time
Both use one class from a membership. The difference is whether anyone is on shift to teach you.
- A class has instructors teaching. At the studio it is called an open studio class, because there is no set lesson: instructors work the room and teach whatever is in front of you. Every session marked “In a class” introduces a move you have not been shown yet.
- Open studio time has nobody teaching, by design. The open studio manager runs the room and does not give pottery advice of any kind. Sessions marked “Class or open studio time” are practice of something you have already been shown.
- Your first visits are classes either way. A very first visit is always a class. Anyone new to pottery comes to two classes before a first open studio time, and anyone who already knew their way around clay comes to one.
- Save the question. Stuck at open studio time? Write it in the notes column of your tracker and bring it to the next class, where answering it is the job.
- Ask for exactly what you need. “Will you watch one pull?” gets a sharper answer than a general request for help. Asking Your Instructor for Help covers how.
The full difference between the two, with who wears which shirt, is in Open Studio Classes vs Open Studio Time.
Repeating a session is not falling behind
There is nothing here to fall behind. The route has an order, not a schedule.
Every session on this page ends with a test, and the test is the only thing that moves you on. Session three might take one visit or six. Both are the plan working. The member at the next wheel is on a different route at a different speed, and their shelf tells you nothing about yours.
- Timing on the wheel varies enormously. We have watched people center on day three and people center in month five, and it said nothing about who was good a year later.
- A good first month on the wheel is a pile of reclaim, a handful of wonky cylinders you are secretly fond of, and the growing ability to tell when a lump is centered without looking. That is the whole target.
- A good first month at the tables is a shelf of pieces that each fixed something the one before got wrong. The fourth pinch pot is better than the first because of the first three.
- Your classes wait. Unused classes carry forward with no cap and no expiration for as long as a membership runs, so nothing is lost by taking a session twice.
- Repeating and stuck are different. Repeating is the same session with the progress line moving. Stuck is three visits with nothing moving. Stuck goes to a class, with one specific thing for an instructor to watch.
- A win is allowed. When the wheel has been winning, the wheel lesson’s own advice is to go make something beautiful on a slab mold and come back. It is creating, not cheating.
Dan put it in his note at the front of the welcome booklet: let yourself be bad at this for a while. The best year he ever had making pottery was the year he was worst at it. His letter Let Yourself Be Bad at Something Again says the rest.
Two free trackers, one for each route
Two letter-size pages each. Print the one for your route, keep it on your shelf, and fill it in before you leave each visit.

The wheel route tracker
Page one holds all ten wheel sessions with their tests, three dated boxes each so repeating has somewhere to go, and a box to tick when you move on. Page two has the shelf routine, boxes for the numbers the sessions ask you to write down, a piece log with clay, glaze and coats, and a line per session for what you noticed and the question to save for the next class.
Wheel tracker, free PDF
The hand-building route tracker
The same two pages for the tables: all ten hand-building sessions with their tests and visit boxes, then the shelf routine, your measurements, a piece log and a notes line for every session.
Hand-building tracker, free PDFFree, with no sign-up. Print at 100 percent on letter paper, and print a fresh copy whenever a page fills up.
Session eleven
Ten sessions is a foundation, not a finish line. Here is where each route goes next.
- On the wheel. The Wheel Practice Plan picks up where session ten stops: thirty drills, each with one number to hit, starting with centering. Bowls, trimming and handles are all on the list How to Throw on the Pottery Wheel gives for the next level.
- At the tables. 20 Easy Projects Beginners Can Hand-Build has a project for every move you now know, and The Book of Molds has a long list of slab molds rated Beginner and up.
- Either way. The Pottery Skill Tree shows which skills are now open to you and which are still waiting on something earlier.
- Or the other route. Session eleven can be session one on the other side of the room. Wedging, joins, drying and the shelf carry straight across.
The ones that come up in the first month
Can I do both routes at the same time?
Yes. Alternate visits, or split a long session between them. Keep a tracker for each so each route has its own record. Most members switch between the two, and How to Throw on the Pottery Wheel itself recommends a slab mold on a night the wheel is winning.
I have done pottery before. Where do I start?
At the first session whose test you cannot already pass. Read the progress lines in order and stop at the first one that is not true yet. Your very first visit is still a class, and one class comes before a first open studio time for anyone who already knew their way around clay.
How long do ten sessions take?
As long as your visits do. Ten sessions might be ten weeks for someone who comes once a week, or a few weeks for someone who comes three nights running. The plan does not care which. Pieces keep their own clock: a first piece usually takes a month or two from wet clay to finished.
What if I miss a few weeks?
Your unused classes wait, so nothing is lost. Start one session back from where your tracker says you stopped. It costs one visit and puts the last move back under your hands before you build on it. Check your shelf first: anything covered loosely may have gone bone dry while you were away.
Do I have to keep what I make?
No. On the wheel, the first sessions are for playing with the clay, not for making anything you intend to keep. Squash it and go again. Keep the pieces that teach you something or that you simply like, because every one you keep costs a firing.
When do I glaze?
When something comes back from the bisque firing, whatever session you are on. Do the brush-on glaze certification before your first glaze. Dipping has its own certification, separate from brushing. Every glazed piece goes to the kiln with a kiln cookie under it and a kiln ticket. Then carry on with the route.
Can I do the whole plan at open studio time?
Not at first. Your first visits are classes, and every session marked “In a class” is a new move that someone should show you. After that, the practice sessions suit open studio time well. Bring the questions it raises to your next class.
What if I end up disliking my route?
Give it three tries on three separate visits first, because the first is confusion, the second is mechanics, and only the third is an opinion. If the opinion is no, switch to session one of the other route. Wedging, joins, drying and everything about the shelf come with you.
Where to go next
The Full Pottery Process, Start to Finish
Every stage a piece moves through, in order, with the waiting written in.
Read it →The Welcome Booklet
The first night, your shelf, the clays, the tools and the four tables, searchable, with the PDF.
Read it →The Wheel Practice Plan
Thirty wheel drills in the order they get useful, each with one number to hit.
Read it →20 Easy Projects Beginners Can Hand-Build
A project for every hand-building move, each one finishable by a beginner.
Read it →What Should I Do Today?
Tell it how long you have and what is on your shelf, and it lays out the session.
Plan a session →The Pottery Skill Tree
Tick what you can already do and see which skills are open to you next.
Open the tree →Bring the next session with you
The open format is the best thing about this studio, and it asks one thing of you in return: arrive knowing what you came to do. For the first ten visits, this page is that answer. Read the card, try the thing, watch for the one detail, and take the test at the end at its word.
By session ten you will have something better than a plan. You will know which side of the room feels like yours, what your hands still argue with, and what you want to make next. After that, the adventure really is yours to choose.
Pick a route, bring the next session, and move on only when its test is true. Work the shelf first, learn new moves in a class, and repeat any session as often as it takes.
For the full card on every session, with what to read and what to watch for, plus the class and open studio rules, switch to the Comprehensive Version at the top of the page.
Which version would you like to print?
Videos come out as a labeled box with the title and channel to search for, since paper does not play them.