Pottery Date Night
 Bring All Your Friends Free Week
 Give a Month of Pottery
 Private Pottery Parties

 The Welcome Booklet
 Your First Ten Sessions
 The Pottery Process
 Finding the Studio
 Your Classes Never Expire
 The Four Tables
 Who’s Who
 The Rewards Program
 Flux Glazes
 The Calculators
 Kiln Tracker
 Holiday Kiln Deadlines

 Beginner’s Tool Set
 Fingernail Clippers
 Mayco Clay Mender
 Epoxy for Kintsugi
 Applicator Bottles
 Large Bead Rack
 Raku Workshop
 Nighttime Raku
 Horsehair and Feather Raku
 The Clay Hole T-Shirt
 Embroidered Crewneck
 Zip-Up Hoodie
 Pre-Made Bisqueware
 Glaze Catchers
 Kiln Cookies
 Clay Cubby Rental
 The Glaze Bible, Printed
 The Book of Molds, Printed
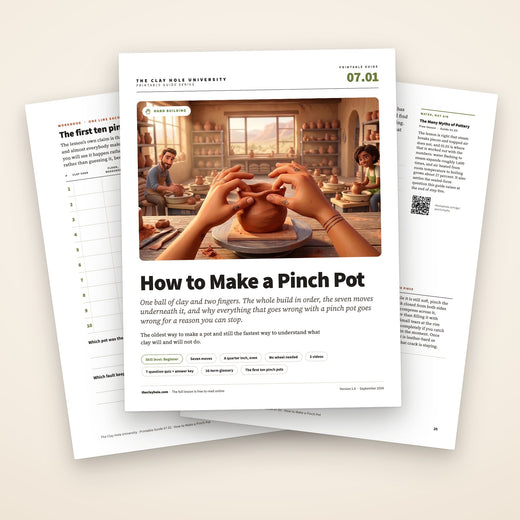
 Printable Pottery Guides
 Free Printable Trackers
 Gifts for Potters
 Christmas Pottery Ideas
 Mother’s Day Gift Ideas
 Pottery Date Night
 Studio Calendar
 2027 Studio Events
 What Should I Do Today?
 How to Throw on the Pottery Wheel
 How to Make a Pinch Pot
 How to Tap Center a Pot
 The Five Stages of Clay
 Is Pottery Hard to Learn?
 Pottery Wheel Practice Drills
 20 Easy Hand-Building Projects
 Everything That Sounds Wrong

 A Beautiful Piece, Every Time
 Slab Roller Tips
 Any Dish as a Slump Mold
 Slab Roller & Slab Mold Certification
 The Pottery Skill Tree
 Clay & Pottery Calculators
 Logging Your Pottery and Glazes
 The Pottery Dictionary
 Why Did My Pottery Do That?
 The Pottery Cone Chart
 Pottery Myths, Fact-Checked
 Is Handmade Pottery Food Safe?
 Incredible Ceramic Artist Videos
 How Dan Throws Giant Pots
 How to Dry Your Pottery
 The Pottery Wheel Introduction
 Pottery by Zodiac Sign
 Personality and the Pottery Wheel
 Pottery for Engineers
 ADHD, Hyperfocus, and Never Running Out
 Hobbies for Burnout
 Screen-Free Hobbies for Adults
 Every Addiction I Ever Had Lost to Art
 Functional Pottery Is Engineering
 How Do We Compare?
 Pottery Classes by City
 Every Pottery Studio in Utah
 Pottery in Draper
 Featured Members
 The Signature Wall
 Making Friends as an Adult Is Brutal
 The Clay Hole Commandments
 2027 Pottery Contests
 2027 Studio Parties
 Gallery Night

 Scream It Into the Void
 Destroy the Glaze Wall
 Daily Affirmation Cards
 Everything That Can Go Wrong
 Subscribe to Our Newsletters
 Contact The Clay Hole
 Corporate Team Building

 Glaze Combinations
 Glazes We Do Not Carry
 Making Glaze Test Tiles
 The Mega Glaze Tool
 How to Use the Mega Glaze Tool

 Glaze Brushing Techniques
 How to Use Underglaze
 How to Use Dipping Glazes
 Glaze Problems, Causes and Fixes
 The Dipping Glaze Guide

 Making a Glaze Catcher
 Fused or Sharp After Firing
 The Signature Wall
 His Viral Videos
 His Own Ceramics
 Meet Mud
Hand-building · Pinch pots
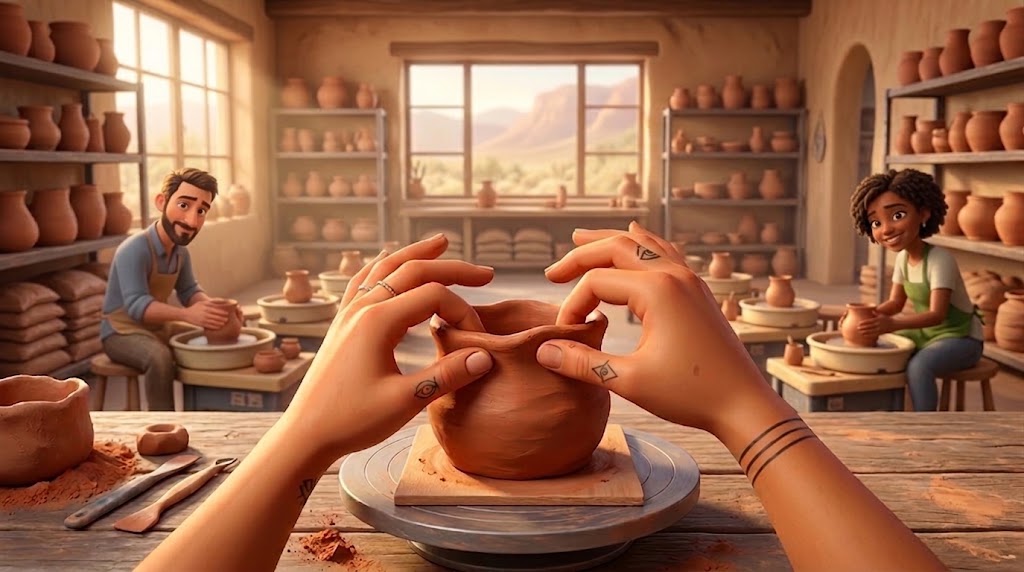
A pinch pot is one ball of clay and two fingers. The rest is rhythm.
There is no wheel to blame here and no form holding the shape for you, which is why the pinch pot is both the first thing anybody makes and the thing potters keep coming back to twenty years later. Everything that goes wrong with one goes wrong for a reason, and every one of those reasons is something you can stop doing.
This page walks the whole build in order, with a tick list at every step so you can put your phone face down, do the thing, and pick the page back up with clay on your hands. The videos are here too, from potters who have nothing to do with us, for the parts where words run out.
Seven moves, one video, and one tick list you can work through with clay on your hands. If you want the reasoning underneath any of it, the Comprehensive version has all of it.
Jump to a step
The short version
Squeezed clay moves upward. Every rule here is that one fact.
Press your thumb into a ball of clay and the clay does not vanish, it travels up into the wall above your fingers. So you work the ring nearest the floor first, all the way around, then move up a finger width and go again. Small squeeze, small turn, every single time. The rim gets left alone until the walls are finished, because it is thin, it is exposed, and it dries first.
- The three numbersA quarter inch wall, a three eighths inch floor, and a rim kept thicker than either until the very end. Even is worth more than thin: a wall that runs from an eighth to half an inch will crack no matter how thin the thin parts are.
- The two compressionsPress the floor down and outward with your thumb while the opening is still small, and once the rim is leveled run a folded scrap of thin plastic around it two or three times. Skipping either one is where almost every crack on a pinch pot starts.
- The inside corner is a curveWhere the wall meets the floor, never leave a sharp right angle. A square corner concentrates the drying stress into one line, which is why cracked pinch pots crack around the bottom rather than anywhere else.
- What you need, and which bagTwo hands. If you want tools, take a needle tool, a barely damp sponge and a corner cut off a clay bag. Buy 52 Buff, or B-Mix w/Grog if the pot will be bigger than a grapefruit, and leave the porcelain until later. Green Level Members bring their own tools and every other Level uses ours.
Clay starts at $28 a 25 lb bag and your Level sets the price. All eight clay bodies, with what each one costs at your Level.
Read it, then watch it
Why this is written down and filmed, both.
We could have handed you a link to a good video and gone home. We keep building pages like this one instead, and there is a real reason for it. Roughly half of what is below exists because of what video is bad at, and the other half exists because of what writing is bad at.
You cannot rewind a video with clay on your hands
A twelve minute demonstration is twelve minutes long whether you need all of it or nine seconds of it. When your rim starts splitting and both hands are covered, a numbered list gets you an answer in about three seconds. Scrubbing a timeline with your knuckle does not.
Reading is what makes the order stick
Most first pinch pots do not fail on technique. They fail on sequence, because somebody thinned the rim before the base or opened the floor too deep to fix. Written steps hold an order in place in your head. Watching a pair of hands move rarely does.
Video carries the pressure and the pace
How hard to squeeze. How far to turn between pinches. What too dry looks like a second before it cracks. None of that survives being written into a sentence, and no amount of rewording fixes it. You have to watch somebody do it, which is what the three videos below are for.
So use both, and in this order
Read the step. Watch the part of the video that covers it. Then do it with the tick list open next to you. People who learn this from video alone tend to rewind the same ten seconds four times. People who learn it from text alone tend to squeeze too hard somewhere. The pairing is the whole point, and it is why this page is as long as it is.
If you would rather just be shown, skip straight to the three videos. Nothing here is a test.
The five-minute version
The whole pot in seven moves.
If you already hand-build and you only want the shape of it, this is the shape of it. Everything further down is these seven moves, slowed right down.
That is the whole pot. Everything after this is the video, the drying, and what to do when it goes wrong.
About the size of an orange for a first pot. Any crack you can see on the ball now is a crack you will be arguing with in twenty minutes.
Straight down the middle, stopping about two thirds of the way through. The clay you leave under your thumb is the floor of the pot, and you cannot put it back.
Thumb inside, fingers outside, small squeezes down near the base first. Beginners almost always start at the rim, and that is what makes a floppy, thick-bottomed bowl.
A small pinch, a small turn, all the way round, then move up a ring and do it again. The turning is the technique. The pinching is the easy part.
Cut or tear it even, then run a soft finger or a scrap of plastic bag around it. A rim that never got compressed is the most common crack on the whole page.
Paddle it, rib it, texture it, or leave the fingerprints in on purpose. Then flatten the base so it sits without rocking.
Loosely covered for the first day or two, upside down at the end. Then bisque at cone 05, glaze, and back in at cone 5½.
About your first one
Your first pinch pot will probably be a bit lopsided, a bit thick at the bottom, and thinner on one side than the other. That is not a sign that you did it wrong. It is a sign that you did it once. Almost nobody makes an even pinch pot on the first attempt and almost everybody makes a good one by the third or fourth, which is a far better ratio than the wheel offers anybody.
Before you touch anything
What you need on the table.
Two hands and a lump of clay. That is the real answer, and it is the reason this technique has outlasted every other one in ceramics by several thousand years. Everything below is optional, and everything below lives in the building.
- A wire cutterFor slicing a chunk off the bag. Cut more than you think you want; the offcuts get wedged straight back in.
- A barely damp spongeEmphasis on barely. Water is the enemy of a pinch pot far more than it is the enemy of a thrown pot, because your hands are already adding moisture with every squeeze.
- A scrap of thin plasticA corner cut off a clay bag is perfect. Fold it over the rim and run it around, and it compresses and smooths in one pass without dragging the clay. It is the single best trick on this page.
- A soft rib and a metal ribThe soft one smooths while the clay is still soft. The metal one is for scraping the outside crisp once it has firmed up to leather-hard.
- A needle toolFor leveling the rim and for the honest floor check further down, which is the one measurement worth taking on a pinch pot.
- A wooden paddle, or a wooden spoonFor tapping a wobbly shape back into line and compressing the wall while you do it. Anything flat and wooden works and members bring all sorts.
- A banding wheel, if one is freeNot needed for the pinching itself, which happens in the air in your hands, but very useful when you set the pot down to true the rim and finish the outside.
- Short fingernailsGenuinely. A long nail on the inside hand gouges a groove up the wall on every stroke and you will not notice until the light hits it sideways.
Green Level Members bring their own tools
Every other Level uses the studio tools, and there are hundreds of them. If you are on Green Level and you are reading this before your first class, a needle tool, a sponge and one rib will get you through everything on this page. A pinch pot is the cheapest possible way to start, which is exactly why it is where most people start.
Which bag to buy
Every clay we stock will make a pinch pot. Three of them make it easy.
Pinching asks something specific of a clay body, and it is not the same thing throwing asks. You are holding an unsupported wall in the air and stretching it thinner with your fingers while the room dries the rim. What you want is a body with some tooth in it, because tooth is what stops a wall slumping and what stops a rim tearing open as it thins. What you do not especially need is smoothness, and the smoothest bodies we carry are the fussiest ones to pinch.
The house starter and the least expensive bag in the building. Slightly coarse, forgiving, and that faint grittiness is doing real work in a pinch pot: it holds a thin wall up and it resists the little tears that open at the rim. If you are making your first one, buy this and do not think about it again.
B-Mix with grog added for tooth. The grog is the whole reason it is here. Once a pinch pot gets past about the size of a grapefruit the wall starts wanting to slump under its own weight, and a grogged body simply does not do that. It is also the one to reach for if you plan to join two pinch pots into a closed form.
A warm buff body with classic speckles that come through the glaze. It handles a thin wall well and the speckle does something a pinch pot in particular benefits from: it gives an uneven, handmade surface a reason to look intentional. A lot of the pinch pots on our show and tell wall are this clay.
A dramatic dark gray stoneware from Spain with a very fine grog running through it, and that grog makes it one of the best-behaved bodies here for hand-building. Dark clay also shows a fingerprint as a shadow rather than a smudge, which is either the point or the problem depending on what you are making.
The same smooth B-Mix body with dark specks through it. Smoother than the three above, so it takes a rib beautifully and shows every mark you leave. Excellent clay. Just know that a smooth body records your technique rather than hiding it.
Smooth, creamy and near white, and a studio favorite on the wheel for good reason. In the hand it is softer and stickier than the buff bodies, which means the wall moves more easily than you meant it to and fingerprints land deeper. Lovely once you have the rhythm.
Half porcelain and half stoneware, so it gives you a porcelain feel with a good deal more forgiveness than the real thing. Still on the soft, smooth end for pinching. Worth trying once your walls are coming out even.
Beautiful, and the least forgiving thing in the studio. Porcelain has almost no tooth, so a pinched wall wants to slump, and it goes from workable to too dry faster than anything else on this list, which is exactly the failure that splits a rim. Make a few pots in something else first. It will be worth the wait.
Clay starts at $28 a 25 lb bag and your Level sets the price. All eight clay bodies, with what each one costs at your Level.
Step one
Make the ball, and make it properly round.
This step takes ninety seconds and it decides more about the finished pot than anything else you will do tonight. A ball with a crease in it becomes a pot with a crack in it, and there is no later step that repairs that.
Wedge it first, and not for the reason you were told
You have probably heard that wedging is about getting the air bubbles out. It mostly is not, and trapped air is not what breaks pieces in a kiln anyway. Wedging matters here because it makes the moisture and the density of the lump the same all the way through. Clay that is softer on one side stretches thinner on that side the moment you start pinching, and you end up with a pot that has a fat wall and a paper wall and no obvious explanation for either.
Fresh clay straight out of a new bag is usually well mixed and needs very little. Clay that has been sitting on your shelf under plastic for three weeks needs a proper wedge, because the outside has dried and the middle has not.
How much clay
About the size of an orange for a first pot, which is roughly three quarters of a pound. That gives you a finished bowl somewhere around four inches across, which is big enough to feel like a real object and small enough that your hand can still support the whole thing while you work. Go much bigger on your first attempt and the wall starts slumping before your technique catches up. Go much smaller and there is not enough clay to feel what is happening.
Roll it until the surface goes quiet
Roll the lump between both palms, in circles, until the outside is smooth and closed with no visible folds or hairline splits anywhere on it. Take your time on this. Every fold that is still there when you start pinching gets stretched wider and wider as the wall thins, and it will surface as a tear in the rim about ten minutes later when you are too invested to start over.
Cold, stiff clay tears instead of smoothing. If the ball feels tight and reluctant, keep rolling it for another thirty seconds. Your hands warm it and it softens noticeably.
Step two
Open the floor, and stop earlier than feels right.
Cradle the ball in your non-dominant hand and press one thumb straight down into the middle of it. Slowly, and with the whole thumb rather than the tip. This is the one move on the page you cannot undo, because clay you push out of the floor does not come back.
Where to stop
Stop when there is about half an inch of clay left under your thumb. Roughly two thirds of the way through the ball, and much less far than your instinct says. That half inch is not the finished floor: you are going to compress it and it is going to spread a little as the walls open, and it wants to end up around three eighths of an inch, which is a touch thicker than the walls.
A thicker floor than the walls is deliberate. The base of a pot is the part that gets dragged across a table, and it is also the part that dries slowest, so it wants material. What it must not be is dramatically thicker, because a heavy slug of clay under thin walls is the classic pinch pot problem: it looks fine, it weighs a ton, and it takes twice as long to dry as everything above it.
The honest floor check
Feeling the base between your thumb inside and a finger outside works, and with practice it is all you need. Until then, do it properly. Push a needle tool straight down through the floor from the inside until it touches the table, put your fingernail against the needle where it comes out of the clay, lift it out and look at the gap. That is your real floor thickness, and it is usually thicker than people guess.
The pinhole closes with one squeeze between two fingers and disappears completely. Nobody has ever lost a pot to a needle hole, and plenty of people have lost one to a floor they never measured.
Compress the floor before you go anywhere else
While the opening is still small, press down and outward on the inside of the base with your thumb, working around it a few times. You are pushing the clay particles together, and a compressed floor is a floor that does not crack in a circle as it dries. It takes fifteen seconds and it is easily the cheapest insurance on this page. If you skip it now you cannot really do it later, because once the walls are up your thumb no longer reaches the base at a useful angle.
Step three
Pinch, and turn. Then do that about two hundred times.
Here is the whole technique in one sentence. Thumb on the inside, two fingers on the outside directly opposite it, squeeze gently, release, turn the pot a small amount, squeeze again. Go all the way around at one height before you move up. That is it, and everything below is just the detail of doing that well.
Start at the bottom. Everybody starts at the top and everybody regrets it.
Work the ring of clay right down near the floor first, all the way around, then move up about a finger width and do the next ring, then the next. The clay you squeeze does not disappear, it moves upward, so working bottom to top feeds material into the wall above you and the pot grows as you go. Starting at the rim does the opposite: you thin the top, then discover a solid inch of clay in the bottom that you can no longer reach properly, and the pot ends up heavy and floppy at the same time.
Small pinches, and a small turn after every one
The pressure is gentler than you think. You are persuading the wall thinner over many passes, not squeezing it thin in one go. A hard pinch leaves a divot that shows on the outside and a thin patch that tears later. If you can see the shape of your fingertip in the wall, you pressed too hard.
Turn a consistent amount between pinches, roughly the width of your own thumb. Consistency is what makes a pot round. Most lopsided pinch pots are not lopsided because somebody squeezed unevenly, they are lopsided because somebody turned unevenly and spent longer on one side without noticing.
Leave the rim alone until the end
The top half inch stays thicker than everything else the entire time you are working. It is the most exposed part of the pot, it dries first, and a thin rim on a soft pot flops around and tears. When the walls are where you want them, then and only then do you deal with the rim, and step four is entirely about that.
Keep your hands drier than feels comfortable
Do not work with wet hands, and do not reach for the sponge every time it feels stiff. Your palms are already adding moisture with every squeeze, and water on the outside of a pinch pot makes the surface slick and gummy, lifts it, and undoes the compression you have been building. If the clay genuinely starts to feel dry and squeaky, that is the point where a rim splits, so touch the sponge lightly to the rim only and carry on.
Even beats thin
A quarter of an inch is the number, and it is a target rather than a rule. A pot with an even three eighths wall will dry beautifully, fire beautifully and feel good in the hand. A pot with a wall that goes from an eighth to half an inch and back again will crack, warp or both, and it will do it no matter how thin the thin parts are. Run your fingers up the outside and the inside at the same time as you work, and fix the fat spots rather than chasing a thinner number.

- 1The rim, thicker on purpose. Slightly heavier than the wall below it for the whole build. It is the first part to dry and the first part to tear, and a rim with a little material in it survives both.
- 2The wall, about a quarter inch. The same quarter inch at every height and all the way around. Even is worth far more than thin, every single time.
- 3The floor, about three eighths. A touch thicker than the wall because it takes the wear and dries slowest, and compressed from the inside before the walls went up.
- 4The inside corner, curved. Never a sharp right angle. A sharp interior corner concentrates the drying stress into one line, which is why cracked pinch pots crack around the bottom rather than anywhere else.
Step four
Settle the shape, then deal with the rim.
At this point you have an even wall and a shape that is probably close to a hemisphere, because that is what pinching naturally produces. Turning it into the shape you actually wanted is a separate job, and it is a surprisingly easy one.
To bring it in, cup it. To push it out, press from inside.
Closing the form is done from the outside with both hands cupped around the top of the pot, squeezing gently while you turn. The opening narrows a little on each pass. Opening the form out is the reverse: fingers of one hand inside pushing outward, the other hand flat against the outside so the wall has something to press against rather than just stretching. Never push from the inside without support outside, because that is how a wall goes thin in one spot without you feeling it.
Paddling is the shortcut nobody tells beginners about
Once the pot has firmed up slightly, hold a hand inside it and tap the outside with a flat piece of wood. Firm, unhurried taps, working around the form. Paddling trues a wobbly shape faster than pinching does, it compresses the wall as it goes, and it will happily turn a round bowl into a squared-off one if that is what you want. It is also the standard way of pulling a slumping wall back into line.
Level the rim, or commit to it being uneven
Both are legitimate finishes and the mistake is not choosing. For a level rim, set the pot on a banding wheel, rest a needle tool at the height you want and turn the pot into it, letting the point cut a clean line, then lift the ring off. For a deliberately organic rim, tear it rather than cutting it, which gives you a soft edge instead of a ragged one. What looks like a mistake is a rim that is nearly level, because the eye reads the wobble as a failure rather than a decision.
Then compress the rim, and do not skip this
Fold a small scrap of thin plastic over the rim, pinch it lightly between finger and thumb, and run it all the way around two or three times. The plastic slides where a bare finger drags, so it compresses and smooths in one pass and leaves a soft rounded edge rather than a sharp one. A leather scrap or a barely damp chamois does the same job.
A rim that was cut and never compressed is where most pinch pots crack, and the crack usually appears days later while the piece is drying quietly on a shelf. Cutting a rim leaves the clay particles opened up and pointing outward at the most exposed edge of the whole pot. Thirty seconds with a piece of plastic bag closes them again.
Step five
Finish the outside, and give it somewhere to sit.
A pinch pot carries the record of how it was made, and you get to decide how much of that record stays visible. There is no correct answer here. There is only a choice, made on purpose.
Three options for the surface
- Leave the fingerprints. Every dent is a record of a hand and it reads as warmth rather than sloppiness, especially on a speckled body. A glaze that breaks over texture will make them beautiful, and this is the most common finish on the pinch pots that come out of this building.
- Smooth it while it is soft. A soft rib run over the outside, working in the same direction, evens the surface without taking material away. Then leave it alone. Chasing perfect smoothness with a wet sponge lifts the surface and gives you a slightly furry finish that nobody wanted.
- Wait, then scrape it crisp. Once the pot is leather-hard, a metal rib takes the surface back to a clean, tight, almost thrown-looking wall in about a minute. This is also the moment to carve, stamp or add texture, because leather-hard clay holds a crisp line and soft clay smears.
Make it sit still
A pinched bowl comes out round underneath, so it rocks. The quickest fix is to tap the base gently on the table while the pot is still soft, which flattens a small area and compresses it at the same time. If you want more than that, wait for leather-hard and either carve a shallow foot ring into the base with a loop tool or roll a thin coil, score both surfaces, slip them, and attach it as a ring foot.
Whatever you do, check that the base is not left thicker than the rest of the pot after you finish it, and run your thumb around the outside bottom edge to soften it. A sharp bottom edge chips easily and it is unpleasant to pick up.
Sign it while you still can
Leather-hard is the moment to put your mark on the bottom. Once it is bone dry the clay crumbles instead of cutting, and once it is bisqued the answer is a permanent marker and a certain amount of regret.
Then, if you want, join two of them
Two pinch pots of the same size, both firmed to leather-hard, scored and slipped around their rims and pressed together, make a hollow sphere. That sphere is the starting point for an enormous amount of ceramic sculpture, and it is also how you make a closed form without ever touching a wheel. Cut an opening in the top and you have a vase. Paddle it square and you have a box. Leave it sealed and pierce one small hole so the trapped air can escape as it heats, and you have a rattle if you dropped a dry clay pebble inside first.
Three potters, three methods
One video, three demonstrations
Now watch three people do this three different ways.
Now watch somebody do it three different ways.
None of these people work here and none of them have any idea we exist. They are here because between them they cover the ways a pinch pot actually gets made, and because watching more than one approach is how you work out which one is yours. Nothing loads from YouTube until you press play.
This potter does not work here and has no idea we exist. One ball of clay handled three different ways, which is what teaches you that the grip is a preference and the rhythm is the technique. Nothing loads from YouTube until you press play.
3 Ways to Pinch a Pot — Relaxing Handbuilding Pottery Tutorial
Sadur Studio
The single most useful video on this page, because it is three demonstrations rather than one. Watching the same ball of clay handled three different ways is what teaches you that the grip is a preference and the rhythm is the technique. Twelve minutes, quiet, no hurry.
How to handbuild a CERAMIC BOWL — Pinch pot technique (the full process)
Umi Ceramics
Start to genuinely finished, in the same order as this page. Ball, floor, walls, rim, refining at leather-hard, the lot. If you only want to see one pot made properly from beginning to end, this is that video.
How to make a Ceramic Mug — no wheel required! // Pinch Pot Tutorial
Pottery to the People
The proof that this is not just a technique for small bowls. A pinched cylinder with a handle on it is a mug, and it is the fastest route to a piece you will actually use every morning. Six minutes and no wasted seconds.
Every title and channel above was checked against YouTube directly rather than copied out of a search result. Videos load from youtube-nocookie.com and nothing from YouTube loads at all until you press play. If one of them ever goes dead, tell us and we will swap it. There is a lot more of this on our page of free videos from other ceramic artists.
The title and channel were checked against YouTube directly rather than copied out of a search result. If it ever goes dead, tell us and we will swap it. There is a lot more of this on our page of free videos from other ceramic artists.
Step six
Dry it slowly, then let the kiln do the rest.
More pinch pots are lost between the table and the kiln than are lost on the table. Drying is not waiting. It is a step, and it is a step you can do badly.
Slow, and above all even
Clay cracks when one part of a piece shrinks while another part has not caught up. A pinch pot has a thin exposed rim sitting directly above a thicker floor, so it is a shape almost designed to dry unevenly. Loosely covered with plastic for the first day or two is the entire answer, and it costs you nothing but patience.
Then upside down
Once the pot is firm enough to handle without denting it, turn it over on your shelf. The base has been sitting on a surface losing no water at all while the rim has been drying in open air, and flipping it lets the two catch up with each other. Purple Level and Black Level Members can use a cotton sheet over it, which dries more evenly again. Green Level and Yellow Level Members use plastic sheets.
The heat tables are a tool, not a shortcut
Flip the lamp on if you genuinely need to speed things up, turn the piece around now and then because one side always dries faster than the other, and get pieces on and off rather than parking them there. Left too long under a lamp a pot dries out unevenly and cracks, so you can absolutely create the exact problem you were trying to avoid. Last one out turns the lamps off.
Then the two firings
Bone dry goes to bisque at cone 05, and bisque firings are free, every time. After you glaze it, it goes back in for a glaze firing at cone 5½, which is cone 5 with a twelve minute hold. Glaze firings are five cents per cubic inch with a $4.80 minimum, so measure the widest points and the firing calculator will give you the number.
One thing worth knowing, because it gets repeated wrongly everywhere: it is water, not air, that breaks pieces in a bisque. A pot that still holds moisture deep in a thick floor turns that water to steam, and steam takes up an enormous amount more room than the water did. That is the real argument for an even wall and a properly dried pot, and it is also why a solid lump of clay is a bad idea and a hollow one is not.
A pinch pot takes glaze exactly like anything else. If the surface still has your fingerprints in it, a glaze that pools and breaks over texture will find every one of them, which is worth planning for rather than discovering. The glaze finder is the fastest way to work out what you want on it.
A pinch pot takes glaze exactly like anything else, and a glaze that pools and breaks over texture will find every fingerprint you left in the surface. The glaze finder is the fastest way to work out what you want on it.
Diagnosis
When it goes wrong, and it will.
Tap whatever happened. Every one of these has a cause, which means every one of them is something you can stop doing rather than something that just happens to you.
The rim cracked
Why it happened
The rim is the thinnest, most exposed part of the pot, so it dries first and shrinks first while the wall below it is still catching up. On top of that, a rim that was cut level and never compressed has its clay particles opened right up at the most vulnerable edge of the whole piece.
Next time
Keep the top half inch thicker than the wall for the whole build and leave it alone until the very end. Then compress it properly with a folded scrap of plastic run around it two or three times. Cover the pot loosely while it dries so the rim is not racing the base.
This piece
While it is still soft, pinch the crack closed from both sides and compress across it, rather than filling it with slip. Small tears at the rim close completely if you catch them in the moment. Once the pot is leather-hard or drier, that crack is staying.
Already out of the kiln and looking rough? Our page on fixing pottery after a firing covers what is salvageable and what is not.
Go make one
Leave this open, or print it. Then go and make one.
The tick lists are here so you can work with your phone propped against something and your hands in the clay. They reset when you reload the page, which is deliberate, because the next pot deserves a clean list. Nothing is sent anywhere and nobody sees any of it but you.
The tick list is here so you can work with your phone propped against something and your hands in the clay. It resets when you reload the page, which is deliberate, because the next pot deserves a clean list. If you want the reasoning underneath any of this, the Comprehensive version at the top of the page has all of it.
Not a member yet
See the four Levels
A membership is what gets you the clay, the tables, the kilns and somebody standing next to you the first time a rim splits. Pinching is the cheapest possible way to find out whether you love this.
You need a bag
All eight clay bodies
Every clay we stock, with what each one costs at your Level. If you skipped the section above, buy 52 Buff and start there.
The other way in
How to use slab molds
Pinching is one hand-building route and slab molds are the other, and the two of them together cover most of what gets made in this building without anybody touching a wheel.
Stuck on something this page did not answer? Text us at 385-241-5528 and ask. There is no such thing as a beginner question here, and the pinch pot is where almost every potter alive started.
Which version would you like to print?
Videos come out as a labeled box with the title and channel to search for, since paper does not play them.