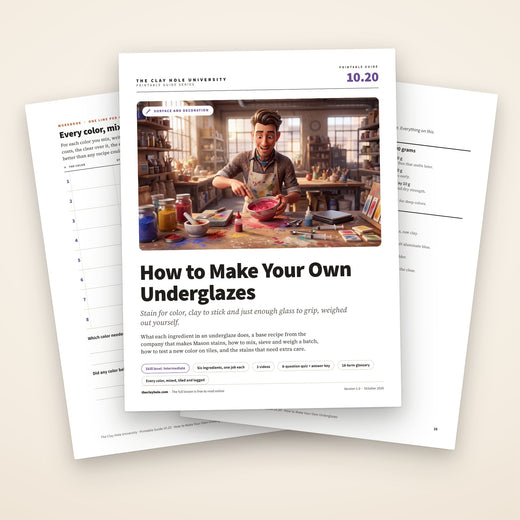
How to Make Your Own Underglazes
An underglaze is mostly color, held on by just enough clay to stick to the pot and just enough glass to grip it in the kiln. Weigh those out yourself and you can make any color a ceramic stain comes in, tuned to your clay and your firing. Here is what each ingredient does, a recipe to start from, how to mix and test a batch, and why some colors refuse to behave.
Stain for color, clay to stick, frit and feldspar to grip, gum and glycerin to brush. Mix the dry base at home with a respirator on, add a stain, test it on a tile, and show the studio team before it goes on a pot.

Jump to a section
Color, with clay to hold it and glass to grip
A jar of underglaze is mostly ceramic stain, the fired and ground pigment that makes the color. Stain on its own would brush on like dust and fall off after the kiln, so it travels with helpers.
Clay makes it stick to a raw pot and shrink along with it. Frit and feldspar melt just enough in the firing to glue it on. Gum and glycerin make it brush like paint, and burn away in the bisque. Get the balance wrong and it flakes off, bleeds into the clear, or comes out pale.
Every color gets its own test tile, because every stain behaves a little differently in the same base. The tile tells you; the jar never does.
From powder to pot
Six steps. The recipe and the safety rules are further down this page.
- Buy the parts. A Mason stain from us; the frit, feldspar, kaolin, ball clay, zircopax, CMC gum and glycerin from a ceramic supplier.
- Mix the dry base at home, respirator on. P100 cartridges and a damp towel under the scale. Never at the studio.
- Make the paint. Dissolve the CMC gum in hot water two days ahead and mix it with water and glycerin. Blend most of that liquid into the base, add the stain, then the rest of the liquid a little at a time, and push it through an 80 mesh sieve.
- Thin it to 1.4 times the weight of water. Weigh a cup of water, then the same cup of underglaze. About 1.4 times as heavy is the specific gravity commercial underglazes aim for.
- Tile it first. Show the studio team the recipe, paint one, two and three coats on a raw tile of your clay, bisque it, and put your clear over half.
- Then the pot. Leather hard or bone dry, never bisque, and bisque fired before any glaze touches it.
Three things that go wrong
It flakes off after the firing
Not enough flux to glue it on, a coat laid on too thick, or paint on bisque. Add a little frit, brush thinner coats, and paint at leather hard.
It bleeds into the clear
Too much flux, too much stain, or a cobalt blue, which dissolves into the glaze above it. Cut the frit, use less stain, or choose a cobalt aluminate blue.
The pink barely showed up
Chrome-tin pinks and crimsons need calcium and are killed by zinc, in the underglaze and in the clear over it. Test every pink under the exact clear it will wear.
What an underglaze actually is
Six facts. The recipe, the mixing and every failure further down this page follow from them.
- It is mostly color. A ceramic stain is metal oxides fired together until they react, then ground to a fine powder. An underglaze is that powder with the least of everything else it needs to stay on a pot. Bright colors in a homemade underglaze often use nearly as much stain as base.
- It is not a glaze. It never melts into a sheet of glass. In the bisque it sinters, hardening in place the way the clay under it does, and the clear on top is the glass. That is why bare underglaze comes out matte.
- The clay makes it stick, and shrink with the pot. Raw clay shrinks as it dries and again as it fires. An underglaze painted on it has to shrink by about the same amount, so it needs plenty of fine clay of its own. On bisque, which has already shrunk, the layer has nothing to shrink with, and the bond is weaker.
- The flux glues it on. Frit and feldspar melt just enough in the firing to bond the layer to the body. Too little, and a heavily loaded color flakes off at the edges. Too much, and the color bleeds into the clear and loses its opacity.
- The gum and glycerin are for the brush. CMC gum makes the paint flow, grip the pot and dry hard enough to handle. Glycerin or propylene glycol makes it smoother on the brush. Both are organic and burn away in the bisque.
- A bottle is the same chemistry, tuned color by color. A manufacturer adjusts the base for each stain and each firing range. A homemade base is one compromise for every color, which is why each new color gets its own tile.
The sentence worth keeping
An underglaze is a stain with exactly enough clay to stick and exactly enough glass to grip. Nearly every homemade failure is one of those two in the wrong amount.
Six ingredients, one job each
Every homemade underglaze recipe is some version of these six, plus water.
Stain, the color
Mason stains or an equivalent, the same pigments used to color clay and glaze. Strong colorants such as black and cobalt blue look dense at around a tenth of the dry weight. Yellows and pinks need far more. The powder in the jar looks nothing like the fired color.
Clay, the grip on a raw pot
Kaolin and ball clay. They make the paint stick to raw clay and shrink with it, keep the stain in suspension, and dry hard enough to handle. Ball clay is the stickier of the two; kaolin fires whiter.
Frit and feldspar, the glue
Frit is glass that was melted and ground in advance, so it starts melting early. Feldspar melts later. Together they bond the layer to the body in the firing. Ferro Frit 3124 is the usual frit, and it is high in calcium.
Zircopax, the opacifier
Zircon, which makes the layer opaque and softens every color it touches. Keep it for light and bright colors. Leave it out when you want a deep black or a navy.
CMC gum, the binder
Sodium carboxymethylcellulose, a cellulose glue. Half a percent to one and a half percent of the dry weight makes the paint flow, grip and dry hard. As a powder it lumps, so it goes in as a solution made with hot water ahead of time.
Glycerin, the smoother
Vegetable glycerin or food grade propylene glycol, mixed into the water. It makes the paint smoother on the brush. Never automotive antifreeze, which can carry other additives.
The recipe
The white underglaze base from Mason Color Works, the company that makes Mason stains, as published on Vince Pitelka’s website. It is rated cone 6 to cone 10 and built for brushing.
The dry base. Parts are by weight. The last column is a batch of 100 grams, enough for several small jars once the stain and liquid go in.
| Material | Parts | For 100 g | Its job |
|---|---|---|---|
| Soda feldspar (Minspar 200, which replaced F-4) | 20 | 40 g | Flux that melts later |
| Ferro Frit 3124 | 10 | 20 g | Flux that melts early |
| Kaolin (EPK) | 10 | 20 g | Grip and suspension |
| Ball clay | 5 | 10 g | Stickiness and dry strength |
| Zircopax | 5 | 10 g | Opacity; leave out for deep colors |
Then, for every 100 grams of dry base:
- Stain: 10 to 80 grams. The published recipe uses 40 parts of stain to the base’s 50, which is 80 grams. Black and cobalt blue can look dense at 10 to 15 grams. Yellows, pinks and reds sit near the top.
- Liquid: up to 150 grams, added a little at a time. Two parts glycerin or food grade propylene glycol, two parts water and one part CMC solution, by weight. You may not need all of it.
- CMC solution, made two days ahead. 30 grams of CMC powder stirred hard into a quart of hot water, lidded and left. A quart of it is enough for about six quarts of base.
Read it as a starting point
A recipe is a report of one potter’s clay, stain and kiln. Our glaze firing, cone 5½, sits just under this base’s range, which is one more reason the tile comes first. The two numbers you will move are the stain and the frit: more frit if a color flakes, less if it bleeds, more stain if it is pale.
Mixing a batch
Weigh it dry, wet it at once, add the stain last, sieve it, and stop at a specific gravity of 1.4.
- Make the CMC solution two days ahead. Stir 30 grams of CMC powder hard into a quart of very hot water, lid it and leave it. Powder added straight to a wet batch lumps and never dissolves properly. A homemade gum solution can spoil, so date the jar.
- Mix the liquid. Two parts glycerin or food grade propylene glycol, two parts water, one part CMC solution, by weight, stirred together.
- Respirator on, then weigh the dry base. P100 cartridges, a damp towel under the scale, each material to the gram, into one lidded container. Shake or stir it dry until it is one even color. A big batch of dry base keeps as long as it stays dry, so you weigh it once.
- Wet it right away. Pour about three quarters of the liquid into the base and blend it smooth. A stick blender or a blender that never goes back to the kitchen does it in a minute.
- Add the stain, then the rest of the liquid a little at a time. Stop when it reaches a thin yogurt. A heavy stain loading may need a splash of extra water.
- Sieve it. Push it through an 80 mesh sieve with a stiff brush. Lumps left in the jar are lumps on the pot. Never ball mill or grind an inclusion stain, usually one of the bright reds, oranges and yellows: grinding breaks the zircon shell that keeps its cadmium locked in.
- Check the weight. Weigh a small cup filled to a line with water, then the same cup filled to the same line with underglaze, each minus the cup. About 1.4 times the water is the specific gravity commercial underglazes aim for; about 1.6 is thick enough for one heavy coat. Too heavy, add water. Too light, leave the lid off a while.
- Label the jar. The color, the stain number, how much stain, the date. The recipe written on the lid is the one you can make again.
Test it on a tile
A homemade color is a guess until it has been fired on your clay, under your clear. One row of tiles answers every question that matters.
- Talk to the studio team first. Show them the written recipe before anything you mixed goes into a kiln here. The tile goes on a catcher after that conversation, the same as anything mixed at home.
- Use your clay, raw. Tiles of the clay you will paint, at leather hard or bone dry, the stage you will paint the pot at. A tile painted on bisque answers a different question.
- Ladder the stain. Put about 10 grams of base in each of three cups and add 1.5, 4 and 8 grams of stain. The lightest loading that looks right is the one to keep, because stain is the expensive part.
- Paint one, two and three coats, in stripes. A well loaded homemade underglaze often covers in one. The tile shows which count you need.
- Number the back. Scratch it in with a needle tool before the bisque, and write in your log what each number means.
- Bisque it, then your clear over half. The bare half shows the underglaze; the glazed half shows what the clear does to it. Use the clear the pot will wear, because a different clear can change the color, a pink most of all.
- Read it, and change one thing. Crisp edges or bleeding, bonded or lifting, dense or pale, the clear smooth or crawling. Then one change, more frit or less stain or fewer coats, never two at once, and tile again.
The colors that need extra care
Most stains drop into the base and do what the chart says. These are the exceptions, and why.
Pinks and crimsons
Mason’s chrome-tin pinks and crimsons, numbers 6000 to 6006, need calcium and are killed by zinc and magnesia, in the underglaze and in the clear above it. Frit 3124 brings calcium. A clear with zinc in it can still flatten the color, so test under the exact clear.
Chrome greens
Zinc turns chrome green brown. A green that comes out brown under a clear points at zinc in that clear, and a different clear is the fix.
Cobalt blues
Cobalt silicate dissolves into the glaze above it and blurs the line. Mason recommends cobalt aluminate stains, or a mix of the two, for a crisp blue. Use the least stain that reads.
Bright reds, oranges and yellows
Often inclusion stains, with the color sealed inside zircon. Never grind one. Each stain carries a maximum firing temperature on the maker’s chart, and one rated below cone 5½ will fade.
Blacks and grays
Black stains are strong and often cover in one coat at a modest loading. For gray, Mason advises against a little black, which tends to come out as whichever oxide dominates it. Use a gray stain.
Yellows and pale colors
Weak colorants need the most stain, often close to equal weights with the base, which makes them the most expensive colors to make. They are the ones to ladder most carefully.
Powders, lungs and food
The dry powders are the hazard. Once the batch is wet in its jar, the dust problem is over; the weighing is where it lives.
- A fitted respirator with P100 cartridges whenever a bag is open. Not a paper mask. Kaolin, ball clay and feldspar carry crystalline silica, and silica dust causes silicosis, lung cancer and kidney disease.
- Respect the stain powder too. Stains are metal oxides, and cobalt, chrome and nickel are the ones to respect most. Their maker’s advice for every fine powder is to limit the dust.
- Weigh over a damp towel, wet it at once, wipe down wet. Never sweep up or dry dust the powder.
- At home, never at the studio. Mixing the dry base is a home job, the same as mixing a glaze, and it never happens at a shared table.
- Kitchen tools stay ceramic tools. A blender, scale or spoon that has mixed underglaze never goes back to food.
- Bare underglaze is not a food surface. Anything you eat or drink from gets a clear rated for food over it; the Food Safe Lookup shows which are. A stained surface that touches food is worth a leach test.
Making your own at The Clay Hole
Homemade underglaze is welcome in our kilns. It gets cleared first, and two of the rules for the bottles on the wall still apply.
- We sell the stains. Pick a color on our Mason stains page, pay for it, and it is weighed out for you. The frit, feldspar, clays, zircopax, CMC and glycerin come from a ceramic supplier; we do not sell them.
- The studio team clears it first. Show them the written recipe before anything you mixed goes into a kiln here, and a fired test tile before it goes on a pot. Test tiles go on a catcher.
- Coverage is your call. The rules about detail work and solid coverage protect the shared bottles. Your own underglaze is yours to use as you like.
- Raw clay only. Leather hard or bone dry, never bisque, the same as the bottles.
- A bisque before any glaze. Unfired underglaze lifts off on the brush and into the shared jars and dipping buckets. The bisque is cone 05 and free, and staff load every kiln.
- Then a clear, like any underglazed pot. Brushing a clear from our wall needs the free glaze and underglaze certification. Glaze fires to cone 5½, and every glazed piece sits on a kiln cookie.
- Rinse water from stain work goes in its own bucket. Never down a sink. Ask the studio team where it goes.
What goes wrong, and what it means
It flaked or peeled at the edges
Not enough flux to bond it, a heavy load of a stiff stain, a thick coat, or paint on bisque. Add a little frit, brush thinner, and paint at leather hard.
The line bled into the clear
Too much flux for the firing, too much stain, or cobalt. Cut the frit, use less stain, or switch to a cobalt aluminate blue.
It came out pale
Too little stain, too thin a coat, or a stain the base or the clear does not support. Move up the ladder, and read that color’s notes on the maker’s chart.
It brushed on streaky and thin
The mix is too light. A specific gravity well under 1.4 paints thin and covers badly. Leave the lid off to let some water go, then weigh it again.
The clear crawled or left bare spots over it
A heavy layer of gum can seal a surface against the clear. Painting raw clay and bisque firing before any glaze, the way it works here, burns the gum off first.
The jar grew mold or set like a brick
Gum is food for mold, and stain with nothing to suspend it settles hard. Make small batches, lid them, date them, and stir from the bottom every time.
The ones that come up at the tables
Is making it cheaper than buying it?
Per gram of color, usually. One test of a 2 ounce commercial jar found it dried to about 21 grams of powder, roughly half of it stain. The stain is the expensive part either way. The real cost of homemade is time: weighing, mixing, and a tile for every color.
Can I just add stain to slip made from my clay?
Yes, and the result is a stained slip: much more clay, less color and no binder, so it brushes less smoothly and needs more coats for the same strength. A stained slip made from our clay is fine here once the studio team knows. Our Mason stains lesson covers it.
Can I use oxides instead of stains?
You can. Oxides give a more transparent, less even color than stains, and strong ones such as cobalt and copper need far less. Stains are the predictable choice. Oxides are an outside material here, so they are cleared with the studio team like everything else in the recipe.
Can I blend two stains?
Yes. Mason itself publishes blends, such as its 6004 Crimson made from 6003 and 6006. Weigh the blend as if it were one stain, write the ratio on the jar, and tile it.
How long does a batch keep?
The dry base keeps as long as it stays dry. A wet batch with gum in it can spoil: a homemade gum solution can go bad where a commercial one with a preservative does not, and versions made with starch have grown mold within days. Make what you will use, lid it and date it.
Glycerin or propylene glycol?
Either. The published recipe uses food grade propylene glycol, and many potters use vegetable glycerin in its place. Never automotive antifreeze.
Can I paint it on bisque?
It will stick, but less well. The layer cannot shrink with a body that has already shrunk, and gum on bisque can seal the surface against the clear. Here, it goes on raw clay only, the same as the bottles.
Will a recipe for another cone work at ours?
Treat it as a new recipe. The flux in an underglaze is tuned to a temperature, and a low fire one can bleed or run at cone 5½; one commercial blue that was nearly vitreous at cone 04 melted outright at cone 6. The base on this page is rated cone 6 to 10, close to our cone 5½, and still gets a tile.
Where to go next
How to Use Underglaze
The techniques, the house rules for the bottles on our wall, and the firing path.
Read it →Using Mason Stains
Stains in clay, slip, glaze and washes, with the loadings for each.
Read it →Buy Mason Stains by the Gram
The colors we sell, and a calculator for how much you need.
Pick a color →Making, Logging and Dialing in Test Tiles
The tile shapes, the numbering and the log that make a ladder of tiles worth firing.
Read it →A Beginner’s Guide to Mixing Your Own Glazes
The same scale, sieve and respirator, pointed at glaze.
Read it →Engobes in Pottery
The high clay cousin of underglaze, for changing the color of a whole pot.
Read it →Your color, on purpose
Every bottle of underglaze is a decision somebody else made about how much stain, how much clay and how much glass a color needs. Making your own hands that decision back to you, one color at a time. That is the whole appeal, and the whole job.
Start with one color you cannot buy, a small batch and a row of tiles. Bring the recipe and the fired tile to the studio team, and then come paint something with it.
Stain for color, clay to stick, frit and feldspar to grip, gum and glycerin to brush. Weigh it at home with a respirator on, tile it under your clear, and clear it with the studio team before it goes on a pot.
For why each ingredient is there, how to mix and test a batch, and the colors that misbehave, switch to the Comprehensive Version at the top of the page.
Which version would you like to print?
Videos come out as a labeled box with the title and channel to search for, since paper does not play them.