


A free resource · every video here belongs to somebody else
Incredible videos from incredible ceramic artists and potters.
Eight skills every potter has to learn. Twenty-four of the best free lessons on the internet, taught by fifteen makers who are better at this than we are.
Not one of them is ours. That is the entire point.
Zero Clay Hole videos below. We checked twice.Why a pottery studio built this
Almost every pottery video on the internet is somebody filming their own knees.
That is not a joke about anyone in particular. It is a camera angle problem, and it is everywhere. You cannot learn a hand skill from a video where you cannot see the hands.
Every week somebody in our studio says the same sentence. “I watched a video and I still cannot center.” Usually they watched a bad one. There are hundreds of thousands of pottery tutorials out there and most of them are shaky, dark, silent, sped up, or filmed from the one angle that hides the thing you needed to see.
So we went looking for the good ones.
We took the eight things people search for most while they are learning pottery. For each one we found lessons that actually teach: clear camera work, real teachers, hands you can see, and an explanation of why rather than just a demonstration of what. Then we wrote up what is in each video, who made it, who they are, and the one idea worth stealing from it.
Then we credited every single person, because they did the work and we did not.
We make pottery videos too. None of them are on this page. No Clay Hole footage, no Clay Hole techniques, no clever pivot at the end where it turns out the real lesson was us. If we had put our own videos here, this would be an ad wearing a resource costume, and you would have known within about nine seconds.
How we picked
Four rules, applied to every single one.
You can see the hands
Tight, lit, steady framing on the part that matters. If the clay is a beige smudge in the corner, it did not make the list.
A real teacher made it
Working potters, studio owners, art teachers, published authors. People who have taught this to a nervous human in a room, not just to a lens.
It explains why
Anyone can film a motion. The videos here tell you what the motion is doing to the clay, which is the part that transfers to your own hands.
It is genuinely free
No course funnel, no gated part two, no email wall. Click, watch, learn, go make something.
Wedging clay
Nobody takes up pottery because they are excited about wedging. It is the dishes of ceramics. But the wall that spirals out of control at three o’clock, the pot that cracks in the kiln for no reason anybody can explain, the lump that fights you the entire way up: a startling number of those started as clay that was never ready in the first place.
Everyone thinks wedging is about popping air bubbles. It is at least as much about even moisture, even stiffness, and getting the clay particles all pointing the same way. A lump that is wetter in the middle than at the edges will fight you the whole way up, and it will look completely fine sitting on the table.
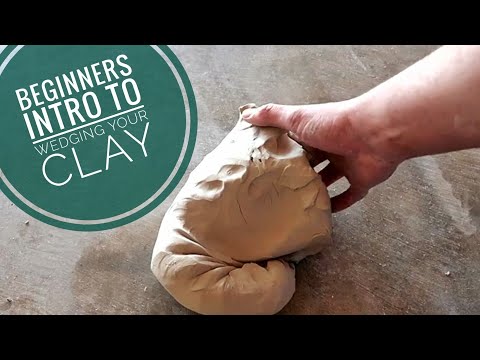
Donte starts exactly where a beginner actually starts: a bag of clay and no real idea what wedging is for. He covers what the motion is doing inside the clay, then the hand mechanics for somebody who has genuinely never done it before. It is the “why” video rather than the “watch my hands” video, which is why it sticks.
Donte is a working ceramics educator who has been teaching online since 2012, not a hobbyist with a tripod. He explains the reason behind each motion, and a reason is a thing your hands can remember three days later. He also co-hosts a ceramics podcast, which tells you how much of his life is spent explaining this stuff out loud.
Wedging is about even moisture at least as much as air. A lump that looks fine can still be unthrowable.
Spiral wedging is the technique where nearly every western tutorial is a shaky imitation of the real thing. Lin teaches it the way it is actually taught in the Taiwanese and Japanese tradition: one hand compressing, the other rotating the mass a few degrees per stroke, finishing in a bullet shape that drops straight onto the wheel head already aligned. Roughly half a million people have watched it, and it is the best dedicated spiral wedging lesson we found anywhere.
The textbook answer, from the organization that publishes Ceramics Monthly and Pottery Making Illustrated. Jeni Hansen Gard has an MFA in ceramics from Ohio State and residencies at the Archie Bray Foundation and Red Lodge Clay Center, so this is the version an art department would show you. If the other two feel like advice, this one feels like instruction.
Centering clay on the wheel
This is the wall. Everybody hits it. More people quit pottery here than at any other point, and almost always for the same reason: somebody told them to let the clay come to them, and nobody ever explained what that means in terms of actual hands on actual clay.
Beginners try to shove the clay into place in one heroic move. Cone it up, cone it down to even the clay out, then hold steady braced pressure and let the wheel do the work. Two things nobody tells you: brace your arms against your body or your thighs, because free-floating arms wobble and wobble is the whole problem, and run the wheel fast. Almost everybody centers too slowly, and slow is what lets the clay keep arguing.

The whole thing, start to finish. How to throw the clay down so it actually sticks, where to plant your elbows, what your body is doing while your hands do the visible work, and then coning up and coning down until the mass runs true. He also covers how to know you are centered rather than hoping you are, which is the part most tutorials skip entirely.
It is approaching two million views, and we think the camera work is the best in ceramics anywhere on the platform. Tight, lit, locked off, unhurried, narrated separately instead of shouted over a wheel. Most centering videos fail because you cannot see the hands. Here you can see everything, including his fingernails.
You are not pushing the clay into place. You are cycling it through a cone until it has nowhere left to go.
The one for people who can sort of center but fight the clay every single time. It is diagnostic rather than demonstrative: instead of showing you the correct motion again, it goes after the specific reasons your version of that motion is not working. If you have already watched five centering tutorials and still lose the middle, watch this one instead of a sixth.
Five named steps instead of a vibe. That framing is the whole value: when centering fails, and it will, you can point at which of the five broke instead of vaguely concluding that you are bad at pottery. Schmidt throws production pottery for coffee shops he owns, so this is somebody who centers clay for a living rather than for a video.
Opening up and pulling walls
The cylinder is the parent form. Mugs, vases, jars, tumblers, steins, tall skinny things you have no plan for: everything with a straight side comes out of this one shape. It is also where most people’s pots die, usually somewhere around the second pull, in a way that feels sudden and personal.
Speed. Walls tear because the hands travel up too fast, not because you are not strong enough. The other one is invisible: a floor you left too thick or too thin, which you cannot see and cannot fix once the pot is tall. Check it with a needle tool the second you finish opening, before the first pull. It takes three seconds and almost nobody does it.

A narrow, deliberate lesson about one motion. Where the pinch point sits between knuckle and fingertip, how much pressure to use, and the slow steady upward travel that thins a wall instead of tearing it in half. It is part of his beginner series, so it assumes you have already got the clay centered and opened.
Most throwing videos race through an entire pot in four minutes and leave you exactly as confused as you were. This one isolates the single motion that people actually fail at and spends the whole video on it. Gadsby trained in Kilkenny, apprenticed under Lisa Hammond, and spent six months in Mashiko, Japan under Ken Matsuzaki, and it shows in how little he rushes.
The pull is slow and continuous. Speed is what tears walls, not weakness.
The full lesson, centering through finished cylinder, in one sitting. Ford trained as a painter, came to clay in 2002 and went full-time in 2015, and she has since written two beginner books and built an online ceramics school. She teaches like somebody who has watched hundreds of beginners make the same mistake and has stopped being surprised by it.
Plain, patient and paced for somebody who is nervous. No music bed, no jump cuts hiding the hard bits, and no assumption that you already know what a rib is or where to put it. Marie names every tool as she picks it up, which sounds like a small thing until you are the person who does not know the names yet.
Throwing a bowl
A bowl is not a cylinder that gave up. It is its own form with its own logic, and the curve is decided in the first thirty seconds, down at the opening, long before you think you are shaping anything at all.
People open narrow and then try to push the wall outward late, when it is already thin and tired, and the whole thing goes floppy and sits down. Plenty of production potters do throw a thick low cylinder and flare it on the last pull, so this is not the only way. But for most beginners the useful way to think about it is that you are not adding a curve later, you are following one you set at the opening.

The Chinese in that title means, near enough, “demonstration of broken-down movements,” and that is precisely what this is. Lin takes the bowl apart into discrete, separately named hand positions instead of performing it as one flowing gesture you can admire but not copy. Then he puts the positions back together.
Lin has a practice going back to the early 1980s, an MFA in ceramics from the University of Iowa, and a whole channel built on decomposing motion into steps a person can name. If you learn by breaking things into parts rather than by watching a performance, he is your teacher. The bilingual titling and the numbered episodes also make his enormous back catalog unusually easy to dig through.
Bowl throwing is a sequence of hand positions, not one continuous motion. Learn the positions separately, then join them up.
This one teaches two different methods rather than insisting on one, which is rarer than it should be and genuinely useful. You get to find out which approach suits your hands instead of assuming there is a single correct way and that your failure to enjoy it is a character flaw. Same immaculate camera work as everything else on his channel.
No production sheen, no intro sequence, no personal brand. Just a working potter at a family pottery in the Yorkshire Dales making a bowl the way working potters make bowls, which is to say quickly and without ceremony. Their channel is one of the largest in pottery anywhere, built almost entirely on that unfussiness.
Trimming and foot rings
Trimming is the stage where a lump with a hole in it turns into an actual pot. It is also the stage that turns confident people into nervous people, because you can undo an hour of good work in roughly four seconds and there is no undo button on a wheel.
Three things. Clay at the wrong stiffness, which no amount of technique will rescue. Ten minutes wasted fiddling with concentric circles trying to get the pot centered upside down before you can even start cutting. And the four-second one: cutting straight through the floor, which happens because you never checked how thick the bottom was while you still could.
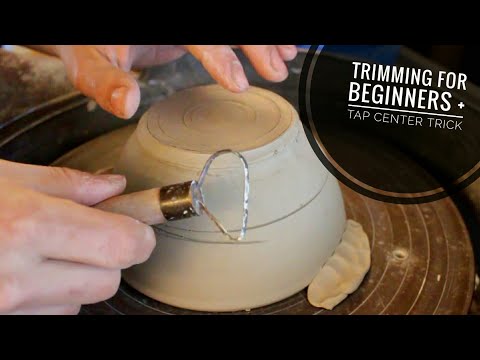
Donte covers trimming from the ground up and then teaches tap centering: the trick where you set the inverted pot spinning and tap it toward the middle by eye, rather than squinting at the rings on the wheel head and nudging it a millimeter at a time.
Tap centering is the single skill that separates people who dread trimming from people who quite enjoy it, and this is the clearest explanation of it we came across. It also directly answers the thing people are really searching for when they type “how to trim pottery,” which is usually not the cutting at all.
You do not measure a pot onto center. You spin it and tap it. It takes seconds once your eye learns it.
Judging when the clay is at the right stiffness, centering the inverted pot, securing it, then cutting the outside wall and the foot ring. The clay-condition part is the bit to pay attention to: if your trimmings are not peeling off in clean continuous ribbons, the pot is probably wrong rather than your hands. Assuming your loop is sharp, because a dull tool will crumble perfectly good clay and let you blame the pot for it.
The most literally on-topic video on this whole page if what you want is a foot ring. Simon Leach is the son of David Leach and the grandson of Bernard Leach, who is about as close as this craft gets to a founding figure in the west. The camera is from an earlier era of the internet. The hands are from a lineage. Watch it for the hands.
Pulling and attaching handles
The handle is the most photographed part of a mug and the part most likely to end up in the bottom of a kiln. Everyone films the pulling, because pulling looks fantastic. Almost nobody films the attaching, which is where handles actually fail.
Moisture mismatch. A wet handle on a leather-hard mug will pull itself apart at the seam as the two dry at different rates, and you will not find out until days later when the kiln tells you. The second one is drying too fast afterwards, which does the same thing more slowly.

Both halves of the job in one lesson. Pulling the handle off a carrot of clay with a wet hand, setting it aside to firm up, then scoring, slipping and seating it on the mug. There is an unnarrated ASMR twin of this video on the same channel. Take the narrated one, unless you already know how and just want to feel calm.
It is the rare handle video that treats attaching as seriously as pulling. Gadsby’s whole thing is the small stuff: no burrs, no smeared slip, no tabletop wood grain printed on the back of your handle where your thumb is going to sit forever.
Get the handle and the mug close to the same moisture level before they meet. That is most of the ballgame.
All attachment, no glamour. Scoring, slipping, seating, blending, and how to make the join survive drying and firing. Schmidt makes mugs commercially for coffee shops he owns, which means every handle he attaches has to survive strangers, dishwashers and years, and he has strong opinions accordingly.
The extruder route: faster, far more repeatable, and a completely legitimate way to make handles despite what a purist might tell you. Joe Thompson also thinks harder about handle ergonomics, leverage and where a finger actually wants to sit than almost anyone else writing about pottery, which makes this more interesting than a shortcut video has any right to be.
Hand building without a wheel
Most people walk into a pottery studio wanting the wheel. A genuinely surprising number of them end up in love with the other side of the room instead. Hand building has no queue, no centering, no minimum viable coordination and no ceiling. Some of the best work anybody makes never touches a wheel.
Joins. Almost every hand-built piece that cracks, cracks at a seam that was not scored, slipped and then properly compressed, or that joined two pieces of clay at different stiffnesses. After that it is uneven wall thickness and drying too fast, which splits corners and rims. None of it is about talent and all of it is about patience at the seams.

All three no-wheel methods in one sitting. Opening a ball of clay into a pinch pot, rolling and stacking coils into a wall, then rolling and joining slabs. It is a full orientation to the hand-building vocabulary rather than one project you follow along with and then have no idea what to do next.
Most channels make you hunt down three separate tutorials from three different people using three different sets of words. This does the entire grammar in one video, so you can find out which method you actually enjoy before you commit an evening to it. It is also the video that kept surfacing no matter which way we came at this topic, which usually means the internet has quietly decided it is the answer.
The three methods are not alternatives, they are a kit. Most real hand-built pieces use a pinched base, coiled walls and slab details all at once.
Coil fundamentals first, rolling even coils and joining them properly, and then fifteen ways to treat the coil as the design instead of as something to smooth away and hide. Karan Witham-Walsh has taught visual arts in a high school for over thirty years, so the scaffolding here is real teaching, not a vlog with a lesson attached.
Ann Ruel’s ten hard-won tips, plus downloadable templates, which is the sort of thing that quietly solves a problem you did not know had a solution. This is the one to watch once you have made a few things and started noticing that your slabs never quite meet where you want them to.
Glazing
Twenty minutes of glazing decides how twelve hours of throwing looks for the rest of the pot’s life. This is the stage where people who have been meticulous about everything else suddenly start winging it, usually because glazing happens at the end of a long day and the bucket is right there.
Thickness. Not the recipe, not the brand, not the color. The same glaze applied thin and applied thick is functionally two different glazes, and a huge share of disappointing results are a consistency problem wearing a color problem’s clothes.

A practical run through dipping, pouring and brushing, plus everything that surrounds them: waxing feet, cleaning up afterwards, and layering glazes to get combination effects. Schmidt shoots on real gear rather than a phone propped against a bucket, so the close-ups genuinely show what his hands are doing.
It is the most-watched glazing lesson we found, and Schmidt works with commercial bottled glazes, which is what most people reading this actually have on their shelf. Advice about mixing your own from raw materials is fascinating and completely useless when you own four jars from a craft shop.
Layering two glazes gives you results neither one makes alone, but the overlap is where runs start. Stop it an inch or so above the foot, and put a cookie under anything you are not sure about.
Sieving and preparing glaze buckets, checking consistency and specific gravity, waxing feet, and the mechanics of dipping and pouring without leaving fingerprints and drips all over the thing you just spent a week on. It is framed as reasoning rather than recipe, so the lesson transfers to glazes he is not using.
A full-length glazing class, given away free, from a potter who has been at this since 1994 and fires to cone 6 like most of us. Mea Rhee spent two decades as a graphic designer before going full-time in clay in 2010, and she has been on the cover of Pottery Making Illustrated. Set aside a proper evening for this one.
The order
If you only have one evening, go in this order.
Not because it is the only way, but because each one quietly assumes you have already sorted out the one before it. Skip step one and step two gets harder for reasons nobody will ever explain to you.
Kudos, and we mean it
The people who actually made this page.
We did not teach you a single thing on this page. They did, for free, on their own time, with their own gear, mostly while running a business that already takes all of their hours. Here is who they are. Go subscribe. Go buy their books. Go buy their pots.
And yes, Florian Gadsby comes up six times. We genuinely tried to spread it around. He kept winning.
Trained on the Design and Crafts Council of Ireland ceramics course in Kilkenny, where he was named the top student of his year. Apprenticed under Lisa Hammond, then spent six months in Mashiko, Japan under Ken Matsuzaki. Wrote a memoir about all of it in 2023. His shop drops sell out in minutes, and his camera work has quietly raised the standard for the entire craft online.
Bought a coffee shop called the Mocha Monkey at twenty-one in 2011 and grew it into several Minnesota locations that serve drinks in pottery he makes himself. Which means his mugs get tested by strangers, daily, forever. Very little of what he teaches is theoretical.
Trained under Yoshio Taylor, and started teaching online back in 2012 partly in response to public school art funding being cut. He also co-hosts a ceramics podcast. Of everyone here, he is the most consistently interested in explaining why a motion works rather than just performing it well.
Born in Taiwan, studying ceramics since the early 1980s, MFA from the University of Iowa, teaching around the Bay Area for decades. He titles everything in both English and Chinese and numbers his videos, which by now run well into the hundreds. We have not found anybody who breaks a hand motion into nameable pieces better than he does.
A painter first, in clay from 2002, full-time since 2015. Author of Pottery for Beginners and The Essential Pottery Notebook, and she runs her own online ceramics school. Teaches like somebody who has answered your exact question four hundred times and still finds it a reasonable question.
Son of David Leach, grandson of Bernard Leach, and the name on Simon Leach’s Pottery Handbook, which has been on studio shelves for years. He has been putting pottery on the internet since long before that was a normal thing for a potter to do, and there is a real argument that he showed everybody else it could be done.
A family pottery in the Dales and one of the largest pottery channels anywhere, built on years of short, unglamorous clips of a working potter doing the actual job. No intro music. No brand strategy. Hundreds of thousands of subscribers.
The video arm of the organization behind Ceramics Monthly and Pottery Making Illustrated. When you want the institutional answer, demonstrated by a credentialed maker, filmed properly, this is where it lives. Their wedging video features Jeni Hansen Gard, who has an MFA from Ohio State and residencies at the Archie Bray Foundation and Red Lodge Clay Center.
Spent about two decades as a graphic designer, started pottery classes in 1994, founded Good Elephant in 2002 and went full-time in 2010. Fires to cone 6, same as most of us. Has been on the cover of Pottery Making Illustrated. Also gives away full-length classes for nothing, which is a genuinely unusual thing to do.
Has taught high school visual arts for decades, at one of the largest high schools in Ohio. It shows in how the lessons are built: fundamentals first, then variations, then explicit permission to go play. Her coil video works as a reference you come back to rather than a thing you watch once.
Makes pottery tools and writes unusually rigorous long-form pieces about things like handle ergonomics: leverage, torque, where a finger actually wants to sit. It is rare to find somebody thinking this hard about a part of a mug most people eyeball and hope for the best on.
Diagnostic rather than demonstrative, which is a genuinely underserved kind of teaching. His centering video is built entirely around why your version of the motion is not working, instead of showing you the correct version one more time and hoping something clicks.
Makes hand building feel approachable and hands out free templates, which quietly removes one of the most annoying barriers to slab work: the bit where your shapes do not meet where you thought they would.
Patient, plainly shot beginner guides with no assumed knowledge and no rush. Marie names every tool as she reaches for it and says the quiet parts out loud, so when a faster video has left you somewhere behind minute four, this is the channel that catches you and starts again without making it weird.
A channel that keeps a low profile. We could not turn up a name to put here, which is a shame, because their pinch-coil-slab video is the clearest single orientation to hand building we found anywhere. Whoever you are: thank you, tell us your name and we will put it here properly.
Everything here is a public YouTube video, credited by name, linked to your channel, and played through YouTube’s own player so the view counts and the watch time go to you, not us. We wrote the summaries ourselves and we tried hard to get the details right. If we got something wrong about you, or you would simply rather not be on this page, get in touch and we will fix it or pull it the same day, no argument and no hard feelings.
Reasonable questions
Things people ask about learning pottery from videos.
Can you actually learn pottery from YouTube?
Partly, and further than most people expect. Video is excellent at showing you what a motion looks like, what the clay is supposed to do, and what stage comes next. Where it runs out is feedback. A video cannot tell you that your right elbow is floating, that you are leaning away from the wheel, or that the reason the wall keeps thinning on one side is a thing you are doing with your shoulder and cannot see. Watch the videos, absolutely. Then get somebody experienced to look at you for ten minutes, and you will save yourself about two months.
What is the best YouTube channel for learning pottery?
There is no single best one, and anybody who tells you otherwise is selling something. For camera work and calm, careful explanation, Florian Gadsby is hard to beat. For the reasoning behind a technique, Earth Nation Ceramics. For breaking a motion into named steps, Hsinchuen Lin. For practical production knowledge from somebody who sells what he makes, Jonthepotter. For patient beginner pacing, Pottery Crafters or Kara Leigh Ford. Most people end up with four or five channels rather than one.
How long does it take to learn to center clay?
Longer than the videos make it look and shorter than it feels while you are failing at it. Most people get their first genuinely centered lump somewhere in the first few sessions, and then spend a good while being able to do it only sometimes. That inconsistent stretch is normal and it is not a sign you lack some inborn pottery gene. Smaller amounts of clay are easier than large ones, so if you are struggling, drop to a pound or two and rebuild your confidence there.
Do I need a pottery wheel to start?
No, and skill 07 on this page is entirely about that. Pinch, coil and slab building need a table, some clay and a couple of cheap tools. Plenty of extremely good ceramic work never touches a wheel, and plenty of people who arrive obsessed with the wheel discover that hand building is the thing they actually love. You will still need access to a kiln eventually, though, and that is the part that is genuinely hard to do at home.
Why does my pot keep collapsing when I pull the walls?
Usually one of four things, roughly in order of likelihood. You are pulling too fast, so the wall tears instead of stretching. The clay is waterlogged, because you have been at it for twenty minutes and keep adding water. The wheel is spinning too quickly for the height you are at. Or it was never properly centered and you have been fighting a wobble the whole time without naming it. Skill 03 on this page goes after the first one specifically.
Why did my handle crack off in the kiln?
Almost always a moisture mismatch at the join, or drying too fast afterwards. If the handle is noticeably wetter than the mug when you attach it, the two shrink at different rates and the seam tears itself apart, sometimes days later. Get them to similar stiffness first, score and slip properly, blend the join thoroughly, and then dry the whole thing slowly under plastic. Skill 06 covers this.
Are all these videos free?
Every one of them. No course funnel, no gated second half, no email wall. That was one of our four selection rules. Several of these makers also sell courses, books and tools, and if one of these videos helps you, buying something from them is a very reasonable way to say thank you.
Why are there no Clay Hole videos on this page?
Because a list of the best pottery videos on the internet that happens to be topped by our own pottery videos is not a list, it is an advertisement, and you would have spotted it immediately. We do make videos, they live elsewhere on this site, and we left every single one of them off this page on purpose.
How did you choose these eight skills?
They are the eight things people most reliably search for when they are learning pottery, and they also happen to map to the order in which things go wrong. Wedging, centering, walls, bowls, trimming, handles, hand building, glazing. If you can do those eight, you can make almost anything else by combining them, and every advanced technique you will ever learn is bolted onto one of them.
One last thing, then go watch something
There is not one video of ours on this page. That was the whole brief.
No Clay Hole footage. No Clay Hole methods. No clever pivot at the end where it turns out the real lesson was us all along. We wrote the write-ups and nothing else. Twenty-four videos, fifteen makers, every one of them credited and linked, and every view goes to them.
We do run a 10,000 square foot community pottery studio in Draper, Utah, just south of Salt Lake City. So we will say exactly one self-interested sentence and then get out of your way: watching pottery videos is a strictly worse hobby than making pottery, and everything above works considerably better with somebody sitting next to you telling you your elbow is in the wrong place.
That is it. Go watch Florian center a lump of clay. It is genuinely lovely.
Every video on this page was checked against YouTube’s own records before publishing, so the titles and the channel credits are the real ones. View counts, where mentioned, are approximate and were accurate when this page was built in August 2026. Videos play through YouTube’s privacy-enhanced player, and that player does not load at all until you press play, so nothing is tracking you while you read. The Clay Hole is not affiliated with, sponsored by, or endorsed by any of the artists or channels featured here. We just think they are very good at this.