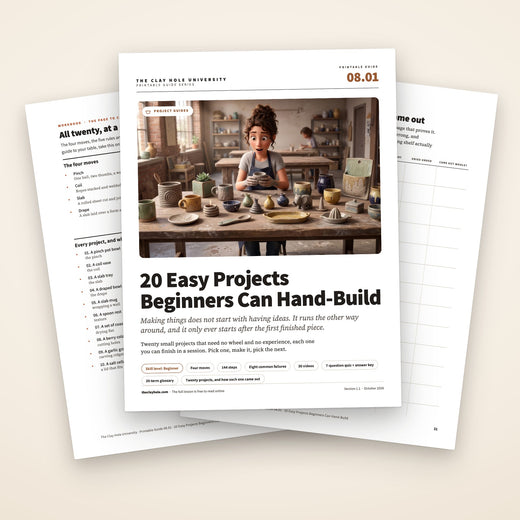
A table of finished hand-built pottery at The Clay Hole in Draper, Utah: bowls, mugs, trays and small dishes made without a wheel
Clay Hole University

20 easy projects beginners can hand-build

Twenty things you can make with a bag of clay, a table and your hands. No wheel at any point. Every one of them is ten steps or fewer, every step is a box you can tick with a wet finger, and every project has its own print button so you can carry one page to your table instead of all of them.

20projects, none of which need a wheel
144steps in total, all of them tickable
30videos from potters who teach for a living
Jump to a section

All twenty projects, 144 steps, the shared kit, the four moves and every video.

The short version

Pick one. Start it today.

Everything on this page comes down to four moves and five rules. Pinch, coil, slab, drape. Even thickness, scored joins, matched firmness, hollow anything thick, slow drying. That is the whole craft of hand-building, and you already have all of it.

The short version keeps the kit, the five rules, the four moves and the first four projects. The long version adds sixteen more projects, a troubleshooting list, questions we get asked, and twenty seven more videos. Switch at the top whenever you want it.

The only decision that matters today

Not which project is best. Which one you can start in the next ten minutes. The first one teaches you the second one, and by the fourth you stop asking this question altogether.

You are not behind

Nobody starts out knowing what to make

The most common thing a brand new potter says is not “I cannot do this.” It is “I do not know what to make.” Those sound similar and they are completely different problems. The second one has an answer, and the answer is this page.

Here is the part that is hard to believe in week one. Making things does not start with having ideas. It runs the other way around. You make a pinch pot because it is the only thing you know how to make, and somewhere in the middle of it your hands notice that the same motion would make a taller one, and a wider one, and one with a lip, and by the time it is drying you have three more you want to try.

That is not inspiration arriving. That is what having a skill feels like from the inside. It only ever shows up after the first piece, never before it.

The unflattering part

Your first few will not be good. Not because you lack talent, but because you have not yet built the small physical habits this page is a list of. Everyone who is good at this made a stack of bad ones first, and most of them still have the first one on a shelf somewhere.

So the goal for today is not a good pot. It is a finished one. Finishing teaches you things that stopping never does: how it dries, how it warps, what the glaze does to your edges, whether you actually like the shape. A finished bad pot is worth ten abandoned good ideas.

How this page is put together

Why you get a list and a video, not one or the other

Watching somebody make a pot is the fastest way to learn the timing. You see how fast their hands move, how wet the clay is, how long they wait. None of that survives in writing.

But watching is also where confidence outruns memory. It looks obvious while it is on the screen, and an hour later at your own table you can picture the whole thing and still not remember whether the handle goes on before or after the floor. That is not a failure of attention. Video runs at the presenter’s pace and gives you nothing to hold.

A numbered list is the opposite. It is slow, it is yours to read at whatever speed you want, and it is checkable. So you get both: the video for the timing and the feel, the list for the order. Two different hooks on the same piece of learning, which is why it sticks when either one alone does not.

How to actually use it

Watch the video once through without stopping. Then put your phone on the list, not the video, and work down it. Go back to the video only for the one move that did not make sense. That order beats pausing and scrubbing a video forty times with wet hands, and your phone stays a lot cleaner.

Before any of them

What every one of these needs

The same short list of tools covers all twenty, and five rules cover almost every way a hand-built piece fails. Read these once and most of the projects below stop having surprises in them.

The same tools cover all twenty. Five rules cover almost every way a hand-built piece fails.

The kit

A bag of clayAny of the eight clay bodies here will hand-build. Ask at the desk which one is running softest that week; a softer bag is kinder to a beginner’s hands.
A rolling pin or the slab rollerEither works. The slab roller is faster and more even, and it takes about a minute to learn.
Two thickness sticksAny two strips of the same thickness, laid either side of the clay. This is the whole secret to an even slab.
A needle toolFor cutting, scoring, trimming a rim and popping air bubbles.
A ribWood or rubber. It compresses a surface and firms a seam back up after a sponge has softened it.
A sponge and a cup of waterWater is a tool with a limit. Too much and every seam you built goes soft again.
Slip, or a scrap of clay and waterScoring plus slip is the only join that survives a kiln.
A board and a cotton sheetAlmost every drying problem on this page is solved by a board underneath and a sheet on top.

The five rules

  • Everything the same thicknessA quarter inch is the working default. Thick next to thin is where cracks start, and it is the single most common reason a first piece fails.
  • Score and slip every joinScratch both surfaces, wet both surfaces, press and hold. A join that was only pressed will come apart in the kiln, sometimes weeks later.
  • Match the firmnessTwo pieces joined at different stiffnesses pull apart as they dry. Handle and mug, lid and pot, foot and bowl: same firmness, always.
  • Hollow, or under an inchSolid clay thicker than about an inch traps water and can blow apart in a bisque firing. Hollow it out, or poke a hole into it.
  • Slow the outside downRims, edges and handles dry first because air reaches them first. A cotton sheet or a loose plastic bag evens that out.

One more thing that is not a rule

Clay that has not been fired is never wasted. Wedge a failure back into the bag and it is clay again. That single fact should change how hard you try things on this page.

Score and slip in under two minutesSlip, Score, and Blend (Basic Clay Techniques)Lisa’s Art and Makerspace
The shortest useful explanation of the only join that works. Two minutes, once, and you are done with this question.Watch on YouTube
Five ways to hide a seam5 tricks to make your seams disappear ✨Pottery to the People
Once the join holds, this is how it stops looking like a join.Watch on YouTube
Why joins fail, from a professionalTips for Making Strong Joints on Slab Built PotteryCeramic Arts Network
Eleven minutes on slab joints specifically, including the ones that survive a decade of dishwashers.Watch on YouTube
Ten hand-building habits worth stealingMy 10 Best Hand Building TipsLittle Street Pottery
A grab bag, and almost all of it is about preparation rather than technique.Watch on YouTube
Four techniques, twenty projects

The four moves

Every project below is one of these four, or two of them stuck together. There is no fifth move waiting for you later, and no order you are supposed to learn them in.

Every project below is one of these four, or two of them stuck together.

PinchOne ball of clay, two thumbs, and a wall you thin by feel. No tools, no rolling, nothing to set up. It is the slowest way to build something big and the fastest way to build something small.
CoilRopes of clay stacked and welded. Any shape, any height, and the only technique on this list with no size limit at all. Slower than the others, and the most forgiving of a wobbly hand.
SlabA rolled sheet, cut into pieces and joined. Everything flat, square or wrapped starts here. It is the technique that rewards patience: cut soft, join firm, dry flat.
DrapeA slab laid over or into a form and left to stiffen. It borrows a curve from something else, which is why it is the quickest route to a bowl that looks intentional.
All three, in under nine minutesBasics of Ceramic Handbuilding: Pinchpot, Coiling & Slab BuildingClay Corner Studio
Pinch, coil and slab demonstrated back to back. If you watch one video on this page, watch this one first.Watch on YouTube
The pinch, properlyHOW TO MAKE A PINCH POTDanny Bealer
Eight unhurried minutes on one pinch pot. He says out loud what his fingers are doing, which is the part that is normally missing.Watch on YouTube
The coil, properlyHOW TO MAKE A COIL POTDanny Bealer
Same teacher, same pace, on a coil pot. Watch what he does to the inside of every join.Watch on YouTube
A good slab with no rollerHow to make a PERFECT CLAY SLAB WITHOUT a rollerJonthepotter
Four minutes. This is the fix if your slabs come out thick in the middle.Watch on YouTube
Draping and slumpingHow To Use Hump And Slump Molds In PotteryBenjamin Cahoon
The two ways to use a form, and why the choice changes the rim.Watch on YouTube
Three ways to build the same vase3 Easy Ways to Make a Slab VaseThe Pottery Wheel
A useful demonstration that there is never one correct method, only the one that suits your hands today.Watch on YouTube
Start here

The first four

Four projects, four techniques. Between them they cover almost everything you will do with your hands for the next year. Make any one of them and the next nineteen get easier.

Four projects, four techniques. Pick one and start today.

Clay Hole University: 20 easy hand-built projects

A pinch pot bowl

Teaches: the pinchDone

Everybody’s first pot, and still the fastest way to get a real bowl out of a bag of clay. One pound, two thumbs, about twenty minutes. It is the only project on this page you can finish without picking up a single tool.

Seven steps0 of 7
Watch outA wall that thins at the rim and stays fat at the floor cracks where the two thicknesses meet. Pinch the bottom third first.
The whole process, start to finishHow to handbuild a CERAMIC BOWL - Pinch pot technique (the full process)Umi Ceramics
Eight minutes on one bowl, filmed close enough that you can see the wall change thickness under her fingers.Watch on YouTube
Clay Hole University: 20 easy hand-built projects

A coil vase

Teaches: the coilDone

Coils build any shape you can draw, at any height, with no wheel and no slab molds. Almost every ancient pot in every museum was made this way, which should tell you how forgiving it is.

Nine steps0 of 9
Watch outUnblended inside joins are where coil pots split. The outside can stay decorative. The inside has to be welded.
One coil pot, all the way throughHow to Make Easy Coil PotsThe Pottery Wheel
Half an hour, unhurried, on the pot most people build first. The joins are shown from the inside, which is the part that matters.Watch on YouTube
Four different ways to do it4 Coil Pottery TechniquesAndy Ward’s Ancient Pottery
The same idea, four ways, from a potter who builds the way people built before wheels existed. Good for deciding which one suits your hands.Watch on YouTube
Clay Hole University: 20 easy hand-built projects

A slab tray

Teaches: the slabDone

A flat rectangle with four walls. It teaches you to cut clean, join square and dry flat, and those three things carry every other project on this page.

Eight steps0 of 8
Watch outA tray dried right side up on a table traps water under the floor and warps. Flip it over.
The easiest slab project there isEASIEST Clay Project EVER! Slab Plates NO WHEEL NEEDED!Jonthepotter
Five minutes, one slab, a plate at the end of it. The cutting and the joining are identical to a tray.Watch on YouTube
Clay Hole University: 20 easy hand-built projects

A draped bowl

Teaches: the drapeDone

A slab laid over or into a form, left to stiffen, then lifted off as a bowl. It is the fastest good looking thing on this page, and the studio keeps more than 150 slab molds to drape over.

Eight steps0 of 8
Watch outA slab pressed into deep folds cracks at the folds every time. Pick a shallow mold for your first one.
One draped bowl, whole buildHow to Make a Slab Drape Mold Ceramic BowlDR Wilde Fire Art
Seventeen minutes on exactly this project, including how long to leave the slab on the form before it will let go.Watch on YouTube
Six for the kitchen

Things you will use every single day

Kitchen pieces are the best beginner projects because you find out immediately whether they work. A spoon rest that is too small annoys you every night. That is useful information.

Clay Hole University: 20 easy hand-built projects

A slab mug

Teaches: wrapping a wallDone

The project every beginner asks for on their first day. A wrapped wall, a floor and a handle. Nothing here is hard on its own, and doing all three in order is the whole lesson.

Nine steps0 of 9
Watch outA handle attached to a mug that is wetter or drier than the handle pops off in the kiln. Match the firmness first.
Three different ways to build the same mugHand Building Mugs - Three EASY Ways!Little Street Pottery
Wrapped, folded and pinched, side by side, so you can pick the one your hands like.Watch on YouTube
The wrapped method in detailHow to make a ceramic CUP: slab building techniqueUmi Ceramics
Quiet, close and unhurried. Watch the seam get blended twice, once inside and once out.Watch on YouTube
Clay Hole University: 20 easy hand-built projects

A spoon rest

Teaches: textureDone

Twenty minutes, one small slab, and something that lives next to your stove forever. It is also the cheapest place to find out what textures you actually like.

Six steps0 of 6
Watch outAnything under an inch thick that dries fast at the edges curls up. Slow the edges down, not the middle.
Five folded projects, one template5 EASY Folded Pottery Projects!! FREE Spoon Rest TEMPLATE!Little Street Pottery
A spoon rest is the first of them. The folding trick here also makes trays, dishes and a soap dish.Watch on YouTube
Clay Hole University: 20 easy hand-built projects

A set of coasters

Teaches: drying flatDone

Four flat squares. They look like the easiest thing on this page and they are the most likely to come out of the kiln warped, which makes them the best possible teacher.

Seven steps0 of 7
Watch outCoasters warp more than any other beginner project. Flat drying under weight is not a suggestion.
Rolling and drying flat thingsRolling and Drying Flat Coasters or TilesKaransPotsAndGlass
Four minutes on exactly this problem. If you only watch one video for coasters and tiles, watch this one.Watch on YouTube
Clay Hole University: 20 easy hand-built projects

A berry colander

Teaches: cutting holesDone

A bowl full of holes, which is more interesting than it sounds: every hole is a chance to weaken the wall, and getting them clean is a real skill you will use again on lanterns and planters.

Eight steps0 of 8
Watch outHoles cut while the clay is soft close back up as it dries. Leather-hard, every time.
A berry bowl from start to finishHow to make a BERRY BOWL!! Clay, Pottery, Ceramics Tutorial!Jonthepotter
The hole pattern, the foot, and how much clay to leave between holes so the wall still holds together.Watch on YouTube
Clay Hole University: 20 easy hand-built projects

A garlic grater plate

Teaches: carving ridgesDone

A small dish with teeth cut into the floor. It is a twenty minute project that people keep on the counter, and it is the first time most beginners cut clay rather than shaping it.

Seven steps0 of 7
Watch outGlaze fills ridges and turns a grater back into a dish. Wax resist is what saves it.
A grater plate, all the way throughHow to make a Ginger Grater // Garlic Grater // Pottery at Home DIYPottery to the People
Cutting the teeth, and how deep is deep enough. She makes a ginger grater; garlic is the same tool.Watch on YouTube
Clay Hole University: 20 easy hand-built projects

A salt cellar

Teaches: a lid that fitsDone

A small pot with a lid. Lids scare beginners and they should not: at this size, the only trick is drying the pot and the lid together so they shrink by the same amount.

Seven steps0 of 7
Watch outA lid dried apart from its pot never fits again. They have to shrink as one object.
Five small ones

Finishable in one sitting

Every one of these fits in your hand and gets done in under an hour. When you have thirty minutes and no plan, this is the group to open.

Clay Hole University: 20 easy hand-built projects

A ring dish

Teaches: a clean edgeDone

Thirty minutes, a scrap of slab, and the piece your friends will ask you to make again. Small pieces get held and looked at closely, so this is where edges start to matter.

Six steps0 of 6
Watch outA dish this small can dry out in a day. Do not leave it uncovered on a warm shelf.
Clay Hole University: 20 easy hand-built projects

A soap dish

Teaches: drainageDone

A tray that has to let water leave. Get the holes right and it lasts forever. Skip them and you have built a small pond with a bar of soap dissolving in it.

Seven steps0 of 7
Watch outA soap dish with no drainage is a soap soup bowl. The holes are the entire point of the object.
A leaf soap dish, whole buildDIY Leaf Soap Dish // Ceramic Soap Dish TutorialPottery to the People
A different shape from the one above, and a good look at how she keeps the drainage from weakening the floor.Watch on YouTube
Clay Hole University: 20 easy hand-built projects

A pen and brush cup

Teaches: a straight wallDone

A cylinder with a floor. No handle, no lid, no spout. It is the cheapest way to practice a seam that has to be invisible, and you will use that seam on every mug you ever make.

Six steps0 of 6
Watch outClay shrinks as it dries. Leave the form inside overnight and it will crack the wall open.
Clay Hole University: 20 easy hand-built projects

An incense holder

Teaches: one angled holeDone

A small tray with a hole in it. The whole project is one decision made correctly, which makes it a very satisfying twenty minutes.

Six steps0 of 6
Watch outA hole drilled straight down drops ash on the table. Angle it or it does not work.
Several holders in one sittingHand-Built Incense Holders (Handbuilding Pottery Tutorial)CeramicsbyJas
Slab, pinch and carved versions side by side, including how he keeps the hole from closing up in the glaze firing.Watch on YouTube
Clay Hole University: 20 easy hand-built projects

A little creature

Teaches: hollow formsDone

Two pinch pots stuck together and given a face. This is the project that turns a bad studio day around, and it teaches the single most important safety habit in hand-building.

Seven steps0 of 7
Watch outA sealed hollow form with no air hole can burst in a hot kiln and take its neighbors with it. One hole. Always.
Animal pinch pots, taught slowlyHow to Make Animal Pinch Pots with ClayMiss Linnea Lark
Made for people who have never touched clay. The joining and the air hole are covered properly, which is why it is here.Watch on YouTube
Five for plants, light and walls

Pieces with a job to do

These five all have a requirement built into them: water has to leave, light has to get out, a wall has to hold weight. Designing around a requirement is the next skill after making things.

Clay Hole University: 20 easy hand-built projects

A planter with a drainage hole

Teaches: planning for a jobDone

A pot that has to keep a plant alive. That single requirement changes the hole, the foot and the glazing, which makes it the first project on this page where you design before you build.

Eight steps0 of 8
Watch outOne small hole clogs within a season. Half an inch is the minimum, not the maximum.
Slab building a planterHow to slab-build a ceramic planterPottery Templates
Fourteen minutes, one planter, with the drainage and the foot treated as part of the design rather than an afterthought.Watch on YouTube
Clay Hole University: 20 easy hand-built projects

A hanging planter

Teaches: even wallsDone

The same pot, hung from three points. Every flaw in your wall thickness becomes a load-bearing problem, so this is the one where being even actually pays you back.

Seven steps0 of 7
Watch outA hole cut too close to the rim tears out under load. Half an inch down, at least.
A hanging planter, hand builtLori Phillips’ How to Make a Ceramic Hanging PlanterClayKing Uploads
Ten minutes on the hanging holes and the rim, which are the only two parts of this that are actually different from a normal pot.Watch on YouTube
Clay Hole University: 20 easy hand-built projects

A tealight lantern

Teaches: cutting into a wallDone

A box with light coming out of it. It is the most impressive thing on this page for the amount of skill it needs, and the only real trick is cutting before you assemble.

Seven steps0 of 7
Watch outToo many holes too close together and the walls sag before the seams have set.
A slab lantern, whole buildHOW TO MAKE A SLAB LANTERNDanny Bealer
Ten minutes. Watch the order he works in: cut flat, assemble second, clean last.Watch on YouTube
Clay Hole University: 20 easy hand-built projects

A textured wall tile

Teaches: flat and staying flatDone

One thick slab, pressed with whatever you can find, hung on a wall. Tiles are simple to make and genuinely hard to keep flat, and everything you learn here applies to plates.

Seven steps0 of 7
Watch outTiles warp and tiles crack, and both of those are drying problems rather than firing problems.
Twenty five ways to texture a slabThe 25 BEST Pottery Texture Tricks!!Little Street Pottery
A catalog rather than a tutorial. Watch it once and you will never again wonder what to press into a tile.Watch on YouTube
Clay Hole University: 20 easy hand-built projects

Ornaments and gift tags

Teaches: thin flat workDone

The fastest project here, and the one that makes twelve pieces out of one slab. It is also the most reliable way to fill a shelf while you decide what you actually want to make.

Seven steps0 of 7
Watch outA hole punched at leather-hard chips out. Punch it while the slab is still soft.
Ornaments, start to finish#6 How I make Ceramic Ornaments | Start to Finish | FREE TemplatesMargriet Kramer | Studio L
Cutting, holes, drying and firing thin flat shapes, from a potter who makes them by the hundred.Watch on YouTube
When it goes wrong

The failures you will actually meet

Eight things that happen to beginners, and what caused each one. None of them mean you are bad at this. They all mean something specific about thickness, water or time.

Three failures you will meet first, and what actually caused each one.

It cracked at a join

The join was pressed rather than scored and slipped, or the two pieces were at different firmnesses. Score deeper than feels necessary, slip both faces, and press until you see a little squeeze out.

It cracked across the floor

The floor was thicker than the wall, so the wall dried and shrank while the floor was still wet. Even thickness fixes it. So does drying upside down on a board.

It warped

It dried faster on one side than the other. Flat things go under a board with weight. Round things get turned daily. Nothing dries well on a warm shelf in a draft.

The rim went wavy

Too much water, or too much handling at the rim. Cut it level with a needle tool while it is soft and then leave it alone.

A handle fell off

Firmness mismatch, almost always. Let the handle stiffen to the same leather-hard as the mug before you attach it, and dry the finished mug slowly with the handle covered.

It blew up in the bisque

Trapped water or trapped air in a solid or sealed form. Hollow anything thicker than an inch, poke an air hole in every closed shape, and let pieces get properly bone dry.

The bottom stuck to the shelf

Glaze ran off the foot. Wipe the bottom half inch clean before you hand it in, every time, on every piece.

It looks like a beginner made it

It does, and so did everybody else’s. The fix is not skill, it is edges: soften every cut, level every rim, clean every seam. Careful finishing reads as skill long before skill arrives.

The part this page cannot do

Ask the person at the next table

Every project here was picked partly because it is common. That is not an accident. It means that on any given evening, several people in the building have already made the thing you are stuck on, and most of them made a bad one first.

Instructors in pink shirts and trade instructors in purple shirts are the official answer, and if one is free they are the fastest one. But they are not always free, and a member two tables over almost always is. Hand-builders in particular tend to be delighted to be asked, because hand-building gets less attention than the wheel and they have opinions saved up.

What to ask

Be specific and physical. “Is this thick enough?” gets you a useful answer in four seconds. “How do I get better at this?” does not. Hold the piece up, point at the part you are unsure about, and say what you were trying to do.

Questions we get asked

The ones that come up every week

Which one should I start with?

The pinch pot bowl, unless something else on this page is pulling at you harder. It needs no tools and no setup, and it gives you the feel of clay changing thickness under your fingers, which is the thing every other project is quietly built on.

How much clay does one of these take?

Most of them take under two pounds. A pinch pot is about one pound, a mug is one and a half, a tray is two to three depending on size. A 25 pound bag will make you a dozen of these with clay left over.

How thick should everything be?

A quarter inch is the default for walls, three eighths for trays and coasters, half an inch for wall tiles. When you are unsure, go slightly thicker and even, rather than thin and variable.

Do I have to use slab molds?

No. Draping is one of four techniques on this page and the other three need nothing but a table. The studio keeps more than 150 slab molds because they are fast and repeatable, not because they are required.

How long before I can glaze it?

It has to be bone dry, then bisque fired to cone 05, and bisque firings here are free every time. After that you can brush from over 650 glazes or dip in one of the seven dipping buckets. Glaze fires between cone 5 and cone 6.

What does it cost to fire?

Bisque is free. Glaze firing is five cents per cubic inch with a $4.80 minimum and a $600 cap, so most of the projects on this page land near the minimum. Staff load and unload every kiln.

Can I really do all of this without a wheel?

Yes. Every project here was chosen because it needs a table, a bag of clay and your hands. Nothing on this page touches a wheel at any point.

What if I get halfway through and it goes wrong?

Wedge it back up and start again, or leave it and start something else. Clay that has not been fired is not wasted, it is just clay again. That is the part beginners forget and it changes how the whole page reads.

The whole point

Do not quit. Start one.

The gap between somebody who makes pottery and somebody who wishes they made pottery is not talent and it is not tools. It is a first finished piece. Everything after that is momentum.

Pick the one on this page that made you think “oh, I could do that.” Do not pick the one you think you should do. Tick the steps as you go, get it onto a shelf, and let it dry. Then pick another one, and notice how much less of this page you needed the second time.

That is the whole method. Twenty projects is not a syllabus you have to finish. It is twenty different doors into the same room, and you only have to open one.

Twenty more ideas when you run out20 easy holiday GIFT ideas (beginner handbuilding)Pottery to the People
Half an hour of small hand-built projects. Worth saving for the evening when you have finished everything on this page and want the next twenty.Watch on YouTube