Pottery Date Night
 Bring All Your Friends Free Week
 Give a Month of Pottery
 Private Pottery Parties

 The Welcome Booklet
 Your First Ten Sessions
 The Pottery Process
 Finding the Studio
 Your Classes Never Expire
 The Four Tables
 Who’s Who
 The Rewards Program
 Flux Glazes
 The Calculators
 Kiln Tracker
 Holiday Kiln Deadlines

 Beginner’s Tool Set
 Fingernail Clippers
 Mayco Clay Mender
 Epoxy for Kintsugi
 Applicator Bottles
 Large Bead Rack
 Raku Workshop
 Nighttime Raku
 Horsehair and Feather Raku
 The Clay Hole T-Shirt
 Embroidered Crewneck
 Zip-Up Hoodie
 Pre-Made Bisqueware
 Glaze Catchers
 Kiln Cookies
 Clay Cubby Rental
 The Glaze Bible, Printed
 The Book of Molds, Printed
 Printable Pottery Guides
 Free Printable Trackers
 Gifts for Potters
 Christmas Pottery Ideas
 Mother’s Day Gift Ideas
 Pottery Date Night
 Studio Calendar
 2027 Studio Events
 What Should I Do Today?
 How to Throw on the Pottery Wheel
 How to Make a Pinch Pot
 How to Tap Center a Pot
 The Five Stages of Clay
 Is Pottery Hard to Learn?
 Pottery Wheel Practice Drills
 20 Easy Hand-Building Projects
 Everything That Sounds Wrong

 A Beautiful Piece, Every Time
 Slab Roller Tips
 Any Dish as a Slump Mold
 Slab Roller & Slab Mold Certification
 The Pottery Skill Tree
 Clay & Pottery Calculators
 Logging Your Pottery and Glazes
 The Pottery Dictionary
 Why Did My Pottery Do That?
 The Pottery Cone Chart
 Pottery Myths, Fact-Checked
 Is Handmade Pottery Food Safe?
 Incredible Ceramic Artist Videos
 How Dan Throws Giant Pots
 How to Dry Your Pottery
 The Pottery Wheel Introduction
 Pottery by Zodiac Sign
 Personality and the Pottery Wheel
 Pottery for Engineers
 ADHD, Hyperfocus, and Never Running Out
 Hobbies for Burnout
 Screen-Free Hobbies for Adults
 Every Addiction I Ever Had Lost to Art
 Functional Pottery Is Engineering
 How Do We Compare?
 Pottery Classes by City
 Every Pottery Studio in Utah
 Pottery in Draper
 Featured Members
 The Signature Wall
 Making Friends as an Adult Is Brutal
 The Clay Hole Commandments
 2027 Pottery Contests
 2027 Studio Parties
 Gallery Night

 Scream It Into the Void
 Destroy the Glaze Wall
 Daily Affirmation Cards
 Everything That Can Go Wrong
 Subscribe to Our Newsletters
 Contact The Clay Hole
 Corporate Team Building

 Glaze Combinations
 Glazes We Do Not Carry
 Making Glaze Test Tiles
 The Mega Glaze Tool
 How to Use the Mega Glaze Tool

 Glaze Brushing Techniques
 How to Use Underglaze
 How to Use Dipping Glazes
 Glaze Problems, Causes and Fixes
 The Dipping Glaze Guide

 Making a Glaze Catcher
 Fused or Sharp After Firing
 The Signature Wall
 His Viral Videos
 His Own Ceramics
 Meet Mud
Hand building · Any dish as a slump mold
Your kitchen is full of slab molds you already own.
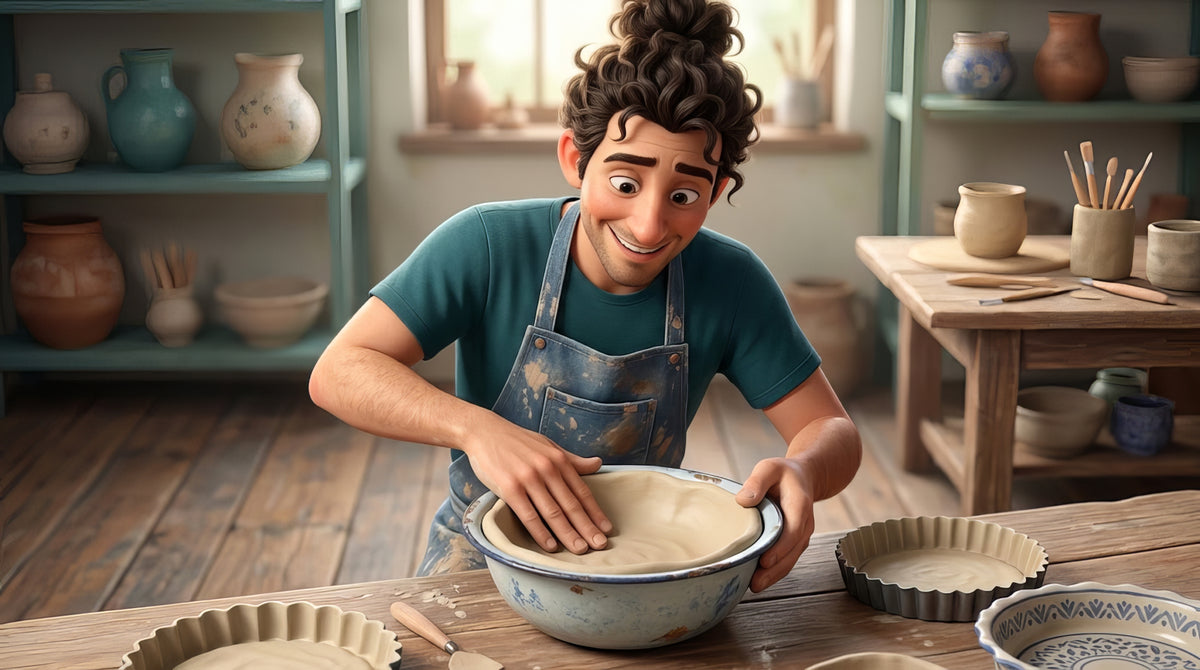
A mixing bowl, a pie dish, a plate, a baking tray. Any dish that is widest at the rim is a slump mold once there is plastic wrap between it and the clay, and a slab laid into it and left to settle becomes a bowl without a wheel or a certification.
This page walks it with a tick list at every step: which dish, the barrier, the slab, the settle, and the trim, plus the difference between clay inside a dish and clay over one, which is the difference between a bowl and a cracked one. Six fixes and five videos.
This is the short version: the dish, the wrap, the settle and the trim, each with a tick list. Slump against hump, the texture note and the questions are in the comprehensive version.
Read it, then watch it
Why this is written down and filmed, both.
A slump mold is three rules and one motion. The rules are which dish, what barrier, and when the clay comes out, and every failed kitchen-dish bowl broke one of the three. Rules go on the page. The motion is the settle: letting a slab find the curve on its own instead of pushing it there, which is the difference between a bowl and a creased one, and which you have to see somebody do. That is the videos.
Use both, in this order
Read the step. Watch the settle. Do it with the tick list open, on a shallow dish before a deep one. The page remembers your ticks.
The whole idea
A dish, plastic wrap, a slab, and patience.
Pick a dish that is widest at the rim, line it with plastic wrap, lay a slab in and let it settle on its own. Trim against the edge of the dish at leather hard. Clay inside a dish shrinks away from it; clay over an upturned dish shrinks onto it and cracks, so hump-molded pieces come off early.
The five-minute version
The whole technique in six moves.
If you already roll slabs and you just want the shape of it, this is the shape of it. Everything below is these six moves, slowed down and with the places they fail marked.
Before you roll anything
What you need on the table.
Six things, and the first two are in your kitchen. The sponge is the tool that makes this work; thumbs are the tool that makes it fail.
A dish that is widest at the rim, plastic wrap, a slab on a board, a soft sponge and a soft rib, and a fettling knife. That is all of it.
Step one
Pick a dish that is widest at the rim, and line it.
Hold the dish up and look at the profile. If the widest point is the rim, the clay can lift straight out and it is a slump mold. If the widest point is anywhere below the rim, a curled lip, a belly, a shoulder, the clay is trapped before it has even shrunk, and it is a dish. Shallow and wide is the easy first one: a plate, a pie dish, a wide bowl. Deep and steep folds.
Then the barrier, which is the rule people skip once and never again. Wet clay grips bare glass, ceramic, plastic and metal, and a slab left to dry in an unlined bowl is a slab you will chip out of that bowl. Plastic wrap, smoothed into the curve so there are no creases to print into the clay, is the standard. A thin cotton cloth works and leaves a faint weave. Cornstarch dusted on a smooth dish works for a shallow plate. The wrap also keeps the dish clean, which matters if it is going back in the cupboard.
Slump
The slab goes into the dish. The outside of the pot is smooth, the inside is what your hands and the rib did. As the clay dries it shrinks away from the dish, so it can stay in until leather hard and lift out without a fight. This is the safe one and the one to learn first.
Hump
The slab goes over the upturned dish. The inside of the pot is smooth, the outside is yours. As the clay dries it shrinks onto the dish, and if it is still there when it gets tight, it cracks. Hump-molded pieces come off at soft leather hard, the moment they hold their shape, and finish drying upside down on a board.
Step two
Roll the slab on a board, and let it lose its shine.
A quarter inch for a plate, three eighths for a bowl. A slab stretches where it is pushed, and a thin slab pushed into the deepest part of a curve comes out thin there and floppy everywhere. Roll it on a board or a sheet of canvas, compress both faces with a rib, and leave it on the board for ten minutes so the surface goes matte.
Cut it larger than the dish. A slab that just fits the rim ends up short once it settles into the curve, because the curve is longer than the flat. Two inches of margin all round is about right for a bowl. It gets trimmed off at the end, and it goes back in the reclaim.
If you want texture on the outside of a slump-molded piece, now is the moment, while the slab is flat: stamp it, roll it, press a leaf into it. The texture faces down into the dish, so it stays untouched while you work the inside. Our imprinting lesson is the whole method, and a textured slab in a salad bowl is one of the best first pots there is.
Step three
Lay it in and let it settle. Ease, never push.
Slide the slab off the board over the dish and let go. Its own weight takes it down into the curve. Give it a minute. Then, with a soft sponge, ease the slab into the parts of the curve it has not reached, working from the center outward, so the excess clay moves toward the rim where it will be trimmed instead of folding in the middle.
Pushing is how bowls go wrong. A thumb pressed into the bottom stretches the slab thin there. Fingers pressing the sides in from the edge fold the extra clay into creases. The sponge, held flat, pats the clay down without stretching it. If a fold starts, lift that part of the slab, smooth the fold flat with a fingertip, and lay it back down. A slab a shade softer than leather hard settles further before it needs help; a stiff slab wants a shallower dish.
Once it is down, compress the inside with a soft rib from the center out, then smooth it. Compression is what stops the bowl warping later, and it is the step that turns a slab in a dish into a pot. If it wants a foot, now is the time: a coil of the same clay, scored and slipped onto the base while the dish still holds the shape, blended on the inside of the ring. Our score and slip lesson covers the join.
Step four
Trim in the dish at leather hard, lift it out, dry it slowly.
The rim of the dish is the guide. When the clay has gone leather hard, run a fettling knife around the rim with the blade resting on the edge of the dish, and the excess falls away in one ring. Rasp lightly to level it. Then soften the edge with a damp sponge or a chamois so the rim is round rather than sharp.
Then it comes out. A slump-molded piece lifts straight out at leather hard, because it has shrunk a hair away from the dish; if it hesitates, a fingertip under one edge starts it. A hump-molded piece should already be off, at soft leather hard, because by now it would have cracked. Either way it finishes drying upside down on a board, rim down, so the rim and the base dry at the same rate and the bowl stays round. Loose plastic for the first day. Our drying lesson is the long version.
The dish goes back in the kitchen. Peel the wrap, rinse it, done. If the dish turns out to be a shape you love, Bill van Gilder’s video below shows how to make a clay copy of a found form. Dried and bisque fired, that copy is a permanent mold, so the salad bowl goes home and the slab mold stays on your shelf. That is plaster-free, which matters here, because wet plaster and plaster dust never come through our door. Our plaster slump mold lesson covers the plaster version for anyone with a garage to do it in.
Watch it done
Now watch five people do this five ways.
Watch this one, then go find a bowl.
None of these potters work here or know we exist. Between them they cover slump and hump, a literal salad bowl, a slab bowl start to finish, rims and the finish, and making a clay copy of a dish so it becomes a permanent slab mold. Nothing but the still frame loads until you press play.
Twelve minutes on hump and slump molds, into a dish and over a dish, with the strengths and drawbacks of each. The other four videos are in the comprehensive version.
When it goes wrong
Six ways it goes wrong, and what to do about each.
The three failures that happen on the first night.
Pick the one that looks like your bowl. The first three are the barrier, the direction and the settle. The last three are the slab, the rim and the dish itself.
Pick the one that looks like your bowl. These are the three that happen on the first night: the barrier, the direction and the settle.
The clay stuck to the dish and tore coming out
No barrier, or the wrap tore. Wet clay grips glass, ceramic and metal like glue.
Plastic wrap or a thin cloth over the dish every time, smoothed into the curve with no gaps. Take the piece out at leather hard, when it holds its shape and has shrunk a hair away from the dish.
Ease a fingertip or a soft rib under one edge and work round. If the slab is still soft, it may tear; if it does, roll it out and start again, because the first slab was already the wrong thickness for a rescue.
It cracked while drying over an upturned dish
A hump mold. Clay shrinks as it dries, and a slab draped over a bowl shrinks onto a bowl that does not shrink with it. Something has to give, and it is the clay.
Take a hump-molded piece off the moment it holds its own shape, soft leather hard, and finish drying it upside down on a board. A slump mold, clay inside the dish, never has this problem, because the clay shrinks away from the dish.
A hairline at leather hard can be scored, slipped and rubbed closed. If it split wide, it is a test tile.
The slab folded and creased going into the bowl
A flat slab pressed into a deep curve has more clay at the edge than the curve wants, and the extra folds. Deep dishes with steep sides do this every time; shallow dishes almost never.
Choose a shallow, wide dish for a first one. Lay the slab in and let it settle under its own weight before you touch it, then ease the excess out from the center with a soft sponge rather than pushing it in from the edge. A slab a little softer than leather hard folds less.
At soft clay, lift the folded area, smooth the fold flat with a fingertip and re-lay it. Small creases smooth out with a soft rib and a damp sponge from the inside.
The bowl came out thin, floppy and warped
The slab was too thin for the depth of the dish, or it was pressed hard into the curve so the clay stretched over the deepest part. A slab stretches where you push it.
Three eighths of an inch for a bowl, a quarter inch for a shallow plate. Let it settle rather than pressing, and compress the inside with a soft rib once it is down.
Rib the inside firmly at soft leather hard to compress what is there, and dry it slowly on the dish. It will be a light bowl rather than a strong one, which is a kind of bowl.
The rim is uneven and lumpy
It was trimmed while soft, so the knife dragged, or it was trimmed by eye without a guide. A rim cut freehand on a curve wanders.
Trim at leather hard with the piece still in the dish, running the knife along the rim of the dish as a guide. Then rasp lightly and soften the edge with a damp sponge or a chamois.
At leather hard, a rasp or a rib held flat takes the rim down to the lowest point, then a damp sponge softens it. At bone dry, wet sand it: keep the piece and the paper wet so nothing can go into the air. If you must sand it dry, that is outside, in an N95, never indoors and never in a shared studio.
The dish had an undercut and the piece would not come out at all
The dish is narrower at the top than somewhere below it, so the clay is trapped even before it shrinks. Any dish with a lip that curls inward is a trap.
Hold the dish up and look at the profile. If the widest point is the rim, it is a slump mold. If the widest point is below the rim, it is a dish.
Wait for leather hard, then flex the dish if it is plastic, or ease the piece out in a spiral if the undercut is slight. If it will not move, cut the piece out and keep the lesson.
How it works here
At The Clay Hole, your kitchen dish is welcome, and so are 248 slab molds.
This page is written for potters everywhere. A few things are specific to our building.
Three things to know here
Bring a dish from home as your own tool, wrap it, take it home again. The slab rollers and the 248 slab molds need the free slab rollers and slab molds certification; a hand-rolled slab and a kitchen bowl need nothing. Wet plaster and plaster dust never come through our door.
Your dish
A bowl from home is your own tool. Bring it, wrap it, use it, take it home. A dish left on a shared table becomes a shared dish. Label anything you leave on your shelf with your name and the date.
The slab room
Both slab rollers and all 248 slab molds are behind the free slab rollers and slab molds certification, about twenty-five minutes, once. The studio slab molds have no undercuts and release without wrap. Our slab molds lesson is the method for those.
No plaster
Wet plaster and plaster dust never come through our door. A chip of plaster in clay survives the firing, then takes water back out of the air, expands, and pops a crater out of the pot weeks or months later, on someone else’s shelf. If you want a permanent copy of a dish, cast it in clay and bisque it (the last video shows making the copy), or make the plaster version at home and keep it at home.
Firing
Bisque is cone 05 and free. The glaze firing is cone 5½ at five cents a cubic inch, with a flat $4.80 for anything 125 cubic inches or under. A wide shallow bowl is measured on its widest dimension, so a platter costs more than a mug of the same weight. Every piece goes in on a cookie with a naked bottom.
Questions people actually ask
The ones that come up every week.
What kind of dish works?
Anything wider at the rim than anywhere below it, so the clay can lift out: mixing bowls, salad bowls, plates, pie dishes, baking trays, lids, serving platters, plant saucers, hub caps. Glass, ceramic, plastic and metal all work with a barrier between. Anything with a lip that curls inward, or a shape narrower at the top than in the middle, is a trap.
Do I need plastic wrap?
Yes, or a thin cloth, or a dusting of cornstarch on a smooth dish. Wet clay grips a hard surface and will not let go, and plastic wrap is the difference between a bowl and a slab welded into a salad bowl. Smooth it into the curve so it does not leave creases in the clay.
Slump or hump?
Slump means the clay goes inside the dish; hump means it goes over an upturned dish. Slump is safer, because clay shrinks away from the dish as it dries and can stay in until leather hard. Hump has to come off early, because the clay shrinks onto the dish and cracks. Hump gives you a smooth inside; slump gives you a smooth outside. Start with slump.
How thick should the slab be?
A quarter inch for a shallow plate, three eighths for a bowl. Thinner slabs stretch over the deepest part of the curve and warp. Roll it on a board and carry the board to the dish rather than carrying the slab.
How do I get a foot on it?
A coil of the same clay, scored and slipped onto the base while the piece is soft leather hard and still supported in the dish, then blended on the inside of the ring. Or leave it footless and rasp the base flat, which is what most kitchen-dish bowls end up with. Our feet and foot rings lesson is the full method.
Can I use the dish for food again?
Yes. Clay is not toxic and it washes off. Plastic wrap keeps the dish clean in the first place. What you should not do is glaze or fire the dish, which nobody was going to do anyway.
Why does The Clay Hole have 248 slab molds if a bowl from home works?
Because a slab mold made for the job has no undercuts, releases without wrap, comes in shapes a kitchen does not, and lives on a shelf for the next person. The kitchen dish is the one you already own tonight. The slab room is the one that is better. Both are worth knowing, and the slab rollers and slab molds certification is twenty-five minutes, once.
Related lessons
Six lessons that sit next to this one.
Three to read next.
A slump-molded bowl is a slab, a shape and a foot. These are the pages for each.
That is the whole technique
Widest at the rim. Wrap it. Let it settle. Trim in the dish.
Your first kitchen-dish bowl will probably have one crease where you pushed instead of easing, and a rim you trimmed too early. That is normal, and the second one will not. Nobody needs a wheel to make a bowl they are proud of, and the proof is in your cupboard.
If you want slump against hump in full, the texture note, the clay-copy method and the answers to the questions everybody asks, switch to the comprehensive version at the top. Otherwise, go raid the kitchen.
Written for potters everywhere. Where our studio does things differently, the page says so.
Which version would you like to print?
Both print clean, with the videos turned into labeled boxes you can search for later.