Pottery Date Night
 Bring All Your Friends Free Week
 Give a Month of Pottery
 Private Pottery Parties

 The Welcome Booklet
 Your First Ten Sessions
 The Pottery Process
 Finding the Studio
 Your Classes Never Expire
 The Four Tables
 Who’s Who
 The Rewards Program
 Flux Glazes
 The Calculators
 Kiln Tracker
 Holiday Kiln Deadlines

 Beginner’s Tool Set
 Fingernail Clippers
 Mayco Clay Mender
 Epoxy for Kintsugi
 Applicator Bottles
 Large Bead Rack
 Raku Workshop
 Nighttime Raku
 Horsehair and Feather Raku
 The Clay Hole T-Shirt
 Embroidered Crewneck
 Zip-Up Hoodie
 Pre-Made Bisqueware
 Glaze Catchers
 Kiln Cookies
 Clay Cubby Rental
 The Glaze Bible, Printed
 The Book of Molds, Printed
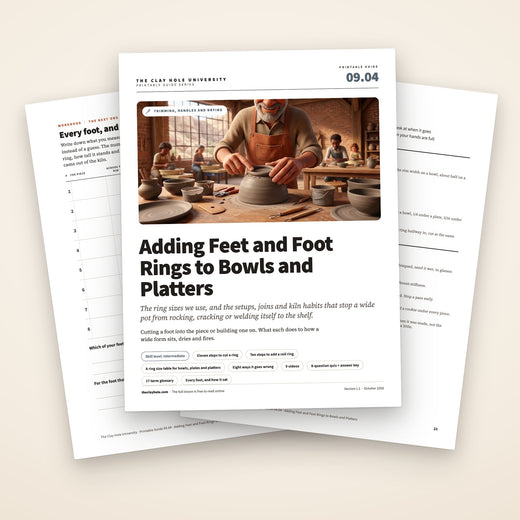
 Printable Pottery Guides
 Free Printable Trackers
 Gifts for Potters
 Christmas Pottery Ideas
 Mother’s Day Gift Ideas
 Pottery Date Night
 Studio Calendar
 2027 Studio Events
 What Should I Do Today?
 How to Throw on the Pottery Wheel
 How to Make a Pinch Pot
 How to Tap Center a Pot
 The Five Stages of Clay
 Is Pottery Hard to Learn?
 Pottery Wheel Practice Drills
 20 Easy Hand-Building Projects
 Everything That Sounds Wrong

 A Beautiful Piece, Every Time
 Slab Roller Tips
 Any Dish as a Slump Mold
 Slab Roller & Slab Mold Certification
 The Pottery Skill Tree
 Clay & Pottery Calculators
 Logging Your Pottery and Glazes
 The Pottery Dictionary
 Why Did My Pottery Do That?
 The Pottery Cone Chart
 Pottery Myths, Fact-Checked
 Is Handmade Pottery Food Safe?
 Incredible Ceramic Artist Videos
 How Dan Throws Giant Pots
 How to Dry Your Pottery
 The Pottery Wheel Introduction
 Pottery by Zodiac Sign
 Personality and the Pottery Wheel
 Pottery for Engineers
 ADHD, Hyperfocus, and Never Running Out
 Hobbies for Burnout
 Screen-Free Hobbies for Adults
 Every Addiction I Ever Had Lost to Art
 Functional Pottery Is Engineering
 How Do We Compare?
 Pottery Classes by City
 Every Pottery Studio in Utah
 Pottery in Draper
 Featured Members
 The Signature Wall
 Making Friends as an Adult Is Brutal
 The Clay Hole Commandments
 2027 Pottery Contests
 2027 Studio Parties
 Gallery Night

 Scream It Into the Void
 Destroy the Glaze Wall
 Daily Affirmation Cards
 Everything That Can Go Wrong
 Subscribe to Our Newsletters
 Contact The Clay Hole
 Corporate Team Building

 Glaze Combinations
 Glazes We Do Not Carry
 Making Glaze Test Tiles
 The Mega Glaze Tool
 How to Use the Mega Glaze Tool

 Glaze Brushing Techniques
 How to Use Underglaze
 How to Use Dipping Glazes
 Glaze Problems, Causes and Fixes
 The Dipping Glaze Guide

 Making a Glaze Catcher
 Fused or Sharp After Firing
 The Signature Wall
 His Viral Videos
 His Own Ceramics
 Meet Mud
Finishing Techniques
Feet and foot rings for bowls and platters.
A wide flat bottom is the one part of a pot that nothing else can rescue. It rocks on the table, it drags on the kiln shelf, and it makes a piece you worked hard on look like it stopped halfway. A foot is the fix. There are only two ways to get one, and this page is both of them, with the numbers we actually use and the lists you can prop your phone against.
Written for members of The Clay Hole, and useful to anybody with clay in front of them. All nine videos on this page belong to somebody else, all nine are free, and nothing from YouTube loads until you press play.
Written for members of The Clay Hole, and useful to anybody with clay in front of them. Both videos belong to somebody else, both are free, and nothing from YouTube loads until you press play.
Jump to a section
Which version would you like to print?
Videos come out as a labeled box with the title and channel to search for, since paper does not play them.
Start here
The whole idea, in one question.
A foot is a ring of clay that lifts the middle of the pot off the table. Every foot ever made was either cut out of clay that was already there or added as clay that was not. That is the entire subject.
So there is one question, and you ask it with the pot upside down in your hand: how much clay is under the floor right now? More than about three eighths of an inch, and you cut a ring out of it (about half an inch on a plate or platter). Less than that, and you add one. Nothing else about the piece changes the answer.
Bowls and platters are where this matters most, because they are wide and shallow, which means the base is a big flat disc. Big flat discs rock, warp, and sit their whole weight on a kiln shelf. A ring turns all of that into one thin circle you can control.
Before you touch it, check the stiffness
Press a thumbnail into the base. It should take the mark and stop, not sink. That is leather hard, and it is the only condition where any of this works. Too soft and the ring collapses under its own weight or the pot dents when you flip it. Too dry and it fights you, makes dust instead of ribbons, and chips at every edge you cut.
In a dry climate like ours, the mistake is almost always too dry. If it got away from you, wrap the piece in plastic with a damp towel touching only the base and give it a few hours. That works far more often than people expect.
Why this page exists
Read it, watch it, then keep the list open.
There are nine excellent videos further down this page and you should watch some of them. But video by itself is a strange way to learn a job you do with a tool in one hand, a wet pot in the other, and a wheel turning underneath.
Reading gives you the order.
Almost nothing in a video survives the trip to the wheel except a general impression. What you need standing over a leather hard platter is not inspiration, it is the sequence: mark it, level the outside, take the middle down, cut the walls, check the thickness. Words hold a sequence. Footage mostly holds a feeling.
A page has no playback bar.
A twenty minute video contains about ninety seconds of the thing you came for, and you cannot skim to them with a muddy thumb. A list is random access. Step five is one glance away. Minute 12:40 is a scrub, a mis-tap, an ad, and a lost place.
Watching teaches what words cannot.
How fast the tool travels. What a good ribbon sounds like coming off. How little pressure somebody skilled actually uses, and how still their arm is. Nobody has written those down successfully and we are not going to be the first. That is exactly what the videos are for.
The order we would actually suggest
Read the steps once, cold, before you sit down. Then watch one video all the way through. Then come back and keep the list open on your phone while you work, because that is the moment the words earn their keep.
If that sounds like too much page, hit Nutshell Version at the top. It is the same teaching with roughly three quarters of the words removed, it remembers your choice on every other page here, and it is the one built for a phone propped against a bucket.
There is no study behind this. It is what we watch happen on the studio floor. People who only watch tend to remember what a technique looked like. People who watch and read tend to remember what to do next.
The point of the thing
Six jobs, and only one of them is about looks.
People treat the foot as decoration, which is why it gets skipped. It is mostly structural, and on a wide piece it is doing more work than any other part of the form.
It gives you one circle to make flat.
A flat bottom has to be flat everywhere or it rocks. A ring only has to be flat along one thin band, and a thin band is something you can true with a rib, a scrape, or a sheet of wet sandpaper after the bisque. This is the single biggest reason a footed bowl sits better than a flat one.
It shrinks what touches the shelf.
Everything that touches a kiln shelf has to be bare clay, waxed and wiped. On a flat twelve inch platter that is a hundred and thirteen square inches of careful work. On a ring it is a strip you can wax in one turn of the brush, and there is far less area for a glaze run to find.
It lets the middle dry at its own pace.
A wide flat base sitting on a board dries from the edges inward, because the middle is sealed against the board and the rim is out in the air. That difference is what warps plates into saddles. Lift the middle and air gets underneath, so the whole floor dries closer to together.
It stops the middle dragging in the firing.
Clay does not slide across a kiln shelf as it shrinks, it grips and then releases in little jumps. A wide flat bottom fights the shelf across its whole face, and that fight can turn a floor that was already under stress from uneven drying into cracks radiating out of the middle. A narrow ring gives the fight far less to hold onto.
It takes weight out of the wrong place.
Most bowls are thrown with a base heavier than the walls, because that is how a base survives being thrown. Cutting a foot removes that surplus from the exact spot where it does nothing. A bowl that felt like a brick becomes a bowl somebody picks up twice.
And yes, it looks finished.
A raised foot puts a shadow line under the pot and a crisp edge where the eye expects one. It reads as a decision. It is also where your signature goes, which is not nothing, given how many unsigned pots are sitting on studio shelves right now.
Plenty of good pots have no foot at all
A flat bottom, cleaned up, beveled at the edge so it does not chip, and sanded true, wet, after the bisque, is a completely legitimate finish. Half the tableware in your kitchen is made that way. Skipping the foot is a choice, and it is a fine one.
What is not fine is skipping it by accident, on a fourteen inch platter, and then wondering why the middle cracked. The wider and flatter the piece, the more the foot stops being a style question and starts being the thing holding your work together.
The fork in the road
Two families, and one question that picks between them.
The anatomy, and the two ways to get one.
Every foot in the history of pottery was either carved out of surplus clay or stuck on afterwards. Wheel work leans one way, hand building leans the other, and both are available to both.

- The footprint. The narrow band that actually touches the table. Aim for a quarter to three eighths of an inch wide. Thinner chips, wider is just a flat bottom with a groove in it.
- The ring height. How far the middle is lifted. An eighth to a quarter of an inch does the whole structural job. Taller is a style choice, and every extra millimeter is another edge to chip.
- The arch. The air under the middle. This is the part doing the work: it is why the floor dries evenly and why the shelf has almost nothing to grip.
- What is left of the floor. The clay between the inside of the pot and the underside. Keep at least three sixteenths of an inch. This is where people trim through, and they do it in the last thirty seconds.
- The plane it stands on. Your table, and later the kiln shelf. The whole ring has to meet this line at once. If it meets it at three points, the pot rocks.
The question, and it is the only one
How much clay is under the floor right now? Turn the piece over and press. If there is more than about three eighths of an inch under the well on a bowl, or about half an inch on a plate or platter, cut a ring out of it: the floor has to keep at least three sixteenths, and the ring takes what is left, up to a quarter inch. If there is less, add one. That is the fork, and everything after this page is just doing whichever side you landed on properly.
A thrown bowl almost always lands on the cut side, because a base gets thrown thick on purpose. A slab plate, a pinch pot and a coil bowl almost always land on the add side, because their floors are the thickness of the slab and nothing more. Those are tendencies, not rules. You can throw a plate too thin to trim, and you can build a slab piece with a doubled base specifically so you can carve it later.
Family one: cut it out
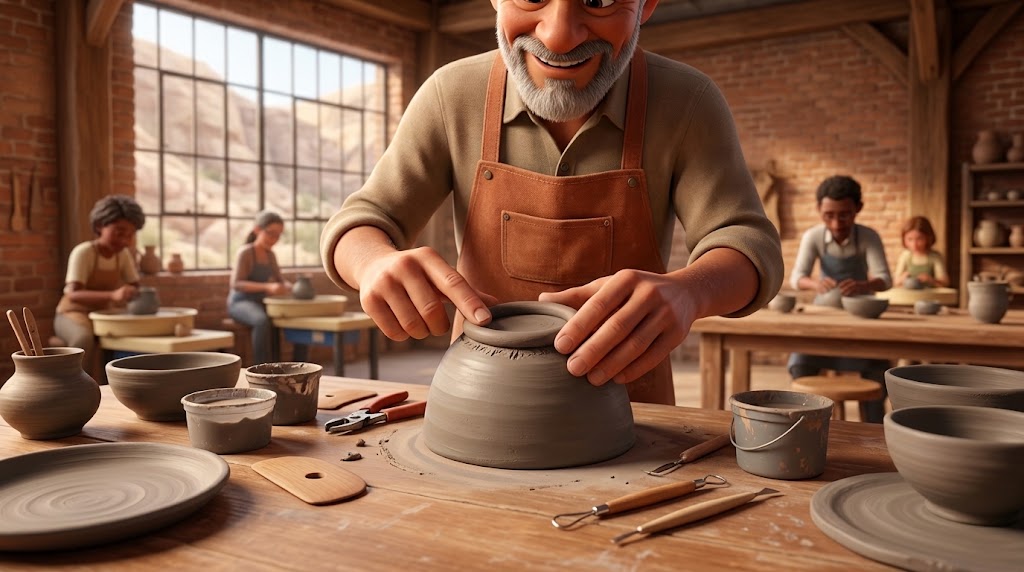
The pot goes back on the wheel upside down at leather hard, and a loop tool takes clay away until a ring is left standing. It is one piece of clay throughout, so there is no joint that can ever fail, and the profile can be as crisp as your tool.
The cost is that you had to leave the clay there in the first place, you have to get the pot back on center, and if you go too far there is a hole in the middle of your bowl and no way back.
Family two: add it on
A coil, a strip, a thrown ring or a set of separate feet gets scored, slipped and pressed onto a finished bottom. It works on anything, wheel thrown or hand built, and it lets you put a foot on a piece far too thin to carve.
The cost is a joint. Joints crack when the two pieces are at different moistures, when the scoring was decorative rather than real, or when the seam dries faster than everything around it. Every failure on this side of the fork is one of those three.
Before you cut anything
A wide pot does not want to sit still.
This is the part of trimming bowls and platters that nobody warns you about. The cutting is easy. Getting fourteen inches of leather hard clay centered and held is the actual skill.
A mug drops into a chuck and behaves. A platter has nothing to grip, will not fit most holders, and rests its entire weight on the one part you least want to damage, which is the rim. Three things solve it, in this order.
- Something soft under it. A thin sheet of foam, or a damp towel folded flat, laid on the wheel head or on a bat. It spreads the load off the rim and it stops the piece skating while you tap.
- Tap centering, not shoving. Spin it slowly, hold a finger still just off the edge, watch where it touches first, and tap the fat side inward with the flat of your hand. Small taps. It is a rhythm, and there is a whole page and a practice tool for it: tap centering, and a practice wheel that runs in your browser.
- Three wads to hold it. Three lumps of soft clay pressed onto the wheel head against the outside of the rim, evenly spaced. Not four, not two. Press them down onto the wheel, not into the pot, and check the piece has not moved before you start.
A deep bowl is a different problem and a nicer one: it can go rim-down into a chuck, which is a wide thrown cylinder you keep for the purpose. The rim has to be firm enough to carry the bowl's weight, and the chuck's own rim should be softened with a wrap of thin foam or a coil of soft clay so it does not print a line.
The ten second check that saves the whole pot
Before the first cut, spin it and hold a needle tool dead still against the outer edge, just barely touching. If the scratch it leaves goes all the way around, you are centered. If it draws an arc on one side only, you are not, and every ring you cut from here will be a crescent that gets thin on one side and cuts through on the other.
Do it again after you anchor the wads. Pressing wads on is the most common way to knock a centered piece back off center, and nobody ever checks twice.
Family one
Cutting a foot ring, in eleven steps.
Cutting a foot ring, in six steps.
Written for a bowl or a platter that has been sitting overnight and takes a thumbnail mark without sinking. Every step assumes the piece is upside down, centered and anchored.
Piece upside down, leather hard, centered on foam and held with three wads of soft clay.
-
Find the walls with your fingers first
Run a thumb up the outside and feel where the wall thickens into the base. That thickening is your budget. Everything you cut has to come out of it, and knowing where it starts stops you cutting a ring that hangs over nothing.
-
Level the outside edge before anything else
Spin it and skim the outer edge of the base until it runs true and the profile of the wall carries on cleanly to the table. On a wide piece this is often the biggest single improvement, and it has to happen before you mark the ring or your marks will not be concentric with the finished edge.
-
Mark both circles, and let the pot draw them
Hold a pencil or the tip of a needle tool still and let the turning pot scratch its own circle. Mark the outside of the ring first, then the inside. Do not draw freehand. The wheel is a better compass than you are.
-
Take the middle down in shallow passes
Work from the inside line toward the center with a loop tool, removing a little on each pass rather than digging a trench. Keep the tool at a shallow angle and let the corner of the loop do the cutting. If it is skipping and chattering, the clay is drier than it should be or the tool is dull.
-
Check the depth by feel, not by looking
Stop the wheel every few passes, rest a finger inside the bowl and a thumb in the trimmed hollow, and pinch. You are feeling for the floor thickness, and you want at least three sixteenths of an inch left. Looking at it tells you nothing at all, because the surface looks identical at a quarter inch and at a sixteenth.
-
Tap it and listen
A flick of a fingernail on the trimmed floor rings dull and low when there is plenty of clay and gets higher and tighter as it thins. It is a rough instrument, but it will tell you when something has gone thin in one spot, which is exactly the failure a pinch test can miss.
-
Cut the ring's two walls
Now define the ring itself: the outer wall down from the edge, the inner wall up from the hollow. Both slightly undercut, meaning the ring is a touch narrower where it meets the table than where it leaves the pot. That reads crisp, and it means a smear of glaze cannot bridge from the wall down onto the shelf.
-
Break the sharp corners
Take the smallest possible bevel off both bottom corners of the ring with the corner of a rib. A knife edge on the ring chips in the drying rack, chips in the bisque cart, chips going into the glaze bucket, and every one of those chips will be there forever after the firing.
-
Compress and smooth the whole underside
Run a soft rib or a barely damp sponge over the hollow and the ring. Trimming leaves a torn surface, and torn surfaces crack. This is thirty seconds and it is the difference between a clean underside and one covered in tool chatter you will still be looking at in two years.
-
Sign it now
You are already holding it upside down with a tool in your hand, and this is the last convenient moment there will ever be. Put the clay body on there too. In three weeks you will not remember which one it was, and it changes how every glaze behaves.
-
Set it down flat and dry it slowly, upside down
Check for rock on a flat board while it is still soft enough to fix. Then leave a wide piece upside down for the rest of its drying, so the rim and the floor lose water at closer to the same rate. Loosely tented with plastic for the first day if the studio is dry.
If your studio has a Giffin Grip, use it, and also learn without it
They are genuinely good and they save time. The standard size also tops out before a big platter does unless you add the jumbo platter extender, they cannot hold an out of round rim, and you will not always be standing next to one. The foam and three wads method works on everything, costs nothing, and is what people were doing for a very long time before the alternative existed.
The numbers
How wide should the ring be?
About a third of the way across on a bowl. About half on anything flat. That is the whole rule, and it is worth knowing by heart, because it is the only part of this you have to decide before you start cutting. Everything below is that rule with the arithmetic already done.
Why flat things go wider
A bowl carries its weight low and inward, so a small ring under it is stable and looks light. A plate carries its weight out at the edges. Put a small ring under a wide flat piece and two things happen: it tips when somebody sets a fork on the rim, and the unsupported middle sags in the firing.
Why taller is not better
An eighth to a quarter of an inch is doing the entire structural job. Past that you are buying shadow, and paying for it with a thinner, more fragile edge, a longer drying mismatch at the joint, and a ring that catches on every shelf edge between here and the kiln.
Three numbers that never change
Whatever the piece, the footprint stays a quarter to three eighths of an inch wide, the floor keeps at least three sixteenths under the well, and the ring gets a whisper of a bevel on both bottom corners. Those hold at four inches across and at twenty.
Foot ring sizer
A starting point, not a law
A 10 inch bowl
- Ring across, outside to outside3 1/2 to 4 1/2 in
- Ring height off the table1/8 to 1/4 in
- Footprint width1/4 to 3/8 in
- Floor left under the well3/16 in
- What that ring height adds to the glaze firingabout $0.94
A deep bowl carries a taller ring than a shallow one. If the ring ends up taller than it is wide, it will chip.
Firing is charged on the box the piece fits in, at five cents per cubic inch with a flat $4.80 for anything 125 cubic inches or under, so height only costs money once the box goes past that, which a wide piece does quickly. Bisque firings are free. You can check any piece against the real numbers on the Clay Hole calculators.
Over fourteen inches, think about a second ring
A big platter with one ring near the edge has a wide unsupported middle, and at cone 5½ an unsupported middle is a slow sag. A second, smaller ring about halfway in fixes it, costs about a minute of trimming, and is what people making very large flat work have always done.
The second ring has to be exactly the same height as the first, which is easier than it sounds: cut them both in the same session, on the same setup, without moving the piece.
Family two
Adding a foot that was never there.
Adding a foot, in eight steps.
This is the half of the subject the wheel pages skip, and it is the half that matters for slab plates, pinch bowls, coil work, and any thrown piece whose base came out thinner than you planned. Four ways, and one of them does most of the work.
For slab plates, pinch bowls, coil work, and any thrown piece whose base came out too thin to carve. Both pieces soft leather hard, and both at the same stiffness.
The coil ring
A rolled coil bent into a circle and joined onto the base. It is the workhorse, it takes about four minutes, it works on anything, and it is the one written out in full below. If you only ever learn one added foot, learn this one.
The strip ring
A straight strip cut from a slab, stood on edge, and joined into a circle. Gives you a ring with dead flat inside and outside faces instead of a rounded one, which suits a piece that is all straight lines. Roll the slab a shade thicker than you want, because standing it on edge and joining it will spread the bottom.
The thrown ring
Throw a short, wide, open cylinder, cut it off, and set it on the base. This is how you get a foot with a fully thrown profile on a hand built piece, and it is the trick that lets a slab platter look like it came off a wheel. Throw it slightly bigger than you need and trim it true after it is attached.
Separate feet
Three balls, three pulled nubs, three cut wedges. Three, not four: a three legged pot cannot rock, and a four legged one almost always does. Keep them inside the widest point of the piece so it does not tip, and if a foot is hollow, put a pinhole in it or it will pop in the firing.
The one rule underneath all four
Both pieces have to be the same stiffness. A soft coil on a firm base shrinks more than the base does, and the joint pulls itself apart during drying. A firm coil on a soft base dents the pot as you press it on. Make the foot at the same time you make the piece, wrap them together, and join them when they are both leather hard and both still cool to the touch.
Nearly every added foot that cracks off was a moisture mismatch. Not bad scoring, not bad slip. Moisture.
The coil ring, step by step
-
Mark the circle on the base first
Set the piece upside down and scratch the ring's line before you make anything. About a third of the way across on a bowl, about half on a plate. Marking first means the coil gets made to fit the line, instead of the line being wherever the coil happened to land.
-
Roll a coil of genuinely even thickness
Thicker than the finished footprint, because pressing it on will spread it. Roll with flat fingers moving outward along the coil, not with your palms in one spot, or you will get a rope that is fat in the middle. Then check it against the marked circle and cut both ends at matching diagonals, so the join has surface area instead of a butt seam.
-
Score both surfaces like you mean it
Real cross-hatching that you can feel with a fingernail, on the base and on the coil, over the full width of the contact. A few polite scratches are decoration. What you want is a rough surface with somewhere for the slip to go.
-
Slip it with the same clay
Thick slip made from the body you are working in, not water, and not slip from a different clay. Water alone lubricates the joint rather than gluing it. If you keep a jar of vinegar slip or magic water at your station, this is exactly what it is for.
-
Join the two ends of the coil first
Close the circle before you attach anything. Press the diagonals together, blend across the seam in both directions, and roll it lightly back to an even thickness. A ring joined after it is stuck down almost always has a weak spot at the seam, because you can only push against the pot.
-
Press it down all the way round, evenly
Set the ring onto the marked line and work around it with a thumb inside and a finger outside, pressing straight down rather than sideways. Go around twice at low pressure instead of once hard. You should see a small amount of slip squeeze out of the joint the whole way round, and if you do not, that section is not joined.
-
Blend the inside seam, leave the outside crisp
Run a small rounded tool around the inside corner and pull a little clay from the ring down onto the base, so there is a soft fillet rather than a sharp angle. Sharp inside corners are where cracks start. Leave the outside seam clean and unblended if you want a defined ring, or blend both if you want it to look like it grew there.
-
Flatten the top of the ring
Whatever face is now pointing up at you is the face the pot will stand on. Run a rib across it, or press the whole piece gently down onto a flat board, so it is a flat band and not a rounded rope. A rounded foot touches the table on a line thinner than a pencil lead and chips at the first knock.
-
Stand it up and check for rock
Onto a flat board, press gently, and rock it with a fingertip. Now is the only easy time to fix it. A little pressure straight down while it is still soft will settle the whole ring into one plane.
-
Wrap the joint and dry it slower than the rest
A strip of plastic laid over the foot for the first day or two. The seam has more surface area than anything around it, so left alone it dries first, shrinks first, and cracks. Then dry the whole piece upside down like any other wide form.
You can still put it on the wheel afterwards
An added ring does not have to stay handmade looking. Once the joint is firm, center the piece upside down and true the ring with a trimming tool exactly as if you had carved it. Two passes will take a slightly wobbly coil to a ring that reads as thrown, and it is the fastest way to make hand built work sit dead flat.
Watch somebody do it
Nine videos, from nine potters, none of them us.
Two videos, and these are the two we would pick.
Every one of these belongs to somebody else and every one is free. We have credited each channel by name, and nothing loads from YouTube until you press play.
One covers both ways of getting a foot onto a flat piece. The other is the added coil foot from start to finish. Both belong to somebody else, both are free.
The two to watch first
The two
Trimming and Throwing Feet on Plates
Chris Donald Ceramics
It shows both families of foot on plates: trimming extra clay off to leave a foot, and throwing a ring of extra clay onto the bottom to make one. At just over twenty five minutes it is the longest of the nine, so save it for when you have time to sit. Watch it on YouTube.
Ever Attached a Foot to a Plate? || Perfect Coil Foot Technique!
MW Ceramics
A five minute time lapse of a coil foot going onto a plate on the wheel, with a voiceover. The chapters in its description follow the job: scoring and attaching the coil, compressing and shaping it into a foot, then trimming it and cutting an undercut on the outside. Watch it on YouTube.
Cutting one out
10 Great Foot Ideas for Pottery!
Little Street Pottery
Ten ideas for the foot, one after another, and some of them are decorative rather than structural. Watch it before you settle on a plain ring: it is the quickest way to see that a foot is a design decision as well as a support. Watch it on YouTube.
Pottery Tutorial- Trimming a Foot on a Large Bowl
Pottery Plus
A big bowl, so the cut is easy to see, and the aim is a nice, defined foot. The description's one rule is that the clay has to be leather hard. Watch it on YouTube.
How to turn a foot ring on a bowl - Ridge Pottery
peter rooke
Douglas Phillips turns the foot of a leather hard bowl on the wheel at a Ridge Pottery summer school. The person who filmed it says these demonstrations are informal, often impromptu, with the demonstrator talking things through with the students, so expect a workshop rather than a polished tutorial. Watch it on YouTube.
Making , Trimming & Decorating a large pottery plate on the wheel
Ingleton Pottery
A largish platter, thrown, given a bit of foot ring trimming and decorated with slip, all in one video. The maker says in the description that the recording card ran out at the end of the throwing, so that part stops short, and that the wheel's slowest speed is a bit too fast for wide pots. Watch it on YouTube.
Adding one on
Adding a Foot (Throwing & Attaching Foot to Bowl)
Sarah Wells Rolland
Sarah Wells Rolland throws the foot as a short collar on a bat, cuts it off, trims the bowl to take it, then scores the base and attaches it. The chapters in the description follow those steps and end with torching and cleaning up. It is the route to a thrown foot on a piece whose own base is too thin to carve. Watch it on YouTube.
Suze Lindsay Shares Two Techniques for Handbuilt Feet
Ceramic Arts Network
An eight minute clip from a Ceramic Arts Network video on pouring vessels, in which Suze Lindsay shows two techniques for hand built feet. It is an excerpt, so it starts and stops inside a longer lesson. Watch it with the design question in mind: a hand built foot can be part of the shape of the pot, not only a way to make it stand. Watch it on YouTube.
When it is a big flat one
Trimming an Undercut Double Footring (for Hanging) on huge Platter on the Wheel- Part 2
KaransPotsAndGlass
The far end of the range: an eighteen pound platter, about twenty two inches across when wet and a little over eighteen after shrinking, trimmed with a double foot ring and an undercut so it can hang on a wall. The description says it is held in a Giffin Grip with a jumbo platter extender, and that this is part two of a pair, so the throwing is in an earlier video. Even if you never make one this size, the setup is worth the watch. Watch it on YouTube.
These are other people's videos, and that is deliberate
Nobody learns a physical skill from one pair of hands. If you want more of this, we keep a whole page of them: free pottery videos from some of the best potters on YouTube, sorted by skill and credited throughout.
Diagnosis
Eight ways this goes wrong, and what each one means.
Three ways this goes wrong.
Find the symptom, read the cause. Almost all of them are moisture or centering wearing a disguise.
The three that get people on the first night. Almost everything else is one of these wearing a disguise.
The added foot cracked away from the base
The two pieces were at different moistures when you joined them, so one shrank more than the other. Scoring and slip get blamed for this constantly and are almost never the cause. Make the foot when you make the pot, keep them wrapped together, and join them at the same stiffness.
It rocks
The ring is not in one plane. If it is still leather hard, press it down flat on a board. If it is bisqued, tape a sheet of coarse wet and dry sandpaper to a table and grind the foot on it in figure eights, wet and never dry, in safety glasses and an N95 or better. Do it before glazing, never after.
You trimmed straight through the floor
You ran out of clay, and you almost certainly ran out of it in the last thirty seconds, going one pass further than the pot had. Sometimes it is patchable while the clay is fresh. There is a whole page on the repair and on avoiding it next time: what to do about a bottom thrown too thin.
The ring is thick on one side and gone on the other
It was not centered, and it was not centered before you started. The needle tool check takes ten seconds and would have caught it. It is also worth checking again after you press the holding wads on, because pressing them on is what knocks it off.
A crack radiating out from the middle
That is an S crack, and it is a drying problem from when the piece was made, not a foot problem: a thin rim dries and shrinks first while a thick floor stays wet, and the rim pulls the floor apart. The foot ring only made it visible by removing the clay that was hiding it. The fix happens much earlier, and it helps a little to press the clay back together while it is still wet: compressing the floor and the rim.
The edges chipped before it even got fired
The ring was left with knife edges and no bevel, and bare clay corners do not survive a drying rack, a bisque cart and a glaze bucket. Take the tiniest bevel off both bottom corners while the piece is still leather hard. Ten seconds, permanently.
The middle of the platter sagged in the firing
Too much unsupported span. Either the ring was too small for the diameter, or the floor was left too thin, or both. On anything over about fourteen inches across, add a second ring halfway in and leave a genuinely thick floor.
It came out of the glaze firing stuck to the shelf
Glaze reached the ring. Either the wax did not cover the whole footprint plus a sliver up the outside, or a run found its way down. A ring with a proper undercut makes this much less likely, because a drip has to travel uphill to get there.
The last mile
The foot is the part the kiln shelf meets.
Everything you just cut or attached has one more job to do, weeks later, in a room you will not be standing in.
We fire glaze to cone 5½, which means cone 5 with a twelve minute hold at peak. At that temperature a glaze is genuinely molten, and anything molten that reaches a shelf welds to it. Bisque firings are free and are not the risk here. The glaze firing is.
Wax the whole footprint and a sliver up the outside. Not most of it. The waxing happens before you rinse the piece, because wax does not stick to wet bisqueware, and it has to be completely dry before the piece goes anywhere near a bucket. The full set of rules lives on the dipping glaze certification page.
An undercut ring is cheap insurance. If the outside face of the ring leans slightly inward toward the table, a run of glaze coming down the wall has to travel uphill to reach the shelf. It usually gives up and pools in the undercut instead, which is a mark on the bottom of your pot rather than a piece welded to studio equipment.
Put a kiln cookie or a glaze catcher under every piece, every time. A kiln cookie is a cheap disc of clay that takes the damage instead of the shelf. A glaze catcher does the same job for a piece you already know is going to move. Both are in the studio, both cost far less than a kiln shelf, and it is a studio rule with no exceptions: no cookie means no firing.
What a tall foot costs
Glaze firings are charged on the box the piece fits inside, at five cents per cubic inch. On a wide piece, height is expensive: three eighths of an inch of foot under a fourteen inch platter adds about $3.68 to that firing, because it is being multiplied by fourteen times fourteen.
That is not a reason to skip the foot. It is a reason to make the foot the height it needs to be rather than the height that looked good in somebody's video of a nine inch bowl.
Questions we actually get
The ones that come up at the trimming table.
Do bowls and platters actually need a foot ring?
Need is strong. A clean flat bottom with a beveled edge is a real finish and always has been. But the wider and flatter the piece, the more the foot stops being decoration and starts being structure, because it is what lets the middle dry evenly and stops the base fighting the kiln shelf as it shrinks. On a mug, take it or leave it. On a fourteen inch platter, we would put one on.
Can I add a foot to a piece that is already bone dry?
Realistically, no. Bone dry clay has stopped shrinking and fresh clay has not, so the new foot shrinks against a base that cannot move and the joint opens up, either while it dries or in the bisque. People do get away with it using paper clay or a commercial mender, and sometimes it holds, but ask a staff member before you put a mender through a firing at The Clay Hole. Plan the foot while the piece is leather hard and you will not need luck.
How do I trim a platter with no Giffin Grip and nothing to hold it?
Thin foam or a folded damp towel on the wheel head, the piece tapped onto center, and three wads of soft clay pressed onto the wheel head against the rim. That is the whole setup and it handles pieces most holders will not take. The needle tool check before the first cut is what makes it reliable.
Three feet or four?
Three. Three points define a plane, so a three footed pot physically cannot rock no matter how imprecisely you attached them. Four have to be within a hair of each other or the piece wobbles, and clay shrinks unevenly enough that they usually are not. Four looks right on some forms and it is your call, but you will be wet sanding.
Is an added foot weaker than a carved one?
A well made joint between two pieces of the same clay at the same moisture fires into a single piece of ceramic and is not meaningfully weaker. A badly made one is a crack waiting to be scheduled. So a carved foot has fewer ways to fail, and an added foot done properly is fine. Museums are full of very old pots with added feet still attached.
My foot ring looks fine but the pot still rocks. What now?
Fix it at bisque, before glazing. Tape coarse wet-dry sandpaper to a flat table, wet it, and move the piece over it in figure eights with even downward pressure until the rock disappears. Wet, so there is no dust, and wear safety glasses and an N95 or better anyway. After the glaze firing your options are a diamond pad, used wet and never dry, and a lot of patience.
Should the inside of the foot ring be glazed?
You can glaze the hollow inside the ring, and plenty of people do because it is easier to wipe clean. What must stay bare is the footprint itself, the band that touches the shelf, plus a little way up the outside for safety. If you are glazing right up to the ring on both sides, be more careful with the wax, not less.
How long after throwing can I trim a foot?
Overnight is the usual answer, but the clock is not what matters and in a dry climate like Utah's the clock lies. Judge it by the thumbnail: it should take a mark and stop. If you have to go back in two days, wrap it. A wide piece left uncovered overnight in this air is often past trimming by morning, which is the single most common reason a foot ring turns to dust instead of ribbons.
Plain English
Every term on this page, defined once.
Pottery has a lot of words for small things. None of these are complicated once somebody just tells you.
- Foot ring. A raised ring of clay on the bottom of a pot that lifts the middle off the table.
- Footprint. The flat band of the ring that actually makes contact with a surface.
- Undercut. An angle cut so the ring is slightly narrower at the table than where it leaves the pot.
- Leather hard. Firm enough to hold its shape and take a thumbnail mark without sinking. The condition all of this happens in.
- Trimming, or turning. Cutting clay away from a leather hard pot on the wheel. Both words mean the same thing.
- Chuck. A holder, usually a thrown cylinder, that a pot sits in upside down so you can trim the bottom.
- Wads. Lumps of soft clay pressed onto the wheel head to hold a piece in place while you trim it.
- Tap centering. Getting a pot on center by spinning it and tapping the fat side in, rather than pushing it around by hand.
- Score and slip. Roughening both surfaces and adding thick liquid clay before joining them. The standard way to attach anything to anything.
- Fillet. The soft rounded corner where two joined pieces meet, blended in so there is no sharp internal angle for a crack to start in.
- S crack. A crack across the floor of a pot, shaped roughly like an S, caused by the floor drying and shrinking unevenly against a thinner rim, which compressing the floor helps a little to prevent.
- Kiln cookie. A cheap disc of clay set under a piece so any glaze that runs damages the disc instead of the shelf.
- Cone 5½. How hot we fire glaze here, and it is a measure of heat and time together rather than temperature alone. In practice it is cone 5 with a twelve minute hold at the top.
One last thing
The foot is the part nobody sees and everybody feels.
That is the short version.
Nobody picks up a bowl and admires the underside. But they feel whether it sits still, whether it is heavier than it looks, and whether the edge is soft or sharp when it slides across a table. All three of those are decided in the four minutes you spend on the bottom, and it is the part of making a pot that people skip most and regret most.
Everything above is enough to go and put a foot on something tonight. If you want the reasoning behind it, the numbers for other sizes, the eight ways it goes wrong and seven more videos, switch to Comprehensive Version at the top of the page.
Go put one on something. A ring you cut slightly wrong still lifts the pot, still dries more evenly, and still teaches you where the clay was. A bottom you never touched teaches you nothing at all.
Trimming and turning, start to finish
The full trimming page: tools, timing, centering, and every shape that makes it harder.
Finish the bottom without flipping it
Bevels, cut foot lines and thrown rings, all done before the pot leaves the wheel.
Tap centering, plus a practice wheel
The rhythm that gets a wide pot true, and a browser tool to learn it on.
Blending coils properly
The joint skills underneath every added foot on this page, taught on their own.
Compressing the floor and the rim
How compressing the floor and the rim helps stop S cracks.
Clay Hole University
Free lessons on every part of making pottery, with quizzes if you want them.