Pottery Date Night
 Bring All Your Friends Free Week
 Give a Month of Pottery
 Private Pottery Parties

 The Welcome Booklet
 Your First Ten Sessions
 The Pottery Process
 Finding the Studio
 Your Classes Never Expire
 The Four Tables
 Who’s Who
 The Rewards Program
 Flux Glazes
 The Calculators
 Kiln Tracker
 Holiday Kiln Deadlines

 Beginner’s Tool Set
 Fingernail Clippers
 Mayco Clay Mender
 Epoxy for Kintsugi
 Applicator Bottles
 Large Bead Rack
 Raku Workshop
 Nighttime Raku
 Horsehair and Feather Raku
 The Clay Hole T-Shirt
 Embroidered Crewneck
 Zip-Up Hoodie
 Pre-Made Bisqueware
 Glaze Catchers
 Kiln Cookies
 Clay Cubby Rental
 The Glaze Bible, Printed
 The Book of Molds, Printed
 Printable Pottery Guides
 Free Printable Trackers
 Gifts for Potters
 Christmas Pottery Ideas
 Mother’s Day Gift Ideas
 Pottery Date Night
 Studio Calendar
 2027 Studio Events
 What Should I Do Today?
 How to Throw on the Pottery Wheel
 How to Make a Pinch Pot
 How to Tap Center a Pot
 The Five Stages of Clay
 Is Pottery Hard to Learn?
 Pottery Wheel Practice Drills
 20 Easy Hand-Building Projects
 Everything That Sounds Wrong

 A Beautiful Piece, Every Time
 Slab Roller Tips
 Any Dish as a Slump Mold
 Slab Roller & Slab Mold Certification
 The Pottery Skill Tree
 Clay & Pottery Calculators
 Logging Your Pottery and Glazes
 The Pottery Dictionary
 Why Did My Pottery Do That?
 The Pottery Cone Chart
 Pottery Myths, Fact-Checked
 Is Handmade Pottery Food Safe?
 Incredible Ceramic Artist Videos
 How Dan Throws Giant Pots
 How to Dry Your Pottery
 The Pottery Wheel Introduction
 Pottery by Zodiac Sign
 Personality and the Pottery Wheel
 Pottery for Engineers
 ADHD, Hyperfocus, and Never Running Out
 Hobbies for Burnout
 Screen-Free Hobbies for Adults
 Every Addiction I Ever Had Lost to Art
 Functional Pottery Is Engineering
 How Do We Compare?
 Pottery Classes by City
 Every Pottery Studio in Utah
 Pottery in Draper
 Featured Members
 The Signature Wall
 Making Friends as an Adult Is Brutal
 The Clay Hole Commandments
 2027 Pottery Contests
 2027 Studio Parties
 Gallery Night

 Scream It Into the Void
 Destroy the Glaze Wall
 Daily Affirmation Cards
 Everything That Can Go Wrong
 Subscribe to Our Newsletters
 Contact The Clay Hole
 Corporate Team Building

 Glaze Combinations
 Glazes We Do Not Carry
 Making Glaze Test Tiles
 The Mega Glaze Tool
 How to Use the Mega Glaze Tool

 Glaze Brushing Techniques
 How to Use Underglaze
 How to Use Dipping Glazes
 Glaze Problems, Causes and Fixes
 The Dipping Glaze Guide

 Making a Glaze Catcher
 Fused or Sharp After Firing
 The Signature Wall
 His Viral Videos
 His Own Ceramics
 Meet Mud
The Clay Hole guide to finishing on the wheel
Trim the whole pot before you ever take it off the wheel
There is a way to finish the bottom of a pot while it is still wet, still centered, and still stuck to the bat. Do it right and the piece comes off the wheel already done. No flipping it over two days later. No coils. No tapping it true. No cutting through the floor at 9:40 on a Thursday night.
It is a real technique, it is a few hundred years old, and almost nobody teaches it to beginners because trimming is easier to film. So here it is, written out, with the videos that show the parts words cannot.
There is a way to finish the bottom of a pot while it is still wet, still centered, and still stuck to the bat. One angled cut around the base, four seconds, and the piece comes off the wheel already done.
This is the short version, and it teaches one cut: the bevel, which is the one worth learning first. The comprehensive version has the other three routes, the cross sections, the checklists for your phone and every way this goes wrong.

01 · The idea
01 · The idea
You are not skipping the work. You are moving it.
Every thrown pot comes off the wheel with a pad of clay under the floor. That pad is not part of your design. It is there because you needed something to hold the pot down while you built it, and because the last inch of the outside curve is buried where your fingers cannot reach.
Trimming is one way to deal with that. You wait two days, flip the pot upside down, stick it back on the wheel, and cut the pad away with a loop tool. It works, it is a beautiful skill, and there is a whole guide to it on this site.
This page is the other way. You deal with the pad while the clay is still soft and the pot has never moved. Same problem, same result, different hour.
Every thrown pot comes off the wheel with a pad of clay under the floor. It is there because you needed something to hold the pot down while you built it. Trimming deals with that pad two days later, upside down. This page deals with it now, while the clay is soft and the pot has never moved.
The cut that does it is called a bevel. One angled pass around the base, coming in and down at about forty five degrees, taking the corner off the pad. The pot ends up standing on a smaller circle than its widest point, and that is the whole trick. Your eye reads that smaller circle as a foot.

-
1
Straight off the wheel
Half a pot, sliced down the middle. The dashed line is the center, the line underneath is the bat. The wall runs down and simply meets it, flaring out as it goes, so the widest point of the whole pot is the bit sitting on your table. It catches light badly and it chips.
-
2
The same pot, beveled
One angled cut takes that flare off. The wire now travels through less clay, so the underside comes out flatter too. The profile is exaggerated to read at this size; a real bevel is subtler than this.
What you get
A pot that is finished when it stops spinning
Cut the base, wire it off, set it on a board. That piece is done. Nothing else has to happen to it before it dries, which means nothing else can go wrong to it before it dries.
What you give up
The ability to remove weight later
This is the trade. Trimming takes clay off a firm pot, so it can rescue a heavy one. Finishing on the wheel only shapes what is already there. If the floor came out thick, it stays thick.
What it forces
Getting the floor right the first time
Which is the actual reason to learn it. Potters who finish on the wheel throw better floors, because they have to. There is no second appointment where the mistake gets fixed.
Where it fits
This does not replace trimming, and it cannot rescue a heavy pot. Trimming takes clay off a firm pot. Finishing on the wheel only shapes what is already there, so if the floor came out thick, it stays thick. That is the trade, and it is why the setup below matters more than the cut does.
The full trimming and turning guide is here. Most people in this building end up doing both, sorted by form.
Where it fits
This is not the better technique. It is a different one. Anyone who tells you real potters never trim is selling something, and anyone who tells you finishing on the wheel is a beginner shortcut has not tried to throw a foot ring. Most people in this building end up doing both, sorted by form: mugs and tumblers finished on the wheel, bowls and plates flipped and trimmed. Learn both and the pot decides, not your habits.
The full trimming and turning guide is here, and it is worth reading even if you never plan to flip a pot, because half of it is about why bottoms crack.
02 · Why this page exists in this shape
Reading it and watching it are two different kinds of learning, and this technique needs both
There are thousands of pottery videos. It is fair to ask why anybody would read a page instead. The answer is specific to this skill, and it is not a general argument for reading things.
The moves on this page are small and fast. A bevel is a four second cut. A foot line is two seconds. In a fourteen minute throwing video those four seconds arrive somewhere around minute eleven, usually while the camera is on the potter's face, usually with music over it, and they are gone before you know they were the part that mattered.
You can rewatch that clip six times and still not learn it, because you were never told what to look at. Nobody said "watch the angle." Nobody said "notice that the wheel slowed down." So you watch the whole thing again and come away with a feeling instead of a procedure.
Video is better at
Speed, angle, pressure and sound
- How fast the wheel is actually turning, which no sentence has ever conveyed.
- How hard a hand is braced and against what.
- The sound a clean cut makes versus a smeared one.
- How casual it looks when somebody good does it, which is oddly the most useful part.
All of that is physical, and physical things travel badly through words.
Text is better at
Order, names, and waiting for you
- The order of operations, which is where most attempts fall apart.
- Words like bevel, pad, undercut and compression. A vague bad feeling about a pot turns into a fixable problem the moment it has a name.
- Numbers. A video cannot tell you to leave a quarter inch of floor. A list can.
- Being available at the wheel with clay on your hands, at your speed, with nothing playing.
A video runs at its pace. A page waits at yours.
The part that actually convinced us to write it out
Watching somebody bevel a base beautifully is a very convincing experience. It is also a slightly dishonest one. You are watching a person who has done it ten thousand times, filmed at a flattering angle, with the four failed attempts cut out.
You come away certain you understood it. Then you sit down at a wheel and find out that what you retained was recognition, not recall. You would know a good bevel if you saw one. You cannot produce one, because you never learned the sequence, only the vibe.
Reading the sequence once, before or after, is what turns the vibe into something your hands can follow. So this page is written to be read, and every video on it is here because it shows something the words genuinely cannot.
The order we recommend: read this page through once without stopping. Watch two videos, not seven. Then keep the checklist open at the wheel and stop reading entirely. Three passes, three different jobs.
03 · Ninety percent of it happens first
02 · Ninety percent of it happens first
The setup decides whether any of this is going to work
Here is the thing nobody says out loud: the cut at the end is the easy part. If the floor is the right thickness and the clay under the wall is where it should be, all four routes on this page take under a minute. If the floor is wrong, none of them save you.
So the real skill is everything below, and it all happens in the first three minutes of the throw.
The cut at the end is the easy part. If the floor is the right thickness and there is clay left at the base to cut into, the bevel takes four seconds. If the floor is wrong, nothing on this page saves you. All five of these happen in the first three minutes of the throw.
-
1
Throw on a bat
You are about to cut most of the way through the clay holding your pot down, and then move the pot without touching the walls. On a bat you lift the bat instead.
-
2
Center it properly, and mean it
Every cut here is a circle. A circle cut around something that is not centered comes out as a spiral, and this time there is no trimming session later where you quietly fix it.
-
3
Measure the floor before you pull a single wall
Push a needle tool straight down through the floor until it touches the bat, pinch it where it enters the clay, pull it out and read the gap against your fingernail. About a quarter inch for a mug, closer to three eighths for a bowl. After the first pull it is too late to add clay back.
-
4
Compress the floor like you mean it
Rib or fingertips, from the center outward, three or four firm passes with the wheel turning. This is the only compression the floor is ever going to get, because you are not going to be trimming. A floor that never gets it pulls itself apart weeks later in the shape of an S.
-
5
Leave the pad, then finish everything else first
Do not let the outside of your wall run all the way down and meet the bat. Leave a small collar of clay flaring out at the base, maybe a quarter inch of it. That collar is the material the cut is made from.
Then do all your shaping, sponge the standing water out of the floor, and slow the wheel to about half your throwing speed. The base cut is the last thing that happens to the clay.
The whole toolkit is a needle tool, a wooden knife, a rib and a cut-off wire. Every one of those is in a basic beginner set, and none of them has to be sharp. The ones we actually recommend are on the helpful pottery items page.
Before the pot is even a pot
-
1
Throw on a bat
Not compulsory, but it turns the hardest part of this into a non-event. You are going to cut most of the way through the clay holding your pot down, and then you have to get the pot somewhere else without touching the walls. On a bat you lift the bat.
-
2
Center it properly, and mean it
An off-center pot gets an off-center bevel, and this time there is no trimming session where you quietly fix it. Every cut on this page is a circle, and a circle cut around something that is not centered comes out as a spiral.
-
3
Open to the depth you want, then stop
Opening deeper than you meant to is how floors get thin, and a thin floor is the one failure this technique cannot absorb. Go shallow, measure, then go deeper if you have room.
-
4
Measure the floor with a needle tool
Push the needle straight down through the floor until it touches the bat. Pinch the needle where it enters the clay, pull it out, and read the gap against your fingernail. Do this before you pull a single wall, because after the first pull it is too late to add clay back.
-
5
Compress the floor like you mean it
Rib or fingertips, from the center outward, three or four firm passes with the wheel turning. Opening a pot drags the clay particles outward and leaves them pointing the wrong way, and a floor that is never compressed pulls itself apart weeks later in the shape of an S.
This step matters more here than anywhere else on this site, because trimming is where most people accidentally get a second chance at it, and you are not going to be trimming.
-
6
Leave the pad
Do not let the outside of your wall run all the way down and meet the bat. Leave a small collar of clay flaring out at the base, maybe a quarter inch of it. That collar is the material every cut on this page is made from. Throw it away by accident and there is nothing left to shape.
Then throw the pot, and finish in this order
-
7
Do all your shaping first
Pulls, curves, collaring, the final rib pass on the outside. Every one of those moves runs down the outside of the pot, and any of them will erase a bevel you cut too early. The base cut is the last thing that happens to the clay.
-
8
Sponge the standing water out of the floor
Water sitting in the bottom of a pot for ten minutes soaks straight into the exact clay you are about to rely on to hold the shape of a cut edge. Get it out with a sponge on a stick before you cut anything, and wipe the outside of the pad too.
-
9
Slow the wheel down
Not to a crawl. Pulling walls wants speed; cutting wants steadiness. Somewhere around half of your throwing speed is where a wooden tool takes a clean continuous curl instead of chattering or grabbing.
-
10
Brace both hands together
Tool hand held by the other hand, both of them resting on the splash pan or the wheel head. The tool and the pot want to behave like one object. Anything held out in the air is going to wobble at exactly the frequency that leaves ridges.
How thick, roughly
Mugs, cups and tumblers
About a quarter inch of floor, measured with the needle tool. Roughly the thickness of the wall at its base. A mug is judged by picking it up, and this is the number that decides how it feels.
How thick, roughly
Bowls and anything wide
Closer to three eighths. Wide flat floors are the most crack-prone clay in ceramics and they want a little more to hold themselves together while they shrink.
How thick, roughly
Anything getting a thrown foot ring
Deliberately generous, around three quarters of an inch. You are going to cut a recess up into that clay, so it has to be there to begin with. This is the one time thick is correct.
The whole toolkit
A needle tool, a wooden knife, a rib with a decent corner on it, and a cut-off wire. That is the entire list. Every one of those is in a basic beginner tool set, which is the quiet argument for learning this early: it needs nothing you do not already own, and nothing that has to be sharp.
What your Level opens up in the studio, tool by tool, is laid out on the membership levels page. If you are shopping for your own, the ones we actually recommend are on the helpful pottery items page.
04 · The menu
There are four routes, and they are not equally hard
People talk about this like it is one technique. It is four, they take between two seconds and about ten minutes, and three of them are genuinely easy. Start at the top of this list and work down over a year.
The bevel
What it is. One angled cut around the base, coming in and down at roughly forty five degrees, taking the corner off the pad.
What it gives you. A clean shadow line at the bottom of the pot, a wire cut that goes through less clay, and on a mug, an edge that sheds the last drip instead of holding it.
Time. Four seconds.
Learn it on. Everything. This one is not optional. If you only take one thing off this page, it is this.
The cut foot line
What it is. A narrow groove cut into the pad just outside the wall, then a bevel taken from that groove outward and down.
What it gives you. A visible step. The pot reads as footed, with a crisp line and a shadow under it, even though the underside is still flat.
Time. Fifteen seconds.
Learn it on. Cups, tumblers, small bowls, anything you want to look deliberate on a shelf.
The thrown foot ring
What it is. A real recessed foot, cut up into a deliberately thick pad with a wooden tool, usually after the pot has firmed for an hour on its bat and gone straight back on the wheel.
What it gives you. The same result trimming gives you, without the pot ever being flipped, moved or re-centered.
Time. Several minutes, plus the wait.
Learn it on. Wide open bowls and plates, where a tool can actually reach under the edge.
The honest flat bottom
What it is. No foot at all. Compress the floor properly, soften the outside corner with a rib, wire it off cleanly, and let the wire cut be the finish.
What it gives you. A flat-bottomed pot, which is most of the pottery that has ever existed and all of the pottery in your kitchen cupboard.
Time. Two seconds.
Learn it on. Plates, wide bowls, anything that has to sit dead flat, and anything you are making forty of.
From Dan
Learn the bevel before you learn anything else in this building. I am serious about that. It costs four seconds, it works on every form, and it is the difference between a pot that looks like it stopped and a pot that looks like it was finished.
Most people I watch fall in love with route C first, because a thrown foot ring is the impressive one. Then they spend two months failing at it and never learn the cut that would have improved every single pot they made in the meantime. Do it in order.
05 · What you are actually making
Four bottoms, sliced down the middle
Each drawing is one half of a pot, cut vertically through the center. The dashed line on the left of each is the middle of the pot. The line underneath is the bat. The terracotta edge is the part you cut.

-
1
Straight off the wheel, untouched
The wall runs down and simply meets the bat. There is a slight flare at the bottom because clay pushes outward when you press it, and that flare is the widest point of the whole pot. It catches light badly, it chips, and it is the thing that makes a beginner mug look like a beginner mug.
-
2
Route A, the bevel
One angled cut takes that flare off. The pot now touches the table on a smaller circle than its widest point, which is what your eye reads as a foot. The wire also has less clay to travel through, so the cut underneath comes out flatter.
-
3
Route B, the cut foot line
A groove cut in above the bevel leaves a distinct step. There is now a shoulder, a short vertical face below it, and a bevel under that. Three surfaces where there used to be one, and a shadow line running all the way around. The base here was thrown thicker on purpose, with a soft curve inside where the wall meets the floor. The groove comes out of that extra clay, not out of the wall.
-
4
Route C, the thrown foot ring
The pad was left thick on purpose, and a recess has been cut up into it. What is left standing is a real ring, and the pot only touches the table on that ring. Same profile a trimmed pot has. The pot just never left the bat to get it.
Profiles are exaggerated so the differences read at this size; a real bevel is subtler than drawing 2 makes it look. Route D, the honest flat bottom, is drawing 1 with a compressed floor and a softened corner, which is why it does not get its own picture.
06 · The actual moves
03 · The actual moves
How each route is done, in order
The bevel, in six steps
All four assume you have already done section 03. Shaping finished, water sponged out, wheel slowed down, both hands braced. If any of that is missing, go back, because none of these steps work on a pot that is still wet and still moving.
This assumes the setup above is done. Shaping finished, water sponged out, wheel slowed down, both hands braced together and resting on the splash pan. The tool and the pot want to behave like one object, and anything held out in the air is going to wobble at exactly the frequency that leaves ridges.
-
1
Wooden tool, angle set in the air first
A wooden knife or the pointed end of a wooden modeling tool. Wood pushes soft clay less than steel does and leaves a matte cut rather than a smeared one. Set it at about forty five degrees, tip pointing down and inward toward the center of the bat, a couple of inches clear of the pot. Adjusting the angle once the tool is already in the clay is what produces a scooped bevel instead of a flat one.
-
2
Come in from the outside, slowly
Move in until the tip touches, then keep pushing at the same steady rate. Do not chase the clay. Let the wheel bring it to you. A ribbon should start peeling off almost immediately.
-
3
Stop about an eighth of an inch above the bat
This is the number that matters. Go deeper and the pot is standing on almost nothing and can shift or tear loose. Stop short and the wire will pass below your bevel, which leaves a thin lip that chips off in the bisque.
-
4
Hold still for two full revolutions
The cut is not finished when you reach depth. It is finished when the ribbon stops coming off, which is the wheel telling you the circle is now actually a circle. Then withdraw the tool straight back out, never upward.
-
5
Lift the curl away dry, then kill the sharpness
The ribbon usually stays hanging on. Pick it off with the tool tip or a dry finger, because a wet sponge will round over the crisp edge you just spent four seconds making. Then one very light pass with a barely damp chamois or a fingertip, wheel turning, almost no pressure. A sharp leather hard edge becomes a chipped bisque edge, and a chipped bisque edge stays sharp forever once it has been through a glaze fire at cone 5½.
-
6
Wire off and lift
Wheel stopped, wire pulled taut and held flat down against the bat, both hands low, one clean pull. Take the bat off the wheel and leave the pot alone until it can be handled. On a bare wheel head, dry your hands completely first, because there is no trimming session coming to remove your fingerprints.
There are three more routes. A cut foot line, a real thrown foot ring, and an honest flat bottom with no cut at all. They are in the comprehensive version with their own step lists and cross sections. Learn the bevel first anyway. It costs four seconds, it works on every form, and it improves every pot you make while you are still failing at the harder ones.
The bevel
One cut. Learn this one properly and you can stop reading.
- 1Pick wood over metal
A wooden knife, or the pointed end of a wooden modeling tool. Wood pushes soft clay less than steel does and leaves a matte cut rather than a smeared one. A needle tool works too and cuts finer, but it is less forgiving of a shaky hand.
- 2Set the angle before you touch anything
About forty five degrees, tip pointing down and inward toward the center of the bat. Get the angle set in the air, a couple of inches away from the pot, and then bring the whole braced unit in. Adjusting the angle mid-cut is what produces a scooped bevel instead of a flat one.
- 3Come in from the outside, slowly
Move in until the tip touches, then keep pushing at the same steady rate. Do not chase the clay. Let the wheel bring it to you. A ribbon should start peeling off almost immediately.
- 4Stop about an eighth of an inch above the bat
This is the number that matters. Go deeper and the pot is standing on almost nothing and can shift or tear loose. Stop short and the wire will pass below your bevel, which leaves a thin lip that chips off in the bisque.
- 5Hold still for two full revolutions
The cut is not finished when you reach depth. It is finished when the ribbon stops coming off, which is the wheel telling you the circle is now actually a circle. Then withdraw the tool straight back out, never upward.
- 6Lift the curl away, do not wipe it
The ribbon usually stays hanging on. Pick it off with the tool tip or a dry finger. A wet sponge will round over the crisp edge you just spent four seconds making.
- 7One very light pass to kill the sharpness
A barely damp chamois or one fingertip, wheel turning, almost no pressure. A sharp leather hard edge becomes a chipped bisque edge, and a chipped bisque edge stays sharp forever once it has been through a glaze fire at cone 5½.
- 8Wire off and lift
Wheel stopped, wire pulled taut and held flat down against the bat, both hands low, one clean pull. On a bat, take the bat off the wheel and leave the pot alone until it can be handled. On a bare wheel head, dry your hands completely first, because there is no trimming session coming to remove your fingerprints.
The cut foot line
A square notch, then Route A underneath it. Two cuts, one shadow line, and a pot that suddenly looks like somebody meant it.
- 1Decide where the line sits
At the top of the pad, where the wall stops being wall and starts being the bit that was holding it down. Usually a quarter to a half inch up from the bat. Any higher and you are cutting into the wall itself, which thins it exactly where the pot is heaviest.
- 2Cut the shoulder
Hold a square cornered tool flat and horizontal, tip aimed at the center of the pot, and push straight in about an eighth of an inch. Two revolutions. That single horizontal cut is the entire visual effect.
- 3Run the face down
Turn the tool so its edge is vertical, keep the same distance in, and draw it down the new face toward the bat. You are carving a short cylinder out of the pad. Two or three passes, light ones.
- 4Bevel the bottom of that face
Route A, exactly as written, taken from the bottom of your new vertical face down and in toward the bat. Now there are three surfaces where there used to be one.
- 5Check the line from eye level
Stop the wheel, crouch, and look straight across at the shoulder. It should be one clean circle. A shoulder that dips on one side means the pot was never centered, and no amount of extra cutting will make an off center circle round.
- 6Do not undercut the wall
If the shoulder cuts in further than the pad flares out, you have made an overhang, and an overhang is a crack with a schedule. Keep the vertical face at or outside the line of the wall above it.
- 7Soften, wire, lift
Same as Route A. Every cut edge gets one light pass. There are now three of them.
The thrown foot ring
The hard one, and the only one on this page that involves waiting. It is also the one that will teach you the most about what a foot is actually for.
- 1Leave three quarters of an inch under the floor
Measure it with the needle tool before the first pull. You cannot cut a recess into clay that is not there, and this is the one situation where a thick base is the correct answer rather than a confession.
- 2Finish the inside completely
Every curve, every rib pass, the whole interior. Once the pot firms up you are not reaching in there again, and an inside that does not match the outside is where thick spots hide.
- 3Leave it on the bat and let it firm
Do not move it. Do not cover it. You want it somewhere between soft leather hard and leather hard: firm enough to hold a cut, soft enough to take one. In this desert that is often about an hour on a dry evening. In a wet month it can be three or four.
- 4Put the bat straight back on the wheel
And here is the entire payoff of the route: it is still centered. No coils, no tapping, no chuck, no upside down guessing. The pot has not moved since you made it.
- 5Draw the two circles
Wheel turning slowly, needle tip held lightly against the pad, and let it scribe the outer edge of the ring and then the inner edge. A ring between a quarter and a half inch wide. On a bowl, put it somewhere around two thirds of the way out from the center, because a foot too close to the middle makes the bowl rock and a foot at the very edge makes it look like a bucket.
- 6Cut the outside of the ring first
Route A, from your outer circle down to the bat. Doing the outside first means the ring is already the right width when you start on the recess, so you are only worrying about one edge at a time.
- 7Cut the recess in small passes
Working from the inner circle, angle a wooden knife or a small loop up and in under the pot. Take thin passes. Every few passes, stop the wheel and push the needle tool up through the recess to read how much floor is left above you. This is the step where pots get holes in them, and the needle tool is the only thing that prevents it.
- 8Round the inside corner
Where the ring meets the recess there is a sharp inside angle, and a sharp inside angle concentrates every bit of shrinkage stress into one line. A small radius there, with the tool or a damp sponge, removes an entire category of cracking for about five seconds of work.
- 9Soften everything, then wire gently
The pot is now standing on a much smaller footprint than it was, so the wire wants to go through flat and slow. Then leave it on the bat to dry, and dry it slowly, because a foot ring and a floor are two different thicknesses drying next to each other.
A note on Route C. This is the one route where flipping the pot over and trimming it is genuinely easier, and plenty of excellent potters do exactly that. Learn this anyway. Not because you will use it every week, but because cutting a foot ring while looking at the outside of the pot is the fastest way anyone has found to understand what the foot is doing to the shape.
The honest flat bottom
There is no cut here at all, which is why people skip past it and then wonder why their plates rock.
- 1Compress, and then compress again
Three or four firm passes with a rib from the center outward, wheel turning. This is not a formality. On a pot that will never be trimmed, this is the only compression the floor is ever going to get, and it is the entire defense against an S shaped crack showing up two weeks later.
- 2Check that it is flat, not domed
Hold a straight rib flat across the floor with the wheel stopped and look for light under it. A floor that bulges upward in the middle becomes a pot that rocks, and a floor that dishes downward becomes a pot that holds a puddle.
- 3Round the outside corner with the rib
Not a cut, just a soft roll of the corner where the wall meets the bat. A hard ninety degree corner is the single most chip prone shape in ceramics. Ten seconds with the curved edge of a rib fixes it permanently.
- 4Choose your wire, and know what it does
A smooth wire leaves a plain flat cut. A twisted wire leaves a pattern of ridges that is a legitimate decorative finish and shows up beautifully under a runny glaze. Neither is a mistake. The mistake is not deciding.
- 5Cut straight, or cut spiral
Wheel stopped, wire taut and pressed flat against the bat, one steady pull, gives you a flat cut. Wheel turning slowly with the wire held into the base gives you a spiral. Both work. Do not do half of each.
- 6Dry it on something genuinely flat
A flat board or a flat shelf. Not a warped bat, not a wrinkled sheet of newspaper. A flat bottomed pot copies whatever surface it dries on and it copies it permanently.
- 7Deal with roughness after the glaze fire, not before
Any foot can come out of a kiln rougher than you wanted. A wet diamond pad takes it down in about ten seconds and it is the last step of a lot of good pots. What can and cannot be rescued after a firing is covered on the fixing pottery page.
07 · Watch the hands
04 · Watch the hands
Seven videos, chosen for what they show rather than who made them
Two videos. Watch the short one first.
Every title, channel and runtime below was checked against YouTube directly rather than copied out of a search result. If one ever disappears, tell us and we will replace it. They load as you scroll to them, so nothing is downloaded for a video you never reach.
Do not watch all seven. Watch the first one, which is two and a half minutes, and then watch whichever second one matches the pot you are about to make.
Both titles and channels below were checked against YouTube directly rather than copied out of a search result. The first is two and a half minutes and shows the whole idea. The second is six minutes on the cut itself, and it is the one to watch if your bevels keep coming out scooped.
Start here: the cut itself, close up
Then: whole pots, start to finish, never flipped
And the other side of the argument
Where the rest live
We keep a curated list of potters worth your evening
Hours of the best ceramic artists on the internet, sorted by skill rather than by algorithm, on the incredible videos page.
And if you are still working on the part that comes before all of this, start with how to throw on the pottery wheel.
Nothing here is ours
These are other people’s videos, and that is on purpose
There is no shortage of good pottery teaching on the internet. There is a shortage of somebody telling you which four minutes of it to watch, and in what order, and what to look at while you do.
That is the only job this page is doing.
08 · The part to keep open at the wheel
Five checklists, built for a phone propped against a bucket
Tap a line to tick it off. It remembers where you got to, so you can lock your phone, throw the pot, and come back. There is a bigger text mode for reading it with clay on your hands, and a reset for the next one.
- Throwing on a batOr ready to lift the pot off a bare wheel head with completely dry hands.
- Clay centered, properlyEvery cut on this page is a circle. A circle cut around something off center comes out a spiral.
- Opened to the depth you meant, not deeperGo shallow, measure, then go deeper if there is room. You cannot put clay back.
- Floor measured with the needle toolA quarter inch for a mug. Three eighths for a bowl. Three quarters if a thrown foot ring is coming.
- Floor compressed, three or four firm passesCenter outward, wheel turning. This is your only shot at it. No trimming session is coming.
- A pad of clay left at the baseDo not run the wall all the way down to the bat. The pad is the material every cut is made from.
- All shaping finishedPulls, curves, collaring, final rib pass. Nothing else is going to run down the outside after this.
- Standing water sponged out, inside and outsideWater sitting in the floor softens the exact clay you are about to rely on.
- Wheel slowed to about half throwing speedPulling wants speed. Cutting wants steadiness.
- Both hands braced together, resting on the panThe tool and the pot want to behave like one object. Anything held in the air wobbles.
- Wooden knife or pointed wooden tool in handWood pushes soft clay less than steel and leaves a matte cut instead of a smear.
- Angle set in the air first, about forty five degreesPointing down and inward. Adjusting mid cut is what makes a scooped bevel instead of a flat one.
- Coming in from the outside at a steady rateDo not chase the clay. Let the wheel bring it to the tool.
- Stopped about an eighth of an inch above the batDeeper and the pot can tear loose. Shallower and the wire passes below the bevel and leaves a lip.
- Held still until the ribbon stopped coming offThat is the wheel telling you the circle is finally a circle.
- Withdrawn straight back out, never upwardLifting the tool out drags a line up the face you just cut.
- Curl lifted away dryTool tip or a dry finger. A wet sponge rounds over the edge you just made.
- One very light pass to kill the sharpnessSharp leather hard edge, chipped bisque edge, permanently sharp glazed edge. In that order.
- Wired off flat, one steady pullWheel stopped, wire taut, both hands low and pressed down against the bat.
- Bat lifted, or pot lifted with dry handsThere is no trimming session coming to remove your fingerprints.
- Line placed at the top of the padA quarter to a half inch up from the bat. Higher and you are thinning the wall itself.
- Square cornered tool held flat and horizontalTip aimed at the center of the pot, not angled.
- Shoulder cut in about an eighth of an inchHeld for two revolutions. That one horizontal cut is the entire visual effect.
- Tool turned vertical, face run down toward the batTwo or three light passes. You are carving a short cylinder out of the pad.
- Face kept at or outside the wall line above itAn overhang is a crack with a schedule.
- Bevel cut at the bottom of the new faceRoute A, exactly as written, from the bottom of the face down and in.
- Shoulder checked from eye level, wheel stoppedOne clean circle. A dip on one side means the pot was never centered.
- All three cut edges softenedYou made three surfaces where there was one. All three chip.
- Wired off and liftedSame as Route A. Flat wire, one pull, dry hands.
- Three quarters of an inch left under the floorMeasured with the needle tool before the first pull. You cannot cut a recess into clay that is not there.
- Inside of the pot completely finishedEvery curve, every rib pass. You are not reaching in there again.
- Left on the bat, uncovered, not movedMoving it is the one thing that throws away the whole advantage of this route.
- Firmed to between soft leather hard and leather hardAbout an hour on a dry Utah evening. Three or four in a wet month. Firm enough to hold a cut, soft enough to take one.
- Bat back on the wheel, still centeredNo coils, no tapping, no chuck, no upside down guessing. This is the payoff.
- Two circles scribed with the needle tipOuter edge of the ring, then inner edge. Wheel turning slowly, almost no pressure.
- Ring width between a quarter and a half inchOn a bowl, sitting about two thirds of the way out from the center.
- Outside of the ring cut first, down to the batThen the ring is already the right width when you start on the recess.
- Recess cut in thin passesAngling up and in under the pot. Small bites only.
- Floor thickness checked every few passesNeedle tool up through the recess. This is the step where pots get holes in them.
- Inside corner of the ring roundedA sharp inside angle concentrates every bit of shrinkage stress into one line.
- Edges softened, wired flat and slow, dried slowlyA ring and a floor are two different thicknesses drying next to each other.
- Floor compressed, three or four firm passesThe entire technique is this line. Skip it and meet an S crack in two weeks.
- Floor checked flat with a straight ribWheel stopped, rib laid across, looking for light underneath. Domed rocks, dished puddles.
- Outside corner rolled soft with the ribA hard ninety degree corner is the most chip prone shape in ceramics.
- Standing water sponged outEspecially here, because there is no cut edge holding the shape together.
- Wire chosen on purposeSmooth for a plain cut. Twisted for a ridged pattern that reads beautifully under a runny glaze.
- Cut committed to, straight or spiralWheel stopped for flat. Wheel turning slowly for spiral. Do not do half of each.
- Set to dry on something genuinely flatA flat bottomed pot copies whatever it dries on, permanently.
- Roughness left for after the glaze fireA wet diamond pad takes it down in about ten seconds. Do not sand dry clay.
Ticks are stored on this device only, so nobody else sees your progress and nothing is sent anywhere. If your browser blocks storage, the list still works, it just forgets when you reload.
09 · Diagnosis
05 · Diagnosis
Something went wrong. Find it here.
Fourteen symptoms in roughly the order they show up. Almost none of the causes are that you are bad at this.
The three that stop people on a first attempt. Almost none of the causes are that you are bad at this, and the other eleven are in the comprehensive version.
The pot slid sideways while I was cutting
You cut too deep. Once there is less than about an eighth of an inch of clay left holding the pot to the bat, the sideways pressure of the tool is stronger than the grip, and it goes.
Also worth checking: a bat that was not properly seated, and pushing inward harder than you need to. A sharp tool at a good angle takes almost no force. If you are leaning on it, the tool is the problem.
The bevel came out scooped and soft instead of flat
The angle changed during the cut, which is what happens when you set the angle after the tool is already in the clay. Set it in the air, two inches out, then bring the whole braced unit in without moving your wrist. The cut is a straight line, and a straight line needs the tool to arrive already pointing the right way.
The wire cut left a thin lip sticking out under the bevel
You stopped the bevel too high, so the wire traveled through clay that was still full width. That lip is thin, unsupported and the first thing to chip in the bisque. Take the bevel down closer to the bat next time, and for this pot, snap the lip off carefully while it is still soft and blend the edge with a fingertip.
The tool chattered and left ridges around the base
Three causes, test in this order. The wheel is too slow, so the clay is grabbing rather than shaving. Your hands are not braced together, so the tool is free to bounce at the wheel's own frequency. Or you are pushing in faster than the clay can come away.
Speed up slightly, anchor both hands on the pan, and slow the push. Almost every case is one of those three.
The clay smeared instead of cutting
Too wet. Either the pad is soaked from standing water you did not sponge out, or the pot is still too fresh to hold a cut. Sponge everything dry, give it five minutes, and try again. A wooden tool on properly damp clay peels a continuous ribbon. If it is pushing a wave of mud, wait.
The bevel is deep on one side and missing on the other
The pot was not centered. There is no fixing this after the fact, because taking the whole circumference down to match the deep side costs you the clay you needed. The good news is that it is entirely a throwing problem, and it will fix itself the day your centering does. If it keeps happening, spend an evening with the tap centering page, which has a practice wheel that runs right in your browser.
I cut through the floor
Almost always Route C, almost always because the needle tool stayed on the bench. A thrown floor is thicker than it looks from above and thinner than it feels from below, and there is no way to know without measuring.
It happens to everyone once. A genuinely tiny hole can be plugged with soft clay of the same body and heavily compressed, but be honest with yourself about whether you want a mug with a patched floor. Usually the answer is reclaim it and measure next time.
The pot came off the bat with fingerprints all over the base
Wet hands, and no second appointment to remove them. This is the tax on finishing on the wheel: every mark you leave after the last cut is permanent. Dry your hands completely, lift from the widest part of the pot with flat palms rather than pinching, or just take the whole bat off and leave the pot alone for an hour.
An S shaped crack appeared in the bottom a week later
Compression, not cutting. Opening a pot drags the clay particles outward, and if they are never pressed back together the floor pulls itself apart as it shrinks. It shows up days or weeks later, which is why almost nobody connects it to the thirty seconds they skipped.
This bites harder on this page than on the trimming page, because a trimmed pot gets a second pass of pressure across the floor whether the potter meant it or not. You are not getting that. Compress properly, every single time.
The pot rocks on the table
Three possible culprits. The floor was domed upward rather than flat. The pot dried on something that was not flat and copied it. Or the piece went into the kiln on an uneven shelf and slumped very slightly.
Check the first two before blaming the third. A rib laid flat across the floor with the wheel stopped, and a flat board to dry on, prevent almost all of it. After the glaze fire, a wet diamond pad can take a small rock out of a foot.
The foot chipped in the bisque
The cut edges were left sharp. Sharp leather hard edges become brittle dry edges, brittle dry edges become chipped bisque edges, and chipped bisque edges are sharp forever once glaze has been fired over them at cone 5½. One light pass with a damp chamois takes about two seconds and removes the entire problem.
My foot ring cracked where it meets the base
A sharp inside corner concentrates every bit of shrinkage stress into one line, and clay obliges by splitting along it. Give the inside of every foot ring a small radius rather than a square angle, with the tool or a damp sponge at the end. Five seconds, one whole category of cracking gone.
The pot is finished and it still feels too heavy
This is the real limitation of the whole page and there is no way around it. Finishing on the wheel shapes clay. It does not remove weight from the floor.
Two answers. For this pot, flip it and trim it, which is always still available and is not a failure. For the next one, measure the floor before you pull the first wall. The weight problem lives in minute two of the throw, not in minute twelve.
It looks fine but it looks like nothing
Probably a bevel that is too shallow. A forty five degree cut that only takes off a millimeter reads as a rounded corner rather than a defined edge, and rounded corners are invisible. Go further in. The whole effect depends on the pot touching the table on a noticeably smaller circle than its widest point, and if you cannot see that difference standing up, neither can anybody else.
10 · Where trimming wins
06 · Where trimming wins
When to stop reading this page and go flip the pot over
A guide that only argues for itself is not a guide, it is an advertisement. So here are the six situations where finishing on the wheel is the wrong call, from the studio that just spent eight sections teaching it to you.
A guide that only argues for itself is not a guide, it is an advertisement. So here is the short version, from the studio that just spent five sections teaching you the other thing.
Flip the pot over and trim it when it came out heavier than you wanted, when you want a tall foot ring that lifts a bowl up off the table, when the outside curve has to carry on underneath, or when the form is too closed in to get a tool under it. Trimming is also the universal undo when a cut goes wrong, and it is available two days later on almost every pot in this building.
Most people here settle into finishing mugs and tumblers on the wheel and flipping bowls and plates. Learn both and the pot gets to decide, not your habits. The trimming and turning guide is here.
The pot is heavier than you wanted
The one thing this page cannot do. If it feels wrong in your hand at cut-off, no amount of wet finishing changes that. Flip it, trim it, and the mug is saved.
You want a tall foot ring
The elevated look, where a bowl sits proudly up off the table, needs more clay removed than you can reasonably cut with a wooden tool through a soft base. That is a trimming shape.
The outside curve has to continue underneath
On a good bowl the line does not stop where the wall meets the table, it carries on under the foot. Getting that curve right means seeing the pot upside down while you cut it.
It is tall, narrow, or closed in
A bottle with a belly wider than its neck gives a tool nowhere to go. There is a reason chucks exist. Anything you cannot get a hand and a tool underneath is a trimming job.
You are working in porcelain and want crisp
A turned edge on firm porcelain is sharper than anything a wooden knife takes out of soft clay. If the precision is the point of the piece, the precision wants leather hard.
Something already went wrong
A bevel that came out lopsided, a foot line that wandered, a base you cut too shallow. Trimming is the universal undo. It is available two days later on almost every pot in this building.
What most people here settle into
Mugs, tumblers, cups and small jars finished on the wheel, because those are forms where a bevel is enough and the time saving is real. Bowls, plates and anything with a curve that matters flipped and trimmed. Then a stubborn few doing Route C on wide bowls because they like it, which is also a completely legitimate reason to do anything in a pottery studio.
Learn both and the pot gets to decide. The trimming and turning guide is here, with fourteen steps and its own set of videos.
11 · The words
Every term we just used, in plain English
None of this vocabulary is difficult once somebody says it out loud. Nobody here will think less of you for asking. Most of us had to ask too.
Go make forty of them
The bevel takes four seconds and about three hundred repetitions
Nobody gets a clean one on the first pot, and nobody is still thinking about it by the fiftieth. It stops being a technique and turns into the thing your hand does automatically at the end of a throw, which is the only place any of this was ever headed.
So do not read this page again. Open the checklist, throw six mugs, and cut all six. The sixth one will be noticeably better than the first, and that is a faster result than almost anything else in pottery gives you.
Nobody gets a clean one on the first pot, and nobody is still thinking about it by the fiftieth. Throw six mugs tonight and cut all six. The sixth will be noticeably better than the first, and that is a faster result than almost anything else in pottery gives you.
If you want the long version of all this, the four routes, the cross sections, the checklists for your phone and every way it goes wrong, switch to the comprehensive version at the top of the page.
The Clay Hole is a community pottery studio in Draper, Utah, with 29 wheels and a lot of people learning this exact thing on a Tuesday night. If something on this page is wrong, or a video has disappeared, tell us and we will fix it.
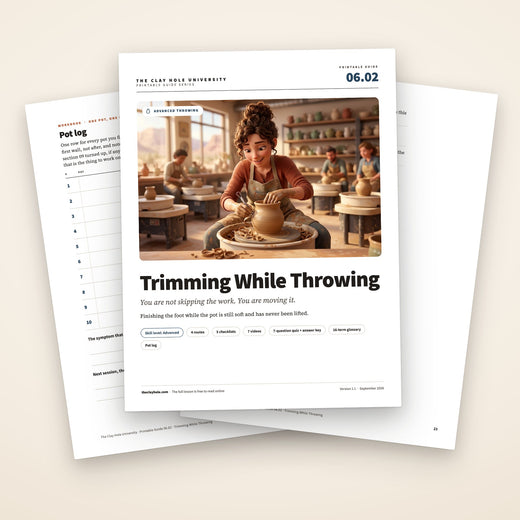
Which version would you like to print?
Videos come out as a labeled box with the title and channel to search for, since paper does not play them.