The Clay Hole guide to the leather-hard pot

Trimming and turning, start to finish

Two words, one job. Half the pottery world says trimming and the other half says turning, and each half is quietly convinced the other one is being strange about it. They are the same thing: a pot goes back on the wheel upside down, and you cut away the clay you did not need.

It is also the step where more good pots die than anywhere else in this building. Not because it is hard. Because it is the one part people do without a plan.

So here is the plan. Written down, in order, with the videos we think teach it best.

So here is the plan, short enough to read standing up.

14 steps you can tick off on your phone 9 videos from 8 potters 18 things that go wrong, and why
8 steps you can tick off on your phone 2 videos from 2 potters 3 things that go wrong first
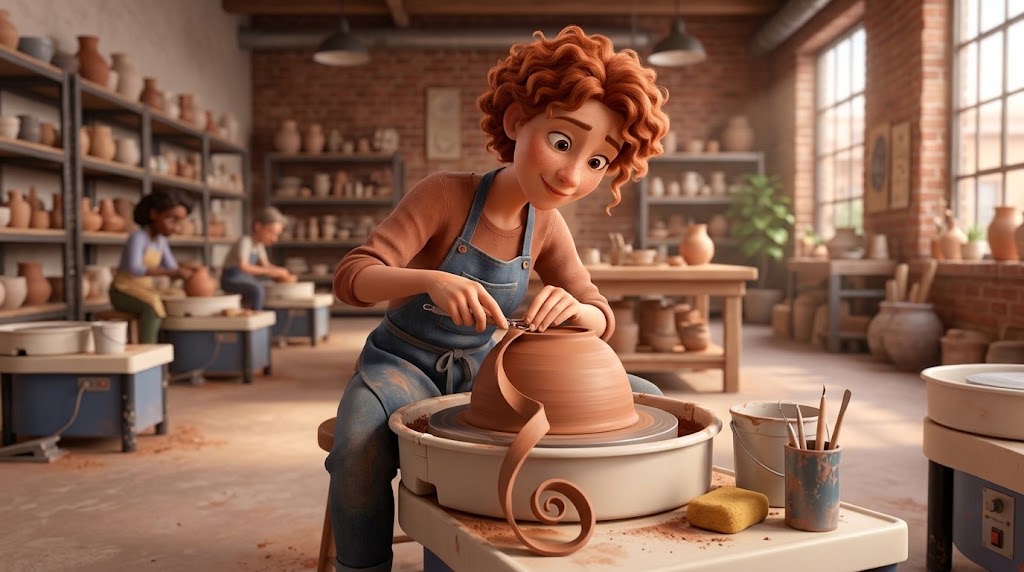
Illustration of a potter at the wheel turning a pot, with a ribbon of trimmed clay curling away from the base

The whole guide. Every step, nine videos, and eighteen ways this goes wrong.

The short version

The whole job, and the one question

A pot goes back on the wheel upside down and you cut away the clay you did not need. You are doing three things while you are down there: making a base the pot can stand on, finishing the curve you could not reach while it was wet, and taking out weight that was never doing anything.

Almost every trimming disaster is a timing problem wearing a costume. So the question that decides your whole session is not about your tool or your hands. It is this one.

Hold the pot against your cheek. Is it cool?

Cool means there is still water leaving it, which means it will cut in ribbons. Room temperature means the water has gone and you have probably missed the window. Nothing else on this page is more reliable and nothing else on it looks sillier.

Too soft

A thumb dents the rim

The tool smears instead of cutting, and holding the pot down slowly walks the rim out of round. Put it back on the shelf, uncovered, and trim something else.

Ready

Cool, and a fingernail leaves a clean dent

Firm enough to hold its shape under real pressure, still damp enough that the tool takes a continuous curl and the sound is a steady shhhhh rather than a stutter. Trim it now.

Too dry

Powder instead of ribbons

The tool skips and the edges chip rather than cut. Wrap it with a barely damp cloth nearby, not touching, and try again tomorrow. Or bisque it as it is and put more care into the bottom next time.

The whole kit is three things

One sharp loop tool, a needle tool for measuring the floor, and three soft coils of clay to hold the pot down. Sharp is not a preference here. A dull loop does not cut clay, it pushes it, and the chatter people blame on their hands is usually a finished blade. Everything else is a convenience.

This is a desert and the studio is dry, so pots move through leather hard faster here than most of the internet assumes. Something thrown on a Tuesday evening is often ready Wednesday. A plastic bag draped loosely over the top, not sealed tight, holds the window open for a day or two.

01 · The part nobody argues about

Two words, one job

Turning is the older word and mostly a British one. Trimming is the newer word and mostly an American one. A potter in Stoke turns a foot. A potter in Draper trims a foot. Same pot, same tool, same curl of clay hitting the splash pan.

If somebody tells you they are different things, ask them to explain the difference. It gets quiet fast.

What is worth knowing is that the job is actually three jobs, and most people only ever think about the first one.

1

You cut a base the pot can stand on

Every thrown pot comes off the wheel with a slab of clay under it that exists purely because you had to hold the thing down while you made it. That slab is not part of the design. Cutting it away, and deciding what the pot stands on instead, is the obvious half of trimming.

2

You finish a curve you could not reach before

This is the half people forget. While the pot was wet you could only shape the top two thirds of the outside, because the bottom third was buried in the clay holding it down. Turning is where the line of the pot actually gets finished. The curve is not done until you have been under it.

3

You take out weight the pot did not need

Pick up a beginner mug and a ten-year mug and the difference you feel is almost never the walls. It is the bottom. Thrown floors come out thick because thick feels safe, and all that safety sits in your hand forever afterward.

4

And you make the drying more even, whether you meant to or not

A thick floor under thin walls shrinks at a different rate than everything above it, and that argument has to end somewhere. Usually in a crack, usually weeks later, usually shaped like an S. Evening out the thickness is a side effect of trimming that quietly saves more pots than the foot ring ever will.

Now the honest part: you do not have to trim anything

Flat-bottomed pottery is real pottery. Plenty of excellent potters get their bottoms right while the piece is still wet, cut it off clean, and never turn a pot in their lives. If trimming is the part of the process you dread, you are allowed to build your way around it, and we will not think less of your mugs.

The reason to learn it anyway is that it is the fastest way to make your work look like you meant it. Not the only way. Just the fastest.

02 · Why this page exists in this shape

Reading it and watching it are two different kinds of learning

You can find nine hundred trimming videos in about four seconds, so it is fair to ask why anybody would read a page about it instead. Short answer: the two do different jobs, and you want both.

Video is better at

Speed, angle and sound

How fast the wheel is really going, how the tool is held and which knuckle is braced where, and the noise a properly leather-hard pot makes when the tool bites. No sentence has ever captured that one.

Text is better at

Order, names, and waiting for you

A video plays at its speed. A page waits at yours. And once you know words like undercut, chuck and chatter, a vague bad feeling about a pot turns into a specific fixable problem.

So: read this once, watch two or three of the videos, then keep the checklist open at the wheel.

Why we bothered writing it downShow less

The part that actually convinced us

Watching somebody trim a bowl beautifully is a very convincing experience. It is also a slightly dishonest one, because you are watching a person who has done it ten thousand times do it at three times normal speed with the boring parts cut out. You come away certain you understood it. Then you sit down at a wheel and discover that what you retained was a feeling, not a procedure.

Reading the procedure once, before or after, is what turns the feeling into something your hands can follow. So this page is written to be read, and every video on it is here because it shows something the words cannot.

Read it once, all the way through

Not to memorize it. Just so that when a pot goes wrong you have a name for what happened instead of a feeling about yourself.

Then watch two or three of the videos

They are grouped by what they teach, not by who made them. Watch the one that covers the part you are least sure about.

Then keep the checklist open at the wheel

It ticks off as you go and it remembers where you got to. There is a bigger-text mode for reading it with clay on your hands.

03 · The window

When a pot is actually ready

Almost every trimming disaster is a timing problem wearing a costume. The tool gets blamed, the wheel gets blamed, the hands get blamed. It was the moisture.

Leather hard is the window, and it is narrower than beginners expect and wider than they fear. Here is how to find it without guessing.

Too soft

It gives when you hold it

Press a thumb on the rim and it dents. The tool smears instead of cutting. Worst of all, the pressure of holding it down against the wheel head slowly walks the rim out of round, and you will not notice until you turn it back over.

What to do: put it back on the shelf, uncovered, and go trim something else.

Just right

It cuts in ribbons and sounds like something

Firm enough to hold its shape under real pressure. Still cool and slightly damp against your cheek. A fingernail leaves a mark but the clay does not stick to it. The tool takes a continuous curl off, and the sound is a steady shhhhh rather than a stutter.

What to do: trim it now. This is the whole window.

Too dry

It fights back and makes dust

The tool skips, chatters where you did not want chatter, and throws powder instead of ribbons. Edges chip rather than cut. The pot has gone pale and it is room temperature against your cheek, not cool.

What to do: think hard before forcing it. A dry pot dulls tools, and a chipped foot is not fixable.

Three tests, in the order we use them

  • The cheek test. Hold the pot against your cheek. Cool means there is still water leaving it. Room temperature means it is close to bone dry and you have probably missed the window. Nothing on this page is more reliable and nothing on it looks sillier.
  • The fingernail test. Press a nail into the base. It should leave a clean dent without any clay coming away on your finger. Clay on the nail means too wet. No dent at all means too dry.
  • The lift test. Pick the pot up by the rim, one hand, no support underneath. If you are afraid to, it is too soft to trim. That fear is good information.

Utah is working against you

This is a desert and the studio is dry, so pots move through leather hard faster here than most of the internet assumes. A piece thrown on a Tuesday evening is often ready Wednesday, sometimes ready the same night if the walls are thin.

Which means the useful skill is not speeding pots up. It is holding them still.

  • Loosely bagged is the default. A plastic bag draped over, not sealed tight, evens the moisture out overnight and holds the window open for a day or two.
  • Sealed tight stops it almost completely, which is what you want if you will not be back until the weekend.
  • Rims dry first because they are thinnest and most exposed. If you are going to cover one part of a pot, cover the top.

The whole subject, at length, is in how to properly dry your pottery, and it is the guide beginners here underestimate the most.

Can you bring a pot that got too dry back?

Sometimes. Wrap it in plastic with a barely damp cloth nearby, not touching, and leave it a full day so the moisture equalizes through the wall rather than soaking the outside. Overnight often works. Spraying a dry pot with water and trimming it twenty minutes later does not work and will crack the base, because you have made the outside wet and left the inside hard.

And if it is truly bone dry, let it go. Trim nothing, bisque it as it is, and put a bit more care into the bottom next time. A slightly heavy pot is a finished pot. A cracked one is reclaim.

04 · The kit

What you cut with

You can trim a good pot with one decent loop tool and a needle tool. Everything else on this list is a convenience, a specialty, or a way of going faster. Buy the first one properly and add the rest when a pot makes you want them.

ToolWhat it actually doesWhen you reach for it
Loop tool A wire or shaped metal loop on a handle. The wire cuts on the way past and the clay curls up through the loop instead of packing against it. The default. Bulk removal, the underside, the outside of the foot.
Ribbon tool A flat steel band bent to a shape, sharpened along the edge. Cuts a wider, flatter path than a loop and leaves a smoother surface behind it. Refining a curve once the rough clay is gone, and finishing a wall you want smooth.
Needle tool A pin in a handle. Its real job in trimming is measuring: push it through the base and pinch where it emerges to read the floor thickness. Before you take a single curl off, and again halfway through.
Chuck or chum A clay or foam support the pot sits in or over, so the rim never touches the wheel head. A chuck holds the pot inside it. A chum goes inside the pot. Anything with a narrow neck, a delicate rim, or a belly wider than its opening.
Soft coils of clay Three or four small lumps pressed against the base at even spacing, which hold the pot down without covering the part you need to cut. Almost every pot. This is the cheapest tool in the building and the one beginners skip.
Chamois or damp sponge Softens the cut edge of a fresh foot so it is not sharp, and blends the tool marks you decided you did not want. Last thirty seconds, wheel still turning, barely any pressure.
Giffin Grip A jig that clamps onto the wheel head and grips the pot with sliding arms, so it is centered and held without coils. Production runs and repeat forms. Read the honest note below before you fall in love with one.

Sharp is not a preference, it is the whole tool

A dull loop does not cut clay. It pushes it, tears it, skips across it and leaves the chatter people think is a technique problem. If your tool is making dust and stutter marks on a properly leather-hard pot, the pot is fine and the tool is finished.

Clay is abrasive and blades dull fast, which is exactly why the good ones in this building are looked after rather than left in a bucket.

How trim tools work at The Clay Hole

Green Level Members
Bring your own trimming tool. One good loop is enough to trim every pot on this page.
Yellow Level Members
Basic studio trimming tools are open to you.
Purple Level Members
The full set, including the sharp ones we keep back, and the Giffin Grips.
Black Level Members
Everything in the building.

Most trim tools sit at Purple Level for one boring reason: blades dull quickly and good ones are not cheap. Every level, compared properly.

From Dan

Learn to trim without a Giffin Grip

We have them, and Purple Level Members are welcome to them. I still think you should learn without one first.

They have real downsides, and they damage pottery. A jig that grips your pot is a jig that can mark it, and a beginner who learns on one has skipped the part where you find out how a pot behaves under your own hands. Learn the coils. Learn to tap it true. Then use whatever you want, knowing what it is doing for you and what it is doing to your work.

05 · Before the tool touches anything

On center, and staying there

A pot that is not centered gets trimmed into a spiral instead of a circle, and you cannot see it happening because the pot is upside down and the wobble is at the end you are cutting. Get this right and half the section on things going wrong never applies to you.

Setting it down

  • Wipe the wheel head bone dry first. A damp head either grabs the pot where you did not want it or lets it slide the moment you tap. Dry metal, every time.
  • Use the rings. Every wheel head has concentric rings cast into it. With the wheel stopped, set the pot down and read the rim against the nearest ring all the way around. Wide margin on one side, none on the other, tells you which way to slide it.
  • Slide before you tap. With the wheel off, push the pot toward the crowded side until the margin looks even. Doing this well is why some people tap three times and others tap twenty.

Knocking it true, then holding it there

  • Tap it on the beat, not when you see it. The fat side comes past your parked finger once per revolution, so you are counting a rhythm rather than reacting to a bulge. There is a whole page on this, with a practice wheel that runs in your browser: learn to tap center.
  • Watch the base edge, not the rim. A rim can be slightly out of round all by itself. The base edge is the circle your tool is about to cut, so it is the only one that has a vote.
  • Then lock it down. Centering and securing are two separate jobs, and skipping the second is why pots walk off center halfway through. Three small coils of soft clay, pressed against the base at even spacing, out where they will not be in the way of the cut.
  • Press the coils onto the wheel head, not into the pot. Push down and outward. Pushing inward dents a leather-hard wall and you will find the dent under the glaze.

The ten-second check that saves the whole pot

Start the wheel and hold a fingertip or a needle tool steady, just clear of the base edge, for five full revolutions. If the gap opens and closes, it is not centered and you are about to cut a wedge out of one side. If the pot creeps away from your finger, the coils are not holding and you are about to have a pot on the floor.

Nobody has ever regretted those ten seconds. Plenty of people have regretted skipping them.

06 · The move The move

Fourteen steps, start to finish

Eight steps, start to finish

This is the list to have open on your phone at the wheel. Tap a step to tick it off and it stays ticked on this device, so you can put the phone down, do the thing, and pick up where you were. Reset it when the next pot goes on.

0 of 14 done
  1. 1. Check the moisture before anything else

    Cheek test, then fingernail. Cool and dents cleanly means go. Room temperature, or clay on your nail, means put it back and pick a different pot.

  2. 2. Wipe the wheel head bone dry

    Dry metal grips predictably and lets the pot slide when you want it to. Damp metal does the opposite of both, at random.

  3. 3. Read the floor thickness before you cut anything

    Push a needle tool through the base until it stops, pinch the pin where it meets the clay, pull it out and look at the gap. That number is your entire budget for the rest of the session. Everything after this is spending it.

  4. 4. Set it down upside down, reading the rings

    Wheel stopped. Compare the rim to the nearest cast ring all the way around, then slide the pot toward the side with no margin until it looks even.

  5. 5. Tap it true

    Park a finger beside the base, count the brushes, tap the fat side toward the middle on the beat. Three or four honest taps, not twenty nervous ones.

  6. 6. Lock it down with three coils

    Small, soft, evenly spaced, pressed down and outward onto the wheel head. Keep them clear of the ring you are about to cut.

  7. 7. Spin it and watch the base edge for five turns

    Steady fingertip just clear of the edge. No opening and closing gap, no creeping. Fix it now or cut a wedge out of it later.

  8. 8. Take the corner off first

    Wheel at a decent clip. Cut the hard edge where the base meets the wall, working around until it is a clean bevel. It settles the tool, shows you exactly how the clay is cutting today, and it is the least risky clay on the whole pot.

  9. 9. Cut the outside line down to the base

    Brace both hands together and against the wheel pan so they move as one object. Light passes, tool held at a shallow angle, following the curve the pot already wants. You are finishing the line you could not reach while it was wet, not inventing a new one.

  10. 10. Mark the foot ring, outside edge first

    Hold the tool steady against the turning base and let it scribe a circle. Outer line first, then the inner one. Cutting to a line you can see beats cutting to a shape you are imagining.

  11. 11. Hollow the inside of the foot

    Start in the middle and work outward toward your inner line, taking shallow passes. Keep the hollow slightly domed rather than dished, and never let it get thinner in the middle than the walls of the pot.

  12. 12. Check the depth again, twice

    Tap the middle of the base with a fingernail and listen. A dull thud is thick, a bright ring is getting thin, and a rattle means stop immediately. Then feel the outside with the flat of your hand for a bulge you have not cut yet.

  13. 13. Soften every cut edge, then sign it

    A damp sponge or chamois, wheel turning slowly, almost no pressure. Sharp trimmed edges chip in the bisque and cut fingers after the glaze fire. Signing is much easier now than it will ever be again.

  14. 14. Lift it off, wipe the head, clean as you go

    Peel the coils off the wheel head rather than the pot. Trimmings go in your reclaim while they are still damp and easy. Dry trimmings have to be scraped, and scraping is what puts dust in the air.

  1. 1. Check the moisture, then wipe the wheel head bone dry

    Cheek test first. Cool, with a fingernail dent that leaves no clay on your finger, means go. Then dry the metal, because damp metal grabs and slides at random.

  2. 2. Read the floor thickness before you cut anything

    Push a needle tool through the base until it stops, pinch the pin where it meets the clay, pull it out and look at the gap. That number is your entire budget. Everything after this is spending it.

  3. 3. Set it down upside down and read the rings

    Wheel stopped. Compare the rim to the nearest cast ring all the way around, then slide the pot toward the side with no margin until it looks even.

  4. 4. Tap it true, then lock it down with three coils

    Park a finger beside the base and tap the fat side toward the middle on the beat. Then press three small soft coils down and outward onto the wheel head, never inward into the pot.

  5. 5. Spin it and watch the base edge for five turns

    Steady fingertip just clear of the edge. No opening and closing gap, no creeping. Fix it now or cut a wedge out of one side later.

  6. 6. Take the corner off, then cut the outside line

    Bevel the hard edge where the base meets the wall first, then follow the curve down to the base in light passes with both hands braced together against the wheel pan.

  7. 7. Mark the foot ring and hollow it out

    Let the tool scribe the outer circle, then the inner one. Work from the middle outward in shallow passes, tapping and listening as you go.

  8. 8. Soften every cut edge, sign it, and clean as you go

    Damp sponge, wheel turning slowly, almost no pressure. Peel the coils off the wheel head rather than the pot, and get the trimmings into reclaim while they are still damp.

Ticks are stored in this browser on this device, not in your membership account. Clearing your browsing data clears them, and a different phone starts fresh. Full studio clean-up, with its own tappable list, is on the clean-up instructions page.

07 · The foot

Feet, and what they are actually for

A foot ring is not decoration, although it is that too. It lifts the pot off the table so the piece reads as lighter than it is, it gives the glaze somewhere to stop, and it makes a piece sit flat even if the base is a hair uneven, because three or four points of contact are easier to level than a whole disc.

Cross-section of a trimmed mug A cut-through view of a trimmed pot showing the foot ring, the hollow under the base, the remaining floor, the finished outside line and the wall thickness. Five numbered markers correspond to the list beside the drawing. 1 2 3 4 5
  1. The foot ringThe narrow band the pot actually stands on. Cut it wide enough that the piece is stable and narrow enough that it does not look like a plinth. Roughly a third to a half of the base diameter suits most mugs and bowls.
  2. The hollow inside the footKeep it very slightly domed rather than dished. A dished hollow traps water in the dishwasher and holds glaze where you do not want it, and a domed one is stronger.
  3. The floor you leave behindWhat is left between the hollow and the inside of the pot. Aim for about the same thickness as the walls, which is what the needle-tool measurement in step three was for.
  4. The outside line, now finishedThe part of the curve that was buried in holding clay while you threw. Trimming is where that line finally continues all the way to the foot instead of stopping in a lump.
  5. The wall, for comparisonThe reference for everything else. If the base is thicker than the wall when you finish, the pot is heavier than it needed to be and it will dry unevenly.

Four bottoms, all legitimate

Simplest

Flat, no foot

Cut clean off the wheel, edge softened, nothing else. Fast, sturdy, honest, and completely fine for tumblers and everyday bowls. The bottom stays in full contact with the kiln shelf, so keep glaze well clear of it.

The default

Cut foot ring

One shallow hollow, one ring, square-ish edges softened. This is the foot that suits nine out of ten pots and the one to learn first. Depth of about a quarter of the base thickness is plenty.

Showy

Tall foot ring

The ring is deeper, so the pot floats. It reads as considered and slightly formal, and it eats more clay and more nerve, because a tall ring is a thin ring and a thin ring is a chipped ring if you rush the edges.

Sharp

Undercut foot

The outside of the ring angles inward slightly so it casts a shadow line and the pot looks like it barely touches the table. Beautiful. Also the most fragile of the four, and the one most likely to chip in the bisque.

When to stop

Three signals, and they all beat looking at it. Tap the middle of the base with a fingernail: a dull thud means there is plenty left, a bright ring means you are near the walls, a rattle means stop right now. Feel the outside with your whole flat hand rather than fingertips, because a palm finds a bulge your eyes will not. And pick the pot up. If it feels like the mug you would actually reach for at home, you are done.

The pot does not get better after the point where it feels right. It just gets thinner.

The target

What you are cutting toward, and when to stop

A foot ring lifts the pot off the table so the piece reads as lighter than it is, gives the glaze somewhere to stop, and lets a piece sit flat even if the base is a hair uneven. Three numbers cover almost every mug and bowl.

  • Leave a floor about as thick as the walls. That is what the needle tool measurement was for. A heavy base under thin walls dries and heats at two different rates, and the join between them is where a pot lets go.
  • Cut the ring about a third to a half of the base diameter. Wide enough that the piece is stable, narrow enough that it does not look like a plinth.
  • Keep the hollow slightly domed rather than dished, and give the inside corner of the ring a small radius instead of a square angle. A sharp inside corner concentrates stress in exactly one line, and that line cracks.

Three signals that you are done, and they all beat looking at it

Tap the middle of the base with a fingernail and listen. A dull thud means there is plenty left, a bright ring means you are near the walls, a rattle means stop right now. Feel the outside with your whole flat hand rather than fingertips, because a palm finds a bulge your eyes will not. Then pick the pot up. If it feels like the mug you would actually reach for at home, you are finished.

The pot does not get better after the point where it feels right. It just gets thinner.

And the honest note: a flat bottom with no foot at all is real pottery. Cut clean off the wheel, edge softened, nothing else. Plenty of excellent potters work that way and never turn a pot in their lives.

08 · Watch the hands Watch the hands

Nine videos, from eight potters, none of them us

Two videos, neither of them us

Every one of these is here because it shows something a paragraph cannot. Different tools, different countries, genuinely different methods, and a couple of them flatly disagree with each other. That is on purpose. Underneath the disagreement the clay is doing the same thing every time.

Both of these show what a paragraph cannot: how fast the wheel is really going, which knuckle is braced where, and the sound a properly leather-hard pot makes when the tool bites.

Nothing loads from YouTube until you press play, so the page stays quick and nobody gets a tracking cookie for scrolling past.

Start here

Florian Gadsby

How to Trim Pots — Tips and Tricks — A Beginner’s Guide

The most complete single explanation we know of. Tool differences, how to hold them, and several ways of fixing a pot to the wheel. If you only watch one, watch this one.

Watch on YouTube
Earth Nation Ceramics

Trimming For Beginners + Tap Centering Trick

Covers the two things beginners get stuck on in the same video: getting the pot true, and knowing what to cut once it is. Pairs directly with section 05 above.

Watch on YouTube
Kara Leigh Ford

How to Get Good at Trimming Pottery (even if you hate it!)

Starts from the honest position that trimming can ruin a perfectly good pot, which is exactly why people avoid it. Worth watching if this is the step you have been quietly skipping.

Watch on YouTube

The foot itself

Kyla Glendenning

How to Trim a Perfect Foot (Beginner Pottery Tutorial)

A clean, unhurried walk through one foot ring from start to finish. This is the one to have playing beside you the first few times you try it.

Watch on YouTube
Simon Leach

SIMON LEACH POTTERY – How to trim a foot ring on a pot!

Third-generation English pottery, which is where the word turning comes from. Watch how little he does and how few passes it takes. Speed here is a by-product of not making extra cuts.

Watch on YouTube
MW Ceramics

10 Pottery Trimming Tips Every Potter Should Know. Stop Ruining Your Pots!

Built around the specific mistakes that cost people pots, so it maps almost point for point onto section 10 below. Good second watch, once you have trimmed a few.

Watch on YouTube

Harder shapes, and the fun end of it

Ceramic Jim

Trimming Mugs 3 Different Ways (Beginner to Intermediate)

Three methods for the same shape, side by side. The clearest demonstration on this page of the fact that there is no single right way to hold a pot down.

Watch on YouTube
Florian Gadsby

How to Make Pottery Chucks and Chums — A Beginner’s Guide

Everything about the supports that let you trim a bottle, a vase or anything with a rim you dare not rest on metal. Watch this before your first narrow-necked piece, not after.

Watch on YouTube
Ingleton Pottery

Simple Textured Pottery Decoration Techniques : Chattering the Clay

The trick where the mistake becomes the decoration. A springy tool allowed to bounce leaves a ring of even marks all the way around, and it happens at the trimming stage or not at all.

Watch on YouTube
Florian Gadsby

How to Trim Pots — Tips and Tricks — A Beginner’s Guide

The most complete single explanation we know of. Tool differences, how to hold them, and several ways of fixing a pot to the wheel. If you only watch one, watch this one.

Watch on YouTube
Kyla Glendenning

How to Trim a Perfect Foot (Beginner Pottery Tutorial)

A clean, unhurried walk through one foot ring from start to finish. This is the one to have playing beside you the first few times you try it.

Watch on YouTube

Every title and channel here was checked against YouTube directly rather than copied from a search result. If one of these ever goes private or disappears, tell us and we will swap it. There are two dozen more, across every pottery skill, on our page of incredible videos from incredible potters.

There are two dozen more, across every pottery skill, on our page of incredible videos from incredible potters.

09 · Shapes

Different pots, different problems

The fourteen steps cover a mug and a bowl, which is most of what gets thrown in this building. Everything below is the same procedure with one thing changed.

Mugs and tumblers

Watch the handle, or leave it off

Trim before you attach the handle whenever you can. A handle changes where the weight sits, gets in the way of the coils, and gives you a reason to rush. If the handle is already on, trim with the pot slightly off-square so the handle clears the wheel head, or use a foam bat.

Mugs are also where weight is judged hardest. People do not measure a mug, they pick it up.

Bowls

The curve continues under the foot

The most common bowl mistake is trimming a wide flat pancake under it and leaving a hard corner where the wall meets the base. Follow the inside curve with your tool. If the outside curve and the inside curve are not parallel, you have a thick spot, and it is almost always right at that corner.

Plates and platters

Wide, flat and unforgiving

The floor of a plate is the most crack-prone piece of clay in ceramics, so leave it thicker than instinct says and take the weight out of the rim instead. Two concentric foot rings, or one ring plus a small central pad, stop a wide plate from rocking or slumping in the kiln.

Bottles and vases

This is what a chuck is for

Anything with a neck narrower than its belly cannot sit on its rim. A chuck holds the pot upright inside a thrown ring, a chum goes inside the pot and holds it from within. Both stop the delicate part from taking the load. The studio has some pre-made chucks, and you can throw your own from reclaim in about four minutes.

Lids and lidded jars

Trim them together, on the pot

Fit the lid to the jar and turn the pair as one object where you can, so the profile actually flows across the join instead of nearly matching. Check the fit constantly, because a lid that fits at leather hard and a lid that fits after firing are two different lids, and shrinkage does not care about your plans.

Faceted and altered pieces

Nothing round to center on

You cannot tap-center a square pot, so center it by eye against the wheel head rings with the wheel stopped, hold it with more coils than usual, and trim only the parts that are still circular. Sometimes that means a flat bottom and no ring, which was probably the right answer anyway.

10 · Diagnosis Diagnosis

Something went wrong. Find it here.

Eighteen symptoms, in roughly the order they show up in a session. Each one has a cause, and almost none of the causes are that you are bad at this.

Three symptoms account for most of what goes wrong in a first session. Each one has a cause, and none of the causes are that you are bad at this.

The tool skips, chatters, or throws dust instead of ribbons

Either the clay is too dry or the tool is dull, and you can tell them apart in about three seconds. Dry clay throws powder and chips at the edges, and it also puts silica dust in the air, which is the one genuine health hazard in a pottery studio, so stop rather than force it. If the pot is properly leather hard and you are still getting stutter marks, the blade is finished. Then brace both hands together and rest them on the wheel pan so the tool and the pot behave as one object.

I trimmed straight through the bottom

You did not measure. A thrown floor is thicker than it looks from above and thinner than it feels from below, and a needle tool pushed through the base before the first cut is the only honest answer. It happens to everyone once. Reclaim it, and measure first next time.

It came loose, or it drifted off center partway through

Nothing was holding it. Centering and securing are two separate jobs, and a pot that was only centered creeps a fraction on every pass until the cut goes lopsided or the piece leaves the wheel entirely. Three coils is the minimum and four is better, spaced evenly, each pressed down and outward onto the metal rather than inward into the pot. A damp wheel head and a heavy first cut make it much more likely, so wipe the head and take the corner off gently before you commit.

The tool skips and leaves ridges I did not ask for

Either the clay is too dry, or the tool is dull, or your hands are not braced. Test in that order. Dry clay throws powder, a dull tool tears rather than curls, and unbraced hands let the tool bounce at exactly the wheel’s frequency. Anchor both hands together and rest them on the wheel pan so the tool and the pot are effectively one object.

I trimmed straight through the bottom

You skipped step three. Measuring the floor with a needle tool before the first cut is the only way to know what you are working with, because a thrown floor is thicker than it looks from above and thinner than it feels from below. It happens to everyone once. Reclaim it, and measure first next time.

A hole that is genuinely tiny can sometimes be plugged with soft clay of the same body and heavily compressed, but be honest with yourself about whether you want a mug with a patched floor.

The pot came loose and flew across the room

Coils too small, too few, or pressed into the pot instead of down onto the wheel head. Three is a minimum and four is better, spaced evenly, and each one wants a real push against the metal. Wet wheel heads and heavy first cuts make it much more likely, so wipe the head and take the corner off gently before you commit.

It was centered and then it was not

Nothing was holding it. Centering and securing are separate jobs and the pot creeps a fraction on every pass until the cut goes lopsided. Stop, recenter, and coil it down before touching it again. If it keeps happening with coils on, you are cutting too aggressively.

One side of the foot is thicker than the other

The pot was off center when you cut, or it was never even to begin with. If the walls of the thrown piece are thick on one side, a perfectly centered trim still produces an uneven foot, because you are cutting a circle out of something that is not one. Check wall thickness before you blame the trimming.

There is a flat spot or a wedge cut out of one side

Classic off-center symptom, and it is why the five-revolution check exists. The tool met the pot on the near side and missed it on the far side, so you removed clay from one place and nothing from the other. Once it is cut, the only fix is to take the whole circumference down to match, which costs you weight you probably wanted to keep.

I am getting dust and crumbs instead of ribbons

Too dry. Stop, both because the pot will chip and because dry trimming puts silica dust in the air, which is the one genuine health hazard in a pottery studio. Wrap it with a barely damp cloth nearby overnight and try again, or accept the pot as it is and bisque it.

The rim went oval while it was upside down

The pot was too soft to carry its own weight on its rim, and your downward pressure did the rest. Bare metal is the worst surface for this. Use a foam bat or a chum for anything soft, thin or wide, and wait longer before trimming next time.

The pot is stuck to the wheel head and will not budge

It went down slightly damp, or it has been sitting there long enough to bond. Do not pry at the rim. Run a wire tool underneath if there is any clearance, or wet around the base slightly and wait a minute. Then wipe the head and start again, because a stuck pot cannot be tapped and everything after that is guesswork.

An S-shaped crack appeared in the bottom

Almost always a compression problem from the throwing stage, not a trimming one. The floor was not pressed back together after being opened and stretched, so the clay particles are aligned outward and the base pulls itself apart as it shrinks. Trimming can reveal it and thin walls can hurry it along, but the crime happened earlier.

Compress the floor properly with a rib while it is on the wheel, before you pull a single wall.

A crack showed up right where the foot ring meets the base

A sharp inside corner concentrates stress in exactly one line. Give the inside of every foot ring a small radius rather than a square angle, either with the tool or with a damp sponge at the end. It costs five seconds and it removes a whole category of cracking.

It survived trimming and cracked in the bisque

Usually uneven thickness. A trimmed pot with a heavy base and thin walls dries and heats at two different rates, and the join between them is where it lets go. This is the argument for trimming to a floor about as thick as the walls rather than leaving the base reassuringly chunky.

If a piece does come out of a firing damaged, there is a whole page on what can and cannot be saved: fixing pottery after a firing.

The surface is torn and rough rather than smooth

Dull tool, wrong angle, or too much pressure in one pass. A sharp tool held at a shallow angle taking a thin cut leaves a surface you barely need to sponge. A dull tool held steeply ploughing a deep cut leaves a surface no amount of sponging will rescue.

I cannot tell how thick the bottom is

Three ways, all worth learning. Measure with a needle tool at the start. Tap with a fingernail as you go and listen for the pitch rising. And on anything with a wide opening, put a hand inside and one outside and feel for the difference. Trusting your eyes is what puts holes in floors.

It still feels heavy but I am scared to cut more

Reasonable fear, wrong response. Take a shallow pass off the outside curve rather than the inside of the foot, because the outside is where the weight usually hides and it is much further from the floor. Then tap and listen. If it still thuds dully, you have room.

The long-term fix is at the wheel, not here: a pot thrown with a modest floor arrives at trimming with almost nothing to remove.

The coils left dents in the wall

Pushed inward instead of down. The coil should grab the wheel head and merely touch the pot. Softer coils, less of them per push, and pressure aimed at the metal. On very soft or very thin work, use a foam bat or a chum so nothing presses on the pot at all.

The foot chipped in the bisque

The edges were left sharp. Every cut edge on a trimmed foot should get a damp sponge or a chamois before the pot leaves the wheel. Sharp leather-hard edges are brittle dry edges, brittle dry edges are chipped bisque edges, and chipped bisque edges are sharp forever after the glaze fire.

Trimming one pot takes me twenty minutes

That is normal at the start and it is almost never the cutting that is slow. It is the setting up, the re-centering, and the small corrections that come from a pot that was not held down properly. People who trim fast are not cutting faster, they are cutting fewer times.

Everything on this page that happens before step eight is what buys that speed.

11 · The fun end

Chattering, and the other things you can only do now

Leather hard is a short window and trimming is not the only thing that happens in it. A few techniques exist purely because the clay is firm enough to hold a mark and soft enough to take one, and every single one of them is unavailable an hour later.

Chattering

The mistake, on purpose

Hold a thin springy metal rib lightly against the turning pot and let it bounce instead of stopping it. It skips, and every skip leaves a mark, and because the pot is turning at a steady rate the marks come out evenly spaced all the way around. A band of texture nobody could carve by hand in an hour.

It wants slightly firmer clay than trimming does, a very light grip, and a lot of failed attempts. Watch the Ingleton video above, then go ruin four pots learning it.

Faceting and carving

Flat cuts on a round pot

A wire or a sharp rib taken down the side of a leather-hard pot in straight passes turns a cylinder into something angular. Do it after you trim the foot, not before, because a faceted pot has nothing round left to center on.

Burnishing

Shine without glaze

Rub firm leather-hard clay with the back of a spoon or a smooth stone and the surface particles lie flat and go glossy. It is the oldest surface treatment there is, it only works on smooth clay bodies, and it is undone by any glaze you put over it.

All of it lives in the same hour

This is the real argument for paying attention to timing. Leather hard is when you can trim, chatter, facet, burnish, carve, attach a handle and cut a lid. Bone dry is when you can do exactly none of those things. The difference between a potter who has options and one who does not is very often just knowing which day to come back.

12 · Fact check

Six things people say about trimming that are not true

Not true

“You have to trim every pot”

You do not. Flat-bottomed pottery is legitimate pottery, and getting the bottom right while the piece is still on the wheel is a perfectly respectable way to work. Trim because you want the look or the weight, not because somebody told you it was compulsory.

Mostly not true

“Trimming is where you fix a bad throw”

Trimming refines a shape. It cannot rescue one. A pot with a lumpy uneven wall trims into a lighter pot with a lumpy uneven wall, because you are only ever cutting the outside and the inside stays exactly as you left it.

Not true

“Thicker is stronger”

Even is stronger. A consistent wall and floor will outlast a heavy base under thin walls every time, because the failure is never about the amount of clay, it is about two parts of the same pot shrinking at different speeds.

Not true

“Go slow, it is safer”

Slow is safer for setting the pot down and for tapping it true. It is worse for cutting. A tool meeting slow-moving clay grabs, digs and chatters, where the same tool on a faster wheel shaves cleanly. Slow down to look at the pot, then speed back up to cut it.

Not true

“You need a Giffin Grip to do this properly”

Potters trimmed for several thousand years using three lumps of clay, and the good ones still do. A grip is a convenience for repetition. It is not a skill upgrade, and learning on one means learning less.

Not true

“Chatter marks mean you did it wrong”

Sometimes they mean your tool is dull. Sometimes they mean somebody spent a year learning to do that deliberately and charges more for it. The marks are identical. The difference is whether they are even, and whether you meant them.

There are about seventy more where those came from, with sources, in the many myths of pottery.

13 · The words

Every term we just used, in plain English

None of this vocabulary is difficult once somebody says it out loud. Nobody in this building will think less of you for asking. Most of us had to ask too.

Bat

A removable disc that clips or sticks onto the wheel head. A foam one is the gentlest surface to rest a rim on while trimming.

Bone dry

As dry as clay gets in the air. Pale, room temperature, fragile, and past the point where trimming is possible.

Burnishing

Rubbing leather-hard clay smooth with a hard object so the surface goes glossy without any glaze.

Chamois

A soft damp leather or synthetic cloth, used here to round off freshly cut edges so they do not chip later.

Chatter

The evenly spaced marks left when a tool bounces against a turning pot. A defect when it is accidental, a decoration when it is not.

Chuck

A support, usually a thrown clay ring, that a pot sits down inside so an awkward shape can be trimmed without resting on its rim.

Chum

The opposite of a chuck. A solid form that goes inside the pot and holds it from within, gripping the inside of the rim rather than the lip.

Compression

Pressing clay particles back together after you have dragged them apart. Skipping it on the floor is the usual cause of an S-crack.

Foot ring

The raised band on the underside that the finished pot actually stands on, cut during trimming.

Gallery

The internal ledge inside a rim that a lid sits down onto. Refined at the same stage as everything else here.

Giffin Grip

A jig that clamps to the wheel head and holds a pot with sliding arms instead of clay coils. Purple Level and up in this studio.

Greenware

Anything made of clay that has not been fired yet, at any stage of dryness.

Leather hard

Firm enough to hold its shape and take a tool, still damp enough to cut cleanly. The entire window this page is about.

Loop tool

A wire or shaped metal loop on a handle. The default trimming tool, because the clay curls up through the loop instead of packing against it.

Needle tool

A pin in a handle. In trimming its job is measuring the floor thickness before you start removing any of it.

Off the hump

Throwing small pots one after another off the top of a single large lump. The bottoms usually need trimming, because they were cut off a cone rather than a flat base.

Reclaim

Scrap clay collected, rehydrated and wedged back into usable clay. Trimmings belong here, while they are still damp.

Rib

A flat shaped tool of wood, metal or rubber. A thin springy metal one is what makes chatter marks.

Ribbon tool

A flat steel band bent to shape and sharpened on the edge. Cuts a wider, smoother path than a loop.

S-crack

An S or Y shaped crack in the bottom of a thrown pot, appearing while drying or after firing. Nearly always a compression problem from the throwing stage.

Spinner

A small free-spinning disc pressed on top of an upside-down pot, letting you hold it down with one finger while it turns underneath.

Trimming

Turning a leather-hard pot upside down on the wheel and cutting away excess clay to refine the base and the lower profile.

Turning

Trimming. The older and more British of the two words, and the one you will hear from anybody trained in England.

Undercut

A small angled cut around the base so the edge is crisp and the pot appears to lift slightly off the table.

Wheel head

The flat metal disc that spins. The cast concentric rings on it are the free centering aid nobody uses.

Wire tool

A wire with two toggles, pulled underneath a pot to cut it free. Also the fastest way to free one that has stuck during trimming.

One last thing

Trimming is the step where a pot stops being a thing you made and starts being a thing you designed

Everything above exists so that when a pot goes wrong you have a name for what happened instead of a feeling about yourself. That is most of the battle. The rest is repetitions, and nobody can hand you those.

Come back to this page the next time a pot fails in a new way. That is what it is for.

That is the short version. The comprehensive one, behind the button at the top of the page, has nine videos, eighteen things that go wrong and why, and every word we used explained in plain English.

If you want somewhere to put the repetitions

We are a community pottery studio in Draper with 29 wheels, and every wheel is open to every membership level, first come first served. Classes run several days a week with instructors on the floor, and open studio runs Friday evenings and weekend mornings with nobody teaching, which is a genuinely good time to trim a backlog of pots in peace.