Pottery Date Night
 Bring All Your Friends Free Week
 Give a Month of Pottery
 Private Pottery Parties

 The Welcome Booklet
 Your First Ten Sessions
 The Pottery Process
 Finding the Studio
 Your Classes Never Expire
 The Four Tables
 Who’s Who
 The Rewards Program
 Flux Glazes
 The Calculators
 Kiln Tracker
 Holiday Kiln Deadlines

 Beginner’s Tool Set
 Fingernail Clippers
 Mayco Clay Mender
 Epoxy for Kintsugi
 Applicator Bottles
 Large Bead Rack
 Raku Workshop
 Nighttime Raku
 Horsehair and Feather Raku
 The Clay Hole T-Shirt
 Embroidered Crewneck
 Zip-Up Hoodie
 Pre-Made Bisqueware
 Glaze Catchers
 Kiln Cookies
 Clay Cubby Rental
 The Glaze Bible, Printed
 The Book of Molds, Printed
 Printable Pottery Guides
 Free Printable Trackers
 Gifts for Potters
 Christmas Pottery Ideas
 Mother’s Day Gift Ideas
 Pottery Date Night
 Studio Calendar
 2027 Studio Events
 What Should I Do Today?
 How to Throw on the Pottery Wheel
 How to Make a Pinch Pot
 How to Tap Center a Pot
 The Five Stages of Clay
 Is Pottery Hard to Learn?
 Pottery Wheel Practice Drills
 20 Easy Hand-Building Projects
 Everything That Sounds Wrong

 A Beautiful Piece, Every Time
 Slab Roller Tips
 Any Dish as a Slump Mold
 Slab Roller & Slab Mold Certification
 The Pottery Skill Tree
 Clay & Pottery Calculators
 Logging Your Pottery and Glazes
 The Pottery Dictionary
 Why Did My Pottery Do That?
 The Pottery Cone Chart
 Pottery Myths, Fact-Checked
 Is Handmade Pottery Food Safe?
 Incredible Ceramic Artist Videos
 How Dan Throws Giant Pots
 How to Dry Your Pottery
 The Pottery Wheel Introduction
 Pottery by Zodiac Sign
 Personality and the Pottery Wheel
 Pottery for Engineers
 ADHD, Hyperfocus, and Never Running Out
 Hobbies for Burnout
 Screen-Free Hobbies for Adults
 Every Addiction I Ever Had Lost to Art
 Functional Pottery Is Engineering
 How Do We Compare?
 Pottery Classes by City
 Every Pottery Studio in Utah
 Pottery in Draper
 Featured Members
 The Signature Wall
 Making Friends as an Adult Is Brutal
 The Clay Hole Commandments
 2027 Pottery Contests
 2027 Studio Parties
 Gallery Night

 Scream It Into the Void
 Destroy the Glaze Wall
 Daily Affirmation Cards
 Everything That Can Go Wrong
 Subscribe to Our Newsletters
 Contact The Clay Hole
 Corporate Team Building

 Glaze Combinations
 Glazes We Do Not Carry
 Making Glaze Test Tiles
 The Mega Glaze Tool
 How to Use the Mega Glaze Tool

 Glaze Brushing Techniques
 How to Use Underglaze
 How to Use Dipping Glazes
 Glaze Problems, Causes and Fixes
 The Dipping Glaze Guide

 Making a Glaze Catcher
 Fused or Sharp After Firing
 The Signature Wall
 His Viral Videos
 His Own Ceramics
 Meet Mud
Nerikomi, patterned colored clay
Every other decorating technique sits on the surface. Nerikomi is the pattern going all the way through the wall, so when you cut the piece in half the design is still there in cross section. This page covers the whole method: picking clays that will survive each other, coloring your own, building and slicing a pattern block, rolling it into a slab, forming it, and finishing it without smearing the thing you just spent two hours building.
Nerikomi is pattern that runs all the way through the clay instead of sitting on top of it. Stack colored clays into a block, slice the block, and press the slices into a slab. Here is the short version: the clays that work, the percentages, and the three things that ruin it.
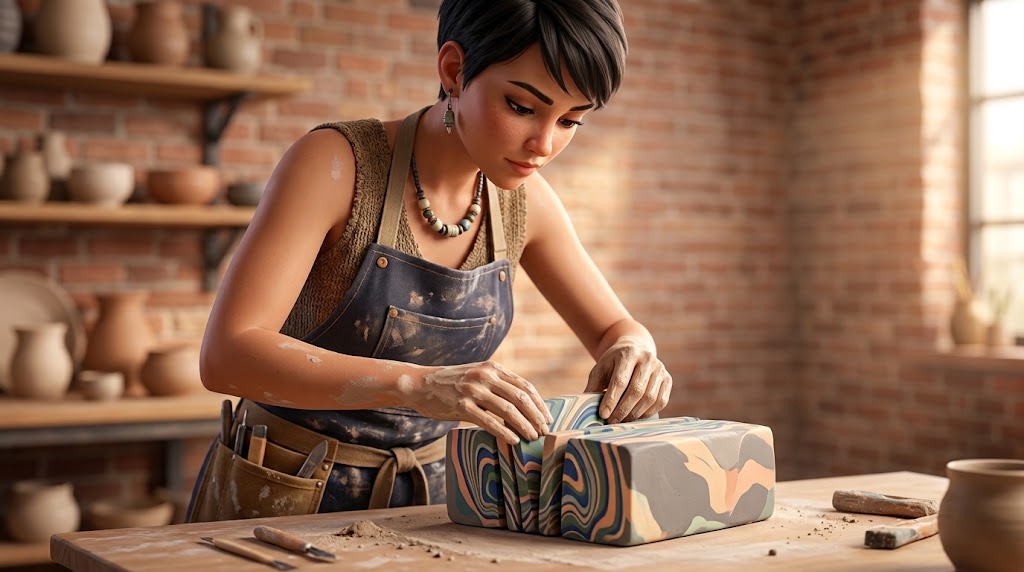
Build a loaf, slice the loaf
Think of a roll of sliced bread. You build a block of colored clay so the pattern you want is visible on the cut end, then you shave slices off that end. Every slice carries the same picture. Lay the slices edge to edge on a plain backing slab, roll them flat until the seams close, and you have a patterned sheet you can cut a plate or a mug out of.
The pattern is inside the clay, not on it. That is the whole appeal and it is also why the mistakes are unforgiving: you cannot wipe off a color that has been dragged into its neighbor, and you cannot fix a seam after the piece is dry.
Wetter than feels right
Colored clays only knit together seamlessly when they are genuinely soft. Stiff clay leaves hairline seams that open into cracks during drying. If your block feels comfortable to handle, it is probably too dry. Work on plastic, keep a spray bottle nearby, and store cut slices between damp cloths under plastic until the moment you use them.
Which clays, and how much stain
Which clays
One question decides it: do these two clays shrink by the same percentage? If they do not, the piece pulls itself apart at every color boundary while it dries and again when it fires.
On our shelf, B-Mix (fires cream) and Berlin Gray (fires dark gray) both publish 12% shrinkage, which makes them the easiest high contrast pair you can buy here without mixing anything. Fire a test tile of the two joined together before you commit a whole afternoon.
How much stain
If you want colors beyond what the bags give you, wedge mason stain into a white body. The working range is 8% to 12% stain by weight for most colors and 5% to 8% for blacks, dark blues and dark greens, which are strong enough that more is wasted.
Mix the powder to a paste with water first, then wedge it in. Never wedge dry powder. An N95 or better and gloves are required any time you are mixing powders here, and a P100 half mask for weighing dry color. Mason stains are an optional extra whose availability depends on your membership Level.
Two videos, then go do it
Reading gives you the order and the numbers. Watching gives you the things writing cannot carry: how soft the clay actually looks, how slowly the wire moves, how little pressure a rolling pin needs. Do both, in that order, and then stop watching and go build something.
Three things that ruin a nerikomi piece
- Mismatched shrinkage Two clays that move different amounts crack apart along every color line. This one is decided before you touch the clay, and no amount of care later fixes it. Match the percentage, and test a joined tile first.
- A dirty rolling pin The first pass picks up dark clay. The second pass smears it across your whites. Wipe the pin after every single pass, roll through a cloth until the surface firms up, and the pattern stays crisp instead of muddy.
- Drying too fast A slab made of several clays dries unevenly, warps, and splits at the seams. Cover it, dry it slowly under plastic, and let the moisture equalize. Slow drying is not optional here the way it is with a single clay body.
One studio rule worth knowing now
Finished nerikomi usually wants a light sanding to sharpen the color boundaries. On fired work in this building that is wet sanding only. Never dry sand fired clay here, ever. Dry sanding puts silica in the air that everybody else has to breathe.
What nerikomi actually is
Nerikomi is pattern built into the clay body rather than applied to its surface. You stack and arrange colored clays into a solid block, slice across that block, and every slice carries the same design. Press the slices into a sheet, cut a form out of the sheet, and the pattern runs through the full thickness of the wall.
It is the closest thing pottery has to millefiori glasswork, and it behaves the same way: all of the design decisions happen before you can see the design. You are building a picture in cross section, which is a genuinely different way of thinking about decoration, and it is the reason people find the first block so absorbing and the first slice so satisfying.

- Stack Slabs of two or more colored clays are laid up in the order you want to see them. At this stage the design is still a guess, because you are looking at the side of the stack and not the end.
- Compress and square The stack gets pressed and slammed until the layers are genuinely joined and the block has flat sides. Many potters wrap the finished block in a thin slab of one color, which gives every future slice a clean border.
- Slice A wire pulled across the end shaves off a thin tile. That tile is the design, finally visible, and you can cut as many identical ones as the block is long.
- Lay and roll Tiles get arranged on a plain backing slab and rolled until the seams close into one continuous sheet. That sheet is what you cut your actual pot out of.
Nerikomi, neriage, agateware, marbling
These words overlap and even experienced potters use them loosely. The convention most people follow: nerikomi is handbuilt work from deliberately arranged colored clay, neriage is colored clay thrown on the wheel, and agateware is the older English name for the same family of marbled results. Millefiori is the Italian glass term that gets borrowed for the bundled cane version. Nothing on this page changes based on which word you use, so use whichever one gets you the search results you want.
Read it, watch it, then read it again
Watching teaches what writing cannot
How soft the clay actually looks when it is wet enough. How slowly a wire moves through a block. How little pressure a rolling pin needs before it starts dragging color. Nobody has written those down successfully and we are not going to be the first. Four seconds of video does what four paragraphs cannot.
Reading is how it sticks
A page has no playback speed. You set the pace, you stop where you are confused, and you go back a line instead of a scrub bar. Nerikomi also happens in bursts across several days, so you need step three on Tuesday and step eight on Saturday. A list on a phone gets you there in two seconds with a muddy thumb. A nineteen minute video means finding minute 12:40 again, twice, with an ad in the middle.
That is why the videos below are placed inside the step they belong to rather than stacked in a playlist at the bottom, and why there is a printable bench card further down that fits on one sheet of paper.
Pick clays that shrink alike
This is the decision that determines whether your piece survives, and it is made before you touch anything. Clay shrinks as it dries and shrinks again as it fires. Two clays welded together that move by different amounts will pull against each other at every color boundary, and the boundary is exactly where the piece is weakest.
A one point difference is usually survivable on a small, simple form. Three points is not. The failure does not always happen in the kiln either: a badly matched slab will often split while it is still drying on the shelf, which at least saves you the firing fee.
| Clay body | Fires to | Published shrinkage |
|---|---|---|
| 52 Buff | Buff | 10.0% |
| B-Mix w/Grog | Off-white | 11.0% |
| B-Mix | Cream | 12.0%matched set |
| Berlin Gray | Dark gray | 12.0%matched set |
| Half & Half | White | 12.0%matched set |
| Speckled Buff | Buff, speckled | 12.0%matched set |
| B-Mix w/Specks | Cream, speckled | 12.47%, matched set |
| #16 Porcelain | White | 13.9% |
Figures are the manufacturers’ published averages, taken from each clay’s own page in our shop. The five rows tagged “matched set” are all within half a point of 12%, so any two of them can be laminated to each other.
The easiest pair on our shelf
B-Mix and Berlin Gray. Both publish 12%, and cream against dark gray is about as much contrast as you can get without mixing a single gram of anything. You can walk in, buy two bags, and start.
Berlin Gray’s figures are measured at the top of its firing range, which is hotter than we fire, so at cone 5½ it will move slightly less than the number says. That is not a margin in your favor. A body that moves slightly less than the one it is laminated to is slightly mismatched to it, which is the whole subject of this section, so it is a reason to fire a joined test tile before you commit an afternoon.
The pairing to avoid
52 Buff with #16 Porcelain. Ten percent against 13.9% is a 3.9 point gap, which is the widest mismatch available in this building. Those two are each excellent on their own and they should not be laminated to each other.
The same logic applies to anything you bring from outside. A low fire body mixed into a mid range slab is not a shrinkage problem, it is a melting problem, and it can damage a kiln shelf that other members are using.
Test a tile before you commit
Ten minutes now saves an afternoon later, and test tiles can be reserved here any time. Roll a small slab of clay A, a small slab of clay B, join them along one straight seam with a light score and slip, and let it dry slowly under plastic. Bisque it, then look at the seam. If it survived drying and bisque intact, the pair is workable. If it opened, believe it.
More on joining cleanly: how to score and slip pottery joins.
Color your own clay
Two bags off the shelf will get you a long way, but the moment you want teal, or three greens that step from pale to deep, you are mixing your own. The method is simple and the discipline is in the record keeping: measure everything, write it down, and you can repeat a color a year from now.
Start from a white or very light body, because a colorant can only darken what it is added to. Mason stains are the usual choice since they are engineered for consistency across a firing range. Raw oxides work too, are cheaper, and give a narrower and more geological set of colors. Both are available here, both depend on your membership Level, and mason stains are an optional extra that costs more.
How much to add
Percentages are by weight against the clay you are coloring.
- 8% to 12% mason stain for most colors. Ten is the sensible default for a first test. Saturated pinks, yellows and purples are the exception and want 12% to 18%, because they are the hardest family to get to read in a body.
- 5% to 8% mason stain for black, dark blue and dark green. They are strong, and more is simply wasted money.
- 2% to 4% raw oxide. Oxides are far more potent than stains, so the same percentage will give you something almost opaque.
- Under 5% gets you tints and pastels, which are lovely and are also the colors most likely to disappear under a glaze.
Potters disagree about whether to calculate against wet or dry clay weight, and in practice most work off the wet weight in front of them. Pick one, use it every time, and your notes stay comparable. Consistency matters more here than which convention you chose.
How to mix it in
- Weigh the clay first and write the number down before anything else happens.
- Weigh the powder to the percentage you want, wearing a P100 half mask and gloves.
- Make a paste by adding just enough water to the powder. Never wedge dry powder into clay. It will not disperse and it puts dust in the air.
- Open a well in the lump of clay, spoon the paste in, and fold it closed.
- Wedge until it is boring. Streaks mean it is not done. Cut the lump in half and look at the cut face: if you can see marbling, keep going.
- Label it and bag it with the stain name and the percentage. Wet colored clay all looks like mud.
Powders, masks and gloves
Mask and gloves are required any time you are mixing powders in this building, and we will walk you through safe handling before you start. It has to be a rated respirator: an N95 at the very least, and a P100 half mask for weighing dry color, because a cloth, surgical or one strap paper mask does not seal and is not protection at all. Dry stain and dry oxide are the two most avoidable exposures in a pottery studio. Wipe the table wet afterward rather than sweeping it, and keep the powder off your hands rather than washing it off them.
Stain calculator
Enter the weight of clay you are coloring and the percentage you want. Weigh the powder dry, then wet it into a paste before it goes anywhere near the clay.
A comfortable starting point. Most colors read clearly at this strength.
Build the pattern block
The block is the whole craft. Everything after this is careful handling of something you already designed. Sketch what you want the cut end to look like before you start stacking, because once the clay is in your hands it is very easy to build a beautiful block that is not the block you meant to build.
The moves
- Get the clay soft Softer than you would throw with. Colored clays only knit without a visible seam when they are properly wet. If a bag is stiff, wet it down and leave it a few days before you plan to build.
- Roll even slabs Consistent thickness is what makes a pattern read as deliberate rather than wobbly. Use guide sticks either side of the clay, or the slab roller.
- Stack in order Lay up the colors in the sequence you sketched. Work on plastic or damp cloth so nothing dries while you build.
- Compress properly Press down, do not push sideways. Sideways stretches the layers and distorts the pattern. Slam the block on the table on each face to square it and force the layers into genuine contact.
- Rest it Set the compressed block aside under plastic for a while. It will shrink back slightly on its own, and it is much better that this happens now than after you have cut and assembled slices.
- Wrap it, optionally A thin slab of one color wrapped around the outside gives every slice a clean border and makes assembled tiles look intentional rather than accidental. Slam once more after wrapping so it bonds.
Tools worth having
- Fine wire or fishing line. A lighter line cuts thin slices cleanly. A heavier line is for sectioning the block itself. A cheese wire works.
- Guide sticks or slats. Two strips of equal thickness laid either side of what you are cutting or rolling. This single trick fixes most consistency problems.
- A rigid metal rib. For compressing faces flat without stretching them.
- Plastic sheet and a damp cloth. Not optional. Everything you are not touching right now should be covered.
- A spray bottle. Small, frequent misting beats one big soaking.
- A notebook. Which stain, what percentage, which clay, what you would change.
As of September 2026, our slab rollers are free to use and are the fastest way to get even slabs. If you have not used one here yet, read how to use slab rollers and slab molds first.
Six blocks worth building first
Every complicated nerikomi block is these simple ones combined, rotated, cut and restacked. Build them in roughly this order and each one teaches you something the next one needs.
Stripes
The first block anybody builds. Stack slabs, compress, slice. It teaches you what compression really means and whether your clays are wet enough.
Checkerboard
A striped block cut into columns, every other column flipped, then restacked. Simple to describe and unforgiving: any sloppiness shows up as a wavy grid line.
Jelly roll
Two thin slabs laid on each other and rolled up from one edge. The fastest way to get a complex looking slice, and very forgiving of imprecision.
Chevron
A striped block sliced on a diagonal, then mirrored and rejoined. Your first taste of cutting a block apart to make a better one out of the pieces.
Gradient
One color blended into white in steps, then stacked in order. Mix the middle steps by wedging your two ends together in measured parts and label every one.
Cane bundle
Several small blocks, often jelly rolls, packed together and filled between with a background color. This is the millefiori look, and it is the hardest to keep clean.
Slice the block
This is the moment the design finally becomes visible, and it is also where a good block gets ruined by a dull wire and an impatient hand. Slicing is slow on purpose.
- Set your thickness Lay a guide stick either side of the block and rest the wire on them, so every slice comes out the same. Roughly a quarter inch is a sensible first thickness. Thinner slices are more elegant and much more fragile.
- Pull, do not saw One steady pull with the wire held taut. Sawing back and forth drags color from one layer into the next, which is the single most common way a crisp block turns into a muddy one.
- Peel carefully Lift the slice off with a flat blade or your fingers spread wide. Slices tear easily and a torn slice is not worth rescuing.
- Store them wet immediately Cut slices go straight between damp cloths under plastic. They need to still be soggy when you assemble them, or the seams will not close.
- Cut more than you need You will lose some. Cutting an extra three now costs nothing and saves you re-wetting a block that has started to stiffen.
If a block has gone too firm to cut cleanly, it can usually be brought back. See how to soften hard, stiff pottery clay.
Turn slices into a sheet
Slices on their own are too thin and too weak to make a pot from. They get laid onto a plain backing slab and rolled until the whole thing becomes one piece of clay with a picture running through it.
The sequence
- Roll a backing slab Plain clay, slightly thicker than you want the finished sheet, sitting on a sheet of plastic so you can move it without touching it.
- Arrange the slices Edge to edge, touching, no gaps. Gaps leave voids, and a void with a wet face inside it blows out in the bisque. Press each slice down lightly as you place it.
- Roll through cloth first Lay a thin cloth over the top and roll through it. The cloth stops the pin from dragging wet color sideways across your pattern, which is exactly what a bare pin does on a soft surface.
- Wipe the pin every pass Every single pass. Dark clay picked up on one pass gets smeared into the whites on the next, and the only cure at that point is sanding at the bisque stage.
- Finish bare Once the surface has firmed slightly and the pin no longer drags, remove the cloth and do the final passes directly. This is what sharpens the edges of the pattern.
- Let it rest Cover it and leave it. Rolled clay wants to shrink back, and you would rather it did that flat on a board than after it has been formed.
Why the cloth is not optional
A rolling pin on soft colored clay works like a squeegee. It picks up the top few thousandths of a millimeter of one color and lays it down on the next one. Through a cloth, the pressure still transfers but the surface never slides, so the boundaries stay where you put them.
You will see a faint cloth texture on the surface afterward. That is fine. It disappears in the final bare passes and again when you scrape at leather hard.
Slab rollers and colored clay
Our slab rollers will do this faster than a pin, but run colored clay between clean canvases and take thinner passes than you would with a plain slab. One heavy squash through a slab roller will distort a pattern that took an hour to build. Several light passes, rotating the slab between them, keeps it honest.
Form the piece
Anything you would normally make from a slab, you can make from a patterned sheet. The difference is that the pattern stretches when the clay stretches, so the form you choose changes the design you spent all that time on.
Forms that suit a patterned sheet
- Plates and shallow bowls in slab molds. The gentlest option. The sheet barely stretches, so the pattern arrives more or less as you designed it. We keep over 150 slab molds here, so there is almost always a shape that fits.
- Cylinders and mugs. Wrap the sheet around a paper-covered tube, join with a light score and slip, and add a base. Straight sides mean almost no distortion.
- Tiles. The purest showcase, and the one that most rewards a crisp block. Flatness is the whole game here.
- Drape-formed dishes. Over a hump, the pattern spreads outward from the center. Some of the nicest nerikomi uses this deliberately.
- Applied panels. A patterned sheet cut into shapes and laid onto a plain thrown or handbuilt form, which lets you use a small amount of expensive pattern on a large pot.
Related: getting the best results from our slab molds, how to make a slab mug, and ceramic tiles that stay flat.
What we cannot do here
Plaster work and slip casting are not allowed in this building, so you cannot pour your own plaster press molds on site. You are welcome to make them at home and bring the finished slab molds in with you. Plaster is banned for a specific reason: a crumb of it in a clay body absorbs moisture after firing and blows a crater out through the surface, sometimes months later, in somebody else’s work.
Reveal the pattern
A freshly formed nerikomi piece usually looks disappointing. The surface is a hazy film of smeared color and the design underneath is muted. That is normal. The pattern gets revealed by taking a very thin layer off the surface, and doing it at the right moment is most of the skill.
At leather hard, scrape
Wait until the piece is properly leather hard. Too soft and the tool smears fresh color across the surface, which makes the problem worse. Too dry and you are grinding rather than shaving.
- Use a metal rib or a flat, sharp scraper, held almost flat to the surface.
- Take whisper thin passes. You are removing a film, not carving.
- Work in one direction per area, and wipe the tool constantly.
- Stop the moment the colors go crisp. Every extra pass thins your wall.
- A final burnish with a smooth rib or the back of a spoon will take a scraped surface to something close to polished stone.
After bisque, wet sand
Bisque firing hardens everything and shows you exactly where stray color still sits. A light sanding at this stage sharpens the boundaries further and is where most of the difference between good and outstanding nerikomi lives.
Wet sanding only
Sanding and grinding fired work is allowed here, but it is wet only, never dry, ever. Dry sanding fired clay puts free silica into the air of a room full of people. Keep the piece and the paper wet, work over a bucket, and rinse rather than wipe. Wear safety glasses and an N95 or better. Bone dry colored clay gets the same treatment: sand it wet, over a bucket, and never dry in this building. The bucket goes to The Wash Pit, never a sink, and the table is wiped down wet afterwards rather than swept.
Dry it slowly, fire it normally
Nerikomi is not fired any differently than the rest of your work. It is dried very differently, and that is where pieces are lost.
Drying
Slower than you think is necessary. A sheet made of several clays holds different amounts of water in different places, and it needs time for that to equalize before any of it goes bone dry. Cover it loosely, uncover it in stages over several days, and keep it off a draft.
Warping and seam splits almost always trace back to this step rather than to the block.
Firing
We bisque to cone 05 and glaze to cone 5½, which is cone 5 with a twelve minute hold. Bisque firings are free. Glaze firings run $0.05 per cubic inch, with a flat $4.80 for anything 125 cubic inches or under.
Some stains shift or fade as temperature rises, so a color that looked right in a low fire sample may not survive here. Test tiles are the only real answer.
Glazing, or not
Clear glaze deepens and saturates the colors, and it is what most people want on the inside of anything that holds food or liquid. Bare, sanded clay on the outside gives the matte, stone-like look the technique is known for.
Doing both is common: clear inside, bare outside, and glaze the rim as well, because that is where lips land. Leaving a piece unglazed does not remove the firing fee, but it does remove the glaze up-charge.
One glaze chemistry note worth knowing
Clear glazes containing zinc can weaken certain stain colors, pinks and lavenders in particular, which come out of the kiln paler than the raw clay promised. If a pink disappeared under a clear and you cannot work out why, this is usually the reason. Try a different clear on a test tile before you give up on the color. Our glaze finder will show you what we stock, and how to use dipping glazes covers getting an even clear coat over a surface you have just spent hours refining.
Colored clay on the wheel
Everything above is handbuilt. The wheel version, usually called neriage, is a completely different experience: instead of designing a pattern you are setting up conditions and then finding out what happens. Colored clays wedged loosely together and thrown will spiral into marbled bands that follow the movement of your hands.
What changes at the wheel
- Wedge less, not more. Every extra fold blends the colors closer to a single muddy tone. Stop while the seams are still obvious.
- Centering is where color dies. Long, hard centering smears everything. Get it centered efficiently and move on.
- Use less water. Slurry from mixed clays is gray, and it coats the outside of your pot in exactly the color you were trying to avoid.
- The surface hides the pattern until you trim. A thrown neriage pot looks gray and unpromising until the outer skin comes off. Trim, scrape or wet sand and the pattern appears.
- Shrinkage still rules. The matched pairs from the table above apply exactly the same way here.
Useful alongside this: trimming and turning on the wheel and using ribs while you throw.
Nine things that go wrong, and why
Almost every nerikomi failure is one of these, and almost all of them are decided several steps before the moment you notice.
The colors look muddy
Something dragged. Usually a rolling pin used bare on a soft surface, or a wire sawed rather than pulled. Scrape at leather hard and it will improve dramatically. Next time, roll through cloth and wipe the pin every pass.
The seams opened while drying
The clay was too stiff when you assembled it, or the drying was too fast, or both. Colored clays need to be genuinely soft to knit. If it happened at one specific color boundary every time, suspect mismatched shrinkage instead.
It cracked apart in the kiln
Almost always shrinkage. Two clays that move different amounts will separate along the boundary, and the kiln is where the last of that stress gets released. Check the published percentages and fire a joined test tile.
The pattern is stretched out of shape
You pushed sideways instead of pressing down, or you took one heavy pass on the slab roller instead of several light ones. Some stretch is inherent in forming a curve, so plan for it: a design you like flat will read wider at the rim of a bowl.
The piece warped
Uneven drying across a sheet holding several different clays. Dry it flat, covered, and slowly. Tiles and plates are the most vulnerable, and a wooden bat or a board under a covered piece helps the underside dry at the same rate as the top.
The color vanished under the glaze
Either the stain percentage was too low, or the stain does not survive our temperature, or the clear contains zinc and leached it. Test tiles answer all three, and they answer them for the cost of one tile rather than one pot.
A piece blew out in the bisque
Gaps between slices that never closed. Every slice must touch its neighbor before you roll, and every layer of the block must be genuinely compressed. What does the damage is water, not air: a gap leaves a void with a wet face inside it, and that water flashes to steam in the bisque and leaves through the wall.
The block will not slice cleanly
It has gone too firm. Wrap it in damp cloth inside plastic for a day or two and try again. Blocks are worth rescuing since they represent the bulk of the work, and clay that dried out is one of the easiest problems in pottery to reverse.
Everything is gray now
Colored clay contaminates fast. One unwashed rib carries black into your whites for the rest of the session. Clean between colors, keep a dedicated cloth for the dark clays, and keep colored offcuts out of the shared reclaim unless you genuinely do not mind the barrel going gray.
What to do with colored scrap
Nerikomi generates a lot of offcuts, and the good news is that the ugly ones are useful. Wedge all your leftovers together and you get a single muddled color that makes an excellent backing slab, a base for a mug, or the plain clay you wrap a block in. Reclaim happens at home rather than here, and there are clay discard barrels by the office and out in the warehouse, and every member can take up to 15 lbs a month from them free if you want practice material. See how to reclaim clay for the whole process.
The bench card
The whole process in the order it happens, short enough to keep on a phone propped against a bucket. Print it from the button at the top of the page and it comes out on a single sheet.
Nerikomi, start to finish
Ten moves- Match the shrinkage. Two clays with the same published percentage. B-Mix and Berlin Gray both read 12%.
- Soften everything. Wetter than throwing clay. Stiff clay leaves seams that open later.
- Color it, if you are coloring it. 8% to 12% mason stain, 5% to 8% for darks. Paste first, P100 mask and gloves, label the bag.
- Roll even slabs. Guide sticks either side, or the slab roller in light passes.
- Stack and compress. Press down, never sideways. Slam each face to square it. Rest it under plastic.
- Slice with a taut wire. One steady pull, no sawing. Guide sticks set the thickness. Straight into damp cloth.
- Lay slices on a backing slab. Edge to edge, no gaps. Press each one down as you place it.
- Roll through cloth, wipe the pin every pass. Finish bare once the surface firms.
- Form it and dry it slowly. Slab molds, a tube, or flat as a tile. Cover it and uncover it in stages over days.
- Scrape at leather hard, wet sand after bisque. Thin passes. Sand wet, bone dry or fired, and never dry sand either one.
What this actually costs you
Nerikomi is slower than almost anything else you can do with clay.
Time
A block is an hour or two on its own. Slicing, assembling and rolling is another session. Then drying takes days rather than hours. A single small plate is realistically a two week project from first slab to finished piece, most of which is waiting.
Materials
Two bags of clay instead of one, and mason stains are an optional extra that costs more on top of your membership, with access depending on your Level. Firing is unchanged: bisque free, glaze at $0.05 per cubic inch, with a flat $4.80 for anything 125 cubic inches or under.
Losses
Expect to lose pieces, especially early. Even experienced colored clay potters talk openly about seconds. That is not a reason to avoid it, but it is a reason to start with tiles and small dishes rather than the set of six dinner plates you have in mind.
Why do it anyway
Because nothing else looks like it. A glaze sits on a pot and a nerikomi pattern is the pot, right through the wall, visible on the foot ring and on the cut edge of a broken shard a thousand years from now. It is also the only decorating technique where the exciting part is a surprise you engineered yourself: you build a block for two hours with no idea whether it worked, and then one pull of a wire tells you.
The ones we actually get asked
Can I do this with just two bags off the shelf?
Yes, and it is the best way to start. B-Mix and Berlin Gray both publish 12% shrinkage and give you cream against dark gray, which is plenty of contrast for stripes, checkerboards and jelly rolls. You only need stains once you want colors those two cannot make.
Can I use underglaze instead of colored clay?
Not for this. Underglaze is a surface coating, so it gives you a picture on the outside rather than pattern through the wall, and it will not show on a cut edge or a foot ring. Underglaze is excellent and it is a different technique with different strengths. See how to use underglaze and engobes, what they are and when to use one.
How thin should slices be?
Around a quarter inch is a forgiving first thickness. Thinner slices look more refined and tear far more easily, and they also give you less material to scrape away at leather hard, which is exactly when you want a little spare. Get consistent before you get thin.
Do I have to glaze it?
No. Bare, sanded nerikomi fired to cone 5½ is a genuinely beautiful matte surface, and our clay bodies are dense enough at that temperature to be worth leaving unglazed. If the piece will hold food or liquid, glaze the inside with a clear and you get the best of both.
Is nerikomi food safe?
The colored clay itself is fired into the body, so there is nothing sitting loose on the surface, and that is not the same thing as food safe. Do not treat a bare stained surface as food safe just because the color is in the wall rather than on it: most reds, oranges and bright pinks are encapsulated cadmium stains, and encapsulation on its own is not a food safety claim. The usual rules still apply: any surface that holds food or liquid should be glazed with a food safe clear, and a stain you bought for decorative work is worth checking before you put it on the inside of a mug.
Can I keep a block for later?
Yes. Wrap it tightly in plastic with a damp cloth inside and it will keep for weeks. Check on it. A block that dried out can usually be brought back, but it is easier to not let it happen. A clay cubby rental is a sensible place to keep one.
What do I do with all the colored offcuts?
Wedge them all together. The resulting muddled color is genuinely useful for backing slabs, bases and block wraps, and it is one of the few cases in pottery where the ugly leftover has an obvious job. Keep it out of the shared reclaim if you care about white clay staying white.
Can I bring my own colored clay from home?
Talk to studio staff first. The concern is never the color, it is the firing range: a low fire body in a mid range kiln melts, and it does not only ruin your piece. Anything you bring has to mature at the temperature we fire to, and staff would much rather answer the question than find out afterward.
Pages that pair with this one
Start with stripes and a small tile
Nobody’s first block is the one they imagined. Build stripes out of two matched clays, slice them, roll them into a tile, and fire it. You will learn more from that one tile about compression, moisture and dragging than from any amount of reading, and then everything on this page will make a different kind of sense.
Two matched clays, stripes, one small tile. That is the whole first project, and it teaches you compression, moisture and dragging in an afternoon. There is a longer version of this page with the full method, six videos, six pattern blocks and the nine ways it goes wrong, sitting behind the toggle at the top.
Bring your questions to any instructor in the studio. Colored clay is one of those techniques where five minutes of somebody watching your hands is worth an hour of troubleshooting on your own.
Which version would you like to print?
Videos come out as a labeled box with the title and channel to search for, since paper does not play them.