Pottery Date Night
 Bring All Your Friends Free Week
 Give a Month of Pottery
 Private Pottery Parties

 The Welcome Booklet
 Your First Ten Sessions
 The Pottery Process
 Finding the Studio
 Your Classes Never Expire
 The Four Tables
 Who’s Who
 The Rewards Program
 Flux Glazes
 The Calculators
 Kiln Tracker
 Holiday Kiln Deadlines

 Beginner’s Tool Set
 Fingernail Clippers
 Mayco Clay Mender
 Epoxy for Kintsugi
 Applicator Bottles
 Large Bead Rack
 Raku Workshop
 Nighttime Raku
 Horsehair and Feather Raku
 The Clay Hole T-Shirt
 Embroidered Crewneck
 Zip-Up Hoodie
 Pre-Made Bisqueware
 Glaze Catchers
 Kiln Cookies
 Clay Cubby Rental
 The Glaze Bible, Printed
 The Book of Molds, Printed
 Printable Pottery Guides
 Free Printable Trackers
 Gifts for Potters
 Christmas Pottery Ideas
 Mother’s Day Gift Ideas
 Pottery Date Night
 Studio Calendar
 2027 Studio Events
 What Should I Do Today?
 How to Throw on the Pottery Wheel
 How to Make a Pinch Pot
 How to Tap Center a Pot
 The Five Stages of Clay
 Is Pottery Hard to Learn?
 Pottery Wheel Practice Drills
 20 Easy Hand-Building Projects
 Everything That Sounds Wrong

 A Beautiful Piece, Every Time
 Slab Roller Tips
 Any Dish as a Slump Mold
 Slab Roller & Slab Mold Certification
 The Pottery Skill Tree
 Clay & Pottery Calculators
 Logging Your Pottery and Glazes
 The Pottery Dictionary
 Why Did My Pottery Do That?
 The Pottery Cone Chart
 Pottery Myths, Fact-Checked
 Is Handmade Pottery Food Safe?
 Incredible Ceramic Artist Videos
 How Dan Throws Giant Pots
 How to Dry Your Pottery
 The Pottery Wheel Introduction
 Pottery by Zodiac Sign
 Personality and the Pottery Wheel
 Pottery for Engineers
 ADHD, Hyperfocus, and Never Running Out
 Hobbies for Burnout
 Screen-Free Hobbies for Adults
 Every Addiction I Ever Had Lost to Art
 Functional Pottery Is Engineering
 How Do We Compare?
 Pottery Classes by City
 Every Pottery Studio in Utah
 Pottery in Draper
 Featured Members
 The Signature Wall
 Making Friends as an Adult Is Brutal
 The Clay Hole Commandments
 2027 Pottery Contests
 2027 Studio Parties
 Gallery Night

 Scream It Into the Void
 Destroy the Glaze Wall
 Daily Affirmation Cards
 Everything That Can Go Wrong
 Subscribe to Our Newsletters
 Contact The Clay Hole
 Corporate Team Building

 Glaze Combinations
 Glazes We Do Not Carry
 Making Glaze Test Tiles
 The Mega Glaze Tool
 How to Use the Mega Glaze Tool

 Glaze Brushing Techniques
 How to Use Underglaze
 How to Use Dipping Glazes
 Glaze Problems, Causes and Fixes
 The Dipping Glaze Guide

 Making a Glaze Catcher
 Fused or Sharp After Firing
 The Signature Wall
 His Viral Videos
 His Own Ceramics
 Meet Mud
Surface techniques
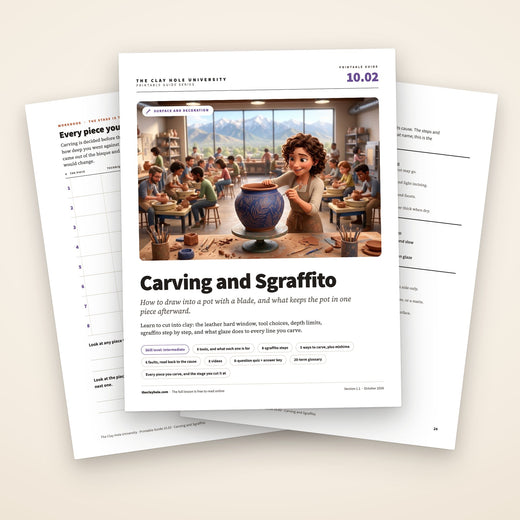
Carving and sgraffito
Two ways to put a drawing into a pot instead of onto it. Carving takes clay away. Sgraffito takes away a colored coating you painted on first, so the clay underneath comes back through as the line. Both of them live or die on the same thing, and it is not your drawing ability. It is catching the clay at the right moment.
The short version
All of it, in five lines
- Carving cuts into the clay. Sgraffito cuts through a coating on top of the clay. That is the entire difference between the two words.
- Both happen at leather hard. Firm enough to hold a line, soft enough that the tool slices instead of chipping. Miss the window and nothing else you do matters.
- Never cut more than a third of the way through your wall. If you plan to carve, throw or build the wall thicker on purpose.
- Brush the crumbs off dry. A wet sponge smears your line into a gray blur, permanently.
- Glaze pools in every cut and goes darker there. That is the payoff. Gloss shows it, matte hides it.
How to use this page
Why there is a video and a list for the same thing
Watching somebody cut into clay tells you things writing cannot. The angle of the tool. How slowly they move. How little pressure it actually takes. Four seconds of video does what four paragraphs cannot.
Reading does the opposite job. It gives you the order of operations, the numbers, and the reason a step exists, and it sits still on a screen while your hands are covered in clay. Nobody has ever successfully scrubbed back through a fourteen minute video with a wet thumb to find the bit about brushing off the burrs.
There is decent evidence that the two together stick better than either one alone. Watching gives you the picture. Writing it down in steps gives you something to rehearse and check yourself against. When you have both, the video stops being something you watched and starts being something you can do.
So this page is built to be used twice. Watch a clip once, all the way through, before you touch anything. Then keep the short lists open on your phone at the table. Every list here is deliberately short enough to hold in your head between glances, and there is a copy button further down that puts the whole thing in your notes app.
Start here
Carving takes clay away. Sgraffito takes a coating away.
People use the two words as if they were the same technique. They are not, and the difference decides everything else: which stage you work at, how deep you can go, what your line looks like, and whether you needed to paint anything first.
The difference decides how deep you can go and whether you needed to paint anything first.

- Your clay body Whatever you threw or built with. Nothing on this page changes it. Chip the rim and it is the same color all the way through.
- The coating Underglaze, an engobe, or a colored slip. Two or three thin coats, about as thick as a sheet of paper once it dries. This is the only layer sgraffito is interested in.
- A sgraffito line Cut through the coating and stop the moment you reach clay. Shallow. The contrast is doing the work, not the depth.
- A carved cut Straight into the clay itself, and it works with a coating or without one. Depth is the whole point, because depth is what the glaze will find later.
- Glaze over the top It runs off the flat and gathers in every cut, so every line you made comes back darker. This is the part beginners do not expect and never forget.
You can do both on one pot, and most good pots do
Carve the form, coat it, then scratch the detail back through. Or draw in sgraffito and then cut two or three deeper lines to give the glaze somewhere to pool. Nobody is checking which category your pot belongs in. The reason to know the difference is that the two want different depths and different tools, and using a sgraffito tool to do relief work is how people end up cutting straight through a wall.
The one that decides everything
The moisture window
Almost every disappointing carving is a timing problem wearing a costume. Too wet and the clay squashes ahead of the tool and your line goes fat and blurry. Too dry and the tool stops cutting and starts chipping, and chips do not come back. There is a window in between, it is real, and you can learn to find it in one session.
Too wet and your line goes fat and blurry. Too dry and the tool chips instead of cutting. Two tests find the window in between.
The thumbnail test
Press your thumbnail into the bottom of the piece where nobody will look. If it leaves a clean dent with almost no effort and no clay sticks to your nail, you are in the window. If clay sticks, wait. If your nail skids and barely marks it, you are late.
The shine test, for coated pots
Once you have painted underglaze or slip on, forget the clay and watch the coating. While it still looks wet and shiny it will smear. The moment the shine goes flat and matte but the surface is still cool to the back of a knuckle, start cutting. That is the window, and on a dry studio day it is shorter than you think.
| Stage | What it feels like | Good for | What goes wrong |
|---|---|---|---|
| Soft leather hard | Cool, slightly tacky, takes a fingerprint if you grip it | Faceting with a wire, deep relief, anything that removes a lot of clay at once | Fine lines close back up behind the tool. Sgraffito smears. The pot distorts in your hand |
| Mid leather hard | Firm, cool, no fingerprint, thumbnail dents it easily | Almost everything. Sgraffito, incising, fluting, mishima, relief | Very little. This is the window. Work here whenever you have the choice |
| Dry leather hard | Lighter in color, barely cool, thumbnail has to work | The finest sgraffito detail, because the burrs brush away instead of smearing | Coatings start chipping at the edge of the cut. Deep carving cracks the wall |
| Bone dry | Pale, room temperature, chalky, alarmingly light | Signing your name lightly. A gentle crumb brush over a damp towel. Not much else | The tool chips rather than cuts, dust goes everywhere, and the piece snaps if you lean on it |
How to hold the window open
Clay does not wait for your schedule. Bag the piece with a damp paper towel beside it, never touching the clay, and it will hold at leather hard for about a week. If one side has run ahead of the other, cover just that part and leave the rest open. If a piece got away from you and went bone dry, wrapping it damp will not bring it back. Be honest with yourself: past that point you are carving a different material, so start another piece.
Underglaze pulls water out of the clay
This surprises everybody, because you just painted something wet onto it. A piece that was comfortably leather hard when you started coating can be noticeably drier the next morning. Plan for it. If you coat on a Tuesday and come back on a Thursday, bag the piece with a damp paper towel beside it before you leave.
Kit
Eight tools, and what each one is actually for
Four tools to start with
There are thousands of tools in this building and you need about three of them to start. The rest of this list is worth knowing so you can recognize the right one when a line is fighting you.
There are thousands of tools in this building. These four will do almost everything.
Loop tool
A flat metal loop on a handle. Scoops a U shaped channel. The workhorse for fluting, relief backgrounds and anything wider than a line.
Ribbon tool
A thinner, springier loop, often teardrop or oval. Cuts a shallower, more controlled groove than a loop tool and turns tight corners without digging.
Needle tool
A spike in a handle. Scores your guide lines, cuts thin incised lines, and opens the first pass of a mishima groove. It scratches rather than slices, so it leaves more burr than most.
Sgraffito tool
A tiny sharpened blade, often double ended with two widths. It slices a clean walled line and lifts a curl instead of tearing. If your sgraffito looks fuzzy, this is usually the missing item.
Fettling knife
A long flexible blade. Cuts flat facets, bevels a rim, and trims a clean edge along a carved panel. Keep the blade almost flat to the surface, not upright.
Wire and wiggle wire
A straight wire slices a dead flat facet in one pull. A wiggle or twisted wire leaves a rippled cut face. Both want a soft leather hard pot, and both work best on a thick wall.
Metal rib
Not for cutting. It is how you scrape a mishima fill back level, and how you smooth a surface before coating it so the coating goes on evenly.
Soft dry brush
The most underrated item here. It is the only correct way to remove the crumbs a cut leaves behind. Dry, soft, and never wet. On a bone dry piece, brush gently over a damp towel.
What you can reach depends on your Level
Every tool in the building carries a color mark, and the rule is one sentence: if it is your Level or below, it is yours. Green Level Members bring their own basic tools, so a loop tool, a needle tool and a soft brush are worth owning. Yellow Level adds hundreds of studio tools, Purple Level adds thousands of higher end ones, and Black Level adds the most exclusive tools we stock. Sharp fine blades tend to sit higher up the ladder for the obvious reason.
Every tool carries a color mark: if it is your Level or below, it is yours. Green Level Members bring their own, so a loop tool, a needle tool and a soft brush are worth owning.
The rule that saves pots
Never cut more than a third of the way through
Plan the thickness before you plan the drawing
If you already know a piece is going to be carved, leave the wall thicker than you normally would. Around a quarter inch is comfortable for sgraffito and light incising. Closer to half an inch gives you room for real relief and for facets. You cannot add thickness back at leather hard, and a pot thrown thin and then carved deep will crack in the bisque even if it looked perfect going in.
Depth is where confidence gets people. A deep cut looks incredible in the moment, because the shadow is dramatic and the glaze is going to pool beautifully in there. Two weeks later it comes out of the kiln with a crack running through the best line on the pot.
The reason is shrinkage. A carved groove is a thin spot, and thin spots dry and shrink faster than the wall around them. That difference pulls, and clay under tension finds the weakest line, which is the one you just cut. The deeper the cut relative to the wall, the more certain that becomes.
A third of the wall is the number to keep in your head. Sgraffito never goes near it, since sgraffito only needs to reach the clay. Fluting and relief get close. Faceting is the exception that proves the rule, because a facet removes a wide shallow slice rather than a narrow deep one, which is why it works and a narrow groove of the same depth does not.
One more thing that catches people: carve the outside evenly. A pot with heavy carving down one side and nothing down the other dries lopsided, and lopsided drying is how a rim goes oval.
The main event
Sgraffito, start to finish
Sgraffito is Italian for scratched, and that is genuinely all it is. Put a contrasting color onto leather hard clay, wait, then scratch your drawing back through it. It is the single most rewarding thing you can do to a plain pot and it needs no drawing talent, because a shape cut out of a dark field reads as confident even when your hand wobbled.
Sgraffito is Italian for scratched. Put a contrasting color onto leather hard clay, wait, then scratch your drawing back through it. No drawing talent required.
First, pick your coating
Underglaze is the easy answer and holds a line better than anything else here. Studio underglaze unlocks at Purple Level; below that, bring your own Speedball Underglaze or Amaco Velvet Underglaze. Engobes and colored slips both work too.
Underglaze
The easiest and the most reliable. Dense color, crisp edges, and it holds a line better than anything else in the building. Studio underglaze unlocks at Purple Level, and Black Level adds the Amaco Velvet line on top of that. Green and Yellow Level Members are welcome to bring their own as long as it is Speedball Underglaze or Amaco Velvet Underglaze. No other brands come through the door.
Engobe
The best answer if you want the whole background to be a color we do not stock as a clay, like black or terracotta. We do not sell engobes, so this one is a jar you buy and bring in, and Mayco is the only line we allow. Two coats covers.
Colored slip
The traditional route, and the cheapest. Slip is just clay and water, so a white slip over a darker body or the reverse costs you almost nothing. Coloring your own slip means stains and oxides, which sit behind the Level system and carry their own handling rules, so talk to a main instructor before you mix anything.
Contrast beats color
The only thing that decides whether sgraffito reads from across a room is how far apart the coating and the clay are in value. Dark navy over 52 Buff is spectacular. A mid tone tan over Speckled Buff is a lot of work for a drawing nobody can see. Hold the bottle next to the pot, squint, and if the two blur together, pick a different bottle.
Eight steps
Seven steps
- Smooth the surface. Rib or lightly sponge the piece at leather hard. Coating goes on evenly over a smooth wall and blotchy over a rough one, and every throwing ridge shows up in your line later.
- Wait for mid leather hard. Thumbnail test. Firm, cool, dents cleanly. Coating a pot that is still soft will slump it.
- Smooth it, then wait for mid leather hard. Rib the surface, then thumbnail test: firm, cool, dents cleanly.
- Two or three thin coats, crossed. First coat horizontal, second vertical, third diagonal if you need it. Crossing the directions is what kills brush marks. Let each coat lose its shine before the next, or you will lift the one underneath.
- Two or three thin coats, crossed. Horizontal, then vertical. Crossing the directions kills brush marks.
- Sketch it in pencil. Light pencil burns away completely in the bisque. Nobody is impressed by freehand.
- Wait for the shine to go. Matte but still cool. Too wet and the tool drags color into a smear. Too dry and the coating chips at the edge of every line.
- Cut with the tool low and slow. Closer to flat than upright, almost no pressure, and let the blade do it. Support the pot with your other hand right behind the cut.
- Brush the burrs off dry. A soft dry brush, always. Do not blow them. Do not wipe with a damp sponge, because that grinds color into your clean clay and there is no undoing it.
- Dry it out, bisque it, then glaze. Underglaze and slip both go through the bisque before any glaze touches them. Bisque firings are free, so this costs time and nothing else.
Sgraffito on bisque is a different animal
You will see it done online. It works, and the line quality is different: harder, dustier, more like scratching stone. At The Clay Hole underglaze goes on raw clay and gets fired before glaze touches it, so plan your sgraffito for the leather hard stage rather than the bisque stage.
Into the clay itself
Five ways to carve
No coating required for any of these. They all cut the clay, and every one of them is really a decision about what the glaze is going to do afterward, because a cut is just somewhere for glaze to gather.
Incising
Drawing a line into the surface, nothing more. The simplest thing on this page and the one people skip past.
- Mid leather hard. Softer than that and the line closes up behind the tool.
- One confident pass beats four nervous ones. Rehearse the stroke in the air first.
- A shallow line will disappear under a thick glaze. If you want to still see it after firing, go deeper than feels necessary, or pick a glaze that breaks.
- Turn the pot, not your wrist. A banding wheel makes every curve better.
Relief carving
Cut the background away so the design stands proud. The most work on this page, and the most dramatic result.
- Build the wall thicker on purpose. This is the technique that eats depth.
- Outline the whole design first with a fine tool, then remove background inside those outlines. Committing to the outline is what keeps the shape from drifting as you work.
- Slope the background gently up to your outline rather than leaving a vertical wall. A sharp ninety degree ledge traps glaze and looks harsh.
- Work all the way around before you go deeper anywhere. Finishing one panel and then starting the next is how a pot ends up with two different depths.
- Let the crumbs dry a moment before brushing. Moist crumbs pack into your cuts and undo the work.
Fluting
Repeating U shaped grooves running down the form. Architectural, calming to do, and unfairly effective under a glaze that breaks.
- Divide the pot before you cut. Mark quarters at the rim, then halve those, and keep halving. Counting sixteen flutes evenly by eye does not work.
- Pull each flute in one continuous stroke from top to bottom. Stopping mid flute leaves a step you will see forever.
- Keep the tool angle constant. Rolling your wrist as you travel turns an even flute into a teardrop.
- Leave the rim alone for the last half inch. Flutes that run off the rim make it fragile and wavy.
Faceting
Slicing flat planes off a round form so it stops being a cylinder and starts being an object with edges.
- Throw the wall much thicker than normal. A facet removes a slice, so what is left in the middle of each panel is thinner than the corners.
- Soft leather hard, or even straight off the wheel. This is the one technique that is easier when the clay is wetter.
- Pick an even number and mark them at the rim first. Six and eight are friendlier than five.
- Pull the wire in one steady motion and do not stop partway. A hesitation mark on a facet is permanent.
- A wiggle wire gives you a rippled cut face instead of a flat one, and it catches glaze beautifully.
Chattering
Letting a springy metal tool bounce against a spinning pot so it cuts a ring of tiny repeating marks. Half technique, half accident.
- It happens on the wheel while you trim, so the piece has to be centered and stuck down.
- You want the tool to skip, which is the opposite of everything else you have been taught. Hold it lightly, far back on the handle, and let it bounce.
- Drier clay chatters more readily than damp clay. If nothing is happening, wait an hour.
- Wheel speed changes the spacing of the marks. Do it on a test piece first, because the difference between a lovely texture and a chewed up mess is about one setting.
The least predictable one
Chattering is the least controllable thing on this page and it will fail more often than it works for the first while. Practice it on the bottom of pots you have already decided you are not attached to. When it does land, nothing else looks like it.
The opposite move
Mishima, or carving in reverse
Sgraffito removes color to show clay. Mishima does exactly the reverse: carve the line into bare clay first, flood color into the groove, then scrape everything back so the color survives only inside the cut. You end up with a drawing that looks inlaid, because it is.
It gives you the finest line available in ceramics. Sgraffito lines have a slightly soft edge because you are cutting through a layer. A mishima line is a filled groove with two clean walls, so it stays as thin as the tool that made it, which means lettering, hair, botanical detail and anything that would turn to mush at a brush tip.
- Carve at mid leather hard. Shallow and clean. A deep groove traps air and fights you when you fill it.
- Overfill on purpose. Push underglaze or slip into the line and let it stand proud. It shrinks as it dries and a stingy fill leaves gaps.
- Wait for the fill to go matte. Scraping a wet fill just smears it across the surface and now you have a stain instead of a line. Keep the pot at leather hard while you wait, because scraping bone dry clay makes silica dust.
- Scrape back with a metal rib held almost flat. Light passes. The surface comes clean and the groove keeps its color.
- Or use wax first, and skip most of the scraping. Wax the surface, carve through the wax, fill the lines, and wipe. The wax refuses the color everywhere except in your cuts.
This is one of the few times a heat gun genuinely earns its keep, because you are waiting on a thick fill to dry. Heat guns are open at Purple Level and Black Level, and natural drying still gives the better bond, so use it when you are actually waiting on a fill rather than just being impatient.
The unglamorous part
Burrs, crumbs and cleanup
Every cut throws up a little ridge of displaced clay along its edges. Deal with those badly and a beautiful piece of carving comes out of the kiln looking furry. Deal with them well and it looks like somebody who knew what they were doing made it.
Wait, then brush
Let the crumbs firm up for a few minutes before you touch them. Moist crumbs smear and pack into your lines. Slightly dried crumbs flick away and leave a clean edge. A soft dry brush is the whole tool kit here.
Never a wet sponge
On coated work this is the mistake that cannot be undone. A damp sponge picks up the color you just cut through and drags it across the bare clay you just revealed, and now the whole drawing is a gray blur. Dry brush only until the piece is fired.
Do not blow on it
Everybody does it once. The crumbs land somewhere else on the pot, usually on a part still damp enough to stick to, and now they are stuck to the surface where a glaze will find them. Brush them down and away, over the edge of the table.
The bone dry pass
Once the piece is fully dry, go over the carving one more time with a dry brush and check it in raking light from the side. Burrs you could not see at leather hard show up clearly as shadows at this stage, and they brush away without any effort. Clay dust is silica, so brush gently over a damp towel, away from the shared tables, and wipe the table down wet afterward.
Support the piece
Bone dry clay is the most fragile thing in this building. It has no give at all. Hold the piece from inside, or work on a banding wheel so you are turning the pot rather than reaching around it and leaning on a handle.
After the firing, wet only
A sharp edge left on a fired piece gets a wet diamond pad or a wet sanding sponge, never a dry one, and you wear safety glasses and an N95 or better while you do it. Dry sanding fired work is not allowed here at any Level, and that is a health rule rather than a preference.
The payoff
What glaze does to carved work
Carving is not finished when you stop cutting. It is finished in the kiln, because the glaze on top is what turns a groove into a line somebody notices from across a room. Pick the wrong one and the same pot comes out looking like nothing happened to it.
Carving is finished in the kiln, not when you stop cutting. The glaze decides whether anybody sees it.
Glaze runs off the high spots and gathers in the low ones
That is the entire mechanic. Where it sits thicker it fires darker and deeper, so every cut you made reads as a darker line. It also means a shallow cut can vanish completely under a thick glaze, which is why an incised line that looked crisp at leather hard sometimes disappears.
Breaking glazes were made for this
A glaze that breaks goes translucent and pale where it is thin and dark and rich where it pools. On a carved pot that means the design draws itself. If you carved it, ask at the glaze wall which of ours break, or filter the Mega Glaze Tool for glazes that hold texture.
Matte flattens relief. Gloss shows it.
A matte glaze scatters light evenly and quietly cancels out most of the shadow you worked for. A gloss or satin catches the edge of every cut. If you spent three hours carving, do not finish it in a matte without seeing a test tile first.
Over sgraffito, use a clear
The drawing is the design, so the glaze job is to make it glassy without changing it. A clear over fired underglaze keeps the color and the crisp edges and adds the shine. A colored glaze over sgraffito is a real technique, it just stops being a drawing and becomes something more atmospheric.
Deep cuts hold more glaze, and more glaze runs
A pot with heavy carving is carrying noticeably more glaze than a smooth one of the same size, and a runny glaze in a deep groove has somewhere to travel. Keep it well up off the foot, and put every piece on a kiln cookie, every time. A kiln shelf costs hundreds of dollars to replace.
Bare carving is a finish too
Unglazed carved clay fired to cone 5½ is lovely on sculpture and decorative work, all texture and no shine. It is not an option for anything you eat or drink from, because a food safe rating belongs to a glaze, so bare clay has none, and a carved groove gives food somewhere to lodge.
Test tiles are not optional for this
A glaze behaves completely differently over a carved surface than it does on a flat one, and no amount of looking at a jar lid will tell you which. Carve a few lines of varying depth into a test tile, run your candidate glaze across it, and keep the tile. You can reserve test tiles any time, and one tile answers more than this whole section can.
Keep this open at the table
The whole thing, on one screen
Tap copy and it lands in your notes app, so you are not scrolling a page with clay on your thumb.
Before you cut
- Smooth the surface at leather hard
- Thumbnail test: clean dent, no clay sticking
- Coating on in 2 to 3 thin crossed coats
- Sketch lightly in pencil, it burns away
- Wait for the shine to go matte
- Thicker wall if you are carving deep
While you cut
- Tool held low, almost flat, not upright
- Almost no pressure. Let the blade cut
- Other hand supports right behind the cut
- Never past a third of the wall
- Turn the pot, not your wrist
- Work all the way around before going deeper
After you cut
- Let crumbs firm up, then soft dry brush
- No wet sponge. No blowing.
- Second, gentle brush pass once bone dry, over a damp towel, then wipe the table wet
- Bisque first, glaze after. Always
- Gloss shows the cuts, matte hides them
- Kiln cookie under every piece
Diagnosis
Six things that go wrong, and why
Three things that go wrong
Nearly all of it comes back to moisture. Find the one that just happened to you.
It chipped instead of cutting
You are late. The coating has gone brittle and so has the clay, so the tool is breaking material off rather than slicing it. Mist it lightly, bag it and give it an hour, then try again on the next one. Chips already taken cannot be put back, though a glaze that pools will soften how they read.
The line smeared and went fat
Too early. The coating was still wet enough to move, so the tool pushed it sideways instead of removing it. Wait for the shine to go. If it is only a couple of lines, let the piece dry a bit and cut a slightly wider line over the top of the smear.
The whole drawing is gray and fuzzy
Somebody reached for a damp sponge. Wet cleanup grinds color into the clay you just exposed and it is not reversible on greenware. Dry brush only. On a future piece, waiting a few minutes for the crumbs to firm up makes this problem disappear.
It cracked in the bisque
Cut too deep for the wall, or carved heavily on one side only. The thin line dried and shrank faster than the wall around it and the clay pulled apart along it. Next piece, build thicker where you plan to carve, and spread the carving evenly around the form.
The carving vanished under the glaze
Cuts too shallow, glaze too thick, or a matte that filled and flattened everything. The piece can be refired with a different glaze on top if you want to try again, and the same firing fee applies. Next time, cut deeper than feels necessary and pick a glaze that breaks.
The coating flaked off around every line
Coats went on too thick, or onto a dusty bone dry surface that they never really gripped. A heavy layer shrinks more than the clay under it and something has to give. Two or three genuinely thin coats hold far better than one generous one.
Bring anything you are not sure about to a main instructor before you do something to it. They are the folks in the pink tees, and half of these are fixable if nobody has tried to fix them yet.
House rules
What applies to carved work here
Carving itself has almost no rules. The materials under it and over it are where the studio has opinions.
- Coated work gets bisqued before any glaze touches it Underglaze, engobe and slip all go on raw clay and go through a bisque first. Unfired color lifts off into shared glaze, and one dip is enough to ruin a bucket. Bisque firings are free, so this costs time and nothing else. Underglaze, engobe and slip go on raw clay and get bisqued before any glaze. Unfired color lifts off into shared buckets.
- Underglaze is for drawing, not for filling Sgraffito, line work and detail are exactly what it is for, so carving through it is squarely a yes. Solidly coloring a whole pot needs a main instructor to say so first, and background fills behind an illustration count as filling. Sgraffito and line work are exactly what it is for. Solidly coloring a whole pot needs a main instructor to say so first.
- Only two underglaze brands, and only one engobe brand Speedball Underglaze and Amaco Velvet Underglaze, and Mayco for engobes. Green and Yellow members can bring their own of those. Nothing else comes through the door, because unknown chemistry in a shared kiln is how a studio loses shelves. Speedball Underglaze and Amaco Velvet Underglaze, and Mayco for engobes. Nothing else comes through the door.
- No dry sanding fired work, ever A sharp edge left by a cut gets wet sanding only, at every Level. This one is not negotiable and it is not about the pot.
- Stains and oxides sit behind the Level system Mixing your own colored slip means colorants, and access to oxides, stains and washes depends on your Level. Mason stains cost extra, and a fitted N95 or better and gloves are required whenever powders get mixed. Ask a main instructor and they will walk you through it.
- Every piece goes on a kiln cookie Deep carving holds more glaze than a smooth pot does, and a groove gives a runny glaze somewhere to go. Cookies are made from your own scrap clay, rolled like a thin tortilla and about three quarters of an inch wider than whatever sits on it.
Questions
The ones we get asked
Still stuck?
Ask a main instructor. They are the folks in the pink tees, and there are several in the room during every instructed class.
Do I need to be able to draw?
No, and sgraffito is unusually forgiving about it. A silhouette cut out of a dark field reads as deliberate even when the hand behind it was shaky, because the eye reads the shape rather than the line. Simple repeating motifs, plants, moons, fish and lettering all look better than complicated scenes on a first attempt. Sketch it in pencil first, which burns away completely in the bisque.
Which clay carves best?
Smooth bodies hold fine detail best, so B-Mix and #16 Porcelain are the ones that give you the crispest line. A coarse grog fights fine detail because the tool keeps hitting a hard particle and skipping, though grog is helpful for deep relief because it resists cracking. B-Mix with Grog uses a very fine one, so it only adds a slight texture. 52 Buff sits comfortably in the middle and is a fine place to learn.
Can I carve a piece that is already bisqued?
Not really, and not in any way you would enjoy. Bisque is a ceramic material now, not clay, so it grinds rather than cuts and it produces dust you do not want to breathe. Any shaping of fired work here is wet work only. Plan the carving for the leather hard stage instead.
What if my piece dried out before I got back to it?
If it is only a little past leather hard, mist it lightly, bag it and give it an hour, and the moisture evens out. Be realistic about how far it went, though. A bone dry pot does not come back evenly, and soaking it to try is a good way to crack it.
How do I get lines that go evenly around the pot?
Divide rather than measure. Mark two points opposite each other at the rim, then halve each gap, then halve again, and you will land on eight even sections without a ruler. For a horizontal band, put the pot back on a wheel head or a banding wheel, rest your hand on something solid, and let the pot move under a stationary tool rather than trying to travel around it.
Can I carve through more than one color?
Yes, and it is one of the better tricks going. Lay down one color, let it set, then a second color over the top. Cut lightly and you are into the first color. Cut harder and you are down to bare clay. Three tones out of one drawing, and the only cost is patience while each layer dries.
Does carved work cost more to fire?
No. Firing is charged on the size of the piece, at five cents per cubic inch with a four dollar eighty minimum on the glaze firing, and bisque firings are free. Carving does not change the outside dimensions, so it does not change the price.
Is a carved mug still food safe?
As long as it carries a glaze its maker rates for ware that holds food over the top, yes. Not every glaze is, so look yours up in the Food Safe Lookup first. Carving on the outside of a mug does not affect the drinking surface at all. Deep texture on the inside of a bowl is worth thinking about, since food does lodge in grooves and a dishwasher does not reach into them the way it reaches a smooth surface.
Go cut something
Find the window and the rest is practice
That is the working version
Everything on this page is downstream of one skill, and it is not drawing. It is recognizing the moment clay is ready. Cut a dozen lines into a scrap slab at four different stages of dryness and you will know it in your hands forever, and every technique here becomes a matter of taste rather than luck.
That is enough to go and cut a good pot tonight. There is a much longer version of this page behind the Comprehensive toggle up at the top, with eight videos, five carving methods, mishima, and the reasons behind every rule here.
Which version would you like to print?
Videos come out as a labeled box with the title and channel to search for, since paper does not play them.