Pottery Date Night
 Bring All Your Friends Free Week
 Give a Month of Pottery
 Private Pottery Parties

 The Welcome Booklet
 Your First Ten Sessions
 The Pottery Process
 Finding the Studio
 Your Classes Never Expire
 The Four Tables
 Who’s Who
 The Rewards Program
 Flux Glazes
 The Calculators
 Kiln Tracker
 Holiday Kiln Deadlines

 Beginner’s Tool Set
 Fingernail Clippers
 Mayco Clay Mender
 Epoxy for Kintsugi
 Applicator Bottles
 Large Bead Rack
 Raku Workshop
 Nighttime Raku
 Horsehair and Feather Raku
 The Clay Hole T-Shirt
 Embroidered Crewneck
 Zip-Up Hoodie
 Pre-Made Bisqueware
 Glaze Catchers
 Kiln Cookies
 Clay Cubby Rental
 The Glaze Bible, Printed
 The Book of Molds, Printed
 Printable Pottery Guides
 Free Printable Trackers
 Gifts for Potters
 Christmas Pottery Ideas
 Mother’s Day Gift Ideas
 Pottery Date Night
 Studio Calendar
 2027 Studio Events
 What Should I Do Today?
 How to Throw on the Pottery Wheel
 How to Make a Pinch Pot
 How to Tap Center a Pot
 The Five Stages of Clay
 Is Pottery Hard to Learn?
 Pottery Wheel Practice Drills
 20 Easy Hand-Building Projects
 Everything That Sounds Wrong

 A Beautiful Piece, Every Time
 Slab Roller Tips
 Any Dish as a Slump Mold
 Slab Roller & Slab Mold Certification
 The Pottery Skill Tree
 Clay & Pottery Calculators
 Logging Your Pottery and Glazes
 The Pottery Dictionary
 Why Did My Pottery Do That?
 The Pottery Cone Chart
 Pottery Myths, Fact-Checked
 Is Handmade Pottery Food Safe?
 Incredible Ceramic Artist Videos
 How Dan Throws Giant Pots
 How to Dry Your Pottery
 The Pottery Wheel Introduction
 Pottery by Zodiac Sign
 Personality and the Pottery Wheel
 Pottery for Engineers
 ADHD, Hyperfocus, and Never Running Out
 Hobbies for Burnout
 Screen-Free Hobbies for Adults
 Every Addiction I Ever Had Lost to Art
 Functional Pottery Is Engineering
 How Do We Compare?
 Pottery Classes by City
 Every Pottery Studio in Utah
 Pottery in Draper
 Featured Members
 The Signature Wall
 Making Friends as an Adult Is Brutal
 The Clay Hole Commandments
 2027 Pottery Contests
 2027 Studio Parties
 Gallery Night

 Scream It Into the Void
 Destroy the Glaze Wall
 Daily Affirmation Cards
 Everything That Can Go Wrong
 Subscribe to Our Newsletters
 Contact The Clay Hole
 Corporate Team Building

 Glaze Combinations
 Glazes We Do Not Carry
 Making Glaze Test Tiles
 The Mega Glaze Tool
 How to Use the Mega Glaze Tool

 Glaze Brushing Techniques
 How to Use Underglaze
 How to Use Dipping Glazes
 Glaze Problems, Causes and Fixes
 The Dipping Glaze Guide

 Making a Glaze Catcher
 Fused or Sharp After Firing
 The Signature Wall
 His Viral Videos
 His Own Ceramics
 Meet Mud
Obvara, or Baltic raku: a surface you cannot draw.
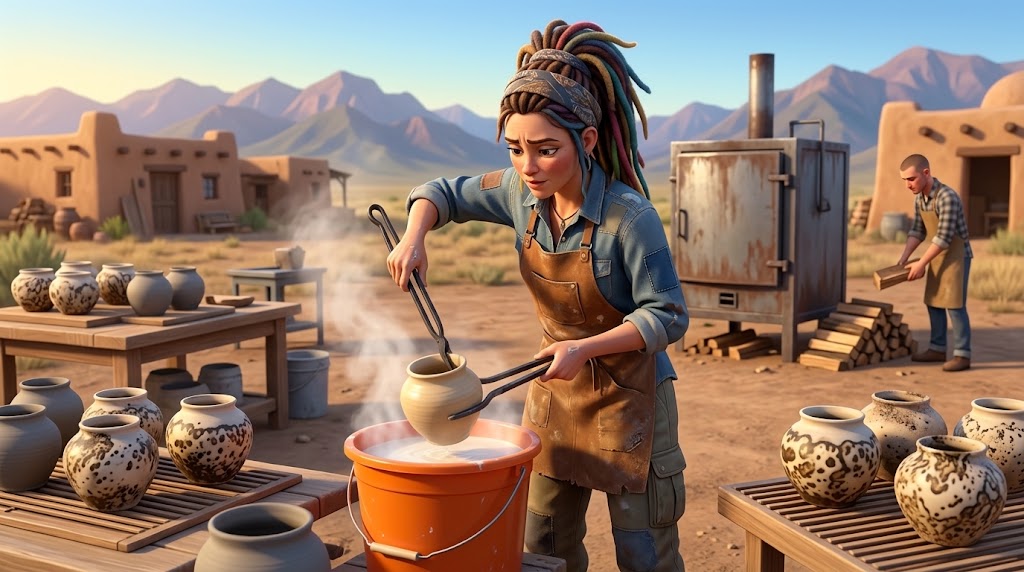
A bisque pot comes out of the kiln glowing orange and goes straight into a bucket of fermented flour and water. The brew cooks onto the clay in a second or two, in creams and browns and blacks that nobody chose. Cold water stops it. What you are left with is a pattern that looks like wood grain, or leopard skin, or something dug out of the ground.
This is how to do that without cracking pots, hurting yourself, or ending up with a bucket of gray slime and twelve wasted pieces.
- Bisque only, never glazed
- Pull at about 1650F
- Seconds in the brew
- Decorative, not food safe
Obvara in five sentences.
Obvara is raku equipment doing something completely different, and there is no glaze anywhere in it.
You bisque a pot, reheat it in a raku kiln to about 1650F, pull it out glowing, and dunk it into a bucket of flour, yeast, sugar and water that has been fermenting on a shelf for three days. The brew hits clay hot enough to cook it on contact: the sugars burn black, the starches and proteins puff up and run down the side in pale cream lines, and the whole surface writes itself in roughly two seconds. Cold water is the off switch, and the instant you hit it the pattern is finished forever. Everything else on this page is either preparation for those two seconds or cleanup afterward.
Three dials, and nothing else.
- How hot the pot is. Below about 1500F the brew does not cook, it just slimes. Around 1650F is where the pattern comes out sharp.
- How long it sits in the brew. Two to four seconds with one swirl. Longer is not darker, it is muddier.
- How long it sits in open air before the water. This is the real darkness control. Two seconds out of the brew reads pale and graphic, six to eight reads smoky, past ten it blurs into one flat brown.
Move one dial at a time. A batch of twelve pots where every variable changed is twelve pots you learned nothing from.
What is actually happening when the brew hits the pot.
You can do obvara perfectly well by copying the motions. You will do it better knowing what the brew is doing, because every choice further down this page is a choice about those first seconds.
The brew is food, and the pot is a griddle.
The mixture is bread ingredients. Flour, water, yeast, a spoon of sugar. Three days of fermentation breaks some of the starch down and fills the bucket with gas, so what you dunk into is a live, fizzing batter about as thick as thin pancake mix.
Clay at 1650F is roughly four times hotter than a hot skillet. When the two meet there is no cooking stage. The water touching the clay flashes straight to steam, the sugars caramelize and then carbonize to black, and the starches and proteins puff and drool down the side of the pot before they can burn. Everything you see afterward is those first seconds of violence, held still.
Which means the pattern is grown, not printed.
The dark marks are burnt sugar. The pale marks are protein and starch that set before the heat got to them. The wood grain and the leopard spotting come from brew running downhill across a curved surface while it cooks, which is why a pot dunked rim first looks nothing like the same pot dunked upside down, and why no two are ever the same.
Where it comes from.
Obvara belongs to the Baltic region and its neighbors. Latvia, Lithuania, Belarus, and parts of Ukraine and Russia, in common use through the nineteenth century and largely gone by the twentieth. The name comes from a root meaning to scald or to pour boiling water over something, which is a far better description of the process than the modern nickname, Baltic raku.
The story usually told is that a potter dropped a hot pot into a bucket of fermenting mash left over from bread or beer, pulled it out marked, and told everybody. We have no way to verify that and we like it anyway.
Two things the old use tells you that the photographs do not. It was a sealing technique, so it genuinely does close the surface a little. And it was used on porous low fired earthenware, so sealed meant less leaky, not watertight.
Why this page is words and video, not one or the other.
Obvara happens in about four seconds of scalding brew. The words cover everything before and after, the videos cover the four seconds. Read it, watch it, then go outside.
The whole firing, in nine steps.
The whole firing, in six steps.
This is the list to have open on your phone. Everything on it assumes you have read the safety section further down, because none of these steps are safe to improvise.
-
Bisque fire first, with nothing glazed
Obvara only marks bare, porous, bisque fired clay. We bisque to cone 05, which sits in the usual range for obvara. Glaze anywhere on the piece, including a glazed interior or a glazed foot, is a patch the brew will slide off.
-
Mix the brew three days out
Flour, yeast, sugar and warm water, left somewhere warm to ferment. Full recipe in the next section. This is the step people leave until the day before and then wonder why nothing happened.
-
Set up outdoors, in a straight line
Kiln, then brew bucket, then water bucket, then a wire rack to set finished pieces on. Both buckets wide enough to take the pot and the tongs without a fight. Arrange it so a hot pot never has to travel over your feet or change direction.
-
Load loosely and fire to about 1650F
At The Clay Hole the instructor or a trained helper loads and runs the kiln, and you never reach in. At a kiln of your own, pieces should not touch each other or the kiln wall. They are coming out one at a time with tongs, and anything wedged against a neighbor is a piece you will knock over while it is glowing.
-
Kill the heat, then open
At The Clay Hole the instructor opens the kiln. At a kiln of your own, burner off or power cut before the lid comes off. Not while it is running. Everybody who has done this a while has a story about the alternative.
-
Lift one piece, with a grip you already practiced
Take the tongs to the widest part of the form and get a real grip, not a pinch on the rim. If this is your first firing, practice the grab on a cold pot ten times before anything is hot.
-
Dunk and swirl, two to four seconds
Straight in, one swirl, back out. Keep hold of the tongs the entire time. A pot let go of in the brew is a pot you fish out later by hand, and the brew is opaque.
-
Lift, and count in open air
This is the part nobody tells you about and it is where the picture is actually made. Out of the brew, hold it up and watch the surface darken. Two seconds for pale and graphic. Six to eight for smoky. When it looks like the thing you wanted, move.
-
Into the water, swirl, then onto the rack
The water is the off switch. A short swirl stops the reaction and washes the loose brew away. Set it on the rack and leave it there until it is cool enough to pick up bare handed.
-
Bisque fire, nothing glazed
We bisque to cone 05. Glaze anywhere on the piece is a patch the brew will not mark.
-
Mix the brew three days ahead
Flour, yeast, sugar, warm water. Recipe in the next section.
-
Set up outdoors in a line
Kiln, brew bucket, water bucket, drying rack. Gear on before anything is hot.
-
Fire to about 1650F, kill the heat, open the kiln
At The Clay Hole the instructor or a trained helper loads and opens the kiln. At a kiln of your own, load so nothing touches and cut the burner or power before the lid comes off.
-
Grab one, dunk and swirl, then count in the air
Two to four seconds in the brew. Lift it out and watch it darken. Two seconds is pale, six to eight is smoky.
-
Into the water, swirl, onto the rack
The water stops everything. Leave it alone until it is cool.
The whole firing, narrated, with the setup explained out loud
The description says the potter walks through a whole raku firing, the obvara mixture and each part of the setup, with safety tips, and that the firing itself starts at 8:13. 16:54.
If you are weighing up equipment, watch it before you spend any money. The safety section on this page is the gear list to follow.
Mixing the brew.
It is bread dough that never became bread. Flour, water, yeast, a little sugar, and three days on a shelf. The amounts below go in a five gallon bucket, which is enough for a full day of small and medium work.
-
Start with warm water
About two and a half gallons into a clean five gallon bucket. Warm, not hot. Hot water kills the yeast and a dead brew marks nothing.
-
Add the flour
Roughly two and a quarter pounds, which is about eight cups. Cheap plain white flour is completely fine.
-
Add sugar and yeast
A tablespoon of sugar and two packets of active dry yeast. The sugar is food for the yeast, not decoration for the pot.
-
Whisk it smooth
No lumps. You are aiming for the consistency of thin pancake batter, loose enough to run off a stick in a stream rather than drop off it in blobs.
-
Cover it loosely and wait three days
Somewhere warm, with the lid resting on rather than sealed, because it produces gas. Stir it hard a few times a day.
The only test that matters on firing day
The brew should still be actively fizzing, it should smell sour and yeasty like a bakery having a bad week, and it should pour like thin batter. Flat, still and smooth means it is dead and it will not mark your work. And stir it hard immediately before every single dunk, because the part that does the work settles to the bottom within minutes.
The flour matters less than you think
Potters who have compared enriched, whole wheat, bread, cake and semolina flours and reported very little visible difference in the finished piece. Buy the cheapest bag.
Three days is a floor, not a rule
A cold room needs longer, a warm one less. Judge it on the fizz and the smell rather than the calendar. If day three arrives and nothing is bubbling, give it another day somewhere warmer.
It has a short shelf life
A few days past its peak the reaction fades and results go weak and patchy. Mix fresh for a firing rather than saving half a bucket for next month.
It travels badly
It is heavy, it slops, and it smells strong enough to own a car for a week. Lid on but not sealed, because it still produces gas, and a bag around the whole bucket if it is riding anywhere.
Village recipes vary
Rye flour, sour milk and beer all turn up in older accounts, and each one changes the result. Worth trying once you have a plain flour baseline to compare against, and not before.
Do not pour it down a studio sink
A full bucket of fermented flour paste is a drain problem waiting to happen and it turns rancid fast. Thin it heavily outdoors, or bag the solids and bin them.
The brew, and its recipe
The description says it shows how to make the obvara mixture and includes the recipe. 3:27.
Making work that survives the shock.
This is a thermal shock process, twice over. A piece goes from 1650F into cold liquid in one motion and then does it again. Some pots take that and some come apart, and the difference was decided weeks earlier at the wheel.
- A light clay body. Cream and white bodies give the most contrast. On a dark body the pattern is still there and you cannot see it.
- Grog or sand in the body. That is what lets clay survive the shock. A raku body is the safe choice and it is the one to start on.
- Even walls. Thick and thin in the same pot is exactly where cracks start when the temperature drops a thousand degrees in a second.
- Small to medium forms. Wide plates and big flat slabs are the first casualties. Rounded, smaller forms take it best. A fully closed form needs a small vent hole through the wall, because water inside turns to steam. A narrow necked or closed form never goes into the brew or water while it is hot: it fills, flashes to steam and bursts.
- No glaze anywhere. Not inside, not on the foot.
- Bisque fired and completely dry. We bisque to cone 05. Any moisture left in a piece at 1650F is steam looking for a way out.
Surface, and what each one gives you.
Plain bisque
The baseline, and the right place to start. A raw porous surface drinks some of the brew, so the pattern comes out softer and slightly diffuse, with edges that fade rather than stop. Plenty of people never go further than this.
Textured
Carving, combing, roulette marks, impressed texture. The brew pools in every recess and burns darker there, so the surface comes out looking drawn in black ink. This is the cheapest way to get a dramatic result and the one most likely to make somebody ask how you did it.
Burnished
Polished at hard leather hard and again near bone dry. A tight, compressed surface takes the sharpest pattern of anything on this list, with crisp edges and real depth. It also costs thirty to ninety minutes on a mug, and more on anything bigger. Our cone 05 bisque takes the edge off a bare burnish, and grog can leave pale scratches, so terra sigillata is the safer choice. Our full write up is on the burnishing and terra sigillata page .
Terra sigillata
A thin coat of the finest particles in a bucket of slip, buffed as the wet look leaves. It gets you most of the way to a burnished surface in a fraction of the time, and it is the standard answer for anybody who wants the sharp version without the stone work.
One warning about polished surfaces
A burnished or terra sigillata layer can delaminate during the dunk and flake off in patches, leaving bright raw clay showing underneath. It is not common, it is not predictable, and it is heartbreaking on a piece you spent hours polishing. Fire one test piece from the same batch, on the same day, before you commit the good work.
An excerpt from a longer raku video
This clip is excerpted from Raku Firing with Marcia Selsor, from Ceramic Arts Network. 5:13.
Temperature, seconds, and air.
Everything else on this page is preparation. These three are what you are actually doing while a pot is glowing on the end of a pair of tongs, and each one moves the result in a direction you can predict and repeat.
| Dial | Too little | Too much | Where to start |
|---|---|---|---|
| Pot temperature | Below about 1500F the brew never cooks. It slides off the pot gray and slimy and the piece comes out looking dirty rather than marked. | Push much past 1750F and you are working closer to the limit of what a low fire body wants, and the pattern tends to burn off pale. | About 1650F. If the kiln falls below 1500F while you work through a batch, close it and bring it back up before continuing. |
| Seconds in the brew | A quick in and out leaves a thin, broken pattern with a lot of bare clay showing through. | Past about five seconds the coating goes even and the pattern loses its edges. Longer does not mean darker. | Two to four seconds, with one swirl. |
| Seconds in open air | Straight from brew to water leaves a pale pattern with clean white and very little black, and it can wash off in the water before it sets. | Ten seconds or more and carbon smoke blurs the whole thing into one even brown with no marks left in it. | Count to about four on the first piece, then adjust on the next one. |
Change one dial at a time and keep everything else identical. Fire the first six pieces the same way to find out what your kiln, your brew and your clay do together, then start moving one number. A batch where every variable changed is a batch you learned nothing from.
Doing this without getting hurt.
This is an open kiln at 1650F, a pot carried by hand across open ground, and a bucket of liquid that flashes to steam the instant the two meet. Nothing below is optional and none of it is us being careful on your behalf.
- Outdoors, every time. Never inside a room. The smoke is thick, it carries a burnt bread smell a long way, and the fire risk from an open kiln is real. Stay upwind of the smoke and steam. A paper N95 helps with soot and does nothing for gases; if smoke worries you, bring a cartridge respirator with organic vapor cartridges.
- A full face shield, not safety glasses. The brew spits upward the moment a hot pot enters it, and it spits toward your face.
- Heat rated gloves, long sleeves, natural fibers. Kevlar or leather. Synthetic clothing melts onto skin and that is a far worse injury than a burn. Tie long hair back.
- Closed leather shoes and long pants. No shorts, no canvas sneakers, no bare ankles.
- Tongs long enough to keep your hands clear of the bucket. Practice the grab on a cold pot until it is boring, before anything is hot.
- Heat off before the kiln opens. Burner shut down or power cut, every time, no exceptions for a quick look.
- Water and an extinguisher within reach. Nothing flammable anywhere near the kiln, and that includes dry grass.
- Never lean over the brew bucket. The steam comes off instantly and it goes straight up into whatever is above it.
- Two people minimum. One person alone with a glowing pot, a bucket and no help is one slip away from a bad afternoon.
Set the buckets before you light anything
Metal or heavy duty plastic, wide mouths, filled to a level where a pot going in does not overflow them. Position them so a hot piece travels in one straight short line and never has to change direction or pass over anybody.
Warn whoever is nearby
It smells like a bakery fire, and it carries. That is a fine thing on a farm and a different conversation in a neighborhood, so have that conversation first rather than during.
The brew itself is not the hazard
It is flour, water, yeast and sugar. It is not toxic and touching it will not hurt you. Every dangerous thing in this process is temperature, which is worth knowing so that the caution goes where it belongs.
Every obvara firing needs a kiln you can safely open at temperature and open ground to work on. At The Clay Hole our raku kilns run outdoors at our raku workshops, and those workshops are for glazed raku pieces, not obvara. If you want to try it, ask the team first. Our raku certification is not required, but it is worth doing, and obvara has hazards of its own on top of it.
Eight ways this goes wrong, and what caused each one.
The three that get everybody the first time.
Gray slime and no pattern
The pot was too cool. Below about 1500F the brew never cooks, it just coats. Close the kiln, bring it back to 1650F, and dunk hotter.
One flat brown, no marks
Too long in open air between the brew and the water. Carbon smoke blurred everything together. Halve the air count on the next piece.
A crack, or a bang inside the kiln
Thermal shock. Wrong clay body, uneven wall thickness, or a piece that was not bone dry going into the bisque. Move to a grogged raku body and even out the walls.
| What you are looking at | What caused it | What to change |
|---|---|---|
| Gray slime, no pattern at all | The pot was under about 1500F, so the brew coated it instead of cooking on it. | Close the kiln, come back to 1650F, and work faster through the batch. |
| One flat brown all over | Too many seconds in open air after the brew. Carbon smoke blurred the marks into each other. | Cut the air count in half and go to the water sooner. |
| Thin, patchy, half covered | The brew is dead, or it settled and you dipped into the water sitting on top of it. | Stir hard before every dunk. If it is not fizzing at all, mix a fresh batch. |
| The pattern washed off in the water | Straight from brew to water with no air time, so nothing had set, or far too long swirling in the water. | Give it a beat in the air first, then a short swirl and out. |
| Very dark, edges all blurred | Brew too thick, or too much time sitting in its own smoke. | Thin the brew toward pancake batter and shorten the air count. |
| Polished layer flaked off in patches | The burnished or terra sigillata layer delaminated during the dunk. | Test one piece from the batch first, and go a little lighter on the final polish. |
| Cracked coming out, or split in the bucket | Thermal shock on a body that could not take it, or uneven walls, or a form too wide and flat. | Grogged raku body, even walls, smaller and rounder forms. |
| Marks rubbing off weeks later | Unsealed carbon sitting on a porous unglazed surface. | Wash, dry completely, then seal with paste wax or a matte acrylic clear coat. |
An obvara firing from MCC Ceramics
The description credits MCC Ceramics and Angel Luna. 4:55.
After the water.
-
Let it cool on a rack
On its own, in air. Do not chase a warm piece with more cold water to speed it up.
-
Wash the residue off
A soft sponge and plain water, over a bucket, never the sink. There is a layer of cooked flour paste sitting on top that comes away easily and takes none of the pattern with it. Skip this and the piece stays slightly tacky forever.
-
Dry it completely
A full day at least, longer for anything thick. Sealing a piece that is still damp inside traps the water and clouds the finish.
-
Seal it, if you want the contrast to last
Paste wax buffed out gives a soft sheen and deepens the darks. A matte acrylic clear coat is more durable and slightly flatter. Both stop the carbon marks rubbing away on hands and cloths. Brush the clear coat on. Spray only at home, outdoors, with eye protection and a respirator rated for the product, never at the studio.
This is decorative work
The original point of obvara was making porous earthenware a little less leaky, and it genuinely does that. A little less leaky is not watertight and it is nowhere near food safe. The surface is unglazed, still porous, and carrying carbon. Dry goods, dried flowers, sculpture, display. Not dinner, and not standing water.
Two more worth your time.
Same process, different hands. Watching more than one person do this is the quickest way to work out which parts are the technique and which parts are just how that particular potter likes to stand.
A visit to a studio in Lithuania
UDUMBARA is a pottery studio channel from Helsinki, and this video visits the home and studio of Giedrius Mazuras in Lithuania, which is much nearer to where obvara comes from. The chapters cover the sourdough method, adjusting your own recipe, and how it differs from American and Japanese raku. 8:15.
Frank Logan demonstrates obvara
The description says Frank Logan demonstrates the technique of obvara firing. 2:30.
The things people ask before their first firing.
Can I do this in a regular electric kiln?
Not by opening it at temperature. An electric kiln has live exposed elements and opening one hot is a genuine electrocution risk as well as an element killer. Obvara needs a kiln you can safely open while it is at heat, which in practice means a gas raku kiln or a purpose built top hat that lifts clear of the work.
Do I have to burnish?
No. Plain bisque works and always has. Burnishing and terra sigillata make the pattern sharper and give it more depth, and they are the reason some obvara pieces look like polished stone rather than pottery. Start plain, decide whether you want more.
Can I obvara something that has already been glaze fired?
No. The brew needs bare porous clay to grab. Glass gives it nothing, so a glazed piece comes out of the bucket looking exactly like a glazed piece that got wet. It also means a glaze fired piece is not a candidate for a second life this way.
How many pots will one bucket handle?
A five gallon bucket comfortably covers a day of small and medium work. What actually limits it is not volume but condition: the brew thins as pots carry it away, it cools, and the reaction weakens across the session. If results start going pale late in the day, that is usually the brew rather than your technique.
Can I refire a piece that came out badly?
Sometimes, but we cannot promise it. Wash it, dry it for a full day or more, and ask the team before you plan on it. A refire like this does not happen in a studio kiln. Carbon from the first attempt stays in places and the second pattern lands on top of it, which sometimes produces something better than either attempt would have alone. It is also another round of thermal shock on a piece that has already had one, so it may not survive another.
What does the word obvara actually mean?
It comes from a Slavic root meaning to scald, or to pour boiling water over something. That is a considerably better description of what happens than Baltic raku, which is a modern nickname borrowed because the equipment and the drama look familiar. The two processes have almost nothing in common chemically.
Why did my whole batch come out the same?
Because you did the same thing every time, which is the correct way to start. Once you have a baseline, vary one thing per piece and write down what you did. Dunk direction, air count and a second quick dip are the three cheapest experiments, and any one of them will change the result visibly.
Nobody gets this on the first bucket.
Obvara is a technique where the finished piece is a record of about four seconds of decisions, and the only way to learn those four seconds is to spend them badly a few times. The first firing teaches you what your kiln does. The second teaches you what your brew does. Somewhere around the third one you stop hoping and start choosing, and the pots begin to look like they were made by somebody rather than by an accident.
Keep notes. Temperature, seconds in the brew, seconds in the air, surface, clay body, one line each. Six pots of notes is worth more than sixty pots of guessing, and it is the difference between a technique you own and a technique that happens to you.
Fire a few, write down what you did, change one thing at a time. That is the whole method. If you want the long version of this page, with the mechanism, every surface option and all eight failures, the toggle at the top will give it to you.
Which version would you like to print?
Videos come out as a labeled box with the title and channel to search for, since paper does not play them.