Pottery Date Night
 Bring All Your Friends Free Week
 Give a Month of Pottery
 Private Pottery Parties

 The Welcome Booklet
 Your First Ten Sessions
 The Pottery Process
 Finding the Studio
 Your Classes Never Expire
 The Four Tables
 Who’s Who
 The Rewards Program
 Flux Glazes
 The Calculators
 Kiln Tracker
 Holiday Kiln Deadlines

 Beginner’s Tool Set
 Fingernail Clippers
 Mayco Clay Mender
 Epoxy for Kintsugi
 Applicator Bottles
 Large Bead Rack
 Raku Workshop
 Nighttime Raku
 Horsehair and Feather Raku
 The Clay Hole T-Shirt
 Embroidered Crewneck
 Zip-Up Hoodie
 Pre-Made Bisqueware
 Glaze Catchers
 Kiln Cookies
 Clay Cubby Rental
 The Glaze Bible, Printed
 The Book of Molds, Printed
 Printable Pottery Guides
 Free Printable Trackers
 Gifts for Potters
 Christmas Pottery Ideas
 Mother’s Day Gift Ideas
 Pottery Date Night
 Studio Calendar
 2027 Studio Events
 What Should I Do Today?
 How to Throw on the Pottery Wheel
 How to Make a Pinch Pot
 How to Tap Center a Pot
 The Five Stages of Clay
 Is Pottery Hard to Learn?
 Pottery Wheel Practice Drills
 20 Easy Hand-Building Projects
 Everything That Sounds Wrong

 A Beautiful Piece, Every Time
 Slab Roller Tips
 Any Dish as a Slump Mold
 Slab Roller & Slab Mold Certification
 The Pottery Skill Tree
 Clay & Pottery Calculators
 Logging Your Pottery and Glazes
 The Pottery Dictionary
 Why Did My Pottery Do That?
 The Pottery Cone Chart
 Pottery Myths, Fact-Checked
 Is Handmade Pottery Food Safe?
 Incredible Ceramic Artist Videos
 How Dan Throws Giant Pots
 How to Dry Your Pottery
 The Pottery Wheel Introduction
 Pottery by Zodiac Sign
 Personality and the Pottery Wheel
 Pottery for Engineers
 ADHD, Hyperfocus, and Never Running Out
 Hobbies for Burnout
 Screen-Free Hobbies for Adults
 Every Addiction I Ever Had Lost to Art
 Functional Pottery Is Engineering
 How Do We Compare?
 Pottery Classes by City
 Every Pottery Studio in Utah
 Pottery in Draper
 Featured Members
 The Signature Wall
 Making Friends as an Adult Is Brutal
 The Clay Hole Commandments
 2027 Pottery Contests
 2027 Studio Parties
 Gallery Night

 Scream It Into the Void
 Destroy the Glaze Wall
 Daily Affirmation Cards
 Everything That Can Go Wrong
 Subscribe to Our Newsletters
 Contact The Clay Hole
 Corporate Team Building

 Glaze Combinations
 Glazes We Do Not Carry
 Making Glaze Test Tiles
 The Mega Glaze Tool
 How to Use the Mega Glaze Tool

 Glaze Brushing Techniques
 How to Use Underglaze
 How to Use Dipping Glazes
 Glaze Problems, Causes and Fixes
 The Dipping Glaze Guide

 Making a Glaze Catcher
 Fused or Sharp After Firing
 The Signature Wall
 His Viral Videos
 His Own Ceramics
 Meet Mud
Firing without a kiln
How to pit fire pottery
Dig a hole, bury your pots in sawdust and wood, light it, and let smoke and mineral vapor decide how they come out. It is the oldest way to fire clay and it still gives colors a glaze cannot. Here is the whole process, the parts that go wrong, and the videos worth watching before you strike a match.
- Temperature Roughly 1,200 to 1,800 F
- Time 4 to 8 hours, then cool overnight
- Before the pit Bisque to cone 05, no glaze
- The result Porous, decorative, never food safe
Jump to a section
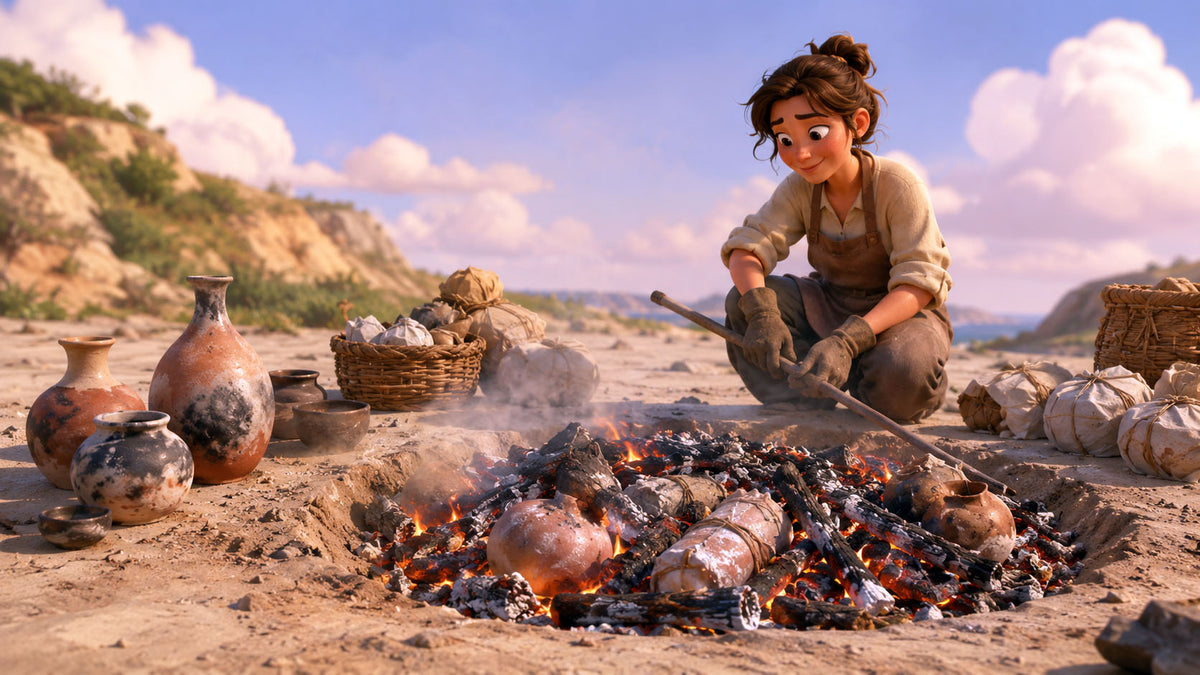
Which version would you like to print?
Videos come out as a labeled box with the title and channel to search for, since paper does not play them.
Why this is a page and not a playlist
Watch it, then read it. Both, in that order.
So every section here does the same thing twice. The words tell you what to do and why it matters. The video shows you what it looks like when somebody actually does it.
Watching somebody pit fire is the fastest way to understand it. It is also the fastest way to forget it. Video moves at the presenter's pace, not yours, and the moment you look away to grab a shovel the thing you needed has already scrolled past. Twenty minutes later you can picture the fire perfectly and you cannot remember how deep the hole was.
Reading is slower and it sticks better. You set the pace, you stop where you are confused, you go back a line without hunting for a timestamp. Lists in particular survive contact with a real workday, because you can hold a phone in a dirty hand, look at one line, put the phone down and go do it.
Neither one on its own is enough. Text without a demonstration leaves you guessing what "packed loosely" means. A demonstration without text leaves you with a feeling instead of a plan.
Video is the fastest way to understand pit firing and the fastest way to forget it. Reading sticks because you set the pace. So each section pairs a list you can work from with a demonstration.
There is a lot on this page. If you want it shorter, the toggle above cuts it down to the parts you need to actually run a firing, and it remembers your choice on every other page on this site.
The mental model
You are not glazing. You are letting fire paint.
A pit fire is cooler than a bisque firing. That single fact explains almost everything else about it.
In a glaze firing you choose the color. You dip the pot, you write the number down, and the kiln does what it did last time. A pit fire does not work like that. You choose the conditions and the fire chooses the color, and it will choose differently for two identical pots sitting six inches apart.
In a glaze firing you choose the color. Here you choose the conditions and the fire chooses the color, differently for two identical pots six inches apart.
Two things are happening in there. Carbon from the smoke drives into the surface of the clay and turns it gray, charcoal and deep black wherever combustible material is pressed against the pot. At the same time, mineral salts and metal oxides in the fuel vaporize and drift, and where that vapor lands on hot porous clay it deposits color: pinks, oranges, rust reds, coppery flashes, sometimes a smoky violet.
Carbon from the smoke blackens the clay wherever fuel touches it. Mineral salts and oxides in that fuel vaporize and land as color: pinks, oranges, rust reds, coppery flashes.
Now the temperature. A pit fire runs somewhere around 1,200 to 1,800 degrees Fahrenheit, and even that is uneven across the pit. A bisque firing here goes to cone 05, about 1,888 degrees. A glaze firing goes to cone 5½, just over 2,180 degrees. So the pit is the coolest firing in the whole process.
That is why nothing melts, why no glass forms, why the pot stays porous, and why the color sits on the surface as a deposit rather than being locked into a layer of glass. It is also why a pit fired pot is beautiful and fragile at the same time.
A pit runs about 1,200 to 1,800 degrees Fahrenheit. Bisque here is cone 05 and glaze is cone 5½, so the pit is the coolest firing in the whole process. Nothing melts, no glass forms, and the color sits on the surface instead of inside it.
What to expect
The parts nobody puts in the reel
Knowing these going in is what makes the first firing feel like a result instead of a failure.
-
Not food safe, ever. Porous, unglazed, coated in carbon. Decorative only.
-
The color can rub off. It is a deposit, not glass. Seal it before it goes on a shelf.
-
You will break pots. Fire ten, expect eight. Not your favorite piece.
-
It is not food safe and it never will be. A pit fired pot is porous, unglazed, and coated in carbon and mineral residue. No eating, no drinking, no holding water. Put a glass or plastic liner inside if you want to use it as a vase.
-
The color can rub off. It is a deposit on the surface, not glass fused into it. Handle a fresh pit fired pot with clean dry hands and seal it before it goes anywhere near a shelf people touch.
-
You will break pots. Losing a couple of pieces out of ten is normal on early firings, and losing more than that is normal on a first one. Fire more than you think you need and do not put your favorite thing in the first pit you ever dig.
-
You do not get to choose the result. You can load the odds. You cannot place a color. Anybody promising repeatable pit fire results is selling something.
-
It takes a whole day and most of it is waiting. Loading is slow, the burn is hours, and the cool down runs overnight. This is not an afternoon project you squeeze in after work.
-
We do not pit fire at the studio. There is no pit at The Clay Hole and there is not going to be one. What we do run is raku, outdoors in Alpine, a few times a year, and that scratches a similar itch with a lot more supervision. Everything on this page is written for a firing you go and do somewhere else.
We do not pit fire at the studio. There is no pit at The Clay Hole. We do run raku outdoors in Alpine a few times a year. This page is for a firing you do somewhere else.
Before you light anything
In Utah, the fire is the easy part
We are potters, not your fire marshal. Call your city fire department before your first firing and tell them exactly what you want to do. It is a two minute phone call and it is the difference between a good day and a citation.
Utah regulates outdoor burning in two separate ways, and they are easy to confuse. Fire safety rules come from the state and your local fire authority. Air quality rules come from the Division of Air Quality. You can be clear on one and in trouble with the other.
- Winter is mostly closed. The Division of Air Quality calls mandatory no burn days during inversions, roughly November 1 to March 1, across the Wasatch Front counties.
- Open burn windows need a permit. April 1 to May 31 and September 15 to October 31, from your county or city fire authority. A contained pit may count differently. Ask, do not assume.
- Never burn treated or painted wood. No plywood, particle board, unknown pallets or plastic. Those fumes are dangerous.
- Water, a shovel, and a person. Every minute the fire is alive. Leaving it unattended can bring a citation.
- Residential open burning has windows. The state's open burn periods run April 1 to May 31 and September 15 to October 31, a permit from your county or city fire authority is required, and the permit system will not issue one unless the clearing index is forecast at 500 or higher.
- Winter is mostly off the table. The Division of Air Quality calls mandatory no burn days when inversions trap fine particulate, typically between November 1 and March 1, and those rules cover Salt Lake, Utah, Davis, Weber, Tooele, Cache and Box Elder counties.
- A contained fire may count differently. A small fire inside a proper pit or ring can fall under recreational fire rules rather than open burning. That is a question for your fire department, not for a pottery page. Ask, do not assume.
- Never burn treated or painted wood. No pressure treated lumber, no plywood, no particle board, no MDF, no pallets of unknown origin, nothing with glue or finish on it. Leave out plastic, foam, rubber and glossy printed paper too, and anything that came out of a container that held a solvent or pesticide. Those fumes are genuinely dangerous and they will also wreck your surfaces.
- Stay out of the smoke. Pit smoke carries carbon monoxide and whatever your colorants turned into. Work upwind, and wear a fitted respirator with P100 filters when you are handling powdered oxides and carbonates, never a paper dust mask. Copper and salt smoke is a gas problem that a dust filter does not stop, so either use a respirator rated for acid gases and organic vapors or leave those materials out. Wear safety glasses, and never fire alone.
- Water, a shovel, and a person. A charged hose or full buckets within reach, a shovel to move dirt, and somebody with the fire the entire time it is alive. Leaving an unattended fire can bring a citation and makes you responsible for any damage, and it is also how a good firing becomes a bad news story.
- Check the wind before you commit. If wind is in the forecast, do not start. You will not be able to control where the heat goes or where the smoke lands, and neither of those is a small problem.
Step one
Most pit fire failures happen at the wheel
A pit fire heats unevenly and fast. Anything in the pot that wants to move at a different rate than the rest of the pot is a crack waiting for a reason. Almost every loss traces back to a decision made weeks earlier, while the clay was still soft.
- Groggy clay, not porcelain. Grog and sand let the wall flex instead of splitting. Ask at the counter which of our bodies has the most tooth.
- Even walls, around a quarter inch. Even matters more than thin. A heavy base under a papery rim is two pots as far as the fire is concerned.
- Round beats angular. Curves spread stress. Sharp corners collect it and hand the crack a starting point.
- No handles, spouts or fine detail. Anything attached is a seam, and seams fail first.
- Start small and make extras. Fist to cantaloupe. Fire ten, expect eight.
- No glaze at all. It needs cone 5½ to melt, so in a pit it just sits there as a crust and blocks the smoke.
- Bone dry means bone dry. Press the base to your cheek. Cool to the touch means there is still water in it.
-
Pick a clay with grog or sand in it
Grog is pre-fired clay ground up and mixed back in, and it does for a pot what rebar does for concrete. It opens the body, gives moisture somewhere to go, and lets the wall flex a little instead of splitting. A smooth porcelain in a pit fire is a coin flip. A visibly speckled or sandy stoneware is a much better bet. Ask at the counter which of our bodies carries the most grog.
-
Keep the walls even, around a quarter inch
Even matters more than thin. A pot with a heavy base and a papery rim is two pots as far as the fire is concerned, and they will try to expand at different speeds. Trim the foot properly and check the wall thickness with your fingers before it dries.
-
Round beats angular, every time
Curves spread stress around the form. Sharp corners collect it in one place and hand the crack a starting point. A closed form needs a hole before it sees fire, so steam from any water left in the wall can get out. With that, round bellied vessels and simple bowls are the classic pit fire shapes for a reason, and it is not only that they look good in the ash.
-
Leave the handles and the fine detail off
Anything attached is a seam, and a seam is where thermal stress goes to work. Thin rims, delicate spouts, applied feet and pulled handles all fail at a much higher rate than the body they are stuck to. If you want a handled mug, make it and glaze it. A pit is not the place.
-
Start small, and make more than you need
Fist sized up to about a cantaloupe is the sweet spot for a first firing. Small pieces heat evenly and you can fit a lot of them in one pit, which matters because some of them are not coming back. Fire ten, expect eight.
-
No glaze. None.
Our glazes are formulated to melt at cone 5½. A pit fire never gets close, so glaze does not melt, it does not seal, and it does not go glossy. What it does do is sit there as a chalky crust, block the smoke and vapor from reaching the clay, and ruin the only effect you came for.
-
Bone dry means bone dry
Press the base against your cheek. If it feels cool, there is still water in there, and water in a fast fire turns to steam and takes the pot with it. Cool to the touch means wait longer. A week on a shelf is not too much for a thick piece.
Step two
The shine is decided long before the fire
This is the single biggest difference between a pit fired pot that looks like art and one that looks like something that fell in a campfire. A polished surface takes color. A rough surface takes soot.
There is no glaze here, so the surface of the clay is the finished surface. Two techniques do the work, and most people use both.
- Burnishing. Rub the pot with a smooth stone or the back of a spoon, at hard leather hard, in small overlapping circles. Plan on thirty to ninety minutes for a mug.
- Terra sigillata. A slip of the finest clay particles, brushed on in three to four thin coats over a bone dry pot wiped smooth with a barely damp sponge, buffed between coats.
Burnishing
Burnishing is rubbing the clay until it shines. A smooth river stone, the back of a spoon, or a scrap of a plastic grocery bag all work. You are not polishing so much as compressing: the pressure lays the flat clay particles down parallel to each other, and a surface of aligned particles reflects light instead of scattering it.
Do it at hard leather hard, when the clay is cool and firm, and work in small overlapping circles. If the clay is too wet you drag it. If it is too dry it will not move, and a barely damp touch, never enough to leave a sheen, brings it back. It is slow. Plan on thirty to ninety minutes for a mug.
Terra sigillata
Terra sigillata is a slip made of only the very finest clay particles, and it gives you most of a burnished shine for a fraction of the elbow grease. You brush it on in thin coats and buff each one. It is the standard prep for pit and saggar work.
A terra sigillata recipe that works. Fill a one liter bottle three quarters full of water. Dissolve about one gram of sodium silicate in the water first (weigh it, a teaspoon is far too much). Dry clay powder is silica dust, so mix this at home rather than in a shared studio, wear a fitted respirator with P100 filters, not a paper mask, pour the powder in slowly and wipe up spills wet. Add 250 grams of ball clay and shake it hard. Let it stand untouched for twelve to twenty four hours. The mix separates into three layers, and the middle one is what you want. Siphon or carefully pour it off, leaving the heavy sediment behind, and store it in a sealed container.
To use it: if a spot needs smoothing, knock it back with a barely damp sponge, never dry sandpaper, which throws silica dust. Wipe the whole pot with a barely damp sponge, then brush on three to four thin coats with a soft mop brush, buffing each coat with a soft plastic bag or a chamois as the wet look leaves.
Step three
Bisque first, unless you have a reason not to
Cone 05 is a good bisque temperature for a pit fire. If you want us to bisque work that will be fired somewhere else, ask the team first about how that works.
Bisque firing drives off the chemically bound water still locked inside the clay. Once that is gone the pot is stable, and it can take the shock of a fast open fire far better than raw greenware can. It is the single cheapest thing you can do to cut your breakage rate. A cone 05 bisque is hotter than most pits, so it takes some of the shine off a bare burnish, and terra sigillata holds its sheen better.
There is a trade off, and it is worth understanding. The hotter you bisque, the tighter and less porous the clay gets, and a tight surface takes less color from the fire. Potters who pit fire seriously often bisque low, somewhere between cone 018 and cone 06, specifically to keep the pot thirsty. Cone 05 is a little tighter than that and it still works well, so this is a refinement rather than a requirement.
You can pit fire raw greenware, and plenty of people do. It is how the technique was done for thousands of years and it gives you the deepest blacks, because there is more organic material left in the clay to burn. It also breaks far more often. If you go that route, warm the pots for an hour beside a small fire before they go anywhere near the pit, turning them as you go, and accept a higher loss rate as the price of admission.
Step four
What a loaded pit actually looks like
A pit fire is a layer cake you are about to set on fire. Everything below is stacked bottom to top, in the order you build it.

- The hole. Eighteen to twenty four inches deep, ten inches deeper than your tallest pot, three feet across. Bare earth walls.
- Sand or old ash. An inch or two on the floor.
- Sawdust bed. Two to three inches, clean and untreated. Anything it touches comes out black.
- Colorants. Scattered through the sawdust, never piled. Respirator on.
- The pots. Set into the bed, a couple of inches apart, wide forms on their sides.
- Organics. Peels, seaweed, straw, dung, wire. Touching the pot, not near it.
- Kindling, then wood. Stacked above ground level. It collapses in as it burns.
- A sheet of metal. Not at the start. Slid over once the flames drop to coals.
- The hole. Eighteen to twenty four inches deep, and at least ten inches deeper than your tallest pot. Three feet across is plenty for a first firing. Bare earth walls are fine and simpler than lining it with stone, which can crack or spall and take your pots with it.
- A base of sand or old ash. An inch or two at the very bottom. It levels the floor and stops pots sitting straight on cold damp soil.
- The sawdust bed. Two to three inches of clean untreated sawdust or fine wood shavings. This is your slow burning fuel and your carbon source, and anywhere a pot touches it will come out black.
- Colorants scattered through the bed. Copper carbonate, salt and iron oxide go in now, sprinkled into the sawdust rather than piled anywhere. Wear a respirator while you handle the powders.
- The pots, nestled and not touching. Set them into the sawdust rather than on it. Leave a couple of inches between pieces so vapor can move, and lay wider forms on their sides so the inside gets some of the atmosphere too.
- Organics packed around each piece. Dried banana peels, seaweed, straw, dry cow dung, copper wire, steel wool. This is where most of your color comes from, so put it in contact with the pot, not near it.
- Kindling, then bigger wood over the top. Small dry sticks first, then split wood stacked across the opening like a campfire. Build it up above ground level. It will collapse into the pit as it burns and that is the point.
- A sheet of metal to smother it. Not on at the start. Once the flames drop to coals you slide it partly over the pit to choke the oxygen, hold the smoke against the pots and slow the cool down. Plain uncoated sheet steel or an old kiln shelf both work. Never galvanized roofing.
Step five
What makes what color
Treat every one of these as a tendency, not a promise. The same material in the same pit will read differently on the hot side than it does on the cool side.
Anything touching sawdust turns black. Copper carbonate gives reds, pinks and green flashes. Salt gives oranges and yellows. Red iron oxide gives warm browns. Dried banana peels give pink. None of it is predictable, so scatter a few different things rather than betting the pit on one.
| Material | What it tends to give you | How to use it |
|---|---|---|
| Sawdust and fine shavings | Deep black and soft gray carbon wherever it touches the clay | A two to three inch bed at the bottom, plus handfuls packed around each pot |
| Copper carbonate | Reds, pinks, coppery flashes, sometimes a surprising green | Sprinkled through the sawdust, or brushed on as a thin wash before loading |
| Table salt or rock salt | Oranges, yellows and warm blushes | Scattered into the bed, or soak string or burlap in salt water and wrap the pot |
| Red iron oxide | Warm browns, rust and soft ochre | A thin wash brushed straight onto the pot, or dusted into the sawdust |
| Dried banana peels | Pinks and oranges, from the potassium in the skin | Dry them first, then lay them flat against the surface of the pot |
| Seaweed and kelp | Smoky blues, violets and linear trails | Drape or wrap it around the pot, dried, so it holds its shape |
| Copper wire | Sharp linear marks in red and green where the wire sat | Wound loosely around the form, not pulled tight |
| Steel wool | Dark rust halos and speckled edges | Small pinches tucked against the pot, used sparingly |
| Dry cow or horse dung | A long even smolder and the deepest blacks in the pit | Broken into patties and packed over and around the pots |
| Miracle-Gro and similar fertilizers | Mixed pastels, because they carry copper, potassium and salts already | A light dusting only. More is not better and it can go muddy fast |
One warning worth repeating. Copper carbonate, iron oxide and the rest are fine dry powders, and breathing them is bad for you in a way you will not notice on the day. Wear a fitted respirator while you are handling and scattering them, keep the bag closed when you are not using it, and wash your hands before you touch your face.
Ferric chloride shows up in a lot of saggar tutorials and it is genuinely caustic. It eats brushes, corrodes metal tools and burns skin. If you decide to use it, that is a full face shield, chemical gloves and outdoor-only territory, and we would leave it alone until you have a few ordinary firings behind you.
Step six
Fire day, hour by hour
The two rules that matter more than any of the rest: heat it slowly at the start, and cool it slowly at the end. Almost every crack in a pit fire is caused by rushing one of those.
- Warm the pots for an hour beside a small fire, turning them. Too hot to hold comfortably before they go in. This saves more pieces than anything else here.
- Load the pit in the order from the diagram. Take your time.
- Light it at the top, or at one end. Never from underneath, which sends the heat up fast and cracks pots.
- Feed it for two hours. Real flame, adding wood as it drops. This is where your temperature comes from.
- Let it fall to coals. Stop adding wood. The smoke gets heavy, and heavy smoke is doing the carbon work.
- Cover it with metal, leaving a small gap. Starving it of oxygen deepens the blacks and slows the cool down.
- Leave the lid on overnight, and have someone check on the pit. No peeking. Cold air on a hot pot cracks pieces that survived the whole firing.
-
The day before
Get everything dry and in one place
Wet fuel is the most common reason a pit never gets hot. Sawdust, wood, dung and organics all want to be genuinely dry. Lay out your gloves, tongs, respirator, shovel and water before you are tired.
-
Hour 0
Warm the pots
Build a small fire next to the pit and set the pots around it, turning them every ten minutes or so for at least an hour. They should be too hot to hold comfortably before they go in. This one step will save you more pieces than anything else on this page.
-
Hour 0 to 1
Load the pit
Build it in the order from the diagram above. Take your time here. Loading badly is the difference between a pit that burns evenly and one that roars at one end and sulks at the other.
-
Hour 1
Light it at the top, or at one end
Lighting from the top lets the fire work downward slowly, which is exactly the gentle heat curve you want. Lighting from underneath sends it up fast and cracks pots. Some potters leave a pocket of shredded paper at one end as a starter and let the burn travel.
-
Hours 1 to 3
Open flame, and you feed it
Keep a real fire going for a couple of hours, adding wood as it drops. This is where your temperature comes from. Do not poke at the pots and do not go looking for them.
-
Hours 3 to 5
Let it fall to coals
Stop adding wood and let the flames die back to a glowing bed. The smoke gets thicker and heavier as it goes, and that heavy smoke is doing the carbon work on your pots.
-
Around hour 5
Cover it and smother it
Slide your sheet of metal over most of the pit, leaving a small gap. Starving the fire of oxygen traps the smoke against the pots, deepens the blacks and slows the cool down all at once. Some potters shovel a layer of ash or sand over the coals first for the same reason.
-
Overnight
Hands off
Leave the lid on and do not lift it to peek. Someone checks on the pit through the night, because a smothered pit is still a live fire. Cold air hitting a hot pot is thermal shock and it will crack pieces that survived everything else. Twelve hours minimum, and next morning is better.
Step seven
Opening it up, and what to do with what comes out
Everything comes out of the ash looking gray and disappointing. Do not judge a single piece until it has been washed and dried. Pots that look ruined at the pit sometimes turn into the best thing in the batch.
- Wait until it is cold. Not warm. Buried coals can hold heat for a day or more, so wear gloves and probe the ash with a stick before you reach in.
- Lift, do not drag. Sliding a pot across grit is its first scratch.
- Wash with plain water and a soft brush. Most of what looks like damage is loose ash.
- Dry it fully, then seal it. Paste wax deepens the color, matte acrylic keeps it as it is. Neither makes it food safe.
- Wait until it is cold to the touch. Not warm. Cold. Buried coals can hold heat for a day or more, so wear gloves and probe the ash with a stick before you reach in.
- Lift, do not drag. Reach under each piece and pick it straight up. Sliding a pot across grit is how a good surface picks up its first scratch.
- Wash with plain water and a soft brush. No soap and no scrubbing at first. Most of what looks like damage is loose ash and it rinses straight off.
- Only then, go after the crust. If there is a hard deposit left, very light steel wool or a green scrub pad, wet and over a bucket, with almost no pressure. Wear safety glasses, and an N95 or better if anything is still dusty. Stop the moment color starts lifting, because it will.
- Let it dry completely, then seal it. A paste wax buffed to a shine deepens every color and gives a soft glow. A matte acrylic spray keeps the surface exactly as it is and protects it better. Neither one makes the pot food safe or watertight.
- Sign it and date it. A soft pencil works on a pit fired surface, and in a year you will want to know which firing it came from and what you put in the pit.
If a piece is cracked but not in pieces, it is still worth finishing. Pit fired work is decorative anyway, and a hairline crack on a beautiful surface reads as history rather than failure. Save the harsh judgment for pots that came apart.
Pick your version
Four ways to do this
Same chemistry every time. What changes is how much digging you do, how much control you get, and how angry your neighbors are. There is a fifth option worth knowing about too: an old charcoal grill with a lid makes a surprisingly good miniature pit for small work, and it is the least conspicuous way to try this at all.
Same chemistry every time. Start with the open pit if you have the ground for it. If not, an old charcoal grill with a lid works for small pieces.
The open pit
- Start here
- Needs a yard
A hole in the ground, loaded as a layer cake, burned down and smothered. The most fuel, the most heat, the biggest color range, and the most work. If you have somewhere legal to dig, this is the one that gives you the real thing.
The most fuel, the most heat, the biggest color range, and the most work. If you can dig legally, start here.
You need: a shovel, a place you are allowed to burn, two to three cubic feet of sawdust, a wheelbarrow of split wood, and a sheet of metal.
The barrel
- No digging
- Smokier
A clean steel drum or an uncoated steel can with holes punched around the base for air and a loose lid on top. Because it is enclosed it holds heat and smoke around the pots, and because it is above ground you can do it on a patio.
You need: an uncoated steel can, a drill, bricks to raise it off the ground, sawdust and small wood. Never a galvanized, plastic-lined or painted can. Galvanized steel is coated in zinc, and zinc fumes make people sick.
The foil saggar
- Most control
- Small work
Wrap a single pot in heavy duty aluminum foil with its own private handful of colorants sealed inside, then fire the parcel. The foil traps the vapor right against that one pot, so the effects are stronger, tighter and more predictable than anything loose in a pit.
Crinkle the foil and open it back out before wrapping, leave one small vent so pressure can escape, and remember foil starts breaking down around 1,400 degrees, which caps how hot you can push it.
The saggar in a kiln
- The cheat
- Not for our kilns
Foil parcels fired inside a raku or gas kiln instead of a bonfire. The surfaces almost look and feel like a pit fire, though the results are not exactly the same. The maker of the video below says it is faster and, to some degree, cheaper.
One firm caveat: this is not something to try in a studio electric kiln. Combustibles and salt vapor destroy elements and brick, so it belongs in a kiln somebody has deliberately sacrificed to the cause.
Keep this open
Two lists for a dirty hand and a phone
Tap a line to cross it off. Your ticks are saved on this device, so you can close the page, drive out to the pit and pick up where you left off.
Pack this
0 of 14Fire day, in order
0 of 12Troubleshooting
When it goes wrong
Every one of these has happened to somebody good at this. Most of them have a single cause and a single fix.
The three that will get you on a first firing.
The pot cracked cleanly in half
Thermal shock at the start. The pot went in cold, or the fire was lit from underneath. Warm the pots for an hour first, and light from the top.
Thermal shock, almost always at the start. Either the pot went in cold, or the fire was lit from underneath and came up fast. Warm your pots for a full hour next to a small fire before they go in, and light the pit from the top so the heat works its way down.
It blew apart with a bang
Water turning to steam with nowhere to go. Bisque first, and press the base to your cheek before it goes near heat. Cool means damp.
Water. Either the pot was not bone dry, or it was raw greenware with chemical water still in it, and the steam had nowhere to go. Bisque first, and press the base against your cheek before it goes anywhere near heat. Cool to the touch means it is still holding moisture.
Everything came out gray and boring
Three usual suspects. The surface was not burnished or terra sigged, so there was nothing for the color to sit on. The colorants were scattered near the pots instead of pressed against them. Or the pit never got hot enough to open the pores of the clay, which is usually damp fuel or too little wood.
Gray is also what a wash looks like before it dries. Rinse and wait a day before you decide.
The color rubbed off on my hand
Normal. The color is a deposit, not glass. Wash it, dry it fully, then seal with paste wax or matte acrylic.
That is normal and it is the nature of the process. Pit fire color is a deposit sitting on the surface, not glass fused into it. Wash the piece, dry it completely, then seal it with paste wax or a matte acrylic spray. After that it will handle normal shelf life fine.
The fire never seemed hot enough
Damp fuel is the number one cause, and sawdust that has been sitting in a shed all winter counts as damp. After that it is airflow: a pit packed too tightly cannot breathe, and a pit that is too shallow loses its heat straight up. Dig deeper, pack a little looser, and put more wood on than feels reasonable.
One side is gorgeous and the other is nothing
Completely normal, and a lot of potters chase it on purpose. It means one side sat against fuel and colorant and the other faced open air. If you want it more even, roll wider forms onto their sides and pack material all the way around rather than mostly underneath.
The burnished shine went dull
Burnished surfaces lose gloss as the temperature climbs. A bisque hotter than the pit softens a bare burnish, and an unusually hot pit flattens it too. It can also be the ash crust, which comes off with a rinse and a very light buff. Sealing with paste wax brings a lot of the depth back either way.
It smells like a campfire and will not stop
A porous pot holds smoke the way a sponge holds water, and there is no fast fix. Air the piece out for a couple of weeks somewhere dry, then seal it. Sealing traps whatever is left, so do not rush that step. The smell fades a lot in the first month.
Questions
What people ask us about pit firing
Can I drink out of a pit fired mug?
No. The pot is porous, unglazed, and carrying a surface layer of carbon and mineral residue. It is not food safe, it will not hold liquid for long, and sealing it does not change either of those. Pit fired work is sculpture that happens to be hollow.
Can I pit fire at The Clay Hole?
There is no pit here and there is not going to be one. What we do run is raku, outdoors in Alpine, a few times a year, and it is the closest thing we offer to this kind of firing. Details and dates live on the workshop page and the studio calendar.
Do I have to bisque first?
You do not have to, but you should for a first firing. Bisqued pots survive at a much higher rate. Raw greenware gives deeper blacks and is how it was done for thousands of years, and it also breaks a lot more. Cone 05 is a good bisque temperature for this, and the team can tell you how bisque firing works for work that will be fired somewhere else.
Which of your clays should I use?
The groggier the better. Grog and sand let the wall move under thermal stress instead of splitting, so a speckled or sandy stoneware is a far safer bet than a smooth porcelain. Ask at the counter and we will point you at the bodies with the most tooth in them.
Can I refire something that came out boring?
Yes, and it is a good habit. Wash it, dry it fully, and put it back in the next pit with more material packed against it. Each firing adds another layer of carbon and vapor, and second-firing pots often come out better than the ones that went in fresh. Warm it slowly again, the same as any other piece.
Is raku the same thing?
Related, but no. Raku heats glazed pots in a kiln to around 1,800 degrees, then pulls them out glowing and drops them into combustibles for a few minutes. Pit firing is unglazed, buried, and takes all day. Raku is fast, loud and dramatic. Pit firing is slow and patient. Both are reduction, and both are unpredictable, which is the family resemblance.
How long before I can touch them?
Overnight at minimum, and the next morning is better. The pit holds heat far longer than it looks like it should, and a pot pulled while it is still warm can crack from the cold air alone after surviving the entire firing.
One last thing
Go in expecting to be surprised
Pit firing is the one process in ceramics where the point is that you are not in charge. You prepare carefully, you load thoughtfully, and then you hand the whole thing to a fire that does not care what you had in mind. The pots that come out are a record of what happened in that hole on that day, which is exactly why no two of them will ever match.
Make more than you need. Warm them slowly. Cool them slower. Everything else is variation.
Make more than you need. Warm them slowly. Cool them slower. Everything else is variation. For the colorant chart, the four methods and the full troubleshooting list, switch the toggle back to Comprehensive.
Videos on this page are embedded from YouTube and belong to the makers credited beside them. Nothing loads from YouTube until you press play. Burn rules change, so confirm the current window and air quality action with your local fire authority before every firing.