Pottery Date Night
 Bring All Your Friends Free Week
 Give a Month of Pottery
 Private Pottery Parties

 The Welcome Booklet
 Your First Ten Sessions
 The Pottery Process
 Finding the Studio
 Your Classes Never Expire
 The Four Tables
 Who’s Who
 The Rewards Program
 Flux Glazes
 The Calculators
 Kiln Tracker
 Holiday Kiln Deadlines

 Beginner’s Tool Set
 Fingernail Clippers
 Mayco Clay Mender
 Epoxy for Kintsugi
 Applicator Bottles
 Large Bead Rack
 Raku Workshop
 Nighttime Raku
 Horsehair and Feather Raku
 The Clay Hole T-Shirt
 Embroidered Crewneck
 Zip-Up Hoodie
 Pre-Made Bisqueware
 Glaze Catchers
 Kiln Cookies
 Clay Cubby Rental
 The Glaze Bible, Printed
 The Book of Molds, Printed
 Printable Pottery Guides
 Free Printable Trackers
 Gifts for Potters
 Christmas Pottery Ideas
 Mother’s Day Gift Ideas
 Pottery Date Night
 Studio Calendar
 2027 Studio Events
 What Should I Do Today?
 How to Throw on the Pottery Wheel
 How to Make a Pinch Pot
 How to Tap Center a Pot
 The Five Stages of Clay
 Is Pottery Hard to Learn?
 Pottery Wheel Practice Drills
 20 Easy Hand-Building Projects
 Everything That Sounds Wrong

 A Beautiful Piece, Every Time
 Slab Roller Tips
 Any Dish as a Slump Mold
 Slab Roller & Slab Mold Certification
 The Pottery Skill Tree
 Clay & Pottery Calculators
 Logging Your Pottery and Glazes
 The Pottery Dictionary
 Why Did My Pottery Do That?
 The Pottery Cone Chart
 Pottery Myths, Fact-Checked
 Is Handmade Pottery Food Safe?
 Incredible Ceramic Artist Videos
 How Dan Throws Giant Pots
 How to Dry Your Pottery
 The Pottery Wheel Introduction
 Pottery by Zodiac Sign
 Personality and the Pottery Wheel
 Pottery for Engineers
 ADHD, Hyperfocus, and Never Running Out
 Hobbies for Burnout
 Screen-Free Hobbies for Adults
 Every Addiction I Ever Had Lost to Art
 Functional Pottery Is Engineering
 How Do We Compare?
 Pottery Classes by City
 Every Pottery Studio in Utah
 Pottery in Draper
 Featured Members
 The Signature Wall
 Making Friends as an Adult Is Brutal
 The Clay Hole Commandments
 2027 Pottery Contests
 2027 Studio Parties
 Gallery Night

 Scream It Into the Void
 Destroy the Glaze Wall
 Daily Affirmation Cards
 Everything That Can Go Wrong
 Subscribe to Our Newsletters
 Contact The Clay Hole
 Corporate Team Building

 Glaze Combinations
 Glazes We Do Not Carry
 Making Glaze Test Tiles
 The Mega Glaze Tool
 How to Use the Mega Glaze Tool

 Glaze Brushing Techniques
 How to Use Underglaze
 How to Use Dipping Glazes
 Glaze Problems, Causes and Fixes
 The Dipping Glaze Guide

 Making a Glaze Catcher
 Fused or Sharp After Firing
 The Signature Wall
 His Viral Videos
 His Own Ceramics
 Meet Mud
Clay & Materials
Reclaiming your clay.
Every scrap you have ever trimmed off, collapsed, hated, or left to dry out on a shelf is still clay. Until it has been through a kiln it is not waste and it never was. Here is how to turn a bucket of dried-out disappointment back into a bag of good throwing clay, at home, with a pillowcase and some patience.
Until clay has been through a kiln it is not waste. Here is how to turn a bucket of dried-out scraps back into good throwing clay, at home, with a pillowcase and some patience.
Written for members of The Clay Hole, and useful to anybody with clay. All six videos on this page belong to somebody else, all six are free, and nothing from YouTube loads until you press play.
Written for members of The Clay Hole, and useful to anybody with clay. Both videos belong to somebody else, both are free, and nothing from YouTube loads until you press play.
Which version would you like to print?
Videos come out as a labeled box with the title and channel to search for, since paper does not play them.
Start here
The whole thing, in four moves.
The one rule that decides everything
Let it dry all the way out first. Bone-dry clay drinks water and falls apart into mush on its own. Half-dry clay already has water in its pores, so it just sits there in the bucket as a stubborn lump and stays lumpy through every step after it.
Almost every bad batch of reclaim traces back to somebody being in a hurry at this exact moment.
Clay is not consumed by being used. It is only rearranged. Water goes in, water comes out, and the only thing that ever makes that permanent is a kiln.
So reclaiming is four moves and a lot of waiting. Dry it out so it can absorb evenly. Drown it so it collapses into slurry. Squeeze the water back out through something porous. Wedge it so the wet parts and the dry parts become one thing again.
The active work is maybe thirty minutes spread across a week. The rest is a bucket being ignored, which is the part everybody gets wrong by trying to speed it up.
Reclaimed clay is usually better than what came out of the bag, because time in water grows the sort of bacteria that make clay plastic.
Why this page exists
Read it, watch it, then read it again.
There are excellent videos about reclaiming clay and six of the best are sitting further down this page. Watch them. We just do not think watching alone is how anybody actually learns a process that happens over a week, in four separate sittings, with your hands full.
Reading is how it sticks.
Watching somebody do a thing is fast and shallow. Reading the same thing is slower and it lands differently, because you set the pace, you stop where you are confused, and you go back a line instead of a scrub bar. When people say a video made sense at the time but they could not do it later, this is usually why.
A page has no playback speed.
Reclaim happens in short bursts days apart. You need step four on Tuesday and step seven on Saturday. A list on a phone gets you there in two seconds with a muddy thumb. A nineteen-minute video means finding minute 12:40 again, twice, with an ad in the middle.
Watching teaches what writing cannot.
How thin a slab of drying reclaim should really be. What slaked clay actually sounds like when you stir it. How firm is firm enough to peel off the cloth. Nobody has written those down successfully and we are not going to be the first. That is exactly what the videos are for.
So this page is built to be used in both directions
Read the lists, watch a potter do it, then keep the lists open on your phone while you work. And if you would rather have half as many words, the Comprehensive and Nutshell toggle at the top of the page will cut this down to the parts you need to actually do it tonight.
What counts
What goes in the bucket, and what ruins it.
Reclaim is generous. Almost anything that is still clay can go back in, no matter how ugly, how dry, or how badly it went. The short list of things that must never go in is worth memorizing, because one of them is the reason a perfectly good pot can blow a crater in itself six months later.
Almost anything that is still clay can go back in the bucket. The list on the right is the one to memorize, because plaster in your clay will blow a crater in a finished pot months later.
Throw it all in
- Trimmings, curls and shavings, wet or dry.
- Failed pots at any stage before bisque, including bone dry ones.
- The slop and slurry out of your wheel pan. This is the good stuff, not the waste. It is the finest particles in the whole body and it is what makes clay plastic.
- Dried-out lumps from the bottom of a bag you forgot about.
- Hand-building offcuts, coil ends, slab trim.
- Bits with dried underglaze on them, in small amounts, as long as you do not mind the color going slightly gray. Keep them out if you throw with white clay and care about it staying white.
Never, at any point
- Plaster. Any chip, any crumb, from a slab mold or a broken bat. It survives the firing, absorbs moisture afterward, expands, and pops a chunk out of the pot. It is the single most expensive mistake in reclaim.
- Anything that has been fired. Bisque is a one-way door. Fired clay is a rock and it will never be clay again.
- Glaze. Glazed greenware, glaze drips, rinse water from a glaze brush.
- Bits of sponge, hair, string, tool handles. All of it turns up later as a hole or a lump.
- Clay bodies that fire to different temperatures. Mixing two mid-fire bodies is fine. Mixing a low-fire body into them is how a shelf gets ruined.
Throw it all in
- Anything that is still clay and has never been fired. Trimmings, failed pots, bone-dry lumps, hand-building offcuts.
- The slop out of your wheel pan, which is the best material in the bucket rather than the waste.
Never, at any point
- Plaster. Any chip, from a slab mold or a broken bat. It survives the firing and pops a crater out of the pot months later.
- Anything fired, and any glaze. Bisque is a one-way door.
- Sponge, hair, string. All of it turns up later as a hole.
- Clay bodies that fire to different temperatures.
Pottery: Reclaiming Clay - How to Recycle your Clay at Home
Kara Leigh Ford
The clearest short version of the whole cycle we have found, filmed in a home studio rather than a production pottery, which is the situation almost everybody reading this is actually in. Watch it on YouTube.
The whole cycle, filmed in a home studio. Watch it on YouTube.
The process
Reclaiming clay, in nine steps.
Reclaiming clay, in six steps.
This is the list to keep open on your phone. It is written for a five gallon bucket at home, which is about as much as most people can wedge in one afternoon. Full of slurry it weighs fifty pounds or more, so fill it where it will sit and move it in smaller loads.
This is the list to keep open on your phone. Written for one five gallon bucket at home.
Two containers, not one
Keep a dry bin and a wet bucket going separately. Dry scraps go in the bin until you have enough to bother with. Slop and slurry go in the bucket. When it is time, the slop becomes the water you pour over the dry scraps, and you have skipped a step and made better clay at the same time.
Keep two containers going
A dry bin for scraps, a wet bucket for slop. When the dry bin is full, the slop becomes the water you pour over it. Better clay, one less step.
-
Let every single piece dry all the way out
Bone dry. Not nearly. Spread it out on a board somewhere warm and give it days if it needs days. Break anything bigger than your fist into smaller lumps, because the middle of a big chunk stays dry-ish for a very long time and that is where lumps come from. Bone dry clay makes silica dust, so break it inside the bin rather than on an open table, wear an N95 or better if you are crushing much of it, and wipe up crumbs with a damp sponge, never a broom.
-
Pick out everything that is not clay
Sponge crumbs, hair, plaster, a lost trimming tool, the corner of a mixing stick. Do it now while everything is dry and visible, because in the next step it all disappears into gray soup.
-
Cover it with water and walk away
Use your saved slop water first and top up with clean water. Everything gets submerged, with an inch or so standing on top. Then leave it alone for at least twenty four hours. Thin trimmings collapse in minutes. Thick pieces want two or three days.
-
Stir it into a thick milkshake
By hand, with a stick, or with a paint mixer on a drill if you have one. You are looking for one even texture with no dry pockets and no lumps hiding on the bottom. If lumps survive the stirring, they need more water and more time, not more stirring.
-
Pour the standing water off the top
Let it settle for an hour, then tip the clear-ish water off slowly and stop the moment the heavy stuff starts to move. Never down a household drain. Clay settles in a trap and sets like concrete.
-
Get it onto something porous
A pillowcase hung up to drip, a plaster bat, canvas over a board. Spread it no thicker than about two inches, or hang it in batches small enough to carry. Thick piles dry from the outside in and give you a wet middle inside a stiff shell.
-
Wait for it, and turn it once
Anywhere from a few hours to three days depending on your weather and your method. On a flat surface, flip the slab over once it releases cleanly. In a pillowcase, squeeze it gently through the cloth and turn the bag. You want it to feel exactly like clay out of a fresh bag.
-
Wedge it more than you think you need to
Reclaim is never uniformly wet, so wedging is doing a real job here rather than just chasing air bubbles. A hundred passes is not too many. If you find a wetter patch, keep going. This is the step that decides whether the clay throws nicely.
-
Bag it and let it rest
Double bag it and squeeze the air out. Give it three days minimum before you throw with it, and a week if you can stand to wait. The moisture keeps evening itself out in the bag and the clay gets noticeably better while you do nothing.
-
Dry everything out completely
Bone dry, and nothing bigger than your fist. Break it up inside the bin, wear an N95 or better if you crush much, and wipe crumbs up with a damp sponge, never a broom. Pick out anything that is not clay while you can still see it.
-
Cover it with water and wait a day
Slop water first, then clean water, with an inch standing on top. Twenty four hours minimum. Thick pieces want longer.
-
Stir it into a thick milkshake
No dry pockets, no lumps on the bottom. Surviving lumps need more time, not more stirring.
-
Pour the standing water off the top
Slowly, and stop when the heavy stuff starts to move. Never down a household drain.
-
Hang it in a pillowcase until it feels like bag clay
Small batches, hung somewhere it can drip. A few hours to three days. Squeeze it through the cloth to check.
-
Wedge it hard, bag it, and leave it alone
A hundred passes is not too many, because reclaim is never evenly wet. Then double bag it and give it three days before you throw with it.
How I Recycle my Stoneware Pottery Reclaim
Florian Gadsby
The same nine steps at a scale most of us will never work at, which is exactly why it is worth watching. Pay attention to how thin he spreads it and how little he hurries. Watch it on YouTube.
Getting the water back out
Five surfaces, and the one we recommend.
Hang it in a pillowcase.
This is the step people overthink. All you are doing is putting wet clay against something that pulls water out of it and does not fall apart while it does. Plaster is the traditional answer. It is also heavy, expensive, breakable, and the source of the worst contamination in pottery.
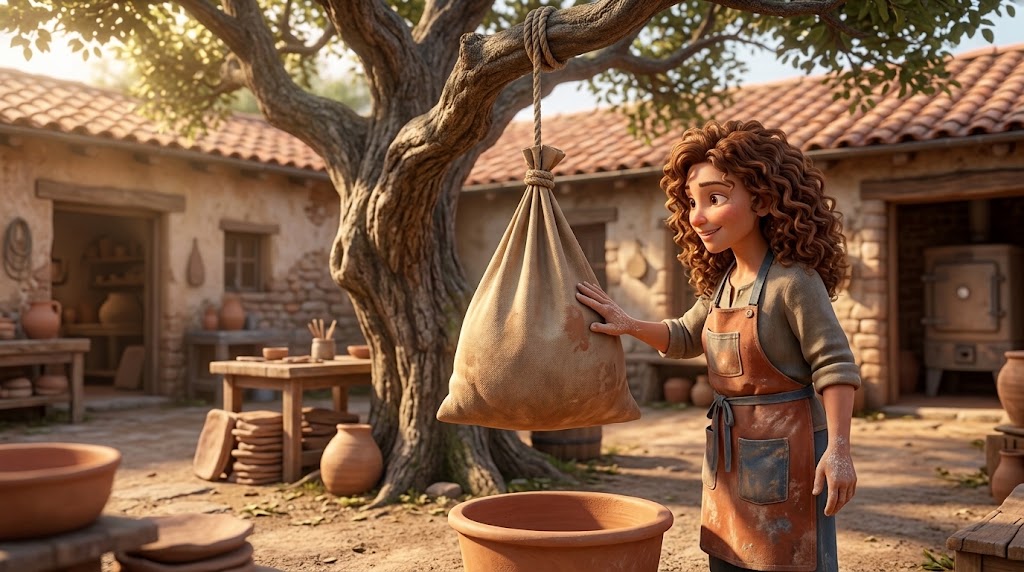
All you are doing is putting wet clay against something that pulls water out of it. An old cotton pillowcase, tied shut and hung up to drip, does that better than anything else you already own.
Our recommendation, for home and for everybody
An old cotton pillowcase. Scoop the slurry in, tie the top, and hang it somewhere it can drip: a shower rod, a fence post, a tree branch, a hook over a bucket. Water leaves through every square inch of the cloth at once instead of only through the bottom face, so it is faster than a slab, and there is no plaster anywhere near your clay.
Four things that matter. Tightly woven cotton, not synthetic. No fraying edges, or you will find threads in your clay. Small batches, because wet clay gets heavy fast and so does your back. And never wrap it in plastic to keep it wet, because evaporation is the entire point.
Four things that matter
Tightly woven cotton, not synthetic. No fraying edges, or you get threads in your clay. Small batches, because wet clay gets heavy fast. And never wrap it in plastic, because evaporation is the entire point.
| Surface | Speed | What it costs | Watch out for |
|---|---|---|---|
| Cotton pillowcase, hung | Fastest, hours to a day | Free | Loose weave sheds threads. Do not overfill it. |
| Plaster bat or slab | Fast, half a day to two days | Plaster, a mold, and some effort | Chips. A worn or knocked bat sheds plaster into the clay. |
| Canvas over a wooden board | Medium, one to three days | Free if you have both | Only the underside breathes. Flip it as soon as it releases. |
| Cement backer board | Medium, one to three days | Cheap at any hardware store | Heavy, and slower than plaster. Otherwise excellent. |
| Drywall or sheetrock | Do not | Cheap, and not worth it | The paper delaminates and the gypsum core is plaster. Same disaster, slower. |
Recycling clay with the pillowcase method
Pursuits Studio
Start to finish with a pillowcase and no special equipment, including several different scrap clays going in at once. This is the closest thing on the internet to what we are asking you to do at home. Watch it on YouTube.
Start to finish with a pillowcase and nothing else. Watch it on YouTube.
Comparing Clay Reclaim Surfaces
Blue Nose Trading
A side by side test of several drying surfaces instead of an argument about which one is best. Watch it on YouTube.
The Easiest Way to make Plaster Reclaim Bats
Pottery to the People
If you are going to use plaster anyway, make it properly and keep it in one piece. Bring it nowhere near the studio. Watch it on YouTube.
The last step, and the one that matters
Wedging reclaim is a different job.
The test for done
Cut the lump in half with a wire and look at the face. If you can see marbling, streaks, or any difference in shade between one part and another, it is not wedged. Put it back together and keep going. A cut face on properly wedged clay looks like one single material, because that is what it now is.
Wedging clay from a fresh bag is mostly about air bubbles and warming it up. Wedging reclaim is about moisture, and it is doing far more work.
Whatever you dried it on, the outside of that lump lost water faster than the inside did. What you are holding is a stiff shell around a softer middle, or a firm slab with a couple of wet patches in it. Throw with it as is and it will feel like it is fighting you in one spot and going soft in another, and you will blame yourself.
So wedge it longer than feels reasonable. A hundred passes or more on a ram’s head is normal for reclaim. If you hit a patch that is noticeably wetter, that is not a sign to stop, it is the whole reason you are doing this.
If your clay came off the cloth too soft to wedge at all, leave it out on a board for an hour and try again. Too stiff, wrap it in a damp towel inside a bag overnight. Neither of those is a failure and both fix themselves.
Our full guide to wedging covers ram’s head and spiral wedging properly, with the hand positions.
How I Reclaim, Cut Wedge and Spiral Wedge my Clay — Narrated Video
Florian Gadsby
Cut wedging is the one worth learning for reclaim specifically, because slamming two halves together is how you beat uneven moisture rather than politely folding it. Watch it on YouTube.
Troubleshooting
Eight ways this goes sideways.
Three things that will happen.
Almost none of these ruin the batch. Reclaim is remarkably hard to destroy, which is one of the reasons it is a good thing to learn on.
None of these ruin the batch. Reclaim is remarkably hard to destroy.
It is still lumpy after a day
Thick pieces need longer, not more stirring. Add water until everything is submerged again, stir once, and give it another day or two. Lumps that survive a second soak were never bone dry when they went in.
It will not leave the cloth
It is not dry enough yet. That is all. Hang it back up and check in a few hours. Peeling it off early gives you a sticky mess and a ruined pillowcase for no reason.
It smells like a swamp
That is bacteria eating organic matter, and it is genuinely good for the clay. It makes it more plastic. Wedge it near an open window and it stops being noticeable within a day. If the smell is too much, a small splash of bleach in the slaking water settles it.
There is mold growing on it
Also fine, and also making your clay better. Wedge it straight in. This is the same aging that potters used to do deliberately in damp cellars for months at a time. Mold can bother lungs and skin, though, so keep your face out of the bucket, and if you react to mold, wear gloves or let somebody else wedge it.
It dried too far and cracked
Nothing is lost. Break it up, put it back in the bucket, and it rejoins the next batch. Or mist it, bag it with a wet towel, and leave it a couple of days to even back out.
It feels short and cracks when you bend it
The plasticity is off, usually after the same clay has been reclaimed several times. A splash of white vinegar in the slaking water helps the fine particles cling together again. So does simply letting it age longer in the bag. Never add vinegar and bleach to the same bucket: together they can give off chlorine gas.
There is grit in it that was not there before
Something got in. Stop and work out what, because if it is plaster it will keep destroying pots for as long as that batch exists. Small amounts of foreign grit that are not plaster can be wedged out or lived with.
It throws differently to the bag
Usually moisture rather than the clay itself. Reclaim tends to be slightly softer and stickier than a fresh bag, which is lovely for hand-building and takes a little getting used to on the wheel. Let it stiffen a day and try again.
At The Clay Hole
Reclaim at home. Take the clay from here.
We hope everybody reclaims a batch here and there, because it is a genuinely good part of the process and it changes how you think about the material. We just cannot have it happening in the building.
Wet reclaim does not get dried here
Reclaim is messy in a way that spreads. Please do not bring wet reclaim into the studio to dry it out, and please do not start a batch here to deal with later. Do it at home, in a pillowcase, where the mess is yours.
The wedging tables are not for it
They are there for wedging clay you are about to use, and they stay usable for everybody only if that is all that happens on them. A wedging table with a pool of slurry drying on it is out of service for the rest of the day.
Take up to 15 lbs of clay home, every month
Free, from the clay discard barrels. There are two by the office and two out in the warehouse. That is 15 lbs a month, per member, and it is there specifically so you have something to practice reclaiming with.
Reclaim at home, not here
Please do not bring wet reclaim into the studio to dry it out, and please do not start a batch here to deal with later. Reclaim is messy in a way that spreads.
Not on the wedging tables
The wedging tables are for wedging clay you are about to use. A pool of slurry drying on one puts it out of service for the day.
Take 15 lbs home, monthly
Free, from the clay discard barrels. Two by the office, two in the warehouse. It is there so you have something to practice on.
Yes, it is Frankenclay. Frankenclay works really well.
What comes out of those barrels is everybody’s scraps mixed together: buff, B-Mix, speckled, gray, whatever went in that week. It will not match a bag of anything and the color is a surprise every time. To be quite frank, it usually works really well. Every clay body we sell fires in the same range, so a mixed batch behaves itself, and plenty of members like the results better than what they paid for.
The fired color of a mixed batch is genuinely unpredictable. Glaze a test tile before you commit to something you care about, and do not expect two batches to ever look the same.
Yes, it is Frankenclay. Frankenclay works really well.
Those barrels hold everybody’s scraps mixed together, so the color is a surprise every time. Every clay body we sell fires in the same range, so a mixed batch behaves itself. Glaze a test tile before you commit to something you care about.
What already happens to your bucket
The studio has its own system for slurry and wet solids, and you are already part of it every time you clean up. Tipping the water off through the sieve at The Wash Pit, leaving your bucket on the drying cart, and putting non-soggy scraps in the wet solids barrel is all covered on the clean-up page. None of that changes because you have started reclaiming at home.
Questions we actually get
The ones that come up every time.
Can I really reclaim clay that is completely bone dry?
Not only can you, it is the best possible state for it. Bone-dry clay has empty pores, so it pulls water in fast and collapses on its own. Half-dry clay has water already sitting in those pores, refuses to absorb any more, and sits in your bucket as a lump. Dry is not a problem to overcome. Dry is the goal.
Can I reclaim something that has already been bisque fired?
No. Firing permanently rearranges the clay at a chemical level, which is the entire point of doing it. A bisque pot is a rock now. It can be broken up and used as grog by people set up to do that, but it can never be clay again.
Can I mix different clay bodies together?
Yes, as long as they fire to the same range. Every clay we sell does, so mixing anything from this building with anything else from this building is fine. Where it goes wrong is mixing a low-fire body in with mid-fire bodies, because one of them will be well past its limit at the other one’s temperature.
Expect a surprise on color and on how much it shrinks. Neither will hurt you. Both are why we call it Frankenclay.
Do I need a plaster bat?
No, and we would rather you did not use one. A pillowcase is faster, free, weighs nothing, and cannot chip a piece of itself into your clay. Plaster is the traditional answer because production potteries move hundreds of pounds at a time and plaster scales. You are moving twenty pounds.
How long does the whole thing take?
About a week, of which roughly thirty minutes is you. Drying the scraps takes as long as it takes. Slaking is a day. Drying it back out is a few hours to three days. Wedging is fifteen minutes. Resting is three days to a week. Nothing about it is hard and all of it is waiting.
Is reclaimed clay worse than clay from a bag?
Usually it is better, and that surprises people. Sitting in water lets bacteria go to work, and that is what makes clay slippery and plastic and pleasant to throw. The one thing that genuinely degrades is plasticity after many rounds of reclaiming the same clay, and a splash of vinegar in the slaking water handles that.
What do I do with the dirty water?
Not the household sink, ever. Clay settles in the trap and turns into something a plumber charges you to remove. Let it settle in a bucket, pour the clear water off outside or onto a gravel patch, and keep the sludge at the bottom for your next batch. It is the best material in the whole process.
Do I have to reclaim?
Not even slightly. Nobody is grading you and a bag of clay is not expensive enough to feel guilty about. We teach it because it is satisfying, because it closes the loop on the material, and because the day you throw something good out of clay you thought you had wasted is a genuinely great day.
Go start a bucket
The clay is still clay.
The clay is still clay.
Put a bin somewhere for dry scraps and a bucket somewhere for slop. That is the entire commitment. In a month you will have enough to reclaim, and about a week after that you will be throwing with clay you already owned. Grab your 15 lbs from the discard barrels on your way out and you do not even have to wait that long.
Put a bin somewhere for dry scraps and a bucket somewhere for slop. That is the whole commitment. Grab your 15 lbs from the discard barrels on the way out and start tonight. There is a longer version of this page behind the toggle at the top if you want the reasoning behind any of it.
How to Wedge Clay
Ram’s head and spiral, properly. The step that decides whether your reclaim throws well.
The Five Stages of Clay
Slip to bone dry to fired, and exactly where reclaim stops being possible.
Clean-Up Instructions
What happens to your bucket, your slurry and your wheel pan before you leave.
The Full Pottery Process
Every stage from a bag of clay to a finished piece, in one place.
The Many Myths of Pottery
Half of what beginners worry about is not true. This clears the rest of the air.
The Everything Page
Every guide, tool and page in the building, on one screen.