Pottery Date Night
 Bring All Your Friends Free Week
 Give a Month of Pottery
 Private Pottery Parties

 The Welcome Booklet
 Your First Ten Sessions
 The Pottery Process
 Finding the Studio
 Your Classes Never Expire
 The Four Tables
 Who’s Who
 The Rewards Program
 Flux Glazes
 The Calculators
 Kiln Tracker
 Holiday Kiln Deadlines

 Beginner’s Tool Set
 Fingernail Clippers
 Mayco Clay Mender
 Epoxy for Kintsugi
 Applicator Bottles
 Large Bead Rack
 Raku Workshop
 Nighttime Raku
 Horsehair and Feather Raku
 The Clay Hole T-Shirt
 Embroidered Crewneck
 Zip-Up Hoodie
 Pre-Made Bisqueware
 Glaze Catchers
 Kiln Cookies
 Clay Cubby Rental
 The Glaze Bible, Printed
 The Book of Molds, Printed
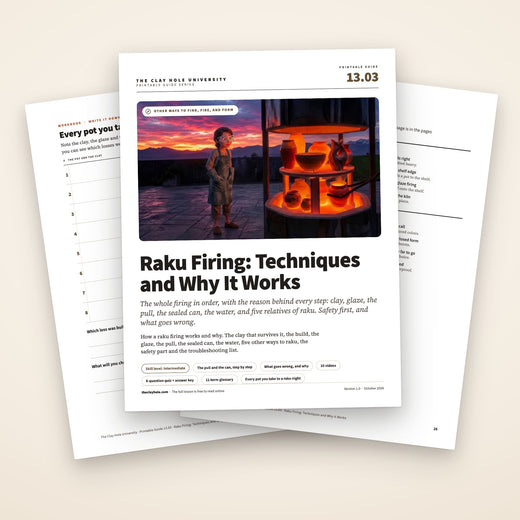
 Printable Pottery Guides
 Free Printable Trackers
 Gifts for Potters
 Christmas Pottery Ideas
 Mother’s Day Gift Ideas
 Pottery Date Night
 Studio Calendar
 2027 Studio Events
 What Should I Do Today?
 How to Throw on the Pottery Wheel
 How to Make a Pinch Pot
 How to Tap Center a Pot
 The Five Stages of Clay
 Is Pottery Hard to Learn?
 Pottery Wheel Practice Drills
 20 Easy Hand-Building Projects
 Everything That Sounds Wrong

 A Beautiful Piece, Every Time
 Slab Roller Tips
 Any Dish as a Slump Mold
 Slab Roller & Slab Mold Certification
 The Pottery Skill Tree
 Clay & Pottery Calculators
 Logging Your Pottery and Glazes
 The Pottery Dictionary
 Why Did My Pottery Do That?
 The Pottery Cone Chart
 Pottery Myths, Fact-Checked
 Is Handmade Pottery Food Safe?
 Incredible Ceramic Artist Videos
 How Dan Throws Giant Pots
 How to Dry Your Pottery
 The Pottery Wheel Introduction
 Pottery by Zodiac Sign
 Personality and the Pottery Wheel
 Pottery for Engineers
 ADHD, Hyperfocus, and Never Running Out
 Hobbies for Burnout
 Screen-Free Hobbies for Adults
 Every Addiction I Ever Had Lost to Art
 Functional Pottery Is Engineering
 How Do We Compare?
 Pottery Classes by City
 Every Pottery Studio in Utah
 Pottery in Draper
 Featured Members
 The Signature Wall
 Making Friends as an Adult Is Brutal
 The Clay Hole Commandments
 2027 Pottery Contests
 2027 Studio Parties
 Gallery Night

 Scream It Into the Void
 Destroy the Glaze Wall
 Daily Affirmation Cards
 Everything That Can Go Wrong
 Subscribe to Our Newsletters
 Contact The Clay Hole
 Corporate Team Building

 Glaze Combinations
 Glazes We Do Not Carry
 Making Glaze Test Tiles
 The Mega Glaze Tool
 How to Use the Mega Glaze Tool

 Glaze Brushing Techniques
 How to Use Underglaze
 How to Use Dipping Glazes
 Glaze Problems, Causes and Fixes
 The Dipping Glaze Guide

 Making a Glaze Catcher
 Fused or Sharp After Firing
 The Signature Wall
 His Viral Videos
 His Own Ceramics
 Meet Mud
Firing techniques
Raku firing, and how to actually be good at it.
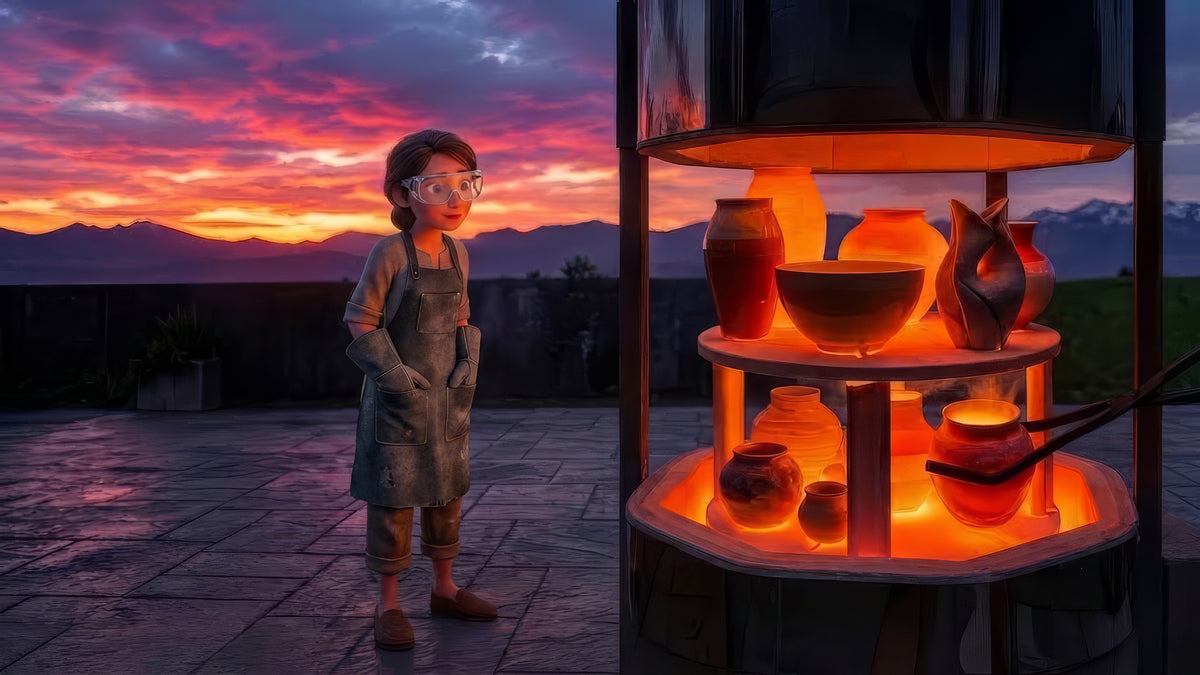
Take a pot to nearly two thousand degrees, open the kiln, and pull it out glowing. Drop it into a can of burning paper and shut the lid. Twenty minutes later you find out what you made. This is the whole process, the reasons behind every step, and video of potters doing it.
Take a pot to nearly two thousand degrees, open the kiln, and pull it out glowing. Drop it into a can of burning paper and shut the lid. Twenty minutes later you find out what you made. This is what you need to know to do it, and nothing else.
Everything on this page
The whole idea
Raku, in about a minute.
This is not our workshop page.
We run raku workshops through the year. Watch the studio calendar and the next one will appear on it. If you are coming to ours, the rules and the certification are on the raku safety and certification page.
Fire a bisqued, glazed pot to a low temperature, somewhere between 1800 and 2000 degrees rather than the 2200 a stoneware kiln reaches. Open the kiln while it is still glowing and pull the pot out. Drop it into a metal can full of paper and shavings, which catches fire instantly, and slam the lid on.
The fire burns all the oxygen inside the can in seconds, then starts pulling oxygen back out of anything else it can find, which includes the metal oxides in your glaze. That is where the reds and golds and the black crackle come from.
One fact explains every rule below. Your pot goes from near 2000 degrees to open air in about four seconds. Very little else in ceramics does that to a piece of clay. Everything about how you build it, what you build it from, and how you handle it exists because of those four seconds.
And one more. The crackle is not in the glaze. It is a fault line with soot in it.
There are other ways to raku: naked raku, horsehair, copper matte, obvara, saggar. The Comprehensive Version covers all five with video, along with the history, the chemistry and the finishing.
How To Make Raku Pottery - A Step-by-Step Beginner Guide
Pottery Crafters
A start to finish overview. The chapters run from choosing clay and glazes and setting up the kiln, through forming and bisquing, the firing and the reduction, to cleaning up afterward. Watch it on YouTube.
Before we start
Why this page reads and watches at the same time.
Raku moves fast and burns hot, and nobody pauses a kiln. The words carry the safety and the order, the videos carry the heat. You need both before you light anything.
The definition
Raku is a firing, not a look.
People think raku means crackle and copper. It does not. Raku is a way of firing, and the crackle and the copper are things that happen to fall out of it.
Here is the whole definition. You fire a bisqued, glazed pot to a low temperature, somewhere between 1800 and 2000 degrees Fahrenheit rather than the 2200 a stoneware kiln reaches. Then, while it is still glowing and the glaze is still molten, you open the kiln and take the pot out. That is it. Everything else people call raku is a variation on those two sentences.
What almost everybody does next, at least in this country, is drop the glowing pot into a metal can full of paper and shavings, which catches fire instantly, and then slam a lid on it. The fire eats all the oxygen inside the can in a few seconds and then starts pulling oxygen out of anything else it can find, which happens to include your glaze. That step is called post-fire reduction and it is where the strange colors and the black crackle come from.
The part almost everybody gets wrong
That reduction can is not Japanese. Raku started in Kyoto in the 1500s, when a tile maker named Chojiro was asked by the tea master Sen no Rikyu to make hand formed tea bowls for the tea ceremony. They were low fired and pulled from a small kiln while glowing, and the warlord Toyotomi Hideyoshi later gave Chojiro’s son a seal bearing the character raku, which is roughly “ease” or “enjoyment.” That became the family name, and that family is still making the work sixteen generations later.
The smoke can arrived four hundred years later and about six thousand miles east across the Pacific. An American potter named Paul Soldner started putting hot pots into combustibles around 1960, and what came out of that is what the rest of the world now means by the word. Traditional Japanese raku has no reduction chamber in it at all.
Some potters are careful to call the western version “raku style” or “American raku” out of respect for the family that owns the name. Others use raku for all of it. Both camps are being reasonable. We use raku for the firing and say Japanese raku when we mean the original.
How To Make Raku Pottery - A Step-by-Step Beginner Guide
Pottery Crafters
A start to finish overview. The chapters run from choosing clay and glazes and setting up the kiln, through forming and bisquing, the firing and the reduction, to cleaning up afterward. Watch it on YouTube.
The physics, briefly
What is actually happening to your pot.
Every rule further down this page comes out of this one chart. A normal glaze firing takes many hours to go up and a day or two to come down. A raku firing takes about an hour to go up, and the pot goes from the kiln to open air in about four seconds.
- The climb. An hour to an hour and a half from cold. That is fast for a kiln, and it is fast on purpose. The first load of the day takes longest because everything starts cold.
- The hold. A few minutes parked at temperature. This is the step beginners skip and then wonder why their glaze came out rough. Holding lets the melt smooth out and settle onto the pot.
- The pull. From near 2000 degrees to open air in about four seconds. Very little else in ceramics does this. Every clay rule on this page exists because of this one moment.
- The sealed can. The fire burns the oxygen out, then starts stripping oxygen out of the metal oxides in your glaze. Copper carbonate goes to copper metal and flashes red and gold. Carbon soaks into every unglazed surface and turns it black.
- The water. A second shock, and a deliberate one. It freezes the reduced state in place before oxygen can get back in and undo it.
Why raku crackles, in one paragraph.
Glaze and clay shrink at different rates when they cool. Normally that is a problem you spend years engineering away, because a crazed glaze on a mug is a defect. In raku it is the point. The glaze shrinks more than the body underneath it as they cool, is pulled tight, and cracks into a web, and the fast drop out of the kiln makes it crack harder. Then you put the pot in smoke, and the smoke crawls into every one of those cracks and stains them black. Crackle is not something in the glaze. It is a fault line with soot in it.
Reduction here is not the same word you know from a gas kiln. In a gas firing you starve the flame while the pot is still climbing, and the atmosphere changes the chemistry as the glaze matures. In raku the pot is already fired. You are changing the chemistry afterward, in the few minutes while the glaze is still soft enough to care. Same word, different event, and mixing them up is why people expect gas reduction results from a raku can.
Step one
Start with clay that can take the shock.
More raku pots are lost to the wrong clay body than to anything else, and the loss is not close. You cannot fix this later, and no amount of careful firing rescues a pot that was made out of the wrong thing three weeks ago.
More raku pots are lost to the wrong clay body than to anything else, and it is not close. There is one question that settles it: does the clay have grog in it? Grog, fired clay ground back in, gives the stress somewhere to go, and some of it is so fine you cannot feel it. Clay with grog survives. Smooth, dense clay with none splits. That is the whole test.
What you want
- Grog, or something like it. Grog is fired clay ground back up and mixed into the body. It works like a few thousand tiny expansion joints, giving the stress somewhere to go.
- An open body. It has grog in it. It may feel gritty, or quite smooth if the grog is very fine, as in Berlin Gray. Open bodies let steam and stress move through them instead of building up.
- Low shrinkage. The less a body wants to move, the less it minds being told to move fast.
- Some tolerance for being underfired. Raku temperatures are hundreds of degrees below where a stoneware body wants to be, so it will stay porous. That is expected.
What loses pots
- Smooth porcelain. Dense, tight, no grog, nowhere for the stress to go. It splits. People do fire porcelain raku successfully and they are working much harder than you are.
- Anything very plastic and very fine. The qualities that make a body lovely on the wheel are mostly the same qualities that make it fail here.
- A body you cannot identify. If you do not know what it is, you do not know what it does at 1800 degrees.
- Reclaim of mixed bodies. Fine for practice pots, genuinely unpredictable in a raku kiln.
What we use here, and why it is only two.
We recommend exactly two clay bodies for raku out of the clays we carry: B-Mix with Grog and Berlin Gray. It is not a close call and we are not being precious about it. Those two take the shock best, the rest of the shelf cracks far more often, and a raku workshop is a bad place to run an experiment you did not plan.
Plenty of studios buy a dedicated raku body, usually a very open, heavily grogged, talc bearing clay sold under a name with the word raku in it. Those are excellent and they throw like sandpaper. Other potters swear you can raku almost any stoneware if you preheat it gently and pull it slowly, and they are not lying, they are just accepting a higher loss rate than we want a room full of people to accept at once.
Raku Clay: What You Need To Know
Tinker & Think
The description says it explains how to modify other commercial clays, or wild clays, to work in a raku firing, and the theory behind it. The chapters cover thermal shock, mixing a test clay by percentages and ratios, grog and quartz inversion, and porosity. We use B-Mix with Grog or Berlin Gray, so treat the mixing as background. Watch it on YouTube.
Step two
Build it so it can survive the pull.
Most pots that fail at a raku firing failed weeks earlier, at the wheel or the table, for reasons that were already baked into them. These are the eight decisions that decide it, made long before anybody lights anything.
Most pots that fail at a raku firing failed weeks earlier, at the wheel or the table. These are the five decisions that decide it, made long before anybody lights anything.
-
Keep the walls even, top to bottom
Thick spots and thin spots cool at different speeds, and all of that stress piles up exactly where the two meet. It is why so many raku failures crack in a clean ring rather than somewhere random. Even walls give the whole pot one cooling curve instead of three fighting each other.
-
Trim the foot to match the walls
A heavy base under thin walls holds its heat much longer than everything above it. The two halves cool at completely different rates and the pot lets go right where they meet, which is why so many beautiful pieces come apart just above the foot. Trim until the bottom feels like the same pot as the rest of it.
-
Give the stress nowhere to gather
Two jobs, one idea. Soften every sharp interior corner with a rib or a damp finger so stress spreads across a curve instead of picking one line to split along. And run an extra coil down the inside of every handbuilt seam, blended until you cannot find it with a fingertip. A seam you can still feel is a crack waiting for an excuse.
-
Round off every inside corner
A sharp angle inside a form funnels stress down into a single line. Soften interior corners with a rib or a damp finger and the stress spreads across a curve instead of picking one place to blow out. It costs about thirty seconds and it saves pots.
-
Reinforce every seam with a blended coil
Handbuilt seams are the first thing to let go under thermal shock, and they let go loudly. Run an extra coil down the inside of every join and blend it until you cannot find it with a fingertip. If you can still feel the seam, it is a crack waiting for an excuse.
-
Compress the floor properly
An uncompressed floor cracks in a normal glaze firing. In raku it does not stand a chance. Compressing the floor is the cheapest insurance on this whole list.
-
Think hard before you close a form
Narrow necks and closed forms are the ones that burst, because water inside turns to steam with nowhere to go. A closed form needs a small vent hole through the wall before it is fired, and it is handled differently at every stage, so decide now rather than being surprised later.
-
Keep it small enough to move fast
Somebody has to carry this thing, glowing, on the end of a pair of tongs, across open ground, in one movement. Big pieces are dramatic and they are also the ones that get dropped. Tall and skinny travels better than wide and heavy.
A closed form needs a small vent hole through the wall before it is fired, and closed and narrow necked forms are handled differently at every stage, so decide now rather than being surprised later.
-
Get it bone dry, then bisque it
Any moisture still hiding inside becomes steam at temperature and leaves through the nearest wall, taking a piece of your pot with it. We bisque to cone 05. A pot that felt dry a week ago is a far safer bet than one that felt dry yesterday.
Bisque temperature is a live argument. Some raku potters bisque low, around cone 08 or 06, on the theory that a more porous body handles shock better and takes glaze more thirstily. Others bisque to cone 04 for strength, because a raku pot gets handled hard. We bisque everything to cone 05 for the same reason we do most things, which is that one temperature for the whole studio beats six.
Step three
Glazes, and how to put them on.
A raku glaze is not a category of chemistry so much as a category of use. The short answer is that a raku glaze is any glaze that melts at the temperature you are firing to and does something interesting when you take the oxygen away from it.
A raku glaze is any glaze that melts at the temperature you are firing to and does something interesting when you take the oxygen away from it. Crackle bases, coppers and metallics, copper matte, flashing slips. And bare clay, which takes the smoke and goes deep black, and is the most underrated surface in raku.
Crackle bases
Clear or white, high in alkaline flux, and formulated to craze deliberately. The glaze is the canvas and the smoke does the drawing. This is the classic white raku pot with a black web across it.
Copper and metallic
Loaded with copper carbonate, and sometimes iron or cobalt alongside it. Reduction strips the oxygen back off the metal and you get reds, golds, greens and oil slick iridescence. Also the least repeatable thing on this list.
Copper matte
A heavy, dry copper coat that is barely a glaze at all. Almost all of the color development happens after the can, when you let air back onto it in a controlled way.
Flashing slips and terra sigillata
Not glazes. Thin clay coatings that take smoke beautifully and stay matte. Burnished terra sigillata is what makes horsehair lines read sharp instead of blurry.
Underglaze and oxides
Both work, both behave differently than they do at cone 5½. Colors that need oxygen to develop will let you down in a reduction can. Test before you commit a piece you love.
Bare clay
The most underrated surface in raku. Anywhere glaze does not reach, carbon soaks in and goes deep black, and the contrast between that black and a flashed copper is most of what people react to.
Applying it: thicker than feels right.
- Three coats minimum, often more. Raku glazes generally want to go on heavier than a cone 5½ brush-on glaze. Thin coats give you patchy, dry, disappointing surfaces.
- Let each coat dry before the next. Wet on wet lifts the coat underneath and you end up with bare patches you will not see until the pot is glowing.
- Keep the foot and about a quarter inch above it clean. Molten glaze plus a kiln shelf equals a pot you own permanently. Raku glazes never go into a studio glaze firing. They melt hundreds of degrees below it and run off the pot onto the shelf.
- Use resists on purpose. Wax, tape, rubber bands, liquid latex. Anywhere the glaze does not reach, the smoke gets in. Resist is how you get pattern and edge instead of an even coat.
- Know what is on each pot. Write it down. Different glaze families want different temperatures, and at the firing somebody will ask you.
- Do not mix families on one piece unless you are certain they fire to the same temperature. Mixing is the fastest way to ruin a good pot and sometimes the rest of the load with it.
- One glaze family per pot, written down. Different families want different temperatures, somebody will ask you at the firing, and mixing them is the fastest way to ruin a good pot and sometimes the load with it.
Steven Branfman, who wrote a well known book on raku, argues that a raku glaze is simply any glaze used in the raku process, and that stoneware glazes, low fire commercial glazes, china paints and plain oxides all have a place in it. He is right, and experienced potters get remarkable results doing exactly that. Our rule about staying inside one family is a studio rule for firing a whole group’s work in one night, not a law of ceramics.
Our raku glazes are used at raku workshops, not on a normal studio day. If you want to see which ones, the glaze collection page lists them.
Beautiful Raku Glaze Recipe
Tinker & Think
Mixing from raw materials is not something you will do here. The description says it is a Paul Soldner recipe, a clear raku glaze of Gerstley borate and Custer feldspar, with copper carbonate and manganese dioxide added for color. The powders are dry dust hazards, so this one stays a video. Watch it on YouTube.
Step four
The firing itself.
A raku kiln is a simple, brutal machine. Almost all of them are a lightweight fiber shell that lifts off or hinges open, sitting on a base, with one or two propane burners pointed in at the bottom. At The Clay Hole the instructor or a trained helper loads it, runs the burners and decides what goes in. Your jobs are the rehearsal, the gear and your own pull.
At The Clay Hole the instructor or a trained helper runs the kiln. These are the parts you need to understand, and the two that are your job: the rehearsal and your gear.
Top hat and lift off
The most common studio kiln. A fiber lined shell on a frame, raised straight up off the load with a pulley or by hand. The whole load is exposed at once, which is why the choreography matters.
Trash can and barrel
A metal can lined with ceramic fiber blanket. Cheap, effective, and the way a lot of people fire at home. Every principle on this page applies unchanged.
Updraft and front loading
Brick built, slower to heat, holds temperature better. Nice for bigger work, harder to unload quickly, which is the tradeoff.
-
Load with the unload in mind
At The Clay Hole the instructor or a trained helper loads the kiln and sets the order, and you hand your piece over and never reach in. Pieces go in spaced apart, not touching each other or the walls, and whoever is pulling which pot should be able to reach it without crossing anybody else’s path.
-
Rehearse the unload cold
Everybody picks up their tongs, grabs their piece the way they intend to, turns the way they intend to turn, and walks where they intend to walk, while the kiln is open and stone cold. Tongs behave differently on different forms and finding that out now is much better than finding it out later. This is the single biggest difference between a firing that looks smooth and one that does not.
Pick up your tongs and rehearse the whole thing while the kiln is open and stone cold: your grab, your turn, your walk. Tongs behave differently on different forms and now is the time to find that out.
-
Climb, and do not rush the start
At The Clay Hole the instructor brings it up gently for the first few minutes, especially if the pots are cold or the weather is. After that, raku climbs fast on purpose. Figure on an hour to an hour and a half, and expect the first load of the day to take the longest because everything is starting from cold.
-
Read the glaze, not just the pyrometer
A pyrometer tells the person running the kiln the air temperature, and the glaze tells the truth. They watch through the spy hole. The surface goes from dry and matte, through a stage that looks like orange peel, to wet and glassy and reflective. When it looks like it is covered in syrup, it is there.
Skipping the hold at the top is the most common reason a glaze comes out looking dry. The instructor holds the kiln at temperature for a few minutes so the melt can smooth out and settle onto the pot.
-
Hold at temperature
A few minutes at the top, in as tight a window as the instructor can manage with a hand valve on a propane line. This is what lets the melt smooth out and settle onto the pot instead of arriving rough. Skipping the hold is the most common reason a glaze comes out looking dry.
-
Get everyone geared and set before you open
Goggles, apron, gloves, all the way on, five minutes before you expect to be at temperature. Cans open, nests built, bags of combustibles parked where they can be grabbed. If the kiln has to wait for a person, it climbs past temperature and somebody’s glaze pays for it.
Temperature is the thing you will see argued about most. A lot of studios fire glazed raku somewhere near 1750 to 1800 degrees Fahrenheit, roughly cone 06, and drop to about 1200 for horsehair and about 1650 for obvara. Ours runs hotter, up near 2000 by the time the lid comes off. Neither is wrong. What matters far more than the number is that you hold there and that you know what your own glazes want.
RAKU FIRING - the CRAZIEST way to finish pottery!
Jonthepotter
A raku firing from the Jonthepotter channel. The chapters are an intro, the firing from 2:00 and the results from 8:34. At our workshops the instructor runs the kiln. Watch it on YouTube.
Step five
The pull, and the can.
This is the part people come for and it lasts about ninety seconds. Everything up to now was preparation for it, and everything after it is cleanup.
Build the nest first
A kiln brick goes in the bottom of the can so the pot has something to sit on that is not the metal. On top of that, a loose nest of torn newspaper with pine shavings and animal bedding sprinkled through it. Loose is the operative word. Packed combustibles smother instead of flaring.
A kiln brick in the bottom of the can, then a loose nest of torn newspaper with pine shavings and animal bedding through it. Loose is the operative word. Packed combustibles smother instead of flaring.
Fill a bag, and tear it
A paper lunch sack packed with more of the same, parked right beside your can. Rip it down one corner before you need it so it dumps instantly rather than fighting you while you are holding a glowing pot in your other hand.
Lift, pivot, set down
Get the tongs on the piece the way you rehearsed, come straight out, turn the way you rehearsed, and set it on the brick in the nest. It will burst into flame the instant it lands. That is supposed to happen.
Feed it, then seal it
Sprinkle or dump the bag over the pot, throw the crumpled bag in too, let the flames climb to their peak and just start to settle, then put the lid on and stomp the edges down so the whole thing seals. The starved atmosphere inside is the entire point.
The burp, and why people argue about it
Five or ten seconds after sealing, some potters crack one side of the lid to let a rush of oxygen in. It catches, and a fireball comes out the side of the can, and then the lid goes straight back down. The theory is that a quick hit of oxygen followed by another hard reduction pushes copper further toward the flashy end of its range.
Potters argue about whether it changes anything at all. Plenty of very good ones swear by it. Plenty of others have run tests and say the difference is noise. It also adds real danger, because a fireball comes out of a specific side at a specific moment, so nobody should be standing there and nobody should be inhaling. Ask before your first one.
Time in the can is completely unsettled. Some potters pull the lid at five minutes. Some leave it an hour. Some never seal at all and just let a pot smoke in the open, which gives softer, grayer results. We go about twenty minutes, which is long enough for the chemistry to finish and short enough that we are also loading the next kiln while it sits.
Everything about this is hotter than it looks.
The number one way people get burned at raku is not the kiln and it is not the tongs. It is the can and its lid, twenty minutes later, sitting there looking like it has been quietly doing nothing. Gloves on for the lid, the can, and the pot inside it, every time. If you are firing with us, the full rule set and the safety certification live on the raku safety and certification page.
The number one way people get burned is not the kiln and not the tongs. It is the can and its lid, twenty minutes later, looking like it has been quietly doing nothing. Gloves on, every time.
Step six
Water, or no water.
Opening the can is the second reveal of the night, and what you do in the next thirty seconds still changes the pot.
Lid off, gloves on, lift the piece out and brush the ash and debris off it. If you want the classic crackle, get down close and listen. It sounds like popcorn in a microwave: fast ticking at first, then the gaps between the ticks stretch out. When the gaps get long, it is time.
Quenching in water stops the pot where it is. Oxygen is trying to get back into your reduced glaze the whole time it is cooling in air, and cold water ends that argument immediately. It is why quenched pieces read brighter and keep more of their metallic flash. Wide open forms, bowls and anything with a big mouth go straight into the tub.
Quenching stops the pot where it is, before oxygen can creep back into the reduced glaze, which is why quenched pieces read brighter. Wide open forms, bowls and anything with a big mouth go straight into the tub.
Air cooling gives you a softer, more muted, often more interesting surface, and it lets the crackle keep developing for another minute or two. Some potters never quench anything and their work is beautiful. It is a taste decision, not a correctness one.
The one rule with no flexibility in it
A narrow necked or closed form never goes into water while it is hot. Water pours in through the neck, flashes to steam instantly, the steam has nowhere to go, and the piece bursts. Those get sprayed instead: several passes into the inside with a pressurized sprayer to bring the temperature down, and only then into the tub to finish cooling. A sprayed piece is not done just because the outside feels cool, and nobody puts a bare hand on it before it has been submerged.
Everything else is quick. A couple of minutes floating in the tub, a tap with a fingertip, and it is yours.
Then scrub it. A pot out of the tub is covered in soot and looks like nothing. Take a scour pad, water and a mild abrasive to the glazed areas until the color comes up, and leave the bare clay alone, because the black there is carbon soaked into the body and you want it.
Step seven
Cleaning it up, and deciding how far to go.
A pot out of the tub is covered in soot and ash and looks like nothing. This step is where it turns into the thing you saw in your head, and it is the step almost nobody films.
- Scrub the carbon off the glazed areas. A scour pad, water, and a mild abrasive cleanser. Work at it. The soot on top of the glaze is not the effect, it is covering the effect.
- Leave the bare clay alone. The black on unglazed areas is carbon soaked into the body and you want that. Scrubbing hard there just makes it patchy.
- Decide about the crackle. Straight out of the can the lines are gray. India ink, or shoe polish, or a graphite rub worked into the surface and wiped back darkens them to a proper black. Some people love it and some people find it heavy handed.
- Seal it, or do not. A wax or an acrylic sealer deepens the color, protects the surface from handling, and slows the copper down. It also puts a film between you and the clay. Try both on two pots before you commit to a habit. We do not spray at The Clay Hole, so a spray sealer is a home job, outdoors, with organic vapor cartridges on.
- Expect it to keep changing. Copper reds are the least stable colors in ceramics. A flashy pot can go quieter over months as oxygen gets back into the surface. Sealing slows this. Nothing stops it.
There is a real school of thought that says do nothing at all: no ink, no wax, no polish, let the pot be exactly what came out of the can and let it age. There is another that treats finishing as half the work. We do the India ink step back at the studio during a normal class rather than out at a firing, because it is fussy and it wants a clean table.
How I Polish and Protect Raku Pots
Doug Rubenstein
A six minute care routine. The chapters cover removing slip, a workable fixative, polishing with wax, UV protection and safety precautions. The fixative and UV protection are sprays, which are a home job outdoors. Watch it on YouTube.
Variations
Five other ways to raku.
Everything above describes glaze raku, which is what most workshops run and what most people mean. These five are its close relatives. They use the same kiln, the same gear and most of the same rules, and they produce work that looks nothing like each other.
Naked raku
The pot comes out with no glaze on it at all, which is the joke in the name. You brush on a resist slip, then a crackle glaze over the top. In the can, the glaze crazes and the smoke drives through those cracks into the slip and stains the clay underneath. Then, once the pot has cooled, both layers flake off, sometimes under running water, sometimes with a fingernail, and what is left is bare burnished clay with a black web drawn on it. It is the most technically fussy thing on this list and the most striking when it works.
Naked Raku ~ The Full Monty
ArranEye
Watched more than five million times. The description says the potter, Simon Thorborn, shows every step involved, and he has worked on the Isle of Arran since 1986. Watch it on YouTube.
Horsehair and feather
No glaze, no reduction can, and a much lower temperature. The pot is burnished first, usually with terra sigillata, which holds its sheen through a cone 05 bisque better than a bare burnish does, and pulled out around 1200 degrees. The hair goes on once it has dropped to around 1100. Then you lay horsehair, feathers, or a sprinkle of sugar directly onto the hot surface and it carbonizes on contact, leaving a wandering black line exactly where it touched. Too cool and nothing marks. Too hot and the carbon burns straight back off. The window is narrow and finding it is most of the skill.
Super Quick Terra Sigillata Plus Feather and Horsehair Raku Firing MARCIA SELSOR
Ceramic Arts Network
A two minute excerpt from a longer video. The title says it covers terra sigillata plus a feather and horsehair firing, and the description says the full length version is sold by Ceramic Arts Network. Watch it on YouTube.
Copper matte
A heavy dry copper coating rather than a glossy glaze, and the trick is that most of the color arrives after the can. You reduce it, then let air back onto the surface in a controlled way, fanning it or misting it with water while it is still hot, and iridescent reds, golds, greens and purples bloom across it as it reoxidizes. Do it too fast and you get gray. It is the most hands on finish in raku and the one people chase hardest. The color comes from copper fume, so this one is for upwind and outdoors.
How to Make Copper Matte Raku
The Pottery Wheel
The description says it shows how to make the copper matte glaze and fire it, and calls the technique copper fuming, which gives a random mix of vivid, iridescent color. Copper fume is metal fume, so stay upwind. Watch it on YouTube.
Obvara
A Baltic technique, several hundred years old, and completely unlike everything else here. You ferment a mixture of flour, yeast, sugar and water for a few days until it is alive and sour. The pot comes out of the kiln around 1650 degrees and gets plunged straight into the bucket. The mixture scorches onto the surface instantly in browns and golds and near blacks, then the piece goes into water. No glaze anywhere. The results look like something that grew rather than something that was fired.
Obvara Raku Firing (Narrated Version)
Doug Rubenstein
The description says the potter walks through a whole raku firing, the obvara mixture and each part of the setup, with safety tips. The chapters cover kiln setup, propane safety, ignition, unloading and reduction and a long safety section, and the description says the firing itself starts at 8:13. At The Clay Hole the instructor runs the kiln. Watch it on YouTube.
Saggar
The reduction happens in a sealed container packed around the pot rather than in a can afterward. You bed the piece in sawdust, salt, copper wire, seaweed or banana skin, close the saggar and fire it. Ferric chloride is genuinely hazardous and is for people with the full gear, and nothing glued, varnished, painted or plastic ever goes in, because those give off dangerous fumes. Every material leaves its own mark on the surface. Of everything on this page it is the least controllable and the most fun to plan.
Saggar Firing
Cantley Pottery
The description says Frank Logan demonstrates a saggar firing. The chapters run from preparing the pots, through adding sugar and covering them, wrapping and additives, to firing the raku pots. Watch it on YouTube.
Purists will point out that horsehair, obvara and saggar are not really raku at all, they are alternative firing techniques that happen to use raku kilns and raku tools and are run by some raku groups and workshops. That is a fair point and we are going to keep grouping them anyway, because the person holding the tongs does not care much about taxonomy.
Not optional
Safety.
Raku is the firing in ceramics where a mistake is most likely to burn somebody. Not ruins a pot. Burns a person. Everything below is standard across every studio that runs this well.
What you wear
- Closed toe shoes, long pants, hair tied back. Every person, every time.
- Natural fibers only. Cotton, denim, wool. Fleece, nylon and polyester do not burn so much as melt, and melted fabric sticks to skin.
- Nothing loose or dangling. No open sleeves, no scarves, no swinging jewelry.
- Goggles, a welding apron and full length welding gloves, fully on, before the kiln is at temperature.
- Glasses stay on and the goggles go over them. Do not swap to contacts for this.
How you move
- People come before pots. If it comes to it, set the piece down or let it go.
- Never lean over to pick something up during an unload. Whatever you dropped will still be there in twenty minutes.
- Not in this firing? Stand well back behind the furthest cans and watch from there.
- Somebody will be shouting orders and it is not personal. If you hear your name, do the thing immediately.
- Nobody participates under the influence of anything that changes their balance, judgment or reaction time.
- Do not breathe what comes out of a can. Take your breath of fresh air first, then go near the lid. A paper N95 helps with soot and does nothing for gases or fumes, so if smoke worries you, bring a cartridge respirator with organic vapor cartridges.
- The can and the lid stay dangerous long after they look boring. Gloves on for the can, the lid and the pot inside, every time. This is where most burns happen.
- Fire it outdoors, always. At The Clay Hole only the instructor or a trained helper loads the kiln, nobody reaches in, and people are assigned to the extinguishers, the hose and the water.
Smoke and fumes
- Do not breathe what comes out of a can. Hold your breath until your face is clear of it.
- Take your breath of fresh air first, then go near the lid. People get caught leaning in and inhaling on reflex. Raku glazes carry copper and sometimes other metals, so some of what comes off a hot pot and out of a can is metal fume. Stay upwind and out of the plume.
- A paper N95 helps with soot and smoke particles and does nothing for gases or fumes. If smoke or fumes worry you, bring a cartridge respirator with organic vapor cartridges. You bring your own. We supply the goggles, aprons and gloves.
- Fire it outdoors. Always. This is not a thing that happens inside a building.
Heat, after the excitement
- The can and the lid stay dangerous long after they look boring. This is where most burns happen.
- At The Clay Hole only the instructor or a trained helper loads the kiln between firings, and nobody reaches in. The air alone will burn you.
- Extinguishers, a hose and buckets of water at the firing area, with specific people assigned to them.
- Cold running water and a burn kit on site, and you say something the second it happens rather than after your pot is safe.
If you are firing with us
Our full rule set, the choreography we use, the gear we supply and a certification you can carry are all on the raku safety and certification page. It takes about fifteen minutes and it makes the night make sense before you are standing in it.
Troubleshooting
When it goes wrong, and it will.
The raku gods take a percentage. That is genuinely part of the deal and it always will be. But most losses have a cause, and most causes are on this list.
It cracked in a clean ring just above the foot
A heavy base under lighter walls. The thick part held its heat while the thin part let go of it, the two halves cooled at different rates, and the pot split exactly where they met. Trim the foot until the bottom feels like the same pot as everything above it.
It burst apart in the can or in the water
Almost always one of three things. Trapped moisture that flashed to steam. A closed or narrow necked form that took on water while hot. Or a clay body with nothing open in it to absorb the shock. The first is a drying problem, the second is a handling rule, and the third cannot be fixed after the fact.
The colors came out dull, brown or gray
Usually not enough reduction. Either the can did not seal properly and oxygen kept feeding in, or the piece sat in open air too long between the kiln and the can, or there were not enough combustibles to get a real fire going. On copper matte specifically, dull gray usually means it reoxidized too fast rather than too slow.
The glaze looks dry, rough or unmelted
It came out too early or it never got a hold at temperature. A raku glaze wants to look wet and glassy through the spy hole before you open anything. If it looked like orange peel when you pulled it, you were a few minutes short.
I got no crackle at all
Either the glaze was not a crackle base, or the pot cooled too gently for the glaze and body to pull apart, or the smoke never got into the cracks because the reduction was weak. A dip in the water after the can is the hardest shock. Do not hold the pot in open air before the can, because that costs you reduction.
There are bare patches where glaze should be
Crawling, and it is nearly always application. Glaze went on over dust or a greasy fingerprint, or a wet coat lifted the coat under it, or it was simply too thick in one spot. Wipe bisque down before glazing and let every coat dry properly.
The whole thing came out black
Often just carbon sitting on top of the glaze rather than a failure. Scrub it properly with a scour pad and a mild abrasive before you decide. If it is still black after real scrubbing, the glaze was probably too thin to cover and the body underneath took the smoke.
It looked incredible and then faded over a few months
Copper reoxidizing. Copper reds are the least stable colors in all of ceramics and they slowly give up their flash as oxygen works back into the surface. A wax or acrylic sealer slows it considerably. Nothing stops it, and plenty of potters think the aged version is the better one.
It survived, but it leaks
It is supposed to. See the next section.
Use and care
What a raku pot is actually for.
Read this before you make something you were planning to drink out of.
Read this before you make something you were planning to drink out of.
Raku is not food safe and it never will be. Not with a sealer, not with a liner glaze, not if you are careful. The body is fired hundreds of degrees below vitrification so it stays porous, the glaze is deliberately crazed so it has a network of cracks running through it, and raku glazes routinely carry copper and other metals in quantities that have no business near food. Those three facts stack. If you want a pot for food or drink, glaze it with something rated for that, fire it in the normal glaze firing, and check the glaze in the Food Safe Lookup.
It is not watertight. Water will pass through the body over hours or days. A raku vase full of flowers is a slow leak sitting on your furniture. If you want to use one, drop a glass or plastic insert inside it and fill that instead.
Raku is not food safe and it never will be, and it is not watertight. The body stays porous, the glaze is deliberately crazed, and raku glazes routinely carry copper. A vase wants a glass insert inside it. For food or drink, use a glaze rated for it in the Food Safe Lookup, in a normal glaze firing.
It is not for the dishwasher, the oven, the microwave or the freezer. Anything that heats or cools it fast is asking it to do the one thing it already survived once, and it will not survive it twice.
It is not weatherproof. A porous pot outside in Utah will take on water and then freeze, and freezing water inside a wall is how pots come apart. Planters need a liner and a winter indoors.
And it is not for the dishwasher, the oven, the freezer or the back yard. Anything that heats or cools it fast is asking it to survive the one thing it already survived once.
So what is it for
Looking at. Holding. Being an object. Raku is the branch of ceramics that gave up function entirely in exchange for surfaces you cannot get any other way, and it made a good trade. Vessels, sculpture, lidded jars, wall pieces, things that sit on a shelf and stop people mid sentence. Nobody has ever been disappointed by a raku pot for the reason they thought they would be.
Looking at. Holding. Being an object. Raku gave up function entirely in exchange for surfaces you cannot get any other way, and it made a good trade.
Keep this open
The phone list.
Everything above, compressed into two lists you can hold in one hand. Print button is at the top of the page if you would rather have it on paper.
Weeks before, at the studio
- Built in a grogged or open clay body
- Walls even from the rim to the foot
- Foot trimmed to match the wall thickness
- Interior corners rounded, not sharp
- Every seam reinforced with a blended coil
- Floor compressed
- Bone dry, then bisqued
- Glazed with raku glazes, three coats or more
- One glaze family per piece, and written down
- Foot and a quarter inch above it wiped clean
At the firing
- Closed toe shoes, long pants, hair back, natural fibers
- Rehearse your grab, your turn and your walk while it is cold
- Nest built: brick, then loose paper and shavings
- Bag filled and torn down one corner, parked by your can
- Fully geared five minutes before temperature
- Glaze looks wet and glassy before anybody opens anything
- Lift, pivot, set down. People before pots
- Feed it, let the flames peak, seal the lid, stomp it down
- Twenty minutes closed, and no reaching into the kiln
- Gloves on for the can, the lid and the pot. Always
- Open mouths into the water, narrow necks get sprayed first
- Scrub, admire, and help clean up
Go do it
Reading about it only gets you so far.
You can know every word on this page and still not know what it is like when the lid comes off and a wall of heat hits you in the face and everything inside is glowing. That part does not transfer. You have to be standing there.
You can know every word of this and still not know what it is like when the lid comes off and everything inside is glowing. That part does not transfer.
We run raku workshops through the year. They show up on the studio calendar when they are scheduled, and they fill.
This was the short version. There is a much longer one behind the toggle at the top of the page, with the history, the chemistry, five other ways to raku and eight more videos.
Watch the studio calendar
Workshops, classes and events, all in one place. The next raku date appears here first.
Get raku safety certified
Our rules, the full choreography, a ten question check and a card you can carry. About fifteen minutes.
One last thing, and every raku potter will tell you the same. Bring one piece you would be genuinely gutted to lose, and one you would not. You will have a better night either way.
Which version would you like to print?
Videos come out as a labeled box with the title and channel to search for, since paper does not play them.