Pottery Date Night
 Bring All Your Friends Free Week
 Give a Month of Pottery
 Private Pottery Parties

 The Welcome Booklet
 Your First Ten Sessions
 The Pottery Process
 Finding the Studio
 Your Classes Never Expire
 The Four Tables
 Who’s Who
 The Rewards Program
 Flux Glazes
 The Calculators
 Kiln Tracker
 Holiday Kiln Deadlines

 Beginner’s Tool Set
 Fingernail Clippers
 Mayco Clay Mender
 Epoxy for Kintsugi
 Applicator Bottles
 Large Bead Rack
 Raku Workshop
 Nighttime Raku
 Horsehair and Feather Raku
 The Clay Hole T-Shirt
 Embroidered Crewneck
 Zip-Up Hoodie
 Pre-Made Bisqueware
 Glaze Catchers
 Kiln Cookies
 Clay Cubby Rental
 The Glaze Bible, Printed
 The Book of Molds, Printed
 Printable Pottery Guides
 Free Printable Trackers
 Gifts for Potters
 Christmas Pottery Ideas
 Mother’s Day Gift Ideas
 Pottery Date Night
 Studio Calendar
 2027 Studio Events
 What Should I Do Today?
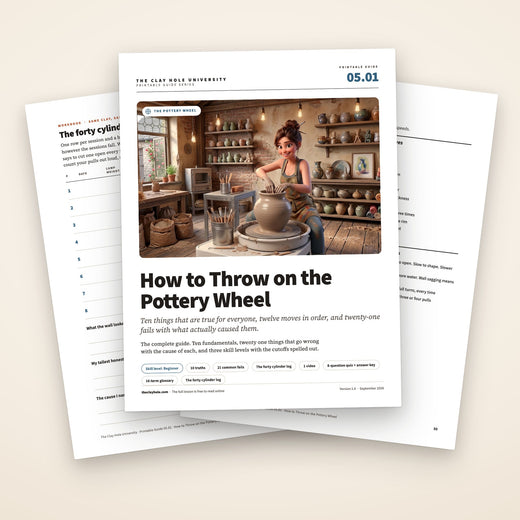
 How to Throw on the Pottery Wheel
 How to Make a Pinch Pot
 How to Tap Center a Pot
 The Five Stages of Clay
 Is Pottery Hard to Learn?
 Pottery Wheel Practice Drills
 20 Easy Hand-Building Projects
 Everything That Sounds Wrong

 A Beautiful Piece, Every Time
 Slab Roller Tips
 Any Dish as a Slump Mold
 Slab Roller & Slab Mold Certification
 The Pottery Skill Tree
 Clay & Pottery Calculators
 Logging Your Pottery and Glazes
 The Pottery Dictionary
 Why Did My Pottery Do That?
 The Pottery Cone Chart
 Pottery Myths, Fact-Checked
 Is Handmade Pottery Food Safe?
 Incredible Ceramic Artist Videos
 How Dan Throws Giant Pots
 How to Dry Your Pottery
 The Pottery Wheel Introduction
 Pottery by Zodiac Sign
 Personality and the Pottery Wheel
 Pottery for Engineers
 ADHD, Hyperfocus, and Never Running Out
 Hobbies for Burnout
 Screen-Free Hobbies for Adults
 Every Addiction I Ever Had Lost to Art
 Functional Pottery Is Engineering
 How Do We Compare?
 Pottery Classes by City
 Every Pottery Studio in Utah
 Pottery in Draper
 Featured Members
 The Signature Wall
 Making Friends as an Adult Is Brutal
 The Clay Hole Commandments
 2027 Pottery Contests
 2027 Studio Parties
 Gallery Night

 Scream It Into the Void
 Destroy the Glaze Wall
 Daily Affirmation Cards
 Everything That Can Go Wrong
 Subscribe to Our Newsletters
 Contact The Clay Hole
 Corporate Team Building

 Glaze Combinations
 Glazes We Do Not Carry
 Making Glaze Test Tiles
 The Mega Glaze Tool
 How to Use the Mega Glaze Tool

 Glaze Brushing Techniques
 How to Use Underglaze
 How to Use Dipping Glazes
 Glaze Problems, Causes and Fixes
 The Dipping Glaze Guide

 Making a Glaze Catcher
 Fused or Sharp After Firing
 The Signature Wall
 His Viral Videos
 His Own Ceramics
 Meet Mud
The Clay Hole guide to the wheel
How to throw on the pottery wheel
Show us a thousand wheel throwers and we will show you a thousand ways to throw. That is not a problem to solve. It is the actual shape of the craft. Underneath all thousand of them sit a handful of things that are true for every single person who has ever sat down at a wheel, and those are the things nobody writes down properly.
So we wrote them down properly. All of it in text, because some people learn better by reading it once than by watching a video eleven times.
A thousand throwers, a thousand ways to throw. Underneath all of them sit a handful of things that are true for everybody. Here they are, plus the six moves, in the order they happen.

Which version would you like to print?
The video comes out as a labeled box with the title and channel to search for, since paper does not play them.
01 · The part nobody argues about
Ten things that are true no matter whose hands are on the clay
Watch ten potters and you will see ten different grips, ten different postures and ten different orders of operations. Watch what the clay does and it is the same ten rules every time. Learn these and every conflicting piece of advice you ever get will suddenly sort itself into “that is physics” and “that is their preference.”
Centered comes before everything
Not close. Not nearly. A pot rises out of a spinning lump, so anything still off center is a wobble you are about to build twelve times taller. There is no later step that fixes it.
You move clay. You never remove it
A wall gets taller because the same clay went somewhere else, not because you took some away. If the wall is not growing, you have not squeezed hard enough at the bottom to make anything travel.
Pressure has to come from two sides
One hand alone just pushes the pot around. Every shaping move on a wheel is a squeeze between an inside point and an outside point, and the clay travels through the gap you leave between them.
Water is a lubricant, not an ingredient
It exists so your hands slide instead of grab. Every extra drop soaks into the wall and makes it softer, heavier and closer to collapse. More water is almost never the answer to a problem on the wheel.
Fast wheel, slow hands
The wheel supplies the repetition. Your hands supply the shape. Every instinct you have says to speed your hands up when things go wrong, and every one of those instincts is backwards.
Whatever you skip compressing will find you later
An uncompressed floor is more likely to crack weeks later on a shelf. An uncompressed rim tears while you pull. Compression is you pressing the clay particles back together after you have just dragged them apart, and there is no version of throwing where you get to skip it.
Even walls dry evenly. Uneven walls crack
Thick and thin sections of the same pot shrink at different rates, and the difference has to go somewhere. A lot of the drying cracks and warps you will ever get were decided while the pot was still spinning.
Your body is the machine. Your arms are just the last few inches of it
Braced beats strong, every time. Elbows buried into your belly or your thighs turns you into one rigid object that the clay has to move. Arms held out in the air turns you into a hinge that the clay opens and closes at will.
Leave slowly or you undo it
Pulling your hands off fast drags the wall out with them and leaves a dent that travels all the way around. Release over about three full turns of the wheel, every single time, on every single move.
Clay gets tired, and it does not recover on the wheel
Every pull soaks in more water and drags the structure looser. A lump has a finite number of good pulls in it before it goes floppy, and no amount of skill adds more. Get the form in as few pulls as you can, then stop.
And here is everything that is genuinely just preference
Every item below has an experienced potter somewhere who will tell you their way is the only way. They are all wrong, and they are all right. If somebody insists on one of these, they are describing their own body, not the laws of clay.
- Which hand goes inside the pot
- Fingertips, knuckle, or a rib on the outside
- Coning up once, three times, or never
- Centering by leaning, by coning, or by bracing from the side
- Elbows in your thighs, on your knees, or on the splash pan
- Throwing on a bat, off a hump, or straight on the wheel head
- A sponge in your hand the whole time, or no sponge at all
- Trimming a foot or leaving a flat bottom
- Sitting high and looking down, or sitting low and looking across
- How much water, how often, and out of what
- Opening with a thumb, two fingers, or the side of a fist
- Which direction the wheel turns
Copy somebody else’s way to get started. Nobody invents this from scratch. Then keep whichever parts of it your own body agrees with, and quietly drop the rest.
The whole thing
Seven rules, and one thing that is not a rule at all
A thousand throwers will show you a thousand grips, postures and orders of operations. Ignore all of that for now. Underneath every one of them sit the same seven things, and they are true whoever you are.
Centered comes first
Not close. Centered. Nothing later fixes it, and every wobble you leave gets built twelve times taller.
You move clay, you never remove it
A wall gets taller because the same clay went somewhere else. If it is not growing, you are not squeezing hard enough at the bottom.
Pressure comes from two sides
One hand alone just shoves the pot around. Every shaping move is a squeeze between an inside point and an outside point.
Water is a lubricant, not an ingredient
It exists so your hands slide. Every extra drop soaks into the wall and moves it closer to collapse. More water is almost never the answer.
Fast wheel, slow hands
The wheel supplies the repetition, your hands supply the shape. Every instinct you have says to do the opposite, and every one of them is wrong.
Compress whatever you dragged apart
Press the floor back together after opening, and the rim after every pull. Skip it and a crack three weeks later on a shelf gets more likely.
Leave slowly or you undo it
Pulling your hands off fast drags a dent all the way around. Release over about three full turns, on every single move.
And everything else is preference
Which hand goes inside, knuckle or fingertip, one cone or three, bat or bare wheel head. Anyone insisting on one of those is describing their own body, not a law. Copy somebody to get started, then keep the parts yours agrees with.
02 · Watch it happen first
Read the words, then watch the hands
Text is better than video for understanding why something happens. Video is better than text for seeing how fast it happens. Do both. This is the wheel video every Clay Hole member watches in full before their first time on a wheel, and it covers centering, opening and getting to a cylinder.
Then go deeper on the three moves that actually decide everything
Each of these is a full explainer of its own, with the videos we think teach it best. They open in a new tab so you do not lose your place on this page.
03 · Before you sit down
Most bad wheel sessions were lost before the wheel was switched on
Six things to get right before you switch the wheel on
Nobody wants to hear this. Everyone wants the problem to be in their hands, because hands can be practiced. But a huge share of the failures we watch happen at this studio trace back to the five minutes before anybody touched a pedal.
1. Wedge it properly, and then wedge it a bit more
Wedging is not a ritual and it is not about air bubbles exploding in the kiln, whatever you have been told. It is about making the whole lump the same wetness and the same softness all the way through, and aligning the particles so the clay pulls evenly instead of pulling in whichever direction it was last squashed.
An unevenly wet lump has a soft side and a firm side. That lump will drift off center under your hands no matter how good your posture is, and you will spend the next twenty minutes deciding you are bad at this. You are not. Your clay is lopsided.
An unevenly wet lump has a soft side and a firm side, and it will drift off center no matter how good your posture is. Wedging also pushes trapped air out to the surface instead of folding it in, which is the other half of why it matters.
Our full guide to wedging, plus step by step walkthroughs of ram’s head and spiral wedging.
2. Check the clay is actually throwable
Hard clay turns throwing from a touch skill into an arm wrestle you will lose, and it is genuinely rough on wrists, shoulders and backs. Press your thumb into the block. If it dents easily, you are fine. If it barely moves, it is no longer a wheel bag.
A stiff bag is usually not dry, just tight and unevenly wet. Throw it at the wedging table, drop it on the floor, cut it in half and slam the halves back together a few times. Two minutes of that rescues most bags.
The clay page has a fixer that walks you through which of the three kinds of “too hard” you actually have, because the answer is completely different for each one.
3. Use less clay than you want to
The single most common beginner mistake in this building is starting with a lump the size of a melon because the goal is a big vase. Big lumps take real force to center, and force is the one thing a beginner does not yet have a technique for.
Start at one to two pounds. Roughly a large orange up to a grapefruit. It centers with body weight rather than brute strength, it forgives a bad pull, and you can throw eight of them in a session instead of losing an hour to one.
When you want to work out how much clay a finished piece actually needs, the clay page has an estimator that does it by piece and by bag.
And use the right bag. Start on 52 Buff or B-Mix w/Grog. Both are forgiving, both tolerate too much water, and neither will punish a clumsy pull. Leave B-Mix, Berlin Gray and porcelain until centering is dependable. All eight of our clays.
4. Set your station up before your hands are muddy
Once you start, both hands are committed. Anything you have to get up for is a pot lost. Before you begin: a bucket of clean water within reach on your dominant side, a big sponge, a wire tool, a rib, a needle tool, a small chamois or a strip of soft plastic for rims, and a towel across your lap.
Wipe the wheel head bone dry and slam the clay down hard onto the middle of it. A wet head lets the clay skate. A weak slam leaves a gap under the lump that will let it tear loose halfway through a pull.
At The Clay Hole, Green Level Members bring their own basic tool set and sponge. Every level above that has tools waiting for you in the building.
5. Air pockets
Trapped air does not make pots explode in the kiln. That is a myth. It is a throwing problem, and a big one. A void is a light spot in a spinning mass, so it pulls the lump off center, and once it reaches the wall your fingers meet firm clay, then nothing, then firm clay again, once per rotation. That is why an even pull suddenly becomes impossible.
If one surfaces, stop the wheel, pierce it with a needle tool and press the clay firmly back together with a wet finger. Do not smear it shut, because that seals the air back in under a seam. Wedge longer and they mostly stop happening.
5. Air pockets, and what they actually do to you
Let us kill the famous one first. Air bubbles do not make pots explode in the kiln. That is a myth, and a stubborn one. Trapped air is a throwing problem, and it is one of the most under-explained problems in pottery, which is why so many people spend a year fighting something nobody named for them.
Here is the actual damage a pocket of air does, in the order you will meet it.
- It throws the lump off center. A void is a light spot in a mass that is spinning fast. The clay is no longer evenly distributed, so it will not settle, and you will chase it around and blame your hands.
- It makes an even pull impossible. Your fingers meet firm clay, then nothing, then firm clay again. The pressure you set for the wall is suddenly wrong for one patch of it, once per rotation.
- It creates a thin spot exactly where you least want one. When a bubble reaches the wall it gets stretched and smeared into a weak patch that looks identical to the clay around it.
- It bursts and takes a hole with it. Usually on the third or fourth pull, usually near the top, usually on the piece you were most pleased with.
- It compromises the wall even when it never surfaces. A sealed void inside the wall is a place with no clay holding anything up, which is how a pot that felt fine collapses on the next pull or cracks while it dries.
Fixing one mid throw. If it surfaces, stop the wheel, pop it with the tip of a needle tool, and press the clay back together firmly with a wet finger. Do not smear it closed. Smearing traps the air again with a seam over the top of it. If it is in the floor, you can usually compress it out. If it is in a thin upper wall, that pot is done. Cut it off and start again.
Not getting them in the first place. Wedge properly, and wedge longer than you want to. Ram’s head and spiral wedging both work by rolling the clay so air is pushed out to the surface rather than folded inward. Kneading it like bread does the opposite and folds air in. This gets harder as the lump gets heavier, which is exactly why air pockets start showing up at three and five pounds for people who never had them at two. How to wedge properly.
6. Take every piece of posture advice, including ours, with a grain of salt
This is the one that catches people out. Nobody has your body. Not your bone lengths, not your shoulder width, not your weight distribution, not your line of sight, not whichever bits of you are soft and whichever are hard. Every potter who has mastered this has mastered their own way with their own body.
So learn somebody’s way exactly as they teach it. Practice it honestly. Then find your way. If a famous technique simply never works for you, that is not a verdict on you, and it is not a verdict on them.
04 · The bag matters more than you think
Which of our eight clays actually throw well, and why the answer changes with the form
All eight of the clays we carry can be thrown. They are all premium, commercially manufactured, de-aired bodies and every one of them matures properly in our kilns. But a body that is a joy for a wide bowl can be a nightmare for a tall vase, and the thing that makes a clay beautiful is often the same thing that makes it unforgiving.
Here they are, sorted by how much a clay will forgive while you are still learning.
52 Buff
The least fussy thing in the room and the cheapest bag we sell. Smooth, warm, and forgiving of almost everything a beginner does to it. It also shrinks the least of anything here, so what comes out of the kiln is closer to the size you meant.
On the wheel: centers easily, tolerates too much water, and does not punish a clumsy pull.
The trade: the buff body warms and mutes pale glaze colors, and it is slightly too coarse for fine carved detail.
See 52 BuffB-Mix w/Grog
B-Mix with a very fine grog stirred through it. Grog is fired clay, crushed and blended back in, and it gives a wall something to stand on. Clay companies specifically recommend this body for schools and beginners, which tells you plenty.
On the wheel: a wobbly pull is far less likely to collapse, and it warps and cracks noticeably less while drying.
The trade: that grog is mildly abrasive on your fingertips over a long session, and its texture reads through thin glazes.
See B-Mix w/GrogSpeckled Buff
Desert tan and brown with heavy manganese speckle, and a genuinely excellent throwing body underneath all that character. It is low in sand and grog for a clay with this much going on, so it throws far more smoothly than it looks like it will.
On the wheel: plenty of backbone for planters and rustic tableware, without fighting you.
The trade: the specks come through pale glazes whether you invited them or not.
See Speckled BuffHalf & Half
Equal parts white stoneware and porcelain. Whiter than B-Mix, much easier to live with than straight porcelain, and very pleasant on the wheel. The stoneware half gives it the backbone for large work and for multi-section throwing, where you throw a piece in parts and join them.
On the wheel: the best white body here for anything tall or built in sections.
The trade: the porcelain half makes it less tolerant of uneven drying, and it shows every fingerprint and tool mark.
See Half & HalfB-Mix
The famous one, and deservedly so. Porcelain smooth under your hands without porcelain’s temper, and it fires a clean cream that lets glaze color read exactly as it should. A studio favorite on the wheel once you can already center.
On the wheel: a beautiful surface and a very fine rim, if you can hold your nerve.
The trade: smooth means unforgiving. Thin rims tear, fast drying cracks it, and a floor that dries unevenly can hand you an S-crack. There is no texture to hide a mistake in.
See B-MixB-Mix w/Specks
The same smooth B-Mix, firing warm white with dark speckle scattered right through it. All the throwing manners of plain B-Mix, with something happening underneath a simple glaze.
On the wheel: identical to B-Mix in the hand, so treat it the same way.
The trade: it genuinely wants slow drying and real compression on rims and bottoms, and it shrinks the most of the B-Mix family.
See B-Mix w/SpecksBerlin Gray
European stoneware with grog so fine your fingers cannot find it. It throws and models smoothly, holds fine detail, and behaves unusually well through drying. Fires anywhere from cement to dark gray, and nothing else we carry fires dark.
On the wheel: lovely and smooth for small and medium forms, with excellent detail retention.
The trade: it wants to sink back down on you while you throw big pieces, and it is the most expensive bag we carry.
See Berlin Gray#16 Porcelain
Real Grolleg porcelain, and a notably forgiving one as porcelains go. Extra ball clay makes it more plastic than most, and it takes carving and fine detail beautifully. Dead white.
On the wheel: rewards a practiced hand with walls and rims nothing else here can give you.
The trade: it shrinks close to 14%, the most of anything we sell, and it finds every weak join and every fast dry. Not a bag to learn on.
See #16 PorcelainTell us what you are throwing and we will name the bag
There is no wrong answer here. Only bags that make a given job easier or harder.
Start with 52 Buff
It is the cheapest bag on the shelf and the most forgiving thing in the building. Smooth, general purpose, and it shrinks less than anything else here, so what you make comes out closer to the size you meant. Buy two before you buy anything fancy.
Second choice: B-Mix w/Grog, if you already suspect you will spend more time building than throwing.
B-Mix w/Grog
The fine grog running through it is the whole point. It gives the walls something to stand on, so a wobbly pull is less likely to collapse, and it cracks and warps noticeably less while drying. Clay companies specifically recommend this body for schools and beginners.
Second choice: 52 Buff, if you would rather spend less per bag while you are throwing a lot of it away. Both are fine. Neither will fight you.
B-Mix, unless you want speckle
It fires a clean cream, which is the best background you can give a glaze. Colors come out looking like the test tile rather than a muddier cousin of it. Smooth to throw, and it takes a fine surface and a fine rim.
If you want speckle: B-Mix w/Specks throws exactly the same and puts dark flecks under everything. If you want it whiter: Half & Half.
Half & Half, or B-Mix w/Grog
Height is a structural problem, so you want a body with backbone. Half & Half has the stoneware half holding it up and throws beautifully. B-Mix w/Grog is the more forgiving of the two and the safer pick if you are not yet confident on a tall pull.
Avoid for now: Berlin Gray, which wants to sink back down on you the moment a piece gets big.
B-Mix w/Grog, without much debate
Grog lowers the overall shrinkage, opens the body so moisture can leave evenly, and gives joins something to grip. That is exactly the set of problems a big piece with handles, spouts and feet runs into.
Also worth knowing: Half & Half is the pick for multi-section throwing, where you throw a piece in parts and join them.
#16 Porcelain
Grolleg porcelain holds a crisp edge better than any stoneware, and this one is built with extra ball clay, which makes it far more plastic and far less temperamental than porcelain’s reputation suggests. Extra silica in the recipe also helps stop glazes crazing over your carving.
Shrinkage: close to 14%, so plan bigger than you think. Alternative: Berlin Gray, made for smooth detailed work, which brings its own color.
Speckled Buff
Granular manganese gives it a genuine desert tan and brown with heavy speckle, and the specks can burn up through a glaze during firing, so an electric kiln can hand you something that looks gas fired. It is a genuinely excellent throwing body underneath, not just a pretty one.
Lighter version: B-Mix w/Specks, which is warm white with speckle rather than tan with speckle.
Berlin Gray, and only Berlin Gray
Nothing else we carry fires dark. Depending on the firing it lands anywhere from cement to a deep gray, and because the grog in it is so fine the surface stays smooth enough for detailed work.
Throwing note: it is lovely on small and medium forms and it wants to sink back down on you while you throw big ones. It is also the most expensive bag we sell, so treat it as a deliberate choice rather than an upgrade.
The full breakdown of all eight bags, with shrinkage figures, a cost estimator and the reason the bags are not all the same price, lives on the clay collection page. One hard rule that applies to all of it: no outside clay comes into the studio, ever.
05 · The moves, start to finish
Twelve moves, in the order they happen
Every mug, bowl, vase and tumbler ever thrown is some arrangement of these twelve. Experienced potters merge them, skip a couple and reorder two of them, and they still do all twelve. Learn them in this order and the merging happens on its own later.
Six moves, in the order they happen
Every mug, bowl, vase and tumbler ever thrown is some arrangement of these six. Do them in this order. The one under them is the detail that makes a pull actually work, and it is the thing beginners are almost never told.
What you are actually looking at
- 1The rimThe thinnest and weakest part of the pot, and the first thing to tear. Compress it after every single pull.
- 2The outer wallWhere your outside hand rides. It should get gradually thinner from bottom to top, never the other way around.
- 3The inner wallWhere your inside hand rides. Your two hands squeeze the same stretch of wall from opposite sides, with the outside hand a little lower than the inside one. The next drawing shows that offset.
- 4The inside cornerThe junction of floor and wall. Leave a lump of clay hiding here and no amount of pulling gets it up the wall.
- 5The floorAim for roughly the same thickness as the base of the wall, plus about a quarter inch if you will trim a foot ring into it. Check it with a needle tool before you pull, not after.
- 6The outer baseWhere you undercut with a needle or a wooden knife so the pot releases cleanly and has a crisp edge.
- 7The wheel headWipe it bone dry before the clay lands on it. A wet head is the reason clay skates instead of sticking.
Wedge, then slam it down
Even wetness, even softness, no trapped air. Wipe the wheel head bone dry, throw the clay hard at the middle of it, then pat the base all the way around to seal it.
Watch for: a lump that lifts at one edge when you push it. There is air under there and it will tear free mid pull.
Center it
Wheel fast, hands wet, elbows buried into your belly or thighs. Lean your weight in and hold perfectly still while the clay comes to you. Squeeze it up into a cone and press it back down at least once.
Watch for: your hands bumping. If they are moving with the clay it is not centered, however still it looks.
Open, then compress the floor
Find the true middle, press straight down slowly, then pull outward to the width you want. Run a finger or a rib across the floor several times to press it back together. Check the depth with a needle tool before you go any further.
Watch for: skipping the compression. It costs eight seconds, and it is cheap insurance against an S-crack in three weeks.
Pull the wall up, three times
Slow the wheel down. Outside hand slightly lower than the inside one. Squeeze in at the very bottom until you feel the clay move, then travel upward slowly, easing off as you reach the rim. Then do it twice more with a little less pressure each time.
Watch for: pull number six. By then the clay is soaked, tired and about to give up on you.
Shape it, then finish the rim
Collar in, belly out, or leave it straight. Then compress the rim between two fingers and a thumb, or with a folded chamois, until it feels smooth and dense.
Watch for: leaving the rim ragged. A ragged rim is a crack that has already decided to happen.
Clean up, wire off, lift
Sponge the water out of the inside, rib the slurry off the outside, and undercut the base with a needle tool. Pull a taut wire underneath, twice. Dry your hands, then lift with two hands from the base.
Watch for: lifting a wide form by its rim. That is how a bowl becomes an oval before it has even left the wheel.
Wedge
Even wetness, even softness, aligned particles. Two extra minutes here saves an hour of confusion later.
Watch for: a lump with a firm side and a soft side. It will drift off center forever and you will blame yourself.
Slam and seal
Dry wheel head, aim for the middle, throw it down hard. Then pat the base with your palms all the way around to seal it.
Watch for: a lump that lifts at one edge when you push it. There is air under there and it will tear free mid pull.
Center
Wheel fast. Hands wet. Elbows locked into your body. Lean your weight in and hold perfectly still while the clay comes to you. Do not chase it.
Watch for: your hands bumping. If they are moving with the clay, it is not centered yet, however still it looks.
Cone up and down
Squeeze inward at the base and the clay has nowhere to go but up. Then press it back down with a braced hand. This is wedging on the wheel, and it is where centering really happens.
Watch for: a mushroom top, which means your side hand is not pressing hard enough while the top hand pushes down.
Open
Find the middle, press straight down slowly, then pull outward to the width you want the floor to be. Slow the wheel a little as you go.
Watch for: starting off center. A hole drilled slightly off puts a thick side and a thin side into every wall above it.
Compress the floor
Run a finger, a sponge or a rib across the floor from the middle outward, several times. You are pressing the particles you just dragged apart back together.
Watch for: skipping this. It costs eight seconds, and it is cheap insurance against an S-crack in three weeks.
Check the floor thickness
Push a needle tool straight down until it hits the wheel head, pinch it where it exits the clay, and pull it out. That gap is your floor.
Watch for: finding out you went through the bottom during the third pull. Measure now, while you can still fix it.
Set the first pull
Slow the wheel down. Get your outside hand slightly lower than your inside hand, squeeze in at the very bottom until you feel the clay move, then travel upward slowly and steadily.
Watch for: starting the squeeze halfway up. Everything below where you started stays exactly as thick as it was.
Pull again, two or three times
Same move, a little less pressure each time, releasing gradually as you reach the rim. Most forms are finished in three or four pulls.
Watch for: pull number six. By then the clay is soaked, tired and about to give up on you.
Shape, then finish the rim
Collar in, belly out, or leave it straight. Then compress the rim between two fingers and a thumb, or with a folded chamois, until it feels smooth and dense.
Watch for: leaving the rim ragged. A ragged rim is a crack that has already decided to happen.
Clean up and undercut
Sponge the water out of the inside. Clean the slurry off the outside with a rib. Undercut the base at an angle with a needle tool so the pot has a crisp edge to sit on.
Watch for: water pooling in the bottom. Left there it softens the floor and warps the base while it dries.
Wire off and lift
Pull a taut wire under the pot, flat against the wheel head, in one confident motion. Dry your hands, then lift with two hands from the base, not the rim.
Watch for: lifting a wide form by its rim. That is how a bowl becomes an oval before it has even left the wheel.
The one detail that makes a pull work
If a wall refuses to grow, this is nearly always why. The two hands are not level with each other. Your outside hand sits slightly below your inside hand, so you are pushing clay inward and then lifting it up over the little ledge your inside fingers are making. Level hands just squeeze the wall thinner in place and move nothing anywhere.
- 1Inside hand, higherFingertips resting against the inner wall. This hand supports and sets the ledge. It does very little work.
- 2Outside hand, lowerKnuckle or fingertips. This is the hand doing the pushing, and it starts at the very bottom of the wall.
- 3The offsetHalf an inch to an inch of vertical difference between the two. Small enough that most people never notice it, big enough that nothing works without it.
- 4The pressure pointThe narrow gap between your hands. Clay gets squeezed into it and squirts upward, which is the entire trick.
- 5TravelSlow and continuous, all the way to the rim, easing off as you go. One smooth trip beats three nervous ones.
06 · Tips for potters based on skill level
Most wheel advice is right. It is just aimed at somebody else
Plenty of what works at the wheel only starts working once other things are already reliable. Trimming is a real skill and it will make you worse this month if centering is still a coin flip. So each level below has its own list of what to practice, and just as usefully, what to deliberately ignore for now.
Pick the one that sounds like you.
I’m not sure. Help me decide
We drew the lines around what you can do rather than how long you have been doing it, because time predicts almost nothing here. We have watched people center on day three and people center in month five, and it said nothing about who was good a year later.
You are here untilyou can take a two pound ball and center it, by yourself, on most attempts. Not every attempt. Most of them.
You have graduated whenyou sit down, slam two pounds, and it is centered inside a couple of minutes, four times out of five, without hunting around for it.
You are here oncecentering has stopped being the problem and consistency has become the problem. You can pull a straight cylinder to around six inches with a wall you would honestly call even.
You have graduated whenyou can decide the piece before you sit down and produce it recognizably six times in a row. Not identically. Recognizably.
You are here oncethe form is decided before you sit down and then you make six of it. The wheel does what you tell it, and on the days it does not, you know why.
You graduate whennever. Master potters will tell you they are still learning this, and that is a description of the job rather than modesty.
What to actually practice as a beginner wheel thrower
- One to two pounds. Nothing bigger, for now.
- Center it, wreck it, center it again. Ten times in a row without making anything. This is the fastest hour you will ever spend.
- Wedging until the lump is genuinely even. Nearly every beginner problem starts here.
- Wheel fast while centering. Faster than feels sensible.
- Elbows buried into your belly or thighs. Then lean, rather than push.
- The eyes-closed finger test. Rest a finger on the spinning clay. Bumping means not centered, however still it looks.
- Releasing over three full turns, every time, until it is automatic.
- The same clay every session. Switching bodies while learning adds a variable you cannot read yet.
- Straight cylinders. Only cylinders. Bowls come later and they are harder than they look.
- Stopping while it is still fun. Ninety minutes is plenty at first.
And, what to deliberately ignore
Every one of these is a real skill, and every one of them will make you worse right now, because it splits attention you do not have to spare.
- Trimming and foot rings
- Handles, lids and spouts
- Throwing off the hump
- Matching sets
- Wall thickness perfection
- Anything over two pounds
- Which glaze it is getting
- Whether it is beautiful
Your first day, and probably your second, should be spent simply playing with the clay. Not making anything you intend to keep. Seeing what it does and how it moves under your hands. You have to know the clay before you can move the clay.
What a good first month actually looks like
A pile of reclaim, a handful of wonky cylinders you are secretly fond of, and the growing ability to tell when a lump is centered without looking at it. That is it. That is the whole target. If you also produced something you want to keep, lovely, but it was a side effect and not the point.
What to actually practice as an intermediate wheel thrower
- Throwing to a target. Pick a height and a width before you start, then hit them. A needle tool and a ruler is enough.
- Cutting finished pots in half with the wire and looking at the wall section. Nothing on this page will teach you faster than doing this six times.
- Throwing to weight. Same lump every session, and see how tall you can honestly take it without cheating the thickness.
- Fewer pulls. Get a form in four. Then three. Then two.
- Sets of four that belong to each other.
- Trimming: recognizing leather hard, recentering on the wheel, cutting a foot ring that suits the pot.
- Handles, galleries and lids, with calipers.
- Collaring a form inward, which is a different muscle memory entirely.
- Three to five pounds, and the harder wedging that comes with it.
- Bowls. They are their own discipline: a continuous curve, a floor that must be compressed properly, and a shape that warps if you look at it wrong.
And, what to deliberately ignore
All good things. All of them a distraction until the form underneath is dependable.
- Eight pounds and up. Three will teach you everything until three is boring.
- Porcelain
- Chasing paper thin walls
- Faceting, darting and altering
- Buying more tools
- Glaze chemistry
- How fast anybody else works
The temptation at this level is to add difficulty because the basics have stopped being exciting. Adding difficulty is not the same as adding skill.
The habit that separates this level from the next
Naming the cause. Every time something fails, say out loud what went wrong before you rewedge it. Not “that one collapsed,” but “that collapsed because I pulled six times and the wall was soaked.”
You will be wrong a lot at first and it does not matter. Committing to a diagnosis is what turns a hundred random failures into a hundred data points, and it is the single fastest thing an intermediate thrower can start doing today. The troubleshooting section further down this page exists to give you the vocabulary for it.
What to actually practice as an advanced wheel thrower
- Throwing to specification. Weight, height, width, rim diameter and wall thickness, all decided in advance and all hit.
- Sectional throwing. Two or three thrown parts joined at leather hard, which is how anything genuinely tall gets made.
- Eight to fifteen pounds. This is a body mechanics problem long before it is a hand problem, and a wedging problem before either.
- Lids that fit every single time. Calipers, a real gallery, and both parts thrown from the same bag on the same day so they shrink together.
- Deliberate wall variation. Thick where it needs weight, thin where it needs to feel like nothing.
- Altering off the wheel: faceting, darting, squaring, throwing intentionally off center.
- Throwing off the hump, for small forms and for speed.
- Designing the form for the glaze. Where a runny glaze will collect, what a shoulder does to a break, where a flux wants to go.
- Porcelain, once everything else is dependable.
- One form, for months. The mug you have thrown four hundred times is where a personal style actually comes from.
And, what to deliberately ignore
At this level the things holding people back are mostly not technical.
- Speed as a goal in its own right
- Somebody else’s signature form
- New tools standing in for new hours
- Needing every single piece to count
- The idea that a plateau means you are finished
- Advice delivered with total certainty, including ours
At some point the wheel stops handing you improvement for free and you have to go and find it. That means deliberately making something harder than you can currently make, repeatedly, and being bad at it in public again.
How to get pushed further here
We used to run scheduled advanced wheel sessions and stopped, because people preferred the open studio format they already had. What replaced it works better anyway.
Dan is in classes often and is glad to work with anyone pushing to the next level: specific forms, fine tuning technique, or advanced fundamentals like centering and opening much larger amounts of clay. Our main wheel throwing instructor is seriously advanced and happy to teach at that level too. No sign up and no waiting for a date on the calendar. Come to a class, say what you are trying to crack, and someone will work on it with you.
07 · Advice we often hear from Dan
Eleven things our owner says at the wheels, roughly weekly
Four things our owner says at the wheels, roughly weekly
Dan built this studio and he hangs out on wheel side a lot. These are the ones he repeats most, in his words rather than ours.

Your first day, just play
On your first day, maybe even your second, just have fun with the clay. Don’t stress about making anything you’re gonna keep. Just play with it. See what it does. See how it moves in your hands.
You have to know the clay before you can move the clay.
My way, when you just can’t get it to center
Stool against the wheel leg. Leg up on the edge of the stool for leverage. Bury that elbow into your belly.
Palm the clay with your left hand at a 6 o’clock position and use your other hand to guide it from behind. Now, just lean your weight into it.
Let your body weight do the work.
Stop bending over to look at it
Stop bending over to look at your piece from the side when you want a straight cylinder. If you want your piece to go straight up, look at it from straight above. If you want your piece to move outward, then you lean over and watch it from the side.
This will naturally help your hands maneuver in the right direction without fighting them.
Blindfold day
If you are just OFF today and can’t get it working like you usually do no matter how many attempts you have, then swallow all ego, walk over to the wall, grab a blindfold, and throw wearing it.
You will learn things. You will feel things. And most importantly you will learn how to lean on other senses when your eyes are failing or frustrating you.
Cylinders. Loads of them
If you want to be great on the wheel, practice, practice, practice cylinders. Loads and loads of them. Tons and tons. Oodles and gobs. Did I make my point?
98% of what you do on the wheel requires a good cylinder to make it happen. You nail the cylinder process and you can make most anything with a little bit of practice.
Go get yourself a win
If you need a win because the wheel is kicking your ass, go make something epic and beautiful on a slab mold.
It’s creating. It’s not cheating. And you need the win so that you can dive back in with better mentality and grit when you come back to the wheel.
Wheel throwers earn it
Wheel throwers earn it. They don’t have a choice. They have to put in the time. They have to not give up. They have to come back from absolute frustration. They have to rewedge a lot of clay. They have to constantly wonder what is wrong with themselves today. They have to let other people see them fail.
The process is harder. The learning is harder. The cleanup is even harder. Yeah, wheel throwers earn it alright. And that’s why becoming good, and then becoming great, at the wheel is such a special thing.
Grain of salt on all posture advice
Take every single bit of posture advice and positioning advice with a grain of salt. Nobody has the same body as you. Not the same bone structures, the same soft and hard parts, the same angles, the same weight distribution, the same line of sight.
Everyone who has mastered this has only mastered their own way with their own body, and sometimes what works for them will simply never work for you. Learn their way. Practice and discover your way.
You don’t have to trim everything
You don’t have to time every pot and trim it when it’s leather hard. If you don’t like that, you can work to get your bottoms perfect and your trimming done while you’re still throwing the piece.
You also don’t have to turn every bottom. If you enjoy it and want it, great. If you don’t and you’d rather just have flat bottom pottery, that’s 100% okay too. It’s your pottery. Your choice. You do it your way.
Don’t compare yourself to the internet
Don’t compare yourself to social media wheel throwers. Learn from them, study them, watch what they do right and wrong. But don’t compare yourself.
First of all, it’s almost always sped up. Second, they usually have a lot more experience, and no matter how hard you practice you’re just not going to do it as smooth and fluidly as they do until you’ve put in the time they have. Third, remember that they’re usually edited and filtered to show only the best of what they’re doing. They have plenty of fails all the time too. I promise you that.
Stop being lazy with your wedging
A minute or two of extra wedging every time you prepare your clay will save you countless fails, endless hours fighting air bubbles, and is worth the extra effort. Lazy wedging is a quick ticket to Doomstowne.
Dan Pearce owns The Clay Hole and is usually somewhere in the building. More about him here.
08 · From Dan himself
Four things I say so much my members can finish them for me
Here is an unflattering truth about anyone who teaches anything. We repeat ourselves. Constantly. I have said all four of these so many times that longtime members have started mouthing them along with me from two wheels away, which is fair, and which I fully deserve.
But it is worth asking why these four and not four hundred others. I am not a parrot. Something made these the ones that survived, and I think it is that each one fixes a whole category of problem rather than one pot. So here they are, with what I am actually trying to tell you.

“There! Right there! I know you felt that!”
I yell this the instant your clay locks into center, because that moment has a feel and it is the single most important sensation you will ever learn on a wheel. Your hands go quiet. The vibration stops. Almost everybody feels it, decides it was nothing, and carries on.
I am shouting so you notice it while it is still happening. Once you know that feeling, you can go looking for it instead of guessing.
“If you already have that many fails, it means you’re going WAY too fast. Slow it down!”
I say this when I wander over about half an hour after somebody sat down and count seven or eight clay arches lined up beside their wheel. We arch our fails here so they dry evenly and quickly enough to get reclaimed by the end of class, which does mean your scoreboard is sitting right there in plain sight.
Seven fails in thirty minutes is not a skill problem. Nobody is that bad at this. It is a pace problem. Rushing centering to get to the fun part, rushing the pull because the wall feels fragile, snatching your hands off at the end. Slow those three down and the row of arches stops growing. I am not telling you to try harder. I am telling you the exact opposite.
“Yes! Yes! You’ve got this! You’ve got this!”
This one is not a teaching technique and I am not sorry about it. It is me losing my composure because you just did the thing. The thing we have been working on together. The thing that has been beating you for weeks. And it finally landed, right there, while I was watching.
There is nothing more fun in this job than seeing somebody grasp a concept they have really struggled with, at the exact second it clicks. I cannot contain myself and I have stopped trying to. So if you hear this one aimed at you, it is not generic encouragement. It means I saw it happen.
“Remember, fast wheel, slow movements. Intuition is to do the opposite.”
If you take one sentence off this whole page, take this one. Every instinct you have says to slow the wheel down when you feel out of control and move your hands quickly to keep up. Both are backwards.
A fast wheel does the work for you and hands the clay a hundred chances a minute to meet your still hand. Fast hands just carve a spiral into the wall. I say it constantly because your gut will keep telling you otherwise for months.
If you come to a class, you will hear all four. Possibly in one evening. Possibly at you.
09 · One hundred things we have heard at the wheels
Not science. Just what throwers tell each other
These come from members, instructors, visiting potters and people passing through, collected over years and left unattributed on purpose, because almost none of them originated with the person who said them to us. Some contradict each other. That is the whole point of the section. Try them, keep the ones your hands agree with.
Everything is shuffled, so you get a genuine mix rather than a hundred centering tips in a row. Every card carries its category and its number, so if you tab across to sort them you can find exactly where you were.
Showing all 100.
“Center with the heels of your hands, not your fingertips.”
Fingertips flex under load and give the clay somewhere to escape to. The heel of your hand is a solid wall attached to your skeleton.
“Push down as much as you push in.”
Inward pressure centers the lump. Downward pressure anchors it to the wheel head. Most people do one and wonder why it keeps lifting.
“If you are chasing it, stop and hold perfectly still.”
Clay comes to a still hand and runs from a moving one. Doing less is the actual technique.
“Wet the clay, not the wheel.”
Water pooling on the wheel head breaks the seal underneath the lump and the whole thing starts to skate.
“Brace your wrists against each other, not just your elbows.”
Two braced arms are still two objects. Wrists locked together makes them one tool with one position.
“If your shoulders are up by your ears, you are using your arms.”
Raised shoulders are the tell. Drop them, lean in from the hips, and let your weight do it.
“Count to ten with your hands still before you decide it is not working.”
Centering finishes several seconds after most people give up on it. Ten seconds of stillness fixes an astonishing number of lumps.
“Cone it up and down one more time, even when it looks fine.”
Twenty seconds against the chance of a wobble you will not spot until the wall is four inches tall.
“The clay is not fighting you. It is doing exactly what you told it to.”
Irritating, and true. It is a completely obedient material with no opinions, which means every result is information about your hands.
“Your thumbs are not centering tools.”
They are the weakest thing you own and they sit at the wrong angle. Palms, heels and the sides of your hands do this job.
“Anchor your hands to each other before you touch the clay.”
Get your grip and your brace sorted in the air, then arrive at the lump as one object rather than assembling yourself on top of it.
“Pick a fixed point and watch the outline against it.”
Staring at the clay itself tells you almost nothing. Watching its silhouette pass a fixed background shows a wobble instantly.
“If your stool is too high you will never get your weight over it.”
Sit so your elbows land at or just below the height of the wheel head. Above that and you are pushing down instead of pressing in.
“Stay on two pounds until it is boring.”
Jumping to five before centering is automatic just reintroduces the exact problem you spent a month solving.
“It should push back at you evenly the whole way around.”
A soft patch or a hard patch under your palm is unevenly wedged clay, not bad technique. Take it off and wedge it again.
“Do not lean over the top to check on it.”
Moving your head moves your shoulders, which moves your hands, which un-centers the thing you leaned over to inspect.
“Cone until the surface goes glassy.”
A properly worked cone has a smooth even sheen with no ripples traveling up it. Ripples mean it is not done yet.
“Keep it dry underneath the whole time.”
Water creeping under the base is the slowest and most annoying way to lose a pot, because it happens while everything looks fine.
“Start every pull lower than you think the clay starts.”
Whatever sits below where you began the squeeze stays exactly as thick as it was, forever.
“Squeeze first, then travel. Never both at once.”
Establish the pressure, feel the clay move, and only then start going up. Doing both together is how you get a spiral groove.
“If the wall will not grow, squeeze harder at the bottom. Do not go slower.”
Slowing down without more pressure just gives the clay more time to absorb water while nothing happens.
“Leave more clay at the base than feels right.”
You can always move clay up later. You can never put it back down.
“Count your pulls out loud.”
People are shocked to discover they have done seven. Saying the number is the cheapest discipline in pottery.
“One committed pull beats three nervous ones.”
Timid pulls move very little clay and soak the wall just as much as a real one does.
“Your inside hand should be almost lazy.”
It supports and it sets the ledge. If it is working hard, it is pushing your wall out of shape from the inside.
“Find yourself a steady rest.”
A spare finger touching the splash pan or the edge of the wheel turns a floating hand into a machine part.
“Stop where the clay stopped moving.”
Carrying on upward after the clay quit traveling does not lift anything. It just thins the wall where you dragged.
“Recharge the water on your hands, not on the pot.”
Dip and wipe between pulls. Pouring water down the inside is how a floor ends up sitting in a puddle.
“Watch the gap between your fingers, not the rim.”
The gap is the wall thickness you are making right now. The rim is just the last place it happened to go.
“Anything you pinch off at the base is height you will never get.”
Squeezing too hard at the very bottom cuts the pot off from its own clay supply. Firm, not vicious.
“Three pulls beats five, and two beats three.”
Not because fewer is impressive, but because every pull is more water and more fatigue in a wall you want standing up.
“Support the rim once you get thin.”
Two fingers of your other hand riding the rim will stop a tall thin wall from going wavy on the last pull.
“A pull that starts nervous ends thick at the top.”
Hesitating at the bottom and committing near the top puts the clay in exactly the wrong place for a tall pot.
“Come off at the top, not out the side.”
Release upward and away over about three turns. Pulling your hands out sideways leaves a dent all the way around.
“A thin band means you paused there.”
Any hesitation during travel becomes a groove. Continuous and slow beats stopping to think about it.
“Compress the rim after every pull, not just at the end.”
Each pull stretches the rim thinner. Compressing once at the end does not undo four rounds of stretching.
“A rib does what your hand does, only truer.”
It cannot get tired, it cannot flex, and it leaves no fingerprints. Learn to trust one early.
“Collar from below the part you want to narrow.”
Squeezing at the neck alone just thickens the neck. Start under it and walk the pressure upward.
“Bellies get pushed out from the inside. Necks get squeezed in from the outside.”
Trying to do either one from the wrong side is the most common reason a curve comes out lumpy.
“An uneven rim gets cut level, not fixed by hand.”
A needle tool held steady while the wheel turns takes three seconds. Chasing it with your fingers takes ten minutes and never works.
“The profile you see from the side is the pot you have. The view from above is the pot you are aiming at.”
Which is why where you put your head changes what your hands do without you deciding anything.
“Thick rims look clumsy on a small pot and reassuring on a big one.”
Rim weight is a design decision, not a mistake. Scale it to the piece deliberately.
“Shape on the way up, not after.”
A form built into the pull is even. A form pushed into a finished cylinder is a set of dents you have decided to like.
“Every curve is a lot of small decisions, not one big push.”
Ease outward a little on each of three pulls and you get a curve. Do it all at once and you get a bulge with a crease under it.
“Rib the outside, fingers on the inside.”
The rib gives you a true profile and the fingers give you feedback on thickness. Doing it the other way round gives you neither.
“A dead straight wall is harder than a curve.”
Curves hide small errors. A cylinder shows every one of them, which is exactly why it is the practice form.
“Belly it out before you narrow the neck.”
Once the neck is in you cannot get a hand back inside to push the belly, and there is no fixing it from outside.
“A tiny bevel on the rim stops chips later.”
A knife sharp rim will chip in the bisque, chip in the glaze bucket and chip in somebody’s dishwasher.
“Stop while it still looks slightly wrong.”
A wet pot relaxes a little as it settles. The shape you walk away from is not quite the shape you get.
“Leave the wall thicker where a handle will land.”
Handles pull. A handle joined to a paper thin wall will crack the wall rather than fall off, which is worse.
“Fast to center. Medium to open. Slow to shape. Slower for the rim.”
If you only remember one thing about the pedal, remember that the speed comes down as the pot goes up.
“Every drop of water is a drop the wall has to hold up.”
Wet clay is heavier clay and weaker clay, at the exact moment you are asking it to be tall.
“Sponge the inside before the water sits.”
Standing water in the base softens the floor and is a common cause of a warped or cracked bottom.
“Hands grabbing means more water. Wall sagging means less.”
Two symptoms, two opposite answers, and people reach for the water bucket for both of them.
“Slurry is not lubricant. It is your pot dissolving.”
A thick coat of slip on the outside is clay that used to be part of the wall. Rib it off and look at what you have left.
“Slow the wheel down as the pot gets wider.”
The outer edge of a wide form is traveling much faster than the middle. Wide and fast throws itself apart.
“Throw with a sponge until your hands learn, then throw without one.”
The sponge meters the water for you while you are learning. Later it gets between you and the only feedback that matters.
“Keep two waters going.”
One stays clean for your hands. The other gets filthy with the sponge. Mixing them means throwing in grit all session.
“The wheel should be slowing down the whole way through a piece.”
If you finish the rim at the speed you centered at, something has gone wrong several minutes ago.
“Thick slurry gets ribbed off, not watered down.”
Adding water to soup makes more soup. Scrape it away and you can see the actual surface you are working on.
“Wet hands slide. Wet clay collapses.”
Before you reach for the bucket, work out which of the two you are actually trying to fix.
“Foot off the pedal before your hands come off the pot.”
A spinning pot and a departing hand is how a perfectly good rim gets a thumbprint in it at the last second.
“Throw one form for a whole session.”
Repetition is where the learning is. Variety is where the fun is. You need both, but not in the same hour.
“Weigh your clay.”
If the lump is a different size every time, you cannot tell whether the change came from your hands or from the clay.
“Do not rescue pots. Make new ones.”
Twenty minutes spent saving a bad pot teaches you nothing. Twenty minutes making three more teaches you plenty.
“Give yourself permission to make ugly things for a month.”
The people who improve fastest are the ones who stopped needing every session to produce a keeper.
“Center five balls before you try to make anything.”
A warm up is not wasted clay. It is the difference between your first pot and your fourth pot being the good one.
“If you are frustrated, stand up.”
The next twenty minutes are already lost. Walk around, look at what somebody else is making, come back.
“Watch somebody good for ten minutes with your phone in your bag.”
Watching in person shows you the pace and the pressure, which is precisely what video cannot show you.
“Photograph your best pot once a month.”
Progress at the wheel is invisible day to day and obvious across eight weeks. The photos are the only honest record.
“Ask three people how they center, and try all three.”
You will hate two of them. The third might be the one your body was waiting for.
“Do not throw angry, tired or rushed.”
The clay reads all three, and hands under any of them get heavy and fast, which is exactly wrong.
“The person beside you is not competition. Ask them how they did that.”
Everyone at a wheel is quietly certain everyone else has it figured out. Nobody does.
“The pot on your shelf you are embarrassed by is next month’s favorite.”
Almost nobody can judge their own work the week they made it. Keep the early ones. They get better while you are not looking.
“Set a timer for the session, not for the pot.”
Deciding to stop at ninety minutes stops you grinding on one piece for an hour out of stubbornness.
“Learn to lose a pot without narrating it.”
The groan, the explanation, the retelling. All of it turns one collapsed cylinder into fifteen minutes of not throwing.
“Nobody is watching you as closely as you think.”
Everybody at the wheels is completely absorbed in their own disaster. It is one of the most freeing things about a shared studio.
“Keep a notebook.”
Clay body, weight, height, number of pulls, what went wrong. Six entries in and you will start seeing your own patterns.
“Treat the first pot of a session as a warm up.”
Because it is one. Expecting it to be good is how a whole evening starts badly for no reason.
“Two short sessions beat one long one.”
Hands get tired and tired hands get heavy. The last hour of a four hour session teaches almost nothing.
“Change one thing at a time.”
New clay, new weight and a new grip all at once means you learn nothing from whatever happens next.
“If you cannot say what you are practicing today, you are not practicing.”
You are just making pots, which is lovely, but it is a different activity and it improves you far more slowly.
“Sit next to somebody better than you and just talk.”
Half of what you need to learn is not demonstrable. It comes out sideways in conversation while four hands are busy.
“Every potter you admire has a shelf of things they hate.”
You are comparing your whole output to their edited highlights. They are doing the same thing to somebody else.
“Wire off twice.”
Once straight after throwing, then again a minute later once the pot has settled and re-stuck itself.
“Dry your hands before you lift.”
Wet fingers on a wet pot slide, and the correction you make when they slip is what dents it.
“Lift a wide form from underneath, never by the rim.”
The rim is the thinnest part of the pot and it will happily take the shape of your fingers on the way to the shelf.
“Cover the rim, not the whole pot.”
Rims and handles dry fastest and crack first. Slowing those down is most of what drying well actually means.
“Sign the bottom before it leaves the wheel.”
Leather hard is fine too, but the number of unclaimed pots on a studio shelf suggests doing it while you are still sitting there.
“Cut one in half. Just one.”
Wire a finished pot vertically and look at the section. You will never misjudge a wall thickness by feel again.
“Reclaim everything.”
Every collapsed pot is a free bag of clay you already paid for. There is no such thing as a wasted lump.
“Clean as you go, not at the end.”
Wet clay wipes off in seconds. Dry clay has to be scraped, and scraping makes the dust that nobody wants in the air.
“Trim when it sounds different.”
Tap the side. Wet clay thuds, leather hard rings a little. Your ears get good at this faster than your fingers do.
“Wrap the rim and the handle together.”
They are the two fastest drying parts of the pot and they are usually the two that crack. Slow them down as a pair.
“Slower drying is nearly always the answer.”
Almost every cracking and warping question ends here. In a dry climate like ours, assume you are drying things too fast.
“Stand wide pieces on their rim once they are firm.”
Bowls and plates dry faster at the edge than in the middle. Flipping them evens it out and stops the base going saddle shaped.
“Sponge the foot before it dries.”
Ten seconds with a damp sponge on a fresh base saves five minutes of scraping a bone dry one.
“Weigh one finished piece, once.”
Comparing that number to the lump you started with tells you exactly how much clay you left in the bottom.
“Do not stack fresh pots.”
A cylinder that feels sturdy will happily take the shape of whatever you rest on it while it is still damp.
“Write the clay body on the bottom too.”
In three weeks you will not remember, the glaze will behave differently on each one, and you will want to know which was which.
10 · Something went wrong
Twenty-one common pottery wheel fails, and what actually caused each one
Find the one that matches what just happened to you. Each answer names the most likely cause first, because in our experience one cause explains most cases, and then the other candidates worth checking. Being able to name a cause out loud is the habit that turns failures into progress.
The three that will happen to you tonight
Each answer names the most likely cause first, because one cause explains most cases. Being able to say the cause out loud before you rewedge is the habit that turns a pile of failures into progress.
While you are centering
I cannot get it centered at all
Almost alwaysYour arms are unbraced and the wheel is too slow. The clay is winning a strength contest that you should never have entered. Bury your elbows into your belly or your thighs, speed the wheel up, and lean your body weight in rather than pushing with your arms.
Also checkUnevenly wedged clay with a soft side and a firm side, a wheel head that was wet when the clay landed, or a lump that is simply bigger than your current technique. Drop to two pounds and prove it works there first.
The clay keeps knocking my hands off
Almost alwaysYou are moving with the bump instead of holding through it. Every time your hand rides up over the high spot, you copy the high spot onto the next rotation and the wobble survives. Hold absolutely still and let the high spot grind itself down against you.
Also checkNot enough water, so your hands are grabbing and getting dragged. A thin film of slip should let you sit still without sticking.
The top of my cone twists into a screw, or snaps off
Almost alwaysYour hands are traveling upward faster than the clay is rising, or the wheel is too slow for the speed you are moving. Speed the wheel up and move your hands in a slow, even count of three. Ease the pressure off as you approach the peak.
Also checkSqueezing too hard at the very top. A cone should look like a sturdy volcano, not a needle.
It mushrooms out at the top when I cone back down
Almost alwaysYour side hand is not pressing hard enough while your top hand pushes down. The clay takes the only escape route it has, which is sideways. Squeeze the side firmly against the cone as you press down, so the two hands work as one unit.
Also checkPressing straight down with a flat palm rather than at a slight angle. Aim the pressure inward and down together.
There is an air bubble in it
Almost alwaysWedging that stopped too early, or wedging done as kneading rather than as rolling. Ram’s head and spiral wedging push air out to the surface. Folding the clay over on itself like bread dough folds air straight back in.
What to do right nowIf it has surfaced, stop the wheel, pierce it with the tip of a needle tool and press the clay firmly back together with a wet finger. Do not smear it shut, because that seals the air back in under a seam. If it is deep in a thin upper wall, cut the pot off and reclaim it. There is no saving that one.
Also checkWhether the lump is simply bigger than your wedging is currently good for. Air pockets show up at three and five pounds for people who never met one at two, and that is a wedging problem rather than a throwing problem.
It looks centered but everything after it goes wrong
Almost alwaysIt was not centered. Looking centered and being centered are different things, and the eye is very easily fooled by a smooth surface spinning fast. Close your eyes, rest a finger lightly against the side, and feel for a bump. No bump means centered. Any bump at all means cone up and down again.
Also checkPulling your hands away quickly at the end. A fast exit drags a dent around the whole lump and un-centers what you just did. Release over three full rotations.
While you are opening and pulling
The pot goes off center as soon as I open it
Almost alwaysYour opening finger went in slightly off the true middle. From that moment one side of the wall is thicker than the other, and every pull exaggerates it. Find the middle by resting a finger on the spinning top and watching for the still point, then press straight down slowly.
Also checkOpening too fast, which drags the whole mass sideways before it has a chance to compress.
The bottom is enormously thick
Almost alwaysYou did not open deep enough, and there is no way to find out later without a needle tool. Push a needle straight down until it hits the wheel head, pinch it where it leaves the clay, and pull it out. Aim for a floor about the same thickness as the base of the wall, plus about a quarter inch if you will trim a foot ring into it.
Also checkClay hiding in the inside corner where floor meets wall. Run your finger firmly into that corner and pull it outward, or that lump never joins the wall at all.
I went straight through the bottom
Almost alwaysOpening by feel rather than by measurement. This is not a repairable pot, so cut it off, reclaim it and move on. Then measure the floor on the next one before you pull.
Also checkCompressing the floor so enthusiastically that you thinned it further. Compression is firm pressure across the surface, not digging.
The walls will not get any taller
Almost alwaysNot enough pressure at the very bottom of the pull. Height comes from moving clay upward out of the base, so if you are not squeezing hard enough down there to feel it move, nothing travels anywhere.
Also checkLevel hands. Your outside hand needs to sit slightly lower than your inside hand so you are lifting clay over the ledge your inside fingers make. Level hands just thin the wall in place.
The rim tears and goes ragged as I pull
Almost alwaysYou are keeping full pressure all the way to the very top. Ease off gradually as you approach the rim so the last inch gets barely any squeeze at all.
Also checkAn already dry rim, or a rim you never compressed. Compress it between two fingers and a thumb after every pull, not once at the end.
It wobbles more and more as it gets taller
Almost alwaysThe wall thickness is uneven, so one side weighs more than the other and the whole thing goes out of balance as it rises. This traces back to centering or to an off center opening, and it gets worse with every pull rather than better.
Also checkUnanchored arms. Floating hands make a spiral of thick and thin all the way up without you noticing.
It collapsed, or went floppy
Almost alwaysToo many pulls and too much water. Clay has a finite number of good pulls in it, and after that it is soaked and structurally tired no matter how skilled you are. Aim to finish a form in three or four pulls and then stop touching it.
Also checkWidening the form while the wheel is still fast. As a pot gets wider, the rim is traveling much faster than the middle and it will fling itself outward.
It twisted off at the base, or tore loose from the wheel
Almost alwaysThe clay was never properly sealed to the wheel head. Slam it down hard on a bone dry head and pat the base firmly all the way around before you start.
Also checkWater running down the outside and pooling at the base, which slowly dissolves the seal while you work. Sponge it away as you go.
After it left the wheel
The rim is higher on one side
Almost alwaysPerfectly normal, and easily fixed while the pot is still on the wheel. Hold a needle tool steady against the spinning rim at the height you want and let it cut all the way through, then lift the ring off.
Also checkIf it is dramatically uneven, the cause is upstream in the centering. Cutting it level fixes this pot but the next one will do the same thing.
The clay keeps coming off the bat and flying across the room
Almost alwaysThe bat was wet, or the clay was. A film of water between clay and bat is a lubricant, and centrifugal force does the rest. Wipe the bat properly dry, slam the clay down hard onto the middle of it, and pat the base firmly all the way around to seal it before you touch the pedal.
Also checkA bat that is not seated on its pins, so the whole bat is rocking rather than the clay letting go. Lift it, clear the pin holes of dried clay, and set it back down flat.
AndWater pooling at the base while you throw. It slowly dissolves the seal underneath you over several minutes, so the pot leaves at pull four rather than at the start. Sponge it away as you go rather than letting it collect in the well.
I wrecked it getting it off the wheel
Almost alwaysWet hands, or lifting by the rim. Dry your hands first, pull the wire under twice, and lift wide forms from underneath with both hands rather than pinching the top.
Also checkLetting the pot re-stick. Wire it once, wait a moment, then wire it again just before you lift.
A crack appeared in the bottom, shaped like an S
Almost alwaysThe floor dried and shrank more slowly than the walls around it, and the shrinking walls pulled its still soft middle apart. A floor much thicker than the walls, or water left standing in the base, sets this up. Keep the floor close to wall thickness, sponge the water out, and dry the pot slowly and evenly.
Also checkA floor that was never compressed after opening. Opening drags the clay particles outward and leaves them aligned like a fan. Compress across the floor firmly several times, from the middle outward, immediately after you open. Potters still argue about how much this matters for an S-crack. It costs eight seconds, so do it anyway.
The rim cracked while it was drying
Almost alwaysThe rim is the thinnest part of the pot, so it dries first, and it then has to shrink while it is attached to a wall that has not shrunk yet. Cover the rim loosely with plastic for the first day so the whole pot dries at the same speed.
Also checkA rim that was never compressed on the wheel, or one that got torn during a pull and then smoothed over rather than repaired.
My round pot dried into an oval
Almost alwaysIt was squeezed while being carried, usually by the rim. A freshly thrown pot remembers everything, and a gentle pinch on the way to the shelf becomes a permanent oval.
Also checkUneven drying, particularly a pot sitting where a draft or a heater hits one side of it, and wide flat forms which warp far more readily than tall ones.
My hands, wrists or back hurt afterwards
Almost alwaysClay that is too hard, or throwing with your arms instead of your body. Both turn a touch skill into a strength contest. Slam wedge the block until it softens, drop the lump size, and brace your elbows so your weight does the work.
Also checkSitting too low or too far from the wheel, and sessions that run too long. Ninety minutes is plenty when you are starting out, and stopping while you still feel good is not quitting.
Still stuck? Grab anyone in a bright pink or purple shirt over on wheel side during a class. That is what our instructors are there for, and watching your hands for thirty seconds beats any amount of reading.
11 · Myths worth killing
Nine things about the wheel that are repeated constantly and are not true
Some of these come from films. Some come from well meaning potters passing on what they were told. All of them cost beginners real time.
“You need strong hands to center clay”
Centering is leverage, not grip. A braced skeleton beats a strong arm every time, which is why small people center perfectly well and large people often struggle at first by trying to overpower it. If you are working hard, your position is wrong.
“There is a right way to throw”
There is a right set of results. The route to them is genuinely personal, because bodies are different. Anyone insisting their grip is the only correct grip is describing their own proportions and calling it a law.
“It should click within a few sessions”
Two to three months to get reasonably proficient is normal here. Years to master. Most people arrive assuming the wheel will be the easy part of pottery, and it is the opposite of the easy part. Nothing has gone wrong if it takes you a while.
“More water will help”
Water is there so your hands slide. Beyond that it is a structural problem, soaking into the wall and making it heavier and softer at exactly the moment you need it to stand up. If a pot is sagging, water is the last thing it needs.
“Slow the wheel down when you feel out of control”
For centering, the opposite. A fast wheel gives the clay hundreds of chances per minute to meet your still hand, which is how a high spot gets ground away. Slow and nervous is how a wobble survives. The speed does come down later, once you are shaping.
“Thicker walls are safer”
Thick is heavy, thick dries unevenly, and a thick floor under thin walls is one of the more reliable ways to produce a crack. Even beats thick every single time. A consistent quarter inch wall will outlive a lumpy half inch one.
“If it is wobbling, it is not centered”
Sometimes. But a perfectly centered pot with a thick side and a thin side will also wobble as it grows, because the two sides weigh different amounts. Check the wall thickness before you assume the problem is back at the start.
“You have to trim every pot”
Trimming is a choice, not a requirement. You can get your bottoms right while the piece is still on the wheel, and flat bottomed pottery is completely legitimate pottery. Do it if you enjoy it. Skip it if you do not.
“The people online do not fail”
They fail constantly. What you are watching is the take that worked, sped up, cut down and often filmed by somebody with a decade of hours in their hands. Study them. Do not measure yourself against them.
There are about sixty more where those came from
Air bubbles do not make pots explode, cone 6 is not a temperature, and clay does not have a memory in the way people mean it. The many myths of pottery and ceramics fact checks seventy of them, with sources, including several about the wheel that we did not repeat here.
12 · The forty cylinders
There is no shortcut, but there is a shortest route
Almost everything you will ever throw is a cylinder that got persuaded into another shape. Bowls, mugs, vases, tumblers, jars, pitchers, teapots. Get the cylinder honest and the rest is decoration with a bit of practice attached.
So here is the exercise. Forty cylinders. Same clay, same weight, one at a time, in whatever order the sessions come. Nobody is checking and there is no prize. Tap them off as you go and this page will remember on the device you are using.
Cylinder oneTwo pounds, straight sided, as tall as it honestly wants to go. Do not decorate it, do not save it, and do not judge it. Reclaim it and go again.
This is stored in your own browser on this device, not in your membership account, so clearing your browsing data clears it and a different phone will start again at zero.
Same clay, same weight
Changing the bag or the lump size mid exercise adds a variable you cannot read yet. Pick 52 Buff or B-Mix w/Grog, pick two pounds, and stay there until it feels boring.
Cut one open every five
Wire a finished cylinder in half from top to bottom and look at the wall. This is the single fastest feedback loop in wheel throwing and almost nobody does it.
Do not keep them
Wanting to keep a piece makes you careful, and careful is slow to learn. Reclaiming everything is what gives you permission to fail usefully.
13 · The wheel is about a fifth of it
What happens to the pot after you throw in the sponge for the night
Throwing is the part everybody photographs. It is also the shortest part. A mug spends twenty minutes on a wheel and then several weeks going through everything else, and most of the pots we lose at this studio are lost after the wheel rather than on it.
Throwing is the shortest part, and most of the pots we lose here are lost after the wheel rather than on it. Two things matter tonight: clean your station properly, and dry the pot slowly with the rim covered.

Cleaning up is genuinely part of throwing
Wheel side is the messiest place in the building, and clean up here is a real job rather than a wipe. Wipe the wheel well out into your own bucket of throwing water (scraps that are not soggy go in the wet solids barrel instead), take the bucket to The Wash Pit, and the whole station gets a damp rag: pan, head, cables, motor, switches, pedal, stool seat and stool legs.
Do it as you go rather than at the end. Wet clay wipes off in seconds and dry clay has to be scraped, and scraping is what puts dust in the air.
The full clean up checklist, with a tappable list for the wheel side that remembers what you have ticked off.
The rest of the road, in order
And when the wheel is beating you, go do something else for an hour
There are slab molds all through this building, and they will give you a genuinely beautiful bowl or platter on a day when nothing is centering. Slab rollers and slab molds need their own short certification first, so ask an instructor. That is not cheating and it is not giving up. It is a win, and a win is often exactly what you need before you sit back down. How the slab rollers and slab molds work.
14 · The words
Every term we just used, in plain English
Pottery has a lot of vocabulary and none of it is difficult once somebody says it out loud. Nobody in this building will think less of you for asking what a word means. Most of us had to ask too.
One last thing
Reading this page will not teach you to throw. It will make the hours count for more
Everything above is here so that when something goes wrong you have a name for it instead of a feeling about yourself. That is genuinely most of the battle. The rest is hours, and there is no version of this where somebody hands you those.
Come back to this page when a pot fails in a new way. That is what it is for.
This is the short version. There is a much longer one behind the toggle at the top: eight clays compared, twenty-one ways it goes wrong, a hundred tips from other throwers, and the skill level each of them is aimed at. Come back for it when a pot fails in a new way.
If you want somewhere to put those hours
We are a community pottery studio in Draper with 29 wheels, and the electric wheels are open to every membership level, first come first served, and the kick wheel opens at Purple Level. Classes run several days a week with four instructors on the floor, and open studio runs Friday evenings and weekend mornings with nobody teaching. Nobody is going to make you stay on the wheel either, which matters more than it sounds on the days it is not going well.