Pottery Date Night
 Bring All Your Friends Free Week
 Give a Month of Pottery
 Private Pottery Parties

 The Welcome Booklet
 Your First Ten Sessions
 The Pottery Process
 Finding the Studio
 Your Classes Never Expire
 The Four Tables
 Who’s Who
 The Rewards Program
 Flux Glazes
 The Calculators
 Kiln Tracker
 Holiday Kiln Deadlines

 Beginner’s Tool Set
 Fingernail Clippers
 Mayco Clay Mender
 Epoxy for Kintsugi
 Applicator Bottles
 Large Bead Rack
 Raku Workshop
 Nighttime Raku
 Horsehair and Feather Raku
 The Clay Hole T-Shirt
 Embroidered Crewneck
 Zip-Up Hoodie
 Pre-Made Bisqueware
 Glaze Catchers
 Kiln Cookies
 Clay Cubby Rental
 The Glaze Bible, Printed
 The Book of Molds, Printed
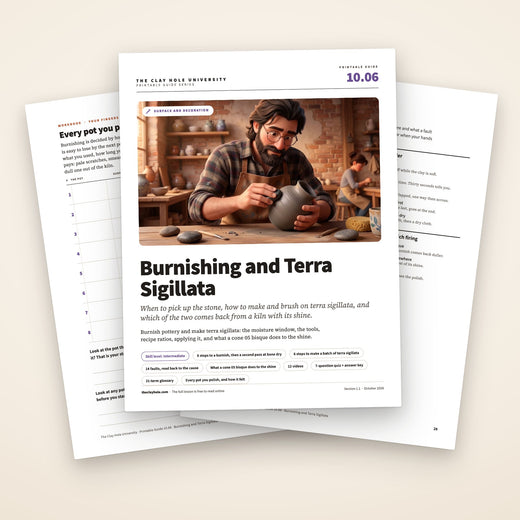
 Printable Pottery Guides
 Free Printable Trackers
 Gifts for Potters
 Christmas Pottery Ideas
 Mother’s Day Gift Ideas
 Pottery Date Night
 Studio Calendar
 2027 Studio Events
 What Should I Do Today?
 How to Throw on the Pottery Wheel
 How to Make a Pinch Pot
 How to Tap Center a Pot
 The Five Stages of Clay
 Is Pottery Hard to Learn?
 Pottery Wheel Practice Drills
 20 Easy Hand-Building Projects
 Everything That Sounds Wrong

 A Beautiful Piece, Every Time
 Slab Roller Tips
 Any Dish as a Slump Mold
 Slab Roller & Slab Mold Certification
 The Pottery Skill Tree
 Clay & Pottery Calculators
 Logging Your Pottery and Glazes
 The Pottery Dictionary
 Why Did My Pottery Do That?
 The Pottery Cone Chart
 Pottery Myths, Fact-Checked
 Is Handmade Pottery Food Safe?
 Incredible Ceramic Artist Videos
 How Dan Throws Giant Pots
 How to Dry Your Pottery
 The Pottery Wheel Introduction
 Pottery by Zodiac Sign
 Personality and the Pottery Wheel
 Pottery for Engineers
 ADHD, Hyperfocus, and Never Running Out
 Hobbies for Burnout
 Screen-Free Hobbies for Adults
 Every Addiction I Ever Had Lost to Art
 Functional Pottery Is Engineering
 How Do We Compare?
 Pottery Classes by City
 Every Pottery Studio in Utah
 Pottery in Draper
 Featured Members
 The Signature Wall
 Making Friends as an Adult Is Brutal
 The Clay Hole Commandments
 2027 Pottery Contests
 2027 Studio Parties
 Gallery Night

 Scream It Into the Void
 Destroy the Glaze Wall
 Daily Affirmation Cards
 Everything That Can Go Wrong
 Subscribe to Our Newsletters
 Contact The Clay Hole
 Corporate Team Building

 Glaze Combinations
 Glazes We Do Not Carry
 Making Glaze Test Tiles
 The Mega Glaze Tool
 How to Use the Mega Glaze Tool

 Glaze Brushing Techniques
 How to Use Underglaze
 How to Use Dipping Glazes
 Glaze Problems, Causes and Fixes
 The Dipping Glaze Guide

 Making a Glaze Catcher
 Fused or Sharp After Firing
 The Signature Wall
 His Viral Videos
 His Own Ceramics
 Meet Mud
Burnishing and terra sigillata: shine without a drop of glaze.
Rub a pot that has reached hard leather hard with a smooth stone and it comes up glossy. No chemistry, no melting, nothing added. You are just pushing the clay flat against itself. Terra sigillata is the same idea with a head start: paint on a layer of the finest particles you can separate out of a bucket of slip, polish that instead, and get a deeper shine for a fraction of the effort. Here is how both of them work, when to do each one, and the part nobody warns you about, which is what our kilns do to that shine afterward.
Rub a pot that has reached hard leather hard with a smooth stone and it comes up glossy. No glaze, nothing melted, nothing added. Terra sigillata is the same idea with a head start. Here is the short version of both, and the one thing our kilns do to that shine that you need to know before you start.
- Wheel or hand building
- No glaze involved
- Intermediate
- An evening, plus drying
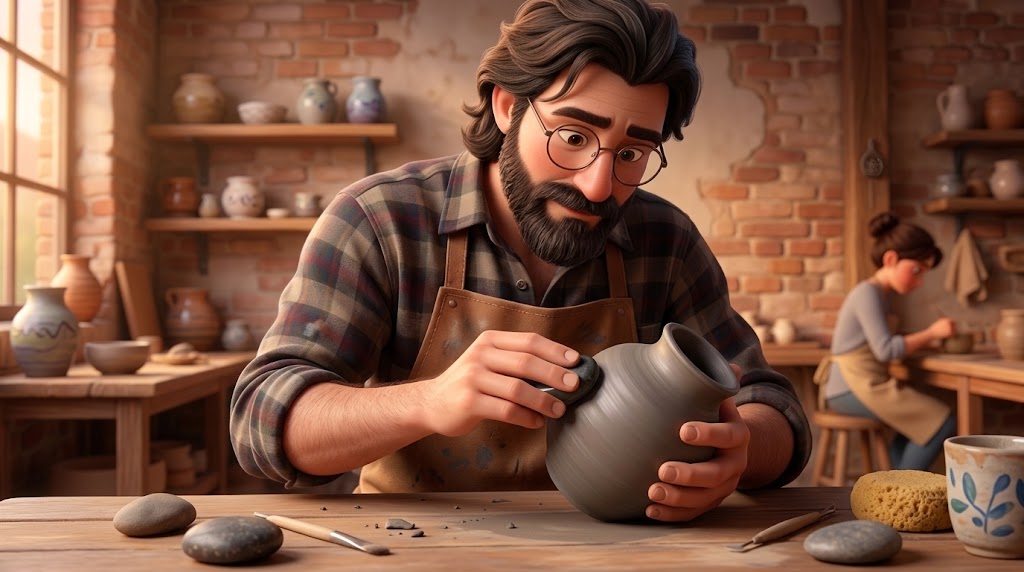
They are two different things, and they get talked about as one.
Nearly every video you will find covers both in the same breath, because most potters use them together. They are not the same technique and they do not fail the same way, so it is worth ten seconds to separate them.
Burnishing
You polish the pot itself. A hard smooth tool, usually a stone, gets rubbed over the surface while the clay is at a very specific dampness. Nothing is added. The shine comes out of the clay body you already threw or built.
Terra sigillata
You paint on a very thin layer of ultra fine clay, then polish that. The layer is made by letting a watery slip settle and taking only the finest particles off the top. Those particles are already flat and tiny, so they shine with a soft cloth instead of an hour of stone work.
| Burnishing | Terra sigillata | |
|---|---|---|
| What you are polishing | The clay body | A coating you painted on |
| When you do it | Hard leather hard, and again at bone dry | Any time from leather hard to bone dry |
| Tool | Smooth stone, spoon back, agate | Soft cloth, plastic bag, chamois |
| Time on a mug | Thirty to ninety minutes | Ten minutes of buffing, plus drying between coats |
| Color | Whatever your clay body is | Whatever clay and stain you mixed, so you can change it |
| Grog tolerance | None. Grog wrecks it | Some. The coating fills a little of it |
| Survives our bisque | Partly, and it dulls | Much better |
If you ever lose track of which one you are doing, one question sorts it: are you polishing the pot, or polishing something you painted onto the pot? That is the whole distinction, and every difference in tools, timing and failure comes out of it.
Why there is a list sitting next to every video on this page. Watching somebody burnish is the fastest way to understand the motion. It is also the fastest way to forget the order. Video runs at somebody else’s pace, your hands are busy, and by the time you have the stone in your hand the thing you needed went by four minutes ago. Reading is slower going in and much stickier coming out, because you set the speed and your eye goes back over the part that did not land. So watch the videos for what the motion looks like, and keep the lists open on your phone while you work.
Watch for the motion, read for the order. Video shows you what a burnishing stroke actually looks like. A list is what you keep open on your phone once your hands are busy, because you set the pace and you can go back a line.
Clay particles are flat plates. Shine is just getting them to lie down.
A clay particle is not a grain of sand. It is a flake, wider than it is thick, like a playing card. On a normal dry pot those flakes sit at every angle, so light hits them and scatters in every direction. That scatter is what matte looks like.
Rub the surface with something hard and smooth and you knock those flakes flat, all facing the same way, packed tight. Now light bounces off them the way it bounces off a still pond, and the pot looks wet. That is the entire trick. There is no glass, nothing melted, nothing chemical. It is a mechanical polish, exactly like buffing a shoe.
Terra sigillata gets to the same place by cheating. If you stir clay into a lot of water and walk away, the heavy coarse particles sink first and the finest flakes stay suspended. Pour off that suspended layer and you have a liquid made of almost nothing but the smallest, flattest particles in the bucket. Brush it on thin and it settles into a coat that is already most of the way flat before you touch it, which is why a soft cloth finishes the job in a few passes.
Terra sigillata cheats to the same place. Stir clay into a lot of water, let it settle, and pour off the top layer. What you poured off is nothing but the smallest, flattest particles in the bucket, so it dries almost flat already and a cloth finishes it.
Two things follow from this, and they explain most of the rest of the page. Anything gritty in the clay is a bump you cannot flatten, so grog and sand are the enemy. And a mechanical polish can be undone by heat, because heat starts moving the particles again. Hold on to that second one.
Burnishing, in six steps.
Use a smooth clay body with no grog. Everything below assumes the surface is already smooth, because a burnish magnifies every ridge instead of removing it.
-
Get the surface smooth first
Scrape and rib every throwing line off while the pot is still soft. A stone will polish a ridge, not remove it, and a polished ridge is more obvious than a matte one.
-
Wait for hard leather hard
Firm enough that a fingernail leaves a mark but no clay comes off on it. Still faintly cool against the back of your hand. This window is the whole ballgame.
-
Work one small patch at a time
Two or three inches square. Light pressure, short overlapping strokes, all going the same direction. Finish the patch, then overlap into the next one.
-
Keep it barely damp
If the stone starts to drag or squeak, wipe the patch with a barely damp sponge and wait a few seconds. Wet enough to smear is too wet.
-
Rims and handles first
They are the thinnest, so they dry first and leave the window first. Do them first, lightly, then the belly. The foot dries last, so it goes at the end.
-
Second pass at bone dry
Let it dry slowly under loose plastic for the first day, then all the way to bone dry, then go over it again with a trace of oil on a cloth. This pass is where the real depth comes from.
Terra sigillata, in five.
-
Mix a thin slip and let it settle
Roughly one part dry clay to three parts water by weight, plus a pinch of deflocculant. Dry clay is silica dust, so mix it at home in a fitted respirator with P100 cartridges, not a paper mask. Blend, then leave it alone for a day.
-
Siphon the middle
Three layers form. Pour off the clear water, siphon the fine middle layer into a clean jar, throw out the heavy sludge at the bottom. The middle layer is your terra sigillata.
-
Brush it on thin
Onto dust free greenware. Three or four coats that look almost watery. Thick coats flake off.
-
Buff as the wet look leaves
Soft cloth, plastic bag or chamois, as each coat goes from shiny wet to just barely matte. Too soon and you drag it, too late and nothing happens.
-
Let it dry all the way before firing
Read the firing section below before you decide where it goes. That part matters more here than it does with glaze.
The short answer on when to burnish
Timing is the thing beginners most often get wrong. Andy Ward recreates prehistoric pottery types of southern Arizona, and the description says this video explains how to tell when to burnish. Watch it before you pick up a stone.
Mixing and applying, in one sitting
The title says mixing and applying, and the description says it is an excerpt from the DVD Pit Firing and Burnishing. Sumi von Dassow also wrote the book Low-firing and Burnishing.
The clay body decides how good this can get.
Burnishing does not remove anything. It flattens what is already there. So every piece of grit, every throwing ridge, every sponge mark gets polished into place instead of polished away, and a shiny defect reads worse than a matte one.
What to look for in a bag
- Smooth and fine. No grog, no sand, no added tooth. Grog particles are harder than the clay around them, so the stone rides over them and leaves a pale scratch on every pass.
- Dark bodies read better. A shine is a reflection, and a reflection shows up against a dark ground far more than against a pale one. This is why so much burnished work is red or near black.
- Porcelain works and is unforgiving. It takes a spectacular polish and it also shows every single stroke boundary you leave behind.
- Our clay bodies are not equal for this. Check the bag, and ask an instructor which of the ones we stock is smoothest before you buy one specifically to burnish.
Getting the surface ready
-
Compress and rib while it is still soft
A metal rib on a thrown pot, pulled up the wall in long passes, removes throwing lines properly instead of hiding them. Do this on the wheel, not later with a stone.
-
Trim, then rib again
Trimming leaves a slightly torn surface. A flexible rubber rib over the trimmed area at leather hard closes it back up. Our trimming guide covers the cuts themselves.
-
Finish with a rib, not a sponge
A sponge pulls the fine particles off and leaves the coarse ones standing proud, which is the exact opposite of what you want. Use a soft rubber rib for the last pass and use the sponge only for moisture.
Do not dry sand greenware to get it smooth. Sanding dry clay puts fine silica dust into the air in a room full of people, and that is the one genuinely hazardous thing in this whole process. If something needs knocking back at bone dry, do it with a barely damp sponge or a green scrub pad held wet, and wipe the surface after. Our studio cleanup rules exist mostly because of dust.
Hard leather hard, and nowhere else.
Everyone who tries burnishing once and gives up got the moisture wrong. Too wet and the stone smears the surface into soft waves that never shine. Too dry and it skates, scratches pale lines, and can flake the surface clean off. The window between those is real, it is narrower than you expect, and you can feel it.
Three ways to test it without guessing
- The cheek test. Hold the pot against your cheek. Cool means water is still evaporating out of it, so it is not there yet. Room temperature means you have gone past.
- The fingernail test. Press a nail into the foot. It should leave a mark but not sink in, and nothing should stick to your nail. If clay transfers, wait. If it leaves no mark at all, you are late.
- The color test. Damp clay is noticeably darker than dry clay. Watch the foot ring, which dries last, and start when the walls have gone pale but the foot has not.
Nothing about this window is fixed in hours. A thin porcelain cup in a dry Utah week can pass through it in ninety minutes. A thick hand built jar under plastic can sit in it for two days. Plan around the pot, not the clock, and slow the whole thing down with loose plastic if you need it to wait for you.
The short answer, from a potter who recreates prehistoric pottery
Andy Ward recreates prehistoric pottery types of southern Arizona, and the description says this video explains how to tell when to burnish. It is one question, answered quickly.
Half of a two part demonstration
Jason Dunn splits burnishing into two videos, and the titles give the dryness for each: this first one is the hard leather hard stage, and the second is the bone dry burnish. Both have him talking to the camera with pots and burnishing tools in hand. The second is in the section on the second pass.
Burnishing, properly, start to finish.
Plan on thirty to ninety minutes for a mug and considerably more for anything bigger. This is genuinely slow work, and rushing it is visible in the result, which is most of why so few people do it.
-
Test on a scrap first
Every stone behaves differently and every clay body reaches the window at a slightly different feel. Burnish a coil or an offcut from the same batch, at the same time, and you will know within thirty seconds whether the pot is ready.
-
Start with light pressure
The first pass is about laying the particles down, not forcing them. Heavy pressure on a surface that has not been compacted yet will gouge. Go light, get the whole area evenly dulled and slightly slick, then come back harder.
-
Work small patches and overlap them
Two or three inches at a time. If you try to cover a whole side, the far end dries while you are still on the near end and you will see the boundary forever. Finish a patch, then start the next one an inch inside the last.
-
Keep the strokes going one direction, then cross them
Consistent direction gets the particles aligned. A second pass at roughly ninety degrees to the first fills in the microscopic tracks the first one left. On a thrown form, go around the pot first, then up and down.
-
Manage moisture constantly, in small amounts
If the stone squeaks or grabs, the patch has dried past the window. A barely damp sponge wiped over it and ten seconds of waiting brings it back. Never enough water to see a sheen, because that is wet enough to smear.
-
Build pressure on the second and third pass
Once the surface is compacted and slick you can lean on it. This is where the shine actually arrives, and it arrives suddenly rather than gradually, so keep going past the point where it looks merely smooth.
-
Rims and handles first, feet last
Thin edges dry fastest, so a rim or a handle reaches the window first and leaves it first. Burnish them first, with lighter pressure and a smaller tool because a thin edge chips, or keep a strip of plastic on the rim while you work the body. The foot is thick and dries last, so it goes at the end.
-
Dry it slowly on purpose
A burnished surface always goes a little duller as the clay dries and shrinks, and the second pass is there to bring the shine back. Drying it slowly keeps the pot from cracking or warping. Loose plastic, a day or two, no fans and no sunny windowsill.
A full walk through, in chapters
YouTube’s chapter markers run from clay dryness and preparation through tools and methods, troubleshooting, the final shine and advanced tips to a pass with oil, so it follows much the same order as the steps above. It is a good one to have playing while you work through your first pot.
Anything hard, smooth and seamless.
There is no correct burnishing tool. There is only a surface harder than leather hard clay with no edge, no seam and no chip in it, because every one of those prints itself onto the pot.
A river stone
The traditional answer and still the best one. Look for agate, jasper or any dense stone worn glassy by water. You want a few shapes: one rounded for open curves, one with a pointed end for inside a rim, one flat for broad walls.
The back of a metal spoon
Free, in every kitchen, and genuinely good. The bowl of the spoon fits a convex wall well. Check for a manufacturing seam along the edge first, because it will score a line all the way around your pot.
A polished glass bead or marble
Excellent for tight curves and inside small openings. Glass is hard, perfectly smooth and does not hold water the way a porous stone can.
A plastic bag over a fingertip
Not for the main burnish, but very good for softening stroke boundaries at the end and for polishing terra sigillata. Your finger follows the form in a way a rigid tool cannot.
Chamois or a soft cloth
The standard finish for terra sigillata and a good final buff on a burnish. Old cotton t-shirt works as well as anything you can buy.
Bone, antler or hardwood
What most of the world used for most of history. Softer than stone, so it is gentler and slower, and it will not chip a delicate rim the way a stone can.
What not to use
- Anything with a manufacturing seam. Spoons, plastic tools and cheap ribs often have one, and you will not see it until it is on the pot.
- A chipped stone. One chip becomes one scratch, repeated across the entire surface.
- Metal ribs used on edge. The edge is the point of a rib, which makes it the wrong shape for this.
- Anything porous and unsealed. It picks up clay, dries, and turns into sandpaper mid-pass.
Proof that you do not need to buy anything
Two minutes with a spoon, set to music, with the steps as text on the screen. We include it because you do not need a special stone to begin. Its text says the form should be almost dry, so check the moisture window above before you copy it. Try it with a spoon tonight and buy a stone later if you like the technique.
Come back at bone dry with a trace of oil.
One burnish at hard leather hard gives you a nice satin surface. The deep, wet looking shine that makes people pick a pot up comes from a second pass, days later, on a surface that has already been compacted once.
-
Let it get all the way to bone dry
Slowly, under loose plastic for the first day. The surface will go noticeably duller than it was when you finished. That is normal and it is not lost.
-
Put a trace of oil on a soft cloth
A drop of vegetable oil, mineral oil or a solid vegetable shortening, worked into the cloth until the cloth barely looks damp. A cloth keeps the oil thin. Some potters brush a very thin coat straight on and let it soak in, which also works, but a heavy coat makes a slick that will not burnish and can leave a stain.
-
Wipe a small area, then burnish it dry
The oil is a lubricant so the stone can slide on a dry surface without scratching. Work the area until the oil is gone and the surface is glossy, then move on. Any oil left sitting on the surface is too much.
-
Finish with a dry cloth
A last buff with clean cotton evens everything out and picks up any oil you missed.
Go easy on the oil. Enough of it will burn out in the firing and carbonize, leaving gray smudges you did not plan, and on a pot headed for a smoke firing it can make the pattern muddy rather than dramatic. A cloth that looks dry and feels faintly slick is the right amount.
The second half of the pair
The description sums it up in one line: add some oil, let it soak in, burnish again. The first half is in the section on the moisture window. The steps above put the oil on a cloth first, which keeps it thin.
The finest clay in the bucket, and nothing else.
Terra sigillata is not a glaze, not a slip in the ordinary sense, and not a product you have to buy. It is a separation. You take ordinary clay, suspend it in a lot of water, and let gravity sort it by particle size. The coarse fraction sinks. What stays floating is a liquid made of the smallest, flattest particles the clay contains, and that is the material.
Because those particles are already tiny and plate shaped, they pack down almost flat on their own as the coat dries. A soft cloth finishes the alignment in a couple of passes. You are getting most of the result of an hour with a stone for about ten minutes of buffing, which is why so many potters working in pit and smoke firing use it as their default surface.
The name comes from Roman pottery, where it referred to the stamped decoration rather than the surface, so the modern usage is a bit of a misnomer that has been in place long enough that arguing about it is pointless. What matters for you is that it is cheap, it is made from materials that are already in a pottery studio, and it will keep in a jar for years.
Reasons to use it
- Far less labor than burnishing for a comparable or better shine.
- You choose the color, independent of the clay body underneath.
- It fills small imperfections instead of magnifying them.
- It holds its sheen through a hotter firing than bare burnishing does.
- It takes smoke, carbon and horsehair beautifully.
Reasons not to
- It is a coating, so it can flake off if applied wrong. A burnish is the clay itself, so it has no coat to peel.
- Making a batch takes a day of waiting, mostly unattended, but a day.
- It hides the clay body, which is the whole point for some people and a loss for others.
- Getting a color you like takes test tiles, the same as glaze does.
Water, clay, a pinch of deflocculant, and a day of patience.
Recipes vary widely and most of them work. The ratios below are a reliable starting point rather than a sacred formula, and the number that actually matters is the thickness at the end, not the amounts at the start. Mixing from dry powder is a job for home, not for a shared studio: dry clay, stains and oxides put dust in the air everyone breathes.
| Ingredient | Proportion by weight | What it does |
|---|---|---|
| Water | 3 parts | Enough volume for the particles to separate by size as they settle |
| Dry powdered clay | 1 part | The material. Ball clay, Redart or a kaolin, depending on the color you want |
| Deflocculant | About half a percent of the dry clay weight | Breaks up clumps so individual particles can settle on their own. Sodium silicate, soda ash or sodium hexametaphosphate |
-
Dissolve the deflocculant in the water first
Not into the clay. A tiny amount goes a long way, and undissolved lumps will not do their job. Too much and nothing settles at all, which is a slow way to find out you have gone wrong.
-
Add the clay and blend it hard
A drill mixer or a blender you keep only for clay. Dry clay powder is silica dust, so wear a fitted respirator with P100 cartridges, not a paper mask, pour the powder in slowly and wipe up wet. Five minutes of real agitation. Every clump left intact is fine material that will end up in the discard layer instead of your jar.
-
Leave it completely alone for twelve to twenty four hours
In a tall clear container so you can see the layers. Do not bump it, do not check it by stirring. Longer settling gives you a finer, glossier, smaller yield. Shorter gives you more of a coarser product.
-
Read the three layers
Clear or slightly cloudy water on top. A cloudy, colored middle layer. A dense sludge at the bottom. The middle is what you want.
-
Siphon the middle into a clean jar
Pour or siphon off the clear water first, then siphon the middle layer with a length of tubing. Stop before you disturb the sludge. Throw the sludge in the reclaim bucket rather than the sink.
-
Check the thickness and adjust
Weigh 100 milliliters of it. Around 110 to 120 grams is right. Thinner than that, let it evaporate with the lid off. Thicker, add water. Thin is safer than thick, always.
Picking a clay for color
A ball clay such as OM-4 gives a creamy off white and is the usual default. Redart gives a warm terracotta through to a deep red and takes the highest shine of the common options. Kaolins give the whitest result with somewhat less gloss, because the particles are a little coarser and blockier.
Adding color
Mason stains at roughly two to five percent of the dry clay weight, or oxides at one to three percent, added after siphoning. Dry stains and oxides are dust too: the same respirator, and weigh them over a damp towel. Make test tiles and put them through the same firing the real pot will get, because these colors shift dramatically between a smoke firing and an oxidation bisque.
You can also start from what is already in your own reclaim bucket at home. The fine slop in a reclaim bucket is most of the way to terra sigillata already. Thin it heavily with water, let it settle, and siphon. The result is unpredictable batch to batch, so it is not what you want for a set of matching pots, but it costs nothing and it is an excellent way to find out whether you like the technique. If you are working with clay you dug yourself, our wild clay page covers the settling and screening side of it in more depth. It also covers the rule that matters here: wild clay, and a terra sigillata made from it, cannot be fired in our kilns, so that batch is for a firing somewhere else.
The demystifying one, if the recipes have you nervous
The chapters cover what terra sigillata is, how modern terra sigillata differs from the Roman ware, how ancient potters made it, using levigation to refine a slip, and the limits of modern methods on wild clay. Watch this first, then the recipe video below if you want measured numbers.
Measured, with two ways to thicken it
The chapter titles run through a graduated cylinder and scales to check the thickness, a 24 hour settle, then siphoning off the top two thirds and discarding the bottom third. That differs from the list above, which keeps only the middle layer, so treat it as a second recipe. Two ways to thicken the result follow: a shallow dish beside a dehumidifier for a few weeks, or a slow cooker for about ten hours.
Thin coats, and buff in a short window.
Almost every terra sigillata failure is one of two mistakes: the coat was too thick, or the buffing happened at the wrong moment. Everything below is about avoiding those two.
-
Start with clean, dust free greenware
Leather hard or bone dry both work, and bone dry is easier to handle. Wipe the surface with a barely damp sponge and let it re-dry. Dust is the single most common reason a coat lifts off later.
-
Brush on a coat that looks too thin
A soft wide brush, quick even strokes, no going back over a wet area. It should look watery and slightly translucent. If it looks like you are painting, it is too thick.
-
Change direction with each coat
Horizontal, then vertical, then horizontal. Three to four coats total. Let each one lose its wet look before the next, which is usually a minute or two.
-
Buff as the shine leaves the surface
The window is short. Too early and the cloth drags the coat off in streaks. Too late and you are polishing a dry powder that will not move. Watch for the moment it goes from wet looking to just barely matte and go then.
-
Use something soft
A plastic grocery bag over your fingers, a chamois, or a piece of old t-shirt. Light pressure, small circles or short strokes. A stone works too and gives an even harder gloss, but it is easy to cut through a thin coat with one.
-
Let it dry completely before firing
The coat is thin but it is still water going into a kiln. Treat it like any other greenware and give it the time.
Combining the two techniques
Burnish the bare clay lightly first to compact the surface, then apply terra sigillata over it and buff that. You get the density of a burnish underneath and the fine particle gloss on top. It is more work than either one alone and it is the route to the deepest shine.
Spraying instead of brushing
A spray gun or an airbrush lays down thinner, more even coats than a brush and avoids stroke marks entirely, which matters on a large or complex form. Wear a respirator and spray outdoors or in an extracted booth, because an airborne clay mist is a dust problem like any other. Not at The Clay Hole though: members do not spray here, so this one is for a home setup. Brush it on instead.
Mixing and application in one go
The description says it is an excerpt from the DVD Pit Firing and Burnishing, and Sumi von Dassow also wrote the book Low-firing and Burnishing. The title says it covers mixing and applying, and the frames show a respirator going on and a coat being brushed onto a vase.
Terra sigillata problems and what caused them.
It flakes or peels off
Almost always too thick. Sometimes dust on the pot underneath. Occasionally too much deflocculant, which leaves the coat brittle. Thin the batch with water and use more coats.
No shine at all
Either the coat is too thick to polish, or you buffed after it was already dry, or the batch did not settle long enough and is still carrying coarse particles. Let the next batch settle a full day.
It streaks when you buff
You went in too early, while the coat was still wet enough to move. Wait for the surface sheen to go and try again on the next coat.
Visible brush marks
Coat too thick, brush too stiff, or you went back over a half dry stroke. Load the brush more, move faster, and do not touch an area twice in the same coat.
It crawls or beads up
Something on the surface is repelling it. Wax, oil from your hands, or a fingerprint from handling the dry pot. Wipe with a damp sponge, let it dry, and recoat.
The jar has separated
Normal, and not a problem. Stir it gently rather than shaking, so you do not whip air into it, and check the thickness again if it has been sitting for months.
Mixing, then troubleshooting
The title says it covers mixing and troubleshooting. Jeremy Randall talks it through to the camera, holding up a glass jar at one point.
Heat undoes a polish. Our kilns are hot.
Know where a pot will be fired before you spend an hour on it with a stone.
A burnish is a physical polish. As firing temperature climbs, the particles you flattened begin to move and sinter, and the shine softens. Potters chasing the maximum possible gloss from burnishing alone often fire as low as cone 018. We bisque to cone 05, about 1,888°F, which is a good deal hotter than that, so a purely burnished surface comes back from our bisque less glossy than it looked when you put it on the shelf.
Terra sigillata holds its sheen far better through a cone 05 bisque than bare burnishing does. If you want that hard polished look coming out of our kilns, terra sigillata is the route, and it is the main practical reason to pick it over the stone.
A glaze firing is a different conversation entirely. Ours goes to cone 5½, and nothing about a polished surface survives that. Whatever sheen you had is gone, and the pot comes out looking like ordinary matte stoneware. There is no version of this technique that ends in our glaze kiln.
A glaze firing at cone 5½ erases the sheen completely. There is no version of this technique that ends in our glaze kiln.
Do not glaze over it
A glaze needs something to grab, and a burnished surface is deliberately as slick and closed as you can make it. On top of that, glaze covers the polish you just spent an hour creating. If a piece needs glaze, do not burnish it.
It is not waterproof and it is not for food
A burnished or terra sigillata surface fired low is still porous clay. It will absorb liquid, it will stain, and it should be treated as decorative. Water and dishwashers also dull the shine, so keep these pieces dry.
Talk to us about the firing before you commit an evening to polishing. Bisque firing here is free and goes to cone 05, and our alternative firings run on their own schedules and their own calendar. Knowing where a pot is headed changes which of these two techniques you should be using on it. Our page on what a firing actually does covers the underlying chemistry if you want it.
Burnished surfaces exist for the smoke firings.
Every technique on this page was developed in a world without glaze, and it still does its best work in firings that behave like that world. A polished surface is what makes carbon, smoke and horsehair read as sharp marks instead of a gray smudge, because there is nothing porous for them to sink into.
A two minute clip, told in text on screen
The description says it is an excerpt from Raku Firing with Marcia Selsor. The frames show text on screen over ball clay being weighed in, then terra sigillata brushed onto a bone dry pot in thin coats, and the title promises the feather and horsehair firing. The last card points to the full narrated version in the Ceramic Arts Network shop.
Eight things that go wrong, and what each one means.
The three you will actually hit.
Pale scratchy lines
The surface was too dry when the tool went over it, or there is grit in the clay or on the stone. Wipe the patch with a barely damp sponge, wait a few seconds, and check your tool for a chip.
A soft, smeared, wavy surface
Too wet. You are pushing the clay around instead of compressing it, and no amount of extra polishing will fix it at this dampness. Stop, let it firm up, come back.
It came out of the bisque dull
Temperature, not technique. A cone 05 bisque takes the edge off a bare burnish. Use terra sigillata for a surface that survives our kilns, or take a bare burnish to a cooler firing somewhere else, because we do not pit fire at the studio and every piece here goes through the cone 05 bisque first.
Visible bands of different shine
You burnished patches at different moisture levels, so each one compacted differently. Work in smaller sections, overlap them, and keep the whole area at one dampness rather than letting the far side dry.
The shine faded while it dried
Some of that is normal: the clay keeps shrinking as it dries, and the polish wrinkles a little. Dry it slowly under loose plastic, and bring the shine back with the oiled bone dry pass.
The rim chipped
You burnished a thin edge that had already gone past the window while the body of the pot was still in it. Rims and handles first, while they are still in the window, with lighter pressure and a smaller tool, or keep plastic on them while you work the body.
Gray or brown smudges after firing
Too much oil on the bone dry pass, carbonizing in the kiln. Work the oil into the cloth first so less goes on, and buff every trace of it off before the piece dries.
It looked great and then somebody washed it
Water dulls a low fired polished surface, and a dishwasher destroys it. These are dry, decorative pieces. Dust them, do not wash them.
Two long ones, for when you are not standing at a bench.
Everything above is built to be usable with clay on your hands. These two are the opposite: sit down, take notes, and come out understanding why the rest of it works.
A long one, for sitting down
The description says it explains what burnished pottery is and how to make it on your own vessels. The frames show a burnished bowl being rubbed with a small stone, its underside, and a clay head being sprayed with water. It is a long one, so it suits a sit down more than the bench.
A conference lecture on the history of the surface
Peter Pinnell and Rhonda Willers presenting at NCECA, the national ceramics conference. The frames are slides, and YouTube’s chapter markers put the history first: Greek, Etruscan and Roman wares and how terra sigillata was rediscovered, then its return among potters today and its modern artistic uses, with a question and answer session at the end. Worth an hour if terra sigillata becomes your thing.
The rest of it.
Can I burnish a pot I already bisque fired?
No. Burnishing works because damp clay particles can still be moved. Once a pot has been fired the particles are locked, and rubbing it with a stone does nothing at all. This has to happen on greenware.
Can terra sigillata go on bisqueware?
It can, and it is done, but it bonds noticeably worse than it does on greenware and is more likely to flake. If you have the choice, apply it before the bisque. If you are salvaging a piece you already fired, expect to use extra thin coats and to accept a less reliable result.
Do I have to use a deflocculant?
No, and plenty of people skip it. Without one the separation is slower and less complete, so you get a smaller yield of slightly coarser material. With one you get more of a finer product in less time. Try it both ways with the same clay and see whether the difference matters to you.
How long does a batch keep?
Years, in a sealed jar. It will separate, which is normal, and it may develop a smell, which is also normal and harmless. Stir gently, check the thickness, and use it.
Can I put underglaze under or over terra sigillata?
Underglaze under terra sigillata generally works and the polished coat over the top gives it a soft sheen. Over the top is less reliable, because you are putting a matte layer on the thing whose whole purpose is to be glossy. Our underglaze page covers the firing rules for those, which still apply here.
What is the difference between terra sigillata and an engobe?
Particle size and purpose. An engobe is a formulated slip designed to fit a clay body and carry color at stoneware temperatures, applied in two or three coats about as thick as a sheet of paper. Terra sigillata is an unformulated fine fraction applied extremely thin, for shine rather than for coverage. Our engobes page covers what an engobe is and how to use one.
Is this beginner friendly?
The motions are simple and anybody can do them on their first day. What makes it intermediate is judgment: reading moisture, knowing when to stop, and choosing a firing that matches the surface. Expect the first pot to teach you something the second one gets right.
Can I burnish something made on a slab roller or in a slab mold?
Yes, and the flat panels are easier to work than a curved thrown wall. Watch the canvas texture, which a slab roller leaves behind and a burnish will happily polish into permanence. Rib it out while the slab is still soft, before you build anything.
Related lessons.
Try it on something you do not care about.
Go find a spoon.
This is one of the few techniques in pottery where the whole thing can be learned in a single evening on a test tile. Roll out a slab, cut it in four, and burnish each piece at a different dryness. You will know more about the moisture window from that one hour than from any amount of reading, including all of this.
Then pick the technique that matches where the pot is going. Bare burnish for a cooler firing somewhere else, such as a pit fire, terra sigillata for anything coming out of our own kilns, and neither one for a piece that needs glaze. Get that decision right and the rest is just patience and a smooth stone.
Roll out a slab, cut it in four, and burnish each piece at a different dryness. One hour will teach you the moisture window better than this page can. Then pick terra sigillata if the pot is coming out of our own kilns, and a bare burnish if it is headed for a pit or a smoke firing.
There is a considerably longer version of this page with both techniques in full, every tool, all twelve videos and the whole troubleshooting list. The toggle is at the top.
Which version would you like to print?
Videos come out as a labeled box with the title and channel to search for, since paper does not play them.