Pottery Date Night
 Bring All Your Friends Free Week
 Give a Month of Pottery
 Private Pottery Parties

 The Welcome Booklet
 Your First Ten Sessions
 The Pottery Process
 Finding the Studio
 Your Classes Never Expire
 The Four Tables
 Who’s Who
 The Rewards Program
 Flux Glazes
 The Calculators
 Kiln Tracker
 Holiday Kiln Deadlines

 Beginner’s Tool Set
 Fingernail Clippers
 Mayco Clay Mender
 Epoxy for Kintsugi
 Applicator Bottles
 Large Bead Rack
 Raku Workshop
 Nighttime Raku
 Horsehair and Feather Raku
 The Clay Hole T-Shirt
 Embroidered Crewneck
 Zip-Up Hoodie
 Pre-Made Bisqueware
 Glaze Catchers
 Kiln Cookies
 Clay Cubby Rental
 The Glaze Bible, Printed
 The Book of Molds, Printed
 Printable Pottery Guides
 Free Printable Trackers
 Gifts for Potters
 Christmas Pottery Ideas
 Mother’s Day Gift Ideas
 Pottery Date Night
 Studio Calendar
 2027 Studio Events
 What Should I Do Today?
 How to Throw on the Pottery Wheel
 How to Make a Pinch Pot
 How to Tap Center a Pot
 The Five Stages of Clay
 Is Pottery Hard to Learn?
 Pottery Wheel Practice Drills
 20 Easy Hand-Building Projects
 Everything That Sounds Wrong

 A Beautiful Piece, Every Time
 Slab Roller Tips
 Any Dish as a Slump Mold
 Slab Roller & Slab Mold Certification
 The Pottery Skill Tree
 Clay & Pottery Calculators
 Logging Your Pottery and Glazes
 The Pottery Dictionary
 Why Did My Pottery Do That?
 The Pottery Cone Chart
 Pottery Myths, Fact-Checked
 Is Handmade Pottery Food Safe?
 Incredible Ceramic Artist Videos
 How Dan Throws Giant Pots
 How to Dry Your Pottery
 The Pottery Wheel Introduction
 Pottery by Zodiac Sign
 Personality and the Pottery Wheel
 Pottery for Engineers
 ADHD, Hyperfocus, and Never Running Out
 Hobbies for Burnout
 Screen-Free Hobbies for Adults
 Every Addiction I Ever Had Lost to Art
 Functional Pottery Is Engineering
 How Do We Compare?
 Pottery Classes by City
 Every Pottery Studio in Utah
 Pottery in Draper
 Featured Members
 The Signature Wall
 Making Friends as an Adult Is Brutal
 The Clay Hole Commandments
 2027 Pottery Contests
 2027 Studio Parties
 Gallery Night

 Scream It Into the Void
 Destroy the Glaze Wall
 Daily Affirmation Cards
 Everything That Can Go Wrong
 Subscribe to Our Newsletters
 Contact The Clay Hole
 Corporate Team Building

 Glaze Combinations
 Glazes We Do Not Carry
 Making Glaze Test Tiles
 The Mega Glaze Tool
 How to Use the Mega Glaze Tool

 Glaze Brushing Techniques
 How to Use Underglaze
 How to Use Dipping Glazes
 Glaze Problems, Causes and Fixes
 The Dipping Glaze Guide

 Making a Glaze Catcher
 Fused or Sharp After Firing
 The Signature Wall
 His Viral Videos
 His Own Ceramics
 Meet Mud
Wild clay · Part two of two
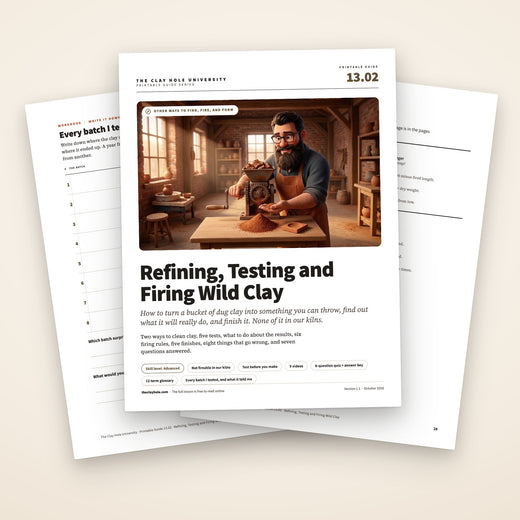
Refining, Testing and Firing Wild Clay
Part one ended with a bucket of dirt in the back of your car. This is the harder half. Grinding it, cleaning it, finding out what it actually does in a kiln, and then finishing it so the pot on the shelf looks like pottery instead of a science experiment.
Have not read the first half? Finding and harvesting wild clay covers where the stuff is, what to look for and how to get it home without wrecking a riverbank. This page picks up the moment the bucket is in the garage.
Jump to a section
The whole thing, short
Clean it, test it, then believe the numbers
The one rule that is not ours to bend
Wild clay cannot be fired at The Clay Hole. No outside clay, zero tolerance, no exceptions, because an untested body can slump onto a shelf and take every other member’s work in that kiln with it. Everything below assumes your own kiln or an outdoor firing.
Dry the raw clay bone dry before you do anything else. Dry clay slakes down in water in a few hours. Damp clay turns into lumps that never break up, and that one mistake costs more time than the whole rest of the job.
Then clean it. Slake it in water, stir it to thin cream, pour it through screens coarse to fine. Sand drops out in the first minute. Pour the good stuff into a second bucket, give it a day to settle, siphon the clear water off and dry the rest until it is stiff enough to wedge.
Then test it, and do not skip this part. Five tests: the coil, shrinkage off a scribed 100 mm line, absorption, a cone ladder, and a craze test. Those five numbers are the difference between a clay body and a lump of dirt with opinions.
Assume it will melt. Every early firing sits in a bisque bowl or on a cookie in a bed of sand, on a shelf you can afford to lose. Start around cone 06 and climb one cone at a time. Wild clay usually matures far below the cone 5½ we fire stoneware to.
Finish it the way the numbers point. Porous means burnish it or coat it in terra sigillata made from the same clay, and keep it low. Vitrified means you can glaze it, after a craze test.
01 · Before you plan anything
This clay cannot come into our kilns
The policy
Absolutely no outside clay. Zero tolerance, no exceptions. Any member who brings in outside clay is financially liable for the damage, and the damage runs into tens of thousands of dollars.
We lead with this because wild clay is exactly the kind of project somebody gets excited about and carries through the front door in a grocery bag.
A commercial clay body is a promise. Somebody measured it, fired it hundreds of times, and printed a temperature on the bag. An untested wild clay is a promise from nobody. It might mature at cone 06 and come out of a cone 5½ firing as a puddle welded to a shelf. It might bloat and throw pieces of itself onto the work next to it. It might be fine. You cannot tell by looking, and a kiln full of other people’s pots is not the place to find out.
The rule covers more than a lump of clay. A slip made from wild clay, a terra sigillata made from wild clay and a glaze made from a rock you found are all outside material going into a shared kiln, and all three are the same answer. So is a pot made from studio clay with wild clay painted on it.
None of that is us being precious about it. We think this is one of the most interesting things a potter can do, which is why this page and its first half exist at all. We just cannot be the kiln that finds out.
01 · Before you plan anything
This clay cannot come into our kilns
The policy
Absolutely no outside clay. Zero tolerance, no exceptions. That covers wild clay bodies, wild clay slips, wild clay terra sigillata and glazes made from found rock. Any member who brings in outside clay is financially liable for the damage, and the damage runs into tens of thousands of dollars.
So where does it get fired?
Your own kiln
A small test kiln is the answer, and secondhand ones turn up cheaply. You own the shelves, so you get to risk them. Fire a kiln wash on and keep cookies under everything.
An outdoor firing
A pit fire, a barrel or a bonfire reaches somewhere around 1200 to 1800°F, which is where a lot of raw wild clay is happiest anyway. Check your local fire restrictions first.
A studio that allows it
Some studios, colleges and maker spaces will fire a tested outside body. Ask before you make anything, get the answer in writing, and bring your test results with you.
Everything past this point assumes one of those three. The techniques are the same wherever you fire; only the kiln changes. Our own glaze firing is a mid-fire stoneware schedule with the heat work of a cone 5½, and we do not make low fire pottery. More on all of that in the studio FAQs.
02 · Why this page reads like this
Video teaches hands. A page holds still.
What only video can teach you
How thin a slurry has to be before the sand will actually drop out of it. What a coil looks like at the exact moment it is too short to use. How slowly somebody pours off a settled bucket. Watch those. No sentence has ever taught them.
There is no shortage of wild clay videos, and nine good ones are linked down this page. So it is fair to ask what a page of words is for.
We think the two do different jobs, and that most people retain more when they get both. Watching somebody do a thing gives you the shape of it: the pace, the pressure, the moment they decide something is ready. It is very good at that and nothing else comes close. What it is bad at is giving you a number back later.
Because this half of wild clay is almost entirely numbers and sequence. One hundred millimeters. Twenty percent temper. Eighty mesh. Two hours in boiling water. Bone dry before you add water, not after. None of that is hard to do. All of it is easy to be missing at the exact moment you needed it, which is usually three weeks after you watched the video, standing over a bucket with wet hands.
You cannot scrub a video back to minute fourteen with slip on both thumbs. You can leave a list open on a phone on the workbench. So we wrote both, and we tried to put the numbers where you can find them again: watch a video or two for the feel of it, read this once for the order of it, then keep the list near the bottom of this page open while you work.
That is the whole trick, and it is why we put a checklist for the bucket before the questions.
03 · Two roads
Dry method or wet method
Both start the same way, with clay dried until it snaps rather than bends. After that they part company completely, and the right one depends less on your patience than on what is actually mixed in with your clay.
One question picks the method
Is there anything in it you want gone? Sand, silt, roots, gravel, organic muck. If yes, you want the wet method, because water is the only thing that sorts particles by size for free. If the clay came out of the ground clean and plastic and you only need to break it up, the dry method is faster and wastes nothing.
The dry method
Crush it, screen it, add water. Nothing is thrown away except what will not fit through the screen.
You are not purifying anything here. You are turning hard lumps into an even powder so it will take water evenly, and pulling out the pieces too big to belong in a pot.
It is fast, it needs almost no equipment, and it keeps every bit of the fine sand that was already doing a useful job in there. It is also the dustiest thing you will ever do with clay, which matters more than any of the rest of it.
- Best for: clean, plastic clay with little grit.
- Removes: only what the screen catches.
- Takes: an afternoon, plus a day to slake.
- Costs you: almost no yield.
- Watch out for: silica dust. This is the real hazard on this page.
The wet method
Slake it, sieve it, let water sort it. You throw away everything that is not clay, including some clay.
Water is a free particle sorter. Heavy things fall fast and fine things stay up, so a bucket left alone for a minute has already separated your sand from your clay without you doing anything.
The cost is time and yield. You will pour away silt that was harmlessly along for the ride, and you will spend days getting the water back out of what is left. What you get in return is a clay you actually know the composition of.
- Best for: dirty, sandy, rooty, gritty clay.
- Removes: sand, silt, roots, gravel, most lime.
- Takes: a week, mostly waiting.
- Costs you: a lot of yield. Expect to lose most of the bucket.
- Watch out for: nowhere to dry it. Sort that out first.
The dust, seriously
Dry clay dust is free silica, and the damage it does to lungs is permanent and cumulative rather than dramatic. Grind outdoors or in a garage with the door open, wear a fitted N95 or better, and never sweep dry clay dust. Wet mop it or wipe it with a damp sponge. If you would rather not think about any of this, use the wet method, where the material is under water the entire time.
The dry method, step by step
- Dry it until it snaps. Spread it thin on a board or a tarp somewhere with no rain and no dew. It has to be dry all the way through, not just on the surface. Grinding clay with any moisture left in it gums up every tool you own.
- Break the big pieces. In safety glasses, a hammer on a driveway, a rock, or a canvas bag you can beat without launching lumps across the yard. The bag is worth it.
- Grind it down. A hand-cranked corn or grain mill is the classic tool and is what most wild clay potters use. A mortar and pestle works for small amounts. You are aiming for something like coarse sand, not talcum powder.
- Pull out what is obviously not clay as you go. Sticks, roots, gravel, anything that refuses to break down.
- Screen it. Push the powder through window screen or a 30 mesh sieve. Whatever will not go through, throw away or grind again.
- Measure your temper now if you are adding any, while everything is still dry powder and easy to scoop. Mixing dry is far more even than mixing wet.
- Add water slowly. Sprinkle the dry mix into water rather than pouring water onto the powder, and let it sit overnight before you touch it.
- Let it stiffen on plaster, canvas or in a pillowcase, then wedge it up and go straight to the test tiles. Not to a pot. To the tests.
04 · Cleaning it
The wet method, step by step
This is the part people picture when they picture processing clay, and it is mostly standing next to a bucket doing nothing. The work is in getting three things right: drying it first, stirring it thin enough, and knowing when to stop pouring.
Three things decide whether this works: drying it first, stirring it thin enough, and knowing when to stop pouring.
Dry it bone dry first, even for the wet method
This is the single most skipped step and the one that ruins the most weekends. Fully dry clay is a sponge and pulls water into itself, so it collapses into a slurry in hours. Damp clay just gets a wet skin and stays lumpy, and those lumps will still be lumps a week later no matter how long you stir.

- Clear waterOnce the bucket has stood overnight this is just water. Siphon it off and pour it outside, never down a household drain. It is holding nothing you want.
- The clay layerThe whole point of the exercise. Soft, even, the color of the finished pot, and it will still be moving under a spoon after a day.
- The silt bandThe fuzzy edge between clay and sand. Where exactly you stop is a judgment call, and taking a little silt is not a disaster. Taking sand is.
- Sand, grit and rootsDropped out in the first sixty seconds. Anything this heavy was never going to help a pot.
- The siphonA length of aquarium tubing. Start at the top and work down slowly, and stop the instant the water coming through goes cloudy.
- Dry it completely, then break it into chunks no bigger than a walnut.
- Slake it. Drop the chunks into a bucket of water, roughly one part clay to two parts water, and leave it alone. Do not stir it yet. Give it a few hours, or overnight for a stubborn clay.
- Stir it thin. A drill and a paint mixing paddle turns an hour of arm work into two minutes. You want it like thin cream, not like batter. Too thick and the sand cannot fall through it.
- Pour it through a coarse screen into a second bucket. Window screen or 30 mesh. This catches roots, gravel and anything that never broke down.
- Then a finer one. 50 mesh takes out the coarser sand. 80 mesh gives you a smooth throwing body. Going past 100 mesh starts removing the tooth that stops a pot collapsing, so most people stop at 80.
- Let it settle, in two stages. Give the bucket sixty seconds and the sand is already on the bottom. Pour the cloudy water off that into a third bucket, leaving the grit behind, and stop the moment you see grit moving.
- Leave the last bucket for a day. The clay drops out and clear water rises. Siphon that water off with a tube.
- Dewater what is left until it is stiff enough to pick up. That is the next section, and it is the slowest part of all of this.
| Screen | Takes out | Leaves you with |
|---|---|---|
| Window screen | Roots, gravel, unbroken lumps | Everything else, sand included |
| 30 mesh | Coarse sand and grit | A gritty body good for hand building |
| 50 mesh | Coarser sand | A general purpose body with tooth left in it |
| 80 mesh | Coarse and medium sand. Fine sand and silt go through | A smooth throwing body |
| 100 mesh and finer | The tooth as well | Slip, terra sigillata, trouble on a wheel |
Mesh numbers count openings per inch, so a bigger number is a finer screen. Paint strainers, flour sifters and old window screen all work; ceramic suppliers sell proper sieves in these sizes for not much.
05 · Getting the water back out
Back to a lump you can throw
You now have a bucket of expensive mud. Turning that into a wedgeable lump is not difficult, but every method is a variation on the same idea: put it on something thirsty and wait.
Every method here is the same idea: put the mud on something thirsty and wait. A plaster bat is fastest, canvas over a frame is safest, a pillowcase hung over a bucket is cheapest.
A plaster bat
The fastest and the most controllable. Pour the slurry two inches deep, come back in a day, and lift it off when it stops sticking to your fingers.
Canvas over a frame
Staple canvas to a wooden frame, sit it on blocks so air gets underneath, pour the slurry in. Slower, but nothing can chip into your clay.
A pillowcase
Pour it in, tie it shut, hang it over a bucket. Cheap, works, and drips for two days. Old cotton sheets and flour sacks do the same job.
Never let plaster get into a clay you will fire
A chip of plaster in a clay body turns into a lime pop after the firing, anywhere from days later to years later, when it absorbs moisture from the air and blows a crater out of the surface of your pot. Keep plaster bats out of the same room as any hammering or scraping, and if you ever see a white fleck in the clay, cut it out and keep going.
Then age it, temper it and wedge it
- Add temper if the clay needs it. Temper is non-plastic material, usually screened sand or ground-up bisque, and its job is to let water move through the wall so the inside and the outside dry at the same rate. Around twenty percent by volume is a common starting point for a wild clay with no grit left in it.
- Add temper if it needs it. Screened sand or ground bisque, around twenty percent by volume, so water can move through the wall as it dries.
- Bag it and forget it. Aging genuinely works. Two weeks in a sealed bag makes a short clay noticeably more plastic, two months makes it better again, and the sour smell that develops is the thing doing the work.
- Wedge it properly. Wild clay is rarely as evenly mixed as it looks, and wedging is where you find the pebble you missed.
- Roll a coil and wrap it around a finger. If it holds, go on to the tests in the next section. If it cracks deeply, go back and add ball clay or bentonite, or give it another month in the bag.
- Keep the trimmings. Wild clay is too expensive in hours to throw away. Reclaim it at home the way you would studio clay: dry it out, slake it, dry it back down. Wild clay never goes into our reclaim, The Wash Pit or the drying cart. The reclaim guide covers the method. It is written for our own system, so leave that part out for wild clay.
Adding temper reduces plasticity, so a clay that is already crumbly does not want more of it. Temper solves cracking caused by uneven drying. It does not solve a clay that was never plastic in the first place, and adding it to one of those makes the problem worse.
06 · The tests
Five tests, and none of them are optional
This is the section that turns a bucket of dirt into a clay body. Everything before it is preparation and everything after it depends on the answers. Make a batch of test bars, run all five, and write the numbers down somewhere you will still have them in a year.
Make more bars than you think you need
A dozen flat bars, about five inches by one inch by three eighths of an inch, all from the same batch on the same day. You will burn through them faster than you expect, and a test bar from a different batch is not a test.
- The coil test Roll a coil about as thick as a pencil and wrap it once around your finger. A plastic clay bends around and holds. Fine surface cracks are normal. Deep splits or a coil that snaps means the clay is short, and short clay cracks in drying no matter how careful you are. Pencil-thick coil, wrapped once around a finger. Surface cracks are fine. Deep splits mean the clay is short.
- Shrinkage Scribe a line exactly 100 mm long into a soft bar with a needle tool and a ruler, with a tick at each end so you measure the same two points every time. Measure it again bone dry, and again after firing. Total shrinkage is 100 minus the fired length, read straight off as a percentage. Scribe 100 mm into a soft bar. Measure it dry, then fired. Shrinkage is 100 minus the fired length, as a percentage.
- Absorption Weigh a fired bar from the cone ladder in the next step. Boil it in water for two hours, or soak it for a full day, then wipe the surface dry and weigh it again. Absorption is the weight it gained, divided by the dry weight, times one hundred. This is the number that decides whether the pot can hold coffee. Weigh a fired bar, boil it two hours, wipe it and weigh again. Weight gained over dry weight, times one hundred.
- The cone ladder Fire identical bars at several temperatures, one cone apart, starting low. Shrinkage climbs and absorption falls as the clay tightens up. The cone where both stop moving is maturity. The next one up is usually where it bloats, slumps or sticks to the shelf. Same bar, several cones, one step at a time. Where shrinkage and absorption stop moving is maturity. One past that is trouble.
- Glaze fit Glaze half of a fired tile and fire it again. Then boil it for twenty minutes and drop it straight into ice water, three times over. Fine craze lines that were not there before mean the glaze does not fit, and no amount of hoping will change that. Glaze half a tile. Boil twenty minutes, then ice water, three times. New craze lines mean the glaze does not fit.
Two more worth running once you have the basics. Put a bar across two kiln posts with the middle unsupported and fire it, to see how much it sags at your top temperature. And break a dry unfired bar in half with your hands, because a clay that snaps like a cracker in greenware will lose you pots on the shelf long before the kiln ever sees them.
| What you measured | Commercial stoneware | What wild clay often does | What it is telling you |
|---|---|---|---|
| Coil around a finger | Holds, no real cracks | Cracks or snaps on the first try | Whether it will survive drying |
| Total shrinkage | 10 to 14 percent | Anywhere from 6 to 20 percent | How much room for error you have |
| Absorption at your top cone | Low single digits | Commonly 5 to 15 percent | Whether it can hold liquid |
| Bar across two posts | Barely sags | Either no sag at all, or a puddle | How close you are to the ceiling |
| Craze lines after boil and ice | None, on a matched glaze | Usually some, on the first attempt | Whether that glaze is usable on it |
Where maturity actually lands
Most wild clay is not stoneware. A great deal of it matures somewhere between cone 06 and cone 2, which is a long way below the cone 5½ we fire studio pottery to, and plenty of it is soft and running by cone 4. That is not a defect. It is what most of the pottery ever made on earth was fired at. It just means you have to find the number rather than assume it.
07 · Fixing it
What to do about what the tests told you
Almost no wild clay is usable exactly as it comes out of the ground. That is normal, it is not a sign you picked a bad hole, and the fixes are all cheap. Change one thing at a time and re-run the tests, or you will never know which change did what.
Too short and crumbly
Age it longer first, because that is free. Then add ball clay, ten to twenty-five percent, which is the standard fix. One or two percent bentonite does a lot of work for very little material.
Sticky, and shrinks too much
Add temper. Screened sand, ground bisque or bought grog, starting around twenty percent by volume. It brings the shrinkage down and lets the wall dry evenly.
Still porous at your top cone
It needs flux. Nepheline syenite, a feldspar or a frit, added at five to ten percent and worked up from there. Every addition lowers the temperature it melts at, so re-run the ladder.
Melts or slumps too early
Go the other way, or just fire it lower. Kaolin, fireclay or silica raise the temperature it can take. Firing lower is free and usually the better answer.
Cracks while drying
More temper, thinner and more even walls, and slower drying under plastic. Wild clay dries less forgivingly than anything you have bought in a bag.
Nothing is working
Blend it with a commercial body you already trust and let that body carry the firing range. This is the highest-yield experiment on the page and hardly anybody tries it first.
How to run a blend test
Mix four batches by dry weight: 25, 50 and 75 percent wild clay against a commercial body, plus 100 percent wild clay as a control. Make bars from all four, run shrinkage and absorption on every one, and fire them together. You will usually find one ratio that keeps the color and the character of the wild clay while firing like the bagged clay, and that ratio is the whole prize.
Weigh dry, not wet. Two lumps of plastic clay at the same weight can hold wildly different amounts of water, and a blend measured that way is not repeatable. Anything blended with studio clay is still outside clay and still cannot be fired here.
08 · The kiln
Firing it without wrecking anything
Six rules. The first one is the one that matters, and the rest are all versions of assuming the worst and being pleasantly surprised.
- Never the first firing in a shared kiln Not here, ever, and not in any shared kiln without that studio’s written yes. A body nobody has fired is a liability to every other pot in the load. A studio that has your test results and has agreed in writing is a different conversation, but that is its call. Here the answer is always no. Not here, ever. Another studio’s yes is its own call. An untested body is a liability to every other pot in the load.
- Contain it, every time Assume it will melt. Sit the piece inside a bisque bowl, or on a kiln cookie in a shallow bed of sand, on a well washed shelf you could stand to lose. Sand catches a run. A bare shelf does not. Assume it melts. Bisque bowl, or a cookie in a bed of sand, on a shelf you can afford to lose.
- Start low and climb Cone 06 first, then step up one cone at a time. It costs a few firings and it saves a shelf. Never jump straight to the temperature you are hoping for. Cone 06 first, then one cone at a time. Never jump to the temperature you are hoping for.
- Bisque it slowly, with a burnout hold Wild clay is full of organic matter and carbon that commercial clay had cleaned out of it. Go slow through the first few hundred degrees, and give it a long hold in the middle of the bisque so all of that burns away before the surface seals over. Run it where the fumes can leave, a vented or outdoor kiln, and keep the room aired. Wild clay carries organics a bagged body does not. Go slow, and hold in the middle of the bisque so they burn off.
- Keep watching for a week at least Lime pops do not happen in the kiln. A speck of unburnt limestone takes on moisture from the air afterward and blows a small crater out of the surface, anywhere from the day it comes out to years later. Give a test a week at least, and know a late one can still come. Lime pops happen after the kiln, from the day it comes out to years later. Give a test a week at least.
- Write down everything Where it came from, what you screened it through, what you added, what cone, what schedule, what happened. In two years you will find another deposit and the only thing that will save you is the notebook. Deposit, mesh, additions, cone, schedule, result. In two years the notebook is the only thing that will save you.
Why the slow bisque matters more here
A bisque firing is not really about hardening the pot. It is about burning off everything that is not clay while the wall is still open enough to let gas out. Wild clay carries far more of that than a bagged body does, so a fast bisque seals the surface before the inside has finished burning, and the trapped gas comes back as bloating in the glaze fire. If you want the longer version of what a firing is actually doing, we wrote one: what a kiln firing actually does.
09 · Side by side
Wild clay next to the stuff in the bag
If your only reference point is studio stoneware, wild clay is going to feel broken for a while. It is not broken. It is a completely different material with a different set of promises.
| What | Studio stoneware at cone 5½ | Wild clay |
|---|---|---|
| Firing range | Printed on the bag and reliable | Unknown until you test. Often cone 06 to cone 2 |
| Color out of the kiln | The same buff, white or gray every time | Orange, red, chocolate, gray or buff, and it changes with every cone |
| Shrinkage | Published, 10 to 14 percent | Yours to measure. 6 to 20 percent is a fair range |
| Absorption | Low single digits. Holds water | Often 5 to 15 percent. Frequently porous |
| Plasticity | Engineered. Throws the same on Tuesday as it did in March | Anything from crumbly to sticky, and it improves as it ages |
| Consistency | Bag to bag identical | Bucket to bucket different, out of the same hole |
| Glaze fit | Matched for you by the manufacturer | Crazing is the normal first result. Expect to test |
| Surface | Clean and even, speckles where you chose them | Iron speckle, sand, mica flash and the occasional lime pop |
| Strength | Vitrified and hard | Usually softer. Often closer to a flower pot than a mug |
| Time from raw material to pot | Open the bag | Weeks, and most of it is waiting |
Read that column on the right as a list of properties rather than a list of faults. The porosity is how unglazed jars have kept water cool for thousands of years, and it is why we keep untested wild clay away from anything you drink from. The iron speckle is something people pay extra for in a bagged body. The color shifting with temperature is the reason a single deposit can give you four different pots. What you are trading away is certainty, and what you get for it is a pot made of a specific place, which is not a thing you can buy.
Read the right hand column as properties, not faults. You are trading certainty for a pot made of a specific place.
10 · Finishing it
Five finishes, and only one involves glaze
Two finishes worth starting with
This is where wild clay stops being a chore and starts being the reason you did it. Which finish you reach for is decided by one number: absorption. A porous body wants a surface that does not need to fit it. A vitrified one can take glaze.
One number decides this: absorption. A porous body wants a surface that does not have to fit it. A vitrified one can take glaze.
Burnishing and terra sigillata
The oldest answer, and still the best looking one on a porous low fired body. No glaze involved at any point.
Burnishing is rubbing the surface with something smooth, a river stone, the back of a spoon, a plastic bag, while the clay is hard leather hard, then again at bone dry with a trace of oil on a cloth. The shine is not glass. It is millions of flat clay platelets pushed into alignment, and it is why a three thousand year old pot can still gleam.
Rub the surface with a river stone, a spoon back or a plastic bag once the clay is hard leather hard, then again at bone dry with a trace of oil. The shine is aligned clay platelets, not glass.
Terra sigillata is the same idea with a head start. You take only the very finest particles from your own clay, brush them on in thin coats and buff them, and get a shine as good as a stone gives, for far less work. The real pleasure of it is that a wild clay makes its own sig, so the finish and the pot are the same material.
- Burnish at: hard leather hard first, then again at bone dry with a trace of oil. Too wet and it smears, and bone dry without oil scratches.
- Make sig by: thin slurry, a deflocculant, stand 24 hours, siphon the middle layer.
- Apply sig: three thin coats on bone dry, buffing between each.
- Fire below: about cone 04. Higher and the shine burns off.
- Not for: liquid or food. It is still porous clay.
Glaze, after a fit test
Possible, worth doing, and the one place where being casual will cost you the pot and possibly the shelf.
Glaze fit is a shrinkage argument between two materials. If the glaze contracts more than the clay as it cools it goes into tension and cracks, which is crazing. If it contracts less it goes into compression and flakes off the edges, which is shivering. Crazing is common, shivering is rarer and much worse, because the flakes are sharp.
Glaze fit is a shrinkage argument. Glaze shrinks more than the clay, it cracks, which is crazing. Glaze shrinks less, it flakes off the edges, which is shivering.
Crazing on a porous wild clay body is not a decorative choice. Water gets through the cracks, into the clay, and stays there with whatever was in it. On a vitrified body a craze line is mostly a look. On a body absorbing ten percent of its own weight, it is a reason not to eat off it.
- Test on: tiles from the same batch, fired at your real cone.
- Force it: boil twenty minutes, then straight into ice water. Three times.
- Crazing means: the glaze shrinks more. Try a different one.
- Shivering means: the glaze shrinks less. Stop using it on this clay.
- Never: put any wild clay pot in a shared kiln without that studio’s written yes. At The Clay Hole it is always no.
Slips and engobes
Use the wild clay as a decorating layer rather than a body. Often the most practical route of all.
Sieve your wild clay very fine, thin it to the consistency of heavy cream and brush or dip it onto leather hard pots. All the color and iron speckle of the deposit, on a body that does the structural work. Wild clay often melts well below a stoneware cone, so test a slip tile first.
The fit rules still apply in miniature. A slip that shrinks much more than the clay it sits on will flake off, so test it on the same clay at the same stage. Our engobes guide covers the difference between a slip and an engobe properly.
- Sieve to: 100 mesh or finer.
- Apply at: leather hard, on both the pot and the slip test tile.
- Watch for: flaking at the rims, which means the fit is wrong.
- Remember: this is still outside material and still not for our kilns.
Smoke, pit, saggar and raku
Everything a porous low fired body is naturally good at, and nothing a vitrified one does well.
An open, absorbent clay takes carbon into its surface, which is exactly the effect these firings are built around. A burnished wild clay pot that comes out of a pit fire in blacks, grays and blushes of orange is the single best looking thing you can do with a bucket of dirt, and it needs no glaze at all.
We run raku workshops on studio clay only, so wild clay cannot join them. To read about what carbon does to a hot surface, horsehair and feather is the obvious place to start reading.
- Suits: burnished, porous, low fired bodies.
- Bisque first: so it survives the shock of an open fire far better than raw clay does.
- Never food safe: smoked surfaces and porous walls are decorative.
- Check: local fire rules before you dig any pit.
Leave it bare
The finish nobody suggests, and often the right one.
A well made wild clay pot, cleanly fired, is a beautiful object with nothing on it. Terracotta planters have been sold unglazed forever. If your clay came out of the kiln a good color and a good surface, adding glaze can be the thing that spoils it.
Some potters rub a little wax or oil into a bare fired surface, which deepens the color and does nothing else. It is not a seal, it does not make anything food safe, and it needs redoing.
- Best for: planters, vases with a liner, sculpture, anything dry.
- Do: smooth the fired surface lightly with a wet diamond pad over a bucket, in safety glasses and an N95 or better. Never sand it dry.
- Do not: assume wax or oil makes it watertight. It does not.
11 · When it goes wrong
Eight things that happen, and what each one means
Every one of these has an obvious cause once you know it, and none of them mean you wasted your time. They mean you now know something about that deposit that you did not know last week.
It cracked while drying
The classic wild clay failure, and almost always uneven drying rather than bad clay. Add temper so water can move through the wall, keep the walls an even thickness, and dry it slowly under loose plastic. Rims and handles dry first, so cover those.
It bloated or blistered
Gas trapped inside a wall that had already sealed over. Either you fired too hot, or the bisque was too fast to burn the organics out. Drop a cone and slow the bisque with a long hold, and it usually disappears.
The glaze crazed
The glaze shrinks more than the clay. Try a different glaze first, since that is free. Adding silica to the body or firing the body hotter will also close the gap. On a porous body treat crazed ware as decorative.
It slumped or melted
You went past maturity. Drop two cones and start climbing again, or add a refractory material like kaolin or silica. This is exactly why every test firing sits in a bisque bowl on a bed of sand.
Little craters appeared after the firing
Lime pops. A speck of limestone or plaster in the body rehydrated and blew out. Sieve finer next time, slake and settle rather than dry processing that deposit, and keep plaster well away from your clay.
A white haze on the surface
Scumming, from soluble salts drawn to the surface as the pot dried. Mostly cosmetic. Drying more slowly helps, and a light sponge before bisque removes a lot of it.
A gray core in the broken edge
Black coring. Carbon that never burned out, sealed inside the wall. Same fix as bloating: a slower bisque with a proper hold, and plenty of air in the kiln while it happens.
It came out chalky and soft
Underfired for that clay, or the clay simply does not vitrify at any usable temperature. Climb the ladder first. If absorption never drops, add flux, or accept it as an earthenware and finish it accordingly.
12 · The videos
Six more, from six channels
Three of the nine are already up the page, sitting next to the method they belong to. These six cover the kiln end of it, the testing, the surfaces and one complete run from gathering the clay to a pit firing and repairs. None of them are us.
Keep this open at the bucket
The whole process, on one screen
Tap copy and it lands in your notes app, so you are not scrolling a page with slip on your thumb.
Cleaning it
- Dry it bone dry before anything else
- Slake it: 1 part clay, 2 parts water
- Leave it hours before you stir
- Stir to thin cream, not batter
- Screen coarse first, then 50 or 80 mesh
- Sand drops in the first minute
- Stop pouring when the stream goes cloudy
- Settle a day, siphon the clear water off
- Dewater on plaster, canvas or in a pillowcase
- Dry grinding: fitted N95 or better on, outdoors, never sweep the dust
Testing it
- Make a dozen bars, one batch, one day
- Coil around a finger: does it hold?
- Scribe 100 mm, measure wet, dry, fired
- Shrinkage = 100 minus fired length
- Absorption = weight gained / dry weight
- Boil 2 hours, or soak 24
- Fire a ladder, one cone at a time
- Craze test: boil 20 min, then ice water, x3
- Change one thing at a time, then retest
- Blend test: 25 / 50 / 75 with a known body
Firing and finishing
- Never a first firing in a shared kiln. Not ours, ever
- Assume it melts. Bowl, cookie, bed of sand
- Start at cone 06 and climb
- Slow bisque, long burnout hold
- Watch for lime pops for a week at least
- Porous? Burnish or terra sig, fire low
- Vitrified? Glaze, after a craze test
- Crazed plus porous means not food safe
- Write down deposit, mesh, cone, result
Questions we get asked
The ones that come up at the sink
If yours is not here, ask any of us in the studio. Wild clay is a subject most of us will happily talk about for longer than you wanted.
Can I really not fire any of this here?
Correct. No outside clay, zero tolerance, no exceptions, and that covers wild clay bodies, wild clay slips, wild clay terra sigillata and glazes made from found materials. It is not about trust. One untested body can slump onto a shelf and ruin every other piece in that load, and the member who brought it in is financially liable for all of it.
Can I process wild clay in the studio, even if I fire it elsewhere?
No. Our sinks, traps, tables and tools stay free of outside material, and a bucket of unknown clay near a wheel is exactly how a stray lump ends up in somebody else’s pot. Process it at home. Come here to make things out of the clay we sell, and to talk about how the tests went.
How much usable clay comes out of a bucket of dirt?
Less than you are hoping, and it varies enormously with the deposit. A clean plastic clay processed dry gives back almost everything. A sandy silty one put through the wet method can give back a small fraction of what you carried home. That is normal, it is not a sign you did it wrong, and it is the main reason people go back for a second bucket.
Do I have to add anything, or can I just use it?
Some clay works straight out of the ground. It is rare, and you will not know which you have until the tests are done. Most wild clay wants either temper to stop it cracking as it dries, or ball clay to make it plastic enough to work with, and a fair amount wants both.
Is a wild clay pot food safe?
Only if you can show it is, and most are not. You need a low absorption number, a glaze that does not craze on that body, a glaze made from materials you know, and clay dug from ground you know was clean. Miss any of the four and it is a beautiful object rather than a mug. Nothing on this page is a food safety certification, and we would keep unglazed or crazed wild clay work to planters, vases with a liner and sculpture.
How long does the whole process take?
From bucket to a clay you trust, plan on a month, and almost all of it is waiting rather than working. Drying takes days, slaking takes hours, settling takes a day, dewatering takes days, aging wants two weeks minimum, and the firing ladder is several firings. The hands-on time across all of that is maybe an afternoon.
Is there a way to get the wild clay look without any of this?
There is. Some of the clay bodies we stock, Speckled Buff for one, give you iron speckle and warm color out of the bag, and a lot of our glazes read as earthy and geological. Have a look at the glaze finder and ask an instructor which clay pairs with what you have in mind. Doing wild clay properly is a separate hobby that happens to overlap with this one.
One last thing
Test it before you fall in love with it
Everything that goes wrong with wild clay goes wrong because somebody made a beautiful pot out of an unknown material and then asked a kiln to sort it out. Do it the other way round. A dozen ugly test bars first, five numbers written in a notebook, and then make whatever you like, because by then you will know exactly what the clay will do. That is the only difference between a bucket of dirt and a clay body, and it is a difference you can measure in an afternoon.
A dozen ugly test bars first, five numbers in a notebook, then make whatever you like. For the mesh sizes, the fixes for every test result, the troubleshooting and seven more videos, switch to the Comprehensive Version at the top.
The videos on this page belong to the potters who made them and are linked, not reposted. Every number here is a starting point rather than a specification, because the whole point of wild clay is that yours is not the same as anybody else’s. Nothing on this page is a food safety assessment. And once more, gently: none of this can be fired at The Clay Hole.
Every number here is a starting point rather than a specification, because yours is not the same as anybody else’s. Nothing on this page is a food safety assessment, and none of this can be fired at The Clay Hole.
Which version would you like to print?
Videos come out as a labeled box with the title and channel to search for, since paper does not play them.