Pottery Date Night
 Bring All Your Friends Free Week
 Give a Month of Pottery
 Private Pottery Parties

 The Welcome Booklet
 Your First Ten Sessions
 The Pottery Process
 Finding the Studio
 Your Classes Never Expire
 The Four Tables
 Who’s Who
 The Rewards Program
 Flux Glazes
 The Calculators
 Kiln Tracker
 Holiday Kiln Deadlines

 Beginner’s Tool Set
 Fingernail Clippers
 Mayco Clay Mender
 Epoxy for Kintsugi
 Applicator Bottles
 Large Bead Rack
 Raku Workshop
 Nighttime Raku
 Horsehair and Feather Raku
 The Clay Hole T-Shirt
 Embroidered Crewneck
 Zip-Up Hoodie
 Pre-Made Bisqueware
 Glaze Catchers
 Kiln Cookies
 Clay Cubby Rental
 The Glaze Bible, Printed
 The Book of Molds, Printed
 Printable Pottery Guides
 Free Printable Trackers
 Gifts for Potters
 Christmas Pottery Ideas
 Mother’s Day Gift Ideas
 Pottery Date Night
 Studio Calendar
 2027 Studio Events
 What Should I Do Today?
 How to Throw on the Pottery Wheel
 How to Make a Pinch Pot
 How to Tap Center a Pot
 The Five Stages of Clay
 Is Pottery Hard to Learn?
 Pottery Wheel Practice Drills
 20 Easy Hand-Building Projects
 Everything That Sounds Wrong

 A Beautiful Piece, Every Time
 Slab Roller Tips
 Any Dish as a Slump Mold
 Slab Roller & Slab Mold Certification
 The Pottery Skill Tree
 Clay & Pottery Calculators
 Logging Your Pottery and Glazes
 The Pottery Dictionary
 Why Did My Pottery Do That?
 The Pottery Cone Chart
 Pottery Myths, Fact-Checked
 Is Handmade Pottery Food Safe?
 Incredible Ceramic Artist Videos
 How Dan Throws Giant Pots
 How to Dry Your Pottery
 The Pottery Wheel Introduction
 Pottery by Zodiac Sign
 Personality and the Pottery Wheel
 Pottery for Engineers
 ADHD, Hyperfocus, and Never Running Out
 Hobbies for Burnout
 Screen-Free Hobbies for Adults
 Every Addiction I Ever Had Lost to Art
 Functional Pottery Is Engineering
 How Do We Compare?
 Pottery Classes by City
 Every Pottery Studio in Utah
 Pottery in Draper
 Featured Members
 The Signature Wall
 Making Friends as an Adult Is Brutal
 The Clay Hole Commandments
 2027 Pottery Contests
 2027 Studio Parties
 Gallery Night

 Scream It Into the Void
 Destroy the Glaze Wall
 Daily Affirmation Cards
 Everything That Can Go Wrong
 Subscribe to Our Newsletters
 Contact The Clay Hole
 Corporate Team Building

 Glaze Combinations
 Glazes We Do Not Carry
 Making Glaze Test Tiles
 The Mega Glaze Tool
 How to Use the Mega Glaze Tool

 Glaze Brushing Techniques
 How to Use Underglaze
 How to Use Dipping Glazes
 Glaze Problems, Causes and Fixes
 The Dipping Glaze Guide

 Making a Glaze Catcher
 Fused or Sharp After Firing
 The Signature Wall
 His Viral Videos
 His Own Ceramics
 Meet Mud
Wild clay, part one of two
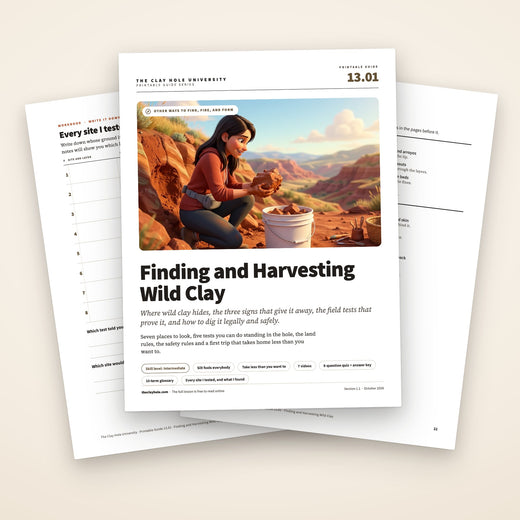
Finding and harvesting wild clay
There is free clay under a great deal of the ground you already walk on. This page is about the first half of the job: knowing where it hides, recognizing it when you are standing on it, proving it is worth carrying, and getting it out without wrecking the bank or hurting yourself. Part two picks up when the bucket comes home.
Jump to a section
Start here
Everything on this page, in one idea
The one test that settles it
Wet a pinch of it. Roll a coil about as thick as a pencil. Wrap that coil around your finger. If it goes all the way around without splitting open, you have clay worth carrying home.
Clay is rock that has weathered down into particles so small they behave like a stack of wet playing cards. Water is what sorted it. Moving water carries those particles longer than it carries sand, so it drops them last, wherever it finally stopped moving. That single fact tells you where to look: floodplains, old lake and sea beds, the bottom of anything that used to hold still water, and the ground beneath all of it.
You cannot see any of that from a trail, because it is buried. So you go where the ground has already been cut open for you. A stream bank, an arroyo wall, a road cut, a gully, a construction hole. Somewhere with a raw vertical face where you can read the layers instead of guessing at them.
- Stream banks and arroyo walls. The best place to start. The outside of a bend has the tallest face, but the current undercuts it. Stay back from the lip, never dig under an overhang, and keep out of a wash if there is weather upstream. Wear a fitted N95 if you break up dry clay.
- Erosion gullies and washouts. Small, common, overlooked, and they cut straight down through the layers.
- Your own yard. If your garden is heavy clay, that complaint was a survey result. Nobody has to give you permission.
- Dry pond and lake beds. Still water is where the finest particles finally settled out.
- Construction holes and dirt roads. Ask first on the one, watch for greasy ruts on the other.
The three signs
- Crackled ground The dried mud puddle pattern on flat ground. Clay swells wet and shrinks dry, and the shrinking is what cracks it into plates.
- Hard angular chunks Dry clay breaks blocky and nearly as hard as rock. Rub one. Rock feels gritty. Clay feels waxy, even bone dry.
- Slick when wet Sticky, greasy, and it records a boot print sharply instead of crumbling. Notice where your feet slip.
How to use this
Read it and watch it, in that order
Two different jobs
Video shows you what a thing looks like. Words tell you what order to do it in. Neither one does the other job well, so this page carries both.
Nobody can describe the color of a clay bank well enough that you will recognize one. You have to see it, and ideally see somebody put a shovel into it. That is what the videos on this page are for, and every one of them was picked because the person in it is genuinely good at this.
But video is terrible at the part that comes next. A clip runs at its own speed, in one order, and it does not wait while you look at a hillside. Two days later you will remember that the guy squeezed something and looked pleased, and you will not remember how thick the coil was supposed to be or which way the light was falling when he found the seam.
Written lists survive that. They hold still, they can be scanned in ten seconds, and they are what you can pull up one-handed on a phone while the other hand is covered in mud. There is decent evidence that seeing something and reading about it lay down two separate handles on the same memory, and that two handles are much easier to grab later than one. That matches what we watch happen in the studio: the members who retain a technique are usually the ones who watched somebody do it and then read the steps back.
So the shape of this page is deliberate. Every section gives you the list first, because the list is what you take outside. The videos sit next to the list so you can see the thing the words are describing. And there is a short list at the bottom built to live on your phone, plus a print button at the top of the page if you would rather have paper in a pocket that has no signal.
The short geology
What clay is, and how it got where it is
Granite and its relatives are largely feldspar. Feldspar sitting in weather for a very long time breaks down into microscopic plate-shaped particles, and those plates are clay. They are what makes clay behave the way it does: wet, the plates slide over each other, which is plasticity. Dried and then fired, they lock together and stop being soil.
Clay that is still sitting where it formed is called primary or residual clay. It tends to be pale and pure and not very plastic, and it is usually tangled up with sand and rock that never went anywhere either. Kaolin is the famous example.
Everything else got moved, mostly by water, and moving is what makes clay good. Clay particles are the smallest thing in the load, so they stay suspended longest and settle last, in the calmest water. Water sorts and concentrates the clay for you, for free, over thousands of years. Which is why transported clay is usually the plastic, workable, potter-friendly kind, and why it collects in predictable places.
- Alluvial. Dropped by rivers and streams on their floodplains. The river may have moved or dried up entirely a million years ago and the clay is still there.
- Lacustrine. Settled on the bottom of a lake. Dry lake beds, and the flats around lakes that used to be much bigger, are full of it.
- Marine. Settled on an ancient sea floor and then lifted up into dry land. These show as colored bands in road cuts and canyon walls.
- Glacial. Rock ground into flour under a glacier and dropped when it melted. Sits near the surface, often just under the topsoil, in country that has not seen ice in ten thousand years.
- Primary. Still at the parent rock, still mixed with everything else. More work, sometimes worth it.
The practical upshot: alluvial, lacustrine and marine clays sit in layers, so you find them by looking at a cut face where the layers are exposed. Glacial and primary clays are not layered and often sit at or just under the topsoil, so you find those by looking at bare ground, dirt roads and tire ruts.
Step one
Where to look
You are not looking for clay. You are looking for a place where something already cut the ground open, because clay is almost always buried and you cannot see through dirt.
Stream banks and arroyo walls
The best single place to start. Running water does the digging, exposes a clean vertical face, and sorted the clay in the first place. The outside of a bend gives the tallest face, but the current undercuts it, so stay back from the lip and never work under an overhang.
Road cuts
Somebody sliced a hillside open and left the layers on display. Excellent for spotting, often illegal and genuinely dangerous for digging. See the two sections below before you pull over.
Erosion gullies and washouts
Anywhere runoff has carved a channel through a field or a hillside. Small, common, usually overlooked, and they cut straight down through the layers.
Your own yard
If you have ever complained that your garden is heavy clay soil, that complaint was a survey result. Dig past the topsoil and see what is under it. No permission needed, no drive, and you can go back for more. Call before you dig (in the US, 811) so you do not hit a buried line.
Dry lake beds and pond bottoms
Still water is where the finest particles finally settle out. A pond that dried up this summer, or a lake bed that dried up in the Pleistocene, both work.
Construction excavations
A basement hole is a free, fresh cut through everything. It is also private property with a fence around it, and you never climb into a trench or an excavation, even with permission. Read it from the edge. Ask the site manager. People say yes more often than you would think, because you are removing spoil they were paying to haul.
Dirt roads and tire ruts
Watch where a dirt road goes greasy and slick after rain, or where ruts hold their shape sharply. That is surface clay announcing itself. This is the main way you find glacial and primary clays, which are not layered and will not show in a cut.
Before you drive anywhere
Geologic maps and county soil surveys are free and will tell you which formations near you are shale, mudstone or lake sediment. Satellite view finds the arroyos and the fresh cuts. An hour at a screen saves a tank of gas.
Most of what you dig will not be clay
Sand, gravel, silt and loam are all common in exactly the same places, and silt in particular looks like clay right up until you wet it. That is normal and it is not a failed trip. Bring a few zip bags, take small samples from several layers and several spots, label them, and sort it out later.
Step two
What clay looks like
Three signs. Most people go looking for the third one, which is wet sticky clay, and walk right past the first two because dry clay in the ground looks like rock.
- Crackled ground The dried mud puddle pattern. Clay swells when it is wet and shrinks when it dries, and that shrinking is what cracks the surface into plates. Where you see that texture on flat ground, clay settled out there.
- Hard angular chunks Dry clay in a cut face breaks into blocky chunks that are nearly as hard as rock, often with a dark patina on some of the broken faces. Rub one. Rock and sand feel gritty. Clay feels waxy or soapy, almost slippery, even bone dry.
- Slick when wet Damp clay is unmistakable: sticky, greasy, and it records a boot print or a tire track sharply instead of crumbling. Walk damp ground and pay attention to where your feet slip.

- Topsoil and rootsSkip it. Organic matter burns out in a firing and leaves holes behind.
- Silt and loamFeels smooth when wet, which fools people constantly. It has no stretch. This is the layer that fails the coil test.
- The damp lineWater travels down until it reaches clay and then stops, so a wet streak, a mineral stain or a green stripe partway up an otherwise dry bank very often marks the top of a clay bed.
- The clay bedHard angular chunks, waxy to the touch, usually a different color from everything above and below it. This is what you came for.
- Gravel and cobblesCoarse material under the bed. When your shovel starts ringing, you are through the clay.
- The slump at the footMaterial that already fell off the face. Closest, easiest, and the worst on the site: it is a mix of every layer, plus whatever washed in. Dig the face, not the pile.
Step three
Five tests you can do standing in the hole
Three tests you can do standing in the hole
Carry water
Every one of these needs the sample wet, and a lot of good clay is bone dry in the ground. A half liter bottle is the difference between testing a site and guessing at it.
None of this tells you what temperature the clay fires to, or whether it will survive a kiln. That is part two, and it happens at home with test tiles.
- Rub it between your fingers. Wet a pinch and rub it against your thumb. Gritty means sand. Floury or powdery means silt. Slick, greasy and smooth, like a wet bar of soap, means clay. This takes four seconds and rules out half of everything you will pick up.
- Squeeze a ribbon. Work the sample to about a toothpaste consistency, put a lump between your thumb and forefinger, and push it up and out into a flat ribbon. A ribbon that gets long before it breaks is a plastic clay. One that crumbles at half an inch has very little clay in it.
- Wrap a coil around your finger. The one that decides it. Roll a coil about as thick as a pencil and bend it all the way around a finger. No cracks means good plastic clay, and it is worth taking a sample bag home. Small surface cracks mean usable but short, and it will want help later. Snaps in half means keep walking, or come back for it when you know more.
- Burnish a thumbnail across it. Smooth a small patch and run your thumbnail over it firmly. Clay takes a shine, because those flat plates line up under pressure. Silt just smears and stays matte.
- Snap a dry chunk. Break a dry piece in half and look at the fresh face. Clay breaks with a smooth, almost waxy surface and fine edges. Silt and weak shale break dusty and crumbly, and leave chalk on your fingers.
Test more than one layer
A bank can hold three different clays and two things that are not clay at all, in bands a foot apart. Test each band separately rather than mixing a scoop of the whole face, or a good clay and a bad one will average into a mediocre one and you will never know which was which.
Before the shovel
Whose ground is it
Clay in the ground belongs to whoever owns the ground. The rules are not complicated, but they are different on every kind of land, and “it was only a bucket of dirt” is not a defense anybody accepts.
| Land | Where it stands | What to do |
|---|---|---|
| Private land | Closed unless the owner says otherwise. That includes a farm field, a construction site and a vacant lot. | Ask, and get the yes before you unload a shovel. |
| BLM land | Generally open to casual collecting of reasonable amounts for personal use. Utah publishes the reasonable figure as 25 pounds a day plus one piece, and 250 pounds a year. | Hand tools only, negligible surface disturbance, nothing in developed recreation sites or anywhere posted closed. Call the local field office if you are unsure about a spot. |
| National forest | Limited personal, hobby, noncommercial collecting is allowed on most National Forest System land, but the details vary by district. | Call the ranger district that covers the ground. It is one phone call and they are used to the question. |
| Utah state trust land | Open with a permit. Trust Lands issues an annual rockhounding permit for a fee, with the same 25 pounds a day and 250 pounds a year limits. | Buy the permit first. It does not cover state parks or sovereign lands, which are separate. |
| National parks and most national monuments | Closed. So are tribal lands, military reservations, dam sites and wildlife refuges. | Do not collect. Not a sample, not a handful. |
| Highway road cuts | Almost always inside a state highway right of way, which is neither yours nor public collecting ground, and stopping on the shoulder to dig is usually illegal on top of being a good way to get hit. | Use road cuts to read the geology from the car. Then find the same formation somewhere you are allowed to stand. |
The whole table, as one question
Do you know who owns this ground, and have they said yes? Private land means ask the owner. National parks, national monuments, tribal land and wildlife refuges mean no, full stop. Everything else is a phone call to the local BLM field office, ranger district or state trust lands office before you drive out, and in Utah state trust land needs a paid annual rockhounding permit.
If you find pottery, stop
Clay beds are exactly where people made pots for thousands of years, so wild clay hunters find sherds, flakes and projectile points more often than you would guess. Collecting archaeological material without a permit is illegal on federal and state land, and vertebrate fossils are off limits to everyone except permitted institutions. Leave it where it lies, photograph it, note the spot, and report it. It is worth far more as information than as a souvenir.
If you find pottery, stop
Clay beds are where people made pots for thousands of years. Collecting sherds, flakes or points without a permit is illegal on federal and state land. Leave it, photograph it, note the spot, report it.
Rules change and this is a general picture rather than legal advice. The figures above come from the Utah Geological Survey’s collecting rules; if you are outside Utah, your state geological survey almost certainly publishes the same page for your state. Confirm with whoever manages the ground before you dig.
Before the shovel
Digging without getting hurt
A clay bank is a wall of heavy wet soil with nothing holding it up but friction. Treat it that way and this is a pleasant afternoon.
Never undercut a face
Digging into the bottom of a bank and letting it hang over you is how people get buried. Work the face from the top down, or from a spot where nothing above you can come loose. Soil is roughly a hundred pounds a cubic foot and it does not warn you.
Never work above or below someone
On a slope, everything you dislodge goes downhill. Spread out sideways, not vertically, and say so out loud before anybody starts.
Eye protection and gloves
Dry clay comes out in chunks that have to be broken, and hammering rock-hard clay throws chips. Safety glasses are cheap. Gloves save your hands from the sharp gravel that lives in every bank.
Tell somebody where you went
Most good sites have no cell signal, which is part of why they are good sites. Leave a location and a time, and take more water than you think the day needs.
Dry clay dust is silica dust
Breaking up bone-dry clay makes a fine dust you should not be inhaling, and the problem is cumulative rather than dramatic. Work upwind, or damp the material down, and wear a fitted N95 or better whenever you break up dry clay. Never sweep the dust. Wipe it up wet.
Read the sky before you enter a wash
Arroyos and slot channels are the best clay hunting and the worst place to be during a storm that is happening ten miles away. If there is weather anywhere upstream, pick a different day.
Watch where your hands go
In the desert Southwest, undercut banks and shaded ledges are exactly where snakes spend a hot afternoon. Look before you reach, and move rocks with a tool.
Stay out of old workings
An abandoned mine or a collapsed prospect pit near a good clay seam is a hard thing to walk past. Walk past it. Bad air and rotten timber do not look like anything from the entrance. Skip ground near old mines, mill sites, dumps, railroad beds, sprayed fields and busy roadsides too, because clay can hold on to metals and chemicals you cannot see or smell. Wash your hands before you eat.
The bag
What to bring
None of this is specialist gear. The only thing people forget every single time is the water.
A rock hammer or mattock
A shovel is for loose ground. A dry clay bed is closer to soft rock, and a masonry hammer or a small mattock will get chunks out of it when a shovel just skates.
Water, in a squeeze bottle
For testing, not for drinking. A squeeze top lets you wet a pinch in your palm without soaking your one sample or emptying the bottle.
Zip bags and a marker
Sample bags for the scouting half of the trip. Write on the bag before you fill it. Four unlabeled bags of brown material are four bags of nothing.
Buckets with lids
Five gallon buckets, and fewer of them than you think. Lids keep the load from drying to concrete on the drive and keep it in the bucket on a dirt road.
A tarp and old towels
For the trunk. Wet clay finds carpet, and it dries into a fine gray dust that stays in a car for a year.
Your phone, for notes
A pin on the map, a photo of the whole bank, and a photo of the exact layer with something in frame for scale. Six months later this is the only reason you can find the site again.
Step four
How to actually get it out
- Pin the spot and photograph the face before you touch it, with something in frame for scale. You will want to come back, and banks change.
- Clear the weathered skin. The outer few inches of any exposed face has been rained on, dried, cracked and re-deposited for years. Scrape it off and throw it away. The good material starts where the color goes even.
- Work one layer at a time. Follow the band sideways rather than digging a hole straight into it. You get cleaner material. Work top down and never notch under what you leave.
- Break it out dry if you can. Dry chunks are lighter to carry, far easier to grind, and they slake down beautifully at home. Wet clay is heavier, stickier, and has to dry out before you can process it anyway.
- Leave the roots, the gravel and the topsoil in the ground rather than in the bucket. Every rock you pick up now is a rock you have to screen out later, and screening is the slow part of part two.
- Take less than you want to. Twenty five pounds is a lot of clay, and it is also the published daily limit for rock and mineral specimens on BLM ground. A first trip should be a sample or two, not a truck bed, because you do not yet know whether this clay is any good.
- Fill buckets a third full, not to the brim. A five gallon bucket of damp clay runs somewhere north of seventy pounds before you add the bucket. A third is about 25 pounds, which is liftable. Full is a back injury on uneven ground.
- Label everything on the spot. Site name, layer, depth, date. Write it on the bag or on tape on the lid, not on a piece of paper that will end up in the bottom of a bucket.
- Put the face back. Push the spoil back against the bank, knock down anything you left overhanging, and do not leave a cave. Somebody else uses that trail, and negligible surface disturbance is a condition of collecting on public land, not a suggestion.
One site, one bucket, one label
The single most common wild clay regret is four identical buckets of brown material and no memory of which came from where. Once two sites get mixed you cannot separate them again, and any test you run on the mix tells you nothing about either one.
Expect these
What goes wrong on a first trip
All of these are normal, none of them mean you are bad at this, and knowing them in advance turns a wasted Saturday into a useful one.
- You dug silt It was smooth and it felt right and it will not hold a coil. Silt is the single most common false positive there is. Run the coil test before the bucket, not after.
- It is clay, but it is full of gravel and roots Usually means you took the slump at the foot of the bank, or you dug the top layer. Go back to a clean face and follow a single band sideways.
- You underestimated the weight Wet clay is roughly twice the weight of the same volume of water. That is what turns a cheerful quarter mile walk back to the car into the memorable part of the day.
- You did not label it Four buckets, one memory, no way to tell them apart. Label at the hole, every time.
- It swells, sticks to everything, and cracks like mad That is likely a bentonite or a high-swelling clay, which is common in parts of the Mountain West. Useful in small amounts as an additive later, miserable on its own.
- There is a white crust on the dry surface Soluble salts. Common in dry country and around old lake beds. Not necessarily a deal breaker, but expect surface scum on fired work. Part two deals with it.
- It is hard as concrete and you brought a shovel Correct diagnosis, wrong tool. Come back with a mattock or a masonry hammer, and do not wait for rain: a soaked bank lets go.
- You found a great bank and it is not yours Happens constantly, because good cuts are on roadsides and building sites. Note it, find out who manages it, and ask. The answer is often yes and then the site is yours for years.
Watch these
Two more worth your time
The videos above sit next to the sections they illustrate. These two are longer and cover more ground.
Take this outside
The whole trip, on one screen
Copy it into your notes app before you lose signal, or use the print button at the top of the page.
Before you go
- Confirm who owns it. Ask a private owner. Call the field office for public land.
- Check a geologic or soil map for shale, mudstone or lake sediment near you.
- Pack: mattock or rock hammer, trowel, buckets with lids, zip bags, marker, gloves, glasses, a fitted N95, tarp.
- A squeeze bottle of water for testing. This is the one people forget.
- Tell somebody where you are going and when you are back.
In the field
- Find a cut face: stream bank, arroyo wall, gully, washout.
- Look for: crackled ground, hard angular waxy chunks, slick wet patches.
- The damp line partway up a dry bank often sits right on top of the clay.
- Rub it. Gritty is sand. Powdery is silt. Slick is clay.
- Coil test. Pencil thick, around a finger, no cracks.
- Thumbnail test. Clay takes a shine. Silt smears.
- Test each layer separately. Do not mix a scoop of the whole face.
Before you leave
- Scrape off the weathered skin and dig clean material behind it.
- Follow one band sideways. Never undercut the face above you.
- Leave roots, gravel and topsoil in the ground.
- Buckets a third full. Damp clay is heavier than it looks.
- Label at the hole: site, layer, depth, date.
- Photograph the face and drop a map pin.
- Put the spoil back and leave no overhang.
Part two
What happens after the bucket comes home
Finding it is the fun half. Part two is the half that decides whether you end up with pottery, and it covers slaking, screening, settling, drying to a workable state, tempering, test tiles, shrinkage and absorption, firing range, and how to glaze and finish something whose behavior nobody has written down yet.
What studio stoneware does
A commercial clay body is blended from measured ingredients, tested batch after batch, and sold with a firing range on the bag. It shrinks a known amount, it is plastic enough to center without a fight, it fires to a color you can predict from a sample tile, and at cone 5½ it vitrifies into something dense enough to hold coffee. It is engineered to be boring, and boring is the entire point.
What wild clay does
Whatever the hillside felt like. Expect more iron and therefore warmer color, real texture instead of a smooth uniform surface, more shrinkage and more variation in it, more warping, and a much lower melting point than stoneware. Many wild clays are earthenware that will slump or melt long before cone 5½. That is not a flaw, it is a different material, and it is why every wild clay gets test tiles before it gets a pot.
The short version of the difference: a bag of studio stoneware is engineered to be predictable, and wild clay is whatever the hillside felt like. Expect warmer color, real texture, more shrinkage, more warping, and a much lower melting point. Plenty of wild clays are earthenware that will slump long before cone 5½.
No wild clay goes in our kilns
A clay body that melts takes the shelf, the posts and everything else on that shelf with it, and those belong to other people. Test tiles are fired somewhere else, low and stepped up, standing in a catch dish. Part two walks through exactly how. No outside clay goes in our kilns, wild clay included, with no exceptions.
Part two is the next lesson in this series.
Questions
The ones we get asked
Anything not covered here, ask us in the studio. Somebody has usually already tried it.
Is wild clay actually free?
The material is. The time is not. Between scouting, driving, digging, hauling and the processing in part two, a usable twenty pounds of wild clay costs a couple of weekends. People do this because the clay came from a place they can point at, not because it is cheaper than a bag of stoneware.
Can I just use the clay in my back yard?
Very possibly, and it is the best place to start because you can go back for more and nobody needs to give you permission. Dig below the topsoil, run the coil test, and treat it exactly like any other site. Plenty of good pots have come out of a vegetable patch.
How much should I bring back the first time?
A few pounds from any one layer is plenty for a first look, and a few labeled sample bags from other layers alongside it. You do not yet know whether this clay is worth anything, and processing loses a surprising amount of the volume to rock, sand and organics. Once a site proves out you can go back and take a proper load.
Will it throw on a wheel?
Some will, many will not without help. Wild clay is often either short, meaning it cracks rather than stretches, or so plastic that it collapses. Hand building forgives both, which is why most people start there. Making a wild clay throw reliably usually means blending it with something, and that is part two.
Can I mix wild clay into a commercial clay body?
Yes, for firing at home, and for a lot of people it is the most practical answer. A blend with wild clay in it is still outside clay, so it cannot be fired in our kilns. A modest proportion of a wild clay blended into a known body gives you the color and the texture of the place without betting your own kiln load on an untested material. It still needs testing, because the blend melts at whatever the mixture melts at, not at whatever the bag said.
Do I need a permit in Utah?
On state trust land, yes, and it is an annual permit with a fee. On BLM ground, generally no permit for reasonable personal amounts, though the limits and the closures still apply. On national forest land the details vary by district, so call them. On private land you need the owner rather than a permit. See the table above, and confirm with whoever manages the ground.
What if I find a pottery sherd while I am digging?
Leave it exactly where it is. Photograph it, note the location, and stop digging in that spot. Collecting archaeological material without a permit is illegal on federal and state land, and beyond the law, a sherd in place tells archaeologists something and a sherd in your pocket tells nobody anything. It is also a useful sign: people made pots there, which is decent evidence there is good clay nearby.
Go dig
Find one cut bank this month
You do not need a plan or a truck to start. You need a stream bank you are allowed to stand on, a bottle of water and twenty minutes. Wet a pinch, roll a coil, bend it around your finger, and you will know more about the ground where you live than you did this morning.
Which version would you like to print?
Videos come out as a labeled box with the title and channel to search for, since paper does not play them.