Pottery Date Night
 Bring All Your Friends Free Week
 Give a Month of Pottery
 Private Pottery Parties

 The Welcome Booklet
 Your First Ten Sessions
 The Pottery Process
 Finding the Studio
 Your Classes Never Expire
 The Four Tables
 Who’s Who
 The Rewards Program
 Flux Glazes
 The Calculators
 Kiln Tracker
 Holiday Kiln Deadlines

 Beginner’s Tool Set
 Fingernail Clippers
 Mayco Clay Mender
 Epoxy for Kintsugi
 Applicator Bottles
 Large Bead Rack
 Raku Workshop
 Nighttime Raku
 Horsehair and Feather Raku
 The Clay Hole T-Shirt
 Embroidered Crewneck
 Zip-Up Hoodie
 Pre-Made Bisqueware
 Glaze Catchers
 Kiln Cookies
 Clay Cubby Rental
 The Glaze Bible, Printed
 The Book of Molds, Printed
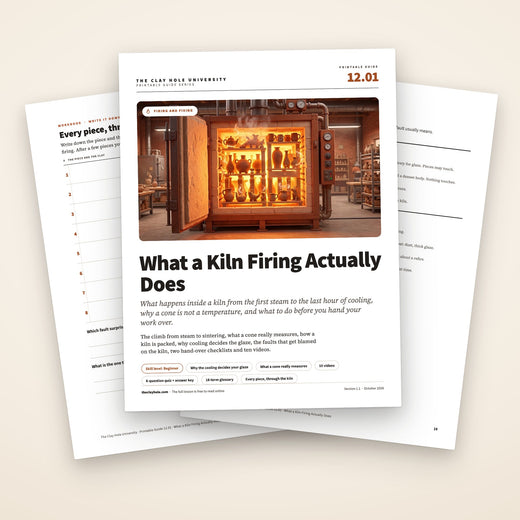
 Printable Pottery Guides
 Free Printable Trackers
 Gifts for Potters
 Christmas Pottery Ideas
 Mother’s Day Gift Ideas
 Pottery Date Night
 Studio Calendar
 2027 Studio Events
 What Should I Do Today?
 How to Throw on the Pottery Wheel
 How to Make a Pinch Pot
 How to Tap Center a Pot
 The Five Stages of Clay
 Is Pottery Hard to Learn?
 Pottery Wheel Practice Drills
 20 Easy Hand-Building Projects
 Everything That Sounds Wrong

 A Beautiful Piece, Every Time
 Slab Roller Tips
 Any Dish as a Slump Mold
 Slab Roller & Slab Mold Certification
 The Pottery Skill Tree
 Clay & Pottery Calculators
 Logging Your Pottery and Glazes
 The Pottery Dictionary
 Why Did My Pottery Do That?
 The Pottery Cone Chart
 Pottery Myths, Fact-Checked
 Is Handmade Pottery Food Safe?
 Incredible Ceramic Artist Videos
 How Dan Throws Giant Pots
 How to Dry Your Pottery
 The Pottery Wheel Introduction
 Pottery by Zodiac Sign
 Personality and the Pottery Wheel
 Pottery for Engineers
 ADHD, Hyperfocus, and Never Running Out
 Hobbies for Burnout
 Screen-Free Hobbies for Adults
 Every Addiction I Ever Had Lost to Art
 Functional Pottery Is Engineering
 How Do We Compare?
 Pottery Classes by City
 Every Pottery Studio in Utah
 Pottery in Draper
 Featured Members
 The Signature Wall
 Making Friends as an Adult Is Brutal
 The Clay Hole Commandments
 2027 Pottery Contests
 2027 Studio Parties
 Gallery Night

 Scream It Into the Void
 Destroy the Glaze Wall
 Daily Affirmation Cards
 Everything That Can Go Wrong
 Subscribe to Our Newsletters
 Contact The Clay Hole
 Corporate Team Building

 Glaze Combinations
 Glazes We Do Not Carry
 Making Glaze Test Tiles
 The Mega Glaze Tool
 How to Use the Mega Glaze Tool

 Glaze Brushing Techniques
 How to Use Underglaze
 How to Use Dipping Glazes
 Glaze Problems, Causes and Fixes
 The Dipping Glaze Guide

 Making a Glaze Catcher
 Fused or Sharp After Firing
 The Signature Wall
 His Viral Videos
 His Own Ceramics
 Meet Mud
Pottery, from the inside of the kiln
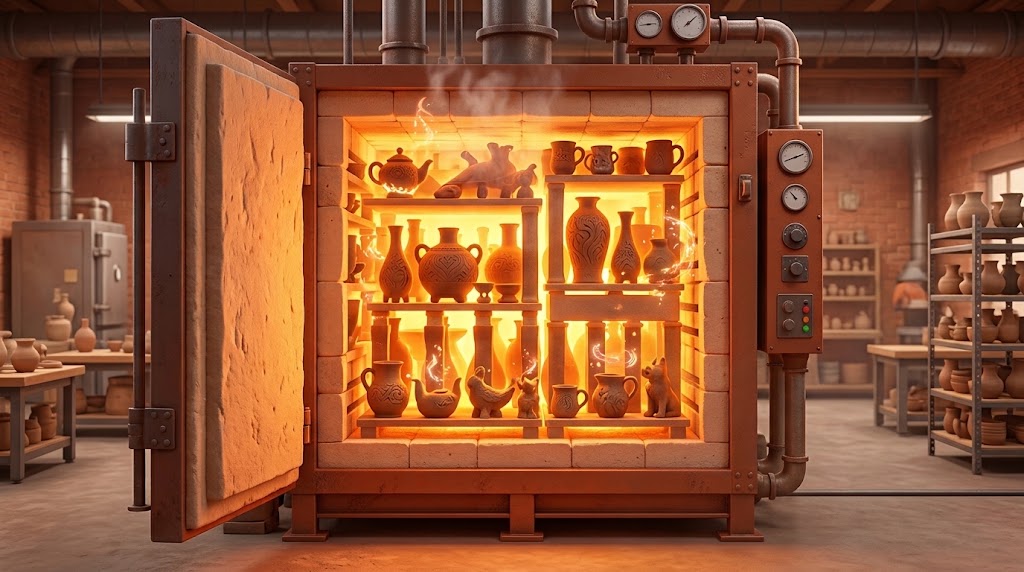
What a kiln firing actually does
Your piece goes in soft, chalky and fragile. Days later it comes out hard enough to ring when you flick it, and it will never be clay again. Here is what happens in those hours, in the order it happens, and which parts of it you actually control.
Written for members standing next to a shelf of drying work, and for anybody who has ever wondered why a mug takes three weeks.
The whole thing
A firing in seven sentences
The one idea to keep
A kiln does not dry your pot and it does not bake it. It rebuilds it, permanently, and almost everything that goes wrong in there was already built into the piece before the door closed.
- Water leaves first. Any moisture still in the clay turns to steam somewhere around 212°F, and steam takes up roughly 1,600 times the room that water did.
- Then the clay burns clean. Organic matter and chemically bound water cook out of the body between about 660°F and 1,300°F, which is why a kiln room smells the way it does. Once that water is gone, the clay will never soften in water again.
- Then the particles weld. Around 1,650°F the clay starts to sinter, meaning the grains fuse where they touch without actually melting. The pores stay open at this point. The point of no return came earlier, when the bound water left.
- We stop there for the bisque. Our first firing goes to cone 05, hard enough to handle and still thirsty enough to drink glaze.
- The second firing is about glass. You glaze it, we fire it to cone 5½, and the glaze melts into a genuine layer of glass while the clay body tightens up underneath it.
- Cones measure work, not heat. A cone bends from time and temperature together, so a kiln that reads the right number on its display can still be underfired.
- Cooling is half the firing. Color, matte, gloss and the sharp crack called dunting are all decided on the way down, which is why we do not open a hot kiln for anybody.
A quick look at both firings in about three and a half minutes. Nothing loads until you press play.
Why this page has both
Read it, then watch somebody do it
So: lists on the left, potters on the right
Most sections here pair the words with a video. Read the list, watch the hands, then go put your work on the shelf.
Video is wonderful for watching a pair of hands and useless for going back three seconds to check a number. It moves at the teacher’s pace, not yours, and the detail you needed slides past while you are still thinking about the last one.
Text is the opposite. You control the speed, your eye can jump back up a list without losing its place, and a number sits still long enough to be copied down. What text cannot do is show you what a properly packed kiln shelf looks like, or how fast a cone actually slumps.
The two together beat either one alone. Reading builds the frame, and then watching drops the real thing into a frame that is already built, so you notice what the teacher is doing rather than just enjoying it. That is also why the lists here are short and blunt: they are meant to be read off a phone propped against a bucket, in a studio, with clay on your hands.
If you only have two minutes, hit Nutshell at the top of the page. Same teaching, a fraction of the words, and it remembers your choice on every other page on this site.
Two firings, two jobs
Why your pot goes in the kiln twice
A quick look at both firings, from greenware to the finished piece, in about three and a half minutes.
You could fire a glazed pot once. Plenty of production potters do, and it saves a whole firing. We do not, and the reason is that the two firings are asking the clay for opposite things.
The bisque firing is a demolition job. It drives out water, burns off every scrap of organic material, and stops just past the point where the clay particles weld to each other. What comes out is hard, permanent, and still full of tiny open pores. That porosity is the entire point: a bisque pot sucks glaze off a brush like a sponge, which is what lets a thin even coat stick to a vertical wall.
The glaze firing is a construction job. It goes far hotter, melts the glaze into a real skin of glass, and tightens the clay body underneath until the piece will hold coffee without weeping through the wall.
Ask one firing to do both and the gas escaping from the clay body has to fight its way out through a glaze that is already melting over the top of it. That is where pinholes and blisters come from. Two firings give the body a chance to finish its business before anything seals it in.
| Bisque firing | Glaze firing | |
|---|---|---|
| Goes in as | Bone dry clay | Bisqueware with glaze on it |
| Our target | cone 05 | cone 5½ |
| The job | Burn the body clean and sinter it | Melt the glaze and tighten the body |
| Comes out | Hard, pale, porous, thirsty | Glassy, dense, finished |
| Pieces may touch | Yes, and they can nest | Never. Melted glaze welds them together |
| What it costs you | Nothing. Bisque firings are free, every time | Five cents per cubic inch, $4.80 minimum |
The climb
What happens, in the order it happens
A firing is not one event. It is a stack of changes, six milestones in all, each with its own temperature and its own way of ruining your day if it is rushed. Reading up the thermometer:
212°F. The water leaves.
Free water still sitting between the clay particles flashes to steam. Steam occupies about 1,600 times the volume the water did, so if it cannot get out through the pores it leaves through the wall instead. This is the stage that breaks damp pots, and the only defense is drying, not luck.
660°F to 1,300°F. The body burns clean.
Organic matter cooks out and chemically bound water is driven off the clay molecules themselves. Once that water is gone, the clay will never soften in water again. Sulfur and carbon compounds go up the vent. Rush this and you seal carbon inside the body, which comes back later as a gray core or as bubbles in the glaze.
1,063°F. Quartz inversion.
The silica crystals in the clay physically change shape and the whole piece jumps in size, then shrinks back through the same point on the way down. Fast movement through this window is the classic cause of a clean crack in a piece that was fine going in.
Around 1,650°F. Sintering.
Clay particles begin fusing to each other at their contact points without melting. It holds the piece together and leaves the pores open. The point of no return came earlier, when the water bound inside the clay left.
1,888°F. Our bisque peak, cone 05.
Hard enough to survive glazing and handling, still porous enough to drink glaze. Fire a bisque much hotter and the pores start closing, which is why an overfired bisque takes glaze badly and comes out thin and patchy.
Roughly 2,167°F. Our glaze peak, cone 5½.
The glaze is fully liquid and running smooth, and the clay body is vitrifying, meaning glass is forming between the particles and filling the pores. We hold here so the melt has time to settle flat and heal its own bubbles.
Those Fahrenheit numbers are approximate on purpose
Cone temperatures shift with how fast the kiln climbs. Orton lists cone 6 at 2,165°F, 2,232°F or 2,269°F depending on whether you get there at 27, 108 or 270 degrees an hour. That spread of over 100°F is exactly why potters talk in cones instead of degrees, which is the next section.
Under two minutes from the AMACO Classroom kiln series, on the boiling point and the other important firing temperatures.
Heat work
A cone is not a temperature
About six minutes from a potter on heat work against temperature, choosing and using cones, and reading the results.
Every glaze jar in the studio has a cone number on it, and almost everybody reads that number as a temperature. It is not one. A cone measures heat work, which is temperature and time multiplied together.
A pyrometric cone is a small pyramid mixed from the same kinds of materials as your clay and glaze. As it takes on heat work it softens, and gravity folds it over. When the cone has bent over to about four or five o’clock, the work beside it has taken the same beating. It is not reporting the air temperature in the kiln. It is reporting what happened to the pots.
This matters because a thermocouple only ever tells you one thing: how hot the air is right now. Two kilns can both read 2,167°F and hand you completely different pots, because one of them got there in six hours and the other took ten. The slow one delivered far more heat work, and the glaze knows it even if the display does not.
The oven comparison is the one that lands. A roast at 350°F for twenty minutes and a roast at 350°F for two hours are not the same dinner. The oven read the same number both times.
What cone 5½ means, and why we fire there
We take the glaze firing to cone 5 with a twelve minute hold at the top. That hold adds heat work without adding temperature, which lands the work between cone 5 and cone 6. We call it cone 5½, and we write it that way on purpose. Glazes labeled for cone 5 and glazes labeled for cone 6 both mature properly in that window, which is what lets one wall of 650+ glazes work together on the same shelf. Our bisque goes to cone 05, which is a completely different and much lower cone. The zero is not a typo.
One more practical consequence. Because cones measure work rather than heat, a kiln can be genuinely underfired while its controller insists everything went perfectly. That is why witness cones still go into kilns in 2026, decades after digital controllers arrived. The cone is the only thing in there that experienced the firing the way your pot did.
Practical upshot: if a glaze comes out dry and unmelted, it is either a coat that went on too thin or not enough heat work, rather than not enough degrees. Show an instructor before any refire.
Just over three minutes from the Edward Orton Jr. Ceramic Foundation on when a cone 6 counts as fired to cone 6, with a look at the cone 6 data.
Reading a bent cone
- Standing up. That cone never got its heat work. Underfired.
- Bent to about four or five o’clock. Perfect. This is what a cone hitting its number looks like.
- Tip flat on the shelf. Slightly past. Usually still fine, sometimes glossier than you wanted.
- Melted into a puddle. Overfired. Check the shelf under your work before you touch anything.
Three cones in a row, one under and one over your target, turn a pass or fail into a measurement.
Packing the box
Loading is not storage, it is engineering
A kiln heats unevenly by nature. Elements are in the walls, so the outside of the load climbs faster than the middle, and the way work is stacked changes how heat moves through it. Members do not load our kilns, but knowing what the load wants explains a lot about why we ask for what we ask for.
A bisque load
- Pieces may touch, and even nest. Nothing is melting, so bowls can stack rim to rim and small work can sit inside bigger work.
- Heavy and thick goes low, delicate goes high. Weight on top of thin bisque is how handles snap.
- Nothing is packed solid. Air and escaping gas need routes through the load, or the middle of the stack fires differently from the edges.
- Everything must be bone dry. Room temperature against the back of your hand, not just dry to the eye.
- Slow at the start. A preheat below boiling gives the last of the water a way out.
A glaze load
- Nothing touches anything. Molten glaze is glue. Two pieces in contact come out as one piece.
- Leave a finger gap. Enough room around each piece that a runny glaze has somewhere to go that is not a neighbor.
- Bare, clean feet. Any glaze on the bottom face welds the pot to the shelf and takes the shelf surface with it.
- Kiln cookies under every glazed piece, and a catcher too under anything that runs. A cookie is a cheap sacrifice. A kiln shelf is not.
- Shelves get washed, not gambled on. Kiln wash is the layer that lets a mistake be chipped off instead of ground out.
Nearly half an hour on loading greenware for a bisque and running a Kilnmaster controller. It is made for people with a kiln of their own, so staff do this part here.
A top loading kiln packed for a glaze firing, with the firing program, the unload and a short chat about Orton cones, in about twenty five minutes.
The half nobody watches
Your glaze is decided on the way down
Matt from Ceramic Materials Workshop on what makes a glaze matte. The description says it is not just the cooling. About twenty five minutes.
Almost everybody pictures a firing as a climb to a number. The climb is only half of it, and it is the boring half. At peak temperature your glaze is a hot liquid with nothing decided about it yet. Much of what you actually care about, the gloss, the matte and the depth of color, is settled while the kiln comes back down.
Crystals grow on the way down. In many matte glazes, microscopic crystals form in the cooling melt and scatter light instead of reflecting it. Cool fast and they may never get time to grow, so the same glaze can come out glossier. Cool slowly through the right window and it can come out soft and buttery. How much the cooling matters depends on the glaze chemistry, so it will not turn every glaze matte.
Color shifts too. Several of the most dramatic mid-range glazes get their depth from what happens between about 1,900°F and 1,500°F on the descent. Rush that stretch and the color goes flat and thin.
And quartz inversion happens again. The same silica jump at 1,063°F that the piece went through on the way up runs in reverse on the way down, and this time the piece is rigid glass-bonded ceramic rather than porous bisque. Yank heat out of it here and you get dunting: a clean, sharp crack that appears in a piece which was perfect an hour earlier.
This is why we will not open a warm kiln for you
We know the wait is agonizing and we get asked constantly. Cracking a kiln early sends a blast of room temperature air across pieces that are still moving through their own contraction, and it does not just risk your mug. It risks everything on the shelf, including work belonging to people who are not standing there. A kiln that comes down on its own schedule is the cheapest insurance in the building.
Diagnosis
When it goes wrong, the kiln is rarely the culprit
Almost every firing failure was built into the piece days earlier. Here are the ones we see most, what actually caused them, and whether the piece can be saved.
It exploded, and took its neighbors with it
Cause: water, not air. Moisture trapped in a thick wall or a solid base turns to steam, and steam needs about 1,600 times the room. Air pockets from wedging are the famous suspect and they are mostly innocent, because trapped air only expands about a quarter of its volume.
Next time: dry longer than feels necessary, and check by touch. Bone dry clay feels the same temperature as the room. Damp clay feels cold on the back of your hand because it is still evaporating.
This piece: gone. Take the lesson.
A clean, sharp crack that was not there before
Cause: almost always thermal, and usually cooling. Dunting cracks are sharp edged and often run in a straight line or a smooth curve, unlike a drying crack which tends to be ragged and S shaped.
Next time: even wall thickness matters more than thin walls. A pot that is half an inch thick at the base and an eighth of an inch at the rim is two different objects trying to shrink at two different rates.
This piece: not repairable as functional ware. Kintsugi is a genuinely good answer, and we sell the epoxy for it.
The glaze pulled away and left bare clay
Cause: crawling. The glaze could not hold onto the surface, so as it melted it drew itself into islands. Usually dust, oil from fingers, glaze applied too thickly, or glazing over a spot that was still damp.
Next time: handle bisque with clean, dry hands, and give the piece a quick rinse before glazing rather than a wipe with a wet sponge that leaves it saturated.
This piece: often rescuable. Worth a refire, but show an instructor first.
Tiny pinholes or popped blisters all over
Cause: gas escaping from the clay body after the glaze had already sealed over. Either the bisque did not fully burn out, or the glaze firing climbed through the melt too quickly for bubbles to heal.
Next time: most pinholes start with the pot or the coat, so rinse the dust off the bisque and keep the glaze even. A hold at the top of the firing helps the melt heal, and very thick glaze makes it worse.
This piece: a refire sometimes heals it. Sometimes it makes it worse. Ask an instructor before committing.
It is fused to the shelf, or the foot is razor sharp
Cause: glaze on the bottom face, or glaze that ran down and pooled at the foot. Once it melts it is glass, and glass sticks to everything.
Next time: zero glaze on the bottom, and stop an eighth to a quarter inch up the side. A quarter inch for anything that runs.
This piece: a piece fused to the kiln shelf is ours to deal with, so tell us before you touch it. For a pot stuck to its cookie or to another pot, a sharp drip or a rough foot, we have a whole page on grinding them back to usable. It is right here.
It slumped, warped or went oval
Cause: at cone 5½ the clay body is genuinely soft. A wide shallow form with thin walls, or a piece with uneven thickness, will move under its own weight.
Next time: thicker floors on wide forms, and compress the base properly while throwing. Also worth knowing: a warped rim usually started as a rim that was handled while damp.
This piece: permanent. Ceramic does not un-slump.
The glaze looks dry, chalky and unmelted
Cause: not enough heat work, or a glaze applied far too thinly, or a glaze that wanted a different cone than the one it got.
Next time: check the coat count on the jar. Most brush-on glazes want three coats, and fan and hake brushes often cover in two.
This piece: a good refire candidate. Show an instructor first, then add a coat and refire.
The color came out nothing like the sample tile
Cause: usually thickness, sometimes the clay body underneath, occasionally a neighbor. Most glazes are dramatically thickness-dependent, and a dark clay under a translucent glaze is a different result from a white one.
Next time: write down what you used, every time. A photo of the jars on your phone takes three seconds and turns a mystery into a recipe.
This piece: keep it. Half the studio’s favorite pots were accidents somebody could not repeat.
A test of whether air pockets or moisture make clay blow up in the kiln, in about eight minutes. More of the myths live on our pottery myths page.
Your half of the deal
What you control, and what the kiln controls
Prop your phone against something and work down this. It is the whole page reduced to things you can actually do with your hands.
Before it goes on the bisque shelf
- Bone dry. Back of your hand, and it feels room temperature, not cool. Thick work can stay wet in the middle, so give it longer.
- Walls roughly even. No half inch base under an eighth inch wall.
- Nothing fully enclosed without a hole in it somewhere.
- Attachments checked. Press a handle and see if it moves.
- Studio clay only. Outside clay can destroy a kiln, and is forbidden.
- Signed and on the correct shelf so it gets loaded.
Before it goes on the glaze shelf
- Bottom face completely bare, and clean to the touch.
- Glaze stopped an eighth to a quarter inch up the side.
- Kiln cookie under every glazed piece, and a catcher too under anything that runs.
- Drips and fingerprints wiped off while they are still dry.
- Kiln ticket filled in: name, date, clay body, every glaze used.
- Firing paid for, and the glazes written down somewhere you will find them.
And the things you do not control
The ramp rate, the hold, the cooling curve, which kiln it lands in, and when it gets fired. Kilns run when there is enough work to fill one, which here usually means a wait of one to two weeks in each queue. Nothing you do speeds that up, so plan around it rather than against it: from wet clay to finished pot is realistically about a month, and roughly two months before you have work you are proud of.
In this building
How a firing works at The Clay Hole
About twelve minutes on vitrification and what it has to do with food, microwave and dishwasher safety, including porosity tests and crackle glazes. The glaze matters too, so check the Food Safe Lookup before food goes in a piece.
Your work gets fired twice and you never touch a kiln. Staff load them, program them and unload them, which is why the rules above are written as things to hand over rather than things to operate.
Bisque firings are free. Every time, at every Level. You only ever pay for the glaze firing, and that is charged by volume: five cents per cubic inch with a $4.80 minimum, measured on the box your piece fits inside. An average piece lands around $7. A very large one can run past $50, and there is a $600 ceiling above 12,000 cubic inches so a genuinely enormous piece cannot run away with you.
Several small pieces can ride through a glaze firing together as one charge if they sit on one six inch kiln cookie, at least a quarter inch apart, and are small enough together to stay under the flat charge, which is worth knowing before you pay for four earrings separately.
Kiln cookies are member-made. Scrap clay, rolled about as thick as a chubby tortilla, and three quarters of an inch wider all round than whatever is sitting on it. They exist because a kiln shelf costs hundreds of dollars and a cookie costs nothing.
Every glaze firing needs a kiln ticket. Name, date, clay body, and every glaze you used. The glaze list is not bureaucracy: if something goes wrong in the kiln, that list is how anybody works out what happened, and it is how you repeat a result you loved.
Fired work has a pickup deadline. A card goes on your finished pieces and they are cleared two weeks later. If you are about to go away, talk to us before you leave rather than after.
Work out your own firing cost
Length by width by height at the widest points, times five cents. Our calculators page does it for you, and the kiln firing product takes the payment.
Other fires
Everything above assumed an electric kiln
Our bisque and glaze kilns are electric, and an electric kiln fires in oxidation: plenty of air, clean burn, predictable color. That is not the only way to do it, and the alternatives change the chemistry rather than just the temperature.
Reduction
A gas kiln starved of oxygen pulls it out of the clay and glaze instead. Copper turns blood red rather than green, iron goes celadon, and whole families of glazes exist that simply cannot be made in an electric kiln.
Raku
Pieces are pulled out glowing at low temperature and dropped straight into combustible material. The thermal shock crackles the glaze and the smoke blackens the bare clay. Fast, dramatic, and not food safe. We run it as a separate workshop.
Wood, salt and soda
The fuel becomes part of the surface. Wood ash lands on the pots and melts into a glaze of its own; salt or soda thrown into the kiln vaporizes and builds a skin on whatever it touches. Days of firing, and no two pots alike.
Twenty narrated minutes inside a gas reduction firing, from packing to unloading.
Want to stand next to a raku firing?
Raku workshops run separately from membership, everyone gets certified before their first one, and it is the only chance most people get to watch a pot come out of a kiln while it is still glowing.
Asked constantly
Firing questions we get every week
How long does a firing actually take?
Counting the cooling, about three days per firing. The climb is usually eight to twelve hours, and coming back down takes a day or two on top of that, longer for a big load or a well insulated kiln. Add the wait for a kiln to fill and two firings per piece, and a month from wet clay to finished pot is normal.
Why does my piece come out smaller than I made it?
Because it is. Clay shrinks as water leaves it during drying, then shrinks again as the body sinters and vitrifies. Total shrinkage from wet clay to fired pot commonly lands somewhere around ten to fifteen percent depending on the clay body. If you are making something that has to fit something else, make it noticeably bigger than the target.
Can I fire something twice?
Usually yes, and refiring is a completely legitimate move for a glaze that came out too thin or too dry. Ask an instructor first, because some faults get worse rather than better on a second trip, and a refire is another paid glaze firing.
Why is bisque free when glaze firings cost money?
Partly because we would rather nobody hesitated over the firing that turns their work permanent, and partly because a bisque load packs far tighter. Pieces can touch and nest, so far more work fits in the same box. A glaze load needs a gap around everything and holds a fraction as much.
Is my finished piece food safe?
The clay is the easy half: our bodies fire vitrified, so they soak up very little. The glaze is the half that varies, jar by jar, and dishwasher and microwave are separate claims, so check the Food Safe Lookup before food or drink goes in a piece. A glaze also has to melt properly for any of it to count, which is what our firing schedule is for. The exceptions are worth knowing: raku is decorative only, and a glaze that came out crawled, crazed or unmelted has not done its job and should not hold food.
Can you open the kiln early? Just this once?
No. Cold air across a cooling load risks every piece in there, not just yours, and the work belongs to people who are not in the room to consent to the gamble.
Why do you write cone 5½ instead of cone 5 or cone 6?
Because neither one is accurate. We fire to cone 5 and hold at the top for twelve minutes, and that hold puts the work between cone 5 and cone 6 in heat work terms. Writing plain cone 6 would overstate it and plain cone 5 would understate it, and glaze results depend on the difference.
Where do I go next?
Three that pair well with this one: how to properly dry your pottery, since drying is where most firing failures are actually born; the full pottery process for where firing sits in the whole arc; and the many myths of pottery, which fact checks a lot of what people believe about kilns.
One last thing
The kiln is the only part you hand over
That is the short version
Everything before the door closes is yours. The wall thickness, the drying, the bare foot, the coat count, the cookie. Everything after it belongs to physics and to a schedule somebody wrote years ago. Get your half right and the kiln will keep handing you back things you did not quite believe you made.
Dry it properly, keep the foot bare, and let the kiln come down on its own. There is a much longer version of this page behind the Comprehensive toggle up top, with ten videos and every temperature along the way.
Nothing on this page loads a YouTube player until you press play, and videos are embedded through youtube-nocookie.com.
Which version would you like to print?
Videos come out as a labeled box with the title and channel to search for, since paper does not play them.