Pottery Date Night
 Bring All Your Friends Free Week
 Give a Month of Pottery
 Private Pottery Parties

 The Welcome Booklet
 Your First Ten Sessions
 The Pottery Process
 Finding the Studio
 Your Classes Never Expire
 The Four Tables
 Who’s Who
 The Rewards Program
 Flux Glazes
 The Calculators
 Kiln Tracker
 Holiday Kiln Deadlines

 Beginner’s Tool Set
 Fingernail Clippers
 Mayco Clay Mender
 Epoxy for Kintsugi
 Applicator Bottles
 Large Bead Rack
 Raku Workshop
 Nighttime Raku
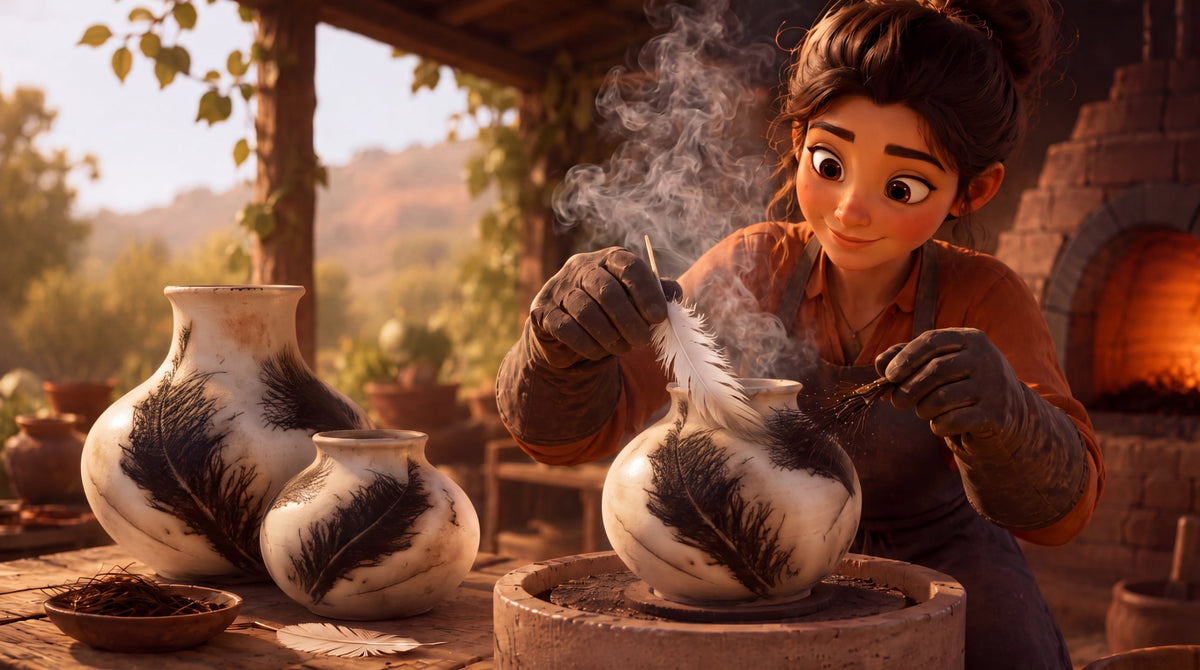
 Horsehair and Feather Raku
 The Clay Hole T-Shirt
 Embroidered Crewneck
 Zip-Up Hoodie
 Pre-Made Bisqueware
 Glaze Catchers
 Kiln Cookies
 Clay Cubby Rental
 The Glaze Bible, Printed
 The Book of Molds, Printed
 Printable Pottery Guides
 Free Printable Trackers
 Gifts for Potters
 Christmas Pottery Ideas
 Mother’s Day Gift Ideas
 Pottery Date Night
 Studio Calendar
 2027 Studio Events
 What Should I Do Today?
 How to Throw on the Pottery Wheel
 How to Make a Pinch Pot
 How to Tap Center a Pot
 The Five Stages of Clay
 Is Pottery Hard to Learn?
 Pottery Wheel Practice Drills
 20 Easy Hand-Building Projects
 Everything That Sounds Wrong

 A Beautiful Piece, Every Time
 Slab Roller Tips
 Any Dish as a Slump Mold
 Slab Roller & Slab Mold Certification
 The Pottery Skill Tree
 Clay & Pottery Calculators
 Logging Your Pottery and Glazes
 The Pottery Dictionary
 Why Did My Pottery Do That?
 The Pottery Cone Chart
 Pottery Myths, Fact-Checked
 Is Handmade Pottery Food Safe?
 Incredible Ceramic Artist Videos
 How Dan Throws Giant Pots
 How to Dry Your Pottery
 The Pottery Wheel Introduction
 Pottery by Zodiac Sign
 Personality and the Pottery Wheel
 Pottery for Engineers
 ADHD, Hyperfocus, and Never Running Out
 Hobbies for Burnout
 Screen-Free Hobbies for Adults
 Every Addiction I Ever Had Lost to Art
 Functional Pottery Is Engineering
 How Do We Compare?
 Pottery Classes by City
 Every Pottery Studio in Utah
 Pottery in Draper
 Featured Members
 The Signature Wall
 Making Friends as an Adult Is Brutal
 The Clay Hole Commandments
 2027 Pottery Contests
 2027 Studio Parties
 Gallery Night

 Scream It Into the Void
 Destroy the Glaze Wall
 Daily Affirmation Cards
 Everything That Can Go Wrong
 Subscribe to Our Newsletters
 Contact The Clay Hole
 Corporate Team Building

 Glaze Combinations
 Glazes We Do Not Carry
 Making Glaze Test Tiles
 The Mega Glaze Tool
 How to Use the Mega Glaze Tool

 Glaze Brushing Techniques
 How to Use Underglaze
 How to Use Dipping Glazes
 Glaze Problems, Causes and Fixes
 The Dipping Glaze Guide

 Making a Glaze Catcher
 Fused or Sharp After Firing
 The Signature Wall
 His Viral Videos
 His Own Ceramics
 Meet Mud
Raku Techniques
Horsehair and feather raku.
No glaze. No brush. You pull a pot out of the kiln glowing, let it settle to around 1,100°F, lay a strand of hair or the edge of a feather against it, and the thing burns itself into the clay in about a second. What is left is a black line nobody could draw on purpose. Here is how the marks actually form, how to prepare a pot that will take them, and what to do on firing day.
Written for members of The Clay Hole, and useful to anybody with access to a raku kiln. All nine videos on this page belong to the potters who made them, every one is free, and nothing from YouTube loads until you press play.
Written for members of The Clay Hole, and useful to anybody with access to a raku kiln. The video on this page belongs to the potter who made it, it is free, and nothing from YouTube loads until you press play.
Jump to a section
Which version would you like to print?
Videos come out as a labeled box with the title and channel to search for, since paper does not play them.
Start here
Two questions decide this, and neither one is about your hands.
There is no glaze and no pigment in horsehair raku. Hair is carbon, a hot bare bisque pot is a sponge for carbon, and the mark you get is the pot staining itself. Everything that goes right or wrong follows from that one fact.
Question one: is the surface polished?
Carbon lands on whatever texture is there. A rough bisque surface scatters it and you get a soft gray worm. A surface that has been burnished, or coated in terra sigillata, or both, holds the edge and you get a black hair.
This is decided days before the fire, and it is the single biggest difference between a first pot and a good one.
Question two: is the pot still hot enough?
The marks only take between roughly 900°F and 1,300°F, and you want to be near 1,100°F when the hair goes on. Below that the hair curls up and leaves nothing. Above it the mark lands and burns straight back off while you watch.
A pot pulled at around 1,200°F gives you well under two minutes, and it cools faster than anybody expects.
And one thing that is not a question
A horsehair pot is decorative. No glaze, a low firing, an open porous body, and a decoration made of soot. It is not food safe, it is not watertight, and no sealer changes either of those. It holds dried flowers or it holds nothing.
Weeks before the fire
Three things to get right beforehand.
None of these can be fixed on firing day, which is why they matter more than anything you do at the kiln.
A shape the tongs can hold
Somebody in heavy gloves has to lift this out of a glowing kiln. A rounded body with a neck that flares even slightly is close to ideal. Wide bowls, plates and platters give the tongs nothing to grip and cool unevenly. Keep the first one under about four pounds.
Clay with grog in it
Kiln heat to open air in one second cracks a tight, smooth body. Of the clay bodies we carry, our two picks for raku are B-Mix with Grog and Berlin Gray. Throw the walls a little thicker than you normally would, because thicker walls hold heat longer and buy you working time.
A polished surface, and no glaze
Burnish the pot at hard leather hard with a smooth stone, or brush on several thin coats of terra sigillata over bone dry work, or do both. Then bisque fire it and bring it bare. Glaze is the one thing that stops this working, because carbon cannot soak into glass.
Super Quick Terra Sigillata Plus Feather and Horsehair Raku Firing
Ceramic Arts Network
A two minute excerpt from Raku Firing with Marcia Selsor, from Ceramic Arts Network, with its steps as text on screen. The closing card points to the full narrated version in the Ceramic Arts Network shop. Watch it on YouTube.
Why this page exists
Read it, watch it, then read it again.
There are excellent videos about horsehair and feather raku and nine of the best are sitting further down this page. Watch them. But video on its own is a strange way to learn something that is over in two minutes, happens next to a kiln, and cannot be paused while you think.
The decoration takes under two minutes.
Most of pottery forgives you. A bad pull gets another pull, a thin spot gets more clay, a glaze you hate often gets another coat and a second firing. Horsehair forgives you only by starting the surface over, which means another raku firing, and that is never certain. The pot leaves the kiln, the window opens, and a minute or two later the window has closed and what you have is whatever you managed in those seconds. What you need in that moment is not inspiration. It is the order of the steps.
A page has no playback speed.
A twenty minute firing video holds maybe ninety seconds of actual decorating, and you cannot skim to find them with a glove on. A page is random access. Step seven is one thumb away. Minute 14:22 is a scrub bar, a mis-tap, an ad, and a lost place, while the pot on the stand keeps cooling the entire time.
Watching teaches what writing cannot.
How fast a hair curls. How close somebody holds a feather before it catches. How little material actually goes on, and how calm the people who are good at this look while doing it. Nobody has written those down successfully and we are not going to be the first. That is the job the videos are doing.
The order we would actually suggest
Read the firing day steps once, cold, days before you fire. Then watch the two minute Marcia Selsor clip, a quick look at terra sigillata and the feather and horsehair firing. Then keep this page open on your phone at the kiln and read the short list again while the kiln comes up to temperature. Reading first is what makes the watching useful, because an expert doing something you have no words for yet is mostly just a person being good at something in front of you.
The part nobody explains
Nothing is being painted on. The pot is staining itself.
There is no glaze in this process and no pigment. A strand of hair is mostly carbon, and a very hot, very dry, very porous bisque surface is extremely good at grabbing carbon and never letting go. The hair burns, the carbon has nowhere to go but sideways and down, and the surface locks it in place as the pot cools. That is the whole mechanism, and understanding it is what tells you why every rule further down this page exists.

- The polished skin. Burnished clay, terra sigillata, or both. Tight, flat and slightly absorbent. This layer is what makes a line sharp instead of fuzzy.
- The open bisque body underneath. Fired once, no glaze, full of microscopic holes. This is the sponge that makes the whole trick work.
- The hair, for about a second. It touches, it sizzles, it curls, it is gone. You are not drawing with it. You are placing it and letting the heat do the drawing.
- Carbon driven into the surface. Not sitting on top of it. The mark is inside the skin now, which is why it survives a gentle wash. A scouring pad or stiff brush will still take it.
- The smoke. It drifts, and wherever it touches hot clay it leaves a fainter gray shadow. Those halos beside the black line are half the beauty of the technique and you have almost no control over them.
This is also why a horsehair pot is decorative, full stop
No glaze, a low firing, an open porous body, and a decoration made of soot. A horsehair pot is not food safe, it is not watertight, and it is not dishwasher anything. It holds dried flowers, it holds nothing, it sits on a shelf and looks extraordinary. Careful sellers say so on the tag, and so do we.
The one variable that matters most
The window is about four hundred degrees wide.
Almost every disappointing horsehair pot is a temperature problem, not a technique problem. Too cool and the hair curls, smokes a little, and falls off having left nothing. Too hot and the carbon lands and immediately burns straight back off, so you watch a beautiful mark appear and then fade in front of you. In between there is a window, it is roughly 900°F to 1,300°F, and everything good happens inside it.
- 1,000°F to 1,200°F is the sweet spot. Hair marks crisply, feathers hold their shape, sugar spots stay round. If you only remember one number from this page, remember that you want the pot somewhere near 1,100°F when the hair goes on.
- Below about 900°F, nothing takes. The hair shrivels, makes a smell, and leaves a faint gray smudge at best. This is the most common first-timer result, because a pot loses heat far faster in open air than anybody expects.
- Above about 1,300°F, the mark burns off as fast as it lands. Frustrating, because it looks like it is working. Give the pot another minute before you start.
How you actually know the temperature
A pyrometer with a probe in the kiln tells you when to pull. After that, nobody has a reading on the pot itself, so the working method is time and eyes. A pot pulled at around 1,200°F sits in open air losing heat quickly, and the practical answer is to pull it, set it down, count out a slow twenty or thirty seconds, and start. Watch what the first strand does. It is the most honest thermometer you have.
The glow tells you too
Somewhere around 1,000°F a pot has a dull red glow that you can see in shade but not in bright sun. As that red fades to nothing you are approaching the bottom of the window. This is why so many potters prefer to fire these late in the day or at dusk, and why our nighttime raku workshop is a genuinely different experience rather than the same thing in the dark.
Weeks before the fire
Make a pot the tongs can actually hold.
This is decided at the wheel, not at the kiln. Somebody in heavy gloves has to lift your piece out of a glowing kiln with a pair of tongs, carry it a few feet, and set it down level without dropping it. Every choice below is really that one choice.
Shapes that work
Closed and half-closed forms. A rounded body with a neck that flares even slightly is close to ideal, because the tongs get under the shoulder and the shape holds itself. Bottle forms, ginger jars, small vases and covered forms all behave, as long as a closed one has a small vent hole through the wall, because water left inside turns to steam. So do simple spheres.
Our pages on collaring in and skinny necks are both useful practice for exactly this shape.
Shapes that fight you
Wide bowls, plates, platters and anything with a broad flat rim. There is nothing for the tongs to grip except the rim itself, the piece wants to tip, and a large flat surface cools unevenly so half of it drops out of the window while the other half is still hot. Save the platter for a glaze firing.
Handles and delicate applied bits are also a gamble. They are the first thing to catch a tong and snap.
Keep the first one small
Aim under about four pounds and somewhere around six to nine inches tall. Small pieces hold heat more predictably, they are easier to handle safely, and if the firing goes badly you have lost an afternoon rather than a month. Almost everybody wishes their first horsehair piece had been smaller.
Clay that survives the shock
Going from kiln heat to open air in one second is brutal, and a tight, smooth, grogless clay body will simply crack. You want some grog in there. Of the clay bodies we carry, the two we point people to for raku are B-Mix with Grog and Berlin Gray.
Berlin Gray fires dark, which is worth thinking about. A dark body under a white terra sigillata gives you a completely different pot than a pale body does.
Walls a little thicker than you would normally throw
Thin walls are a virtue almost everywhere else in pottery and a liability here. A wall with some substance holds heat longer, which widens your working window by real seconds, and it survives thermal shock better. This is not permission to throw a brick. It is permission to stop at the thickness you would normally push past.
The step people skip
The surface decides whether your line is a hair or a smudge.
Carbon lands on whatever texture is there. A rough, open, sandy bisque surface scatters it, and you get a soft gray worm instead of a black hair. A tight polished surface holds the edge, so a strand of tail hair reads as a strand of tail hair. This is the single biggest difference between a first horsehair pot and a good one, and it happens days before the fire.
Route one: burnishing
Rub the pot with something hard and smooth until it shines, once it has reached hard leather hard, which means a fingernail leaves a mark but nothing comes off on it. A polished stone, the back of a spoon, a smooth plastic bag. You are physically laying the clay platelets flat so they all reflect light the same way, and it needs no materials at all beyond patience.
It is slow, it is meditative, and people either love it or never do it twice. Plan on thirty to ninety minutes for a mug and more for anything bigger. Our burnishing lesson shows how to test the moisture. One catch: the grog that keeps a raku pot alive can catch the stone and leave pale scratches, so burnishing is harder on the clays we recommend for raku. Terra sigillata fills a little of that texture.
Route two: terra sigillata
A very fine clay slip, brushed on in several thin coats over bone dry work and polished with a soft cloth between coats. It is not a glaze and it does not melt. It is a skin of clay so fine it can be polished. It gives a sheen with a fraction of the labor of burnishing, it can be stained with oxides for color, and many potters who work in pit and smoke firing reach for it.
Thin is the whole secret. If it goes on like paint, it is far too thick and it will flake.
A note about our bisque temperature
A burnish is a physical polish, and it softens as the firing temperature climbs. Potters chasing maximum shine from burnishing alone often bisque as low as cone 018. We bisque to cone 05, which is a good deal hotter, so a purely burnished surface will come back less glossy here than it looked when you put it on the shelf.
That is not a problem, it is a reason to pick your route. Terra sigillata tends to keep more of its sheen through our cone 05 bisque than a bare burnish does, though any polish dulls a little, so if you want that hard polished look out of our kilns, use terra sigillata, or burnish first and then put sigillata over the top of it. Make a test tile first.
Burnishing Pottery with Terra Sigillata
Travis Thomason Pottery
Travis Thomason shows how he prepares terra sigillata, brushes it on and polishes it. The description calls it a good first step before horsehair, pit and raku firings, where no glaze is used. The chapters cover preparing it, applying it, polishing, complex forms and how sigillata compares with burnishing. Watch it on YouTube.
How to Mix and Apply Terra Sigillata for Burnishing Pottery
Ceramic Arts Network
Sumi von Dassow, in an excerpt from the DVD Pit Firing and Burnishing. The title says it covers mixing and applying terra sigillata, and a respirator goes on before a coat is brushed onto a pot. Dry clay powder is silica dust, so mixing from powder is a job for home, not for the shared studio. Watch it on YouTube.
The materials
What you can lay on a hot pot, and what each one leaves.
Anything that is dry and made of carbon will mark a hot pot. The differences between materials are real and worth knowing before you are standing there deciding in a hurry, because each one behaves in its own way and they go on in a particular order.
| Material | What it leaves | How it behaves |
|---|---|---|
| Horse tail hair | Thick, dark, confident lines with strong curl and a gray smoke halo alongside. | The classic. Coarse and slightly oily, so it grabs fast and holds a bold line. The easiest material to get a satisfying result from on a first attempt. |
| Horse mane hair | Finer, softer, wispier lines than tail hair. More drift, less drama. | Lighter, so it moves in any breeze and can lift off the pot before it catches. Lovely mixed in among tail hair for variation. |
| Human hair | Very fine, tight, squiggly lines. Noticeably more delicate than horse hair. | It works, and people are always surprised. It is thinner so it burns faster and marks lighter. Long hair from a hairbrush is plenty. |
| Feathers | A soft branching silhouette, like a fern pressed into the surface. The most immediately recognizable mark in the technique. | Needs a genuinely hot pot and firm contact. Hold the quill and lay the vane down rather than dropping it. Ostrich and other soft plumes give the widest, fullest shapes. |
| Granulated sugar | Small round black dots and spatters, wherever the grains land. | Sprinkle from a few inches up. Goes on last, after the hair and feathers, because it bounces and scatters. It smells like creme brulee, which is a genuine relief after the hair. |
| Dry grasses and leaves | Broad, soft, unpredictable shadows rather than lines. Sometimes a recognizable leaf, more often a cloud. | Must be bone dry. Green material steams instead of burning and does very little. Fun to experiment with, hard to control. |
The order we suggest
Hair first, while the pot is at its hottest and the lines will be blackest. Feathers next, because they need real heat but slightly less than hair does. Sugar last, because it scatters and would bounce off anything you place afterward. Then stop, though potters differ on this and you should treat the order as a place to start. The urge to keep adding is strong and it is the reason most over-decorated horsehair pots end up looking muddy instead of drawn.
Super Quick Terra Sigillata Plus Feather and Horsehair Raku Firing
Ceramic Arts Network
A two minute excerpt from Raku Firing with Marcia Selsor, from Ceramic Arts Network. Its steps appear as text on screen: weighing out ball clay for terra sigillata, brushing it onto a bone dry pot in thin coats, and, going by the title, the feather and horsehair firing. The closing card points to the full narrated version in the Ceramic Arts Network shop. Watch it on YouTube.
Feathers In Fire, Raku Art Pottery Creation
Corvus Moon Studio
Artists Ruth Cutter and Briggs carve feather designs into a pot and fire it outdoors. This is carved feathers and a raccoon style firing, not feathers laid on a hot pot, so use it for ideas rather than for placing a feather. Chapters cover a studio update, the firing process and the post firing evaluation. Watch it on YouTube.
Does Human Hair Work on Raku Pottery?
Breva Creative
Breva Creative builds a small bowl, sets up a raku kiln, bisque fires it and then tries human hair on it. The chapters run from clay building through the hair test to glazing, a second firing and a review. The description says it smelled horrible, so expect that. Watch it on YouTube.
Firing day
Nine steps, and the first five are setup.
Before anything else
This is an open flame, a kiln at over a thousand degrees, and glowing objects being carried through the air. Closed shoes, long pants, hair tied back, and natural fibers only, such as cotton, denim or wool, with no synthetics anywhere on your body. Synthetic fabric melts onto skin. At our workshops we supply the goggles, welding apron and full length welding gloves, and you wear them before the kiln reaches temperature. Hair, feathers and sugar all make smoke, so do not lean into it or breathe it in. If smoke worries you or you have trouble breathing, bring a cartridge respirator with organic vapor cartridges, because a paper N95 does nothing for fumes.
At The Clay Hole every raku workshop runs outdoors. Everybody signs the waiver and sits through the safety meeting in person, and we also invite everybody to take the online raku safety certification first. It is not required, and it does not replace the meeting. The waiver and the meeting apply to everyone, including people who have fired raku somewhere else.
-
Bisque fire the piece first
Horsehair goes onto bisque, not greenware and not glaze ware. At our horsehair and feather workshops it arrives already fired, with the surface prepared and nothing on it you would not want to see in the finished pot. Fingerprints and dust show.
-
Decide where the pot will sit before it comes out
A brick, a kiln shelf on a stand, a banding wheel with a shelf on it. Waist height, out of the wind, reachable from all sides. A banding wheel is a genuine luxury here because you can turn the pot instead of walking around it.
-
Lay out your materials within arm's reach
Hair separated into small loose bundles, feathers laid out singly, sugar in a shaker or a small open dish. Once the pot is out you have well under two minutes and you will not be untangling anything.
-
Preheat the piece
Cold pots crack. At our workshops the instructor or a trained helper loads the kiln, so your piece goes in cool and comes up with the kiln, or you hand it over to be warmed near the kiln first. Never put a room temperature pot into a hot kiln.
-
Bring the kiln up and watch the pyrometer
You are aiming to pull somewhere around 1,200°F. This is far cooler than a glaze raku firing, which is why other studios often pull horsehair pieces on the way up, before the kiln goes hotter for glazed work. Our horsehair workshops are their own day, so every firing is a horsehair firing.
-
Pull the pot and set it down level
Two people is better than one. Tongs under the shoulder, lift straight, move slowly, set it down flat. This is the moment that goes wrong, and it goes wrong because somebody hurried.
-
Wait, then lay the hair on
Give it twenty or thirty seconds to drop into the window. Then take a few strands at a time by one end and lay them across the surface, letting them fall where they want. Do not drag, do not press, do not draw. The curl is the point, and the curl is the pot's doing, not yours.
-
Feathers, then sugar
Hold a feather by the quill and press the vane gently against the hottest area for a second or two. Then sprinkle sugar from a few inches above for spots. Then stop, even though you will not want to.
-
Leave it alone to cool
No water, no post-firing reduction can, no wrapping. Unlike glaze raku, this piece just sits in the open air and cools where it stands. Moving it hot risks cracking it and smudging marks that have not fully set. Give it a good half hour before anybody touches it.
Horse Hair Burning and Raku Firing Pottery
Jonthepotter
Jonthepotter takes a raku firing from kiln setup to unloading, with a recap of the results. The chapters cover setting up the kiln, preparing the pots, firing, unloading and finishing, and the title says horsehair is burned onto the pots. Watch it on YouTube.
Horse Hair Raku (1)
ArranEye
Isle of Arran potter Simon Thorborn demonstrates the technique, according to the description, in a short film of just over two minutes. Watch it on YouTube.
Horse hair raku student demonstration
mayormcdiamond
Detroit area potter Paul M. Chisholm decorates two pots in a demonstration for high school art students, according to the description. It says the pots were at sixteen hundred degrees, hotter than the window on this page, so watch it for the motion rather than the temperature. Watch it on YouTube.
Keep this one open
The short list, for the phone in your pocket.
The list to keep on your phone.
Everything above this, boiled down to what you can read with a glove on while the kiln comes up. Screenshot it, or use the print button at the top of the page.
What you can read with a glove on while the kiln comes up. Screenshot it, or use the print button at the top of the page.
Before you leave the house
- Piece is bisque fired, surface polished, no glaze anywhere.
- Long pants, closed shoes, hair tied back, cotton, denim or wool. No synthetics.
- Goggles, a welding apron and full length welding gloves. We supply them at our workshops.
- Hair separated into small loose bundles, not a knot in a bag.
- Feathers laid flat so they are not crushed.
- Sugar in a shaker or a small open dish.
- Something to set the hot pot on, at waist height.
At the kiln
- Materials within arm's reach before the pot comes out.
- Pull at around 1,200°F. Set it down level and let go.
- Count a slow twenty or thirty seconds.
- Hair first. Lay it on by one end, let it fall, do not drag.
- Feathers next. Hold the quill, press the vane, hold two seconds.
- Sugar last, sprinkled from a few inches up.
- Stop before you think you should.
- Walk away. It cools in open air for at least half an hour.
The one thing to remember if you remember nothing else
Hot enough, and hands slow. Almost every result people are unhappy with comes from a pot that had already cooled too far, or from somebody trying to arrange the hair instead of letting it land.
Afterward, in three lines
Let it cool completely, half an hour at the very least. Wash it gently with cool water and a soft cloth to lift the loose ash, and expect that to look alarming for a few seconds before the real marks show. No scouring pads, no soap, no bleach.
Then dry it overnight and seal it with a paste wax or a brush on matte acrylic sealer. Sealing deepens the blacks and stops the surface picking up dust. It does not make the pot food safe or watertight, and nothing will.
Beyond black on white
Black on white is the default, not the limit.
Most horsehair work you have seen is charcoal marks on a pale creamy body, and there is a good reason for that: the contrast is the whole drama. But there are four ways to bring color into it, and they range from completely straightforward to genuinely hazardous.
Stain the terra sigillata
The easy one, and the one we would point almost everybody toward. Sigillata takes oxides and commercial stains, so you can make a batch that fires soft yellow, warm terracotta, pale blue or near black, and then put ordinary carbon marks on top of it. All the work happens calmly at a table, days ahead of the fire, away from the kiln. Stains and oxides are dust when dry, so weigh them over a damp towel, wear a fitted respirator with P100 cartridges, and do the mixing at home, not in the shared studio. Our burnishing lesson has the details. Make a test tile first, because stain colors shift in a smoke firing.
Use a darker clay body
Berlin Gray fires dark, so a white sigillata over it gives you a pale surface with a dark body showing anywhere the sigillata is thin or has worn at an edge. It is a quieter effect than a stain and it costs you nothing extra.
Leave a glazed area
Nothing stops you glazing the inside of a neck, or a band at the rim, with a raku crackle glaze and leaving the rest bare for horsehair. You get crackle and shine against matte carbon on one pot. It takes planning, because the glazed part wants a hotter firing than the horsehair part does. Our horsehair and feather workshops take bare pots only, with no glaze anywhere on them, so this is not one to bring to those days.
Ferric chloride, and why we are not writing instructions for it
Sprayed onto a hot pot, ferric chloride gives the ambers, rusts, oranges and deep browns you see behind the black marks on a lot of professional horsehair work. The color depends on how hot the pot is when it goes on. It is genuinely beautiful and it is genuinely one of the most hazardous things anybody does around a raku firing.
Ferric chloride is corrosive to skin, eyes and metal, and heating it releases fumes you must not breathe. Doing it properly means a fitted respirator with cartridges rated for both organic vapor and acid gas, chemical splash goggles, gloves and covered skin, working outdoors and upwind, with everybody else well back. That is a different level of preparation from tossing sugar at a pot, and it is not something to read about on a phone and then improvise.
So: know that it exists, know that it is what produced the color in that pot you admired, and if you want to try it, ask the team before you plan on it, and do not bring any chemical to a workshop without asking first. The video below is there so you can see the effect and judge for yourself, not as a set of instructions to follow.
How to do Horse Hair Raku, with ferric chloride fumes
Mikkel deMib, Pottery Tips
Mikkel deMib covers horsehair raku from start to finish in a long video, with ferric chloride spraying in several chapters. The description says the colors run from dark red through orange to light yellow, and two chapters are about safety: protection when spraying ferric chloride, and welding gloves for hot objects. We have not checked that what the potter wears matches our rules, so watch it to see the effect, not as instructions. Watch it on YouTube.
Troubleshooting
Six things that go wrong, and what each one is telling you.
Raku has a loss rate. Even experienced potters lose some of what goes into a raku firing, and that is not a sign anybody is doing it badly. Knowing which failure you are looking at is what makes the next firing better.
The hair curled up and fell off without marking
Too cool. The pot dropped below the window before you started, which happens faster than anybody expects, especially on a windy day or with a thin walled piece. Next time pull hotter, work faster, and get your materials laid out before the pot comes out.
The mark appeared and then faded away
Too hot. The carbon landed and burned straight back off. This one is maddening precisely because it looks like it is working. Give the pot another thirty to sixty seconds before you start on the next one.
The lines are fuzzy gray worms, not black hairs
A surface problem, not a heat problem. The bisque is too open and rough, so the carbon scattered instead of holding an edge. This is what burnishing and terra sigillata are for, and it is the failure that sends most people back to the surface preparation section for real.
The pot cracked, or came apart with a ping
Thermal shock. Either the clay body had no grog in it, or the piece went into a hot kiln cold, or there was a cold draft on one side of it. Uneven wall thickness makes it much more likely, because thick and thin sections expand at different rates.
The whole pot went uniformly sooty gray
Too much material at once. A big handful of hair produces a cloud of smoke rather than a set of lines, and the smoke settles everywhere. Small bundles, a few strands at a time, and stop earlier than feels right.
The marks came off in the sink
Two possibilities. Either the pot was too cool and that was surface soot rather than carbon locked into the skin, or it was fine and you scrubbed it. Cool water, a soft cloth, no scouring pad, no bleach and no dish soap. See the next section.
If it goes wrong
Three things that happen on a first firing.
Raku has a loss rate, and even experienced potters lose some of what goes in. Losing a pot is not a sign you did it badly.
The hair left no mark
Too cool. The pot dropped below the window before you started. Pull hotter, lay your materials out beforehand, and move faster.
The mark appeared, then faded
Too hot. The carbon landed and burned back off. Maddening, because it looks like it is working. Wait another thirty to sixty seconds on the next one.
Gray worms instead of black hairs
A surface problem, not a heat problem. The bisque was too open and rough, so the carbon scattered. That is what the burnishing and terra sigillata are for.
A pot you dislike is not a dead pot
Heating it past the window burns the carbon off and leaves a clean surface, at the cost of a little sheen each time. It needs another raku firing, so ask the team first and do not count on it.
Afterward
The pot is not finished when it stops glowing.
Say it on the tag
If you sell or gift one of these, tell people what it is. Decorative only, not food safe, not watertight, hand wipe with a dry or barely damp cloth. Careful sellers put that on the card, and a pot that ends up holding somebody's soup is a pot that ends up in the bin.
Let it cool completely, and mean completely. Half an hour minimum, longer for anything with real wall thickness. A pot that feels merely warm on the outside can still be holding more heat than you expect, and picking it up early is how a piece that survived the whole firing cracks on the table.
Then wash it, gently. Cool water and a soft cloth or your bare hand, working lightly over the surface to lift the ash and the loose soot that did not bond. There will be more of it than you expect and the first few seconds are alarming, because it looks like your marks are coming off. The loose gray rinses away. The carbon that actually drove into the skin stays.
What not to use: scouring pads, stiff brushes, dish soap, bleach, or anything abrasive. They will take the marks with them and they will dull the polish underneath. If a spot resists a soft cloth, leave it. Better a slightly ashy patch than a scrubbed pale streak through the middle of a good line.
Sealing
Dry it completely, overnight if you can, then seal it. A paste wax buffed to a shine is the traditional choice and it deepens the blacks noticeably, giving the surface a soft glow that a bare pot does not have. A brush on matte or satin acrylic sealer is easier to control. If you use a spray can, do it at home, outdoors, away from any flame, with eye protection and a respirator rated for the product, and never spray at the studio. Both work. Neither one makes the pot watertight or food safe, and anybody who tells you otherwise is selling something.
What sealing does do is stop the surface picking up dust and skin oil, keep the carbon from wearing at the high points where hands touch it, and make the whole piece look finished rather than raw. It is a ten minute job and it is the difference between a pot that looks like a test and a pot that looks like a piece of work.
One more thing, and it is the part people forget: sign it. A pot with this much chance in it deserves a date on the bottom, because in two years you will want to know which firing it came out of.
Questions we actually get
The ones that come up at every workshop.
Where do I get horsehair?
At our horsehair and feather workshops we bring the horse hair. For practice at home, ask at any barn, stable or riding school, and the answer is almost always yes. Horses are groomed constantly and the hair comes out of the brush by the handful. Ask for tail hair if you can, mane if that is what there is, and take more than you think you need because it goes fast once you start. It costs nothing and nobody has to do anything to the horse to get it.
Failing that, it sells online by the ounce, and a single ounce is a lot of pots.
Does this hurt the horse?
No. It is brushed-out hair, the same way hair comes out of a hairbrush. Nothing is cut, nothing is pulled, and the hair is a waste product of ordinary grooming. If you are ever offered hair that was obtained some other way, do not take it.
Can I do horsehair raku with an electric kiln at the studio?
No, and this is worth being clear about. The technique needs a pot pulled glowing hot out of an open kiln, which means a propane raku kiln outdoors, tongs, protective gear and space. Opening a hot electric kiln and reaching into it is dangerous in ways that go beyond the heat, and burning organic material in the studio is not something our ventilation is built for.
This is what the raku workshops exist for. They run outdoors, they have the right kilns and the right equipment, and the team walks everyone through every unload.
Do I need to glaze the pot first?
For horsehair, the opposite. Glaze is the one thing that stops this working, because carbon cannot soak into a glassy surface, so the piece goes into the kiln as bare polished bisque. At our horsehair and feather workshops you bring a bare, polished, bisqued pot with no glaze anywhere on it.
That is different from a glaze raku day, which has its own rules and asks for bisqued, glazed pieces.
Can I use hair from my dog, or my own hair?
Yes to both, with a caveat about scale. Human hair works and leaves a finer, tighter line than horse hair because it is thinner. Dog hair works if it is long enough to lay across a surface, which rules out most short-coated breeds. There is a video further up this page where a potter tries human hair on a pot.
People do make memorial pieces this way, using hair from a pet or a person they have lost. It is a genuinely lovely use of the technique. Just fire a test piece first, because a memorial pot is a bad place to discover your material behaves differently than you assumed.
Why did my marks come out gray instead of black?
Almost always temperature, occasionally surface. A pot at the bottom of the window makes soft gray marks rather than hard black ones. A rough, unpolished bisque surface scatters the carbon and produces the same washed-out look for a different reason.
If the grayness is even across the whole pot rather than in the marks themselves, that is smoke settling, usually from putting too much material on at once.
Can a horsehair pot be refired if I hate it?
Sometimes, but we cannot promise it. Taking a pot back past the temperature where marks form burns the carbon off and leaves a clean surface, at the cost of a little sigillata sheen each time, and a pot that has already been through a hard shock may not survive another. It would have to happen at a raku firing, not in a studio kiln, so ask the team before you plan on it.
A second round of marks over the first is the same question, because it needs another trip through the raku kiln.
How long does the whole decorating part take?
Between about thirty seconds and two minutes per pot, from the moment it lands on the stand. That is the entire creative act, and it is why the preparation matters so much. Everything else, the throwing, the burnishing, the sigillata, the bisque firing, the kiln coming up to temperature, exists to buy you that ninety seconds.
Is horsehair raku actually Japanese raku?
Not really, and it is worth knowing the difference. Traditional Japanese raku is a specific centuries-old tradition of hand-formed tea bowls. What most Western studios call raku is a twentieth century adaptation of it, and horsehair is a further branch off that, closer in spirit to pit firing and other smoke techniques than to anything from a tea ceremony.
Smoke and carbon on burnished pots is an older tradition in many places, and horsehair work is often linked with Native American potters in the Southwest. None of that stops you enjoying it. It just means calling it raku is a convenience of vocabulary rather than a claim of lineage.
What to do with this
You cannot practice this one at home.
Where to actually do this.
Nearly everything else we teach can be practiced on a Tuesday night until it clicks. This one needs a propane kiln, open sky, protective gear and other people, so it happens on specific days, each listed on its workshop page, and the rest of the time you prepare for it. Which is fine. The preparation is most of the quality anyway.
This one needs a propane kiln, open sky, protective gear and other people, so it happens on specific days, each listed on its workshop page. The rest of the time you prepare for it, and the preparation is most of the quality anyway.
The raku workshops
How a workshop runs, what to bring, what we bring, and how to sign up. Each workshop is announced with its own date, and they fill fast.
Raku safety certification
Not required, but worth doing. Read the rules, pass the quick check and get a card to show an instructor. It does not replace the safety meeting or the waiver.
Clay that survives it
B-Mix with Grog, one of our two picks for raku. Berlin Gray is the other, and it fires dark.
Collaring in
How to close a form down to a neck, which is the shape that behaves best in a pair of tongs.
Pinch pots
You do not need a wheel for this technique. A pinch pot in B-Mix with Grog or Berlin Gray suits it, and the lesson shows how to build an even wall.
The studio calendar
Every class, open studio session and workshop on the books. Raku dates appear here when they are scheduled. Closures come by email, not from the calendar.
There is a longer version of this page with the full explanation, nine videos, a troubleshooting section and the questions we get asked most. Use the toggle at the top to switch to it.
Every video on this page belongs to the potter or organization that made it, and we link each one back to its channel. If you teach this and would rather not be featured here, tell us and we will take it down the same day.