Pottery Date Night
 Bring All Your Friends Free Week
 Give a Month of Pottery
 Private Pottery Parties

 The Welcome Booklet
 Your First Ten Sessions
 The Pottery Process
 Finding the Studio
 Your Classes Never Expire
 The Four Tables
 Who’s Who
 The Rewards Program
 Flux Glazes
 The Calculators
 Kiln Tracker
 Holiday Kiln Deadlines

 Beginner’s Tool Set
 Fingernail Clippers
 Mayco Clay Mender
 Epoxy for Kintsugi
 Applicator Bottles
 Large Bead Rack
 Raku Workshop
 Nighttime Raku
 Horsehair and Feather Raku
 The Clay Hole T-Shirt
 Embroidered Crewneck
 Zip-Up Hoodie
 Pre-Made Bisqueware
 Glaze Catchers
 Kiln Cookies
 Clay Cubby Rental
 The Glaze Bible, Printed
 The Book of Molds, Printed
 Printable Pottery Guides
 Free Printable Trackers
 Gifts for Potters
 Christmas Pottery Ideas
 Mother’s Day Gift Ideas
 Pottery Date Night
 Studio Calendar
 2027 Studio Events
 What Should I Do Today?
 How to Throw on the Pottery Wheel
 How to Make a Pinch Pot
 How to Tap Center a Pot
 The Five Stages of Clay
 Is Pottery Hard to Learn?
 Pottery Wheel Practice Drills
 20 Easy Hand-Building Projects
 Everything That Sounds Wrong

 A Beautiful Piece, Every Time
 Slab Roller Tips
 Any Dish as a Slump Mold
 Slab Roller & Slab Mold Certification
 The Pottery Skill Tree
 Clay & Pottery Calculators
 Logging Your Pottery and Glazes
 The Pottery Dictionary
 Why Did My Pottery Do That?
 The Pottery Cone Chart
 Pottery Myths, Fact-Checked
 Is Handmade Pottery Food Safe?
 Incredible Ceramic Artist Videos
 How Dan Throws Giant Pots
 How to Dry Your Pottery
 The Pottery Wheel Introduction
 Pottery by Zodiac Sign
 Personality and the Pottery Wheel
 Pottery for Engineers
 ADHD, Hyperfocus, and Never Running Out
 Hobbies for Burnout
 Screen-Free Hobbies for Adults
 Every Addiction I Ever Had Lost to Art
 Functional Pottery Is Engineering
 How Do We Compare?
 Pottery Classes by City
 Every Pottery Studio in Utah
 Pottery in Draper
 Featured Members
 The Signature Wall
 Making Friends as an Adult Is Brutal
 The Clay Hole Commandments
 2027 Pottery Contests
 2027 Studio Parties
 Gallery Night

 Scream It Into the Void
 Destroy the Glaze Wall
 Daily Affirmation Cards
 Everything That Can Go Wrong
 Subscribe to Our Newsletters
 Contact The Clay Hole
 Corporate Team Building

 Glaze Combinations
 Glazes We Do Not Carry
 Making Glaze Test Tiles
 The Mega Glaze Tool
 How to Use the Mega Glaze Tool

 Glaze Brushing Techniques
 How to Use Underglaze
 How to Use Dipping Glazes
 Glaze Problems, Causes and Fixes
 The Dipping Glaze Guide

 Making a Glaze Catcher
 Fused or Sharp After Firing
 The Signature Wall
 His Viral Videos
 His Own Ceramics
 Meet Mud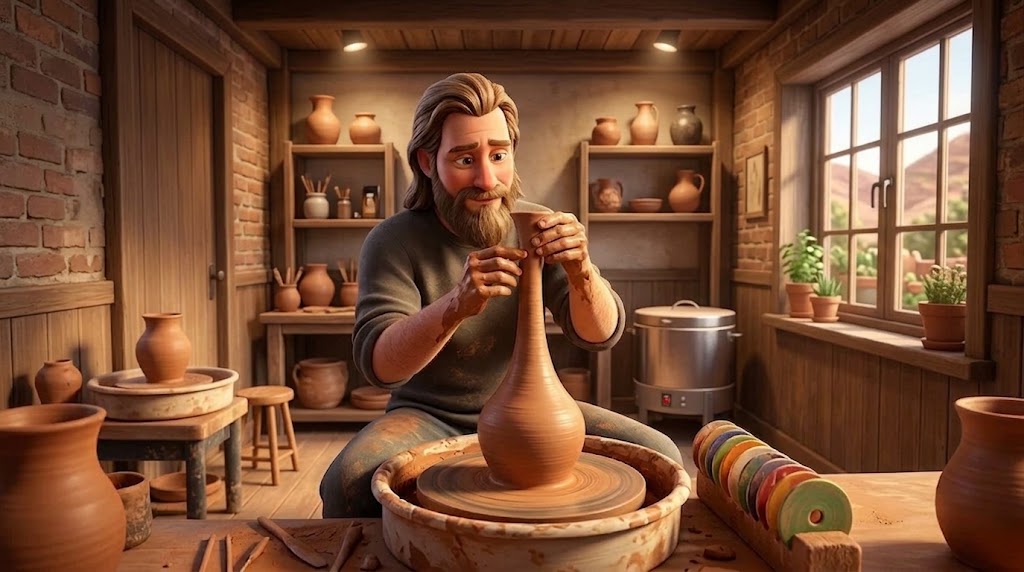
The Clay Hole guide to narrow necks
How to throw gooseneck and skinny neck pots
A bottle is a cylinder that got squeezed. That is the entire secret, and it is also the least useful sentence anybody has ever said to a person watching their fourth neck fold over sideways.
So here is the long version. What the squeeze actually does to the clay, three different routes to the same shape, ten videos from potters who make it look effortless, and a set of checklists built to sit open on a phone while your hands are covered in slip.
So here is the short version. What the squeeze does to the clay, one route from lump to bottle, two videos, and the checklists to keep open on a phone while your hands are covered in slip.
x3
routes to the same shape, and one of them is far kinder to a beginner than the other two
x1
route, the one that needs nothing you do not already own. The other two are in the comprehensive version
x10
videos from seven potters, every one of them somebody else’s, every one of them free
x2
videos, both of them somebody else’s and both of them free. The other eight are in the comprehensive version
60%
thicker a wall gets when you squeeze that ring of clay 30 percent narrower. That number is the whole craft
Everything on this page, in order
- 01What a gooseneck actually is
- 02Why this page is words and video both
- 03Why the neck is the hard part
- 04The parts of a bottle
- 05Collaring, the move everything hangs on
- 06Three routes to the same shape
- 07Route one: one piece, one sitting
- 08Route two: the throwing stick
- 09Route three: two pieces, joined
- 10When it goes wrong, and why
- 11After the wheel: drying, trimming, glazing
- 12Keep these open at the wheel
- 13Every word we just used
- 14Where to go from here
The short version
What is actually happening
A gooseneck is a wide round body with a long narrow neck. The neck ends up too small to get a hand into, so from the moment it closes you are shaping a pot you can no longer reach inside of. Everything below is a consequence of that one fact.

- 1Before. A wall you have already pulled thin. Wide, and about as thick as you want the finished pot.
- 2After one collar. Same clay, 30 percent less diameter, and the wall is now about 60 percent thicker. You did not add anything. The clay had to go somewhere and inward was the only direction available.
- 3After you pull it back thin. Roughly a third of the clay in that ring is now gone from it, and the only place it can have gone is up. Collaring is not just narrowing. It is how you buy height.
The four things that decide it
- Collar, then pull. Then collar, then pull. Every squeeze thickens the wall it squeezes, and every pull turns that thickness back into height. Collar three times in a row without pulling and you get a short lumpy funnel.
- Throw the cylinder thick at the top and thin at the bottom. Backwards from every mug you have made, and it feels wrong for about three pots. The top third is the entire budget of clay the neck gets built from, and thin walls do not collar, they wring.
- Keep it a cylinder until the neck is nearly done. A belly is an overhang, and you are about to apply the hardest twist of the session directly above it. Push the body out last, not first.
- Slip, not water. Collaring is the highest torque thing you will do on a wheel, and every drop of water is structure taken out of the wall you are about to twist. If your hands are grabbing, reach into the splash pan.
01 · Naming the thing
What a gooseneck actually is
Nobody agrees on the words, which is a nuisance when you are trying to search for help. So here is what we mean when we say it on this page.
A gooseneck pot has a wide, round body and a long slender neck that rises out of it. Fat at the bottom, thin at the top, and a shoulder in between where one becomes the other. The neck is usually too narrow to fit a hand into, which is the single fact that makes the whole shape difficult.
A skinny neck pot is any pot whose opening is much narrower than its widest point. It does not have to be round. It does not have to be tall. A squat little bud vase with a pencil-width mouth is a skinny neck pot, and it will teach you almost everything the big dramatic version will.
Different traditions named these shapes long before we got here, and the names are worth knowing because they are what the good videos are titled.
Bud vase, or soliflore
The small one. One stem, one flower, an opening you could poke a pen through. Made from one or two pounds of clay. This is where everybody should start, and almost nobody does.
Bottle
The catch-all term, and the one most YouTube titles use. Anything with a defined shoulder and a neck. Search “throwing a bottle” and you will find ten times what you find searching “gooseneck.”
Tianqiuping, the celestial ball vase
The Chinese form that most people picture when they say gooseneck. A near-perfect sphere with a straight cylindrical neck standing on top of it. Centuries old, still one of the hardest things on a wheel.
Tsurukubi and tokkuri
Japanese. Tsurukubi means crane neck, which is the closest anyone has come to a better word than gooseneck. Tokkuri is the sake bottle: round belly, short throat, poured from. Both are thrown with a tool we will get to.
The one thing they share
Every shape on this list is the same problem wearing a different hat. At some point the opening gets narrower than your hand, and from that moment on you are shaping a pot you can no longer reach inside of. Everything on this page is really about that moment. What to do before it, what to do during it, and how to keep working after it.
02 · Why this page looks like this
Why it is words and video both
We could have made this a playlist. We could have made it a wall of text. We did neither, on purpose, and the reason is worth two minutes of your time because it changes how you should use the rest of the page.
Watching somebody throw a bottle is wonderful. It is also slightly dishonest, and not on purpose. A potter who has made four thousand bottles is no longer thinking about most of what they are doing. They are not thinking about how little water they used. They are not thinking about the fact that they stopped pulling one pull earlier than you would have. So they do not mention it.
A video cannot tell you about the thing somebody is not doing. It just quietly does not do it, twenty-two minutes go by, and you come away thinking the difference between your pot and their pot is talent.
It is not. It is usually four small decisions that nobody said out loud.
Writing is good at exactly that. A sentence can say do not add water here, no matter how much you want to. A demo can only fail to add water, which looks like nothing at all.
What the video does better
- Speed. There is no way to write down how fast a collar happens. Too slow and the pot goes lopsided. You have to see it.
- Pressure. “Firm but gentle” means nothing. Watching a wall dimple under a thumb means everything.
- The whole shape of the session. How long the boring parts take, and how many times a good potter stops and looks.
- Proof that it is possible. Which sounds soft, and matters more than it should on attempt number six.
What the words do better
- Reasons. A video shows you the hands. A sentence tells you why the hands are there, which is the part that transfers to a different pot.
- Warnings. Everything in the negative. Do not, never, stop before, resist the urge to.
- Your pace. You can sit on one line for a full minute. You cannot pause a demo on one frame and have it explain itself.
- Wet hands. You are not going to scrub back through a video with a slippery finger while a pot is spinning. You can glance at a list.
And there is a sneakier reason
Watching is smooth. It feels like learning while it is happening, and that feeling is not very honest either. Reading a step and then trying to picture your own hands doing it is uncomfortable and slow, and the discomfort is the part that sticks. That is why every technique on this page is written out as a list first and shown as a video second, and why we would rather you read the list, watch the hands, and then read the list again than watch anything twice.
So the pattern for the rest of this page is always the same, in this order.
- 1
Read the steps cold
Before you watch anything. It will feel abstract. Good. That is your brain building the slot the video is about to drop into.
- 2
Watch the video for the timing
You already know what is coming. Now you are only watching for speed, pressure and the pauses, which are the three things text is bad at.
- 3
Read the steps again
Thirty seconds. This is the pass where the words stop being abstract, and it is the one everybody skips.
- 4
Take the checklist to the wheel, not the video
Section 12 is built for a phone propped against a splash pan. Big rows, short lines, and you can tap each one off as you go so you know where you were when the clay went sideways.
03 · The physics
Why the neck is the hard part
Five things are working against you, and only one of them is your hands. Learn what the other four are and most of the mystery goes away.
- 1Before. A wall you have already pulled thin. Wide, and about as thick as you want the finished pot.
- 2After one collar. Same clay, 30 percent less diameter, and the wall is now about 60 percent thicker. You did not add anything. The clay had to go somewhere and inward was the only direction available.
- 3After you pull it back thin. Roughly a third of the clay in that ring is now gone from it, and the only place it can have gone is up. Collaring is not just narrowing. It is how you buy height.
- 1
Collaring hands you clay back, whether you wanted it or not
This is the diagram above and it is the most useful fact on the page. Every squeeze thickens the wall it squeezes. That is not a side effect to fight, it is the engine of the whole form. Collar, then pull the thickness back out and upward, then collar again. People who collar once and wonder why the neck is stubby have skipped the half of the move that does the work.
- 2
Squeezing something that is spinning is a twisting force
Your hands are still and the clay is not, so every point of contact drags. Squeeze a thick wall and it just narrows. Squeeze a thin one and it wrings out like a wet towel, and you get that spiral of folds people describe as the neck turning into a screw thread. Thin walls cannot survive collaring. Which leads directly to the strangest rule on this page.
- 3
A belly is an overhang, and overhangs are heavy
The moment you push the middle of the pot outward, all that clay is sitting past the edge of what is holding it up. Now you want to apply serious torque above it. The soft lower wall folds, the shoulder sags, and it looks like the neck failed. It did not. The belly failed, half a minute earlier, and you were looking the wrong way.
- 4
The inside has a closing time
The instant the opening is narrower than your hand, the interior is finished forever. Anything you want pushed outward from the inside has to be done before that, or done with a tool on a stick, or done in two pieces. That is not a difficulty. That is a fork in the road, and it is why this page has three routes instead of one.
- 5
Water is what turns all four of those into a collapse
Collaring is the highest torque thing you will do on a wheel, and every drop of water is structure removed from the wall you are about to twist. Use slip. The slurry already sitting in your splash pan lubricates about as well and softens far less. If your hands are grabbing, you want slip, not more water.
The rule that sounds wrong
Throw your cylinder thicker at the top than at the bottom. Every mug you have ever made was the other way round, so this feels like a mistake for about three pots. It is not. The top of that cylinder is the entire budget of clay you have to build a neck out of, and once you have started collaring you cannot go back down and fetch more. Leave the top third noticeably heavy. Leave the rim heavier still.
04 · Vocabulary you will need
The parts of a bottle
Six words. These six come up all through the guide, so here they are once, in one picture.

- 1Lip. The rim. Leave it the thickest thing on the pot while you work. Collaring drives clay straight into it, and a thin rim tears.
- 2Neck. Everything above the shoulder. Its final width was decided long before you got here, by how much clay you left at the top of the cylinder.
- 3Shoulder. Where the body turns in. This is where bottles die. It is holding up the belly and being twisted at the same time.
- 4Belly. The widest point. Everything good about the shape and everything heavy about it, in one place.
- 5Floor. The inside bottom. Once the neck closes in you can never check it again, so check it early with a needle tool.
- 6Foot. What it stands on. On a bottle you deliberately leave extra clay down here and carve the curve you want later.
Proportion, and this part is taste
If you want a starting point rather than a rule: a gooseneck tends to read well when the neck is somewhere between a third and a half of the total height, and the mouth is a fifth or less of the belly at its widest. Nothing enforces that. Plenty of beautiful bottles break both halves of it. But if your first few look somehow wrong and you cannot say why, measure those two ratios before you blame your hands.
05 · The one move
The one move
Collaring, and everything hangs on it
Also called necking, choking, or collaring in. Same move. You put a ring of hands around a spinning wall and persuade it to get smaller. Nine steps, and eight of them are about restraint.
Also called necking, choking, or collaring in. Same move. You put a ring of hands around a spinning wall and persuade it to get smaller. Six steps, and four of them are about restraint.
- 1
Leave the top of the cylinder heavy
Rim compressed and thick, top third noticeably heavier than the base. If your wall is already as thin as you want the finished pot, you are too late. Thin walls do not collar, they wring.
- 2
Slow the wheel down
Not off. Slower than you threw the cylinder. Spinning clay is being flung outward and you are asking it to come in, so you want the slowest speed at which the pot still looks like one solid object.
- 3
Make a ring, not two points
Two fingertips pressing from opposite sides produce an oval, every time. Link both hands into a closed loop so the pressure lands in five or six places at once, and move them as one rigid object.
- 4
Squeeze and rise, a quarter inch at a time
Set the ring a little lower than where the taper should start, close it gently, and lift as you squeeze. Squeezing in one fixed spot cuts a groove. Four inches wide down to one inch is twelve small passes, and it should be.
- 5
Collar, then pull, and compress the rim as you go
This is the rhythm. Every collar leaves the wall thicker and every pull turns that thickness into height. Every couple of passes, press the rim down and slightly inward with a wet finger for a few turns, because collaring drives clay straight up into it and an uncompressed rim ripples or tears.
- 6
Let go slowly, and stop before you want to
Release over two or three full rotations or the wall comes away with your hands. When the neck is close, do one more careful pass and then stop. Almost every bottle we watch collapse was already finished two passes earlier.
- 1
Get the wall ready before you touch it
Cylinder first, top third left heavy, rim compressed and thick. If your wall is already as thin as you want the finished pot, you are too late. Thin walls do not collar, they wring. Go up and read the second fact in section 03 again if that sounds like nonsense, because it is the whole game.
- 2
Slow the wheel down
Not off. Slower than you threw the cylinder. Spinning clay is being flung outward, the force goes up with the square of the speed, and you are asking it to come in. Fight that at full speed and you will lose. Go too slow and the pot stops running true, so you want the slowest speed at which it still looks like one solid object.
- 3
Make a ring, not two points
Two fingertips pressing from opposite sides produce an oval, every time. You want contact spread all the way around: both hands, thumbs and index fingers linked into a loop, or fingers interlaced like you are about to crack your knuckles. Five or six points of contact beats two. Some potters count them out loud when they teach it, and it is a good habit.
- 4
Start below the narrowing and travel upward
Set your ring a little lower than where you want the taper to begin, close it gently, and lift as you squeeze. Squeezing in one fixed spot cuts a groove. Squeezing while rising moves clay, which is the entire difference between a neck and a wound.
- 5
Take small bites
A quarter inch of diameter per pass. Not an inch. Going from four inches wide to one inch wide is twelve small passes and it should be, because each pass is thickening the wall and you need to keep dealing with that thickness as you go.
- 6
Collar, then pull. Then collar, then pull
This is the rhythm and nobody tells beginners about it clearly enough. Every collar leaves the wall thicker. Every pull turns that thickness back into height. Collar three times in a row without pulling and you end up with a short lumpy funnel. Alternate and the neck grows out of your hands like it was always in there.
- 7
Compress the rim constantly
Every couple of passes, put a wet finger or a scrap of chamois on the rim and press down and in for a few turns. Collaring drives clay upward into that rim and it will ripple, fold or crack if you leave it alone. A cracked rim on a bottle is unfixable, because you cannot reach in to support it.
- 8
Let go slowly, every single time
Release over two or three full rotations. Pulling your hands off a narrow neck quickly drags the wall out with them and leaves a dent that runs all the way around, and on a neck that thin the dent is usually terminal.
- 9
Stop earlier than you want to
Clay has a finite number of good passes in it and no amount of skill adds more. When the neck is close, do one more careful pass and then stop, cut it off the wheel, and go look at it tomorrow. Almost every bottle we watch collapse was already finished two passes before it fell over.
Now watch it happen
Two videos, doing two different jobs. The first explains the move itself and why it works. The second takes it straight to a bottle neck with a specific, countable hand position you can copy tomorrow.
One video, on collaring from the start: what it is and why contact matters, then collaring cylinders, necks and bowls, and why a thick rim helps.
06 · Pick a road
Three routes to the same shape
A gooseneck can be made three genuinely different ways, and the internet mostly shows you the hardest one because it films the best. Here is the comparison first, then a section on each.
| Route | What you need | Good first pot | Where it usually goes wrong |
|---|---|---|---|
| One piece, one sitting | Your hands, a rib, and clay that is not too soft | A bud vase from one or two pounds. Small forgives nearly everything | You spend your clay budget on height and have nothing left at the top, or you belly out before the neck is finished |
| The throwing stick | A throwing stick. A wooden spoon or a smooth dowel will start you off | A round-bellied bottle with a genuinely small mouth | You cannot feel the wall from the outside, so you push a bulge somewhere you did not intend and only see it afterwards |
| Two pieces, joined | Calipers, a needle tool, slip, and a day of patience | A tall dramatic gooseneck at basically any size you like | The join, and the fact that a thin neck and a fat body dry at completely different speeds |
Where to start
Make three small bud vases in one piece before you attempt anything else. Not because it is the proper way, but because it is the fastest way to feel what collaring does to a wall, and that feeling is the thing you are actually here to acquire. Then go to route three, which is much easier than it sounds and gets you a dramatic pot far sooner than route one will. The throwing stick is worth learning, but it is a tool that solves a problem you have to meet first.
07 · Route one
Start to finish
One piece, one sitting
Bag of clay to finished bottle without ever taking it off the wheel. The classic, the one every video shows, and the one that will humble you the most productively.
Bag of clay to finished bottle without ever taking it off the wheel. There are three routes to this shape and this is the one to learn first, because it needs nothing you do not already own and it is the one that teaches your hands what collaring feels like.
Start small. One to two pounds. A small bottle has less weight fighting its own shoulder, less water in it by the time you get to the neck, and it takes six minutes instead of forty, which means you get five attempts in an evening instead of one. Five attempts teaches you five times as much.
- 1
Bat, small lump, properly centered
One to two pounds, thrown on a bat so you never have to lift a wet bottle by its neck. A bottle magnifies every wobble into a lean you cannot fix later, so center it, rest a still finger against it, and check again.
- 2
Open narrow, leave a heavy floor, compress it
Not the wide opening you would make for a mug. A bottle wants a small footprint, and anything you open wide now has to be collared back in later. Leave the floor thicker than feels sensible because you are carving a foot out of it, compress it with a rib several turns out from the middle, and needle-check the thickness while you still can.
- 3
Pull a cylinder, thin at the base and thick at the top
Backwards from every mug you have made. That top third is the raw material for the entire neck, and once the collaring starts you cannot go back down for more.
- 4
Do not belly it out yet
Everything in you wants to, because that is the part that looks like a bottle. Hint at the curve at most. A bellied form is an overhang and the highest torque of the session is about to land directly above it.
- 5
Collar the top down, alternating with pulls
All six steps from the section above, over and over, in small bites. Slow wheel, ring of hands, squeeze and rise, pull the thickness back into height, compress the rim, let go slowly. This is the long part of the session and it should be.
- 6
Now the belly, then rib it dry and wire it off
With the neck established, the top of the pot is a stiff little ring holding everything true and you can finally push the body out from the outside, supporting from within the neck with a fingertip or a chopstick. Then rib the outside dry, compress the rim one last time, and wire it off the bat with two passes.
- 1
Throw it on a bat
A wet bottle has one handle and it is the part most likely to snap off. If it is on a bat you never have to touch the neck to move it. Lift the bat, set it on a shelf, done. This one habit will save more pots than any technique on this page.
- 2
Center it, and then actually center it
A bottle magnifies every wobble, because you are building something tall and narrow on top of it. Anything off center at the base becomes a neck that visibly leans. There is no later step that fixes this, and you will not be able to see the problem until you are twenty minutes in.
- 3
Open narrow, and leave a heavy floor
Not the wide opening you would make for a mug. A bottle wants a small footprint, and everything you open wide now has to be collared back in later. Leave the floor thicker than feels sensible, because you will carve a curved foot out of it. Check the thickness with a needle tool right now, while you still can.
- 4
Compress that floor properly
Rib or fingertips, several turns, out from the middle. A bottle floor is thick, heavy and slow to dry, which is exactly the recipe for an S-shaped crack appearing three weeks later. You get one chance and it is now.
- 5
Pull a cylinder, heavy at the top
Thin at the base, thicker as you go up, thickest at the rim. Backwards from everything you have practiced. That top third is the raw material for the entire neck and you cannot go back down for more once the collaring starts.
- 6
Resist the belly. Seriously
Everything in you wants to push the middle out now, because that is the part that looks like a bottle. Do not. A bellied form is an overhang, and you are about to apply the highest torque of the whole session directly above it. At most, hint at the curve. Save the real swell for after the neck exists.
- 7
Collar the top down, alternating with pulls
All nine steps from section 05, over and over, in small bites. Slow wheel, ring of hands, squeeze and rise, pull the thickness back into height, compress the rim, let go slowly. This is the long part of the session and it should be.
- 8
Now shape the belly, from the outside
With the neck established, the top of the pot is a stiff little ring holding everything true, and you can finally push the body out. If your hand still fits, use it. If it does not, a curved rib pressed against the outside while you support from within the neck with a finger will do it, gently. This is also the point where a throwing stick would earn its keep, which is route two.
- 9
Finish the neck with something thin
When your finger no longer fits, a chopstick, a wooden dowel or the handle end of a brush will keep the neck open and true while you narrow the last of it from the outside. Support inside, squeeze outside. Same two-sided rule as every other move on a wheel.
- 10
Rib the outside dry, compress the rim, wire it off
A metal or rubber rib down the outside pulls off the slip and water and firms the surface, which is a real structural improvement on a form this tall. One more rim compression. Then wire it off the bat with two passes and leave it alone.
Three versions of the same ten steps
Watch a skinny neck vase from start to finish
Watch them in this order. The skinny neck vase for beginners first, then the wide bodied bottle with the thin neck, then a bottle thrown start to finish with no edits.
One skinny neck vase from preparing the clay to the finishing touches, made for beginners.
The unflattering bit
Your first one will probably be short and thick, and your second one will probably fold over at the shoulder. That is not a sign you picked the wrong hobby, it is the normal shape of learning this particular form, and it is why we keep telling you to use small lumps. Ten bad bud vases cost about two pounds of clay and one evening. One bad ten-pound bottle costs an evening as well, and teaches you a tenth as much.
08 · Route two
The throwing stick, and the trick nobody mentions
A throwing stick is a rib on a long handle. In Japan it is an egote, and the slim finishing versions are called fuzuke. It exists for exactly one reason: your hand does not fit and the pot is not finished.
Most people meet it as a rescue tool. That is a shame, because the interesting thing about it is not that it reaches further. It is that it lets you do the whole job in a different order, and the different order is much easier.
The reversal
Without a stick you can only shape the belly from the inside before the opening closes, so people push it out early. Which means you end up wrestling a heavy overhanging shoulder at the exact moment you need to apply serious twisting force above it. That is the fight route one is really about.
With a stick, you throw a plain cylinder, neck the top down while the whole thing is still straight and stable and easy, and only then reach in and push the belly out from the inside. The hard part happens while the pot is at its strongest, and the delicate part happens when there is nothing left to collapse. It changes the shapes you can reach, not just the shapes you can rescue.
- 1
Anything smooth and long will start you off
A wooden spoon turned around. A sanded dowel with a rounded end. A wooden spatula with a bend in it. Purpose-made sticks come in straight versions for tall cylinders and hooked versions that get up under a shoulder, and potters have been carving their own out of branches for a very long time. You do not need to buy anything to find out whether you like the technique.
- 2
Hold it against the direction of spin
On a wheel turning counter-clockwise, which is most wheels, hold the stick in your left hand with the rounded working end facing to your right. Clockwise, the mirror of that. Get this backwards and the tool catches the wall instead of gliding along it, which on a soft interior is not a small mistake.
- 3
Support the outside with your other hand
Always. The stick is a lever, and a lever gives you far more force than your fingers ever did with far less feedback. A hand resting on the outside wall is how you find out what the stick is doing, and it is the only brake you have.
- 4
Brace the handle, do not wave it
Wrist against the rim, forearm against your body, the same bracing you already use for centering. An unbraced stick hunts around inside the pot and puts a ripple in the wall every time your hand shakes, which it will, because you are holding it at arm’s length through a hole you cannot see through.
- 5
Expect to be working blind, and slow down accordingly
You cannot see the inside and you can barely feel it. Go in small increments, pull the stick out often, and look at the silhouette from the side at eye level rather than from above. Every mistake made with a throwing stick is discovered several seconds after it was made.
- 6
Finish the profile from the outside
The stick makes the volume. A rib on the outside makes the line. Push the belly out a bit further than you want with the stick, then bring it back and true it with a curved rib, supporting from inside the neck with a fingertip.
09 · Route three
Two pieces, joined
Throw the body. Throw the neck separately. Stick them together and throw the seam until it disappears. Then stand back and let people assume you did it in one go.
Some part of you is going to file this under cheating. Put that away. Enormous numbers of the beautiful narrow-necked pots you have admired were made in sections, because past a certain size and past a certain neck-to-belly ratio the one-piece version stops being difficult and starts being physically silly. This is the professional answer, not the shortcut.
It also has a real advantage nobody mentions: you get to throw the neck facing you, with two hands, on a piece of clay that weighs almost nothing. Every awkward thing about collaring gets easier when there is no heavy bellied pot underneath it.
- 1
Throw the body and stop early
Belly it out as far as you like, because there is no neck above it fighting you. Bring the top in only as far as is comfortable, and leave the rim genuinely thick, a good half inch. That rim is about to become a weld, and thin rims make weak welds.
- 2
Measure the opening with calipers and write the number down
Not eyeball it. Measure it. The whole method lives or dies on the two diameters matching, and clay shrinks as it firms, so measure at the moment you stop throwing and note it somewhere that is not your memory.
- 3
Let the body firm up. It must end up stiffer than the neck
Soft leather hard. Firm enough to take weight, soft enough to weld. Time does this for free overnight, a hair dryer does it in ten minutes, and some potters use a torch, so ask an instructor what is allowed where you are throwing before you go looking for one. Join a neck to a body that is still wet and the body will simply sit down under it.
- 4
Throw the neck as its own little pot
A short cylinder, two or three inches tall, collared and pulled exactly as in section 05. Leave its base flaring wide so it will blend into the shoulder, and leave that base rim thick. Open it all the way through to the bat so it is a tube rather than a pot with a floor in it. Match your caliper number. Do not cut it off the bat.
- 5
Score, slip, and press them together rim to rim
Both mating surfaces scratched properly and wetted with slip, then set together and pressed with a firm even push straight down. Check from the side at eye level that the neck is standing up straight before you commit, because you have about one minute to fix it and then you have none.
- 6
Put it back on the wheel and throw the join
This is the step people skip and it is the entire point. Wheel on slow, wet fingers, and work the seam like you are pulling a wall, blending the collar of clay both ways into the shoulder above and the body below. Done properly there is no seam. Done badly there is a ring that will crack in the kiln, because a weld you did not throw is just two pots touching.
- 7
Rib the transition, then walk away
A curved rib across the shoulder makes the join into a deliberate line rather than a repair. Then stop. A freshly joined pot has two sections at two different moistures and it needs to even out slowly, which is the next section.
Two ways to do it
The first video takes a two part vase through its lower part. The second joins two freshly thrown sections wet to wet, straight off the wheel. Same idea, different moment, and both are worth having.
10 · Diagnosis
Diagnosis
When it goes wrong, and why
Nine ways a narrow neck fails. Find the one that matches what you are looking at, and note that in almost every case the cause happened somewhere earlier than the damage.
The three that will get you tonight. Find the one that matches what you are looking at, and note that in every case the cause happened earlier than the damage.
The neck twisted into a spiral, like a screw thread or curtain folds
What happened
The wall was too thin to survive being twisted. Collaring drags the clay around as well as inward, and a thin wall has nothing to resist with, so it folds up on itself like a wrung towel.
Next time
Stop pulling the top of the cylinder so thin. Leave the upper third heavy. Then take smaller bites, slow the wheel further, and use slip rather than water.
The neck came out oval instead of round
What happened
Two points of contact instead of a ring. Two fingers squeezing from opposite sides can only ever produce an oval, and once it is oval the wheel will not round it back out for you.
Next time
Link both hands into a closed loop around the pot so the pressure lands in five or six places at once, and move both hands as one rigid object rather than as ten independent fingers.
The neck flopped over sideways near the end
What happened
The clay is exhausted. Every pass added water and loosened the structure, and a tall narrow column is the least forgiving shape there is to be holding wet clay in.
Next time
Fewer, better passes. Far less water. And genuinely stop one pass before you want to, because the pot that fell over was finished thirty seconds earlier and you kept going.
The rim rippled, folded, or split
What happened
You never compressed it. Collaring pushes clay upward into the rim from every direction at once, and an uncompressed rim has nowhere to put it, so it buckles or tears.
Next time
Compress the rim every two passes, all the way through. Press down and slightly inward with a wet finger or a scrap of chamois for several full turns. It takes four seconds.
The whole pot sagged at the shoulder
What happened
You bellied out before the neck existed. All that clay hanging past its own support could not take the torque you then applied above it. The neck did not fail. The shoulder did, and it took the neck with it.
Next time
Keep it a cylinder for far longer than feels right. Collar the neck to nearly final size while the form is still straight, and only then push the belly out.
The neck is standing there leaning like it is tired
What happened
It was never centered. A small wobble at the base becomes a visible lean by the time you are ten inches up, and there is no move that corrects it once you are building on top of it.
Next time
This is the one failure that is not about collaring at all. Center it properly, check with a fingertip resting still against the clay, and refuse to open until it stops moving under your hand.
You cannot get the neck as narrow as you wanted
What happened
You ran out of clay. Narrowing needs wall to squeeze, and you spent yours making the cylinder tall and even. There is nothing left up there to work with.
Next time
Throw the cylinder thick at the top and thin at the bottom. Or accept the width you have, and get the neck you wanted by throwing it separately as in route three.
A crack appeared across the bottom weeks later
What happened
The floor was never compressed. Bottles get this more than any other form, because their floors are deliberately left thick and heavy, and thick floors dry slowest and pull hardest against everything around them.
Next time
Compress the floor immediately after opening, with a rib, outward from the center, several turns. There is no second opportunity. Once the neck is on, that floor is out of reach forever.
It cracked at the shoulder while it dried
What happened
A thin neck and a fat body dry at completely different speeds. The neck stiffened and stopped shrinking while the belly was still letting go of water and pulling inward, and the shoulder sits exactly where those two arguments meet.
Next time
Loosely bag the neck and shoulder for the first day or two so the thin part is forced to wait for the thick part. Drying is where bottles are lost most often, and it is covered properly in the next section.
11 · The rest of the job
The rest of the job
After the wheel
You survived the neck. Now come the three places narrow-necked pots are actually lost, and none of them involve throwing.
You survived the neck. The pot is not safe yet, and the thing that usually takes it from here is drying.
A bottle is a thin neck bolted to a fat body, so one part of it is nearly dry while the other is still soaking, and all of that difference ends up in the shoulder as a crack. Bag the neck and shoulder loosely for the first day or two and leave the belly open, which forces the fast part to wait for the slow part. After that, slow and even and boring, and no sunny windowsills.
Drying, which is where most of them die
A bottle is a thin neck bolted to a fat body, which means one part of it is bone dry while the other is still soaking. Every bit of that difference has to go somewhere, and it goes into the shoulder as a crack.
Bag the neck and shoulder loosely for the first day or two and leave the belly open. You are deliberately holding the fast part back until the slow part catches up. After that, slow and even and boring, and no sunny windowsills.
Glazing something you cannot reach into
Nobody thinks about this until the bisqueware is in their hands and they realize a brush does not fit down a half-inch neck. Whatever you want on the inside of that pot has to be decided before it is fired, not after.
So decide now, and ask an instructor how to get it in there, because the answer depends on which glazes you are using and what you are allowed to do with them. Do not find out at the glaze table.
Trimming, and why you need a chuck
You cannot turn a bottle upside down on the wheel head. It has a long fragile neck and a rim the size of a coin, and putting the entire weight of the pot onto that is exactly as bad an idea as it sounds. So you make something for it to sit inside instead.
A chuck is a thrown clay cylinder, open at the top, that the neck drops down into while the shoulders rest on its rim. A chum is a solid mound the pot sits over instead. Either way the pot is held upright-but-inverted and supported at its strongest point rather than its weakest, and you trim the foot with the whole thing spinning as one object.
Which means the pot has to be centered inside the chuck by tapping, not by squashing, because there is nothing to squash. If tap centering is new to you, we built a practice tool for exactly that.
Two practical warnings before you fire it
One warning before you fire it
If a form is completely sealed, it needs a hole. Some potters close a bottle off entirely to shape it and then open it again. If you ever leave one sealed, the water still inside turns to steam in the kiln and the pot can burst. Pierce it somewhere before it goes anywhere near heat, every time, no exceptions.
Tall pots are expensive to fire. Glaze firings here are priced by volume at five cents per cubic inch, with a flat $4.80 for anything 125 cubic inches or under, and the volume is measured at the widest points, not the actual shape. A skinny neck sitting on a fat belly measures like a box, and the box is much bigger than the pot. Worth knowing before you throw a two-foot one.
12 · The part to keep open
The part to keep open
Keep these open at the wheel
Four lists, short lines, big rows. Tap a line to cross it off so you know where you were when the clay went sideways. Nothing is saved anywhere, so reload the page and it is all back.
Two lists, short lines, big rows. Tap a line to cross it off so you know where you were when the clay went sideways. Nothing is saved anywhere, so reload the page and it is all back.
Bookmark this page with #chg-wheelside on the end of the address and it will open straight here, which is a nicer thing to do with wet hands than scrolling past three thousand words of us talking.
Bookmark this page with #chg-wheelside on the end of the address and it will open straight here, which is a nicer thing to do with wet hands than scrolling.
Before you sit down
Five minutes here saves the next forty.
Building the cylinder
Everything here is the opposite of making a mug.
Collaring the neck
The loop you repeat until the neck is there.
Before you walk away
The last two minutes decide the next two weeks.
13 · Glossary
Every word we just used
Sixteen terms, in the order you are likely to meet them.
Collaring
Squeezing a spinning wall inward to reduce its diameter. Also called necking in, or choking. The one move this entire page is about.
Compression
Pressing clay particles back together after a move dragged them apart. Skip it on a floor or a rim and it finds you later, usually on a shelf, usually as a crack.
Shoulder
Where the body of a pot turns inward toward the neck. The most heavily loaded part of a bottle and the place most of them fail.
Belly
The widest part of the form. Also, structurally, an overhang, which is why it is the last thing you make rather than the first.
Overhang
Any clay sitting out past what is holding it up. Soft clay does not enjoy this and will tell you so.
Closed form
A pot thrown completely shut, with the air sealed inside acting like a balloon you can shape against. Must be pierced before firing, without exception.
Throwing stick, or egote
A rib on a long handle, for shaping the inside of a pot your hand no longer fits into. Straight ones for cylinders, hooked ones for getting under a shoulder.
Fuzuke
The slim finishing version of a throwing stick, used at the very end to adjust a profile by a hair rather than to move real volume.
Chuck
A thrown clay cylinder you drop a narrow-necked pot into so you can trim its foot without resting any weight on the neck.
Chum
Same job as a chuck, but a solid mound the pot sits over rather than a hollow tube it sits inside.
Tap centering
Centering a pot on the wheel by tapping it true while it spins, instead of pushing it, because there is nothing on a bottle you could safely push.
Calipers
The two-armed measuring tool that makes a two-part pot possible. It is how the neck ends up the same diameter as the hole it is going onto.
Leather hard
Firm enough to handle without denting, damp enough to join and carve. The state a body has to reach before a neck gets attached to it.
Score and slip
Scratching both surfaces and wetting them with clay slurry before joining. On a bottle it is the difference between one pot and two pots that happen to be touching.
Soliflore
A bud vase. One stem, one flower, a mouth barely wider than a pencil. The best possible place to learn all of this.
Tianqiuping
The Chinese celestial ball vase: a sphere with a straight cylindrical neck on top. The shape most people are picturing when they say gooseneck.
14 · Onward
Onward
Where to go from here
A narrow neck is a hard form built out of easy parts. If any of the easy parts felt shaky while you were reading, go and fix that one first. It is faster than practicing the hard thing badly.
That was the short version. The comprehensive version at the top of the page adds the physics, the other two routes including the throwing stick and the two-piece method, the full list of nine ways a neck fails, a glossary and all ten videos.
How to throw on the wheel
The full guide underneath this one. Centering, opening, pulling, and every way it goes wrong, all written out to be read.
Read the guide
Centering, in detail
A leaning neck is a centering problem wearing a disguise. This is the one to fix if your bottles lean.
Fix the base
Pulling walls, in detail
Collaring only works if the pull that follows it works. The offset between your hands, the pressure point, and the mistakes on purpose.
Pull better walls
Tap centering practice tool
You cannot trim a bottle without it. A practice wheel that runs in your browser, no clay required.
Find the beat
Drying pottery properly
More bottles are lost on a shelf than on a wheel. Worth reading before your first one comes off the bat.
Dry it right
More videos, other skills
Twenty-four hand-picked lessons across eight core skills, from fifteen of the best potters on the internet. None of them ours.
Go watch
Want a wheel to try this on
We are a community pottery studio in Draper, Utah, with twenty-nine wheels and instructors who have watched a great many necks fold over. Memberships start at $145 a month and include classes, so somebody can stand next to you the first time you try this.
Every video on this page belongs to the potter who made it, and none of them are ours. Nothing loads from YouTube until you press play, which is why you are looking at a thumbnail and a button rather than an embedded player.
Which version would you like to print?
Videos come out as a labeled box with the title and channel to search for, since paper does not play them.