Pottery Date Night
 Bring All Your Friends Free Week
 Give a Month of Pottery
 Private Pottery Parties

 The Welcome Booklet
 Your First Ten Sessions
 The Pottery Process
 Finding the Studio
 Your Classes Never Expire
 The Four Tables
 Who’s Who
 The Rewards Program
 Flux Glazes
 The Calculators
 Kiln Tracker
 Holiday Kiln Deadlines

 Beginner’s Tool Set
 Fingernail Clippers
 Mayco Clay Mender
 Epoxy for Kintsugi
 Applicator Bottles
 Large Bead Rack
 Raku Workshop
 Nighttime Raku
 Horsehair and Feather Raku
 The Clay Hole T-Shirt
 Embroidered Crewneck
 Zip-Up Hoodie
 Pre-Made Bisqueware
 Glaze Catchers
 Kiln Cookies
 Clay Cubby Rental
 The Glaze Bible, Printed
 The Book of Molds, Printed
 Printable Pottery Guides
 Free Printable Trackers
 Gifts for Potters
 Christmas Pottery Ideas
 Mother’s Day Gift Ideas
 Pottery Date Night
 Studio Calendar
 2027 Studio Events
 What Should I Do Today?
 How to Throw on the Pottery Wheel
 How to Make a Pinch Pot
 How to Tap Center a Pot
 The Five Stages of Clay
 Is Pottery Hard to Learn?
 Pottery Wheel Practice Drills
 20 Easy Hand-Building Projects
 Everything That Sounds Wrong

 A Beautiful Piece, Every Time
 Slab Roller Tips
 Any Dish as a Slump Mold
 Slab Roller & Slab Mold Certification
 The Pottery Skill Tree
 Clay & Pottery Calculators
 Logging Your Pottery and Glazes
 The Pottery Dictionary
 Why Did My Pottery Do That?
 The Pottery Cone Chart
 Pottery Myths, Fact-Checked
 Is Handmade Pottery Food Safe?
 Incredible Ceramic Artist Videos
 How Dan Throws Giant Pots
 How to Dry Your Pottery
 The Pottery Wheel Introduction
 Pottery by Zodiac Sign
 Personality and the Pottery Wheel
 Pottery for Engineers
 ADHD, Hyperfocus, and Never Running Out
 Hobbies for Burnout
 Screen-Free Hobbies for Adults
 Every Addiction I Ever Had Lost to Art
 Functional Pottery Is Engineering
 How Do We Compare?
 Pottery Classes by City
 Every Pottery Studio in Utah
 Pottery in Draper
 Featured Members
 The Signature Wall
 Making Friends as an Adult Is Brutal
 The Clay Hole Commandments
 2027 Pottery Contests
 2027 Studio Parties
 Gallery Night

 Scream It Into the Void
 Destroy the Glaze Wall
 Daily Affirmation Cards
 Everything That Can Go Wrong
 Subscribe to Our Newsletters
 Contact The Clay Hole
 Corporate Team Building

 Glaze Combinations
 Glazes We Do Not Carry
 Making Glaze Test Tiles
 The Mega Glaze Tool
 How to Use the Mega Glaze Tool

 Glaze Brushing Techniques
 How to Use Underglaze
 How to Use Dipping Glazes
 Glaze Problems, Causes and Fixes
 The Dipping Glaze Guide

 Making a Glaze Catcher
 Fused or Sharp After Firing
 The Signature Wall
 His Viral Videos
 His Own Ceramics
 Meet Mud
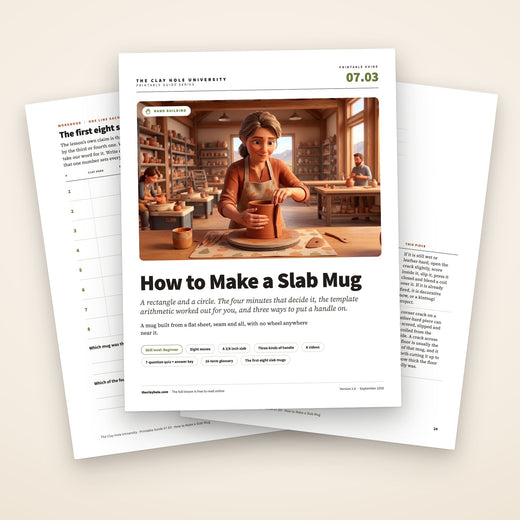
Hand-building · Slab mugs
A mug is a rectangle and a circle. That is the entire secret.
Everything hard about a slab mug happens in about four minutes of the evening: the thickness of the slab, the seam where the two ends meet, the joint where the wall meets the floor, and the moment the handle goes on. Get those four right and the rest is decoration.
This page walks the whole build in order, with a tick list at every step so you can put your phone down, do the thing, and pick the page back up with clay on your hands. The videos are here too, from potters who do not work here, for the parts where words run out.
This is the short version: what to cut, what to close, and a tick list at every step. The reasoning, the videos and the questions people ask are all in the comprehensive version.

Read it, then watch it
Why this is written down and filmed, both.
There is a real reason we keep making pages like this one instead of just handing you a link to a video, and it is not that we dislike video. Two thirds of this page is here because of what video is bad at, and the other third is here because of what writing is bad at.
You cannot scrub a video with clay on your hands
A fourteen-minute build is fourteen minutes whether you need all of it or forty seconds of it. When your seam is opening up and your hands are covered, a numbered list gets you to the answer in about three seconds and a video does not.
Reading is what makes the order stick
Most slab mugs do not fail on technique. They fail on sequence, because somebody put the floor in before they closed the wall, or attached a wet handle to a firm mug. Written steps hold an order in place. Watching hands move rarely does.
Video shows the things nobody says out loud
How hard to press. How wet is too wet. What a properly compressed joint sounds like under a rib. None of that survives a sentence. You have to see somebody do it, which is exactly what the eight videos on this page are for.
So use both, in this order
Read the step. Watch the piece of video that covers it. Then do it with the tick list open. Almost everybody who tries to learn this from video alone ends up rewinding the same ten seconds four times, and almost everybody who tries it from text alone presses too hard somewhere. The pairing is the point, and it is why this page is as long as it is.
The five-minute version
The whole mug in eight moves.
If you already hand-build and you just want the shape of it, this is the shape of it. Everything below is these eight moves, slowed down.
If you already hand-build and you just want the shape of it, this is the shape of it. Everything below is these eight moves with the places they fail marked, and nothing else.
First mugs
Your first slab mug will probably be a little oval and the seam will probably show. That is completely normal and it is not a sign you did it wrong. Round comes from the former and from not squeezing, and both of those are habits rather than talent. Most people are making mugs they are genuinely proud of by the third or fourth one.
Before you cut anything
What you need on the table.
Almost none of this is special. Green Level Members bring their own tools; every other Level uses the studio ones, and everything below lives in the building either way.
The former, which is the one thing people ask about
A former is just a cylinder you wrap the clay around while it learns to be round. We keep dedicated mug formers in the slab mold room, and there are rolling pins, wooden dowels and lengths of pipe around the studio that do the same job. Members bring cans from home constantly and it works fine. The only real requirements are that it is straight, that it is a size you actually want to drink out of, and that you put paper between it and the clay.
Slightly tapered is better than perfectly straight. Clay shrinks onto whatever it is wrapped around as it dries, and a dead-straight form can grip hard enough to crack the wall. A form that is a hair narrower at the bottom slides out. Paper solves most of this on its own, which is the other reason we keep saying paper.
Which bag to buy
Six of our eight clay bodies make a good slab mug.
The number on each card is that body’s published shrinkage, wet to fired. It is the number that decides how much bigger than the finished mug you have to build, and the calculator further down uses it.
The two we left off, and why
B-Mix w/Grog and Half & Half are both fine clay and plenty of people slab-build in them. They are simply not where we would point somebody making their first few mugs. If you already know you like one of them, use it, and read every shrinkage number on this page as the rough guide it is rather than gospel.
All eight clay bodies, with what each one costs at your Level
Before you cut anything
What you need, and which bag.
Three things to settle before the clay comes off the shelf. All of it lives in the building.
On the table
A wire cutter, a needle tool, a soft red rib, a barely damp sponge, a ruler, a banding wheel, thin paper, and a little pot of slip mixed from your own offcuts to about the thickness of yogurt. Slip has to be the same clay body you are building in, never a different one. Green Level Members bring their own tools; every other Level uses the studio ones.
Something to wrap it around
A former is just a cylinder the clay wraps around while it learns to be round. Mug formers live in the slab mold room, and a rolling pin, a dowel or a can from home does the same job. It has to be straight, a size you actually want to drink out of, and wrapped in paper. Slightly tapered releases more easily than dead straight.
Which bag
52 Buff for your first one. Least expensive bag in the building, forgiving, and at about 10% it shrinks less than anything else we carry, which puts less stress on every joint you just made.
All eight clay bodies, with what each one costs at your Level
First mugs
Your first one will probably be a little oval and the seam will probably show. That is normal. Round comes from the former and from not squeezing, and both of those are habits rather than talent.
Step one
Roll the slab, and roll it thicker than feels right.
Three eighths of an inch. That is the number for a mug. It sounds heavy and it is not, because the wall you end up with after you rib it, compress it and fire it is nothing like the slab you started with.
Thin slabs are where beginners lose mugs. A quarter-inch wall warps as it dries, goes wavy at the rim, and leaves you no clay at all to carve, stamp or paddle into. Three eighths gives you a wall you can decorate without punching through and a cylinder that holds its own shape while you work on it. Clay is the cheapest part of the evening, and most of your trimmings get wedged up and go straight back in the bag anyway.
On a slab roller
We have x2 slab rollers, both open to every Level, and both will roll a slab up to thirty inches. You need the slab roller and slab molds certification before you touch either one. It is free, it takes about twenty-five minutes, and it covers the parts that damage the machine.
- Read the gauge in eighths, not quarters. The big marks are quarter inches and the small ones between them are eighths. Almost everybody reads them all as quarters the first time and lands nowhere near the thickness they wanted.
- Get the block under three inches before it goes on, or the bar cannot come down on it. Slam it flat on the table at an angle, rotate, slam again.
- Rotate ninety degrees between passes. Clay only stretches side to side as you look at the machine, never front to back.
- The gap includes the mats, so your final setting lands a little under the number on the gauge.
With a rolling pin
Not certified yet, or the rollers are busy? A mug needs a slab about the size of a sheet of paper. You can roll that by hand in five minutes and the result is genuinely just as good.
- Use guide sticks. Two wooden strips of equal thickness, one either side of the clay, and roll until the pin rides on both of them. That is what makes it even, and even is the whole game.
- Beat the block flat first with the pin or the heel of your hand. Rolling a thick lump is miserable and it is what makes people give up on hand rolling.
- Turn the clay, not yourself. Roll a few passes, lift and rotate the slab a quarter turn, roll again. Flip it over at least once so it releases cleanly.
- Compress both faces with a rib when you are done. This is the step people skip and it is a real cause of warping later.
Roller or rolling pin
The x2 slab rollers need the free slab roller and slab molds certification first. Without it, roll it by hand: two guide sticks of equal thickness either side of the clay, roll until the pin rides on both, turning the slab a quarter turn as you go. A mug needs a slab the size of a sheet of paper, so five minutes does it.
Then walk away from it for a while
A slab straight off the roller is too soft to hold a cylinder. It will slump, bulge at the bottom and take a fingerprint from anything. What you want is soft leather-hard: firm enough to lift by one corner without it drooping, soft enough to bend around a form without the outside of the bend cracking open.
How long that takes depends on the clay, the room and how thick you rolled, so nobody can hand you a number. Fifteen minutes uncovered is often close on a dry evening. Test it by standing the slab up on one edge. If it holds, you are ready. If it folds, give it longer, and if the edges have gone pale and stiff, you waited too long and it will crack when you wrap it.
Step two
Cut the template, not the clay.
Cut a paper template first, wrap the paper around your former with the ends overlapping, and check it before a knife goes anywhere near the slab. Paper is free. A slab you cut two inches short is an evening.
A former that measures three and a half inches across is eleven inches around, and a three eighths inch wall has to wrap around the outside of that, so the cut is longer again. This does that arithmetic, and the shrinkage of whichever clay you bought.
The wall is a rectangle. Its height is the height of your mug, and its length is the distance around your former, plus the extra the clay needs to get around the outside of its own thickness, plus a little to trim off. That length is the part people get wrong. A former that measures three and a half inches across is eleven inches around, not three and a half, and a three eighths inch wall then has to wrap around the outside of that, which adds about another inch and an eighth and puts the cut at about twelve and five eighths inches. Below does the arithmetic, including the shrinkage of whichever clay you bought.
52 Buff shrinks about 10.0% from wet clay to fired mug.
Cut these
The wall length already includes half an inch of extra to trim away when you close the seam. Cut long and trim to fit. Nobody has ever fixed a wall that came out short.

- 112 5/8 in. The length of the wall. This is the distance around a circle one wall thickness wider than your former, plus half an inch to trim.
- 24 1/2 in. The height of the wall, which is the height of the finished mug before it shrinks.
- 3Bevel both short ends at about forty-five degrees, sloping opposite ways, so the two ends meet face to face instead of edge to edge. A bevelled seam has several times the gluing area of a butt joint.
- 43 1/2 in across. The floor. Cut it from the same slab so it is the same thickness and dries at the same rate.
- 5Cut both pieces at once and keep the offcuts under plastic. If the floor cracks later you want a spare piece of clay at exactly the same moisture, not a fresh lump.
Two cuts, and one of them is bevelled
Bevel both short ends of the rectangle at about forty-five degrees, sloping opposite ways, so the two ends meet face to face instead of edge to edge. That turns a 3/8 inch edge into a gluing face about half an inch wide, and it is most of why the seam holds.
Cut the floor circle from the same slab, so it is the same thickness and dries at the same rate. Keep the offcuts under plastic: that is your slip and your coils.
A word about the shrinkage number
Shrinkage is not a promise. Published figures come from test bars fired in a lab, and your mug is not a test bar. The number is here so you understand that a mug built at four and a half inches tall comes out of the kiln at about four, and so you build a little bigger when the size actually matters, like a mug that has to fit under a specific coffee machine.
Everything on this page is fired the same way we fire everything: bisque at cone 05, then glaze at cone 5½, which is cone 5 with a twelve-minute hold.
Step three
Wrap it around the former.
This is a slow, boring, thirty-second move, and rushing it is how a wall ends up with a crease in it that shows through the glaze three weeks later.
A slow, boring, thirty-second move. Rushing it puts a crease in the wall that shows through the glaze weeks later.
Paper goes on first. Every time.
Wrap your former in a single layer of newspaper or any thin paper and tape it, loosely. Clay shrinks as it dries and it shrinks onto whatever is inside it. Without paper the mug grips the form, and when you finally force it off you take the seam with it. The paper also lets you slide the whole thing out without touching the inside wall.
Roll it on, do not bend it on
Lay the slab flat with the former at one end, and roll the former along it so the clay picks itself up off the table. Lifting a slab and bending it around a form stretches the outside of every curve, and stretched clay is where a crack starts. Rolling it on stretches nothing.
Which face goes outward
If you textured, stamped or rolled a pattern into the slab, that face goes outward, so decide before you roll. It is also much easier to texture a flat slab on a table than a curved wall on a form, which is why almost all slab decoration happens before this step.
Round comes from not squeezing
Hold the clay against the form with flat palms, never fingertips. A fingertip leaves a dent you will still be able to feel after firing, and the mugs that come out oval are almost always the ones that got gripped. Put it on a banding wheel and turn the mug instead of walking around it.
Leave the former in until the seam is closed and the floor is on. It is the only thing holding the mug round while you work, and pulling it early is why walls go pear-shaped at the bottom. Hold the clay with flat palms, never fingertips, and turn it on a banding wheel.
When to take the former out
Leave it in until the seam is closed and the floor is on. The form is the only thing holding your mug round while you work, and pulling it early is why walls go pear-shaped at the bottom. Once the mug is assembled and has firmed slightly, slide the former out, then peel the paper off the inside. If the paper is stuck, it is fine to leave it in there. It burns away in the bisque and does nothing to your piece.
Step four
Close the seam. This is the one that fails.
If a slab mug comes apart, it comes apart here, and it happens in the kiln weeks later, as a hairline crack running dead straight up the wall.
If a slab mug is going to come apart, it comes apart here, and it usually does not happen while you are watching. It happens in the kiln, weeks later, as a hairline crack running straight up the wall in a perfectly straight line. A straight crack is a seam that was never really joined.

- 1Opposing bevels. Cut at roughly forty-five degrees, sloping opposite ways, so the two faces lie flat against each other. A bevel turns a 3/8 inch edge into a gluing face about half an inch wide.
- 2Score both faces, then slip both faces. Crosshatch hard with a needle tool until it looks scruffy, then wet both with slip. Scoring one side only is the single most common version of this mistake.
- 3Press and hold, then compress across the joint. Push the ends together firmly, wiggle them slightly against each other to seat them, then work a rib back and forth across the line until you cannot find it.
- 4Blend a thin coil down the inside. Roll a pencil-thick coil of the same clay, lay it along the seam inside the mug, and smear it flat into both walls. This is the step that actually holds. Everything above it just gets the two faces touching.
Slip means the same clay
Slip made from a different clay body shrinks at a different rate than your mug does, and a joint made of two shrinkage rates is a joint that opens. Grab your own offcuts, add water, mash it to yogurt.
The seam wants to be thicker, not thinner
People smooth a seam until it is the thinnest part of the wall, which is exactly backwards. Thin joint, weak joint. If you have taken material away, add a little back and blend it in.
Do the outside dry
Once the joint is closed, finish the outside with a rib and as little water as you can stand. Water on the outside softens the wall, lifts the surface and undoes compression you just put in.
Step five
Put a floor in it.
There are two ways to attach a floor and they are both correct. Pick one on purpose rather than discovering which one you did.
Two ways work. This is the stronger one, and it is the one the numbers above are sized for.

The wall wraps around the floor
The floor circle sits inside the bottom of the cylinder and the walls run past its outer edge. That puts the joint at the exact spot taking all the weight, so the coil in the corner is not optional.
The floor circle sits inside the bottom of the cylinder and the walls run past its outer edge. This is the one the calculator above is sized for, it is the stronger of the two, and the joint is hidden inside the mug where nobody sees it. Downside: the seam sits at the exact spot that takes all the weight, so the inside coil is not optional.

The wall stands on the floor
Cut the floor circle oversized, stand the finished cylinder on it, score and slip the ring where they meet, then trim the surplus away flush with a knife held against the wall. Easier to line up, and it gives you a mug about one slab thickness taller than the calculator says. Downside: the joint runs around the outside where it shows.
Either way, the coil in the corner does the work
Roll a thin coil, press it into the inside corner where the wall meets the floor, and smear it into both surfaces with a rounded tool or your fingertip until it becomes a smooth curve rather than a right angle. A sharp interior corner concentrates stress in exactly one line, which is why mugs crack around the bottom rather than anywhere else. Turning that corner into a curve is most of what stops it.
Then compress the floor from the inside. Press down firmly all over it with your thumb or the back of a rib. The floor is the thickest, slowest-drying, most crack-prone piece of the mug and this thirty seconds is the cheapest insurance on the whole page.
Step six
Put a handle on it.
Handles come off in the kiln for one reason far more often than any other, and it is not bad joining. It is that the handle and the mug were at different stages of dryness when they met, so they shrank at different rates and pulled themselves apart.
Handles come off in the kiln because the handle and the mug were at different stages of dryness when they met. Attach leather-hard to leather-hard.
The rule that prevents most of it
Attach leather-hard to leather-hard. Make the handle, then let it firm up alongside the mug until both feel the same. A soft handle on a firm mug will crack at the joint every time, and it will do it quietly, days after you have stopped looking at it.
The pulled handle
The traditional one, and the one that looks like it grew out of the mug rather than being stuck on it. It is also the hardest of the three, so give yourself a few evenings before you judge how it is going.
- Shape a lump of clay into a fat carrot, thick at the top and tapering down.
- Hold it up by the thick end over a bowl or a bucket. Wet your other hand.
- Stroke down the carrot with a loose, wet hand, thumb on one side and fingers on the other, gradually thinning and lengthening it. Rotate a quarter turn between pulls so it thins evenly instead of going flat.
- When it is close, flatten the cross-section slightly so it sits comfortably against a finger rather than being round.
- Lay it over a rounded surface in roughly the curve you want and let it stiffen there until it is leather-hard, at the same time as the mug.
Where it goes wrong: too much water, which makes the clay sloppy and the handle sag, and pulling in only one plane, which makes a ribbon instead of a handle.
The slab strap handle
Three ways work. This is the one to start on. Cut straight out of the same slab as the mug, which means it is already the right thickness, already the same moisture, and already matches whatever texture you put on the wall. If you are new to this, start here.
- Cut a strip from the leftover slab, a little longer than you think you need and about as wide as two fingers.
- Soften the long edges by running a damp fingertip down them. A sharp-edged handle is unpleasant to hold and chips easily.
- Bend it into a curve and rest it on something round so it holds that shape while it firms.
- For a thicker, richer-looking strap, score and slip the back of a thinner strip and fold both long edges into the middle so they meet. That gives you a rounded front, a flat back, and a handle that sits nicely against the mug.
Where it goes wrong: cutting it too thin, because a strap has none of the strength a pulled handle gets from being tapered and compressed.
The rolled coil handle
The most forgiving of the three and completely legitimate. A lot of very good pots have coil handles on them.
- Roll a coil on the table, thicker than a pencil, keeping it even along its whole length.
- Taper one end slightly if you want the handle to look lighter at the bottom, which most do.
- Flatten it a little with a rib or a finger so it has a front and a back rather than being a perfect tube.
- Curve it, rest it on something round, and let it firm up with the mug.
Where it goes wrong: rolling it unevenly, so one section is thin, and that thin section is where it snaps when somebody picks the mug up full.
Attaching it, in order
- Hold the handle against the mug and mark both spots.
- Score both spots on the mug and both ends of the handle. Crosshatch hard.
- Slip all four surfaces with slip made from your own clay.
- Press the top end on first and hold it. Then bring the bottom end in, and press.
- Add a small extra bit of clay at each join and blend it outward into the mug wall, so the joint has more material than the handle does. Never pinch the handle to the mug.
- Support the middle of the handle with a rolled-up scrap of paper towel or a bit of soft foam while it dries.
Size it against your own hand first. Two or three fingers through the gap, top attachment near the rim, bottom about two thirds of the way down.
Getting the size right
Check it with your own hand before it goes on. Most people want two or three fingers through the gap, and a handle that sticks out much more than half the width of the mug starts to feel like a lever when the mug is full.
Set the top attachment near the rim and the bottom roughly two thirds of the way down. Both ends too close together is the classic first-mug handle, and it looks small no matter how well it is made.
Black Level Members also have the wall extruder, which will push out handle stock in a dozen profiles in about four seconds. Everything above still applies once it is off the machine.
Four builds, four potters
Now watch four people do this four different ways.
None of these people work here and none of them know we exist. They are here because between them they cover every reasonable way to build a mug out of a flat sheet of clay, and because watching four approaches is how you work out which one is yours. Nothing loads until you press play.
Every title and channel above was checked against YouTube directly rather than copied from a search result. Videos load from youtube-nocookie.com and nothing from YouTube loads at all until you press play. If one of them ever goes dead, tell us and we will swap it. More of this sort of thing on our page of free videos from other ceramic artists.
Step seven
Dry it slowly, then let the kiln do the rest.
More slab mugs are lost between the table and the kiln than are lost on the table. Drying is not waiting. It is a step, and it is one you can do badly.
Slow, and above all even
Clay cracks when one part of a piece shrinks while another part has not caught up yet. A mug has a thin rim, a thick floor and a handle sticking out into the air, so it is a piece almost designed to dry unevenly. Loosely covered for the first day or two is the whole answer.
Cover the handle for longer
The handle is out in the air on all sides and dries faster than the wall it is stuck to. Drape a scrap of plastic over just the handle and a lot of handle cracks stop happening.
Upside down at the end
Once it is firm, turn it over on a plastic bat on your shelf. That lets the thick floor lose water from the side it has been sitting on.
Purple Level and Black Level Members can use a cotton sheet over it, which dries more evenly. Green Level and Yellow Level Members use plastic sheets.
The heat tables are a tool, not a shortcut
Flip the lamp on if you need to speed things up, rotate the piece a hundred and eighty degrees now and then because one side always dries faster, and get pieces on and off rather than parking them. Left too long under a lamp a mug will dry out and crack, so you can absolutely create the problem you were trying to avoid. Last one out turns the lamps off.
Then the two firings
Bone dry goes to bisque at cone 05, and bisque firings are free, every time. After you glaze it, it goes to a glaze firing at cone 5½, which is cone 5 with a twelve-minute hold, and glaze firings are five cents per cubic inch with a $4.80 minimum. Measure the widest points of the piece and the firing calculator will give you the number.
A slab mug takes glaze exactly like anything else, and the seam does not need any special treatment once it is fired. If you have not glazed here before, the glaze finder is the fastest way to work out what you want on it.
Diagnosis
When it goes wrong, and it will.
Tap whatever happened. Every one of these has a cause, which means every one of them is something you can stop doing.
A straight crack up the wall
That is the seam, and a dead straight crack is nearly always a seam that never truly joined. The usual cause is scoring one face instead of both, or slip that dried out before the ends went together.
Score both bevelled faces until they look scruffy, slip both, press and wiggle them together, and blend a coil down the inside. The coil is the part that holds.
If it is still wet or leather-hard, open the crack slightly, score inside it, slip it, press it closed and blend a coil over it. If it is already fired, it is decorative now, or a kintsugi project.
Already out of the kiln and looking rough? Our page on fixing pottery after a firing covers what is salvageable and what is not.
Questions people actually ask
The ones that come up every week.
Do I need to be certified to make a slab mug?
Only if you want to use a slab roller. Rolling a slab by hand with a rolling pin is open to every Member at every Level with no certification at all, and a mug needs a small enough slab that hand rolling is genuinely practical. The slab roller and slab molds certification is free, takes about twenty-five minutes, and once you have it both slab rollers are open to you regardless of your Level.
Can I make a mug on my very first day?
Yes. Slab building is one of the few things in pottery where a first attempt can come out genuinely good, because the form is doing the hard part instead of your hands. Tell an instructor it is your first one and they will get you set up. Our main instructors wear pink shirts and our trade instructors wear purple, and there are instructors on the floor during every instructed class.
How thick should the slab really be?
Three eighths of an inch for a mug. People consistently want to go thinner and it is consistently the wrong call. A thinner wall warps as it dries, gives you nothing to carve or stamp into, and does not feel any better in the hand once it is fired. If you want a delicate mug, get the wall even rather than getting it thin.
What can I use as a former?
We keep dedicated mug formers in the slab mold room, and there are rolling pins, wooden dowels and pipe around the studio that do the same job. Members bring cans and containers from home all the time and it works. Whatever you use, wrap it in paper first, and a slightly tapered form releases more easily than a perfectly straight one.
Which clay should I use for my first one?
52 Buff. It is the least expensive bag in the building, it is forgiving, and at about 10% it shrinks less than anything else we carry, which means less stress on every joint you just made. B-Mix and Speckled Buff are both excellent second mugs. Leave #16 Porcelain until you have a few behind you, because it shrinks nearly 14% and will find any joint you rushed.
How long does the whole thing take?
An evening for the building, if you include the waiting while the slab firms up. Then a week or so of drying, a bisque firing, glazing on another visit, and a glaze firing. The mug you build on a Tuesday is a mug you take home a few weeks later, which surprises people every single time and is true of everything made out of clay anywhere.
Is a slab mug as strong as a thrown one?
Once it is fired at cone 5½ and the joints were made properly, yes. Fired clay does not remember which direction it was formed in. What a slab mug has that a thrown mug does not is joints, and a joint that was scored, slipped and reinforced with a coil is as strong as the wall around it. A joint that was pressed together dry is not, which is why the seam and floor sections above are the longest ones on this page.
Can I make something other than a mug this way?
This is one technique wearing a mug costume. The same rectangle-and-circle build at a different scale gives you tumblers, vases, canisters, planters and utensil crocks. Change the rectangle into a curve and you get an oval. It is genuinely the most transferable thing on the hand-building side of the studio, and it is why we would rather teach it properly once than teach mugs eleven times.
Go make one
Leave this open on the table.
That is the whole build.
Your ticks save on this device, so you can close the page halfway through a mug and pick it back up where you left off next week. Nothing is sent anywhere and nobody sees it but you. If you would rather have it on paper, the print button at the top will ask which version you want.
Your ticks save on this device, so you can close the page halfway through a mug and pick it up next week. For the reasoning, the videos and the questions people ask, switch to the comprehensive version at the top.
Not a Member yet? A membership is what gets you the clay, the rollers, the kilns and somebody standing next to you when the seam opens up. See the four Levels, or text us at 385-241-5528 and ask anything.
Which version would you like to print?
Videos come out as a labeled box with the title and channel to search for, since paper does not play them.