Pottery Date Night
 Bring All Your Friends Free Week
 Give a Month of Pottery
 Private Pottery Parties

 The Welcome Booklet
 Your First Ten Sessions
 The Pottery Process
 Finding the Studio
 Your Classes Never Expire
 The Four Tables
 Who’s Who
 The Rewards Program
 Flux Glazes
 The Calculators
 Kiln Tracker
 Holiday Kiln Deadlines

 Beginner’s Tool Set
 Fingernail Clippers
 Mayco Clay Mender
 Epoxy for Kintsugi
 Applicator Bottles
 Large Bead Rack
 Raku Workshop
 Nighttime Raku
 Horsehair and Feather Raku
 The Clay Hole T-Shirt
 Embroidered Crewneck
 Zip-Up Hoodie
 Pre-Made Bisqueware
 Glaze Catchers
 Kiln Cookies
 Clay Cubby Rental
 The Glaze Bible, Printed
 The Book of Molds, Printed
 Printable Pottery Guides
 Free Printable Trackers
 Gifts for Potters
 Christmas Pottery Ideas
 Mother’s Day Gift Ideas
 Pottery Date Night
 Studio Calendar
 2027 Studio Events
 What Should I Do Today?
 How to Throw on the Pottery Wheel
 How to Make a Pinch Pot
 How to Tap Center a Pot
 The Five Stages of Clay
 Is Pottery Hard to Learn?
 Pottery Wheel Practice Drills
 20 Easy Hand-Building Projects
 Everything That Sounds Wrong

 A Beautiful Piece, Every Time
 Slab Roller Tips
 Any Dish as a Slump Mold
 Slab Roller & Slab Mold Certification
 The Pottery Skill Tree
 Clay & Pottery Calculators
 Logging Your Pottery and Glazes
 The Pottery Dictionary
 Why Did My Pottery Do That?
 The Pottery Cone Chart
 Pottery Myths, Fact-Checked
 Is Handmade Pottery Food Safe?
 Incredible Ceramic Artist Videos
 How Dan Throws Giant Pots
 How to Dry Your Pottery
 The Pottery Wheel Introduction
 Pottery by Zodiac Sign
 Personality and the Pottery Wheel
 Pottery for Engineers
 ADHD, Hyperfocus, and Never Running Out
 Hobbies for Burnout
 Screen-Free Hobbies for Adults
 Every Addiction I Ever Had Lost to Art
 Functional Pottery Is Engineering
 How Do We Compare?
 Pottery Classes by City
 Every Pottery Studio in Utah
 Pottery in Draper
 Featured Members
 The Signature Wall
 Making Friends as an Adult Is Brutal
 The Clay Hole Commandments
 2027 Pottery Contests
 2027 Studio Parties
 Gallery Night

 Scream It Into the Void
 Destroy the Glaze Wall
 Daily Affirmation Cards
 Everything That Can Go Wrong
 Subscribe to Our Newsletters
 Contact The Clay Hole
 Corporate Team Building

 Glaze Combinations
 Glazes We Do Not Carry
 Making Glaze Test Tiles
 The Mega Glaze Tool
 How to Use the Mega Glaze Tool

 Glaze Brushing Techniques
 How to Use Underglaze
 How to Use Dipping Glazes
 Glaze Problems, Causes and Fixes
 The Dipping Glaze Guide

 Making a Glaze Catcher
 Fused or Sharp After Firing
 The Signature Wall
 His Viral Videos
 His Own Ceramics
 Meet Mud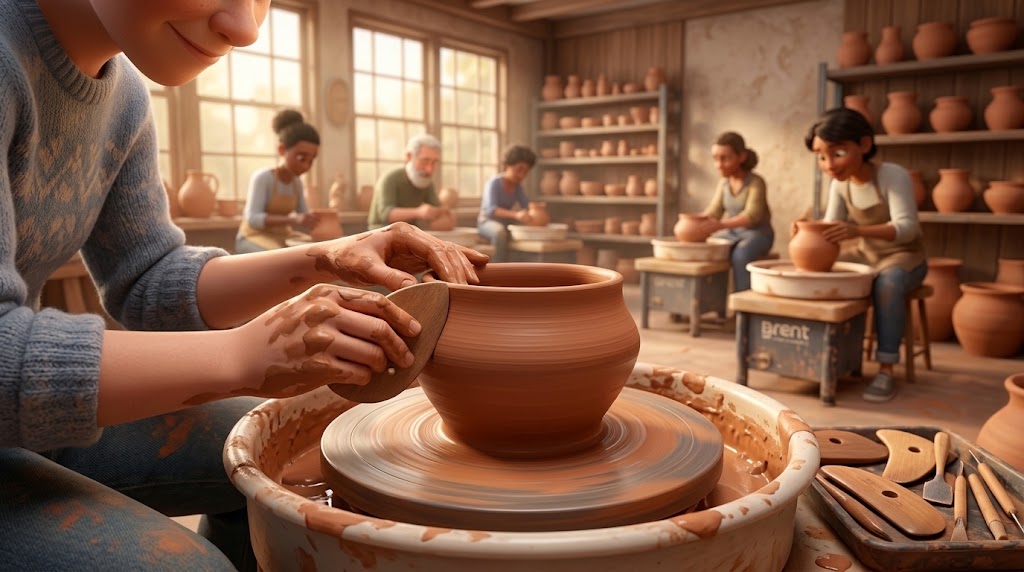
Throwing techniques
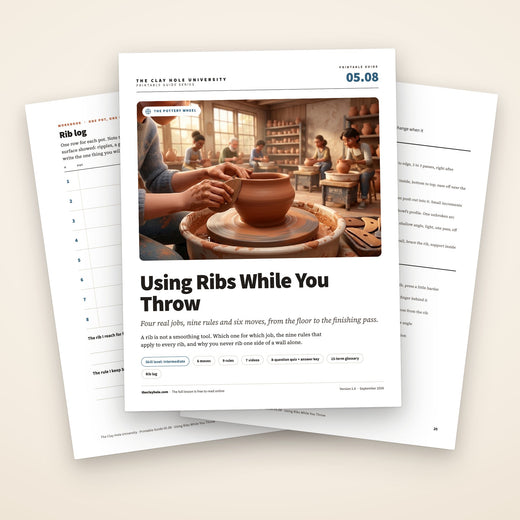
Using ribs while you throw
A rib is the only tool on the wheel that does not get tired, does not have a soft spot in the middle, and does not change shape halfway up a pull. Learn to use one properly and your pots get straighter, thinner, stronger and cleaner, all at once.
Most people meet a rib on day one, use it as a smoothing tool, and never find out what else it is for. This is the rest of it.
The short version of what else it is for.
Which version would you like to print?
Videos come out as a labeled box with the title and channel to search for, since paper does not play them.
Section one
A rib is not a smoothing tool
Or rather, smoothing is the least interesting thing it does. A rib has four real jobs on the wheel, and three of them change the pot structurally rather than cosmetically. Knowing which job you are asking it to do is most of the skill.
Smoothing is the least interesting thing it does. Knowing which of these four jobs you are asking it to do is most of the skill.
It compresses
Pressing clay between a rib and your finger pushes the particles closer together and squeezes out the tiny gaps left by throwing. A compressed floor is far less likely to crack in a ring as it dries. A compressed wall is stronger, holds its shape better, and warps less in the kiln. You cannot see compression happening. You find out about it three days later.
Clay squeezed between a rib and your finger packs tighter and dries with fewer cracks. You cannot see it happen. You find out three days later.
It holds a line your hand cannot
Your finger is soft, warm, and attached to an arm that drifts. A rib is a rigid edge that does not deform under pressure and does not get tired two thirds of the way up. That is why a ribbed wall reads as deliberate and a hand-finished one reads as handmade. Both are fine. They are just different decisions.
Your finger is soft and drifts. A rib is a rigid edge that does not deform and does not get tired two thirds of the way up.
It removes the slip
The slurry your hands leave behind is the wettest, weakest, floppiest clay on the pot. Leave it there and it soaks into the wall, softens the whole form, and dries into a slightly different color and texture than everything under it. Scraping it off with a rib is the single fastest way to stiffen a pot mid-throw.
The slurry your hands leave is the wettest, weakest clay on the pot. Scraping it off is the fastest way to stiffen a pot mid-throw.
It supports from the far side
Push a wall outward from the inside with nothing behind it and the clay goes wherever it wants. Put a rib on the outside first and the clay only goes where the gap between rib and finger lets it. This is how bellies get made on purpose instead of by accident.
Push a wall out with nothing behind it and the clay goes anywhere. Put a rib outside first and it only goes where you allow.
There is a fifth job, and it is the one people reach for first: texture. Serrated ribs, notched ribs and comb ribs all cut deliberate lines into a wall. That is a decorating decision, not a throwing one, and it belongs at the end after the form is right. Nothing on this page is about texture ribs.
Five minutes, before anything else
If you only watch one video on this page, watch this one. It is short, it is filmed close enough that you can actually see the angle of the tool, and it covers the two things beginners get wrong most: how hard to hold the rib, and where the other hand goes.
Then come back and read the nine rules. They will make a lot more sense once you have watched somebody do it.
Then come back and read the four rules. They will make a lot more sense once you have watched somebody do it.
Why this page is words and video, and not just video
A rib changes what your hands feel, and video alone cannot teach a feeling. The words tell you what to notice, the videos show you the pass. Read once, watch once, then go get muddy.
Section three
Section two
Which rib for which job
Three ribs, three jobs
The material is not a style preference. Stiffness decides whether a rib cuts, shapes or follows, and that is the whole decision. Here is what each family is genuinely good at, and what it will do to you if you pick it at the wrong moment.
Stiffness is the whole decision. Wood shapes, metal scrapes, flexible follows. Everything else on the wall sits somewhere between those three.
Wood
Stiff but forgiving, with a warm drag that tells you what it is doing. Absorbs a little water so it glides without stripping the wall bare. This is the shaping rib: bellies, curves, compressing a floor, supporting from outside while you push from inside. It will not cut through a thin wall, which is exactly why beginners should start here.
Metal
Thin, rigid and sharp. Nothing else removes slip and throwing rings as completely, and nothing else leaves a surface that crisp. It is also the rib most likely to slice a thin wall open, and the one that will give you the worst paper cut of your life if you run a finger along the edge. Use it last, use it slowly, and respect it.
Soft rubber and silicone
Bends to whatever it is pressed against, so it follows a curve instead of fighting it. Removes almost no clay. This is the smoothing and rim-compressing rib, and the one to reach for when a form is already right and you just want the surface calm. Ask it to shape anything and it will politely do nothing.
Firm rubber and polymer
The middle of the range, and the most generally useful rib in the building. Firm enough to move clay, flexible enough to follow a gentle curve, and it will not cut. Most brands color-code their flex, softest to stiffest, so check the packaging or just press the edge against your thumb before you commit.
Plastic and acrylic
Cheap, rigid, will never rust, and holds a shape forever. The edge is usually blunter than metal, which makes it a safer straightening tool on a wall you are not confident about. Often the material profile ribs get cut from, because it machines cleanly and survives being scrubbed.
Profile and template ribs
Cut to the exact silhouette of the pot you want, so the wall is shaped by the tool rather than by your judgment. Brilliant for making twelve identical bowls. Not a shortcut past learning to throw, and genuinely risky on thin walls, which is a whole conversation we have further down this page.
The full tool tour, from somebody with the whole drawer out
Fifteen minutes, and worth every one of them if you are standing in front of a wall of ribs wondering which four to actually own. It goes family by family, shows each one against clay, and is honest about which ones get used once a year.
Watch it once now for orientation. You will get more out of it a second time after you have used a few.
What we have, and who can reach it. The studio stocks close to every kind of rib made, in every material above, so nobody has to buy one to find out whether they like it. Studio tool access does step up with membership level: Green Level Members bring their own starter tools, Yellow Level Members and up get the studio’s. How the levels compare.
What we have, and who can reach it. The studio stocks close to every kind of rib made, in every material on this list, which means nobody here has to buy a tool to find out whether they like it. Pull four off the wall, try them all on the same pot, put back the three that were not for you.
Studio tool access steps up with membership level, the same way glazes, slab molds and shelf size do. Green Level Members bring their own starter tools. Yellow Level Members and up get the studio’s tools, and the range keeps widening from there. Here is how the levels compare.
Section four
Section three
Nine rules that apply to every rib you will ever pick up
Four rules that apply to every rib you will ever pick up
Learn these once and every specific technique further down gets easier, because all six of them are just these nine rules pointed at a different part of the pot.
Learn these once and every move below gets easier, because all three of them are just these four rules pointed at a different part of the pot. Break one and something in the troubleshooting list happens to you.
-
Slow the wheel down Faster than you need is how chatter marks happen. A rigid tool against fast clay bounces, and every bounce prints a ridge. Shaping wants a slower wheel than pulling did. A final cleaning pass wants slower still. If your rib is leaving evenly spaced ripples, the wheel is too fast. That is almost always the answer.
-
Never rib one side of a wall alone A rib pressed on the outside with nothing opposite it pushes the wall inward and knocks the pot off round. Your fingertip goes on the inside, directly across from the rib, and the two travel together. The clay is shaped by the gap between them, which means you control thickness and profile in the same motion.
-
Trail the edge, do not point it Hold the rib at a shallow angle so the edge skims across the clay and the body of the rib follows behind it. Stand it up perpendicular and it stops being a rib and becomes a chisel. If you are getting a hard line or a gouge, you are too upright by about twenty degrees.
-
Anchor your arms before you touch the pot Elbows on your thighs, or forearms braced on the splash pan. Same rule as centering. A hand floating in mid air wobbles a little, and the pot records every bit of it in a permanent spiral. Nothing about a rib fixes an unbraced arm.
-
Wet enough to glide, not so wet it is soup A dry rib grabs, judders and tears. A rib sliding through a thick layer of slurry is not touching the wall at all and does nothing. You want the surface damp and the rib damp, and then you want that slurry gone rather than reapplied.
-
One committed pass beats five nervous ones Every pass takes clay off and adds a chance to wobble. Decide what the pass is for, do it in one continuous travel from bottom to top, and stop. The hesitant potter who goes over the same wall six times ends up with a thin uneven wall and a surface no better than after the first pass.
-
Leave gradually, never lift off Snatching a rib off a spinning wall leaves a mark exactly where you finished. Ease the pressure off over the last half rotation and let the rib drift away from the clay, or run it off the top of the rim. Same for coming off a floor: spiral out, do not pick up.
-
Wipe the rib between passes Slip builds on the working edge within one pass. A loaded edge stops cutting cleanly and starts smearing and chattering, and most people blame the rib. Wipe it on the sponge, on your apron, on your leg. Every single pass.
-
Softest tool first, hardest tool last Wood and firm rubber move clay around while there is still clay to move. Metal comes out at the end, when the form is already decided and all that is left is taking off the slip. Reaching for metal early is how a good pot becomes a thin pot with a hole in it.
-
Slow the wheel down Slower than the pull before it, and slower again for a cleaning pass. A rigid tool against fast clay bounces, and every bounce prints a ridge. If your rib is leaving evenly spaced ripples, this is the answer.
-
Never rib one side of a wall alone Fingertip on the inside, directly across from the rib, traveling with it. The clay is shaped by the gap between them. A rib with nothing opposite it pushes the wall inward once per rotation and knocks the pot off round.
-
Trail the edge, do not point it Shallow angle, so the edge skims and the body of the rib follows behind it. Stand it up perpendicular and it stops being a rib and becomes a chisel. A gouge means you are about twenty degrees too upright.
-
One committed pass beats five nervous ones Every pass takes clay off and adds a chance to wobble. Decide what the pass is for, travel bottom to top without stopping, wipe the rib, and look at it before you decide to do another. Usually you will not need one.
Rule zero, which is not really about ribs. If the pot is not centered, a rib will not save it. It will do the opposite: a rigid tool held still against a wall that is orbiting will shave one side thin and leave the other side fat, and now the wall is uneven as well as off round. Get it running true first. Our throwing guide and the page on twisting both cover that.
Section five
Section four
The six moves, in the order you would use them
The three moves, in the order you would use them
These run roughly in the order they happen on a real pot: floor first, then walls, then shape, then surface. Each one is a short numbered list you can hold on a phone, plus what it should feel like when it is going right.
Floor, then wall, then surface. Every pot wants these three in this order, whatever shape it is going to end up. Each one is a short numbered list you can hold on a phone.
Move one: compressing the floor
Right after you open, before you pull a single wall. Two minutes of work that decides whether the piece survives drying.
- Open and flatten the floor first. Get it roughly level with your fingers so the rib is refining, not excavating.
- Slow the wheel to a comfortable walking pace. Fast is pointless here and will skitter the rib.
- Lay the rib almost flat against the floor, edge trailing, held between thumb and two fingers so it can pivot slightly.
- Start dead center and travel outward to the wall in one slow, continuous spiral. Steady downward pressure the whole way.
- Do it two or three times. Not ten. You are compressing, not carving.
- Spiral out and off at the corner where floor meets wall. Do not lift the rib out of the middle.
- Check the corner. A tight, clean junction between floor and wall is the point. A rounded gully full of slurry is not.
What it should feel like
Firm and quiet. Slight resistance that stays even from center to edge. If the rib chatters, the wheel is too fast or the floor is too dry.
Why anyone bothers. A floor that was never compressed can crack in a ring or an S shape as it dries, sometimes not showing up until after the bisque. It is the single most common preventable crack in a community studio, and this is the fix. It costs two minutes.
Move two: the rib pull, for a wall that is actually straight
A rib on the outside instead of a second hand. Thinner walls, straighter profile, less slip, fewer fingerprints.
- Pull the wall up normally first. The rib is not for the first pull. Get your height and roughly even thickness with your hands.
- Slow the wheel a notch below your pulling speed.
- Fingertip inside, rib outside, exactly opposite each other. If they are not lined up, the wall gets squeezed sideways instead of thinned.
- Start at the very bottom of the wall and press the two together until you feel the clay pinch between them.
- Climb slowly and together, keeping the rib at a shallow trailing angle and the pressure constant.
- Do not chase thickness at the rim. Ease off over the last inch or you will thin the top into a flare.
- Run off the top of the rim and let the pot spin a rotation before you touch it again.
- Wipe the rib. Then decide whether it needs another pass. Usually it does not.
Move three: shaping a curve without losing the wall
Turning a cylinder into a belly. The rib is what stops the clay going somewhere you did not ask it to.
- Start from a good cylinder. You cannot rescue a bad wall by curving it. Even thickness first, shape second.
- Let it firm up slightly if the wall feels soft. A minute of doing nothing is a legitimate step.
- Slow wheel. Slower than you think, because the wall is about to get less supported than it has been all day.
- Rib on the outside first, held against the wall where the widest part of the curve will sit.
- Push outward from the inside with the fingers of your other hand, into the back of the rib. The clay swells into the gap you allow it.
- Move the rib up and down slowly to blend the curve rather than leaving a single bulge at one height.
- Work in small increments. A belly built over four gentle passes stands up. One built in a single shove collapses.
- Collar the top back in if the rim has widened, then re-compress the rim before you stop.
Move four: the inside of a bowl, in one arc
The interior of a bowl is the one surface people actually look into. It deserves better than a fingertip.
- Pick a rib whose curve is the curve you want. The outer edge of the rib becomes the inner profile of the bowl. That is the entire trick.
- Get the wall thickness right first. The rib refines an interior; it does not build one.
- Slow the wheel. Bowls are wide, so the rim is traveling much faster than the middle even at a modest speed.
- Support the outside wall with your free hand while the rib works inside. Unsupported wide walls flare fast.
- Start at the center of the floor and travel out and up in one unbroken arc, following the curve you want.
- Keep the rib angle constant. Rolling it as you climb changes the profile halfway and leaves a step.
- Finish off the rim and compress the rim with a soft rib or a chamois.
- Look across the rim at eye level, not down into it. Bumps hide from directly above.
Move five: the finishing pass
Move three: the finishing pass
Taking the slip off. The last thing you do to the wall, and the one that makes the biggest visible difference.
- Do this last. The form is decided. Nothing after this pass except the rim, the foot and the wire.
- Do this last, and only with metal. Wood and rubber move clay while there is clay to move. Metal comes out at the end, when the form is decided and all that is left is taking off the slip.
- Sponge the excess water out of the inside first, so nothing runs down the wall you are about to clean.
- Slowest wheel you have used on this pot. A metal rib on a fast wall skips, and every skip is a ridge you now have to remove.
- Fingertip inside, opposite the rib. Same rule as always. A metal rib with no backing will cut straight into the wall.
- Very shallow angle, barely more than flat against the clay, so the edge shaves rather than digs.
- Light pressure, bottom to top, one pass. You are removing a skin, not a layer.
- Run off the rim and stop. Look at it. Most pots only need the one.
- Clean the corner and undercut the base with the corner of a wooden rib, so the wire has something to follow.
The one that surprises people
A metal rib pass genuinely stiffens the pot. You are removing the wettest clay on it and compressing what is left, so a wall that was going soft will often firm up enough to keep working. If a form is starting to sag, cleaning it is sometimes a better move than waiting.
And the warning. This is the pass that opens holes. Thin wall, sharp tool, no finger behind it, and you are through. If you are not sure the wall can take it, use a firm rubber rib instead and accept a slightly softer surface.
Move six: profile ribs, and when not to use one
A rib cut to the exact silhouette you want. Enormously useful, and the most over-sold tool in ceramics.
- Throw a plain cylinder slightly narrower than the widest point of your profile, with even walls and a bit more thickness than usual.
- Wet the wall. A profile rib covers a lot of clay at once and a dry wall will grab and tear.
- Slow wheel, and keep it slow the whole time the rib is on the pot.
- Brace the rib against the wheel head or your leg so it cannot travel. It has to stay in one place while the pot turns through it.
- Support from inside with your free hand, moving up and down behind the rib as the clay is pushed in.
- Bring it in slowly over several rotations. The pot arrives at the profile; it is not stamped into it.
- Stop when the rib is fully seated and the pot stops changing. Holding it there longer only thins the wall.
- Ease it away sideways, not straight out, and clean the join line at the base.
What profile ribs actually do.
Profile ribs are marketed as a way to make beautiful shapes without learning to throw. They are not. A profile rib needs a good even cylinder to work on, which means you have to be able to throw a good even cylinder before the tool does anything for you at all.
They also do not love thin walls. Some very accomplished potters avoid them entirely for exactly that reason: pressing a rigid profile into a thin fast-moving wall is a reliable way to catch and rip it. If you want thin, shape by hand and refine with a plain rib.
Where they genuinely earn their place is repeatability. Twelve mugs that stack. A lid that fits the pot you made yesterday. A production run where the tenth matches the first. That is a real problem and this is a real solution to it.
Section six
Making a rib of your own
At some point you will want a curve that nobody sells. This is the moment most potters discover that ribs are just shaped pieces of stuff, and that a bandsaw, a rasp and forty minutes will get you the exact edge you have been looking for.
Start by cutting up something you already own
The cheapest first attempt is an old plastic rib, an expired gift card or a scrap of hardwood, and a file. Trace the profile you keep wishing for, cut wide of the line, and sand back to it. Then round every edge that will touch clay, because a square edge cuts a line you did not want.
Things worth knowing before you start. Hardwood lasts and softwood fuzzes. Anything you make from wood wants to be dried flat and occasionally oiled, or it will warp into a shape you did not design. And make the handle end wider than you think, because you will be pressing hard on it with wet hands.
Ask an instructor before cutting anything on studio equipment. Some of it is not for wood.
Section seven
Section five
When it goes wrong
The three that happen first
Nearly every rib problem is one of eight things, and five of them are the wheel being too fast or the tool having nothing behind it. Find your symptom.
These three are almost all of it on a first night, and every one of them is a rule above being broken. Find your symptom.
| What you are seeing | What is actually happening | What to change |
|---|---|---|
| Evenly spaced ripples up the wall | Chatter. The rib is bouncing off clay that is moving past it faster than it can stay in contact with. | Slow the wheel down, wet the surface, wipe the rib, and press slightly harder rather than slightly lighter. Light and fast is what causes it. |
| The wall tore open | Too sharp a tool on too thin a wall, or a dry rib that grabbed instead of gliding. | Softer rib, wetter surface, shallower angle, and a finger behind the rib at all times. If it happened on a profile rib, throw the cylinder thicker next time. |
| The pot went off round | The rib was pressing on one side with nothing opposite it, so it pushed the wall inward once per rotation. | Fingertip inside, directly across from the rib, traveling with it. Never rib one side of a wall alone. |
| A hard line or a step in the surface | The rib was too upright and acting as a chisel, or the angle changed partway through the pass. | Lay the rib flatter so the edge trails, and keep the angle locked for the whole travel. Rolling the tool as you climb is what leaves the step. |
| A mark exactly where you stopped | You lifted the rib straight off a spinning wall instead of easing away from it. | Release pressure over the last half rotation and drift off, or run the rib off the top of the rim. |
| The rib is smearing, not cutting | Slip has built up on the working edge, or the wall is under a layer of slurry the rib never reaches through. | Wipe the rib. Every pass. Then sponge the excess slurry off the wall before the next one. |
| The wall got thin at the top and stayed fat at the bottom | Pressure stayed constant, or increased, as you climbed. Clay is easier to move near the rim, so equal pressure removes more up there. | Start firm at the base and ease off as you go up. The last inch below the rim wants barely any pressure at all. |
| The floor cracked in a ring or an S, days later | Not a rib problem at the time. It is a rib problem you skipped: the floor was never compressed. | Move one, on every pot, always. Two or three passes from center out with a wood rib right after opening. |
If several of these are happening at once, do not start changing your rib technique. Check that the pot is centered and running true first, because an off center pot produces chatter, uneven walls and off-round rims all by itself, and no amount of tool skill fixes it.
Section eight
The cheat sheet
Everything above, compressed to the bit you actually need with clay on your hands. Screenshot it, or hit the button and paste it into your notes app. The button copies whichever version you are reading.
Ribs at the wheel
Every single time
- Slow the wheel down. Slower than the pull before it.
- Finger inside, rib outside, opposite each other.
- Trail the edge. Flat, not upright.
- Brace your arms on your legs or the pan.
- Damp, not soupy. Dry ribs tear.
- One pass, committed. Not five nervous ones.
- Ease off, never lift off.
- Wipe the rib between every pass.
- Wood first, metal last.
The six moves
- Floor: wood rib, center to edge, 2 to 3 passes, right after opening.
- Wall: rib outside, finger inside, bottom to top, ease off near the rim.
- Curve: rib outside first, then push out from inside into it. Small increments.
- Bowl inside: the rib’s edge is the bowl’s profile. One unbroken arc, center outward.
- Finish: metal, slowest wheel, shallow angle, light, one pass, off the rim.
- Profile rib: thicker cylinder, wet wall, brace the rib, support inside, arrive slowly.
If the button does nothing, your browser is blocking clipboard access. Screenshot works fine and nobody will know the difference.
One last thing
Go and use a rib badly for an hour
Reading about a rib is worth roughly one session at the wheel. Watching seven videos about ribs is worth roughly one session at the wheel. Doing it, on a real pot, with the list open next to you, is worth all of it, and the first ten will be worse than what you were making before. That is the normal part.
Reading about a rib is worth roughly one session at the wheel. Doing it, on a real pot, with the list open next to you, is worth all of it, and the first ten will be worse than what you were making before. That is the normal part.
We have close to every kind of rib made, in every material on this page, so nobody here has to guess which one they like from a photograph on the internet. Pull four off the wall and find out on the same pot.
Not a member yet? Twenty-nine wheels, four kilns, thousands of tools and four instructors on the floor during class, so you can hand somebody a rib and ask them what you are doing wrong. Which is a much faster way to learn this than any page on the internet, including this one.
You are reading the Nutshell Version. The switch at the top of the page opens the comprehensive one, which adds three more moves, five more rules, six rib materials, five more troubleshooting rows and five more videos.
Every video on this page belongs to the potter who made it, and we are grateful they put it out for free. Nothing plays and no YouTube cookies load until you press a play button. The Clay Hole, 12896 S Pony Express Rd, Suite 100, Draper, Utah.