Pottery Date Night
 Bring All Your Friends Free Week
 Give a Month of Pottery
 Private Pottery Parties

 The Welcome Booklet
 Your First Ten Sessions
 The Pottery Process
 Finding the Studio
 Your Classes Never Expire
 The Four Tables
 Who’s Who
 The Rewards Program
 Flux Glazes
 The Calculators
 Kiln Tracker
 Holiday Kiln Deadlines

 Beginner’s Tool Set
 Fingernail Clippers
 Mayco Clay Mender
 Epoxy for Kintsugi
 Applicator Bottles
 Large Bead Rack
 Raku Workshop
 Nighttime Raku
 Horsehair and Feather Raku
 The Clay Hole T-Shirt
 Embroidered Crewneck
 Zip-Up Hoodie
 Pre-Made Bisqueware
 Glaze Catchers
 Kiln Cookies
 Clay Cubby Rental
 The Glaze Bible, Printed
 The Book of Molds, Printed
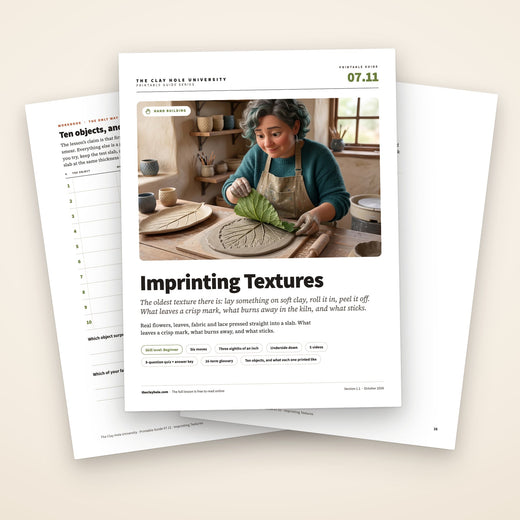
 Printable Pottery Guides
 Free Printable Trackers
 Gifts for Potters
 Christmas Pottery Ideas
 Mother’s Day Gift Ideas
 Pottery Date Night
 Studio Calendar
 2027 Studio Events
 What Should I Do Today?
 How to Throw on the Pottery Wheel
 How to Make a Pinch Pot
 How to Tap Center a Pot
 The Five Stages of Clay
 Is Pottery Hard to Learn?
 Pottery Wheel Practice Drills
 20 Easy Hand-Building Projects
 Everything That Sounds Wrong

 A Beautiful Piece, Every Time
 Slab Roller Tips
 Any Dish as a Slump Mold
 Slab Roller & Slab Mold Certification
 The Pottery Skill Tree
 Clay & Pottery Calculators
 Logging Your Pottery and Glazes
 The Pottery Dictionary
 Why Did My Pottery Do That?
 The Pottery Cone Chart
 Pottery Myths, Fact-Checked
 Is Handmade Pottery Food Safe?
 Incredible Ceramic Artist Videos
 How Dan Throws Giant Pots
 How to Dry Your Pottery
 The Pottery Wheel Introduction
 Pottery by Zodiac Sign
 Personality and the Pottery Wheel
 Pottery for Engineers
 ADHD, Hyperfocus, and Never Running Out
 Hobbies for Burnout
 Screen-Free Hobbies for Adults
 Every Addiction I Ever Had Lost to Art
 Functional Pottery Is Engineering
 How Do We Compare?
 Pottery Classes by City
 Every Pottery Studio in Utah
 Pottery in Draper
 Featured Members
 The Signature Wall
 Making Friends as an Adult Is Brutal
 The Clay Hole Commandments
 2027 Pottery Contests
 2027 Studio Parties
 Gallery Night

 Scream It Into the Void
 Destroy the Glaze Wall
 Daily Affirmation Cards
 Everything That Can Go Wrong
 Subscribe to Our Newsletters
 Contact The Clay Hole
 Corporate Team Building

 Glaze Combinations
 Glazes We Do Not Carry
 Making Glaze Test Tiles
 The Mega Glaze Tool
 How to Use the Mega Glaze Tool

 Glaze Brushing Techniques
 How to Use Underglaze
 How to Use Dipping Glazes
 Glaze Problems, Causes and Fixes
 The Dipping Glaze Guide

 Making a Glaze Catcher
 Fused or Sharp After Firing
 The Signature Wall
 His Viral Videos
 His Own Ceramics
 Meet Mud
Hand building · Imprinting textures
Real leaves, lace and fabric, pressed straight into a slab.
The oldest texture there is: lay something on soft clay, roll it in, peel it off. What leaves a crisp mark, what burns away in the kiln, and what sticks are the three things this page is about, because the difference between a leaf and a smear is all in those three.
This page walks it in order with a tick list at every step: the slab, the object and which way up it goes, the roll and the lift, and what to do with the slab afterwards. Six fixes and five videos from potters who do not work here.
This is the short version: the slab, the object, the roll, the lift, each with a tick list. The what-prints-what tables, the reasoning and the questions are in the comprehensive version.
Read it, then watch it
Why this is written down and filmed, both.
Imprinting is the easiest texture there is and the one people are most disappointed by, because the difference between a crisp leaf and a smear is three things nobody tells you: how soft the slab is, which side of the leaf goes down, and how you lift it. Those are facts, and facts go on the page. What the page cannot show is the roll: how hard, how fast, and what it looks like when an object is fully registered and it is time to stop. That is the videos.
Use both, in this order
Read the step. Watch the roll. Do it with the tick list open, on a scrap slab before the real one. The page remembers your ticks.
The whole idea
Soft slab, dusted object, rolled in, lifted straight up.
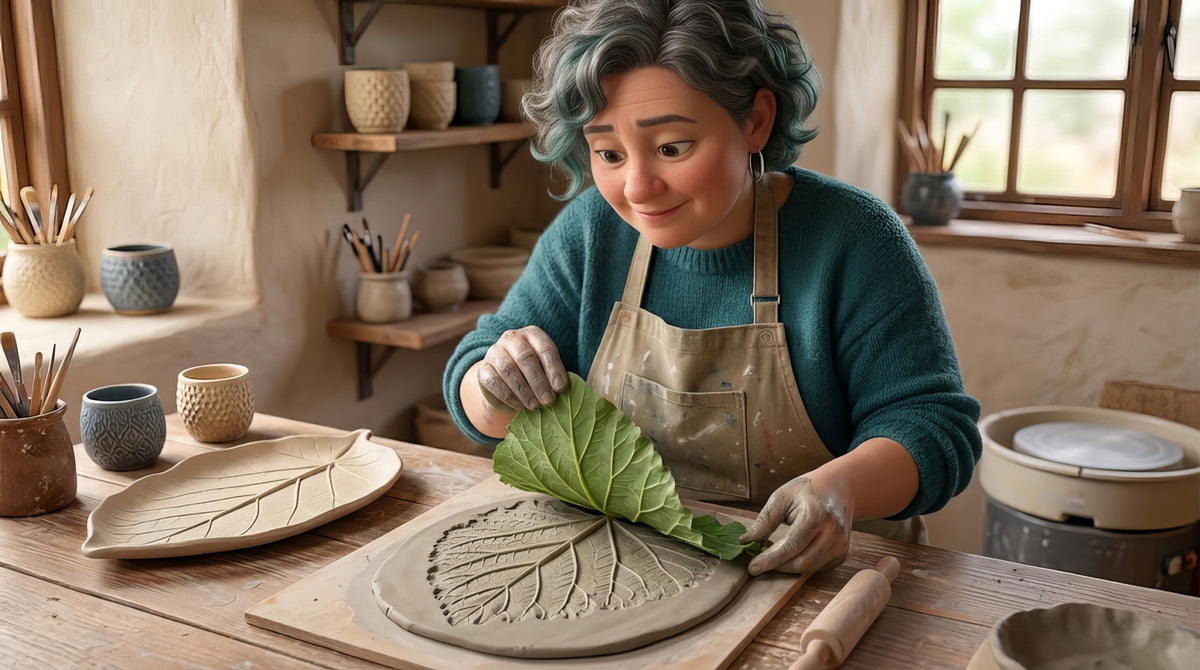
Roll a slab a little thicker than usual, let it lose its shine, lay the object on it, roll it in with a pin in two directions, and peel it off straight up from one corner. Cornstarch on the object stops it sticking. Then let the slab firm up on its board before you move it, and glaze it with something you can see through.
The five-minute version
The whole technique in six moves.
If you already roll slabs and you just want the shape of it, this is the shape of it. Everything below is these six moves, slowed down and with the places they fail marked.
Before you press anything
What you need on the table.
Six things, and the only one you cannot find in a kitchen drawer is the slab. The cornstarch is the one people skip and then regret.
A slab rolled thicker than usual on a board, something with relief to press, a rolling pin, cornstarch or a sheet of thin plastic, and a needle tool. That is all of it.
Step one
Roll it thick, and let it lose its shine before you press.
Three eighths of an inch. An impression takes clay away from the slab, and a quarter inch slab with a rope pressed into it is an eighth of an inch thick under the rope. Roll thicker than feels right, on a board or a sheet of canvas, and leave it there. The slab does not move until it can hold its own shape.
Then wait ten or fifteen minutes. A slab straight off the roller is shiny and sticky, and a shiny slab grips whatever touches it and smears when it comes off. You want the surface matte and soft: it takes a thumbprint easily but does not stick to the thumb. On a warm evening that is a quarter of an hour uncovered. Compress the slab with a rib while you wait, both faces, because a compressed slab warps less later and takes a cleaner impression now.
The slab rollers here need the free slab rollers and slab molds certification; rolling by hand with two guide sticks either side of the clay gives the same slab in five minutes for anything mug sized. Either way, roll on the board you will leave it on.
Step two
Pick the object, turn it the right way, and dust it.
If it has relief and it is not sticky, it will print. The question is how well. Firm, ribbed, veined things print crisply: the underside of a leaf, lace with a thick thread, burlap, rope, bark, a shell, a bolt. Soft, flat, sticky things print as a smear: a lettuce leaf, thin nylon lace, anything with an adhesive back.
What leaves a mark
Leaves, underside down: rose, maple, oak, geranium, hosta, sage, mint, ferns. Lace and doilies with thick thread. Burlap, linen, canvas, knitting. Rope, string, chain. Bark, shells, seed heads, pine cones. Bolts, gears, keys, a cheese grater, a tire, bubble wrap, a plastic canvas grid, textured wallpaper, a rubber mat.
What the kiln removes
Any organic thing left in the clay: leaves, seeds, string, paper, cotton thread. It burns out in the bisque and leaves a ghost of itself, sometimes a lovely one. Shells are the exception: they are limestone, and a bisque turns them to quicklime, which takes water back out of the air and pops a crater out of the surface later. Press with one, then lift it off. It also makes smoke and ash, and a thick stem or a wad of fabric leaves a void that can crack. Pull what you can at soft leather hard. Synthetics do not burn out: they melt, they give off fumes on the way, and what is left sticks to the piece and to the shelf underneath it. Pull every synthetic thread out, every time.
What locks in
Open-weave lace and burlap, because clay pushes through the holes. Foam, because it grips. Anything with a hairy surface. These all work, with a release: cornstarch dusted on the object, or a sheet of thin plastic rolled over the top so the object never touches the clay directly. The plastic softens the impression a little; the cornstarch does not.
Turn the object the right way. A leaf prints its veins from the underside and prints nothing much from the top. Lace prints its thread side. A shell prints its ridged outside, not its smooth inside. Hold it up to a light and look at the side with the most shadow; that is the side that goes down. Then dust it: a pinch of cornstarch rubbed over the surface, which burns out in the kiln and leaves nothing behind. Water is not a release. A wet object slides, and a slide is a smear.
Step three
Roll it in, two directions, then lift it straight up.
The pin gives even pressure. Fingers give fingerprints. Lay the object on the slab, put the rolling pin over it, and roll with even weight along the object and then across it. A leaf registers in two passes. Lace takes a few more. Anything deep, a shell or a rope, gets pressed in first with the heel of the hand and then rolled so the edges seat.
Roll from the middle of the slab outward, not from one edge to the other. A slab rolled from one side stretches that way and the pattern stretches with it, which is how a round leaf becomes an oval. And keep the pressure the same on every pass. The most common faint impression is a slab that got one hard pass and three light ones, and the pattern is only there where the hard pass went.
Then the lift, which is where most imprints are lost. Take one corner of the object and peel it back slowly, straight up, keeping the object flat rather than dragging it across the surface. If a corner grips, a needle tool under it lifts it without tearing. A leaf comes off from the stem end, so the veins release in the direction they grew. Lace comes off in one steady peel. If something tears and leaves a thread behind, leave it if the thread is a natural one: cotton, linen and jute burn out in the bisque. A synthetic thread does not, so that one comes out with a needle tool.
Rollers and stamps
A texture roller is an object you roll in without taking it out again, and the same rules apply: matte slab, even pressure, roll from the middle. Keep the pattern straight by rolling toward yourself in one motion rather than back and forth, which doubles the print. Overlap passes by half a pattern so the seam disappears. Our stamps lesson covers making your own flat and roller stamps from clay.
Step four
Firm it on the board, shape it, dry it slowly, glaze it thin.
Move the board, not the slab. A textured slab picked up soft stretches, and the texture stretches with it. Leave it on the board until it is soft leather hard, firm enough to lift by one edge without drooping, and then shape it: drape it into or over a slab mold, wrap it around a form for a mug, or cut a tile from it.
When you shape it, the texture faces out or up and nothing touches it. A textured slab pressed into a slab mold goes texture up; a textured slab draped over a hump goes texture out, and the hands go on the back. Any object still in the clay, a leaf or a length of string, comes out now with a needle tool, before the piece dries hard around it. Then dry it slowly: a textured slab is thick in some places and thin under every impression, and the thin places shrink first. Loose plastic for the first day or two, and tiles between boards.
Then glaze for the texture, which means glaze thin and see-through, or wash and wipe first. A dark wash wiped back over an imprinted slab is the single best thing you can do to it, and it takes a teaspoon of underglaze. Our wipe-away lesson is the method. Three coats of an opaque glaze, on the other hand, fill every vein you spent the evening on.
Watch it done
Now watch five people do this five ways.
Watch this one, then go roll a slab.
None of these potters work here. Between them they cover ten texture ideas, six textures from everyday things, the leaf imprint, texture rollers, and making your own roller. Nothing but the still frame loads until you press play.
Ten texture ideas in eleven minutes, from wire brushes to sweet corn on the cob. The other four videos are in the comprehensive version.
When it goes wrong
Six ways it goes wrong, and what to do about each.
The three failures that happen on the first night.
Pick the one that looks like your slab. The first three are the press. The last three are what happened to the slab afterwards.
The texture smeared when you lifted the object
The slab was too wet, or the object moved while it was coming off, or you lifted it at an angle instead of straight up. A soft slab holds a crisp impression only until something drags across it.
Let a freshly rolled slab sit ten or fifteen minutes before pressing so the surface loses its shine. Lift the object straight up from one corner, slowly. Peel, do not slide.
If the slab is still soft, roll it flat again with the pin and press again; you have lost nothing but five minutes. If it has started to firm, the smear is a texture now.
The object stuck in the clay and tore it coming out
No release, or an object with an open weave that clay flows into. Lace, burlap and anything with holes lets the clay push through, and then the object is locked in.
Dust the object with cornstarch before pressing, or roll a sheet of thin plastic over it and press through the plastic. Press open-weave fabrics lightly enough that the clay does not go through.
Tease it out with a needle tool, then smooth what tore with a fingertip and a barely damp sponge. Cotton, linen and jute threads left in the clay burn out in the bisque and leave nothing but their ghost. A synthetic thread melts instead, so pull that one out.
The impression is faint and half the pattern is missing
Not enough pressure, or uneven pressure, or a slab that had firmed too far to take it. Pressing by hand gives a mark where the fingers were and nothing between them.
Roll the object in with a rolling pin, in one direction and then across, with even weight. Press while the slab is still soft enough to take a thumbprint without cracking. Deep objects get pressed with the heel of the hand and then rolled.
If the slab is soft, roll harder over the same object in the same place; it will usually register. If it has firmed, roll the slab flat and start again.
The slab stretched and distorted as you worked
You pressed on a slab that had nothing under it, or lifted it while it was still too soft to hold its shape, or rolled a hard object across it and dragged the surface along.
Roll and press the slab on a board or a sheet of canvas and leave it there until it firms. Move the board, not the slab. Roll objects in from the middle outward so the slab spreads evenly instead of one way.
A stretched pattern is a stretched pattern. Cut the piece from the part of the slab that survived, or use the distortion: a leaf print that has stretched reads as a leaf in wind.
It cracked along a deep impression while drying
A deep object left a thin spot, and thin spots dry first and shrink first. A rope pressed halfway through a quarter inch slab leaves an eighth of an inch of clay under it.
Roll the slab thicker than usual, three eighths of an inch, when you plan to press anything deep. Compress the back of the slab with a rib after pressing. Dry slowly under plastic.
A hairline at leather hard can be scored, slipped and rubbed closed from the back. At bone dry it is a crack, and it opens in the bisque, so show the studio team before it goes in for firing. The next slab is thicker.
The texture vanished under the glaze
An opaque glaze, or too many coats of any glaze, filled the low points and rounded the high ones. A fine leaf vein is about a millimeter deep and a glaze coat is a good fraction of that.
A wash wiped back before a clear, a celadon that pools, or two thin coats of a transparent. Our wipe-away lesson is the natural next page for every imprinted slab.
Fired is fired. The next one gets the wash.
How it works here
At The Clay Hole, this is a slab room technique.
This page is written for potters everywhere. A few things are specific to our building.
Three things to know here
The slab rollers and the 248 slab molds need the free slab rollers and slab molds certification; rolling by hand needs nothing. Bring your own leaves, lace and objects, and take them home again; a leaf left on a shared table is compost by Thursday. Pull organic material out before the piece goes to the drop-off table.
Slab rollers and slab molds
Both slab rollers and all 248 slab molds are behind the free slab rollers and slab molds certification, about twenty-five minutes, once. Rolling by hand with guide sticks needs no certification and makes a perfectly good slab for anything mug sized. Never press an object into a slab that is sitting in a slab mold; press it on a board, then move it.
Your objects
Leaves, lace, fabric and found objects are yours to bring and yours to take home. Wash the clay off lace and fabric while it is wet, or it sets like plaster. Do not let it dry and then shake it out: dry clay is dust, and that dust is the one thing here you do not want to breathe. The studio’s own stamps and texture rollers are on the shelves too, a lot of them, and they are studio tools from Yellow Level up. A bag of textures in your locker is still a better tool kit than most things you can buy.
Organic material and the kiln
Our staff load every kiln, and a slab with a whole leaf still in it smokes. Pull leaves, string and fabric out at soft leather hard before the piece dries. A stray cotton, linen or jute thread left behind burns out cleanly. A synthetic thread melts, so it always comes out. A wad of anything does not burn out cleanly either.
Firing
Bisque is cone 05 and free. The glaze firing is cone 5½ at five cents a cubic inch, $4.80 minimum. Texture does not change the price. Every piece goes in with a naked bottom on a cookie, so keep the impression off the base of anything that will stand on a shelf.
Questions people actually ask
The ones that come up every week.
Which side of a leaf do I press?
The underside, where the veins stand up. The top of a leaf is smooth and prints as a shape; the underside prints as a leaf. Firm, ribbed leaves work best: rose, geranium, maple, oak, hosta, ferns, herbs like sage and mint. Soft leaves like lettuce tear and leave mush.
Do I have to take the leaf out?
Take it out if you can, once the slab has firmed enough to hold the impression. A leaf left in will burn away in the bisque and leave a perfect ghost of itself, but organic material in a kiln makes smoke and ash, and a thick stem can leave a void that cracks. Pull it at soft leather hard with a needle tool, from the stem end.
How thick should the slab be?
Thicker than you would roll for a plain slab. Three eighths of an inch for anything you press deeply, a quarter inch for a light texture like fabric. The impression takes clay away from the wall, and a slab that was already thin has nothing to give.
How do I stop things sticking?
Cornstarch on the object, or a sheet of thin plastic between the object and the clay. Cornstarch burns out in the kiln and leaves nothing. Plastic softens the impression slightly but it saves lace, burlap and anything with holes in it. Water is not a release; a wet object slides and smears.
Can I texture a pot on the wheel this way?
Not with a slab technique, but a thrown pot at soft leather hard takes stamps, rollers and pressed objects on the outside if you support the wall from inside with a hand or a sponge. It is harder than a flat slab, because the surface curves away from the object. Roll the object across rather than pressing it flat.
What happens to fabric and string in the kiln?
They burn out in the bisque, completely, and leave a hollow where they were. Cotton, linen, jute, paper and leaves all go. Synthetic fabric melts first and can leave a residue, and a wad of anything thick can leave a void that cracks, so pull what you can before the piece dries.
What do I do with the slab once it is textured?
Let it firm to soft leather hard on its board, then shape it: drape it over or into one of the 248 slab molds, wrap it around a form for a mug, or cut a tile from it. Our slab rollers and slab molds certification opens the slab room, and the slab mug lesson is the whole build.
Related lessons
Six lessons that sit next to this one.
Three to read next.
An imprint is only as good as the slab under it and the glaze over it. These are the lessons on either side.
That is the whole technique
Thick slab, right side down, roll it in, lift it straight.
Your first imprinted slab will probably have one smeared corner where you slid the leaf instead of peeling it. That is normal, and the second one will not. There is no faster way in this building to make a slab look like it was made by someone who knew what they were doing, and the whole tool kit is a leaf.
If you want the what-prints-what tables, the roller notes, the reasoning and the answers to the questions everybody asks, switch to the comprehensive version at the top. Otherwise, go find a leaf.
Written for potters everywhere. Where our studio does things differently, the page says so.
Which version would you like to print?
Both print clean, with the videos turned into labeled boxes you can search for later.