Pottery Date Night
 Bring All Your Friends Free Week
 Give a Month of Pottery
 Private Pottery Parties

 The Welcome Booklet
 Your First Ten Sessions
 The Pottery Process
 Finding the Studio
 Your Classes Never Expire
 The Four Tables
 Who’s Who
 The Rewards Program
 Flux Glazes
 The Calculators
 Kiln Tracker
 Holiday Kiln Deadlines

 Beginner’s Tool Set
 Fingernail Clippers
 Mayco Clay Mender
 Epoxy for Kintsugi
 Applicator Bottles
 Large Bead Rack
 Raku Workshop
 Nighttime Raku
 Horsehair and Feather Raku
 The Clay Hole T-Shirt
 Embroidered Crewneck
 Zip-Up Hoodie
 Pre-Made Bisqueware
 Glaze Catchers
 Kiln Cookies
 Clay Cubby Rental
 The Glaze Bible, Printed
 The Book of Molds, Printed
 Printable Pottery Guides
 Free Printable Trackers
 Gifts for Potters
 Christmas Pottery Ideas
 Mother’s Day Gift Ideas
 Pottery Date Night
 Studio Calendar
 2027 Studio Events
 What Should I Do Today?
 How to Throw on the Pottery Wheel
 How to Make a Pinch Pot
 How to Tap Center a Pot
 The Five Stages of Clay
 Is Pottery Hard to Learn?
 Pottery Wheel Practice Drills
 20 Easy Hand-Building Projects
 Everything That Sounds Wrong

 A Beautiful Piece, Every Time
 Slab Roller Tips
 Any Dish as a Slump Mold
 Slab Roller & Slab Mold Certification
 The Pottery Skill Tree
 Clay & Pottery Calculators
 Logging Your Pottery and Glazes
 The Pottery Dictionary
 Why Did My Pottery Do That?
 The Pottery Cone Chart
 Pottery Myths, Fact-Checked
 Is Handmade Pottery Food Safe?
 Incredible Ceramic Artist Videos
 How Dan Throws Giant Pots
 How to Dry Your Pottery
 The Pottery Wheel Introduction
 Pottery by Zodiac Sign
 Personality and the Pottery Wheel
 Pottery for Engineers
 ADHD, Hyperfocus, and Never Running Out
 Hobbies for Burnout
 Screen-Free Hobbies for Adults
 Every Addiction I Ever Had Lost to Art
 Functional Pottery Is Engineering
 How Do We Compare?
 Pottery Classes by City
 Every Pottery Studio in Utah
 Pottery in Draper
 Featured Members
 The Signature Wall
 Making Friends as an Adult Is Brutal
 The Clay Hole Commandments
 2027 Pottery Contests
 2027 Studio Parties
 Gallery Night

 Scream It Into the Void
 Destroy the Glaze Wall
 Daily Affirmation Cards
 Everything That Can Go Wrong
 Subscribe to Our Newsletters
 Contact The Clay Hole
 Corporate Team Building

 Glaze Combinations
 Glazes We Do Not Carry
 Making Glaze Test Tiles
 The Mega Glaze Tool
 How to Use the Mega Glaze Tool

 Glaze Brushing Techniques
 How to Use Underglaze
 How to Use Dipping Glazes
 Glaze Problems, Causes and Fixes
 The Dipping Glaze Guide

 Making a Glaze Catcher
 Fused or Sharp After Firing
 The Signature Wall
 His Viral Videos
 His Own Ceramics
 Meet Mud
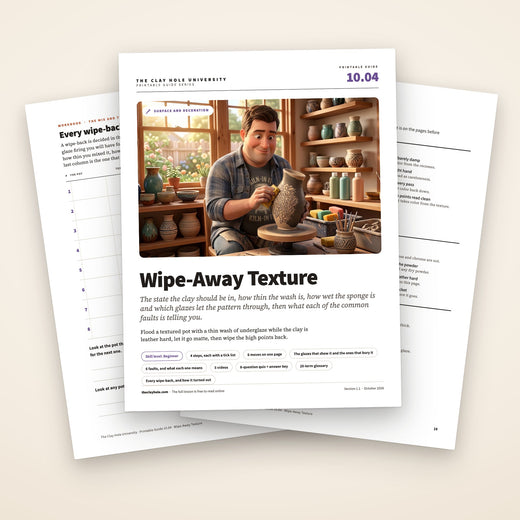
Surface and decoration · Wipe-away texture
Color goes everywhere. The sponge decides what stays.
Flood a textured pot with a thin wash, let it go matte, then wipe the high points clean. The color that stays in the recesses turns a texture you could barely see into the whole design.
This page walks it in the order the pot wants it, with a tick list at every step, the underglaze and oxide versions side by side, the glazes that show it and the glazes that bury it, six fixes and five videos.
This is the short version: the mix, the wait, the wipe, and the glaze rule. The oxide details, the reasoning and the questions are in the comprehensive version.

Read it, then watch it
Why this is written down and filmed, both.
The wipe is a feel. How damp the sponge is, how hard you press, when to stop: none of that survives a sentence, and a wipe-back done with a sponge that is a little too wet is a plain pot. So the videos are here for the sponge. The mixing ratios, the order of operations, and which glazes will hide your work are the other half, and that half is what people forget between the bench and the glaze wall, which is why it is written down with a tick list under it.
Use both, in this order
Read the step. Watch the sponge. Do it with the tick list open. The page remembers your ticks, so you can wash a pot on Tuesday and pick up where you left off when it comes out of the bisque.
The whole idea
Color goes everywhere. The sponge takes it off the top.
Paint a thin wash over a textured pot while the clay is still leather hard, let it go matte, then wipe the high points clean with a sponge wrung nearly dry. What stays in the recesses is the design. Once it is dry and bisque fired, a see-through glaze goes over the top and the texture reads from across the room.
The five-minute version
The whole technique in six moves.
If you already glaze and you just want the shape of it, this is the shape of it. Everything below is these six moves, slowed down and with the places they fail marked.
Six moves. The tick lists below are these six broken into things you can do with a sponge in one hand.
Before you open a bottle
What you need on the table.
Six things. The sponge is the one that matters, and the glaze is the one people get wrong.
A textured pot at leather hard, a bottle of underglaze in a strong color, a small pot of water, a wide soft brush, a clean sponge with a bucket to rinse it in, and a glaze you can see through. That is all of it.
Step one
Texture first, then the wash while the clay is still leather hard.
The texture is the design. The wash only reveals what is already there, so the evening is decided at leather hard, before the first brushstroke. Stamp it, roll it, carve it, add sprigs, or build from a textured slab. Anything with real recesses works. Anything smooth does not.
Then keep it leather hard. Leather hard is firm and cool but not dry, and it is the stage this wipe works at. Bone dry clay drinks the wash and will not give it back, so you will never wipe it off. We put underglaze on raw clay here, and it goes through the bisque firing before any glaze touches it. Our bisque firing is cone 05 and it is free.
Handle the pot by the foot from here on. Skin oil on the surface is a crawl waiting to happen.
How deep is deep enough
Deeper than the sponge can reach, which is only about a millimeter. A firm stamp press, a roller with real relief, or a carved line all qualify. A light fabric impression is borderline: it will take a wash, but you will need a stronger mix and a lighter hand, and the result reads as a tint rather than a pattern. When in doubt, press harder at leather hard. You cannot add depth once it is bisque fired.
Step two
Mix a thin wash and flood the whole surface.
One part underglaze, two parts water. That is the starting mix, made in your own pot with an instructor beside you. It should look like weak tea, and it should look far too thin. It is not. Leather hard clay drinks the water and keeps the color, and a wash that looks right in the pot is a wash that will not wipe off.
Stir it every time you load the brush, because pigment sinks. Then paint it on everywhere with a wide soft brush, working it into the recesses, going round the pot twice if the first pass looked patchy. Do not be neat. Neat is what the sponge does. A wash that is applied thinly and evenly wipes back thinly and evenly; a wash slapped on in one heavy coat gives you a dark half and a pale half.
Then wait. A few minutes on a warm evening. The surface goes from shiny to matte as the clay pulls the water in, and matte is the signal. A shiny wash is a wet wash, and a wet wash moves sideways under a sponge instead of lifting off. If you are doing several pots, wash them all first and start wiping the first one; by the time you finish, the last one is ready.
Red iron oxide, and the rest
A teaspoon of red iron oxide in a small pot of water is the classic wash: cheap, warm, forgiving. A wash needs a flux in it, about half the dry weight, or the fired wash dusts off on your hands. The University lesson on making and using pottery washes has the recipe and a calculator. Cobalt is far stronger, a quarter teaspoon is plenty; copper goes green and can run; manganese and chrome are the ones to be genuinely careful with. All of them are metal compounds. Mix them wet, wear a respirator if you are handling dry powder, keep them off your skin, and never eat or drink at the bench. Oxide washes are the exception to the leather hard rule: our oxide washes lesson does them on bisque, because porous bisque grips the wash and on leather hard clay it bleeds.
Predictable, and it stays where you put it
Underglaze is colored clay with a little flux in it, so it stays where you put it and does not run into the glaze above it. It comes out of the kiln as a chalky, matte version of the color in the bottle, lighter when the wash is thin, and a thin wash of it wipes back cleanly. Oxides interact with whatever glaze sits on top, which is either the whole point or the whole problem depending on the day. Learn the technique with underglaze, then play with iron once you know what a good wipe looks like.
Step three
Wipe the high points, and stop before you think you should.
The sponge is wrung out until it is barely damp. Wipe in one direction with a light hand. Rinse it, wring it, wipe again. The high points come clean and the recesses stay full. Stop the moment the surface reads the way you want, because every pass after that takes color out of the texture too.
Three things go wrong here, and two of them are about water. A sponge that is too wet floods the recesses and lifts the color out of them. A sponge that is not rinsed between passes puts the pigment it just collected back down as a gray film. And a sponge dragged in every direction leaves crossed streaks that read as carelessness, where one direction reads as a decision. Rinse, wring, one direction, light. That is the whole skill.
How far you wipe is taste. Wipe hard and the high points go back to bare clay and the pattern is crisp and graphic. Wipe lightly and a tint stays on the surface and the whole pot goes a shade warmer, with the texture darker still. Both are correct. What is not correct is deciding halfway through, so look at the first pot and decide before you start the second. If a faint tint stays where you wanted clean clay, one more light pass with a barely damp sponge takes most of it, and what is left reads as a deliberate tint under the glaze.
The rinse water
At The Clay Hole, rinse the sponge at the all-purpose sink and take a full rinse bucket to The Wash Pit, as the clean-up instructions say. Oxide rinse water should not go down any sink: let it settle in a bucket overnight, and ask the studio team where the sludge and the clear water go. Cobalt, copper and manganese in particular do not belong in the drain.
Step four
Bisque it, then glaze with something you can see through.
An opaque glaze erases the evening. The wash lives under the glaze, so the glaze has to be one that light gets through: a transparent, a celadon, a translucent satin, most honey and amber glazes. A white gloss, a heavy satin or three fat coats of anything opaque and the texture is gone for good.
Celadons and translucent glazes do something extra: they pool thicker in the recesses and thinner on the high points, which doubles the effect the wash started. A washed and celadoned texture reads from across a room. Our celadon lesson covers why celadon pools in texture and which surfaces it flatters. Keep to the maker’s coat count: a third coat that turns a translucent glaze milky is the most common way a good wipe-back disappears.
Transparent
Shows the wash exactly as you left it. The honest choice for a first pot, and the one that teaches you what your wipe actually looks like.
Celadon and translucent satin
Tints the whole pot and pools darker in the texture. Iron washes go olive and amber under green celadons, which is the classic look for a reason.
Nothing at all
A decorative piece can stay raw: underglaze fires to a dry matte skin, iron to a soft metallic one. Never on a food or drink surface.
Wash over glaze, the variation
Some potters brush an oxide wash over an unfired glaze coat instead of under it, and wipe or blend it there. It gives soft, mottled, painterly results and it is much harder to control, because the wash can flux the glaze and run. Richard McColl’s video below is the one to watch if you want to try it. Treat it as a test tile technique until you have seen a few fired.
Watch it done
Now watch five people do this five ways.
Watch this one, then go wash a pot.
None of these potters work here. Between them they cover the underglaze version, a textured fish wiped back, the iron oxide version, oxide washes on test tiles, and oxide washes over a glaze. Nothing but the still frame loads until you press play.
Underglaze wiped back on a bowl covered in sprigs, with a celadon over the top. The other four videos are in the comprehensive version.
When it goes wrong
Six ways it goes wrong, and what to do about each.
The three failures that happen on the first night.
Pick the one that looks like your pot. The first three are sponge problems. The last three are glaze problems, and two of them are permanent.
The wash will not wipe off the high points
Too much pigment, or the clay was too thirsty. Underglaze at full strength soaks in and stays. So does any wash left to dry for an hour before you came back to it, and so does a wash on bone dry clay, which drinks it and will not give it back.
Thin the underglaze, one part color to two parts water at least, and wipe as soon as the shine has gone. Work while the clay is still leather hard, never bone dry. Clay that is a little damper takes less of the wash in, so it wipes off more easily.
Use a slightly wetter sponge and more passes, rinsing every pass. A green scrubbing pad, used wet and gently, will lift stubborn color off flat high points. If the piece has gone bone dry and nothing moves, leave it: bone dry clay does not give the wash back, so get the timing right on the next one.
It came off the recesses too and the pot is plain again
The sponge was too wet, or the wash was too thin, or you kept wiping past the point where the high points were clean. The recesses only hold color if there is enough of it and if the sponge cannot reach the bottom of them.
Wring the sponge until it is barely damp. Wipe in one direction, lightly, and stop the moment the high points read clean. Shallow texture holds less; if the pattern is faint, the wash needs to be stronger, not the wipe gentler.
If the clay is still leather hard, wash that part again with a thicker mix and wipe with a drier sponge. If it has dried, leave it and decide sooner on the next pot.
Streaks and a muddy film over everything
A dirty sponge. Every pass loads the sponge with pigment and every unrinsed pass puts it back down somewhere else. Wiping while the wash is still wet does the same thing.
Rinse after every single pass, wring it out, and wipe in one direction so the drag pattern reads as intentional. Wait for the wash to go matte before the first pass.
Rinse the sponge properly and go over the high points again with clean water. If a faint film stays, a translucent glaze will make it look like a deliberate tint, which it now is.
The texture showed on the shelf and vanished in the kiln
The glaze on top was opaque, or thick enough to behave like it was. A wipe-back lives under a glaze you can see through. A white gloss, a heavy satin or three coats of anything opaque buries it.
Choose a transparent, a celadon, or a translucent satin, and keep it to the manufacturer’s coats. Test the pairing on a scrap tile first; the glaze wall is enormous and a lot of it is opaque.
Gone is gone. Fired glaze does not come off. Put the pot in the kitchen and put the lesson in the next one.
The glaze crawled away from the washed areas
Glaze needs to grip the surface, and a thick layer of underglaze or wash is a powdery layer it cannot grip. Dust from sanding, oil from hands, and a pot that was still damp when it was glazed do the same thing.
Thin wash, wiped back hard, and a full dry before glazing. Wipe the pot with a clean damp sponge before glazing to lift any dust. Handle bisque by the foot.
If it crawled in the bisque-to-glaze firing, show it to an instructor before you do anything to it; whether it is worth a refire is their call. Our glaze problems lesson covers the refire decision.
The color bled into the glaze and ran
Too much oxide under a glaze with movement. Iron and cobalt are fluxes as well as colorants, and a heavy wash under a runny glaze turns into a runny, colored glaze.
Thinner wash, wiped back properly, and a stable glaze over it. This is the reason we teach underglaze first: underglaze does not flux the glaze above it the way raw oxides do.
If it ran onto the kiln cookie and welded the pot to it, it is a job to show the studio team first. Any grinding is wet, over a bucket, with glasses and an N95 or better; power grinders stay out of the studio. If it stayed on the pot, it is a pot with an interesting glaze. Our fused pottery lesson has the at home version.
How it works here
At The Clay Hole, this is an underglaze technique.
This page is written for potters everywhere. A few things are specific to our building.
Four things to know here
We teach the wash with underglaze from our wall of 150+, which needs the free brush-on glaze and underglaze certification first, and your membership level decides which ones you can use. Underglaze goes on while the clay is leather hard and is bisque fired before any glaze goes over it. We do not sell oxides or washes; check with the studio team before bringing in anything that goes into our kilns. Bisque is cone 05 and free; glaze firing is cone 5½ at five cents a cubic inch. Every piece fires on a kiln cookie. Sponges rinse at the all-purpose sink and rinse buckets go to The Wash Pit; oxide water settles in a bucket instead.
Underglaze from the wall
The 150+ underglazes are the tool we teach this with, and every one of them sits behind the free brush-on glaze and underglaze certification, and a member’s level decides which ones they can use. It takes about half an hour, once. Get certified here. Thin it in your own pot, not in the bottle, and with an instructor beside you. Our underglaze lesson has the studio’s rules, and it lists washes into texture as fine to go ahead with.
Oxides
We do not sell oxides or commercial washes, and this page teaches them for potters who have their own. If you want to bring one in, talk to the studio team first, because anything that goes into our kilns needs to be something we know about. Our glaze firing is cone 5½, and iron behaves well there under most see-through glazes.
Texture worth washing
We have 248 slab molds, many of them textured, and sprig molds, stamps and rollers in the building. The slab roller and slab mold certification opens the slab room. Our eight clays are light or medium, apart from Berlin Gray, a dramatic dark gray stoneware that a wash will barely show on. Light or medium is the ideal ground: a dark wash on pale clay is the whole effect.
Firing and the sink
Bisque is cone 05 and free. The glaze firing is cone 5½ at five cents a cubic inch, $4.80 minimum, and every piece goes into it on a kiln cookie or glaze catcher, every time. Rinse the sponge at the all-purpose sink and take a full rinse bucket to The Wash Pit. Oxide water is different: settle it in a bucket and ask the studio team where the sludge and the water go.
They are metals. Treat them like it.
Iron is the gentle one. Cobalt, copper, manganese and chrome are not. Mix them wet, wear a fitted respirator around any dry powder, keep them off your skin, and do not eat at the bench. Rinse water settles in a bucket, never the sink.
They are metals. Treat them like it.
Red iron oxide is the gentle one, and it is still a fine metal powder you should not breathe. Cobalt, copper, manganese and chrome are genuinely toxic in the quantities a careless potter can inhale over a year. The rules are short: buy them as powder and mix them wet, wear a fitted respirator with P100 cartridges around dry powder rather than a paper mask, keep them off broken skin, wash your hands before you eat, and settle the rinse water rather than pouring it away. An N95 is better than nothing and worse than a respirator. Underglaze does not carry the powder hazard: the pigment is already bound in the bottle, which is one more reason it is the version we teach.
Questions people actually ask
The ones that come up every week.
Do I do this on greenware or bisque?
Greenware, while it is still leather hard. Bone dry clay soaks the underglaze in and will not release it, so the wash has to go on while the clay is firm and cool but not dry, and be wiped with a barely damp sponge. We put underglaze on raw clay here and it goes through the bisque firing before any glaze goes over it. Oxide washes are the exception: they go on bisque.
What is the difference between an underglaze wash and an oxide wash?
An underglaze wash is bottled underglaze thinned with water. It is a finished, predictable color that stays put in the kiln. An oxide wash is a raw metal oxide, usually red iron oxide, mixed with water. It is cheaper, more traditional, and it interacts with the glaze on top: iron goes amber under a clear, olive under a celadon, and can run under anything with movement. Underglaze is the one we teach here.
Can I use it under any glaze?
Under any glaze you can see through. Transparent, celadon, translucent satin, most of the amber and honey glazes. An opaque glaze hides it completely. Test the pairing on a tile before you put a pot you care about under it.
How thin should the wash be?
For underglaze, start at one part color to two parts water and adjust. Too thin looks weak in the recesses; too thick will not wipe off the high points. For red iron oxide, a teaspoon in a small yogurt pot of water is a common starting point, and it should look like weak tea, not coffee.
Can I leave the wash unglazed?
On a decorative piece, yes. Underglaze fires to a dry matte surface and an oxide wash fires to a metallic or matte skin, and both can be lovely on a vase or a wall piece. On anything that touches food or drink, no: an unglazed wash is porous, it can be rough, and raw oxides should never be a food surface.
Does the texture need to be deep?
It needs to be deeper than your sponge can reach, which is not very deep. Stamped, rolled and carved textures all work. Very shallow texture, like a light fabric print, holds less color and needs a stronger wash and a lighter wipe. Our imprinting textures lesson and sprig molds lesson cover making texture worth washing.
Why does everyone use red iron oxide?
Because it is cheap, forgiving, relatively low in toxicity as oxides go, and it gives the warm rust and amber tones that make texture look old. Cobalt, copper, manganese and chrome all work too and all of them are more toxic to handle, stronger per teaspoon, and more likely to run. Iron is the beginner oxide for good reasons.
Related lessons
Six lessons that sit next to this one.
Three to read next.
A wipe-back is only as good as the texture under it and the glaze over it. These are the lessons on either side.
That is the whole technique
Flood it, wait for matte, wipe it back, glaze clear.
Your first one will probably be wiped a little too hard or glazed a little too thick. Both are fixed on the second pot. Almost nothing in this building turns a plain textured pot into something people pick up as reliably as this does, and it costs a teaspoon of underglaze.
If you want the oxide version, the glaze pairings, and the answers to the questions everybody asks, switch to the comprehensive version at the top. Otherwise, go find a textured pot.
Written for potters everywhere. Where our studio does things differently, the page says so.
Which version would you like to print?
Both print clean, with the videos turned into labeled boxes you can search for later.