Pottery Date Night
 Bring All Your Friends Free Week
 Give a Month of Pottery
 Private Pottery Parties

 The Welcome Booklet
 Your First Ten Sessions
 The Pottery Process
 Finding the Studio
 Your Classes Never Expire
 The Four Tables
 Who’s Who
 The Rewards Program
 Flux Glazes
 The Calculators
 Kiln Tracker
 Holiday Kiln Deadlines

 Beginner’s Tool Set
 Fingernail Clippers
 Mayco Clay Mender
 Epoxy for Kintsugi
 Applicator Bottles
 Large Bead Rack
 Raku Workshop
 Nighttime Raku
 Horsehair and Feather Raku
 The Clay Hole T-Shirt
 Embroidered Crewneck
 Zip-Up Hoodie
 Pre-Made Bisqueware
 Glaze Catchers
 Kiln Cookies
 Clay Cubby Rental
 The Glaze Bible, Printed
 The Book of Molds, Printed
 Printable Pottery Guides
 Free Printable Trackers
 Gifts for Potters
 Christmas Pottery Ideas
 Mother’s Day Gift Ideas
 Pottery Date Night
 Studio Calendar
 2027 Studio Events
 What Should I Do Today?
 How to Throw on the Pottery Wheel
 How to Make a Pinch Pot
 How to Tap Center a Pot
 The Five Stages of Clay
 Is Pottery Hard to Learn?
 Pottery Wheel Practice Drills
 20 Easy Hand-Building Projects
 Everything That Sounds Wrong

 A Beautiful Piece, Every Time
 Slab Roller Tips
 Any Dish as a Slump Mold
 Slab Roller & Slab Mold Certification
 The Pottery Skill Tree
 Clay & Pottery Calculators
 Logging Your Pottery and Glazes
 The Pottery Dictionary
 Why Did My Pottery Do That?
 The Pottery Cone Chart
 Pottery Myths, Fact-Checked
 Is Handmade Pottery Food Safe?
 Incredible Ceramic Artist Videos
 How Dan Throws Giant Pots
 How to Dry Your Pottery
 The Pottery Wheel Introduction
 Pottery by Zodiac Sign
 Personality and the Pottery Wheel
 Pottery for Engineers
 ADHD, Hyperfocus, and Never Running Out
 Hobbies for Burnout
 Screen-Free Hobbies for Adults
 Every Addiction I Ever Had Lost to Art
 Functional Pottery Is Engineering
 How Do We Compare?
 Pottery Classes by City
 Every Pottery Studio in Utah
 Pottery in Draper
 Featured Members
 The Signature Wall
 Making Friends as an Adult Is Brutal
 The Clay Hole Commandments
 2027 Pottery Contests
 2027 Studio Parties
 Gallery Night

 Scream It Into the Void
 Destroy the Glaze Wall
 Daily Affirmation Cards
 Everything That Can Go Wrong
 Subscribe to Our Newsletters
 Contact The Clay Hole
 Corporate Team Building

 Glaze Combinations
 Glazes We Do Not Carry
 Making Glaze Test Tiles
 The Mega Glaze Tool
 How to Use the Mega Glaze Tool

 Glaze Brushing Techniques
 How to Use Underglaze
 How to Use Dipping Glazes
 Glaze Problems, Causes and Fixes
 The Dipping Glaze Guide

 Making a Glaze Catcher
 Fused or Sharp After Firing
 The Signature Wall
 His Viral Videos
 His Own Ceramics
 Meet Mud
Surface and decoration · Forty ways to add texture
Forty textures, each with the stage of the clay it actually wants.
One long reference. From stamps and roulettes to slip trailing, faceting and sandblasting, every technique on this page carries the stage of the clay it needs, because the stage is the reason it works.
The list is grouped into five stages, wet on the wheel, soft slab, slip, leather hard, and bisque and glaze, with a tick list for choosing, six fixes that cover every entry, and six videos that show the ones that are motions rather than facts.
This is the short version: the three choosing questions and all forty techniques one line each, grouped by stage. The full entries, the reasoning and the questions are in the comprehensive version.
Read it, then watch it
Why this is written down and filmed, both.
This page is a reference, and a reference is the one kind of page video is worst at, because you cannot scan a video. Forty techniques, each with the stage of the clay it wants, is a list you come back to with a pot in one hand and a question in the other, and the answer has to be findable in seconds. The videos are here for the techniques that are motions rather than facts: chattering, trailing, stamping, and two fast tours of texture ideas.
Use both, in this order
Find the stage your pot is at. Read that section. Pick one. Watch the video that covers it if there is one. The tick list at the top is the choosing, and the page remembers it.
The whole idea
Every texture has a stage. Find the stage, then pick one.
Wet clay takes impressions. Leather hard clay takes a cut. Bisque takes color. The forty techniques below are grouped by which of those the pot is ready for, because a technique at the wrong stage does not half work, it fails. Pick one texture, put it in one zone, and glaze with something you can see through.
Before you pick one
Three questions that rule out most of the list.
Forty techniques is a menu. Nobody orders the menu. The stage the pot is at right now rules out three quarters of it, the glaze you are going to use rules out half of what is left, and the third question is whether you can bear to leave most of the pot plain, because texture only reads against smooth.
The stage rules out most of the list, the glaze rules out half of what is left, and texture only reads against smooth. Tick these before you pick.
The whole list
All forty, one line each, grouped by the stage of the clay.
Find the stage your pot is at, pick one, and go. Every entry has a fuller version in the comprehensive page, and the lessons that sit next to this one are linked at the bottom.
Wet, on the wheel
- 1Throwing rings leave or exaggerate the last pull.
- 2Rib and tool lines a notched edge against the turning wall.
- 3Finger combing fingertips through thick slip.
- 4Wire facets taut wire rim to base, minutes after throwing.
- 5Twisted-wire base twist the wire before you cut it off.
- 6Pushing and dimpling fingertip from inside, rim pinched into lobes.
- 7Paddling a wooden paddle, a hand inside.
- 8Thick slip skin yogurt slip dabbed on while it turns.
Soft slab
- 9Stamps bisque stamp, wall supported.
- 10Roller stamps carved cylinder, overlapping passes.
- 11Roulettes a small wheel along a band.
- 12Leaves and plants underside down, cornstarch, rolling pin.
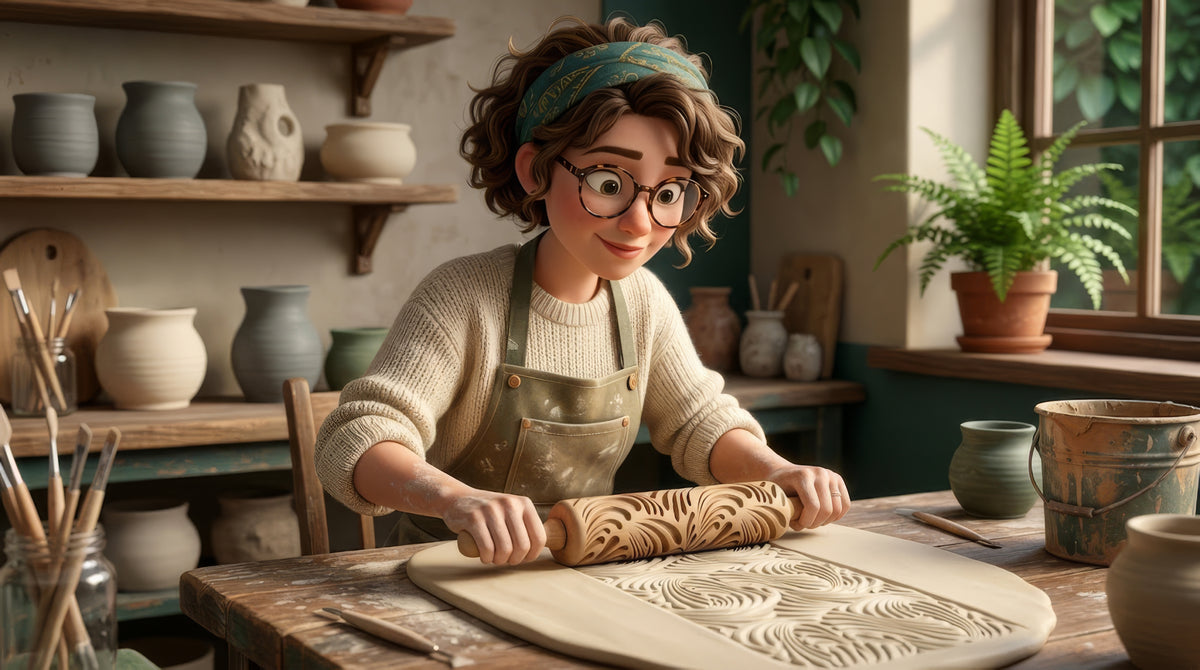
- 13Fabric and lace through plastic or over cornstarch.
- 14Found objects anything with relief that is not sticky.
- 15Textured slab molds and forms shape and surface at once.
- 16Rope and cord pressed or rolled into a thick slab.
- 17Exposed coils outside left unblended.
- 18Pinch marks deliberate, rhythmic, repeated.
- 19Sprigs press molded, scored and slipped on.
Slip, soft to leather hard
- 20Slip trailing thick slip from a bulb, lines and dots.
- 21Stippled slip sponge or stiff brush, rough skin.
- 22Feathered and combed slip two colors, dragged while wet.
- 23Hakeme coarse brush, thick white slip, one stroke.
- 24Applied pellets and coils small additions, scored under every one.
Leather hard
- 25Carved lines sharp tool, one pass, burr off dry.
- 26Sgraffito scratched back through underglaze or slip.
- 27Relief carving outline, lower, model, detail.
- 28Fluting round loop, one long stroke, divide first.
- 29Rasp facets flat planes shaved at leather hard.
- 30Piercing bridges as wide as the holes.
- 31Chattering trimming tool bouncing on the wheel.
- 32Incising with a fork or serrated rib a field of parallel lines.
- 33Rasp and tooth scraping rough open tooth like stone.
- 34Burnishing polished zone against matte, texture by contrast, on bare clay only; our glaze firing erases the polish.
Bisque and glaze
- 35Dry-brushed and stippled underglaze color on the high points only, fired before any glaze goes on.
- 36Wax resist between glaze coats wax sheds the second coat.
- 37Bubble glaze soapy glaze foam from a straw with a hole in it, burst on the pot.
- 38Crawl and textured glazes glazes that bead on purpose, test tile first.
- 39Glaze trailing and thick dots stable glaze, applied thick.
- 40Sandblasting after firing, a workshop tool.
Stage one
Wet, on the wheel.
Eight textures that happen while the pot is still turning, or in the minutes after. All of them cost nothing and most of them take one motion.
- 1Throwing ringsLeave the finger ridges from the last pull instead of ribbing them off, or exaggerate them with a fingertip pressed harder on the final lift. Wet, on the wheel, as the last thing you do to the wall.
- 2Rib and tool linesA notched rib, a wooden knife edge or a serrated rib held against the spinning wall cuts one line per revolution. Move it up slowly for a spiral, hold it still for a band. Wet, on the wheel.
- 3Finger combing through slipBrush thick slip onto the wall while it turns, then drag fingertips through it from bottom to top. The slip stands up in ridges. Wet, on the wheel, with slip the same clay body.
- 4Wire facetsA taut wire pulled from rim to base on a thick cylinder within minutes of throwing, then bellied out from inside. Soft, on the wheel. Our faceting lesson is the whole method.
- 5Twisted-wire baseTwist the cutting wire before you pull it under the pot and the base comes off with a shell pattern. Wet, the moment the pot is finished, as part of a step you do anyway.
- 6Pushing and dimplingPush the wall from inside with a fingertip, or pinch the rim into lobes, while the pot is soft enough to move and firm enough to stay. Wet to soft leather hard.
- 7PaddlingA flat wooden paddle, plain or carved, slapped against a soft thrown or coiled wall to flatten and texture it at once. Soft, off the wheel, with a hand inside to push back.
- 8Thick slip skinSlip mixed to yogurt and dabbed or trailed onto the turning wall for a rough, lumpy skin. Wet, on the wheel. Same clay body as the pot or it shrinks off.
Stage two
Soft slab, and soft clay generally.
Eleven textures that need clay soft enough to take an impression. The slab has lost its shine but takes a thumbprint. A pot at the same stage takes most of these on its outside, with a hand inside.
- 9StampsA carved bisque stamp pressed straight in at soft leather hard, wall supported from inside. Our stamps lesson is the whole build; this is the entry that pays back forever.
- 10Roller stampsA carved cylinder rolled across a slab in one motion, overlapping passes by half a pattern. Soft slab. Made the same way as a flat stamp.
- 11RoulettesA small textured wheel on a handle, rolled along a band. Faster and narrower than a roller stamp; the traditional tool for a border. Soft slab or soft leather hard on a pot.
- 12Leaves and plantsUnderside down, dusted with cornstarch, rolled in with a pin. Firm veined leaves print; soft ones smear. Soft slab. Pull the leaf at soft leather hard. Our imprinting lesson.
- 13Fabric and laceBurlap, linen, canvas, knitting, lace with a thick thread, rolled in through a sheet of thin plastic or over cornstarch. Soft slab. Open weaves lock in without a release.
- 14Found objectsBolts, keys, a cheese grater, a tire, bubble wrap, a plastic canvas grid, a rubber texture mat, textured wallpaper. If it has relief and is not sticky, it prints. Soft slab.
- 15Textured slab molds and formsA slab pressed into or over a form that carries its own texture, so the shape and the surface arrive together. Soft slab; the slab roller and slab mold certification opens the room.
- 16Rope and cordRope pressed or rolled into a soft slab for a line that reads as a line. Thick rope needs a thick slab; the impression spends clay.
- 17Exposed coilsCoil building with the outside left unblended, so the coils read as coils. Soft, as you build. Blend the inside fully or the joins open.
- 18Pinch marksDeliberate thumb and finger marks, rhythmic and repeated, on a pinch pot or a soft wall. Soft. The oldest texture in the world and still one of the best.
- 19SprigsA shape pressed in a sprig mold, lifted out and attached with score and slip. Raised decoration without carving. Soft leather hard on both parts. Our sprig molds lesson.
Stage three
Slip, from soft to leather hard.
Five raised textures made by adding slip or soft clay to a pot that has firmed enough to hold it. Slip is best made from the same clay body as the pot, or it can shrink off.
- 20Slip trailingThick slip piped from a bulb or a bottle in lines and dots that stand proud of the surface. Leather hard pot, slip the same clay body, sieved to thick cream.
- 21Stippled slipThick slip dabbed on with a sponge, a stiff brush or a fingertip for a rough, even skin. Soft leather hard. Wonderful under a wash wiped back.
- 22Feathered and combed slipTwo colors of slip trailed side by side while wet, then dragged across with a feather, a needle or a comb. Wet slip on a leather hard pot. The slipware classic.
- 23HakemeA coarse brush, traditionally a bundle of straw, loaded with thick white slip and dragged across the pot in one stroke so the bristle marks stay. Leather hard. One stroke, never two.
- 24Applied pellets and coilsSmall balls or thin coils of soft clay attached with slip and left standing, or pressed with a fingertip. Soft leather hard on both parts. Score under every one.
Stage four
Leather hard.
Ten textures that need clay firm enough to cut cleanly. A fingernail marks it, a fingertip does not. Every one of these makes curls at this stage and dust if you wait too long.
- 25Carved linesA sharp tool at firm leather hard, one pass per line, elbows braced, burr left until dry. Our clean lines lesson is the whole method.
- 26SgraffitoA coat of underglaze or slip at leather hard, then a line scratched back through it to show the clay. Our carving and sgraffito lesson.
- 27Relief carvingOutline, lower the background, model the forms, cut the detail last. Firm leather hard, thick clay. Our relief carving lesson.
- 28FlutingWide shallow grooves cut with a round loop in one long stroke, usually top to bottom. Firm leather hard. Divide the pot first or the last flute is a sliver.
- 29Rasp facetsA hardware store rasp shaving flat planes onto a leather hard cylinder. Curls, not dust. Our faceting lesson.
- 30PiercingA needle or a hole cutter through the wall at leather hard, from the outside. Bridges as wide as the holes, rim and base solid, slow drying.
- 31ChatteringA flexible trimming tool held at a low angle against a leather hard pot on the wheel so it bounces, leaving a rhythmic row of marks. Leather hard, trimming stage, wheel at speed.
- 32Incising with a fork or serrated ribA fork, a comb or a serrated rib dragged across the surface for a field of parallel lines. Firm leather hard. Cross-hatch for a rougher field.
- 33Rasp and tooth scrapingA rasp or a serrated rib scraped across the surface for a rough, open tooth that reads like stone. Leather hard. Groggy clay does this best.
- 34BurnishingThe opposite move: a smooth stone or the back of a spoon rubbed over leather hard clay until it shines. Texture by contrast, burnish one zone and leave the rest matte. Our burnishing lesson. Burnished clay stays bare: our cone 5½ glaze firing erases the polish.
Stage five
Bisque and glaze.
Six textures that happen after the first firing, five of them on glaze day. These are the ones that need a test tile, because a glaze that behaves on a round tile is not a glaze that behaves in a texture.
- 35Dry-brushed and stippled underglazeUnderglaze on a nearly dry brush dragged across texture, or dabbed on with a sponge, so it lands on the high points only. Bisque. Color that reads as texture, and it needs its own firing before any glaze goes over it.
- 36Wax resist between glaze coatsWax brushed in a pattern over the first glaze, then a second glaze over the top. The wax sheds the second coat and the two glazes react where they meet. Bisque, glaze day. Our resists lesson.
- 37Bubble glazeGlaze thinned with water and a good squirt of dish soap in your own throwaway cup, blown into foam through a straw with a hole cut near the top so nothing can be sucked up, and let burst on the pot. Bisque. Our bubble glaze lesson is the whole method.
- 38Crawl and textured glazesGlazes formulated to bead, crawl or crackle on purpose. Bisque, glaze day, and only where the maker says they are stable. Test tile first, every time.
- 39Glaze trailing and thick dotsGlaze applied thick in dots or lines from a bulb so it stands up after firing. Bisque. Stable glazes only; a runny glaze trailed thick is a puddle on the cookie.
- 40SandblastingA fired pot masked with vinyl and blasted so the exposed glaze goes matte or the clay erodes. After the glaze firing. A cabinet, a compressor and a respirator: a workshop tool, not a shared-studio one.
Watch it done
Now watch five potters show how it is done.
Watch this one, then go look at your pot.
None of these potters work here or know we exist. Between them you get a countdown of twenty-five texture tricks, chattering, slip trailing twice, twenty stamps and rollers, and layered slip scratched back. Nothing but the still frame loads until you press play.
Twenty-five texture tricks in thirteen minutes, mostly pressed into soft clay. The other five videos are in the comprehensive version.
When it goes wrong
Six ways texture goes wrong, whichever one you picked.
The three failures that happen on the first night.
These cover every entry on the page, because texture fails the same ways whatever made it. Pick the one that looks like your pot.
The texture vanished under the glaze
Three coats of anything opaque fill the low points and round the high ones. Most of the forty textures on this page are a millimeter or two deep, and a glaze coat is a good fraction of that.
A wash wiped back before a clear, a celadon or translucent satin that pools, or two thin coats of a transparent. Decide the glaze when you decide the texture, not on glaze day.
Fired is fired. The next pot gets the glaze decided first.
It smeared, tore or chipped instead of taking the texture
The clay was at the wrong stage for that technique. Every entry on this page carries a stage, and the stage is not advice, it is the whole reason the entry works. Pressing needs soft clay. Carving needs leather hard. Chattering needs leather hard on the wheel. Sanding belongs to bisque, and it is done wet.
Read the stage before the technique. Bag a piece to hold it at leather hard; uncover it to move it on. The five stages of clay lesson is the map.
Too soft: wait. Too dry: mist and bag for an hour. Bone dry: this pot gets a bisque stage texture instead.
It cracked along the deepest texture while drying
Texture spends clay. A deep impression or a deep carve leaves a thin spot, thin spots dry first, and the shrinkage pulls the piece apart along the line.
Throw or roll thicker where the texture will go. Compress the back of a textured slab with a rib. Dry slowly under loose plastic, tiles between boards.
A hairline at leather hard can be scored, slipped and rubbed closed from behind. At bone dry it stays.
The pot looks busy instead of textured
More than one texture, or texture over the whole surface with nothing plain to compare it to. Texture reads against smooth. Forty techniques is a menu, not a shopping list.
One texture per pot, in one zone, with plain clay around it. A band, a panel, the lower third, the shoulder. Let the smooth part do half the work.
If it is still leather hard, rib one area smooth again. If it is fired, a plain glaze on part of it and a see-through glaze on the rest will separate the zones.
The object or the slip stuck where it should have released
No release, or clay that was too wet. Fabric and lace lock in without cornstarch or plastic. A slip trailer clogs when the slip is too thick. A stamp sticks when the pot is too wet or the stamp is unfired.
Cornstarch on objects, bisque fired stamps, slip sieved to the consistency of thick cream, and a slab that has lost its shine before anything touches it.
Needle tool under the stuck corner, then a soft rib over the tear. Pull out what you can. Natural threads and crumbs burn out in the bisque, but synthetic ones melt and a thick wad of fabric can leave a void.
You made dust
Sanding, scraping or carving bone dry clay makes fine silica dust, and in a shared studio everyone breathes it. This is the one failure on this page that is about you rather than the pot.
Do the smoothing textures at leather hard, where they make curls. Do the bisque-stage textures wet. There is no dry version of a job in this building: do it wet, over a bucket, away from shared tables, and wipe the table down wet afterwards.
Stop, wet the table, wipe it, and finish the job at the right stage, or wet.
How it works here
At The Clay Hole, thirty-nine of these happen at our tables.
This page is written for potters everywhere. A few things are specific to our building, so you know before you start.
What to know here
Everything on the list except sandblasting happens at our tables; sandblasting is not allowed here. Studio tools, including our many stamps and rollers, open at Yellow; Green Level Members bring their own. Materials we do not stock, oxides and latex, are bring-your-own; wet plaster and plaster dust never come in. Bisque is cone 05 and free; the glaze firing is cone 5½ at five cents a cubic inch, $4.80 flat up to 125 cubic inches. Do the dusty ones at leather hard, where they make curls.
Tools and materials by Level
Ribs, loops, needles, banding wheels and our large collection of stamps and texture rollers are studio tools for Yellow, Purple and Black Level Members; Green Level Members bring their own. The 150+ underglazes and the glaze wall need the free brush-on certification. Studio underglaze starts at Purple Level; Green and Yellow bring their own Speedball or Amaco Velvet. Wax stations are a Purple and Black Level tool for brush-on glazing, and open to every Level when you dip. Oxides and latex are not stocked; bring your own and ask first about anything going into a kiln. Wet plaster and plaster dust never come in.
The slab room
Eleven of the forty are soft clay textures, most of them done on a slab, and both slab rollers and all 248 slab molds are behind the free slab roller and slab mold certification. Press textures on a board and move the board. Never scrape or cut into a slab mold with a sharp tool.
The one we cannot do
Sandblasting needs a cabinet blaster, a compressor and a respirator, and it is not allowed at The Clay Hole. It is on the list because it belongs on a list of forty, and because potters with a workshop of their own should know it exists.
Firing and the naked bottom
Bisque is cone 05 and free. The glaze firing is cone 5½ at five cents a cubic inch, $4.80 flat up to 125 cubic inches, measured at the widest points, so raised texture that stands proud is measured to its top. Every piece goes in on a cookie with a bare bottom; keep texture off the base of anything that will stand.
Dusty textures at leather hard, never dry
Rasping, scraping and carving bone dry clay make silica dust that everyone at the table breathes. Do them at leather hard. Sanding is done wet, never dry: bisque with a scouring pad or wet sandpaper over a bucket, away from shared tables, with the table wiped wet afterwards.
Dusty textures at leather hard, never dry
Clay dust is silica, and silica in your lungs does not leave. Rasping, tooth scraping, carving and faceting all make curls at leather hard and dust at bone dry. Do them at leather hard. Sanding is not one of the forty, and here it is done wet, never dry: a scouring pad or wet sandpaper on bisque, over a bucket, away from shared tables, with the table wiped down wet afterwards. Dry sanding of greenware does not happen in the building. Grinding fired work is wet too: a diamond pad under water, over a bucket, with safety glasses and an N95 or better. Our sanding lesson covers the safe way stage by stage.
Questions people actually ask
The ones that come up every week.
How do I choose one?
Start with the stage the pot is at right now, because that rules out three quarters of the list. Then ask what the glaze is going to be, because an opaque glaze rules out anything shallow. Then pick one. One texture per pot, in one zone, with plain clay around it, is the rule that separates a textured pot from a busy one.
Which textures are easiest for a beginner?
Stamps, natural imprints and fabric on a soft slab, and throwing rings left on purpose on the wheel. All four are one motion, none of them needs a tool you would have to buy, and all four look better under a wash wiped back than anything you could do with a brush.
Do I need different clay for texture?
No. Every one of our eight clay bodies takes the techniques on this page that we allow. A smoother body holds fine detail; a groggy body gives a rougher, warmer texture and stands up better to deep carving. Choose the body for the pot, then choose the texture for the body.
What about slip and underglaze, are those textures?
Trailed, stippled, combed and brushed slip are raised textures you can feel, so they are on the list. Underglaze painted flat is color, not texture, and it is on the underglaze page. Dry-brushed and stippled underglaze sits in between and is on this list because it reads as texture from a meter away.
Can I combine techniques?
Yes: one texture plus a color treatment that shows it. Stamp, then wipe a wash back. Carve, then inlay. Facet, then a glaze that breaks. What does not work is two relief textures on top of each other, which reads as a mistake almost every time.
Which ones can I not do at The Clay Hole?
Sandblasting is not allowed at The Clay Hole; it needs a cabinet blaster and a respirator and belongs in a workshop. Anything that needs a material we do not stock, oxides and latex, is bring-your-own. Wet plaster and plaster dust never come in, and nobody mixes or pours plaster here. Everything else on the list happens at our tables.
Why does the stage matter so much?
Because clay only does one thing at each stage. Wet clay takes impressions and moves. Leather hard clay cuts cleanly and holds a line. Bone dry clay chips and makes dust. Bisque takes color and washes. A technique done at the wrong stage does not half work; it fails completely. Our five stages of clay lesson is the page under this one.
Related lessons
Six lessons that sit next to this one.
Three to read next.
Fourteen of the forty have a lesson of their own in the University. These are the six that matter most.
That is the whole list
Find the stage. Pick one. Leave the rest of the pot plain.
Nobody uses forty textures. Most potters use three, and the three are the ones that suit the pots they make. This page is here so that when a pot needs something and you cannot think what, the answer is one scroll away and it comes with the stage attached.
If you want every entry in full, the reasoning, the studio notes and the answers to the questions everybody asks, switch to the comprehensive version at the top. Otherwise, go look at your pot and check its stage.
Written for potters everywhere. Where our studio does things differently, the page says so.
Which version would you like to print?
Both print clean, with the videos turned into labeled boxes you can search for later.