Pottery Date Night
 Bring All Your Friends Free Week
 Give a Month of Pottery
 Private Pottery Parties

 The Welcome Booklet
 Your First Ten Sessions
 The Pottery Process
 Finding the Studio
 Your Classes Never Expire
 The Four Tables
 Who’s Who
 The Rewards Program
 Flux Glazes
 The Calculators
 Kiln Tracker
 Holiday Kiln Deadlines

 Beginner’s Tool Set
 Fingernail Clippers
 Mayco Clay Mender
 Epoxy for Kintsugi
 Applicator Bottles
 Large Bead Rack
 Raku Workshop
 Nighttime Raku
 Horsehair and Feather Raku
 The Clay Hole T-Shirt
 Embroidered Crewneck
 Zip-Up Hoodie
 Pre-Made Bisqueware
 Glaze Catchers
 Kiln Cookies
 Clay Cubby Rental
 The Glaze Bible, Printed
 The Book of Molds, Printed
 Printable Pottery Guides
 Free Printable Trackers
 Gifts for Potters
 Christmas Pottery Ideas
 Mother’s Day Gift Ideas
 Pottery Date Night
 Studio Calendar
 2027 Studio Events
 What Should I Do Today?
 How to Throw on the Pottery Wheel
 How to Make a Pinch Pot
 How to Tap Center a Pot
 The Five Stages of Clay
 Is Pottery Hard to Learn?
 Pottery Wheel Practice Drills
 20 Easy Hand-Building Projects
 Everything That Sounds Wrong

 A Beautiful Piece, Every Time
 Slab Roller Tips
 Any Dish as a Slump Mold
 Slab Roller & Slab Mold Certification
 The Pottery Skill Tree
 Clay & Pottery Calculators
 Logging Your Pottery and Glazes
 The Pottery Dictionary
 Why Did My Pottery Do That?
 The Pottery Cone Chart
 Pottery Myths, Fact-Checked
 Is Handmade Pottery Food Safe?
 Incredible Ceramic Artist Videos
 How Dan Throws Giant Pots
 How to Dry Your Pottery
 The Pottery Wheel Introduction
 Pottery by Zodiac Sign
 Personality and the Pottery Wheel
 Pottery for Engineers
 ADHD, Hyperfocus, and Never Running Out
 Hobbies for Burnout
 Screen-Free Hobbies for Adults
 Every Addiction I Ever Had Lost to Art
 Functional Pottery Is Engineering
 How Do We Compare?
 Pottery Classes by City
 Every Pottery Studio in Utah
 Pottery in Draper
 Featured Members
 The Signature Wall
 Making Friends as an Adult Is Brutal
 The Clay Hole Commandments
 2027 Pottery Contests
 2027 Studio Parties
 Gallery Night

 Scream It Into the Void
 Destroy the Glaze Wall
 Daily Affirmation Cards
 Everything That Can Go Wrong
 Subscribe to Our Newsletters
 Contact The Clay Hole
 Corporate Team Building

 Glaze Combinations
 Glazes We Do Not Carry
 Making Glaze Test Tiles
 The Mega Glaze Tool
 How to Use the Mega Glaze Tool

 Glaze Brushing Techniques
 How to Use Underglaze
 How to Use Dipping Glazes
 Glaze Problems, Causes and Fixes
 The Dipping Glaze Guide

 Making a Glaze Catcher
 Fused or Sharp After Firing
 The Signature Wall
 His Viral Videos
 His Own Ceramics
 Meet Mud
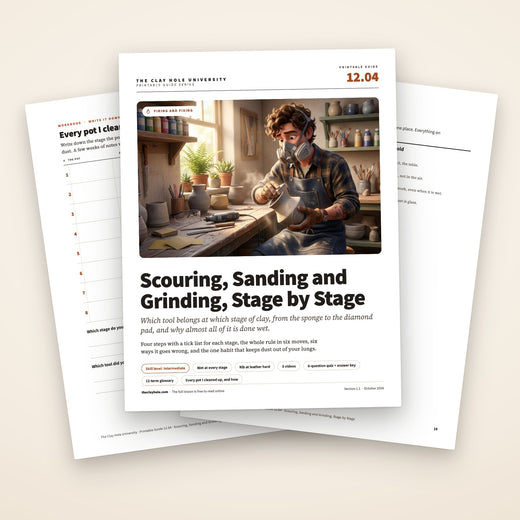
Firing and fixing · Scouring, sanding and grinding
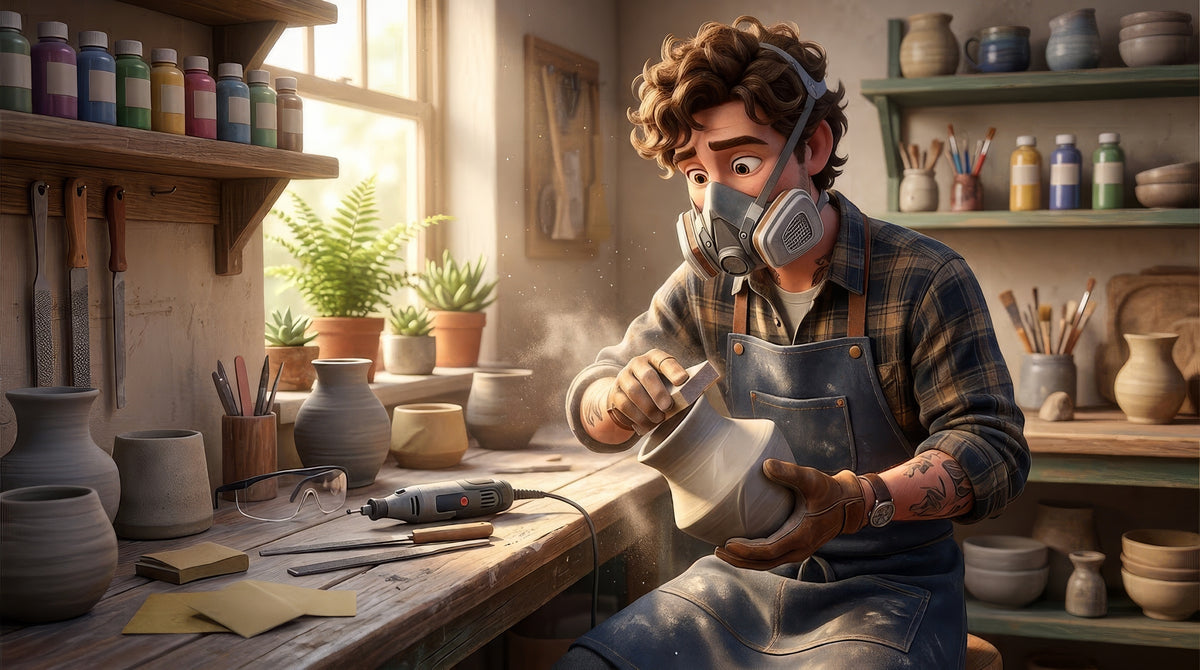
Sponge, scouring pad, sandpaper, rubbing stone, diamond file and grinder.
Which one belongs at which stage, and why almost all of it is done wet. Leather hard is where cleanup lives and makes curls instead of dust; bone dry gets left alone; bisque gets a scouring pad and wet paper; fired gets diamond. Clay dust is silica, and the bucket under the work is the whole safety plan.
Four steps with a tick list at each, one per stage: wet and leather hard, bone dry, bisque, and fired. Six things that go wrong, most of them the wrong tool at the wrong stage, and five videos.
This is the short version: one tool per stage, all of it wet, each stage with a tick list. The reasoning, the wipe-before-glazing argument and the questions are in the comprehensive version.
Read it, then watch it
Why this is written down and filmed, both.
Cleanup is a table: five stages of clay, and for each one the tool that belongs and the tools that do not. A table is what a page holds, and the wrong tool at the wrong stage is most of what goes wrong. What a page cannot show is how wet is wet enough, what a rib held nearly flat looks like against one held upright, and a diamond pad in circles on a fired foot. That is the videos. And the one rule, that all of it is done wet, is on the page in every band because it is the rule that keeps everyone in the building breathing.
Use both, in this order
Find the stage your pot is at. Read the tool for it. Watch the wet sanding video whatever the stage. Then do it over a bucket.
The whole idea
One tool per stage, and all of it wet.
Wet clay gets a sponge. Leather hard gets a rib and a scraper, where nearly all cleanup belongs and makes curls instead of dust. Bone dry gets almost nothing. Bisque gets a scouring pad and wet sandpaper. Fired gets diamond. All of it over a bucket, because clay dust is silica and silica stays in lungs, and the table wiped down wet after.
The five-minute version
The whole rule in six moves.
If you already clean up pots and you just want the shape of it, this is the shape of it. Everything below is these six moves, slowed down and with the places they fail marked.
Before you touch the pot
What you need, by stage.
Six things, and the bucket is not optional. The diamond pad is the one to buy.
A sponge and chamois, a rib and scraper, a green scouring pad and wet sandpaper, a rubbing stone, a diamond pad and file, and a bucket of water under all of it.
Step one
Wet and leather hard: the sponge, then the rib, and nearly all of the cleanup.
Leather hard is where cleanup lives. A rib held nearly flat planes a surface; a scraper takes down a lump; a knife trims an edge; a chamois rounds a rim so it feels finished on the lip. All of it makes curls and next to no dust. Wet clay, before that, gets only a sponge and a chamois.
Every foot gets rounded here, once it is trimmed, with a fingertip or a chamois run round the edge, because a foot that is sharp at leather hard is sharp after the glaze firing and a diamond pad is a slower way to do what a chamois did in a second. Every rim the same. Every handle join gets blended with a wooden tool and a damp fingertip. This is the stage where a pot becomes finished or does not, and the pots that need the most work at bisque are the pots that skipped it.
The rib angle is the skill. Held nearly flat to the surface, it planes and compresses; held upright, it digs a trench. Long strokes, light pressure, with the edge rather than the corner. Our trimming lesson is the foot, and the handles lesson is the join.
Step two
Bone dry: leave it alone, and if you cannot, a damp sponge.
Bone dry clay is at its most fragile and its most dusty. A rib chips it, sandpaper turns it into silica dust, and a scraper takes chunks out of a rim. Everything sanding does at bone dry, a rib did better at leather hard. So the instruction for this stage is: do not.
If a bone dry piece has a rough spot that cannot wait for bisque, a barely damp sponge, wrung nearly dry, softens it in a few strokes and makes no dust. A wet sanding sponge, the kind sold for drywall, used damp, does a little more. Both are done over a bucket and away from shared tables, because even damp work on bone dry clay sheds. Dry sanding greenware is the one job on this page that cannot be done without an N95 or better, and it is done outside, and it is done almost never.
A crack at bone dry does not sand out; it is a crack. A chip can be patched with a paste of the same clay, pressed in and left to dry slowly, and it sometimes holds through the bisque. Mostly, a bone dry pot with a problem is a pot that tells you what to do at leather hard next time.
Step three
Bisque: a scouring pad, wet sandpaper, a rubbing stone under water, and the wipe.
A green scouring pad does most of it. A green kitchen scouring pad, wet, in circles, takes off burrs, rough edges and a scratchy rim in a minute. Wet-and-dry sandpaper at 220 or finer, wet, in circles, for anything the pad leaves; coarser grits scratch bisque and show under a clear.
A rubbing stone, a block of silicon carbide used under water, is the tool for a lumpy foot or a rough rim that the pad will not shift. Hold the pot in the bucket, or the stone in the bucket, so the slurry goes into the water and never into the air. Ten strokes does what a minute of sandpaper does, and it lasts for years.
Then the wipe. The standard advice is a barely damp sponge over the whole pot before glazing, so dust and finger oil do not make the glaze crawl or pinhole, then a few minutes for the surface to dry before the first coat. Earth Nation Ceramics argues below that you can skip the wipe, and the argument is worth thirty-five minutes once you know the standard version. Never a dry cloth, which makes dust, and never a soak, which makes bisque too wet to take glaze. Our glaze problems lesson is what a dusty bisque does in the kiln.
Step four
Fired: diamond, wet, and thirty seconds on a foot.
Diamond cuts fired stoneware fastest, and a wet silicon carbide stone does it too, just slower. A diamond hand pad, wet, in circles, takes the bump off a fired foot in thirty seconds. A diamond file takes the edge off a sharp glaze line. A drip is ground wet, by hand, with the diamond pad or a silicon carbide stone, in an N95 or better with safety glasses, because fired glaze dust is glass. A rotary tool with a diamond bit does a drip too, but that is a home job, outdoors, with a face shield, and not something we do at our tables.
Every fired pot gets a fingertip run round its foot as it comes off the pickup shelf, and any pot that catches gets the pad before it goes near a table. A foot that catches scratches every surface it ever sits on. Kara Leigh Ford’s video below is the fired stage in six minutes, drips included, and our fused and sharp pottery lesson is the long version for the pot that touched something in the kiln.
Then the bucket. Slurry from every stage on this page goes into the bucket under the work. A bisque bucket goes to The Wash Pit, as the clean-up instructions say, and fired glaze grindings go in the bin, never straight down a drain, because clay and glass settle in pipes. The table gets wiped down wet, the pad gets rinsed, and nobody at the next table has breathed anything.
Watch it done
Now watch five potters.
Watch this one before any sandpaper touches any pot.
None of these potters work here. Between them they cover wet sanding, sanding bisque before glazing, wet sanding in a studio, saving a fired pot from a glaze drip, and the case against wiping bisque. Nothing but the still frame loads until you press play.
Five minutes on wet sanding, which uses water to catch the silica dust while you sand bisque. The other four videos are in the comprehensive version.
When it goes wrong
Six ways it goes wrong, and what to do about each.
The three failures that happen first.
Pick the one that looks like your table. The first is your lungs. The rest are the wrong tool at the wrong stage.
You made dust
Dry sanding, dry scraping, or sweeping up bone dry clay or bisque dry. Clay dust is silica, and silica in lungs stays there. In a shared studio the person breathing it is rarely the one making it.
Wet. Every stage is done wet. The one dry job, sanding greenware, goes outside in an N95 or better. A bucket under the work, a damp sponge on the table, never a dry brush.
Stop. Wet the table, wipe it, and do the rest of the job wet. Tell whoever is next to you, because they are breathing it too.
The tool did nothing, or did too much
A rib on bone dry clay chips it; sandpaper on leather hard clay clogs and tears; a rubbing stone on greenware crumbles it; a diamond pad on bisque is far more than the job needs and leaves deep scratches. Every tool on this page belongs to one stage.
Read the stage first. Wet clay: sponge. Leather hard: rib and scraper. Bone dry: almost nothing, and that wet. Bisque: scouring pad and wet sandpaper. Fired: diamond.
Put the tool down and pick the one for the stage. If the surface is torn, a damp sponge and a rib at leather hard usually recover it.
The fired foot or a glaze edge is still sharp
A grain of sand, a kiln wash flake, a drip, or a foot that was never rounded before firing. Fired stoneware is harder than most abrasives. Diamond cuts it fastest, and a wet silicon carbide stone does it too, just slower.
Round every foot with a damp sponge or a chamois at leather hard. At glazing, wax the foot, and every piece sits on a kiln cookie in the firing. A sharp foot is a foot that was sharp before the kiln.
A diamond pad, wet, in circles, thirty seconds. A diamond file for a glaze edge. A diamond pad or a silicon carbide stone, wet, for a drip, in an N95 or better with safety glasses. Our fused pottery lesson is the long version.
Sanding scratched the bisque and it shows under the glaze
Too coarse a grit, or dry, or sanded in one direction. Deep scratches in bisque fill with glaze unevenly and show as lines under a clear or a celadon.
A green scouring pad for most bisque cleanup, and if sandpaper, 220 or finer, wet, in circles. Coarse grits scratch bisque, so skip them.
Wet sand again with a finer grit until the scratches soften, wipe, and glaze. Under an opaque glaze it will not show; under a clear, choose a different pot for the clear.
A rim or an edge chipped while you were cleaning it
Bone dry clay is at its most fragile, and a rib or a scraper on a bone dry rim takes chunks out of it. Leather hard is when edges get cleaned; bone dry is when they get left alone.
All the trimming, scraping and edge-rounding at leather hard. A bone dry piece gets a barely damp sponge and nothing harder.
A chip at bone dry can be patched with a paste of the same clay, slowly, and it sometimes holds through the bisque. A chipped rim at bisque is a rim that gets sanded round, wet.
The rib or scraper gouged the surface
Held at too steep an angle, or pressed too hard, or dragged rather than shaved. A rib held nearly flat planes; a rib held upright digs.
Rib nearly flat to the surface, light pressure, long strokes. Scrape with the edge, not the corner.
At leather hard, fill the gouge with a scrap of the same clay, rib it flat, and a damp sponge finishes it.
How it works here
At The Clay Hole, if it makes dust it is being done wrong.
This page is written for potters everywhere. A few things are specific to our building.
Four things to know here
Leather hard cleanup with a rib happens anywhere, because it makes curls. Anything on bone dry or bisque is done wet, over a bucket, away from the shared tables, table wiped down wet after; dry sanding of greenware does not happen in the building, and the rare piece that needs it goes outside in an N95 or better. Diamond pads are bring-your-own; ribs, scrapers and sponges are studio tools from Yellow up. Full buckets go to The Wash Pit, never the drain.
Where it happens
Leather hard work at any table. Bisque cleanup wet, over a bucket, at the end of a table or by the sink, away from anyone else’s work. Dry sanding of greenware not at all; if a piece genuinely needs it, it goes outside in an N95 or better and comes back wiped. The table wiped down wet, every time, never swept.
Tools by Level
Ribs, scrapers, knives, sponges and chamois are studio tools for Yellow, Purple and Black Level Members; Green Level Members bring their own. Diamond pads, diamond files and rubbing stones are bring-your-own for everyone, and the diamond pad is the best small purchase in pottery.
The Wash Pit
Rinse tools and sponges at the all-purpose sink. A full bucket of sanding slurry goes to The Wash Pit, as the clean-up instructions say, never straight down a drain. Fired glaze grindings are glass and go in the bin, not the reclaim.
Why we hold this rule so firmly
Clay dust is silica. Silica that goes into a lung does not come out, and the damage is cumulative and permanent. In a room full of potters, the person breathing the dust is rarely the one who made it. Wet is not a preference; it is the rule that keeps our building safe to work in.
Questions people actually ask
The ones that come up most.
Why is almost all of it done wet?
Because dry clay dust and dry bisque dust are silica, and silica that goes into lungs does not come out. Wet sanding makes slurry instead of dust, slurry falls into a bucket, and the bucket goes to The Wash Pit. One rule covers every stage: if it makes dust, it is being done wrong, and the fix is water.
Which tool for which stage?
Wet clay: a sponge and a chamois. Leather hard: a rib, a scraper and a knife, which is where nearly all cleanup belongs. Bone dry: almost nothing, and a barely damp sponge if you must. Bisque: a green scouring pad and wet sandpaper at 220 or finer, or a rubbing stone under water. Fired: a diamond pad, a diamond file, or a silicon carbide stone under water for a drip. Diamond is fastest.
Should I wipe bisque before glazing?
The standard advice is yes, a damp sponge, because dust on bisque makes glaze crawl and pinhole. Earth Nation Ceramics argues on this page that you can skip it, and it is worth hearing. Either way the one thing not to do is wipe with a dry cloth, which makes dust, or soak the bisque, which makes it too wet to take glaze. A barely damp sponge, and let it dry a few minutes.
Can I sand greenware?
You can, and mostly you should not. Bone dry clay is at its most fragile and its most dusty, and everything sanding does at bone dry, a rib does better at leather hard with next to no dust. If a bone dry piece has a rough spot, a barely damp sponge or a damp sanding sponge, over a bucket, away from shared tables. Dry sanding greenware is the one job that goes outside, in an N95 or better.
What is a rubbing stone?
A block of silicon carbide, sold for sharpening or as a pottery rubbing stone, used wet on bisque to take down a rough rim or a lumpy foot. It cuts bisque quickly, makes slurry rather than dust, and lasts years. Under water in a bucket is where it lives.
Do I need a diamond pad?
Yes, if you make pots. A hand pad with diamond grit, used wet, takes the bump off a fired foot in thirty seconds and lasts for years, and nothing else is as quick. A diamond file does the same for a sharp glaze edge. They are bring-your-own here and they are the best small purchase in pottery.
Where does this happen at The Clay Hole?
Wet, over a bucket, away from the shared tables, with the table wiped down wet when you finish. Leather hard cleanup with a rib happens anywhere, because it makes curls, not dust. Anything on bone dry or bisque that could make dust is done wet, and the one job that cannot be done wet, which is nearly nothing, is done outside in an N95 or better.
Related lessons
Six lessons that sit next to this one.
Three to read next.
Cleanup is the last step of every stage. These are the stages, and the fired-pot rescue.
That is the whole rule
Rib at leather hard. Nothing at bone dry. Pad and wet paper at bisque. Diamond after. All of it over a bucket.
If you ever reach for dry sandpaper at a shared table, someone will say something, and they will be right. After that it is a bucket and a green pad, which is faster anyway, and a diamond pad in your bag for the foot that catches. Wet is not a preference here; it is how our building stays safe to work in.
If you want the reasoning, the wipe-before-glazing argument, the patching notes and the answers to the questions everybody asks, switch to the comprehensive version at the top. Otherwise, go fill a bucket.
Written for potters everywhere. Where our studio does things differently, the page says so.
Which version would you like to print?
Both print clean, with the videos turned into labeled boxes you can search for later.