Pottery Date Night
 Bring All Your Friends Free Week
 Give a Month of Pottery
 Private Pottery Parties

 The Welcome Booklet
 Your First Ten Sessions
 The Pottery Process
 Finding the Studio
 Your Classes Never Expire
 The Four Tables
 Who’s Who
 The Rewards Program
 Flux Glazes
 The Calculators
 Kiln Tracker
 Holiday Kiln Deadlines

 Beginner’s Tool Set
 Fingernail Clippers
 Mayco Clay Mender
 Epoxy for Kintsugi
 Applicator Bottles
 Large Bead Rack
 Raku Workshop
 Nighttime Raku
 Horsehair and Feather Raku
 The Clay Hole T-Shirt
 Embroidered Crewneck
 Zip-Up Hoodie
 Pre-Made Bisqueware
 Glaze Catchers
 Kiln Cookies
 Clay Cubby Rental
 The Glaze Bible, Printed
 The Book of Molds, Printed
 Printable Pottery Guides
 Free Printable Trackers
 Gifts for Potters
 Christmas Pottery Ideas
 Mother’s Day Gift Ideas
 Pottery Date Night
 Studio Calendar
 2027 Studio Events
 What Should I Do Today?
 How to Throw on the Pottery Wheel
 How to Make a Pinch Pot
 How to Tap Center a Pot
 The Five Stages of Clay
 Is Pottery Hard to Learn?
 Pottery Wheel Practice Drills
 20 Easy Hand-Building Projects
 Everything That Sounds Wrong

 A Beautiful Piece, Every Time
 Slab Roller Tips
 Any Dish as a Slump Mold
 Slab Roller & Slab Mold Certification
 The Pottery Skill Tree
 Clay & Pottery Calculators
 Logging Your Pottery and Glazes
 The Pottery Dictionary
 Why Did My Pottery Do That?
 The Pottery Cone Chart
 Pottery Myths, Fact-Checked
 Is Handmade Pottery Food Safe?
 Incredible Ceramic Artist Videos
 How Dan Throws Giant Pots
 How to Dry Your Pottery
 The Pottery Wheel Introduction
 Pottery by Zodiac Sign
 Personality and the Pottery Wheel
 Pottery for Engineers
 ADHD, Hyperfocus, and Never Running Out
 Hobbies for Burnout
 Screen-Free Hobbies for Adults
 Every Addiction I Ever Had Lost to Art
 Functional Pottery Is Engineering
 How Do We Compare?
 Pottery Classes by City
 Every Pottery Studio in Utah
 Pottery in Draper
 Featured Members
 The Signature Wall
 Making Friends as an Adult Is Brutal
 The Clay Hole Commandments
 2027 Pottery Contests
 2027 Studio Parties
 Gallery Night

 Scream It Into the Void
 Destroy the Glaze Wall
 Daily Affirmation Cards
 Everything That Can Go Wrong
 Subscribe to Our Newsletters
 Contact The Clay Hole
 Corporate Team Building

 Glaze Combinations
 Glazes We Do Not Carry
 Making Glaze Test Tiles
 The Mega Glaze Tool
 How to Use the Mega Glaze Tool

 Glaze Brushing Techniques
 How to Use Underglaze
 How to Use Dipping Glazes
 Glaze Problems, Causes and Fixes
 The Dipping Glaze Guide

 Making a Glaze Catcher
 Fused or Sharp After Firing
 The Signature Wall
 His Viral Videos
 His Own Ceramics
 Meet Mud
A handle is the hardest easy thing in pottery.
You can throw a clean mug in six months. You can spend six years making handles that still look like a question mark somebody gave up on. Here is every method we teach, written out in lists you can prop your phone against, plus eight videos from potters who are much better at this than most of us.
You can throw a clean mug in six months. You can spend six years making handles that still look like a question mark somebody gave up on. Here are two methods, the attaching sequence that decides whether they survive, and one video.

Pick one method, make six, keep two.
The method is almost never what fails. Handles come off because the handle and the pot were at different wetnesses when they met, or because the thin parts dried and shrank first and the thick join was left to catch up. Get those two right and any method works.
Never made one before
Roll a coil. It teaches you taper, curve and joining without also asking you to master a pull, and a tapered coil handle looks deliberate rather than apologetic.
You want it to look pulled
Pull off a carrot. It looks impossible for about three weeks and then suddenly is not, and nothing else gives you that thick-to-thin cross section.
Whichever one you pick, make a batch
Pull or roll five or six at a time, lay them on a board, and choose the two best once they have stiffened. The rest go back in the reclaim bucket and cost you nothing. Choosing beats salvaging.
You already watched the video. That is the problem.
Everybody learns handles the same way. You find a video, you watch somebody with beautiful forearms do it in ninety seconds, you nod, you feel ready. Then you sit down at your own table with a wet lump and no idea what order anything happens in.
We think that gap is not a you problem. It is a format problem.
What video is genuinely better at
Timing, pressure, and speed. There is no sentence on earth that teaches you how hard to squeeze. You have to see a hand do it, ideally several different hands, because every potter grips a little differently and one of them will click for you.
What a written list is better at
Order and recall. A list sits still. You can look at step four, do step four, look back at step four again. A video keeps going whether or not your hands did, and scrubbing back thirty seconds with clay on your thumb is its own small tragedy.
Why we put both on one page
Watch first so you know what the motion looks like. Then work off the list, because the list is the part you can keep open next to you. The video teaches the feel. The list keeps you from forgetting the boring step that decides whether the thing cracks.
And you can tick things off
Every list below is tappable. Tap a step, it goes green. It is not saving anything anywhere and it resets when you reload, which is on purpose. It is a place to keep your finger, not a record of your life.
The rest is practice
None of this replaces doing it forty times. Handles are a muscle skill. Reading about them will get you from bad to okay much faster than guessing, and then the only thing that gets you from okay to good is clay under your fingernails on a Tuesday.
Five things every handle needs, no matter how you make it
Method is the fun argument. These five are the part that actually decides whether your handle survives the kiln.
Same clay
Handle and pot come from the same clay body. Different bodies shrink at different rates and pull each other apart on the way down.
Same wetness
Match the moisture of the pot. Soft handle onto a dry pot is one of the most common cracks in any studio.
Same thickness
Roughly the thickness of the wall it attaches to. Thicker dries slower, and anything that dries at a different speed than its neighbor is looking for a way to crack.
Room for fingers
Two fingers minimum for a mug, three if you like a full grip. Test it while the clay is still soft, because you get zero votes after it dries.
A slow dry
The join is thicker than everything around it. Cover the handle loosely, let the whole piece even out, and stop trying to make it to the shelf tonight.
Leather hard is the word you want
Almost every method below wants the pot at soft leather hard: firm enough to hold its shape when you hold it, damp enough that a fingernail still marks it. Bone dry pots do not take handles. They take handles temporarily, and then they take them off again in the kiln.
Pulled off a carrot
- The classic
- Hardest to learn
- Best for batches
You wedge a lump, shape it into a fat carrot, and pull the handle out of it with a wet hand. Gravity and friction do the thinning. You cut off the good part and let it stiffen before it goes on the pot.
This is the one that looks impossible for about three weeks and then suddenly is not. It also gives you the nicest cross section of any method: thick at the top, tapering down, with a soft ridge where your fingers ran. Nothing else looks quite like it.
- Wedge a lump and shape a carrot. Fat end up, roughly the size of a fist for a few handles. Softer than throwing clay.
- Hold it up, wet your pulling hand. Bucket of water beside you, elbow loose. Wet hand, not a drowning hand.
- Pull downward in long strokes. Thumb on one side, fingers on the other. Start near the top and run all the way off the bottom.
- Rotate a quarter turn every few pulls. This is the step people skip. Skip it and you get a flat noodle with two sharp edges.
- Re-wet often, but let it get tacky. A greasy handle slips out of your grip. Damp is right. Dripping is not.
- Stop while it is still slightly too thick. You will thin it again when you attach it. Everybody pulls one pull too many at first.
- Cut the good section off. Take more length than you think. You can always shorten it, and you can never lengthen it.
- Lay it over a curve to stiffen. A board edge, a rolled towel, a chunk of foam. Give it the arc now so you are not forcing it later.
- Wait until it is soft leather hard. It should hold a bend without flopping and without cracking. Then go attach it.
- Wedge a lump and shape a fat carrot. About the size of a fist for a few handles, and softer than throwing clay.
- Wet your pulling hand and pull downward in long strokes. Thumb on one side, fingers on the other, elbow loose. Run all the way off the bottom every time.
- Rotate a quarter turn every few pulls. This is the step people skip. Skip it and you get a flat noodle with two sharp edges.
- Stop while it is still slightly too thick. You thin it again when you attach it. Everybody pulls one pull too many at first.
- Cut off more length than you think you need. You can always shorten it. You can never lengthen it.
- Lay it over a curve and wait for soft leather hard. A board edge, a rolled towel, a chunk of foam. It should hold a bend without flopping and without cracking.
Pull more than you need
Nobody pulls one handle. Pull five or six off the same carrot, lay them all out on a board, and pick the two best once they have stiffened.
The rest go back in the reclaim bucket and cost you nothing. Choosing beats salvaging, and it is the fastest way to learn what a good one looks like.
Pulled straight off the mug
- One mug at a time
- Strongest join
- Traditional
Same pulling motion, different starting point. You attach a stub of clay to the pot first and then pull the handle downward while it is already stuck on. The join gets made before the handle exists, which is why it cracks less often, as long as the stub is as stiff as the mug.
The trade is that you are working on a finished pot with wet hands. It takes nerve. It is also the fastest way to a handle that looks like it grew out of the mug instead of being glued to it.
- Get the mug to soft leather hard. Firm enough to hold while you work on it. Trim it first if you are going to trim it.
- Score and slip the top attachment point. Only the top. The bottom join comes much later.
- Press a fat stub of clay on and weld it. Push it in and smear the edges down into the wall. This join is the whole ball game.
- Turn the mug upside down. Hold it by the foot so the stub points at the floor and gravity is on your side.
- Wet hand, pull downward off the stub. Short strokes at first, longer as it lengthens. Rotate the mug a little between pulls.
- Check the taper as you go. Thick at the mug, thinner at the free end. Look at it from the side, not just from where you are standing.
- Flip the mug upright and let it fall into the arc. Do not fight it into shape. Set it down and let it hang for a minute.
- Trim the end, score, slip, press the bottom join. Cut it at an angle so it meets the wall flat instead of butting into it.
- Wipe your fingerprints off and stop touching it. Every extra poke is a new dent you will see forever after glaze.
Which of the two pulls should you learn?
Carrot first, if you are making more than one mug. You get to throw away the bad handles before they touch a pot, and throwing away bad handles is most of learning handles.
Off the mug once you trust your pull. It is fewer steps, it is a better join, and it looks the most alive.
Coil and rolled
- Start here
- No wheel needed
- Very forgiving
Roll a coil, taper it, bend it, attach it. That is the whole method, and there is nothing embarrassing about it. Plenty of potters who can pull a beautiful handle still roll coils when they want a round grip or a chunky farmhouse look.
The one thing that separates a good coil handle from a snake stuck on a cup is the taper. A coil of even thickness reads as lazy from across the room. Thin the bottom third and it suddenly looks intentional.
- Roll a coil longer and fatter than you need. Roll from the middle outward, hands moving apart, or you get a bone shape.
- Taper one end thinner than the other. The thick end goes at the top of the mug. This is the step that makes it look designed.
- Flatten it slightly if you want a comfier grip. A few passes between finger and thumb. Round is fine too, just less comfortable on a big mug.
- Let it firm up before you bend it. A soaking wet coil bent into an arc keeps flattening under its own weight for the next hour.
- Bend it in one smooth curve, not a corner. Two fingers of clearance. Hold it against the mug and look before you commit.
- Cut both ends at an angle. Angled ends sit flush on a curved wall. Square ends leave a gap that becomes a crack.
- Score, slip, press, blend. A tiny coil of clay smoothed into the top join adds real strength and reads as a design detail.
- Roll a coil longer and fatter than you need. Roll from the middle outward, hands moving apart, or you get a bone shape.
- Taper one end thinner than the other. The thick end goes at the top of the mug. This is the step that makes it look designed.
- Flatten one face if you want a comfier grip. A few passes between finger and thumb, or run a rib down one side to give it a spine.
- Let it firm up before you bend it. A soaking wet coil bent into an arc keeps flattening under its own weight for the next hour.
- Bend one smooth curve, then cut both ends at an angle. Two fingers of clearance. Angled ends sit flush on a curved wall, square ends leave a gap that becomes a crack.
The lazy upgrade
Roll a coil, then run a rib or the flat of a knife down one face. Now it has a spine and a flat where your fingers go. Ten extra seconds, completely different object.
Slab and strap
- Most repeatable
- Clean and modern
- Great with texture
Roll a slab, cut a strip, curve it, attach it. Flat and wide instead of round. If you want ten mugs whose handles match, this is the answer, because a template cuts the same shape every single time and your hands do not.
Straps also take texture better than anything else. Stamps, roulettes, a fabric press, a thumb rest pressed into the top. There is a lot of room to make it yours.
- Roll a slab about as thick as your mug wall. Use guide sticks, or the slab roller once you have done our free slab roller certification, so it is even end to end.
- Texture it now if you are going to. Once it is curved and attached, pressing anything into it distorts the arc.
- Cut a strip with a straightedge, or make a template. Cardboard template if you want a matching set. Cut a spare, always.
- Soften every cut edge with a damp sponge. Sharp slab edges cut lips and chip in the kiln. Two seconds each.
- Let it stiffen over a curve. Drape it over a tube, a jar, a rolled towel. Do not try to bend a floppy strip.
- Bevel the two ends where they meet the pot. Angled ends make contact across the whole face instead of on one edge.
- Score, slip, press, and reinforce the top join. The top carries the weight. Blend a small coil in there and smooth it out.
- Add a thumb rest if it wants one. A small wedge of clay blended into the top of the strap. Instantly nicer to hold.
Where straps go wrong
People cut them too wide. A strap wider than about an inch and a quarter starts fighting the curve of the mug and lifts at the edges as it dries. Narrower than you think, every time.
Lugs and knobs
- Casseroles
- Serving bowls
- Lids
A lug is a handle you grip rather than hook your fingers through. Two of them on a casserole, one on each side of a soup bowl, a little tab on a lid. Nothing loops. You are making something to hold, not something to hang a finger in.
Lugs are the most forgiving handle on this page and the easiest to make badly, because there is no obvious right shape to aim at. The fix is to make them in pairs, side by side, and compare them before either one touches the pot.
- Decide grip first, look second. Pick the piece up empty and notice where your thumbs actually land. Put the lugs there.
- Make both lugs at once, from equal lumps. Pinch or roll them side by side so they are twins, not cousins.
- Go bigger than feels right. A hot casserole gets carried with oven mitts on. Small elegant lugs are useless in mitts.
- Mark both positions before attaching either. Measure across the rim or use a strip of paper. Off-center lugs are visible from space.
- Score, slip, and support the wall from inside. Pressing a lug on unsupported pushes a dent through to the inside.
- Blend the lower edge down into the wall. The underside is where a lug pulls off. Feather it in, do not just stick it on.
- Check the glaze trap. Any tight gap between lug and wall will pool glaze and fuse. Keep the gap open or close it completely.
Attaching, in the order it actually happens
You can make a gorgeous handle and lose it here. Almost every handle that pops off in the kiln was attached in a hurry by somebody who was already thinking about the next pot.
This sequence works for every method above. Learn it once and it stops being a thing you think about.
Same sequence for either method above. Learn it once and it stops being a thing you think about.
- Check both pieces are the same wetness. If one is noticeably drier, wait, or wrap the dry one for an hour and come back.
- Hold the handle up and pick your two points. Top of the handle usually sits just under the rim. Look at it from the front before you mark anything.
- Score deep and rough, both sides. Real crosshatching that you can feel with a fingernail. A polite little scratch does nothing.
- Slip both surfaces, not just one. Slip from the same clay body. Thick as heavy cream, not as milk.
- Press and twist a few degrees, then settle it. The tiny wiggle squeezes air out of the join. Support the wall from inside while you push.
- Blend the squeeze-out inward, then brush off what is left. Push the excess into the join rather than wiping it away with a wet sponge, which softens the join. That ridge is free strength. Take the last of it off with a barely damp brush.
- Look down at it from directly above. This is the only angle that shows you the handle is twisted. Fix it now or live with it.
- Put your finger through it. Last chance. If it does not feel good empty, it will not feel good full and hot.
- Check both pieces are the same wetness. If one is noticeably drier, wrap the dry one for an hour and come back.
- Score deep and rough on both faces. Real crosshatching you can feel with a fingernail. A polite little scratch does nothing.
- Slip both surfaces. Slip from the same clay body, thick as heavy cream rather than milk.
- Press with a small twist, supporting the wall from inside. The tiny wiggle squeezes air out of the join instead of sealing it in.
- Blend the squeeze-out inward instead of wiping it away with a wet sponge. That little ridge of clay around the join is free strength. Take the last of it off with a barely damp brush.
- Look down from directly above, then put a finger through it. Above is the only angle that shows a twist. If it does not feel good empty, it will not feel good full and hot.
The one-day rule
The join area is thicker and wetter than everything around it. Give the whole piece a day loosely covered before you leave it out to dry properly, so the moisture has time to even out across the pot.
Rushing this is a common cause of a hairline crack that does not appear until after the glaze firing, which is the cruelest possible moment for it to appear.
Drying is where handles are actually lost
You did the hard part. Now do the boring part, because a handle that cracks off in the kiln almost never failed because of how it was made. It failed because of how it dried.
Cover it loosely
Plastic draped over, not wrapped tight. You are slowing the air down, not sealing the piece in a bag. A day or two of that lets the thick join catch up with the thin walls. A cotton sheet does the same job more evenly, if you have one.
Upside down at the end
Once it is firm, stand the mug on its rim. The foot and the join are the thickest parts, so let them be the ones facing the air.
Away from moving air
Not by a door, a vent, a fan, or a window in July. Uneven airflow dries one side faster than the other, and uneven drying is just cracking with extra steps.
If you are going to see a crack, you will see it here
Check the two joins when the piece is bone dry and again after it comes out of the bisque. A hairline you catch at bone dry can sometimes be saved. One you find after glaze cannot.
A crack that opens in the kiln ends that piece. For a rough foot, a drip or a fused cookie, we wrote a whole separate guide: how to fix pottery after a firing .
When it goes wrong
Tap whichever one is happening to you.
The three that happen while you are still sitting at the table.
It goes flat and wide
You are pulling on the same two faces every stroke. Rotate the carrot a quarter turn every few pulls and the section stays oval. This one fix solves more handle complaints than anything else.
It tears while you pull
The clay is too dry, your hand is too dry, or you are pulling faster than the clay can stretch. Wedge that one back up, start again softer, and slow the stroke down.
The arc sags after you bend it
You bent it while it was still too soft, so it keeps moving under its own weight. Let it stiffen over a curve until it holds the bend on its own before it goes near the pot.
It cracked at the join
Almost always a moisture mismatch. The handle and the pot were at different stages when they met, so they shrank at different rates and tore each other at the seam.
Attach at soft leather hard on both pieces, score deep enough to feel, slip both faces, and cover the finished piece loosely for a day so the thick join can catch up.
If it is still damp, open the crack up, re-score, add fresh slip, press it back and blend. If it is bone dry, this one is a lesson rather than a mug.
The whole thing on one screen
Method-agnostic. Works whether you pulled it, rolled it, or cut it out of a slab.
Handle, start to shelf
Nine steps. Screenshot it, or leave this page open.
- 1 Pot to soft leather hard. Trimmed already if it is getting trimmed.
- 2 Make the handle from the same clay. The same stiffness as the pot.
- 3 Make it thicker than you want it. You lose thickness at every later step.
- 4 Give it the curve, then walk away. Let it stiffen over something round until it holds a bend.
- 5 Cut both ends at an angle. Flat contact beats a butt join every time.
- 6 Score deep, slip both faces. Feel the crosshatch with a fingernail.
- 7 Press, small twist, support from inside. Blend the squeeze-out into the join.
- 8 Look from above and from the front. Straighten now. There is no later.
- 9 Cover loosely for a day, then dry slow. Rim-down at the end, away from moving air.
Handle questions, answered
Which handle method should a beginner start with?
Coil. It is the least frustrating way to get a handle that works, and it teaches you taper, curve and joining without also asking you to master a pull. Once coil handles feel easy, learn to pull off a carrot. Most people who quit on handles quit because they started with the hardest method on day one.
How thick should a mug handle be?
Roughly as thick as the wall of the mug at the top of the handle, tapering thinner toward the bottom join. Thicker than the wall dries slower and cracks. Much thinner than the wall snaps when somebody who is not you picks it up by the handle with a full cup of coffee in it.
Can I attach a handle to a bone dry pot?
Not reliably, no. Bone dry clay has finished shrinking and fresh clay has not, so the two pull against each other the entire way down. It will sometimes survive the bisque and then come apart in the glaze firing, which is worse than failing early. If the pot has gone too far, it is usually faster to make another pot than to fight it.
Do I really need slip, or is water enough?
Use slip. Water alone lubricates the two surfaces rather than gluing them, and the join relies on clay particles actually knitting together. Slip made from the same clay body is best, because it shrinks at the same rate as everything it is touching. A small tub of it next to you costs nothing and saves handles.
Why does my pulled handle keep going flat?
You are not rotating the clay. Pulling on the same two faces over and over squeezes it into a ribbon with sharp edges. Turn the carrot a quarter turn every few pulls and the section stays oval. This one fix solves more handle complaints than anything else on this page.
How long should a handle stiffen before I attach it?
Until it holds a curve without flopping and without cracking when you bend it. Depending on the room and the clay body, that is usually somewhere between twenty minutes and a couple of hours. Time is not the measure, feel is. Bend the end of a spare one and see what it does.
Can I make handles ahead of time and save them?
Yes, and it is a good habit. Pull a batch, curve them, and keep them wrapped so they hold at leather hard. They still have to match the moisture of the pot when you use them, so a bag of handles that has gone hard is a bag of nothing. Check them before you plan a session around them.
What about extruded handles?
An extruder pushes clay through a shaped die and gives you identical handles all day long, which is wonderful for matching sets. At The Clay Hole the wall extruder is a Black Level tool, so it is not part of what most members will be reaching for. Everything on this page is done with your hands and a table.
Should the handle go on before or after trimming?
After. Trimming means holding the pot upside down and putting pressure on it, and a handle in the way turns that into an awkward wrestling match. Trim the foot, let the pot settle back to soft leather hard, then handle it.
Is there a right place on the mug for the handle to sit?
There is no rule, but there is a reliable starting point: top join just below the rim, bottom join around the widest part or a little below the midpoint. From there it is about balance. Hold the mug as if it were full. If your wrist is doing work to keep it level, move the handle down.
Reading about handles is step one. Step two needs clay.
A Clay Hole membership gets you the wheels, the tables, the tools, the classes, and a shelf to line up all the handles that did not work while you figure out the ones that do. Green, Yellow, Purple or Black, whichever fits how often you can get here.
Every video on this page belongs to the potter who made it, and none of them are ours. We link them because they are good. Nothing from YouTube loads until you press play.
The video on this page belongs to the potter who made it, and it is not ours. Nothing from YouTube loads until you press play. Three more methods, the drying rules and ten questions we get asked are all in the comprehensive version, back at the top of the page.
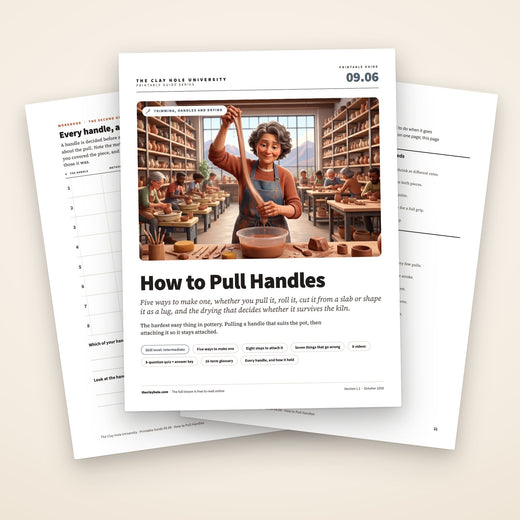
Which version would you like to print?
Videos come out as a labeled box with the title and channel to search for, since paper does not play them.