Pottery Date Night
 Bring All Your Friends Free Week
 Give a Month of Pottery
 Private Pottery Parties

 The Welcome Booklet
 Your First Ten Sessions
 The Pottery Process
 Finding the Studio
 Your Classes Never Expire
 The Four Tables
 Who’s Who
 The Rewards Program
 Flux Glazes
 The Calculators
 Kiln Tracker
 Holiday Kiln Deadlines

 Beginner’s Tool Set
 Fingernail Clippers
 Mayco Clay Mender
 Epoxy for Kintsugi
 Applicator Bottles
 Large Bead Rack
 Raku Workshop
 Nighttime Raku
 Horsehair and Feather Raku
 The Clay Hole T-Shirt
 Embroidered Crewneck
 Zip-Up Hoodie
 Pre-Made Bisqueware
 Glaze Catchers
 Kiln Cookies
 Clay Cubby Rental
 The Glaze Bible, Printed
 The Book of Molds, Printed
 Printable Pottery Guides
 Free Printable Trackers
 Gifts for Potters
 Christmas Pottery Ideas
 Mother’s Day Gift Ideas
 Pottery Date Night
 Studio Calendar
 2027 Studio Events
 What Should I Do Today?
 How to Throw on the Pottery Wheel
 How to Make a Pinch Pot
 How to Tap Center a Pot
 The Five Stages of Clay
 Is Pottery Hard to Learn?
 Pottery Wheel Practice Drills
 20 Easy Hand-Building Projects
 Everything That Sounds Wrong

 A Beautiful Piece, Every Time
 Slab Roller Tips
 Any Dish as a Slump Mold
 Slab Roller & Slab Mold Certification
 The Pottery Skill Tree
 Clay & Pottery Calculators
 Logging Your Pottery and Glazes
 The Pottery Dictionary
 Why Did My Pottery Do That?
 The Pottery Cone Chart
 Pottery Myths, Fact-Checked
 Is Handmade Pottery Food Safe?
 Incredible Ceramic Artist Videos
 How Dan Throws Giant Pots
 How to Dry Your Pottery
 The Pottery Wheel Introduction
 Pottery by Zodiac Sign
 Personality and the Pottery Wheel
 Pottery for Engineers
 ADHD, Hyperfocus, and Never Running Out
 Hobbies for Burnout
 Screen-Free Hobbies for Adults
 Every Addiction I Ever Had Lost to Art
 Functional Pottery Is Engineering
 How Do We Compare?
 Pottery Classes by City
 Every Pottery Studio in Utah
 Pottery in Draper
 Featured Members
 The Signature Wall
 Making Friends as an Adult Is Brutal
 The Clay Hole Commandments
 2027 Pottery Contests
 2027 Studio Parties
 Gallery Night

 Scream It Into the Void
 Destroy the Glaze Wall
 Daily Affirmation Cards
 Everything That Can Go Wrong
 Subscribe to Our Newsletters
 Contact The Clay Hole
 Corporate Team Building

 Glaze Combinations
 Glazes We Do Not Carry
 Making Glaze Test Tiles
 The Mega Glaze Tool
 How to Use the Mega Glaze Tool

 Glaze Brushing Techniques
 How to Use Underglaze
 How to Use Dipping Glazes
 Glaze Problems, Causes and Fixes
 The Dipping Glaze Guide

 Making a Glaze Catcher
 Fused or Sharp After Firing
 The Signature Wall
 His Viral Videos
 His Own Ceramics
 Meet Mud
Surface and decoration · Carving clean lines
Right stage, sharp tool, one pass. That is the whole secret.
A clean carved line is not a talent. It is clay at firm leather hard, a tool sharp enough that you never press, and one unhurried pass with your elbows on the table. Get those three right and the tool draws the line for you.
This page walks it in four steps, with a tick list at each: the moisture test, the layout, the cut itself, and what to do about the burr. Six fixes and five videos from potters who carve.
This is the short version: the stage, the layout, the cut and the burr, each with a tick list. The tool guide, the reasoning and the questions are in the comprehensive version.
Read it, then watch it
Why this is written down and filmed, both.
A clean line is three things: the clay at the right stage, a sharp tool at a steady angle, and one unhurried pass. Two of those are facts you can read and check off. The third is a motion, and nobody has ever learned a motion from a paragraph. So the moisture test, the tool choice, the layout and the burr rules are written here with a tick list under each, and the videos are for the motion, which is why the first one is Adam Field and why you should watch the hands and not the pot.
Use both, in this order
Read the step. Watch the hands. Do it on a scrap slab before you do it on the pot. The page remembers your ticks, so you can lay out tonight and carve tomorrow.
The whole idea
Right stage, sharp tool, one pass.
Firm leather hard, so the clay parts instead of tearing or chipping. A tool sharp enough that you never press. One continuous pass at an even speed with both elbows braced, and the pot turning where the hand would otherwise wobble. Leave the burr until the piece is dry, then brush it off gently over a bucket and wipe the table down wet. That is the whole technique.
The five-minute version
The whole technique in six moves.
If you already carve and you just want the shape of it, this is the shape of it. Everything below is these six moves, slowed down and with the places they fail marked.
Before you cut anything
What you need on the table.
Six things, and the expensive ones are optional. The banding wheel and the paper strip are the two that separate straight lines from nearly straight ones.
A needle tool, a ball stylus or mechanical pencil, a small V tool or a loop with a real edge, a banding wheel, a pencil, and a strip of paper for dividing the pot. That is all of it.
Step one
Get the clay to firm leather hard. Nothing else matters until it is.
Fingernail marks it. Fingertip does not. That is the test, and it is the whole first step. Too soft and the clay drags under the tool and tears at the edge of every line. Too dry and it stops parting and starts chipping. In between there is a window of a few hours on a warm evening, or a day or two in a bag, where the clay parts like cheese and leaves a wall you could draw with a ruler.
The window moves. A thin thrown cup gets there in a few hours uncovered. A thick slab takes a day. Anything left in a bag with a damp paper towel stays there for a week. The mistake is carving when you happen to be at the studio rather than when the clay is ready, and the fix is planning: throw or build on one visit, bag it, carve on the next. Our five stages of clay lesson is the long version.
If the piece has dried past the window, do not carve it. Mist it lightly, bag it, and give it an hour. It will come back. If it has gone bone dry, it will not come back evenly, and carving bone dry clay makes silica dust at a shared table, which is the one thing on this page that is not a matter of taste.
Step two
Lay it out before the tool comes anywhere near it.
Where the lines go matters more than how they are cut. A perfectly cut line in the wrong place is still in the wrong place. Pencil first, lightly, straight on the clay. Graphite burns out in the bisque, so draw as much as you like.
For anything that repeats around a pot, do not measure the circumference. Wrap a strip of paper round the pot, mark where it overlaps, take it off, fold it into as many equal parts as you want divisions, and wrap it back on. Every fold is a mark. It is faster than a ruler and it is exact. For horizontal bands, put the pot on a banding wheel, hold a pencil still against a fixed rest, and turn the wheel. For anything diagonal or curved, draw it freehand on paper first, cut it out, and trace round it.
Then look at the layout for longer than feels necessary. Turn the pot. Look at it from across the table. A design that looks busy in pencil will look twice as busy carved, because carving adds shadow. The best carved pots usually have fewer lines than the potter first drew, and the cut that made them best was made with an eraser.
Where a line starts and stops
A line that begins with the tool already at full depth has a hard square start. A line that begins with the tool skating in from above has a taper. Decide which you want and do it on purpose at both ends. Where a line has to join another, run into the existing groove rather than stopping next to it; a join inside the groove disappears, a join beside it never does.
Step three
Sharp tool, braced arm, one pass.
Never press. A sharp tool at a steady angle finds its own depth and cuts a line with clean walls. The moment you lean on it, the depth changes, the angle changes, and the line wobbles. If you find yourself pressing, the tool is dull or the clay is too dry, and the answer is the stone or the bag, never more force.
Brace everything that can be braced. Both elbows on the table. The hand holding the pot resting on the banding wheel. Then move only one thing: for a vertical line, the hand moves and the pot stays still; for a horizontal line, the pot turns and the hand stays still. A line drawn by a hand that is also steadying a pot is a line drawn by a hand that is doing two jobs, and it shows.
One continuous pass at an even speed. Faster is smoother, within reason; a slow, careful line records every hesitation as a wobble. Breathe out as you cut. Do not stop mid-line, do not go back over it, and do not chase a line that went wrong with a second cut on top of it, because two passes is a line twice as wide and no straighter. If a line goes wrong, leave it, finish the rest, and decide later whether it needs widening into a bolder line or scraping back and recutting.
The tool angle
Upright for the finest line. Raked back, and a V tool cuts wider and a needle starts to plow instead of cut. On a curved pot the angle has to follow the curve, which means your wrist turns as the pot does. Pick the angle on a scrap slab first and feel what it does to the width.
Fluting and wide lines
A wide shallow groove wants a round loop held nearly flat and pulled in one long stroke, usually top to bottom on a pot. The same rules apply, only more so: sharp edge, no pressing, one pass. Faceting is its own page and it is the natural next step from fluting.
Step four
Leave the burr alone, then take it off dry.
Every cut throws up a little ridge of clay along both edges. The instinct is to wipe it. Do not. A wet wipe rounds the edge, pushes slurry into the line, and turns a crisp cut into a soft one. Leave the burr exactly where it is until the piece is bone dry, then sweep it off gently with a soft dry brush, over a bucket or a damp towel and away from other people, and it will fall away in a single flake, leaving the edge the tool left. Wipe the table down wet afterward, never dry.
There is one exception, for potters who want the edge even crisper than the tool left it. At leather hard, a thin metal rib dragged flat across the line, at right angles to it, shaves the burr off without touching the walls of the groove. This is the mishima scrape, and it works on plain carved lines too. It takes a light hand and a rib with a straight edge. If you are not sure, the dry brush tomorrow is safer.
Then glaze thin. A fine carved line is about a millimeter wide and a glaze coat is a good fraction of that, so three coats of an opaque glaze bury it. Two coats of a transparent, a celadon that pools in the groove, or a wash wiped back before two coats of clear all keep the line. If your wash is underglaze, bisque fire it before any glaze goes over it, so never clear over a fresh wash. If you want a bold opaque glaze, carve bold lines that can survive it, which is a different design, decided at the layout stage.
Watch it done
Now watch five people do this five ways.
Watch this one, then go cut a line.
None of these potters work here or know we exist. Between them they cover the cut itself, layout and design, making a tool, choosing a tool, and carving at leather hard. Nothing but the still frame loads until you press play.
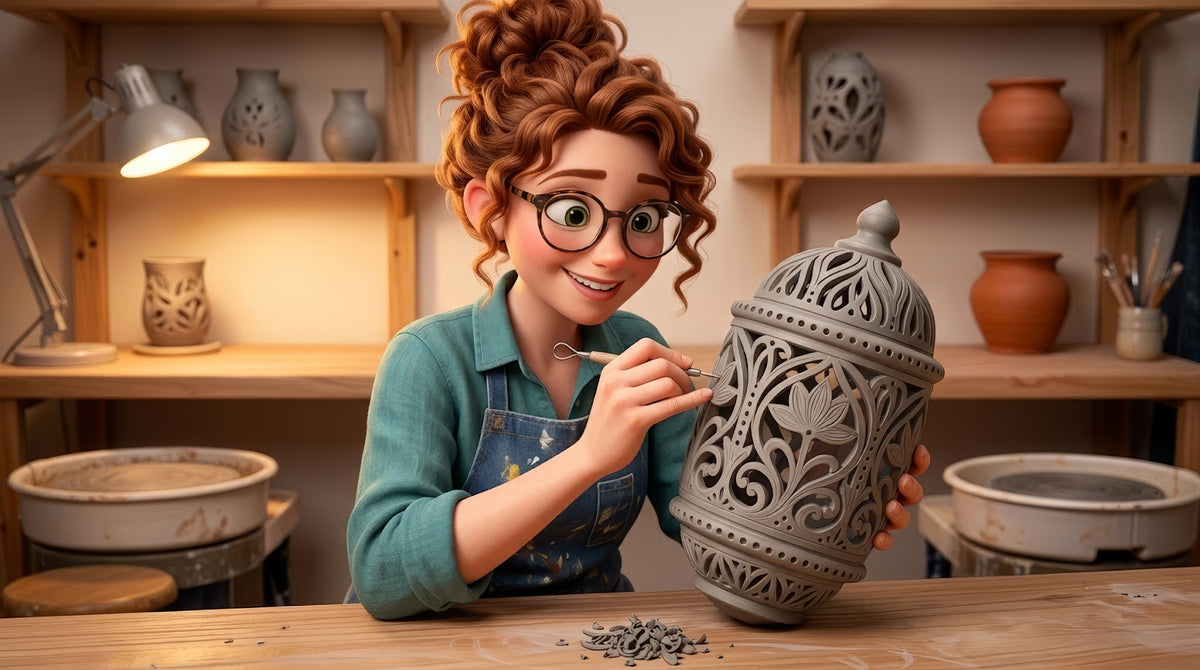
A clip of Adam Field carving a piece from layout to finish. Watch the hands, not the pot. The other four videos are in the comprehensive version.
When it goes wrong
Six ways it goes wrong, and what to do about each.
The three failures that happen on the first night.
Pick the one that looks like your pot. The first four are about the cut itself: the arm, the clay and the tool. The last two are what happens after the cut.
Pick the one that looks like your pot. All three are about the cut itself: the arm, the clay and the tool.
The lines wobble
The tool changed angle mid-line, or your hand was moving instead of the pot, or you slowed down. A carving tool is like a pen: it draws the line your arm draws, and an unbraced arm draws a wobble.
Brace both elbows on the table, hold the tool like a pen, and turn the pot on a banding wheel while the tool stays still wherever it can. One steady pass at an even speed. Breathe out as you cut.
A wobbly line cannot be straightened, but it can be widened into a bolder line with a bigger tool, which hides the wobble. Or fill it and scrape it back as mishima, where a hair of wobble reads as handmade.
The edges of every line are torn and ragged
Too soft, or too dull. Clay that is still plastic tears at the edge of a cut instead of parting, and a dull tool tears clay at any moisture.
Wait for firm leather hard, the stage where a fingernail marks it and a fingertip does not. Sharpen the tool: a loop or a V tool gets a few strokes on a fine stone, a needle gets replaced.
Let the piece firm up, then run the tool through each line once more at firm leather hard. The second pass trues the walls and makes the line a little wider. Then leave the burr alone until it is dry.
The edges chip and flake instead of cutting
Too dry. Past leather hard the clay stops parting and starts breaking, and every line you cut has a chipped edge with a chunk missing somewhere along it.
Carve earlier. If the piece has dried too far, mist it lightly and bag it for an hour, and it will come back to leather hard, unless it has gone bone dry, which will not come back evenly. Keep it bagged between sessions.
Mist, bag, wait, recut. A chipped line at leather hard can usually be recut a fraction wider with a clean edge. A chipped line at bone dry is a texture now.
The lines vary in depth along their length
The tool angle drifted, or the pressure did. A V tool cuts deeper as it tilts more upright, and a loop cuts deeper as you lean on it. Neither is obvious while it is happening.
Pick an angle and keep it. Let the tool find its own depth rather than pressing. On a curved pot, the tool has to follow the curve, which means your wrist turns as the pot turns.
A second light pass at a consistent angle evens most lines out, and makes them a little wider. Alternatively, glaze it with something that pools, and let the depth changes become shading.
The glaze filled the lines and they vanished
Thick glaze, or a glaze with no transparency. A fine carved line is a millimeter wide and a glaze coat is a good fraction of that. Three coats of an opaque glaze and the line is gone.
Thin glaze over fine carving: two coats of a transparent or a celadon, or a wash wiped back and bisque fired, then two coats of clear. Or carve bolder, so the line has room to survive the glaze.
Fired is fired. The lesson goes into the next pot. If a few lines still ghost through, a light sanding of the glaze surface will not bring them back, so do not try.
The edges came out of the kiln sharp enough to cut
The burr was never removed, or the edges were left as vertical cliffs. Fired clay keeps every edge you leave it with and makes it harder.
At bone dry, a soft dry brush along each line, worked gently over a bucket, lifts the burr. A barely damp brush at leather hard softens an edge without filling the line. Glaze softens edges too, if there is any glaze on them.
Our fused and sharp pottery lesson covers the diamond pad. Go gently, keep it wet, and wear safety glasses and an N95 or better; you are taking the edge off, not the line.
How it works here
At The Clay Hole, the tools are on the wall and the dust rule is not optional.
This page is written for potters everywhere. A few things are specific to our building, so you know before you start.
Three things to know here
Needles, loops, styluses and banding wheels are studio tools for every Level except Green, who bring their own. Carve at leather hard: bone dry carving makes silica dust at a shared table, so mist and bag a piece that has dried a little too far rather than cutting it, and leave a bone dry one alone. Bisque is cone 05 and free; the glaze firing is cone 5½ at five cents a cubic inch.
Tools by Level
Needles, loops, ball styluses, ribs and banding wheels are studio tools, open to Yellow, Purple and Black Level Members. Green Level Members bring their own. If you fall in love with a particular V tool, buy your own; the ones on the wall get sharpened, but not as often as a tool you carry home.
Between sessions
A bag with a damp paper towel holds a piece at leather hard on your shelf for a week. Name and date on the bag. A pot you meant to carve that has gone bone dry on the shelf is a glazing project now, not a carving one.
Color in the lines
A carved line with underglaze scraped into it is mishima, and our mishima lesson picks up exactly where this one ends. A carved line with a wash wiped back over it is our wipe-away lesson. Both need the free brush-on glaze and underglaze certification.
Firing
Bisque is cone 05 and free. The glaze firing is cone 5½ at five cents a cubic inch, $4.80 minimum. Carved lines do not change the price; the kiln measures the pot, not the decoration.
Carve leather hard, not dry
Clay dust is silica and it does not leave your lungs. Leather hard carving makes curls. Bone dry carving makes dust that everyone at the table breathes. Mist and bag a piece that has dried a little too far, and leave a bone dry piece alone, because it will not come back evenly. Wipe the table down wet when you finish.
Carve leather hard, not dry
Clay dust is silica, and silica in your lungs does not leave. Carving at leather hard makes curls that fall on the table and get wiped up wet. Carving or sanding bone dry clay makes fine dust that hangs in the air for hours, and a shared studio is the worst place to make it, because everyone breathes what you make. Mist and bag a piece that has dried a little too far. A bone dry piece will not come back evenly, so leave it alone. If you genuinely must work dry, a fitted respirator with P100 cartridges is the minimum and an N95 is a compromise, and neither makes it acceptable at a shared table. Wipe your table with a wet sponge when you are done, never sweep it dry.
Questions people actually ask
The ones that come up every week.
What is the single most important thing?
Moisture. Firm leather hard, the stage where a fingernail marks the clay and a fingertip does not. Nearly every ragged, torn, chipped or smeared line on a beginner pot was cut at the wrong stage, and no tool or technique fixes the wrong stage.
Do I need expensive carving tools?
No, but you need sharp ones. A needle tool, a ball stylus and one small loop with a real edge will carve most of what is on this page. The tungsten and diamond V tools people love are lovely because they are sharp and stay sharp, not because they are magic. A dull expensive tool tears clay exactly like a dull cheap one.
Should I draw the design on first?
Yes, in pencil, lightly. Graphite burns out in the bisque and leaves nothing behind, so draw and redraw freely. For repeating patterns, mark the divisions with a strip of paper wrapped round the pot before you draw a single line. Where the lines go matters more than how well they are cut.
How do I carve a straight line around a pot?
Put the pot on a banding wheel, brace your arm on something that does not move, hold the tool still, and turn the wheel. The tool draws a perfect circle because your hand is not moving. Vertical lines are the reverse: pot still, hand moving, elbow braced on the table, one pass.
What do I do about the burr?
Leave it until the piece is bone dry, then sweep it off gently with a soft dry brush, over a bucket, and wipe the table down wet afterward. Wiping a burr while the clay is wet rounds the edge and fills the line. If you want a truly crisp edge at leather hard, a metal rib dragged flat across the line shaves the burr off without touching the walls; that is the mishima move.
Can I carve on bisque?
Not really. Bisque is too hard to cut and too abrasive on tools, and the dust is silica. Fine lines on bisque are a job for a rotary tool worked wet, a respirator, safety glasses and a very good reason. Carve at leather hard, always.
Which glaze keeps fine lines visible?
Anything thin and transparent: a clear, a celadon that pools, a wash wiped back and fired on in a bisque, then two coats of clear. Opaque glazes at three coats bury a fine line. If you want a bold opaque glaze, carve bold lines, wide and deep enough to survive it.
Related lessons
Six lessons that sit next to this one.
Three to read next.
A clean line is the foundation under half the surface work in this University. These are the pages built on it.
That is the whole technique
Right stage. Sharp tool. One pass. Burr off dry.
Your first carved pot will have one line you pressed on and one you went back over. That is normal, and you will feel both of them happen, which is the point. The second pot will be cut on a scrap slab first, and the lines will look like they were drawn by somebody else. Carving is a quiet skill and it arrives quickly once the clay is at the right stage.
If you want the tool guide, the layout tricks, the fluting notes and the answers to the questions everybody asks, switch to the comprehensive version at the top. Otherwise, go check a pot with your fingernail.
Written for potters everywhere. Where our studio does things differently, the page says so.
Which version would you like to print?
Both print clean, with the videos turned into labeled boxes you can search for later.