Pottery Date Night
 Bring All Your Friends Free Week
 Give a Month of Pottery
 Private Pottery Parties

 The Welcome Booklet
 Your First Ten Sessions
 The Pottery Process
 Finding the Studio
 Your Classes Never Expire
 The Four Tables
 Who’s Who
 The Rewards Program
 Flux Glazes
 The Calculators
 Kiln Tracker
 Holiday Kiln Deadlines

 Beginner’s Tool Set
 Fingernail Clippers
 Mayco Clay Mender
 Epoxy for Kintsugi
 Applicator Bottles
 Large Bead Rack
 Raku Workshop
 Nighttime Raku
 Horsehair and Feather Raku
 The Clay Hole T-Shirt
 Embroidered Crewneck
 Zip-Up Hoodie
 Pre-Made Bisqueware
 Glaze Catchers
 Kiln Cookies
 Clay Cubby Rental
 The Glaze Bible, Printed
 The Book of Molds, Printed
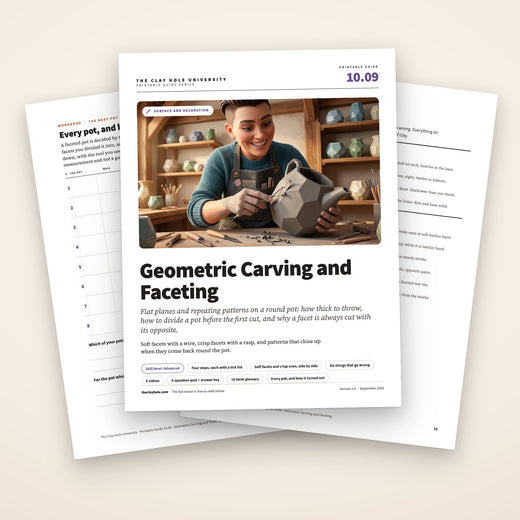
 Printable Pottery Guides
 Free Printable Trackers
 Gifts for Potters
 Christmas Pottery Ideas
 Mother’s Day Gift Ideas
 Pottery Date Night
 Studio Calendar
 2027 Studio Events
 What Should I Do Today?
 How to Throw on the Pottery Wheel
 How to Make a Pinch Pot
 How to Tap Center a Pot
 The Five Stages of Clay
 Is Pottery Hard to Learn?
 Pottery Wheel Practice Drills
 20 Easy Hand-Building Projects
 Everything That Sounds Wrong

 A Beautiful Piece, Every Time
 Slab Roller Tips
 Any Dish as a Slump Mold
 Slab Roller & Slab Mold Certification
 The Pottery Skill Tree
 Clay & Pottery Calculators
 Logging Your Pottery and Glazes
 The Pottery Dictionary
 Why Did My Pottery Do That?
 The Pottery Cone Chart
 Pottery Myths, Fact-Checked
 Is Handmade Pottery Food Safe?
 Incredible Ceramic Artist Videos
 How Dan Throws Giant Pots
 How to Dry Your Pottery
 The Pottery Wheel Introduction
 Pottery by Zodiac Sign
 Personality and the Pottery Wheel
 Pottery for Engineers
 ADHD, Hyperfocus, and Never Running Out
 Hobbies for Burnout
 Screen-Free Hobbies for Adults
 Every Addiction I Ever Had Lost to Art
 Functional Pottery Is Engineering
 How Do We Compare?
 Pottery Classes by City
 Every Pottery Studio in Utah
 Pottery in Draper
 Featured Members
 The Signature Wall
 Making Friends as an Adult Is Brutal
 The Clay Hole Commandments
 2027 Pottery Contests
 2027 Studio Parties
 Gallery Night

 Scream It Into the Void
 Destroy the Glaze Wall
 Daily Affirmation Cards
 Everything That Can Go Wrong
 Subscribe to Our Newsletters
 Contact The Clay Hole
 Corporate Team Building

 Glaze Combinations
 Glazes We Do Not Carry
 Making Glaze Test Tiles
 The Mega Glaze Tool
 How to Use the Mega Glaze Tool

 Glaze Brushing Techniques
 How to Use Underglaze
 How to Use Dipping Glazes
 Glaze Problems, Causes and Fixes
 The Dipping Glaze Guide

 Making a Glaze Catcher
 Fused or Sharp After Firing
 The Signature Wall
 His Viral Videos
 His Own Ceramics
 Meet Mud
Surface and decoration · Geometric carving and faceting
Throw thick, divide first, cut opposites in pairs.
Faceting takes a round pot and gives it planes and edges. Geometric carving takes a plain surface and gives it a pattern that has to meet itself when it comes back round. Both are the same lesson: the layout is the work, and the cut is one confident stroke.
This page walks both, with a tick list at every step: throwing for facets, soft facets against crisp ones, dividing a pot so the error has nowhere to hide, laying out a pattern that closes, piercing, drying and the glazes that make an edge sing. Six fixes and six videos.
This is the short version: the thick throw, the division, the pairs, the pattern rule, each with a tick list. The soft-versus-crisp detail, the reasoning and the questions are in the comprehensive version.
Read it, then watch it
Why this is written down and filmed, both.
Faceting is a single stroke with a wire, and no sentence can tell you how fast that stroke is or how the wire feels when it is cutting cleanly. Geometric carving is the opposite: it is almost all planning, and the planning is a set of rules you can read, check off, and get right the first time. So the layout lives here, with a tick list under it, and the videos are for the wire.
Use both, in this order
Read the step. Watch the cut. Do it on a thick practice cylinder before you do it on a pot you like. The page remembers your ticks, so you can throw tonight and facet tomorrow.
The whole idea
Throw thick. Divide first. Cut opposites in pairs.
A facet is clay you threw on purpose in order to take it off, so the wall has to be thick. Divide the rim before the first cut, cut each facet in one stroke top to bottom, and cut opposite facets in pairs so any error is split rather than stacked. Geometric carving is the same rule with a pencil: divide the whole pot, then carve from the divisions and never from the last element.
The five-minute version
The whole technique in six moves.
If you already throw and you just want the shape of it, this is the shape of it. Everything below is these six moves, slowed down and with the places they fail marked.
Before you cut anything
What you need on the table.
Six things, two of which are a strip of paper and a pencil. The rasp is the one people do not expect, and the one that makes leather hard facets easy.
A cutting wire or a wire on a frame, a rasp or a knife for leather hard, a strip of paper for dividing, a pencil and a flexible ruler for patterns, a small V tool or needle, and a banding wheel. That is all of it.
Step one
Throw thick, and decide soft or crisp before you cut.
A facet is clay you threw in order to take off. Throw the cylinder thicker than you would for anything else: three eighths of an inch for gentle facets, half an inch for deep ones, and heavier at the base than at the rim, because the bottom of every facet is the deepest part of the cut.
Then decide which kind of facet you want, because the two happen at different times and produce different pots. Soft facets are cut within minutes of throwing, while the clay is still wet, with a wire or a wire on a frame. They are quick, slightly rounded, and they can be pushed out from inside afterwards so the flat planes belly into curves. Crisp facets are cut at leather hard with a knife, a plane or a rasp. They stay flat, the edges stay sharp, and you have all the control in the world and none of the softness.
Soft facets with a wire
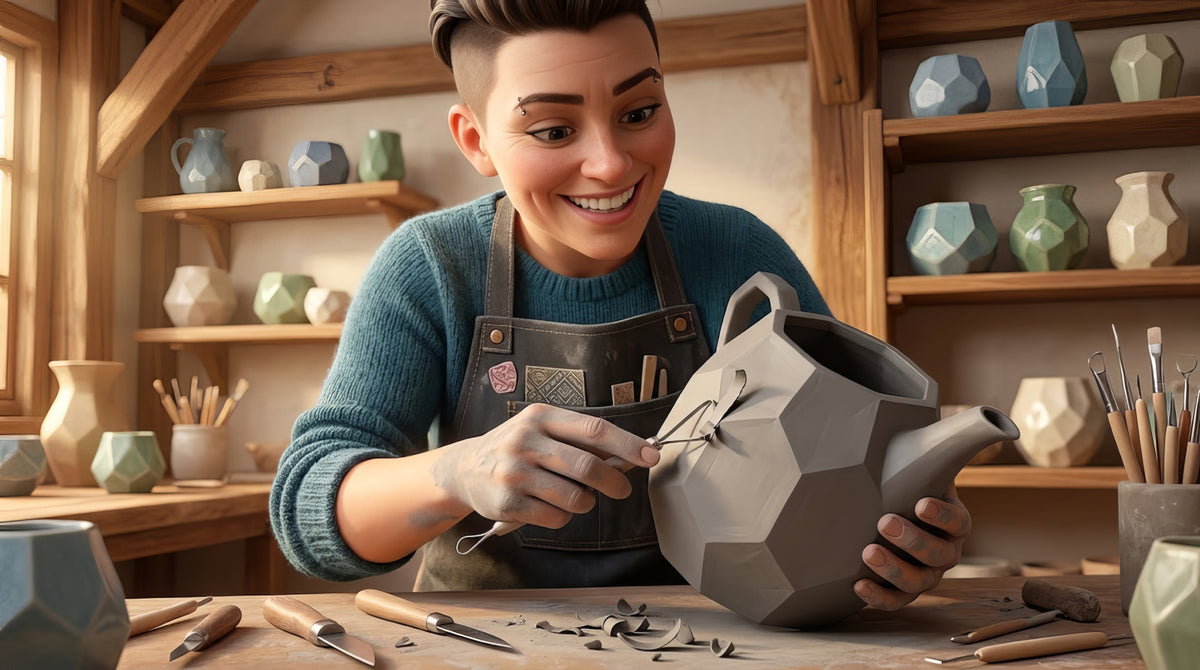
Throw a thick cylinder, stop the wheel, and cut each facet in one stroke from rim to base with a taut wire, thumbs braced on the rim, or with a wire on a frame. Then, if you want, wet your fingers and throw the pot out from inside, and the facets stretch into gentle curves while the edges stay. Dick Lehman and Bill van Gilder both do this in the videos below, and Warren MacKenzie cuts with the same tool, a cheese cutter, which is a wire on a frame.
Crisp facets with a rasp or a knife
Let the cylinder firm to leather hard, mark the divisions, and shave each facet flat with a rasp, a plane or a fettling knife held at a constant angle. The rasp leaves curls, not dust, and it is forgiving: a facet that came out narrow gets three more strokes. Hand-built cylinders facet this way too.
Soft or crisp
Wire on the wheel within minutes of throwing gives soft facets you can belly out from inside. Rasp or knife at leather hard gives flat planes with sharp edges. Decide before the first cut, because you cannot have both on one pot.
Step two
Divide the rim, then cut opposites in pairs.
An even number of facets, marked before the first cut. Six, eight, twelve or sixteen. Wrap a paper strip round the rim, fold it into that many equal parts, wrap it back on, and mark every fold with a needle. On the wheel, the two bat pins give you halves for free.
Then cut. Each facet is one stroke from rim to base, at a steady speed, with the tool held at the same angle for every facet. Cut the first facet, then the one directly opposite it, then the pair a quarter of the way round, or as near to that as your count allows, then the ones between. Opposite pairs share any error between them; going round in sequence stacks the error until the last facet is either a sliver or a slab. The wire wants to be taut and the cut wants to be confident: a slow wire tears, a fast wire cuts.
Depth is the other thing to keep constant. Every facet should take the same amount off, which on a tapered pot means the tool follows the taper rather than cutting straight down. Cut shallower than you think. A second pass to deepen a facet is easy; putting clay back is not. If a facet came out narrow, deepen the ones either side of it slightly rather than trying to widen it, and the eye will not find it.
Bellying out
Soft facets only. Once every facet is cut, wet your fingers, put a hand inside, and throw the pot out gently with the wheel turning slowly, the same pressure at every facet. The flat planes curve, the edges stay, and the pot looks like a faceted pot that has taken a breath. Stop early; it keeps moving as it dries.
Offset rows and tapers
A second row of facets above the first, offset by half a division, gives a diamond pattern. Facets that start wide at the base and taper to a point near the rim, or the reverse, give a petal. Both are the same rule twice: divide, then cut opposites. Draw it on the practice cylinder first.
Step three
For a geometric pattern, divide the whole pot and carve from the marks.
The layout is the work. Chevrons, triangles, a grid, a hex pattern, any repeat that goes round a pot has to meet itself when it comes back round, and it only does that if every element is placed from a division you marked first. Carve element by element, each one judged against the last, and the errors add up until the final one has nowhere to go.
So: at leather hard, paper strip round the rim for the vertical divisions, banding wheel and a still pencil for the horizontal bands, and a light pencil grid on the pot before any tool comes out. Diagonals come from joining grid points, and a flexible ruler or a strip of masking tape bent round the pot gives you a straight edge to draw along and, if you like, to carve along. Now every element in the pattern has a home, and you carve it in that home. The pattern closes up because it was never allowed to wander.
The cut itself is a clean carved line: firm leather hard, a sharp V tool or needle held upright, one pass per line, elbows braced, pot turned on the banding wheel wherever the line goes round. Our clean lines lesson is the full method and it applies here without change. What geometric work adds is discipline about depth: every line in a pattern wants to be the same depth, because a pattern with one deeper line has a flaw the eye finds in a second.
Piercing, and how much to leave
A geometric grid can be cut right through the wall, at leather hard, with a needle and a small hole cutter, working from the outside so the clean edge faces out. The rule is structural: leave at least as much clay between holes as the holes are wide, keep the rim and the base solid, and dry the pot slowly under plastic because a pierced wall dries fast and cracks between the holes. The pierced bowl video below shows the layout and the cutting, and its maker says it was dried very slowly under a thick towel.
Step four
Dry it evenly, then glaze for the edges.
A faceted pot is thin across the middle of each plane and thick at the edges between them. Uneven thickness dries at uneven speed, so cover it loosely for the first day or two, out of any draft, and let the edges and the planes catch up with each other. A pierced pot doubly so. Then give it the full week uncovered in the open that our drying lesson asks for before it goes near the ready-for-bisque tables, and longer for a heavy wall, because water left in thick clay turns to steam in the kiln.
Then the glaze, which is where faceted pots either sing or sulk. Glaze does two things on a facet: it thins and breaks on the sharp edge, showing the clay through, and it pools on the flat plane. Glazes that are made for that, the rutile blues, the iron saturates, the tenmokus, the celadons, the ones a maker describes as breaking or floating, turn every edge into a highlight. Flat opaque glazes do the opposite: they fill the edges, pool on the planes, and turn a faceted pot into a round pot that somebody stepped on.
Two coats, not three, and test the glaze on a faceted test tile rather than a flat one. A round tile tells you what a glaze does on a curve. A faceted tile tells you what it does on an edge, which is the only thing that matters here. Our Mega Glaze Tool lists every glaze and underglaze we carry and can filter for glazes that show texture well, a good place to start when you want a glaze to show an edge. Ask at the glaze wall which of ours break.
Watch it done
Now watch six people do this six ways.
Watch this one for ideas, then go throw a thick cylinder.
None of these potters work here or know we exist. Between them they cover three projects with extruded facets, soft facets bellied out, a cheese cutter demonstration, wide facets from square to round, a geometric pattern carved into a vase, and a pierced geometric bowl. Nothing but the still frame loads until you press play.
Eleven minutes, three faceted pots made a different way, with extruders and carving tools instead of a wire. The other five videos are in the comprehensive version.
When it goes wrong
Six ways it goes wrong, and what to do about each.
The three failures to watch for.
Pick the one that looks like your pot. The first three are faults in the cut. The last three are the shape, the glaze and the pattern.
Pick the one that looks like your pot. All three are faults in the cut.
The facets came out different widths
The pot was not divided before the cutting started. Faceting by eye accumulates error: each facet is judged against the last one, and by the time you get back round to the first, the error has nowhere to go.
Mark the divisions at the rim before the first cut, with a folded paper strip or the wheel head’s bat pins as a reference. Cut opposite facets first, then the ones between, so any error is split rather than stacked.
At soft leather hard you can shave the wide facets down with a rasp or a knife to match the narrow ones, and a slightly irregular set of facets on a pot that is then bellied out from inside reads as handmade rather than wrong. At bone dry, it is what it is.
A facet went through the wall
Not enough clay. A facet removes clay from the outside and the wall behind it has to be thick enough to survive the cut. A quarter inch wall on a cylinder is a facet and a half from being a window.
Throw thick where the facets go: three eighths of an inch at least, half an inch for deep facets, and heavier at the base than the rim because the base facet is always the deepest. Cut shallower than you think and cut again if you want more.
A patch from inside, scored and slipped and blended, will hold if the pot is still leather hard. If the hole is at soft clay on the wheel, the pot is a test tile now.
The wire tore and dragged instead of cutting
The clay was too soft, too dry, or the wire was slack. A taut wire through clay at the right stage leaves a surface like cut cheese; a slack wire through clay that is too soft leaves a surface like torn bread.
Keep the wire taut, thumbs braced on the rim if you are using a bare wire, and cut in one steady stroke top to bottom. For soft facets, cut within a few minutes of throwing. For crisp facets, wait for leather hard and use a blade or a rasp instead.
Let the pot firm up and clean the torn surface with a rasp or a rib at leather hard. Or embrace it: a torn facet under a glaze that breaks on edges is a texture, and a good one.
The pot went oval after faceting
Clay was removed unevenly, so the wall is thick on one side and thin on the other, and the thin side moved as the pot dried or was bellied out. Or one facet was cut deeper than its opposite.
Divide first, cut opposite facets in pairs, and keep every cut to the same depth. When bellying out from inside, work round the pot evenly with the same pressure at every facet.
At soft leather hard, a gentle push from inside on the flat sides brings most ovals back. Past that, an oval faceted pot is a faceted pot with a bit of character.
Glaze ran on the flat planes and left the edges bare
Two things happening at once, and both are what glaze does on a facet. Glaze pools and runs on a flat plane. Glaze thins and breaks on a sharp edge. Together they make a facet look different from the rest of the pot, which is either the effect you wanted or the one you did not.
A stable glaze, two coats, on a pot with facets. Or lean into it: glazes that break on edges, rutile blues and iron saturates, are made for faceted pots. Test the glaze on a faceted test tile first, because a round test tile tells you nothing about a facet.
A bare edge on a functional pot wants a light wet sanding over a bucket with a diamond pad, never dry, with safety glasses and an N95 or better, and a second firing with glaze on the edge, which you tell the studio team about. A pot welded to its kiln cookie goes to the studio team before you touch it, and power tools stay at home. Our fused pottery lesson covers both.
The geometric pattern drifted and does not meet up
The pattern was carved sequentially, each element placed relative to the last, and the small errors added up until the last element had nowhere to go. Every repeating pattern that is carved in a row does this.
Divide the whole pot first and mark every division. Then carve from the marks, not from the last element. A pattern built on divisions closes up; a pattern built on the previous mark never does.
At leather hard you can often recut the last two or three elements to share the error between them instead of dumping it on one. Or add a vertical band, a line or a plain panel, that stops the pattern before the join and starts it again on the other side.
How it works here
At The Clay Hole, facets cost clay, and clay is the cheap part.
This page is written for potters everywhere. A few things are specific to our building.
What to know here
Every Level can use the electric wheels, first come, first served, and the kick wheel opens at Purple Level. A faceted pot needs a thicker throw, so buy a little more clay than usual. Wires, needles and banding wheels are studio tools for every Level except Green, who bring their own; a rasp from the hardware store is your own. Bisque is cone 05 and free; the glaze firing is cone 5½ at five cents a cubic inch, measured on the longest dimension in every direction, so facets do not change the price.
Wheels and clay
Every Level can use the electric wheels, first come, first served, and the kick wheel opens at Purple Level. A faceted pot is thrown heavy, so it uses more clay than the same pot thrown thin, and the trimmings from a rasp go straight back into your reclaim. Every clay we stock can be faceted; the smoother ones give crisper edges, the groggier ones a softer plane.
Tools by Level
Cutting wires, needles, V tools and banding wheels are studio tools for Yellow, Purple and Black Level Members. Green Level Members bring their own. A rasp or a wire on a frame is a hardware store purchase either way, and worth it.
Curls, not dust
A rasp on leather hard clay makes curls that fall on the table and get wiped up wet. A rasp on bone dry clay makes silica dust, at a shared table, that everyone breathes. Facet wet or at leather hard, never bone dry. Mist and bag a pot that has dried a little too far. A bone dry pot will not come back evenly, so leave it alone.
Firing
Bisque is cone 05 and free. The glaze firing is cone 5½ at five cents a cubic inch, $4.80 minimum, measured on the longest dimension in every direction. Facets do not change the price. A glaze that runs off a facet and welds the pot to its kiln cookie does change the evening, so two coats and a stable glaze.
Questions people actually ask
The ones people ask when they try this.
When do I facet, on the wheel or at leather hard?
Both work and they give different pots. Facet within minutes of throwing, with a wire or a taut wire tool, and you get soft rounded planes that can then be bellied out from inside so the facets curve. Facet at leather hard, with a knife or a rasp, and you get crisp flat planes and sharp edges. The first is faster and more forgiving; the second is more controlled.
How thick should the wall be?
Thicker than you throw normally. Three eighths of an inch for gentle facets, half an inch for deep ones, and heavier at the base than the rim because the base facet is always the deepest cut. A facet is clay you throw on purpose in order to take it off.
How many facets?
An even number, so every facet has an opposite to check it against. Six, eight, twelve and sixteen are the common ones. Fewer facets are wider, deeper and more dramatic; more facets are shallower and read as fluting. Bill van Gilder’s video does four, which is a square pot from a round one.
How do I divide a pot evenly?
Wrap a strip of paper round the rim, mark where it overlaps, take it off, fold it into as many equal parts as you want facets, wrap it back on and mark each fold. On the wheel, the two bat pins give you halves for free. A dividing web, which is a printed disc of marked divisions used with a pointer, is the tool for anyone who does this weekly.
Can I facet a hand-built pot?
Yes, and a coiled or slab-built cylinder at leather hard facets beautifully with a rasp. The only rule is the same: enough wall thickness to spend on the cut. A thin slab cylinder cannot be faceted; a thick one can.
What glaze suits facets?
Glazes that do something on an edge. Rutile blues, iron saturates, tenmokus, celadons and anything the maker describes as breaking or floating: the glaze thins on the edge, shows the clay through, and pools on the plane. Flat opaque glazes make a faceted pot look like a round pot somebody stepped on.
Is geometric carving just carving with a ruler?
It is carving where the layout is most of the work. The cut is the same clean line as any carved line, at leather hard with a sharp tool. What changes is that the pattern has to close up when it comes round the pot, and that only happens if you divide the whole pot first and carve from the divisions rather than from the last element. Our clean lines lesson covers the cut; this page covers the layout.
Related lessons
Six lessons that sit next to this one.
Three to read next.
Faceting sits between throwing and surface work, and geometric carving sits between drawing and carving. These are the pages on every side.
That is the whole technique
Thick throw. Divide. Opposites in pairs. Carve from the marks.
Your first faceted pot will have one facet wider than the rest and you will know exactly which one. That is normal. The second will be divided with a paper strip before the wire comes out, and it will look like a decision. Faceting is one of the fastest ways in this building to make a thrown pot look like it was made by somebody with a point of view, and it costs a few minutes and some extra clay.
If you want soft facets against crisp ones, the pattern layout in full, the piercing rules and the answers to the questions everybody asks, switch to the comprehensive version at the top. Otherwise, go throw something thick.
Written for potters everywhere. Where our studio does things differently, the page says so.
Which version would you like to print?
Both print clean, with the videos turned into labeled boxes you can search for later.