Pottery Date Night
 Bring All Your Friends Free Week
 Give a Month of Pottery
 Private Pottery Parties

 The Welcome Booklet
 Your First Ten Sessions
 The Pottery Process
 Finding the Studio
 Your Classes Never Expire
 The Four Tables
 Who’s Who
 The Rewards Program
 Flux Glazes
 The Calculators
 Kiln Tracker
 Holiday Kiln Deadlines

 Beginner’s Tool Set
 Fingernail Clippers
 Mayco Clay Mender
 Epoxy for Kintsugi
 Applicator Bottles
 Large Bead Rack
 Raku Workshop
 Nighttime Raku
 Horsehair and Feather Raku
 The Clay Hole T-Shirt
 Embroidered Crewneck
 Zip-Up Hoodie
 Pre-Made Bisqueware
 Glaze Catchers
 Kiln Cookies
 Clay Cubby Rental
 The Glaze Bible, Printed
 The Book of Molds, Printed
 Printable Pottery Guides
 Free Printable Trackers
 Gifts for Potters
 Christmas Pottery Ideas
 Mother’s Day Gift Ideas
 Pottery Date Night
 Studio Calendar
 2027 Studio Events
 What Should I Do Today?
 How to Throw on the Pottery Wheel
 How to Make a Pinch Pot
 How to Tap Center a Pot
 The Five Stages of Clay
 Is Pottery Hard to Learn?
 Pottery Wheel Practice Drills
 20 Easy Hand-Building Projects
 Everything That Sounds Wrong

 A Beautiful Piece, Every Time
 Slab Roller Tips
 Any Dish as a Slump Mold
 Slab Roller & Slab Mold Certification
 The Pottery Skill Tree
 Clay & Pottery Calculators
 Logging Your Pottery and Glazes
 The Pottery Dictionary
 Why Did My Pottery Do That?
 The Pottery Cone Chart
 Pottery Myths, Fact-Checked
 Is Handmade Pottery Food Safe?
 Incredible Ceramic Artist Videos
 How Dan Throws Giant Pots
 How to Dry Your Pottery
 The Pottery Wheel Introduction
 Pottery by Zodiac Sign
 Personality and the Pottery Wheel
 Pottery for Engineers
 ADHD, Hyperfocus, and Never Running Out
 Hobbies for Burnout
 Screen-Free Hobbies for Adults
 Every Addiction I Ever Had Lost to Art
 Functional Pottery Is Engineering
 How Do We Compare?
 Pottery Classes by City
 Every Pottery Studio in Utah
 Pottery in Draper
 Featured Members
 The Signature Wall
 Making Friends as an Adult Is Brutal
 The Clay Hole Commandments
 2027 Pottery Contests
 2027 Studio Parties
 Gallery Night

 Scream It Into the Void
 Destroy the Glaze Wall
 Daily Affirmation Cards
 Everything That Can Go Wrong
 Subscribe to Our Newsletters
 Contact The Clay Hole
 Corporate Team Building

 Glaze Combinations
 Glazes We Do Not Carry
 Making Glaze Test Tiles
 The Mega Glaze Tool
 How to Use the Mega Glaze Tool

 Glaze Brushing Techniques
 How to Use Underglaze
 How to Use Dipping Glazes
 Glaze Problems, Causes and Fixes
 The Dipping Glaze Guide

 Making a Glaze Catcher
 Fused or Sharp After Firing
 The Signature Wall
 His Viral Videos
 His Own Ceramics
 Meet Mud
Wheel throwing · The numbers
Throwing by the numbers
Wall thickness. Floor depth. How much clay a mug actually takes. Where the widest part of a pot belongs. All the targets nobody says out loud while they are demonstrating, written down so you can read them with muddy hands, with eleven videos from very good potters sitting right next to the words.
Wall thickness. Floor depth. How much clay a mug actually takes. Where the widest part of a pot belongs. All the targets nobody says out loud while they are demonstrating, short enough to read with muddy hands.
- 11 videos, 7 potters
- 2 videos, 2 potters
- 6 numbers to memorize
- Built for a phone at the wheel
Jump to a section

01 · Why this page exists
Why this is written down and not just filmed
There are a thousand good throwing videos. We link eleven of them below, and every one of them will teach you something a paragraph never could.
But try this. Watch a really good tutorial all the way through, walk to a wheel, and answer three questions from memory. How thick should the floor be? Where should the widest part of the pot sit? How much clay does a mug take?
You watched somebody say all three out loud. You probably cannot say any of them back.
That is not a memory problem. It is a format problem.
Keep reading
Video is the only way to learn a motion. You cannot read your way into knowing how much pressure a wall wants, any more than you can read your way into riding a bike. Watching hands do a thing is how hands learn to do the thing, and no amount of text substitutes for it.
Numbers do not work that way at all. A number is something you look up, not something you absorb. In a video it arrives once, at minute four, in the middle of a sentence, while your eyes are busy on somebody's thumb. Then it is gone. Getting it back costs you forty seconds of scrubbing a timeline with a wet finger.
A list does not do that. A list sits there.
So here is what this page is. Every target is written out, in short lines, in roughly the order you meet it at the wheel. Underneath each one is somebody excellent doing the thing, so you can watch the motion that the words cannot carry.
Read the number. Watch the hands. Then come back and read the number again, and this time it sticks, because now it is attached to something you have actually seen happen.
That is the whole trick. It is not complicated and it is not ours. It is just the thing that works, and almost nobody builds a page to do it.
One more reason, and it is a stupid one
A phone at a pottery wheel is a hostile device. Wet hands, a screen that keeps going to sleep, and a video that helpfully restarts at the beginning. A page of short lines survives all three. Screenshot the parts you need and you do not even have to touch it.
01 · The whole thing
Five measurements, and then throw it bigger
Everything below comes down to five places you can put a ruler on, and one correction you make for the kiln.
Then throw all of it bigger than you want it, because clay leaves a tenth to a seventh of itself behind in the drying and the firing.
One thing to know before you sit down that is not a measurement. A mug takes a pound to a pound and a half of clay, a cereal bowl takes two, a serving bowl takes four. Starting with twice what you need is the most common reason a first hour at the wheel goes badly.
02 · The short version
02 · The six numbers
If you read nothing else, read these six
The rest of this page is the reasoning, the exceptions and the videos. This is the part to screenshot.
This is the part to screenshot.
- 1 Wall: a quarter inch, even, all the way up Get even boring before you get thin. A consistent quarter inch wall outlives a lumpy eighth inch wall every single time.
- 2 Floor: the same thickness as the bottom of the wall Add another quarter inch on top of that if you are going to trim a foot ring into it later.
- 3 Rim: the same as the wall, or a hair more. Never less A rim thinner than its own wall is a chip waiting for a dishwasher, and one chip ends the mug.
- 4 The widest point: a third of the way up, or two thirds Anywhere except the exact middle. This one sentence fixes more ugly pots than any other on this page.
- 5 The foot: a third to a half of the widest diameter Narrower than a third and it tips. Wider than a half and it looks like it sat down.
- 6 Shrinkage: 10 to 14 percent, depending on the bag Every number above is a wet number. Throw everything bigger than you want it to end up.
03 · Wall thickness
Even is the number. Thin is a bonus.
Ask ten potters how thick a wall should be and you get ten answers, and every one of them is right, because they are all quietly answering a different question. Here is the answer that holds for all of them.
Ask ten potters how thick a wall should be and you get ten answers. Here is the one that holds for all of them.
An even wall survives. An uneven wall does not.
Thick and thin sections of the same pot dry at different speeds and shrink at different rates, and that difference has to go somewhere. It goes into a warp, or a crack, or a rim that comes out of the kiln shaped like a potato chip. A lot of the drying cracks you will ever get were decided while the pot was still spinning, by a hand that was firm in one place and shy in the next.
So the first target is not a thickness at all. It is consistency. Get a quarter inch, everywhere, boringly, for a few weeks, and do not trim any of it. Then start taking it down.
Thick and thin sections of one pot dry at different speeds and pull against each other, and the difference comes out as a warp or a crack. So the first target is not a thickness at all. It is consistency. Get an even quarter inch while you learn, then take it down toward the 3/16 the mug diagram shows.
What thickness, though
Wet numbers, as thrown, before anything shrinks. If you are leaving a flat bottom rather than trimming a foot, the floor simply matches the wall at its base. These are the same figures the spec card further down works from, so the two will never disagree with each other.
| Form | Start with | Wall at the base | Wall at the rim | Floor, if trimming a foot |
|---|---|---|---|---|
| Tumbler or small cup | 1 to 1.25 lb | 3/16 in | 3/16 in | 7/16 in |
| Mug | 1 to 1.5 lb | 3/16 in | 3/16 in | 7/16 in |
| Cereal bowl, 6 in | 1.5 to 2 lb | 1/4 in | 3/16 in | 1/2 in |
| Serving bowl, 10 in | 3 to 4 lb | 5/16 in | 1/4 in | 9/16 in |
| Dinner plate, 11 in | 3 to 4 lb | 5/16 in | 1/4 in | 9/16 in |
| Vase, 5 by 10 in | 4 to 5 lb | 1/4 in | 3/16 in | 1/2 in |
| Pitcher | 3 to 4 lb | 1/4 in | 3/16 in | 1/2 in |
Two rules hiding in that table
Small things want a nearly even wall, top to bottom. A mug that is thicker at the bottom than at the top is just a heavier mug, and you will feel it every morning for years.
Tall things want a taper. Anything over about eight inches should be noticeably thicker at the base than at the rim, on the order of a third to a half again, because the bottom of a tall pot is holding up everything above it while all of it is still wet. This is the one place where a big difference is correct, and it has to be uneven on purpose, in one direction, gradually.

- 1
The rim. The last place the wall gets thin and the first place it cracks. Compress it after every pull.
- 2
The wall just below the rim. On this mug it is 3/16 of an inch, and it should measure the same all the way round.
- 3
The wall an inch above the floor. Same 3/16 of an inch. This is the number people get wrong, because it is the one you never look at.
- 4
The inside corner. The valley where clay hides. Anything left in here never joins the wall no matter how many times you pull.
- 5
The floor. 7/16 of an inch, which is the wall plus a quarter inch, because this mug is getting a foot ring trimmed into it.
- 6
The outer base. Smooth it, and undercut it slightly so the pot releases cleanly and reads crisp once it is trimmed.
Three ways to know, and only one of them is guessing
- 1
The gap between your hands. The space between your inside fingers and your outside knuckle is the wall thickness you are making, right now, live. Not the rim. The rim is just the last place it happened to end up.
- 1
The gap between your hands. The space between your inside fingers and your outside knuckle is the wall you are making, right now, live. Not the rim.
- 2
Pinch the top and the bottom. Thumb and finger at the rim, then thumb and finger an inch above the base, and compare. Free, honest, and you can do it after every pull without stopping the wheel.
- 3
Wire one in half and look at it. Costs you one pot. Worth ten of them.
Cut one in half. Just one.
Take a finished pot, run a wire down through it from rim to base, stand the two halves up and look at the section. You will learn three things at once: how thick the wall actually is, exactly where you left clay behind, and how much heavier the bottom is than you believed. Nobody has ever done this and been unsurprised. Nobody has done it twice and gone back to guessing.
At the wheel
- 1
Watch the gap between your fingers, not the rim.
- 2
Start every pull at the very bottom. Whatever sits below where you started stays exactly as thick as it was, forever.
- 3
Squeeze first, then travel. Never both at once.
- 4
Ease off as you reach the rim so the last inch gets almost no pressure.
- 5
Compress the rim between two fingers and a thumb after every pull, not once at the end.
- 6
Count your pulls out loud. Three committed ones beat six nervous ones.
- 7
Every fifth pot, cut one open.
- 3
Squeeze first, then travel, and ease off through the last inch so the rim gets almost no pressure.
- 4
Compress the rim between two fingers and a thumb after every pull, not once at the end.
- 5
Three committed pulls beat six nervous ones. Count them out loud.
04 · The floor
The floor is where most pots are already lost
By the time you have pulled three walls, the floor is decided and out of reach. There is no fixing it from above, and there is no finding out about it later without a needle tool.
So it gets measured before the first pull, on the wheel, before anything has been trimmed off the bottom. Every time, until you stop needing to.
The rule itself is short. The floor should be the same thickness as the bottom of the wall. If you plan to trim a foot ring into it, add another quarter inch, because a foot ring is a groove you are about to cut out of that floor, and cutting through the bottom of a good pot at the very last step is a specific kind of heartbreak. What is left inside the ring when the trimming is finished should match the wall again.
The rule is short. The floor should be the same thickness as the bottom of the wall. Add another quarter inch if you are trimming a foot ring into it, because a foot ring is a groove cut out of that floor.
Flat bottom, nothing trimmed
Floor = wall
Trimming a foot ring
Floor = wall + 1/4 in
Dinner plates, always
About 1/2 to 5/8 in
When to check it
After opening, before pull one
How to actually measure it
Push a needle tool straight down through the floor until it stops on the wheel head. Pinch the needle where it leaves the clay, pull it out, and look at the gap between your fingernail and the tip. That gap is your floor. Then press the little hole closed with a wet finger and compress the floor once more.
Push a needle tool straight down until it stops on the wheel head. Pinch it where it leaves the clay, pull it out, and look at the gap between your fingernail and the tip. That gap is your floor. Then press the little hole closed with a wet finger and compress the floor once more.
Four seconds. It is the highest value four seconds in throwing, and the reason is timing rather than accuracy: do it after you open and before you pull, while you can still act on the answer. After the pulls it is just bad news, because you cannot put clay back.
Compression is not optional
Opening drags the clay particles outward and leaves them fanned out like a deck of cards, and compression stacks them back down. What actually tears a floor open, though, is uneven shrinkage. A thick floor under thin walls is the last part of the pot to dry, the rim shrinks first and pulls the soft middle several ways at once, and three weeks later you own an S-crack. So do both jobs. Run a rib or a firm finger across the floor from the middle outward, several times, immediately after you open, then trim that extra floor back to wall thickness, keep standing water out of the base, and dry the pot evenly. Eight seconds and a little care. It is the difference between owning a mug and telling a story about one.
Opening fans the clay particles outward like a deck of cards, and compression stacks them back down. What tears a floor open, though, is uneven shrinkage: a thick floor under thin walls dries last and splits in an S three weeks later. So compress right after you open, trim that extra floor back to wall thickness, and dry it evenly.
The inside corner is where clay hides
Where the floor meets the wall there is a little valley, and a lump left sitting in it never joins the wall no matter how many times you pull. Run a finger firmly into that corner and drag it outward and up before your first pull.
That lump is the reason your pot is short and your bottom is heavy, and it is the single most common thing a beginner cannot see.
At the wheel
- 1
Open slowly, straight down, then outward. Slow the wheel a little as you go.
- 2
Stop while there is still floor left. You can always take more. You can never add.
- 3
Compress from the middle outward, several firm passes.
- 4
Needle tool. Measure it now, while the answer is still useful.
- 5
Clear the inside corner before pull one.
- 6
Sponge standing water out of the base between pulls. A floor sitting in a puddle is a floor that cracks.
05 · Clay weight
How much clay, and how big it comes out
Every number here is a starting point rather than a rule, because a squat mug and a tall one thrown from the same lump are both correct. What weights are actually good for is stopping you from beginning with twice the clay you need, which is the most common reason a first hour at the wheel goes badly.
There is a second thing weight is good for, and it is bigger.
Height from a fixed weight is the only honest measure of throwing skill there is.
Take one pound. Center it, open it, and take it as tall as it will honestly go with a wall you would not be embarrassed by. A beginner gets about four inches. Somebody who has been at it a year gets seven or eight out of the same pound. Nothing changed except how much of that clay they managed to move up the wall instead of leaving behind in the base.
Which is why we keep asking people to throw to weight instead of throwing to size. Same lump, every session, and watch the number climb.
| What you want | Finished size, wide by tall | So throw it | Start with |
|---|---|---|---|
| Espresso cup | 2.25 x 2.5 in | 2.6 x 2.8 in | 1/2 lb |
| Tumbler | 3 x 4.5 in | 3.4 x 5.1 in | 1 to 1.25 lb |
| Mug | 3.25 x 4 in | 3.7 x 4.5 in | 1 to 1.5 lb |
| Cereal bowl | 6 x 3 in | 6.8 x 3.4 in | 1.5 to 2 lb |
| Serving bowl | 10 x 4.5 in | 11.4 x 5.1 in | 3 to 4 lb |
| Dinner plate | 11 x 1 in | 12.5 x 1.1 in | 3 to 4 lb |
| Vase | 5 x 10 in | 5.7 x 11.4 in | 4 to 5 lb |
| Pitcher | 6 x 7 in | 6.8 x 8 in | 3 to 4 lb |
Thrown sizes assume 12 percent shrinkage, which is B-Mix. Lighter shrinkers need less allowance and porcelain needs more. The spec card below does the math for whichever bag you are actually holding.
One useful sanity check on that table. A mug finishing at 3.25 by 4 inches holds somewhere around 12 ounces filled to half an inch below the rim, and about 13 filled to the brim. If you want a genuinely big 20 ounce mug, the answer is about two pounds and a wider form, not a taller one. Volume goes up with the square of the width and only linearly with the height, so an inch of extra width buys you far more coffee than an inch of extra height, and it does not make the mug tip over.
06 · The spec card
05 · The spec card
Build your own card before you sit down
Pick a form, set the size you actually want out of the kiln, pick the bag in your hands. It does the shrinkage math and prints every target on this page for that one pot.
What are you making
Wall and floor targets scale with the size you set, and every one of them is a range in real life rather than a single right answer. Clay weight scales with the surface area of the form you picked, which is why the same eight inches across needs one answer as a bowl and a different one as a mug, and why an inch of extra width costs you far more clay than an inch of extra height. Pick the chip closest to what you are actually making, and treat the result as a place to start rather than a promise. Shrinkage figures come from the clay manufacturers and are averages.
Pick the chip closest to what you are actually making. Every figure is a place to start rather than a promise, and every one of them is a range in real life. Shrinkage numbers come from the clay manufacturers and are averages.
07 · Proportion
06 · Proportion
Where the widest part of the pot goes
This is the part of throwing that gets called taste, and mostly it is not taste at all. A pot that looks wrong usually looks wrong for one of about four reasons, and every one of them is a ratio you can measure with a ruler.
Start with the biggest one.
A pot that looks wrong almost always looks wrong for a reason you can measure with a ruler. This is the big one.
Do not put the widest point of a pot at exactly half its height.
That is the whole thing. It is the highest return sentence on this page for anybody whose pots are technically fine and somehow still look like nothing in particular. A belly at the halfway mark reads as inert, because the eye finds the middle instantly and then has nowhere left to go.
Move it down to a third and the pot looks planted and generous. Move it up to two thirds and it looks lifted, a little tense, and harder to pull off. Both of those are shapes. The middle is an average.

- 1
Widest at the halfway mark. Technically fine, and the eye finds the middle, stops, and never travels. This is what most beginner pots do without anyone choosing it.
- 2
Widest a third of the way up. The pot looks planted and generous, and the curve above it has somewhere to go. This is the safest of the three by a distance.
- 3
Widest two thirds of the way up. Lifted and a little tense. Harder to throw, harder to trim, and the best of the three when it comes off.
Height to width, as a starting vocabulary
As wide as it is tall
1 to 1
The workhorse mug
1.3 to 1
The classic vase, the golden section
1.6 to 1
Stops being a container, starts being a vessel
2 to 1 and up
Bowls
1 to 2, wider than tall
Plates and platters
1 to 8 and flatter
The golden section is the one people get mystical about, so here is the unmystical version. It is a ratio of roughly 1.6 to 1, it shows up in a lot of pots that people like, and it is useful for exactly one reason: it keeps you away from halves and doubles. Halves and doubles are what your hands reach for when nobody is watching, and they are the reason a shelf of beginner pots all look vaguely like each other.
The other ratios worth knowing
Foot diameter, against the widest diameter
1/3 to 1/2
Neck, against the belly, on a closed form
1/3 to 1/2
Rim diameter to foot diameter on a bowl
2.5 to 1, up to 3 to 1
Handle gap, measured with your own hand
2 fingers minimum
Lid overhang past the gallery
Nothing. Cut it to fit
One curve, or one break. Not three.
Look at the silhouette of your pot from the side and count how many times it changes its mind. A single continuous curve is a decision. A single crisp break, with straight runs above and below it, is also a decision. Three small wobbles is a pot that argued with itself the whole way up, and the eye reads it exactly that way without being able to say why.
This is also the easiest fault to fix, because a profile rib held against the outside on the last pass erases every wobble in one pass. More on that further down.
The easiest fix is a profile rib. Cut the curve you want out of a stiff plastic card, hold it against the outside on the last pass, and the pot becomes that curve.
None of this is a law, and plenty of very good pots break all of it
What ratios actually do is give you something to aim at, so that when a pot comes out wrong you have language for what happened instead of a shrug. "The belly is too high and the foot is too narrow" is a fixable sentence. "It looks weird" is not, and it is where most people stop.
08 · The foot
The foot is a ratio, not a decoration
A foot ring does three jobs. It gives the glaze a clean place to stop short of the bottom, it puts a shadow line under the piece so it stops reading as a lump, and it takes weight out of the exact place you accidentally left it. At The Clay Hole every piece also goes on a kiln cookie, every time, and our staff load the kilns.
The measurement that decides whether it works is not how deep you cut. It is how wide the ring is compared to the pot standing on it.
Foot diameter, against the widest diameter
1/3 to 1/2
Thickness of the ring itself
1/8 to 3/16 in
Height of the ring
1/8 to 1/4 in
Floor left inside the ring
Same as the wall
When to trim
Leather hard, and no later
Under a third and the pot looks like it is standing on tiptoe, and on a wide bowl it will genuinely rock on the table. Over half and it looks like it sat down. Somewhere between the two, the shadow under the rim does the work and the piece reads like somebody meant it.
The other number is the one you cannot see once you are done. Whatever floor you leave inside the foot ring should match the wall. Leave it thicker and it dries at a different rate to everything above it, which is one of the most common causes of a cracked bottom. Leave it thinner and you find out about it in the kiln, along with everybody else's work.
The fastest honesty test in pottery
Pick the trimmed pot up. It should feel lighter than it looks. If it feels exactly as heavy as it looks, there is still clay in the base and you stopped too early. Weight is the feedback, not depth, and your hands are better at judging it than your eyes will ever be.
At the wheel
- 1
Trim at leather hard. Firm enough to take a knife, damp enough to cut cleanly.
- 2
Recenter properly before you cut anything. A foot cut off center is worse than no foot at all.
- 3
Mark the outer and inner diameter of the ring first, then cut to your own marks.
- 4
Shape the outside profile first, the ring second. It is much harder the other way around.
- 5
Stop twice and pick it up. Judge by weight, not by how deep the groove looks.
- 6
Undercut the outer edge slightly so it releases cleanly and reads crisp.
09 · Rims and handles
The two places people actually touch
A rim is the only part of a pot that goes in somebody's mouth, and the only part that regularly meets the edge of a steel sink. It has earned the right to be the most considered quarter inch on the piece.
Rim thickness, against the wall below it
Equal, or a hair more
Compress it
After every pull
Level an uneven rim by
Cutting, not pinching
Never thinner than the wall below it. A rim that tapers away to nothing looks refined for about six weeks and then chips, and once a mug has chipped at the lip the mug is finished no matter how good the rest of it was.
Thick rims read clumsy on a small pot and reassuring on a big one. That is a design decision rather than a fault, so scale it to the piece on purpose. A wide serving bowl can carry a rim you could sit on. An espresso cup cannot.
And compress it after every single pull, between two fingers and a thumb, rather than once at the end. The rim is the thinnest and driest part of the pot the entire time you are working on it, which is exactly why it is the first place a crack starts.
Handles
Thickness where it joins
At least the wall it lands on
The wall where a handle will land
Leave it thicker on purpose
The gap
2 fingers min, 3 is generous
Top join
A finger's width below the rim
Bottom join
In the lower third
Clay and timing
Same bag, same day, same dryness
Handles pull. That is the entire engineering problem. A handle joined onto a paper thin wall will not fall off, it will crack the wall, which is considerably worse.
So the wall where a handle is going gets left deliberately thicker while the pot is still on the wheel, which means you have to know a handle is coming before you finish throwing. Deciding to add one later is how a good mug becomes a good mug with a crack in it.
For the gap, stop reading numbers and use your own hand. Two fingers is the minimum anybody can hold. Three fingers is comfortable. Four is a soup ladle. And the curve of the handle should agree with the curve of the pot, because a tight little handle on a soft round mug always looks like it was borrowed from something else.
10 · Repeating it
Hitting the same numbers twice
Making one good pot is luck with a lot of practice attached. Making four that clearly belong to each other is a completely different skill, and it is almost entirely measurement.
Nobody eyeballs a matching set. They only look like they do, because all the measuring happened before anyone was watching.
- 1
Weigh every ball. Same weight, same bag, same day, no exceptions.
- 2
Set calipers to the rim diameter you want and then leave them alone.
- 3
Tape a stick or a ruler to the splash pan at your target height so you stop guessing.
- 4
Fix your pulls. Three, every time, starting and ending in the same places.
- 5
Cut a profile rib out of an old plastic card and use it on the last pass of every piece.
- 6
Throw the whole set in one sitting. Clay from two different sessions dries and shrinks differently.
A profile rib is the cheapest superpower there is
Cut the curve you want out of a stiff plastic card, hold it against the outside of the pot on the last pass, and the pot becomes that curve. It does not get tired, it cannot flex, it leaves no fingerprints, and it makes the fourth pot the same as the first. You can cut one in ninety seconds and it will outlast the set it was made for.
11 · Shrinkage
Every number on this page is a wet number
Clay shrinks as it dries and then shrinks again in the kiln, and between wet and fired you lose somewhere between a tenth and a seventh of everything. Height, width, rim diameter, the gap inside a handle, the fit of a lid. All of it, all at once.
Which means every target above is a number to throw, not a number to end up with. If you want a four inch bowl you have to throw a four and a half inch bowl and let drying and the kiln take the difference.
On our shelves it runs from about 10 percent to about 14 percent depending on which bag you picked up.
52 Buff
10%
B-Mix w/Grog
11%
B-Mix
12%
Speckled Buff
12%
Half & Half
12%
Berlin Gray
12%
B-Mix w/Specks
12.5%
#16 Porcelain
13.9%
The formula, if you want to do it in your head: divide the size you want by one minus the shrinkage. A four inch finished bowl in a 12 percent clay is 4 divided by 0.88, which is 4.55 inches on the wheel. The spec card further up does this for you, and the clay page has a calculator that does it for every bag we carry.
The one that costs people real work
If a lid absolutely has to fit a jar, throw both from the same bag on the same day. Two bags of nominally the same clay can shrink slightly differently, and a lid that misses by three percent is a lid that does not go on. There is no fixing that after the bisque.
12 · Going wrong
07 · Going wrong
Six ways the numbers go wrong
Three ways the numbers go wrong
Not throwing mistakes. Measuring mistakes. Every one of these is somebody doing the right thing at the wrong moment.
- 1
You measured the floor after the pulls. By then it is information you cannot act on. The window is between opening and pull one, and it is about six seconds wide.
- 2
You judged the wall by the rim. The rim is the thinnest place on any pot, always, by design. It tells you nothing about the inch above the base, which is where the weight actually lives.
- 3
You aimed for thin instead of even. Thin is a result. Even is the technique. Chase thin directly and you get a wall that is an eighth of an inch in two places and half an inch everywhere else.
- 4
You compared your pot to the demo pot. Compare it to the last one you made instead. That is the only comparison with any information in it.
- 5
You trimmed a foot into a floor you never measured. This is how a finished pot becomes a hole, at the last possible step, after every bit of the work is already done.
- 6
You threw the size you wanted. Then drying and the kiln took their twelve percent and you got a bowl that does not fit the shelf you built it for.
- Needle tool in reach before you sit down
- Clay weighed, not eyeballed
- Floor measured before pull one
- Floor compressed, several passes
- Inside corner cleared
- Rim compressed after every pull
- Widest point off the halfway mark
- Thrown bigger than you want it
- Rim never thinner than the wall below it
- Wall left thicker where a handle will land
13 · Where to go next
08 · Where to go next
Read it, watch it, then go get your hands muddy
Nothing on this page will make a pot. All it can do is stop you from making the same one four times without ever knowing why.
So pick one number this week. Floor thickness is a good place to start, because it is easy to measure and it quietly fixes three other problems on its own. Measure it on every single pot for one session, and do not worry about anything else on this page while you do.
So pick one number this week. Floor thickness is the one to start with, because it is easy to measure and it quietly fixes three other problems on its own. Measure it on every pot for one session and ignore the rest.
Then pick another one next week.
If you want the reasoning behind any of these numbers, the comprehensive version of this page has the tables, one more diagram and nine more videos. The switch for it is at the top.
If you want somewhere to put the hours
We are a community pottery studio in Draper. Every level can use our electric wheels, first come, first served, and the kick wheel opens at Purple Level. Nobody is going to check your wall thickness at the door.
Every video on this page belongs to the potter who made it, and none of them are ours. Nothing loads from YouTube until you press play. Thickness, weight and proportion figures are the starting points our instructors use, not laws, and every one of them is a range in practice.
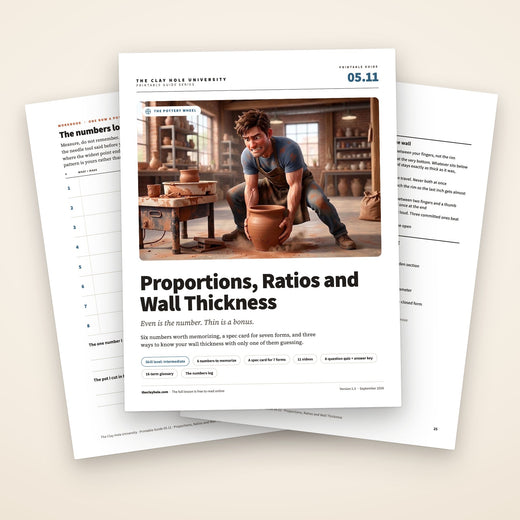
Which version would you like to print?
Videos come out as a labeled box with the title and channel to search for, since paper does not play them.