Pottery Date Night
 Bring All Your Friends Free Week
 Give a Month of Pottery
 Private Pottery Parties

 The Welcome Booklet
 Your First Ten Sessions
 The Pottery Process
 Finding the Studio
 Your Classes Never Expire
 The Four Tables
 Who’s Who
 The Rewards Program
 Flux Glazes
 The Calculators
 Kiln Tracker
 Holiday Kiln Deadlines

 Beginner’s Tool Set
 Fingernail Clippers
 Mayco Clay Mender
 Epoxy for Kintsugi
 Applicator Bottles
 Large Bead Rack
 Raku Workshop
 Nighttime Raku
 Horsehair and Feather Raku
 The Clay Hole T-Shirt
 Embroidered Crewneck
 Zip-Up Hoodie
 Pre-Made Bisqueware
 Glaze Catchers
 Kiln Cookies
 Clay Cubby Rental
 The Glaze Bible, Printed
 The Book of Molds, Printed
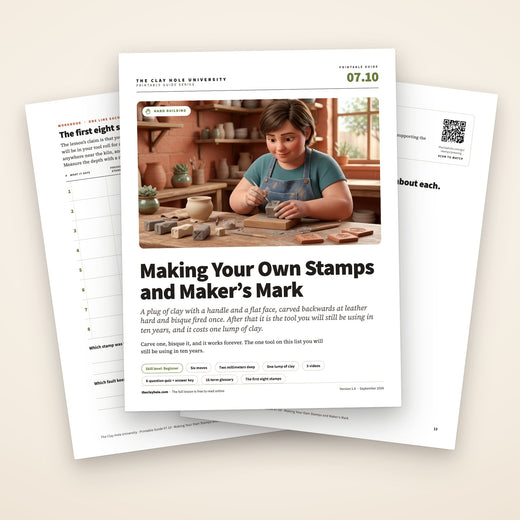
 Printable Pottery Guides
 Free Printable Trackers
 Gifts for Potters
 Christmas Pottery Ideas
 Mother’s Day Gift Ideas
 Pottery Date Night
 Studio Calendar
 2027 Studio Events
 What Should I Do Today?
 How to Throw on the Pottery Wheel
 How to Make a Pinch Pot
 How to Tap Center a Pot
 The Five Stages of Clay
 Is Pottery Hard to Learn?
 Pottery Wheel Practice Drills
 20 Easy Hand-Building Projects
 Everything That Sounds Wrong

 A Beautiful Piece, Every Time
 Slab Roller Tips
 Any Dish as a Slump Mold
 Slab Roller & Slab Mold Certification
 The Pottery Skill Tree
 Clay & Pottery Calculators
 Logging Your Pottery and Glazes
 The Pottery Dictionary
 Why Did My Pottery Do That?
 The Pottery Cone Chart
 Pottery Myths, Fact-Checked
 Is Handmade Pottery Food Safe?
 Incredible Ceramic Artist Videos
 How Dan Throws Giant Pots
 How to Dry Your Pottery
 The Pottery Wheel Introduction
 Pottery by Zodiac Sign
 Personality and the Pottery Wheel
 Pottery for Engineers
 ADHD, Hyperfocus, and Never Running Out
 Hobbies for Burnout
 Screen-Free Hobbies for Adults
 Every Addiction I Ever Had Lost to Art
 Functional Pottery Is Engineering
 How Do We Compare?
 Pottery Classes by City
 Every Pottery Studio in Utah
 Pottery in Draper
 Featured Members
 The Signature Wall
 Making Friends as an Adult Is Brutal
 The Clay Hole Commandments
 2027 Pottery Contests
 2027 Studio Parties
 Gallery Night

 Scream It Into the Void
 Destroy the Glaze Wall
 Daily Affirmation Cards
 Everything That Can Go Wrong
 Subscribe to Our Newsletters
 Contact The Clay Hole
 Corporate Team Building

 Glaze Combinations
 Glazes We Do Not Carry
 Making Glaze Test Tiles
 The Mega Glaze Tool
 How to Use the Mega Glaze Tool

 Glaze Brushing Techniques
 How to Use Underglaze
 How to Use Dipping Glazes
 Glaze Problems, Causes and Fixes
 The Dipping Glaze Guide

 Making a Glaze Catcher
 Fused or Sharp After Firing
 The Signature Wall
 His Viral Videos
 His Own Ceramics
 Meet Mud
Hand building · Stamps and maker’s mark
Carve one, bisque it, and it works forever.
A stamp is a plug of clay with a handle and a flat face, carved backwards at leather hard and bisque fired once. After that it is the tool on this list you will still be using in ten years, and it costs one lump of clay.
This page walks it in order with a tick list at every step: the plug, the mirrored carving, the test press, the bisque, and how to press it into a pot without the wall caving or the letters coming out backwards. Six fixes and five videos.
This is the short version: the plug, the mirrored carve, the bisque, the press, each with a tick list. The design notes, the roller stamp and the questions are in the comprehensive version.
Read it, then watch it
Why this is written down and filmed, both.
Making a stamp is a small project with three traps in it, and every one of the traps is a fact: the design has to be mirrored, the stamp has to be bisque fired, and the pot has to be at the right stage when you press. Facts are what writing is for. What writing cannot do is show you how hard to press, how to hold a wall from inside while you do it, or what a two-millimeter carving actually looks like next to a one-millimeter one. That is what the five videos are for.
Use both, in this order
Read the step. Watch the part of the video that covers it. Do it with the tick list open. A stamp is a two-visit project, carve one night and bisque with the next load, and the page remembers where you got to.
The whole idea
Carve it backwards, bisque it, press it into soft leather hard.
A stamp is a plug of clay with a handle and a flat face, carved at leather hard, bisque fired, and then pressed into pots for the rest of your life. Three things decide whether it works: the design is mirrored, the stamp goes through the bisque before you use it, and the pot is soft leather hard with a hand behind the wall when you press.
The five-minute version
The whole technique in six moves.
If you already hand-build and you just want the shape of it, this is the shape of it. Everything below is these six moves, slowed down and with the places they fail marked.
Before you roll anything
What you need on the table.
Six things, and one of them is a scrap of clay to test in. The tracing paper is the one that saves you a backwards stamp.
A wedged lump of clay, a needle tool and a small loop, a rib for the face, tracing paper to flip the design, a scrap of soft clay to test in, and a pinch of cornstarch. That is all of it.
Step one
Make the plug, flatten the face, let it firm up.
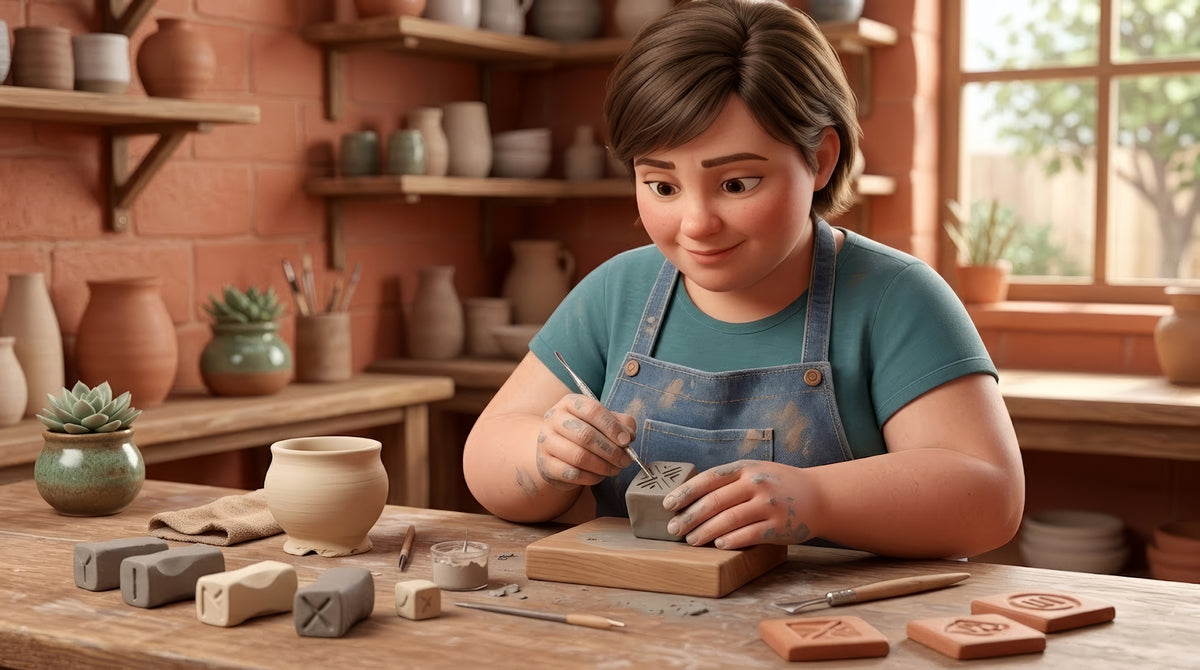
A stamp is a handle with a flat face. Wedge a lump the size of a wine cork, roll it into a short cylinder, pinch or roll a handle you can hold comfortably, and press one end down flat on the table. That flat end is the face, and it has to be genuinely flat: a domed face prints a crescent, a dished face prints a ring.
Size follows the job. A maker’s mark is small, a centimeter or two across, and wants a handle long enough to grip between finger and thumb. A texture stamp for a slab can be as big as your palm and wants a handle you can push with the heel of your hand. A roller stamp is a cylinder as long as a thumb with a hole through the middle for a chopstick, carved all the way round; it is the fastest way to texture a whole slab and it is made exactly the same way as a flat stamp, just rolled instead of pressed.
Then wait for leather hard. A fingernail marks it, a fingertip does not. Carve too soft and the walls of every letter tear and close back up; carve too dry and the edges chip. If you make several plugs at once, which is a good habit because stamps are cheap and you will want more than one, bag the ones you are not carving tonight with a damp paper towel. They will keep for a week.
Keep the body under an inch
The stamp is going through the bisque, and it is the thickest thing on the shelf. Thick clay dried fast cracks, and air trapped in an unwedged plug blows the face off. Wedge it, keep the body no thicker than an inch, hollow a big handle from the back, and dry it slowly for days under loose plastic before it goes anywhere near the kiln.
Step two
Draw it mirrored. Then carve it deep and simple.
Every stamp is a mirror. Whatever you carve prints reversed. For a texture that does not matter. For letters, initials, a logo or anything with a left and a right, it matters completely, and the fix is to flip the design before it touches the clay: draw it, trace it, turn the tracing over, and carve what you see through the paper.
Then decide which way the mark should sit on the pot. Carve the design into the face of the stamp, and it stands up on the pot as a raised mark. Carve the background away and leave the design standing on the stamp, and it presses into the pot as a recessed mark. A maker’s mark usually wants to press in, because a recessed mark survives a wash, a wipe and a glaze, and a raised one gets sanded flat by the first thing it touches. Texture stamps go either way, and a good one is often both.
Depth is the thing beginners underdo. Two millimeters at least, with vertical walls, held-upright tool, one pass per line. A shallow carving prints as a smudge once the clay springs back a little, and hairline detail fills with the first coat of anything. Bold, simple, deep. If a mark looks slightly crude on the stamp, it will look right on the pot. If it looks refined on the stamp, it will disappear. Our clean lines lesson is the whole method for the cut itself.
Designing a maker’s mark
Initials, a symbol, or a symbol with initials inside it. Simple enough to read at a centimeter across. No thin lines, no tiny counters in letters, no serifs. Make it once, then make two more at different sizes from the same drawing, because a mug foot and a platter foot want different marks. Keep the drawing; you will remake the stamp one day.
Designing a texture stamp
Think in repeats. A stamp that tiles with itself, a stripe that lines up end to end, a dot pattern that overlaps without a seam, is worth ten one-off pictures. Carve the edges of the face too, so the stamp can be walked across a slab. A roller stamp is a repeat by definition.
Step three
Test it in a scrap, dry it slowly, bisque it.
Every stamp gets tested before the kiln. Press the leather hard stamp into a scrap of soft clay and read the result. Backwards letters, a domed face, a line too fine to print: all of that is found here, where it costs two minutes, and not on the first pot, where it costs the pot.
Then dry it slowly. A stamp is a lump, and lumps crack. Loose plastic for a few days, then open air out of any draft, and it is dry when it is no longer cool against your cheek. Then bisque it with your next load. Our bisque is cone 05 and free, so a bag of stamps costs nothing to fire. Do not glaze fire a stamp; bisque is porous, which is what makes it release, and a glazed stamp is a glass tool that sticks.
Once it is bisque fired it is done, and it is done for a very long time. A bisque stamp does not wear out, does not soften, does not care about water, and lives in your tool roll for as long as you make pots. Write your name on the handle in pencil before it goes in the kiln; pencil burns out, so write it on again afterwards in marker.
Step four
Press it at soft leather hard, straight in, straight out.
The pot has to be ready too. Soft leather hard: the surface takes a crisp mark, the wall does not move, the stamp lifts clean. Straight off the wheel is too soft and the mark smears as you lift. Firm leather hard is too dry for anything deeper than a whisper. For a foot mark, the moment after trimming is exactly right.
Support the wall from inside with a hand, a sponge or a wooden spoon, directly behind where the stamp lands. Press straight in, hold for a second so the clay takes the whole face, and lift straight out. No rocking, no twisting, no second press to make sure. A rocked stamp prints a double edge, and a twisted one smears. If the clay grips the stamp, a pinch of cornstarch rubbed on the face is the release; it burns out in the kiln and leaves nothing behind.
Then put the mark where glaze cannot fill it. On the bare foot ring or the bottom, where there is no glaze at all, is the traditional place and the reason every pot in our kilns goes in with a naked bottom on a cookie. A mark on the side of a pot is a design decision, and it wants a wash wiped into it before glazing or a glaze that breaks on edges, otherwise three coats of anything opaque turn it into a dent. Our wipe-away lesson is the natural next page for a stamped surface.
Watch it done
Now watch five people make five kinds of stamp.
Watch this one, then go make a plug.
None of these potters work here or know we exist. Between them they cover the maker’s mark, texture stamps from start to finish, the classroom version, five kinds of stamp, and pressing cleanly. Nothing but the still frame loads until you press play.
Fifteen minutes on a maker’s mark from a working potter, mirror writing included. The other four videos are in the comprehensive version.
When it goes wrong
Six ways it goes wrong, and what to do about each.
The three failures that happen on the first night.
Pick the one that looks like your stamp or your pot. The first three are the stamp. The last three are what happened when you used it.
The stamp sticks and tears the surface
The clay was too wet, or the stamp was not bisque fired. Soft clay grips anything pressed into it, and an unfired or barely dry clay stamp is clay pressed into clay: they bond.
Bisque the stamp. Wait for soft leather hard on the pot, the stage where the surface takes a mark without smearing. A dusting of cornstarch on the stamp face is the release for stubborn clay.
Wait for the pot to firm up, then smooth the torn area with a soft rib and stamp again beside it or over it. Cornstarch on the face this time.
The letters came out backwards
The design was carved the right way round on the stamp, so it prints the wrong way round on the pot. Every stamp is a mirror.
Write it out, flip it, and carve the flipped version. Hold the drawing up to a mirror, or trace it and turn the tracing over. Check by pressing the leather hard stamp into a scrap before you bisque it.
A backwards mark is a backwards mark. If the stamp is still leather hard, fill the carving with soft clay, let it firm up and carve again. If it is bisque fired, make another one; they cost nothing.
The impression is fuzzy or shallow
Either the carving on the stamp is too shallow, or the clay was too firm to take it, or you rocked the stamp as you pressed. A stamp only prints as deep as its carving and as crisp as the stage of the clay.
Carve at least two millimeters deep with clean vertical walls. Stamp at soft leather hard. Press straight in with the wall supported from inside, hold for a second, lift straight out.
If the pot is still soft enough, smooth the mark with a rib and stamp again, straight and firmer. If not, a fuzzy mark under a wash wiped back reads better than you think.
The wall caved in under the stamp
Nothing was behind the wall. A stamp is a lot of pressure on a small area, and a thin wall with air behind it moves.
A hand, a sponge, a paddle or a wooden spoon held inside the pot, directly behind the stamp. Press the stamp into the support, not into the void.
Push it back out from inside with a rounded tool while the clay is still soft, then smooth the outside with a rib. The stamp mark is gone; stamp again with the support in place.
The stamp cracked in the bisque
Too thick, or dried too fast, or air trapped in the plug. A chunky stamp is the thickest thing you will ever bisque, and thick clay that dries unevenly cracks.
Wedge the plug properly, keep the body no thicker than an inch, hollow the handle if it is big, and dry it slowly under plastic for several days before it goes near a shelf.
If the face survived, the stamp still works; a crack in the handle is cosmetic. If the face cracked, the crack prints. Make another.
The glaze filled the mark in and it vanished
Fine detail, thin lines, or a mark placed where the glaze pools. A maker’s mark a few millimeters across with hairline letters is a puddle of glaze after firing.
Bold and simple, a centimeter or more across, deep lines. Put it on the bare foot ring where there is no glaze at all, or on the side under a glaze that breaks, or wipe a wash into it before glazing.
Fired is fired. On the next pot, put the mark on the foot.
How it works here
At The Clay Hole, a stamp is the cheapest tool you will ever make.
This page is written for potters everywhere. A few things are specific to our building.
Three things to know here
Bisque is cone 05 and free, so stamps cost nothing to fire; put them in with your other work, dried properly. Carving tools are studio tools for every Level except Green, who bring their own. Every pot goes into our kilns with a naked bottom on a cookie, which is exactly where a maker’s mark belongs.
Firing your stamps
Bisque is cone 05 and free. Put your stamps on the drop-off table with your other greenware, dried properly and with your name on them. A dozen stamps in a bowl is fine. Do not glaze fire them; bisque is what makes them release.
Tools by Level
Needles, loops and V tools are studio tools for Yellow, Purple and Black Level Members. Green Level Members bring their own. We also have a large collection of stamps and rollers on the shelves, more than we need, and they are studio tools too. Make your own anyway: a maker’s mark is yours, and that one goes home with you.
Naked bottoms
Every glazed piece goes into our kilns on a cookie with a bare bottom, no exceptions, which is the rule that keeps the shelves clean. It is also why the bottom is the right place for a maker’s mark: no glaze ever touches it, so the mark stays as crisp as the day you pressed it.
Stamping other people’s pots
A studio full of members is a studio full of stamps left on tables. Yours goes in your bag or on your shelf. A stamp found on a shared table with no name on it becomes a shared stamp, and then everyone has your initials.
Questions people actually ask
The ones that come up every week.
Do I have to bisque fire the stamp?
Yes, if it is made of clay. An unfired stamp sticks to soft clay, crumbles at the edges and softens the moment it gets damp. A bisque fired stamp is porous, so it releases cleanly, and it is hard enough to last for years. Our bisque firing is cone 05 and free, so put your stamps in with your other work.
Should the design be carved into the stamp or left standing up?
Both work and they print opposite ways. Carve the design into the face and it stands up on the pot. Carve the background away and leave the design standing on the stamp, and it presses into the pot. A maker’s mark usually wants to press in, so it survives a wash and a glaze. Texture stamps go either way.
How do I get the letters the right way round?
Mirror the design before you carve it. Draw it, trace it, turn the tracing over and carve what you see. Then press the leather hard stamp into a scrap of clay and read it before you bisque it. Everyone makes one backwards stamp. Make yours in the scrap.
What stage should the pot be at when I stamp it?
Soft leather hard. Soft enough that the surface takes a crisp mark, firm enough that the wall does not distort and the mark does not smear when you lift the stamp. Straight off the wheel is too soft. Leather hard is too firm for anything but a shallow mark. For a mark on the foot, stamp right after trimming.
Can I use rubber stamps or linocut blocks?
Yes. Carved rubber blocks give the sharpest letters of anything, and they release cleanly from clay. The trade is that they do not last as long as bisque, and they need a firm press because rubber gives. Polymer clay stamps and 3D printed stamps also work. A bisque stamp is still the one you will have in ten years.
Where should a maker’s mark go?
On the foot ring or the bare bottom, where there is no glaze to fill it. That is why every pot in our kilns has a naked bottom on a cookie, and it is why the foot is the traditional place. A mark on the side is a design choice and it wants a wash wiped into it or a glaze that breaks over it.
How do I stop the stamp sticking?
Bisque it, use it on clay that is not too wet, and dust the face with cornstarch for a difficult clay. Cornstarch burns out in the kiln and leaves nothing behind. Talc works too. Water does not: a wet stamp smears the mark.
Related lessons
Six lessons that sit next to this one.
Three to read next.
A stamp is one way to put a mark in clay. These are the others, and what to do with the mark once it is there.
That is the whole project
Plug. Mirror. Carve. Bisque. Press.
Your first stamp will probably be backwards or shallow, and you will find out in the scrap of clay, which is the point of the scrap. The second one will be in your tool roll for a decade. Almost nothing in this building gives back as much per lump of clay as a good stamp does.
If you want the design notes, the roller stamp, the reasoning and the answers to the questions everybody asks, switch to the comprehensive version at the top. Otherwise, go wedge a lump.
Written for potters everywhere. Where our studio does things differently, the page says so.
Which version would you like to print?
Both print clean, with the videos turned into labeled boxes you can search for later.