Pottery Date Night
 Bring All Your Friends Free Week
 Give a Month of Pottery
 Private Pottery Parties

 The Welcome Booklet
 Your First Ten Sessions
 The Pottery Process
 Finding the Studio
 Your Classes Never Expire
 The Four Tables
 Who’s Who
 The Rewards Program
 Flux Glazes
 The Calculators
 Kiln Tracker
 Holiday Kiln Deadlines

 Beginner’s Tool Set
 Fingernail Clippers
 Mayco Clay Mender
 Epoxy for Kintsugi
 Applicator Bottles
 Large Bead Rack
 Raku Workshop
 Nighttime Raku
 Horsehair and Feather Raku
 The Clay Hole T-Shirt
 Embroidered Crewneck
 Zip-Up Hoodie
 Pre-Made Bisqueware
 Glaze Catchers
 Kiln Cookies
 Clay Cubby Rental
 The Glaze Bible, Printed
 The Book of Molds, Printed
 Printable Pottery Guides
 Free Printable Trackers
 Gifts for Potters
 Christmas Pottery Ideas
 Mother’s Day Gift Ideas
 Pottery Date Night
 Studio Calendar
 2027 Studio Events
 What Should I Do Today?
 How to Throw on the Pottery Wheel
 How to Make a Pinch Pot
 How to Tap Center a Pot
 The Five Stages of Clay
 Is Pottery Hard to Learn?
 Pottery Wheel Practice Drills
 20 Easy Hand-Building Projects
 Everything That Sounds Wrong

 A Beautiful Piece, Every Time
 Slab Roller Tips
 Any Dish as a Slump Mold
 Slab Roller & Slab Mold Certification
 The Pottery Skill Tree
 Clay & Pottery Calculators
 Logging Your Pottery and Glazes
 The Pottery Dictionary
 Why Did My Pottery Do That?
 The Pottery Cone Chart
 Pottery Myths, Fact-Checked
 Is Handmade Pottery Food Safe?
 Incredible Ceramic Artist Videos
 How Dan Throws Giant Pots
 How to Dry Your Pottery
 The Pottery Wheel Introduction
 Pottery by Zodiac Sign
 Personality and the Pottery Wheel
 Pottery for Engineers
 ADHD, Hyperfocus, and Never Running Out
 Hobbies for Burnout
 Screen-Free Hobbies for Adults
 Every Addiction I Ever Had Lost to Art
 Functional Pottery Is Engineering
 How Do We Compare?
 Pottery Classes by City
 Every Pottery Studio in Utah
 Pottery in Draper
 Featured Members
 The Signature Wall
 Making Friends as an Adult Is Brutal
 The Clay Hole Commandments
 2027 Pottery Contests
 2027 Studio Parties
 Gallery Night

 Scream It Into the Void
 Destroy the Glaze Wall
 Daily Affirmation Cards
 Everything That Can Go Wrong
 Subscribe to Our Newsletters
 Contact The Clay Hole
 Corporate Team Building

 Glaze Combinations
 Glazes We Do Not Carry
 Making Glaze Test Tiles
 The Mega Glaze Tool
 How to Use the Mega Glaze Tool

 Glaze Brushing Techniques
 How to Use Underglaze
 How to Use Dipping Glazes
 Glaze Problems, Causes and Fixes
 The Dipping Glaze Guide

 Making a Glaze Catcher
 Fused or Sharp After Firing
 The Signature Wall
 His Viral Videos
 His Own Ceramics
 Meet Mud
Hand building · Plaster slump mold
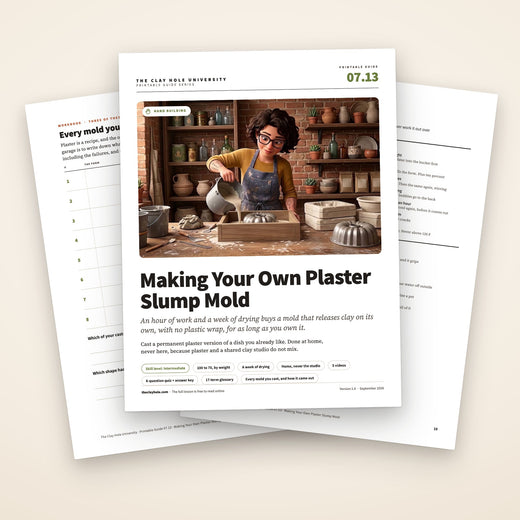
Cast a permanent plaster version of a dish you already like.
Line a dish, mix pottery plaster by weight, pour it in, and in an hour you own that shape forever. Dry it for a week and it releases clay with no wrap at all. It is done at home, never here, because plaster and a shared clay studio do not mix, and this page says exactly why.
This page walks the recipe with a tick list at every step: the form and the release, hump against slump, mixing by weight, the pour, the set, and the drying, plus the safety rules and the reason the studio keeps plaster out. Six fixes and five videos.
This is the short version: the form, the ratio, the pour, the drying, each with a tick list. The hump-and-slump detail, the reasoning and the questions are in the comprehensive version.
Read it, then watch it
Why this is written down and filmed, both.
Plaster is a recipe. A ratio by weight, a slaking time, a mixing time, a pour, a set, a drying time. Recipes are what pages are for, and a plaster mold that crumbles is nearly always a recipe followed by eye. What a recipe cannot tell you is what thick cream looks like on a stick, or how a form gets tapped so the bubbles leave the face, or the moment a hump lifts clean out of its dish. That is the five videos.
Use both, in this order
Read the recipe. Watch the mix and the pour. Do it at home, outside or in a garage, with the tick list open. This one is never done at the studio, and the page says why.
The whole idea
Weigh it, slake it, pour it low, leave it alone. At home.
Line a dish you like, mix pottery plaster by weight, pour it in, and in an hour you own that shape. Dry it for a week and it releases clay with no wrap. Wet plaster never comes into a shared studio: one chip in the reclaim blows a crater out of somebody else’s pot months later.
The five-minute version
The whole job in six moves.
If you have cast plaster before and you just want the shape of it, this is the shape of it. Everything below is these six moves, slowed down and with the places they fail marked.
Before you open the bag
What you need on the bench.
Six things, and the last one is a place. The scale is the one that separates a plaster mold from a crumbly lump.
Pottery plaster, a scale, a flexible bucket, the dish and a release, an N95 or better, safety glasses and gloves, a stick, and a garage to do it in.
Step one
Prepare the form, and decide hump or slump.
The dish rules are the same as for any slump mold. Widest at the rim, no curled lip, no belly, or the plaster is trapped exactly as clay would be. Then a release on every surface the plaster will touch: mold soap brushed on and buffed until it barely shows, petroleum jelly rubbed to almost nothing, or plastic wrap smoothed into the curve. Thick release prints; thin release lets go.
Makes a hump
Pour plaster into the lined dish and you get the inside shape of the dish as a solid: a hump the clay goes over. The easiest cast there is, no cottle needed, and the one to make first. Clay over a plaster hump has to come off early, at soft leather hard, for the same shrinkage reason as clay over any hump.
Makes a slump
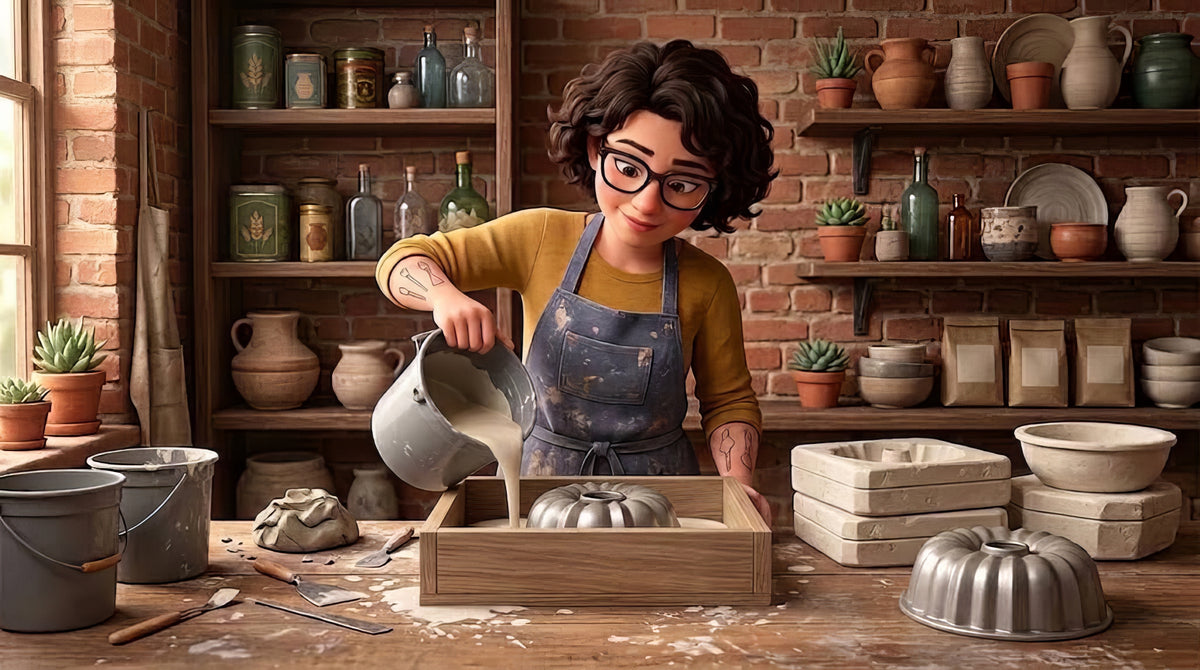
Set the dish upside down on a board inside a cottle, a wall of coiled clay, foam board or a plastic tub an inch or two bigger all round, and pour plaster around and over it an inch deep above the base. When it sets, lift the dish out and you have a plaster dish the clay goes into. Or cast the slump from a finished hump, which gives a matching pair.
Seal the cottle where it meets the board with a coil of soft clay pressed along the seam, inside and out, because plaster finds every gap. Level the board. Have everything ready before the plaster is mixed: once it is mixed you have only a few minutes and no time to look for a bucket.
Step two
Weigh it, sift it, slake it, then mix it slowly.
One hundred parts plaster to seventy parts water, by weight. Weigh the water into the bucket first. Sift the plaster in through your fingers, spreading it over the surface, until it stops sinking and dry islands sit on top. Then leave it alone for two or three minutes. That pause is the slake, and skipping it is the most common reason plaster comes out weak.
Then mix, with a hand or a stick under the surface, slowly, for two or three minutes, until it is smooth and the consistency of thick cream. No whisk, no drill, no lifting the stick out and plunging it back in; every one of those folds air into the mix, and air in the mix is pinholes on the face of the plaster mold. When you can draw a line on the surface with a finger and it holds for a second, it is ready to pour. Working time from here is a few minutes, so everything else was ready before you started.
How much to mix: fill the form or the cottle with water first, pour that water into the bucket, and weigh it. Then take two thirds of that weight: that is your seventy, and the plaster is one and three sevenths of it. Two thirds looks wrong and it is right, because plaster does not vanish into the water, it takes up room of its own, and a bucket of slurry ends up about half as big again as the water you started with. Mix ten percent more than the sum, because a bucket that runs short mid-pour makes a plaster mold with a seam.
The bucket rules
An N95 or better and safety glasses for the dry powder; gypsum dust is not silica but it is not for your lungs either. Gloves, because plaster dries skin and sets warm. Never put a hand into a bucket of plaster, and never cast a hand, a foot or anything else attached to a person. It is not only that set plaster grips. The setting itself is what burns: the bag’s own warning says a cast enclosing any part of the body can cause burns bad enough to need surgery, and people have lost fingers doing it. And nothing plaster ever goes down a sink, because plaster sets under water and pipes are full of water. Settle the bucket overnight, pour the clear water off outside, bin the solid.
Step three
Pour low, tap it, and leave it alone until it is cool.
Pour from close, against the side of the form. Plaster poured from a height traps air. Plaster poured in one steady stream against a wall runs down and fills from the bottom with none. Fill past where you need, an inch of plaster above the base of a slump, the full dish for a hump, and then tap the form or the board steadily for a minute. The bubbles rise to the back, where they do not matter.
Then walk away. Plaster sets in twenty to thirty minutes and, as it sets, it heats: warm to the hand, sometimes hot. That heat is the set finishing, and a plaster mold turned out while it is still warm is a plaster mold that cracks. Wait until it has gone through the heat and cooled again, forty five minutes to an hour, then remove the cottle, flex a plastic form or lift the plaster out of a glass one, and peel the release.
Clean the edges while it is fresh: a rasp or a rib takes the sharp rim down and rounds it, and a fresh plaster mold cuts like cheese. Bevel any edge the clay will drape over. A day later it will be hard enough to argue with you.
Step four
Dry it for a week, then use it, at home.
A wet plaster mold sticks. A dry one releases. Plaster works as a plaster mold because it is thirsty, and a fresh cast is full of water. Somewhere warm and airy, turned daily, for a week or two. It is ready when it is light for its size and cool rather than cold to the cheek. Do not oven it. Plaster starts to cook back into powder above 120 degrees Fahrenheit, which is barely warm to a hand, so a low oven or a radiator is enough to ruin a mold that took a week to dry.
Then it is a slab mold with no wrap: lay the slab in or over, let it settle, trim against the edge, lift it out when it is firm. Everything in our kitchen-dish lesson applies, minus the plastic. Between uses let it dry out again. Never leave clay to go bone dry in a plaster mold; the plaster mold does not shrink and the clay does.
And it stays at home. Mixing, pouring, sanding and rinsing plaster stay wherever you made the mold. A plaster mold that has started to shed, chalky at the rim, is retired, because the chips that come off it end up in clay, and plaster in clay blows a crater out of the pot weeks after the firing. That is the whole reason the studio keeps wet plaster and plaster dust out, and has 248 slab molds instead.
Watch it done
Now watch five people cast five plaster molds.
Watch this one, then go buy a bag of plaster.
None of these potters work here or know we exist. Between them they cover the whole job, the hump direction, the slump direction, plaster itself done properly, and casting a batch. Nothing but the still frame loads until you press play.
Seven minutes: form, release, mix, pour, demold, and a slab pressed into the result. The other four videos are in the comprehensive version.
When it goes wrong
Six ways it goes wrong, and what to do about each.
The three failures that happen on the first cast.
Pick the one that looks like your plaster mold.
The plaster is soft, chalky or crumbles at the edges
Too much water, or the plaster was stirred before it had slaked, or it was old and had absorbed moisture in the bag. Plaster only reaches full strength at the right ratio, and the ratio is by weight, not by eye.
Weigh it. One hundred parts pottery plaster to about seventy parts water by weight, sifted into the water, left two to three minutes to slake, then mixed for two to three minutes and poured at the consistency of thick cream. Fresh plaster, stored dry.
A soft plaster mold still works as a plaster mold for a while, but it sheds. Sheds means plaster chips in clay, which means craters in pots months later. Cast it again.
The plaster would not come off the form
No release, or an undercut. Plaster grips a bare surface and keys into every scratch, and a form that is narrower at the top than in the middle holds the plaster the way it would hold clay.
Release on every surface: a thin, even coat of mold soap or petroleum jelly buffed to almost nothing, or plastic wrap smoothed in. And the same rule as any slump mold: widest point at the rim.
A plastic form can sometimes be flexed off. A glass or ceramic form can be soaked in a bucket of warm water to soften a petroleum jelly release, and that water is settled and binned like any plaster water. If the form has an undercut, one of the two is being sacrificed.
The working face is full of pinholes and bubbles
Air folded into the mix by stirring too hard, or poured from too high, or not tapped out. Every bubble on the face of the plaster mold prints a pimple onto every slab that ever goes in it.
Stir under the surface, slowly, with a hand or a stick, never a whisk. Pour low and against the side of the form. Tap or vibrate the form for a minute after pouring so the bubbles rise to the back, where they do not matter.
Small pinholes on the face can be filled with a paste of fresh plaster and sanded flush once dry, in the same N95 or better and safety glasses. A face full of them is a back, so flip the plaster mold over and use the other side if the shape allows.
The plaster cracked as it set or when it came off
Too thin at the edge, demolded too early, or dropped. Plaster is brittle for the first day and stays brittle at any edge under three quarters of an inch.
Keep every part of the plaster mold at least an inch thick, thicker at the rim. Leave it in the form until it has gone through its heat and cooled again, forty five minutes to an hour, before you turn it out.
A crack in the back is cosmetic. A crack through the working face prints a line onto every slab, and it is better as a garden ornament.
Little craters blew out of a fired pot
A chip of plaster got into the clay, sometimes from a plaster mold that was shedding, sometimes from a plaster slab used for wedging. Plaster in clay absorbs water after firing, expands, and pops a crater out of the surface weeks or months later.
Plaster tools live in a plaster room and clay tools do not go near them. A plaster mold that sheds is retired. Reclaim that has been near plaster is thrown away, not wedged.
The pot is what it is. Any clay that touched that plaster mold is suspect. This is the whole reason wet plaster and plaster dust stay out of a shared studio.
Plaster went down the drain
Plaster sets under water, in pipes, and it does not come out again. A bucket of rinse water poured down a sink is a plumbing bill.
Let every bucket settle overnight, pour the clear water off outside, and scrape the set plaster into the bin. Wipe tools clean before they go anywhere near a tap. Never rinse plaster in a sink, and never at the studio.
If it was a small amount, run the tap for a long time immediately. If it was a bucket, call somebody who owns a drain snake.
How it works here
At The Clay Hole, wet plaster and plaster dust never come through the door.
This page is written for potters everywhere, and this one is for potters at home. Here is where the studio stands.
Three things to know here
Wet plaster, plaster dust and rinse water never come into the building. The studio has 248 slab molds behind the free slab roller and slab mold certification. For a permanent copy of a shape you can use here, cast it in clay and bisque it.
Why the rule exists
A chip of plaster in clay survives the firing and then absorbs water from the air, expands, and pops a crater out of the glazed surface. Not in the kiln: weeks later, on a shelf, on a pot that was perfect. In a shared studio the chip travels through the reclaim into everybody’s clay. So plaster is mixed and poured at home, and that part has no exceptions.
What we have instead
248 slab molds, the studio-made kind, behind the free slab roller and slab mold certification. Our slab molds lesson is the method. Any dish from home works too, with plastic wrap, per the kitchen-dish lesson.
A permanent mold you can bring in
Cast a clay copy of the dish, dry it, bisque it. A bisque slab mold is porous, releases clay, and is made of nothing that can hurt the reclaim. Bill van Gilder shows the whole method in the kitchen-dish lesson’s videos. Bisque is cone 05 and free.
The damp box is the exception that proves it
A damp box has a plaster slab in it, which is why we do not have a communal one and why yours lives at home. Our damp box lesson covers building one, and a plaster-free tub for the studio shelf.
Questions people actually ask
The ones that come up every week.
Why does The Clay Hole keep wet plaster out?
Because a single chip of plaster in clay ruins a pot, and not immediately: the chip survives the firing, then absorbs water, expands, and blows a crater out of the surface weeks later. In a shared studio the chip ends up in the reclaim, which ends up in everybody. So plaster molds are made and mixed at home, wet plaster and plaster dust stay out of the studio, and the studio has 248 slab molds instead.
Which plaster?
Pottery plaster, sometimes sold as No. 1 pottery plaster or casting plaster. Not plaster of Paris from a craft shop, which is softer, and not any of the hard dental or hydrocal plasters, which are too dense to absorb water from clay. A plaster mold works because it is thirsty; the wrong plaster is not.
What is the ratio?
By weight, about one hundred parts plaster to seventy parts water. Weigh the water first, sift the plaster into it until it stops sinking and islands form on the surface, leave it two or three minutes to slake, then mix gently for two or three minutes and pour when it looks like thick cream. A scale and a timer make plaster reliable; a cup and a guess do not.
Hump or slump?
Pour plaster into a lined dish and you get a hump, the positive shape of the inside of the dish, which the clay goes over. To get a slump, the plaster dish that clay goes into, either cast from a hump, or set the dish upside down in a box and pour plaster round and over it. Both are on this page; the hump is easier and the slump is more useful.
How long before I can use it?
A week to two weeks of drying in a warm airy place after it comes out of the form, turned daily. A damp plaster mold sticks to clay and grows mold. A dry one draws water out of the slab evenly and releases it without any wrap at all, which is the whole point.
Do I need a release?
On the form, yes: a thin buffed coat of mold soap, or petroleum jelly rubbed to almost nothing, or plastic wrap. On the finished plaster mold, no. A dry plaster mold releases clay on its own, and that is why potters put up with plaster.
Can I make the plaster mold at the studio and just keep it at home?
No. The rule is about the building, not the plaster mold. Mixing, pouring, sanding and rinsing plaster all happen at home. Ask the studio team before you bring in a finished, fully dry plaster mold, and never let one near the reclaim buckets.
Related lessons
Six lessons that sit next to this one.
Three to read next.
A plaster mold is one way to own a shape. These are the others, and the two that live inside the studio.
That is the whole job
Weigh it. Slake it. Pour low. Wait for cool. Dry for a week. Keep it at home.
Your first cast will probably be a hump with three pinholes on the face because you stirred it like soup. That is normal, and the second one will be poured low and tapped. A shelf of plaster molds in a garage is how a lot of serious hand-builders work, and every one of them started with a mixing bowl and a scale.
If you want hump against slump in full, the safety rules and the answers to the questions everybody asks, switch to the comprehensive version at the top. Otherwise, go find a scale.
Written for potters everywhere. Where our studio does things differently, the page says so.
Which version would you like to print?
Both print clean, with the videos turned into labeled boxes you can search for later.