Pottery Date Night
 Bring All Your Friends Free Week
 Give a Month of Pottery
 Private Pottery Parties

 The Welcome Booklet
 Your First Ten Sessions
 The Pottery Process
 Finding the Studio
 Your Classes Never Expire
 The Four Tables
 Who’s Who
 The Rewards Program
 Flux Glazes
 The Calculators
 Kiln Tracker
 Holiday Kiln Deadlines

 Beginner’s Tool Set
 Fingernail Clippers
 Mayco Clay Mender
 Epoxy for Kintsugi
 Applicator Bottles
 Large Bead Rack
 Raku Workshop
 Nighttime Raku
 Horsehair and Feather Raku
 The Clay Hole T-Shirt
 Embroidered Crewneck
 Zip-Up Hoodie
 Pre-Made Bisqueware
 Glaze Catchers
 Kiln Cookies
 Clay Cubby Rental
 The Glaze Bible, Printed
 The Book of Molds, Printed
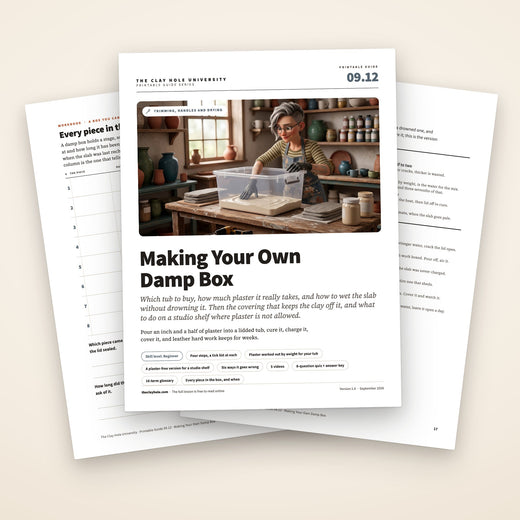
 Printable Pottery Guides
 Free Printable Trackers
 Gifts for Potters
 Christmas Pottery Ideas
 Mother’s Day Gift Ideas
 Pottery Date Night
 Studio Calendar
 2027 Studio Events
 What Should I Do Today?
 How to Throw on the Pottery Wheel
 How to Make a Pinch Pot
 How to Tap Center a Pot
 The Five Stages of Clay
 Is Pottery Hard to Learn?
 Pottery Wheel Practice Drills
 20 Easy Hand-Building Projects
 Everything That Sounds Wrong

 A Beautiful Piece, Every Time
 Slab Roller Tips
 Any Dish as a Slump Mold
 Slab Roller & Slab Mold Certification
 The Pottery Skill Tree
 Clay & Pottery Calculators
 Logging Your Pottery and Glazes
 The Pottery Dictionary
 Why Did My Pottery Do That?
 The Pottery Cone Chart
 Pottery Myths, Fact-Checked
 Is Handmade Pottery Food Safe?
 Incredible Ceramic Artist Videos
 How Dan Throws Giant Pots
 How to Dry Your Pottery
 The Pottery Wheel Introduction
 Pottery by Zodiac Sign
 Personality and the Pottery Wheel
 Pottery for Engineers
 ADHD, Hyperfocus, and Never Running Out
 Hobbies for Burnout
 Screen-Free Hobbies for Adults
 Every Addiction I Ever Had Lost to Art
 Functional Pottery Is Engineering
 How Do We Compare?
 Pottery Classes by City
 Every Pottery Studio in Utah
 Pottery in Draper
 Featured Members
 The Signature Wall
 Making Friends as an Adult Is Brutal
 The Clay Hole Commandments
 2027 Pottery Contests
 2027 Studio Parties
 Gallery Night

 Scream It Into the Void
 Destroy the Glaze Wall
 Daily Affirmation Cards
 Everything That Can Go Wrong
 Subscribe to Our Newsletters
 Contact The Clay Hole
 Corporate Team Building

 Glaze Combinations
 Glazes We Do Not Carry
 Making Glaze Test Tiles
 The Mega Glaze Tool
 How to Use the Mega Glaze Tool

 Glaze Brushing Techniques
 How to Use Underglaze
 How to Use Dipping Glazes
 Glaze Problems, Causes and Fixes
 The Dipping Glaze Guide

 Making a Glaze Catcher
 Fused or Sharp After Firing
 The Signature Wall
 His Viral Videos
 His Own Ceramics
 Meet Mud
Trimming, handles and drying · Damp box
A tub, a plaster slab and some water.
A damp box holds work at leather hard for weeks instead of days, which is most of what stops a project stalling. It is a lidded tub with a plaster slab in the bottom, and because the slab is plaster, it is built and kept at home. The plaster-free version for your studio shelf is here too.
This page walks the build with a tick list at every step: the tub, the plaster by weight, the pour, the cure, charging it, covering it, and the studio-shelf version. Six fixes, most of them about water or plaster, and five videos.
This is the short version: the tub, the pour, the charge, and the plaster-free studio version, each with a tick list. The reasoning, the reclaim note and the questions are in the comprehensive version.
Read it, then watch it
Why this is written down and filmed, both.
A damp box is a recipe with one judgment call in it. The recipe is the tub, the plaster ratio, the thickness and the drying time, and that is a list. The judgment call is how wet: what a charged slab looks like against a saturated one, and what standing water does to a pot left on it overnight. You have to see it once, and the videos below show the pour and the slab.
Use both, in this order
Read the recipe. Watch the pour and the slab. Build it at home with the tick list open. This one is a plaster project, so it never happens at the studio, and the page carries a plaster-free version for your studio shelf.
The whole idea
A tub, a plaster slab, some water, a lid. At home.
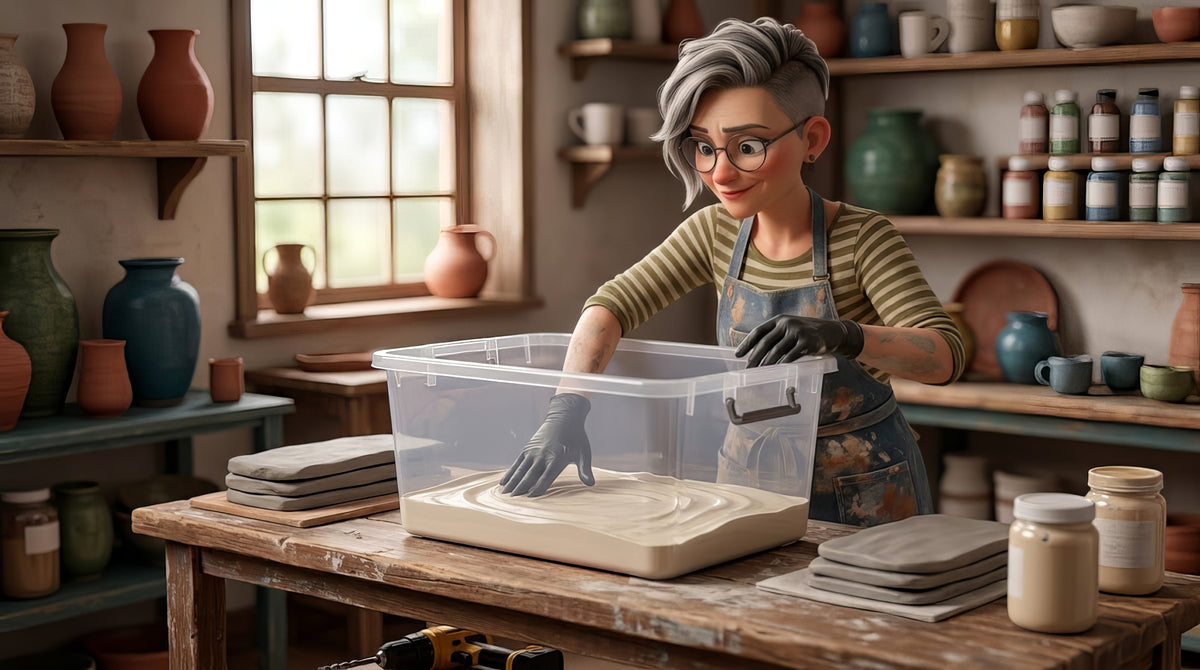
Pour an inch and a half of plaster into a lidded tub, cure it, soak it, pour the standing water off, and leather hard work stays leather hard for weeks. The box lives at home, because wet plaster and plaster dust never come into the studio; a sealed tub with a wet towel in the corner is the studio-shelf version.
The five-minute version
The whole build in six moves.
If you have mixed plaster before and you just want the shape of it, this is the shape of it. Everything below is these six moves, slowed down and with the places they fail marked.
Before you open the bag
What you need on the bench.
Six things, and one of them is vinegar. The tub is the decision; everything else is a bag of plaster and an afternoon.
A clear lidded tub, pottery plaster and a scale, an N95 and safety glasses, gloves, a flexible bucket, mesh or newspaper, white vinegar, and a garage.
Step one
Pick a tub that seals, and work out how much plaster.
The lid is the damp box. A plaster slab in a tub that does not seal is a plaster slab on a shelf. Look for a clear tub with a lid that snaps shut or has a gasket, deep enough for the tallest thing you make plus two inches of slab.
Then the plaster. An inch and a half to two inches of slab is right: thinner cracks and holds less water, thicker is wasted. To know how much, pour water into the tub to the depth you want, then pour that water into your mixing bucket and weigh it. Then take two thirds of that weight: that is your seventy parts, and the plaster is one and three sevenths of it, by weight. Two thirds looks wrong and it is right, because plaster does not vanish into the water, it takes up room of its own, and a bucket of slurry ends up about half as big again as the water you mix it with. Mix ten percent extra. The ratio and the slaking and the slow stir are exactly as in our plaster mold lesson, and so are the safety rules: an N95 or better and safety glasses for the powder, gloves, never a hand in a setting bucket, and nothing plaster ever down a sink.
The place matters as much as the tub. This is a garage, porch or driveway job. Plaster dust, plaster tools and plaster rinse water never come into a clay studio, ours or anyone else’s, and the reason is in the first card of the studio band below.
Step two
Pour it into the tub, tap it, and leave it alone.
Cast the slab in the tub it will live in. Set the tub on a flat floor, mix the plaster by weight, and pour it in low and steady. Tap the sides for a minute so the bubbles rise. Then walk away for an hour: it will heat as it sets, and moving a tub of setting plaster is how a slab cracks before it has done a day of work.
Some potters cast the slab separately in a tray and drop it into the tub afterwards, which lets you replace it later without giving up the tub. That works too; the slab needs a day to cure before it is moved, and it wants to fit the tub with a little room round the edge. Casting in the tub is simpler and the slab cannot tip.
Then a day with the lid off, so the plaster cures and gives up its own water. A slab charged the same day it was poured is a swamp. The next day it is pale, hard, and ready to be charged for the first time.
Step three
Charge it, pour the standing water off, and cover the plaster.
Dark and damp, never shiny. Pour water over the slab and watch it drink. When it stops, pour off every drop that is standing. A charged slab is dark, cool and matte. A slab with a puddle rewets everything you put in and grows things.
A splash of white vinegar in the charging water is the difference between a damp box and a mold farm; a few drops of bleach does the same. Pick one and keep to it, because bleach and vinegar together give off chlorine gas. Then lay something over the plaster so clay never touches it: thin plastic mesh, a sheet of damp newspaper, a few strips of wood. Pots dragged across bare plaster pick up chips, and pots left standing on wet plaster get wetter at the base than at the rim. The cover solves both.
Now it works. Anything leather hard goes in and stays leather hard. Freshly thrown work goes in only after it has firmed up in the open air, because the box holds a stage rather than choosing one. Lid on, and the box goes somewhere cool and out of the sun. Recharge when the plaster goes pale, every week or two in a dry climate, and open the lid for an hour now and then to let the air change.
Step four
The plaster-free version for the studio shelf.
Wet plaster and plaster dust never come into the studio, so this is what does. A lidded tub with a wet sponge or a wrung-out towel in a small open container in one corner. It holds a piece at leather hard for days instead of weeks, which covers most projects that span two visits.
The rules are the same in miniature: the lid has to seal, nothing wet touches the clay, and the sponge gets rewetted when it goes dry. A plastic bag with a damp paper towel inside it does the same job for a single piece and fits on any shelf, which is the method many lessons in this University that span two sessions already recommend. Name and date on the bag or the tub.
For anything that needs weeks (a big sculpture, a set of pieces that have to match, a project that stalls), the answer is the plaster box at home, and the pieces travel. Wrap them in damp cloth and plastic for the trip; a leather hard pot in a sealed bag survives a car journey without complaint.
Watch it done
Now watch five potters, three of them building a damp box.
Watch this one, then go find a tub.
None of these potters work here or know we exist. Between them they cover the whole box in five minutes, a slower walk through the build, the measurements, the case for building one, and the plaster slab on its own. Nothing but the still frame loads until you press play.
Under five minutes: a tub, a bag of plaster, a pour and a lid. The other four videos are in the comprehensive version.
When it goes wrong
Six ways it goes wrong, and what to do about each.
The three failures that happen in the first month.
Pick the one that looks like your box. Most of them come back to water or to the plaster, which is the whole subject.
Mold grew on the plaster or the pots
A sealed box at full humidity is where mold wants to live, especially in warm weather. It is ugly and it smells; it does not hurt the clay or the firing.
A splash of white vinegar in the water you charge the slab with, and the lid cracked open for an hour every week or two. Some potters use a few drops of bleach instead. Keep to one or the other, because bleach and vinegar together give off chlorine gas. Wipe the plaster down when you recharge it.
Wipe the pots with a damp sponge, wipe the plaster, recharge with vinegar water, and carry on. Mold burns out completely in the bisque.
Everything came out wetter than it went in
Too much water on the slab, or standing water left on it, or pots put in straight from being worked. A damp box holds clay where it is; a saturated slab with a puddle rewets it.
Pour water on, let the plaster drink for a few minutes, pour every drop of standing water off. The plaster should be dark and damp, never shiny. Let a freshly made piece stand in the open until it is soft leather hard before it goes in.
Pots out, standing water off, plaster wiped, pieces left in the open air until they are where you want them. Then back in.
The pots dried out anyway
The lid does not seal, or the slab was never charged, or it was charged weeks ago. A damp box works because the lid keeps the moisture in; a cracked lid is a shelf.
A lid that snaps shut or has a gasket. Charge the slab when it goes pale, every week or two in a dry climate. Out of the sun.
Recharge the slab, mist the pieces lightly, seal the lid and give it a day. A piece that has gone bone dry is not coming back evenly, but leather hard pieces recover overnight.
Plaster chips got into the clay
The slab is shedding, or a tool dug into it, or a pot was dragged across it. Plaster chips in clay blow craters out of the fired pot weeks later.
Never dig into the slab. Set pots down on it, never drag. A layer of thin plastic mesh or a sheet of damp newspaper over the plaster keeps clay and plaster from ever touching. Retire a slab that sheds.
Any clay that touched a shedding slab is suspect; do not reclaim it. This is why the plaster damp box lives at home and never at the studio.
The plaster slab cracked
Cast too thin, cast in a tub that flexed while it set, or turned out or moved before it had gone through its heat and cooled.
An inch and a half to two inches thick. Cast it in the tub it will live in, on a flat floor, and do not touch the tub for an hour. A slab cast separately goes in only once it has cured for a day.
A cracked slab still holds water and still works as a damp slab. It is more likely to shed, so cover it with mesh or newspaper and watch it.
The box smells
Bacteria, which is the same colony that makes a bag of reclaim smell, and which arrives with any organic matter in the box: a leaf, a bit of paper, a moldy pot.
Vinegar in the recharge water, nothing organic left in the box, and the lid opened for an hour every week or two. Keep it somewhere cool.
Empty it, wipe everything with vinegar water, leave it open for a day, recharge. The smell is harmless to the clay and gone from the fired pot.
How it works here
At The Clay Hole, the damp box lives at your house.
This page is written for potters everywhere, and the box it describes is a home project. Here is where the studio stands.
Three things to know here
There is no communal damp box, because wet plaster and plaster dust never come into the building. On your shelf, a bag with a damp paper towel holds a piece at leather hard for a week; a sealed plaster-free tub a little longer. Weeks-long projects go home to the plaster box, wrapped damp for the trip.
Why there is no communal one
Plaster in clay blows a crater out of the fired pot, weeks after the firing, on a shelf, on a pot that was perfect. In a shared studio a chip travels through the reclaim into everybody. So wet plaster and plaster dust stay out of the building, and that includes the slab in the bottom of a damp box.
On your shelf
A plastic bag with a damp paper towel holds a single piece at leather hard for about a week. A sealed tub with a wet sponge in a container holds several for a little longer. Both are plaster-free and both are welcome. Name and date on everything; unlabeled work on a shelf is how projects go missing.
Traveling work
Leather hard pieces wrapped in damp cloth and then plastic travel home and back without trouble. That is how a weeks-long sculpture gets the studio’s tools and the home damp box both. Bone dry pieces travel in a box with padding and nothing damp near them.
What the box is for, here
Matching handles to mugs across two visits. Coil-built work that takes four sessions. A figurine whose arms were made on a different night from its body. Our drying awkward pieces lesson is the other half of the same problem.
Questions people actually ask
The ones that come up every week.
What does a damp box actually do?
It holds clay at whatever stage it went in, for weeks. A leather hard pot stays leather hard. A half-built sculpture stays workable between sessions. Handles pulled on Tuesday match a mug thrown on Thursday. The plaster slab is a reservoir: it releases water into the sealed air until the box is at full humidity, and at full humidity clay stops drying.
Do I need plaster?
For a real damp box that holds work for weeks, yes; the plaster is the reservoir and nothing else holds and releases water the same way. For a few days, a sealed tub with a wet sponge or a folded wet towel in a container in the corner does most of the job, and that plaster-free version is the only kind that can live on a studio shelf.
Why can I not have one at The Clay Hole?
Because it has wet plaster in it, and wet plaster and plaster dust never come into the building. A single chip of plaster in the reclaim blows a crater out of somebody else’s pot months after the firing. Your plaster damp box lives at home. At the studio, a bag with a damp paper towel holds a piece at leather hard for a week, and a plaster-free tub holds it a little longer.
How much water?
Enough that the plaster drinks and stops, then pour off every drop that is standing. A dark, damp slab with no shine is charged. A shiny slab with a puddle rewets everything you put in it. In a dry climate you will recharge every week or two; you can tell because the plaster goes pale.
Can the pots sit straight on the plaster?
Not for long. Two things go wrong: a pot dragged across the slab picks up chips, and a pot left on wet plaster gets wetter at the base than the rim. A sheet of thin plastic mesh, a piece of damp newspaper or a few strips of wood keep the clay just off the surface and solve both.
How long will work keep?
Weeks, sometimes months, if the box seals and the slab is recharged. Leather hard is the stage that keeps best. Wet, freshly thrown work is better left in the open to firm up first, then boxed. Bone dry work does not come back; a damp box holds a stage, it does not reverse one.
Can I use it for reclaim?
A plaster slab on its own is the classic reclaim tool: slop poured onto it firms to wedging consistency in a day. In the damp box the slab is doing the opposite job, so use a separate slab for reclaim, and keep both away from the studio, per the plaster rule.
Related lessons
Six lessons that sit next to this one.
Three to read next.
A damp box holds a stage. These are the pages about the stage, and the projects that need holding.
That is the whole build
Tub. Plaster. Charge it. Cover it. Lid on. At home.
Your first damp box will probably be charged too wet and grow something interesting in the corner. That is normal, and vinegar fixes it. After that it is the tool you did not know you were missing, and the reason your handles finally match your mugs.
If you want the reasoning, the reclaim note and the answers to the questions everybody asks, switch to the comprehensive version at the top. Otherwise, go find a tub with a lid.
Written for potters everywhere. Where our studio does things differently, the page says so.
Which version would you like to print?
Both print clean, with the videos turned into labeled boxes you can search for later.