Pottery Date Night
 Bring All Your Friends Free Week
 Give a Month of Pottery
 Private Pottery Parties

 The Welcome Booklet
 Your First Ten Sessions
 The Pottery Process
 Finding the Studio
 Your Classes Never Expire
 The Four Tables
 Who’s Who
 The Rewards Program
 Flux Glazes
 The Calculators
 Kiln Tracker
 Holiday Kiln Deadlines

 Beginner’s Tool Set
 Fingernail Clippers
 Mayco Clay Mender
 Epoxy for Kintsugi
 Applicator Bottles
 Large Bead Rack
 Raku Workshop
 Nighttime Raku
 Horsehair and Feather Raku
 The Clay Hole T-Shirt
 Embroidered Crewneck
 Zip-Up Hoodie
 Pre-Made Bisqueware
 Glaze Catchers
 Kiln Cookies
 Clay Cubby Rental
 The Glaze Bible, Printed
 The Book of Molds, Printed
 Printable Pottery Guides
 Free Printable Trackers
 Gifts for Potters
 Christmas Pottery Ideas
 Mother’s Day Gift Ideas
 Pottery Date Night
 Studio Calendar
 2027 Studio Events
 What Should I Do Today?
 How to Throw on the Pottery Wheel
 How to Make a Pinch Pot
 How to Tap Center a Pot
 The Five Stages of Clay
 Is Pottery Hard to Learn?
 Pottery Wheel Practice Drills
 20 Easy Hand-Building Projects
 Everything That Sounds Wrong

 A Beautiful Piece, Every Time
 Slab Roller Tips
 Any Dish as a Slump Mold
 Slab Roller & Slab Mold Certification
 The Pottery Skill Tree
 Clay & Pottery Calculators
 Logging Your Pottery and Glazes
 The Pottery Dictionary
 Why Did My Pottery Do That?
 The Pottery Cone Chart
 Pottery Myths, Fact-Checked
 Is Handmade Pottery Food Safe?
 Incredible Ceramic Artist Videos
 How Dan Throws Giant Pots
 How to Dry Your Pottery
 The Pottery Wheel Introduction
 Pottery by Zodiac Sign
 Personality and the Pottery Wheel
 Pottery for Engineers
 ADHD, Hyperfocus, and Never Running Out
 Hobbies for Burnout
 Screen-Free Hobbies for Adults
 Every Addiction I Ever Had Lost to Art
 Functional Pottery Is Engineering
 How Do We Compare?
 Pottery Classes by City
 Every Pottery Studio in Utah
 Pottery in Draper
 Featured Members
 The Signature Wall
 Making Friends as an Adult Is Brutal
 The Clay Hole Commandments
 2027 Pottery Contests
 2027 Studio Parties
 Gallery Night

 Scream It Into the Void
 Destroy the Glaze Wall
 Daily Affirmation Cards
 Everything That Can Go Wrong
 Subscribe to Our Newsletters
 Contact The Clay Hole
 Corporate Team Building

 Glaze Combinations
 Glazes We Do Not Carry
 Making Glaze Test Tiles
 The Mega Glaze Tool
 How to Use the Mega Glaze Tool

 Glaze Brushing Techniques
 How to Use Underglaze
 How to Use Dipping Glazes
 Glaze Problems, Causes and Fixes
 The Dipping Glaze Guide

 Making a Glaze Catcher
 Fused or Sharp After Firing
 The Signature Wall
 His Viral Videos
 His Own Ceramics
 Meet Mud
Hand building · A beginner’s guide to sculpting
Where to start when the thing you are making is not a pot.
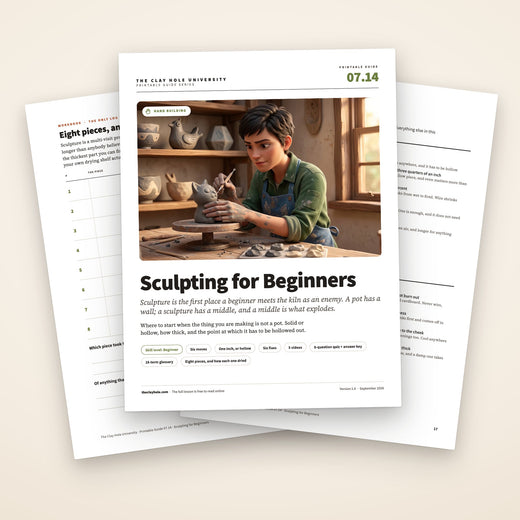
Sculpture is the first place a beginner meets the kiln as an enemy. A pot has a wall; a sculpture has a middle, and a middle is what explodes. Solid or hollow, how thick, and the point at which it has to be hollowed out are the three questions, and this page answers them before you pick up a lump.
This page walks it in order with a tick list at every step: solid or hollow, building in simple volumes, propping and joining, hollowing at leather hard, and the long drying that sculpture depends on. Six fixes and five videos from sculptors who do not work here.
This is the short version: the inch rule, the volumes, the join, the hollowing and the drying, each with a tick list. The reasoning, the two build methods in full and the questions are in the comprehensive version.

Read it, then watch it
Why this is written down and filmed, both.
Sculpture is where beginners meet the kiln for the first time as an enemy. Every other lesson in this University makes something with a wall; sculpture makes something with a middle, and a middle is what explodes. The rules about thickness, hollowing, armatures and drying are facts, and facts go on a page you can check against your piece. What the page cannot show is the hollowing: a form cut open, scooped and closed without losing its shape. That is the videos.
Use both, in this order
Read the thickness rule. Watch the hollowing. Build with the tick list open, over several visits, with the piece in a bag between them.
The whole idea
Nothing thicker than an inch goes in the kiln solid.
Build it hollow, or hollow it out at leather hard, so every wall is three eighths to three quarters of an inch. Score and slip every join. No wire inside; paper burns out. A pinhole somewhere hidden, weeks of drying, and it comes out of the kiln in one piece.
The five-minute version
The whole technique in six moves.
If you already hand-build and you just want the shape of it, this is the shape of it. Everything below is these six moves, slowed down and with the places they fail marked.
Before you pick up a lump
What you need on the table.
Six things, and one of them is a bag, because this is a multi-visit project. The newspaper does the job people think wire does.
B-Mix with Grog or Berlin Gray, a wire, a loop tool, a needle, a wooden tool, a rib, newspaper for cores and props, a board, and a bag with a damp paper towel.
Step one
Decide solid or hollow, and think in simple volumes.
An inch is the number. Anything thinner than an inch everywhere can be solid, dried thoroughly, and fired. Anything thicker anywhere has to be hollow, either built hollow from the beginning or built solid and hollowed out at leather hard. That decision comes before the first lump is picked up, because it changes how you build.
Then simplify. Every sculpture is a handful of simple volumes joined together: a sphere for a head, a cylinder for a body, a slab for a wing, a coil for a tail. Beginners try to sculpt the animal; sculptors build the ball, the tube and the wedge and then make it into the animal. Two pinch pots joined rim to rim make a hollow sphere, which is the body of half the creatures ever made in clay. A slab rolled into a tube is a torso. Our pinch pot, coil building and slab lessons are the three techniques this page assumes.
Pinch, coil and slab from the start
Faster to dry, lighter, and it never needs cutting open. The cost is that a hollow form is soft while you build it and needs propping and patience. Right for animals, heads, vessels that happen to be creatures, and anything bigger than a fist.
Model it, then dig it out
You get to model a solid lump, which is the most direct way to find a form, and then at leather hard you cut it open, scoop the core out to three-quarter-inch walls, and close it. Right for portrait heads, figures, and anything where the outside matters more than the inside while you work.
Step two
Build in stages, prop it with paper, and join at the same softness.
Clay has to firm up under itself. A form built in one session as high as your ambition slumps. Build the base, let it firm to soft leather hard, add the next section. Between sessions the piece lives in a bag with a damp paper towel on your shelf.
Overhangs and anything that leans get propped with scrunched newspaper or paper towel, which holds the shape while the clay firms and then burns out in the bisque without a trace. A hollow form can be built around a ball of newspaper for the same reason. What never goes inside is wire, wood, or anything else that does not shrink: clay shrinks ten to fourteen percent from wet to fired and it will tear itself apart around anything that stays the same size.
Every join is scored, slipped and pressed, with a thin coil of soft clay blended into the seam on the outside, and both parts at the same softness when they meet. A soft leg on a firm body is still wet after the body has stopped shrinking, so it keeps shrinking after the join is made and comes off in the kiln. Our score and slip lesson is the whole method, and sculpture is where it earns its keep.
Step three
Hollow it at leather hard, close it, and put a pinhole in it.
Firm leather hard, then the wire. Cut the piece open where the seam will hide, usually the base or the back, in one clean pull. Scoop the core out with a loop until every wall is three eighths to three quarters of an inch, checked with a needle. Score and slip both faces, press the halves together, blend the seam with a coil.
Even thickness matters more than the number. A wall that is a quarter inch in one place and an inch and a half in another dries at two speeds and pulls apart at the boundary. Feel round the inside with a fingertip as you scoop; thick spots feel cold and heavy, thin spots feel the light through them if you hold the piece up.
Then the pinhole. A sealed hollow form does not explode because of trapped air; that is a myth. It explodes because a sealed form cannot dry from the inside and the damp core turns to steam in the kiln. A needle pushed through somewhere hidden, the base, under an arm, behind an ear, lets the inside dry and lets steam out. One is enough. It does not need to be big.
Step four
Dry it for weeks, then fire it, then finish it.
Longer than feels necessary, then a week more. A week under loose plastic and two in the open, out of any draft, thin parts covered so they dry as slowly as the body. Dry means room temperature to the cheek everywhere, inside the openings too. Cool anywhere means wet there.
Then the bisque, which is where a sculpture either proves itself or takes its neighbors with it. Our staff load every kiln; a piece that arrives damp is a piece that explodes into somebody else’s mugs. If in doubt, give it another week. Thick sculpture benefits from a slow bisque, and telling the studio team a piece is thick is the way to get one.
Finishing is a surface question. Underglaze at greenware or bisque with a clear over it, a wash wiped back to bring out the modeling, a glaze that breaks on edges, or nothing at all: bare fired clay is a legitimate finish for sculpture and most of the pieces in museums have it. Keep glaze off the base, and every glazed piece goes on a kiln cookie, every time. Our wipe-away lesson is the one that suits modeled surfaces best.
Watch it done
Now watch five people build five ways.
Watch this one, then go make two pinch pots.
None of these sculptors work here or know we exist. Between them they cover a first sculpture start to finish, hollowing and why, building hollow from slab, coil and pinch, the hollow sphere in four minutes, and a figure built hollow from slabs. Nothing but the still frame loads until you press play.
Twenty-three minutes on a first sculpture, start to finish. The other four videos are in the comprehensive version.
When it goes wrong
Six ways it goes wrong, and what to do about each.
The three failures that happen on the first piece.
Pick the one that looks like your piece.
It exploded in the bisque
Water, not air. A thick solid piece that felt dry on the outside was still damp in the middle, and when the kiln passed boiling point the steam had nowhere to go. Air pockets by themselves do not explode; wet clay around them does.
Nothing thicker than an inch goes in the kiln unhollowed, and anything hollowed gets a pinhole so the inside can dry. Then dry it for far longer than feels necessary: weeks for a thick piece, and room temperature to the cheek all the way through before it goes on the drop-off table.
Sweep the shards up with a dustpan and a damp cloth rather than with your fingers, then read the next panel, because the next one will be hollow. Our staff load every kiln, and an exploding piece takes its neighbors with it.
It has been drying for weeks and is still cool in the middle
A solid lump. Clay dries from the outside in, and a mass more than an inch thick can hold water in its core for a very long time, then crack when it finally lets go.
Build hollow, or hollow out at leather hard. Walls between three eighths and three quarters of an inch dry evenly and fire safely.
If it is still leather hard anywhere, cut it open with a wire, scoop the core out with a loop tool, score and slip it closed, and put a pinhole in it. If it has gone bone dry solid, it is past hollowing. Give it weeks more, tell the studio team before it goes anywhere near a kiln, and expect that it may still crack or explode. The safe choice is to keep it as a study and build the next one hollow.
A part cracked off or a joint opened
Two pieces at different moisture, joined without scoring and slipping, or a thin part attached to a thick one so they dried at different speeds and pulled apart.
Every join scored, slipped and pressed, with a thin coil blended into the seam. Both parts at the same softness when they meet. Thin parts covered so they dry as slowly as the thick body.
At leather hard, score both faces, slip, press, coil the seam and blend. At bone dry, a paste of the same clay sometimes holds through the bisque; often it does not. Fired, it is an epoxy job.
It slumped or sagged while you were building
Soft clay stacked higher than it can hold, or a form built in one session that needed two. Clay has to firm up under itself before more weight goes on.
Build in stages. Let the base firm to soft leather hard before the next section goes on. Prop overhangs with wads of newspaper or scrunched paper towel, which burn out in the bisque.
Prop what has sagged with newspaper, let it firm up, then rebuild the top. If it has folded, cut the fold out and rejoin at leather hard.
It cracked around an armature
Wire, wood or anything that does not shrink was left inside clay that does. Clay shrinks about ten to fourteen percent as it dries and fires; a wire does not, and the clay tears itself open around it.
No permanent armatures in ceramic work. Newspaper, paper towel and cardboard cores burn out in the bisque and are fine. Anything that has to be removed comes out at leather hard.
Cut the piece open, remove the wire, rejoin. If the wire is in too deep, the piece is a study, and the next one is built hollow around paper.
The surface is rough, cracked and marked
Clay dried while you were still working it, or was overworked while too wet, or the surface was never compressed. Small drying cracks on the surface appear when the outside dries faster than the inside.
Mist the surface lightly as you work, keep the piece under plastic between sessions, and compress the surface with a rib or a fingertip before it firms. Work the details at leather hard, not wet.
At leather hard, a damp sponge and a soft rib close most surface cracks; a paste of the same clay fills the rest. Or leave them: a sculpture with a surface that shows it was made is not a mistake.
How it works here
At The Clay Hole, sculpture goes through the same door as a mug.
This page is written for potters everywhere. A few things are specific to our building, so you know before you start.
Three things to know here
Studio tools open at Yellow; Green Level Members bring their own. Our staff load every kiln, so build so it can be lifted by the body, and dry it until it is room temperature to the cheek everywhere. Bisque is cone 05 and free; the glaze firing is cone 5½ at five cents a cubic inch, $600 cap. Anything enormous is a conversation with Dan first.
Tools and clay by Level
Loops, wires, ribs, needles and banding wheels are studio tools for Yellow, Purple and Black Level Members; Green Level Members bring their own. Clay comes from our shelves, eight bodies, no outside clay. For sculpture the two with grog in them are B-Mix with Grog and Berlin Gray.
Between visits
A bag with a damp paper towel holds a piece at leather hard on your shelf for a week. Name and date on the bag. A weeks-long piece can travel home to a damp box wrapped damp, per the damp box lesson.
The kiln
Our staff load and unload every kiln. Build so the piece can be lifted by its body, not by a limb or an ear. A piece that arrives damp explodes and takes its neighbors with it, so dry it until it is room temperature to the cheek everywhere and tell the studio team if it is thick. Bisque is cone 05 and free.
What a sculpture costs to fire
The glaze firing is five cents a cubic inch on the longest measurement in every direction. Any piece of 125 cubic inches or less is a flat $4.80, and the cap is $600, so a sculpture is priced on the box it would fit in, not its weight. Anything massive is a conversation with Dan first. A piece left bare after the bisque costs nothing at all.
Questions people actually ask
The ones that come up every week.
Solid or hollow?
Hollow, if any part is thicker than an inch. Small solid pieces, a bead, a finger, a small bird no thicker than an inch, fire fine if they are fully dry. Anything bigger is either built hollow from the start or built solid and hollowed out at leather hard. Solid clay more than an inch thick holds water in its core for weeks and can explode in the bisque.
How thick should the walls be?
Between three eighths and three quarters of an inch. Thinner is fragile and dries too fast at the edges; thicker holds water and cracks. Even thickness matters more than the number: a piece that is a quarter inch in one place and an inch and a half in another dries unevenly and pulls itself apart.
Can I use a wire armature?
Not one that stays in. Clay shrinks as it dries and fires and wire does not, so the clay cracks around it. Newspaper, paper towel and cardboard cores are fine because they burn out in the bisque. A wire or a stick can support a piece while you build it, if it comes out at leather hard and the hole is closed.
Do I need a hole in a hollow piece?
Yes, a small one. Not because trapped air explodes, which is a myth, but because a sealed hollow cannot dry from the inside and the damp core is what explodes. A pinhole somewhere hidden, the base or under an arm, lets the inside dry and lets steam out in the kiln. Our pottery myths lesson covers the air one.
Which clay is best for sculpture?
A body with grog or sand, which opens the clay so it dries more evenly, shrinks less, and stands up under its own weight while you build. Ours are B-Mix with Grog and Berlin Gray. Porcelain is the hardest to sculpt in and the most likely to crack.
How long does it take to dry?
Longer than a pot. A hollow piece with three-quarter-inch walls wants a week under loose plastic and another week or two in the open. It is dry when it is room temperature to the cheek everywhere, including inside any openings. A piece that is cool anywhere is still wet there.
Can I sculpt at The Clay Hole?
Yes, and people do, at every Level. Studio tools open at Yellow, Green Level Members bring their own, and every piece goes into the kiln through the same drop-off table as a mug. Our staff load the kilns, so build it so it can be lifted by the body, not by an ear, and keep it inside the glaze firing’s $600 cap by talking to Dan first about anything enormous.
Related lessons
Six lessons that sit next to this one.
Three to read next.
Sculpture is pinch, coil and slab pointed at something that is not a pot. These are the pages it is built from.
That is the whole technique
Under an inch, or hollow. Score every join. Paper inside, never wire. Dry for weeks.
Your first sculpture will probably be a little heavy and one ear will come off in the kiln because it was softer than the head. That is normal, and the second one will have a coil blended round every join and a pinhole under its tail. Sculpture rewards patience more than talent, and patience is free.
If you want both build methods in full, the finishing notes and the answers to the questions everybody asks, switch to the comprehensive version at the top. Otherwise, go make two pinch pots and join them.
Written for potters everywhere. Where our studio does things differently, the page says so.
Which version would you like to print?
Both print clean, with the videos turned into labeled boxes you can search for later.