Pottery Date Night
 Bring All Your Friends Free Week
 Give a Month of Pottery
 Private Pottery Parties

 The Welcome Booklet
 Your First Ten Sessions
 The Pottery Process
 Finding the Studio
 Your Classes Never Expire
 The Four Tables
 Who’s Who
 The Rewards Program
 Flux Glazes
 The Calculators
 Kiln Tracker
 Holiday Kiln Deadlines

 Beginner’s Tool Set
 Fingernail Clippers
 Mayco Clay Mender
 Epoxy for Kintsugi
 Applicator Bottles
 Large Bead Rack
 Raku Workshop
 Nighttime Raku
 Horsehair and Feather Raku
 The Clay Hole T-Shirt
 Embroidered Crewneck
 Zip-Up Hoodie
 Pre-Made Bisqueware
 Glaze Catchers
 Kiln Cookies
 Clay Cubby Rental
 The Glaze Bible, Printed
 The Book of Molds, Printed
 Printable Pottery Guides
 Free Printable Trackers
 Gifts for Potters
 Christmas Pottery Ideas
 Mother’s Day Gift Ideas
 Pottery Date Night
 Studio Calendar
 2027 Studio Events
 What Should I Do Today?
 How to Throw on the Pottery Wheel
 How to Make a Pinch Pot
 How to Tap Center a Pot
 The Five Stages of Clay
 Is Pottery Hard to Learn?
 Pottery Wheel Practice Drills
 20 Easy Hand-Building Projects
 Everything That Sounds Wrong

 A Beautiful Piece, Every Time
 Slab Roller Tips
 Any Dish as a Slump Mold
 Slab Roller & Slab Mold Certification
 The Pottery Skill Tree
 Clay & Pottery Calculators
 Logging Your Pottery and Glazes
 The Pottery Dictionary
 Why Did My Pottery Do That?
 The Pottery Cone Chart
 Pottery Myths, Fact-Checked
 Is Handmade Pottery Food Safe?
 Incredible Ceramic Artist Videos
 How Dan Throws Giant Pots
 How to Dry Your Pottery
 The Pottery Wheel Introduction
 Pottery by Zodiac Sign
 Personality and the Pottery Wheel
 Pottery for Engineers
 ADHD, Hyperfocus, and Never Running Out
 Hobbies for Burnout
 Screen-Free Hobbies for Adults
 Every Addiction I Ever Had Lost to Art
 Functional Pottery Is Engineering
 How Do We Compare?
 Pottery Classes by City
 Every Pottery Studio in Utah
 Pottery in Draper
 Featured Members
 The Signature Wall
 Making Friends as an Adult Is Brutal
 The Clay Hole Commandments
 2027 Pottery Contests
 2027 Studio Parties
 Gallery Night

 Scream It Into the Void
 Destroy the Glaze Wall
 Daily Affirmation Cards
 Everything That Can Go Wrong
 Subscribe to Our Newsletters
 Contact The Clay Hole
 Corporate Team Building

 Glaze Combinations
 Glazes We Do Not Carry
 Making Glaze Test Tiles
 The Mega Glaze Tool
 How to Use the Mega Glaze Tool

 Glaze Brushing Techniques
 How to Use Underglaze
 How to Use Dipping Glazes
 Glaze Problems, Causes and Fixes
 The Dipping Glaze Guide

 Making a Glaze Catcher
 Fused or Sharp After Firing
 The Signature Wall
 His Viral Videos
 His Own Ceramics
 Meet Mud
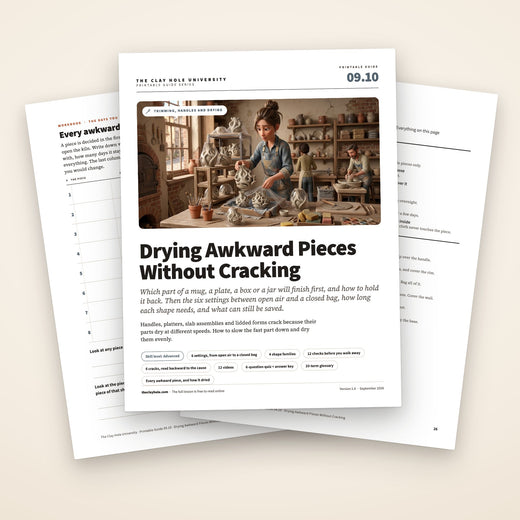
Drying Awkward Pieces
A mug with a handle. A platter that is thin at the rim and thick through the middle. A teapot carrying a spout, a lid and a strap. These are the pieces that crack days after you thought the hard part was finished, and they crack for a reason that has nothing to do with how well you made them.
Awkward does not mean big. It means the piece disagrees with itself about how fast to dry. Once you can see that disagreement, every one of these shapes gets easier to handle.
Why both, instead of one or the other
Video is unbeatable for timing and for the feel of a thing. You can watch somebody decide that a handle is ready, and you pick up something from their hands that no paragraph will ever give you. What video is bad at is being interrupted. The moment you are elbow deep and need the one sentence again, you are scrubbing a timeline with a wet knuckle.
Written steps are the opposite. They are slow to fall in love with and easy to return to. You can read one line, put the phone down, do the thing, and read the next line without losing your place. You can also hold a written rule in your head while your hands are busy, which is most of what learning a craft actually is.
So we do both, deliberately. The lists on this page are written to be short enough to keep open on a phone at the table. The videos are here because a few of these moves are far clearer watched once than described three times.
One pot, two speeds
An awkward piece is not a big piece. It is a piece where one part wants to dry faster than another part it is attached to. Clay shrinks as it dries, dry clay has already shrunk, wet clay has not, and leather hard clay does not stretch. So it tears.
Three things cause the split: uneven thickness (thin rim, thick base), joins (a handle, a spout, a seam), and uneven exposure (a rim sees air on both sides, an underside sees none). A mug has all three, which is why mugs crack more than vases.
The rule that replaces the rest
You cannot speed the slow part up. You can only slow the fast part down. Find whichever part will dry first, cover that part on its own, and let the rest catch up.
| Shape | Where it goes wrong | Cover this, leave the rest open |
|---|---|---|
| Handles and added parts | A fine crack tracing the join, usually at the lower attachment | A plastic strip over the handle only, for the first day or two |
| Wide flat pieces | A crack through the floor, or a rim that lifts and rocks | The rim. Leave the floor open and get the piece up on slats |
| Slab assemblies | Seams opening, and splits at sharp inside corners | All of it. Bag the whole piece and go slower than feels sensible |
| Lids, spouts, closed forms | A lid that stops fitting, a spout pulling away, an uneven wall | Dry the lid on the pot. Slow the outside down so the inside can keep up |
Covering, done slowly and on purpose
An experiment in slowing the drying of thrown pieces by wrapping them, with checks the next day. The description says to wrap it so that no air gets inside, which is the closed end of the ladder.
The join, tested rather than argued about
Ten attachment methods put through the same test instead of defended. Handles are the awkward piece almost everybody meets first, so if you only watch one thing here, watch this.
An awkward piece disagrees with itself
Clay shrinks as water leaves it. Our eight clay bodies give up somewhere between ten and fourteen percent of their size from wet to fired, and most of that movement happens while the piece is sitting on a shelf doing nothing.
Shrinking is not the problem. Shrinking at different rates in one object is the problem. A part that has dried has already made itself smaller. A part that is still wet has not. When those two parts are joined to each other, and one of them is trying to pull the other in, something has to give. Wet clay would stretch. Leather hard clay will not. It tears instead, and that tear is the crack you find three days later. Three things set it up: uneven thickness (a thin rim on a thick base), joins (a handle, a spout, a seam) and uneven exposure (a rim sees air on both sides, an underside sees none). A mug has all three, which is why mugs crack more than vases.
So the useful question is never how fast a piece is drying. It is which part of it is drying first, and by how much it is winning.

One mug, five different drying rates
- The base is thick. It holds the most water and it is the last thing to give it up. Everything else on the pot is waiting on this.
- The upper wall is thin. Less water, more surface for its volume, so it is finished long before the base is. It shrinks first and pulls down against a base that has not moved.
- The handle is a join. It was a different wetness than the wall when it landed, it is thin, and it is exposed on every side. It is one of the fastest parts of the whole pot, along with the rim.
- The underside sees no air at all. Sitting flat on a shelf, the bottom is effectively sealed, which makes the thickest part of the pot also the least ventilated part.
- The rim edge sees air on both faces. Inside and outside at once, which is why rims go pale first and why a rim can be bone dry while the floor is still soft.
Nothing in that list is a mistake. It is what a mug is. The skill is in managing the gaps, not in trying to make them disappear.
What the water is actually doing
The second longest video on this page, and the one worth sitting down for. It walks through what happens to clay between wet and bone dry, which is the model everything else here is built on.
If you only have a few minutes, skip it for now and come back. The rest of this page works without it.
Slow the fast part down
You cannot make the thick part dry faster. Water leaves clay from the surface, and the water in the middle of a base has to travel out through the clay around it. Nothing you do at the surface changes how long that journey takes.
What you can do, easily and cheaply, is hold the fast parts back until the slow part has caught up. That is the entire craft of drying an awkward piece. Find the part that will finish first, cover that part specifically, and leave everything else open.
Why heat makes the crack worse, not better
A heat gun, a hair dryer or a sunny window aimed at a thick base does not dry the middle of the base. It dries the outside of the base, fast, while the middle stays full of water. Now you have a shrunken skin wrapped around a wet core, which is the same disagreement you were trying to avoid, moved half an inch and made sharper. Pieces treated this way often look fine until the bisque and then come apart in the kiln.
The same logic rules out the fan pointed at one side of a pot, and the shelf directly under a vent. Moving air is not the enemy. Unevenly moving air is. If every face of the piece is getting the same breeze, a fan is harmless. That is almost never what is happening.
Things that make an awkward piece worse
- A heat gun, a hair dryer or a heat lamp aimed at a thick base
- A fan pointed at one side of a piece rather than around all of it
- A shelf directly under a vent, or beside a door that opens all day
- A bag pulled tight against wet clay, which leaves that patch wet while everything around it dries
- Going from fully bagged straight to fully open in one move
- Drying a lid anywhere other than on its own pot
- A wooden bat left under a piece, quietly pulling water out of the base
Flip it if you can
Turning a piece over once it is stiff enough to handle gives the sealed underside its first real access to air, and it is the single most useful free move in drying. Do it as soon as the rim can take the weight without distorting.
And if you cannot, go slower
Plenty of pieces cannot be flipped. Anything with a delicate rim, a spout, applied decoration or an unbalanced shape stays the way it is. The answer is not to force it. The answer is to slow the top down with cover so the trapped underside is not left so far behind.
The four ways a piece gets awkward
Almost everything difficult belongs to one of four groups, and the fix is the same inside each group. Work out which one you are holding and you have most of your answer.
1. Anything with a handle or an added part
Mugs, pitchers, casseroles with lugs, teapot straps, sculpture with limbs, anything with a knob. This is the family most people meet first, because it includes the mug.
Handles, lugs, knobs and applied parts
-
Match the stiffness before you attach
Both parts at the same leather hard, not one soft and one firm. If the mug got ahead of you while you pulled the handle, bag the mug for an hour and let the handle stiffen alongside it.
-
Compress the join, do not just stick it
Score, slip, press, and then work the clay at the edge of the join back into the wall on both sides so there is no seam left to open. A join that is only glued will find that seam again while it dries.
-
Cover the handle on its own
A strip of plastic laid over just the handle, for the first day or two. The body stays open and keeps drying, the handle is held back, and the gap between them closes instead of widening. This is the highest-value trick on this page and hardly anybody does it.
-
Take the strip off in stages
Once the wall has caught up, move the strip so it covers only the two attachment points, then take it off entirely. Going straight from covered to open on day two undoes the work.
Ten methods, one test
Rather than arguing about slip recipes, this puts ten attachment methods through the same trial and shows what survives. Useful because it separates the parts that matter from the parts that are habit.
A handle, start to finish
A whole handle made and attached on a mug: sizing and shaping it, scoring, slip, attaching, and smoothing the seams. The part that matters here is the last few minutes, which cover why handles crack and how to prevent it, with slow drying under a covered board.
2. Wide flat pieces
Plates, platters, trays, tiles, shallow bowls, slab dishes. Anything where the piece is much wider than it is tall.
Plates, platters, trays and tiles
-
Compress the floor properly on the way in
Compressing the floor while the piece is still on the wheel or the table helps, and it takes seconds, so do it. It does not decide a floor crack, though. What does is the difference in drying: a thick, wet floor under a thin, dry rim is the one that tears.
-
Get air underneath from the start
Set the piece on slats, a rack, or two strips of wood rather than flat on a shelf. The underside is the thickest, least ventilated part of a flat piece, and lifting it is free.
-
Cover the rim, leave the floor open
A ring of plastic laid over the outer edge only. The floor keeps drying, the rim is held back, and the whole piece arrives at leather hard at roughly the same time.
-
Flip it once it will hold its shape
Turn it over onto a clean board as soon as it is stiff enough to move without distorting, and let it finish upside down. On a wide piece this is often the difference between flat and rocking.
-
Treat weights as a last resort
A weighted board on top can help a piece that is already going wrong, but it is a correction, not a method. If you need weight every time, the drying is uneven and the weight is hiding it.
Three minutes, one idea, done properly
One trick for plates, described by the maker as getting the foot to dry evenly with the rim. Short enough to watch before you cover your next one.
Scaled up, where the margin disappears
A large platter is the same problem with none of the forgiveness. Worth watching before you commit ten pounds of clay to something that has to stay flat.
3. Assemblies and seams
Slab boxes, hand-built forms, sculpture, and anything put together from parts that were made separately.
Slab boxes, sculpture and multi-part builds
-
Build from slabs at the same stiffness
Cut all the parts from the same slab at the same time where you can. Two walls that were rolled an hour apart are already disagreeing before you join them.
-
Reinforce every inside corner
A soft coil pressed into the inside angle and smoothed out gives the join something to hold with and takes the sharpness out of the corner. Sharp inside angles concentrate the stress exactly where the clay is least able to take it.
-
Bag the whole thing, not part of it
Assemblies are the one family where covering everything is right. There is no single fast part to hold back, so the goal is simply to keep the whole build moving together and slowly.
-
Give it far longer than feels necessary
These are the pieces that want two weeks rather than a few days. A box that felt dry on the outside and went in early is one of the most common ways a bisque load gets a surprise.
Joins that survive the drying
Most seam failures are decided at the moment of joining rather than on the drying shelf. This clip is from a longer Ceramic Arts Network course. It walks through what a join needs in order to still be there a week later.
4. Lids, spouts and closed forms
Lidded jars, teapots, butter dishes, bottles with narrow necks, and anything where the inside cannot breathe at the same rate as the outside.
Galleries, spouts, knobs and trapped interiors
-
Dry the lid on the pot
Two parts that have to keep fitting each other need to shrink together, and the only reliable way to arrange that is to leave them assembled while they dry. A lid dried on the bench beside its jar is a lid that will not fit it.
-
Give the interior a way to keep up
On a narrow neck or a closed form, the outside will always be ahead of the inside. Cover the outside so it waits. Do not try to force air into a form that was built to keep it out.
-
Cover the spout and the knob specifically
They are small, thin and exposed on every side, which makes them the fastest parts of a teapot by a wide margin. They want their own piece of plastic just like a handle does.
-
Check the fit each time you change the cover
Lift the lid, look at the seat, put it back. If it has started to bind, you have caught it early enough to do something. If you check it once at bone dry, you have not.
Lidded jars, start to finish
A long video that follows seven lidded store jars from the first throw to the finished set: the gallery, the lids, trimming, bisque, waxing, glazing, firing, and grinding each lid to fit. The chapter list in the description lets you jump to the part you want.
What to cover with, and for how long
Most people own two settings: out in the open, or sealed in a bag. Nearly every drying problem on an awkward piece lives in the gap between those two. Here is that gap, laid out as six rungs you can move up and down one at a time.
Most people own two settings: open air or sealed bag. Almost everything useful lives between them. Pick a rung, then move down one rung a day.
| Rung | Setting | What it is for |
|---|---|---|
| 0 | Open air, nothing over it | Even, thin, simple pieces. Almost never the right first setting for anything on this page. |
| 1 | A cotton sheet draped loosely over the top | Takes the edge off the exposed faces without really slowing the piece down. A gentle first night. |
| 2 | Cotton sheet, with plastic laid over the sheet | Noticeably slower. Good for a piece that is close to leather hard and needs to even out before trimming. |
| 3 | Bagged loosely, mouth left open | The working setting for most awkward pieces overnight. Slow, but still going somewhere. |
| 4 | Bagged and closed | Close to a holding pattern. Use it when you will be away for a few days and you do not want the piece finishing without you. |
| 5 | Bagged and closed with a damp cloth inside, not touching the piece | Holds where it is, or softens slightly. For a piece you still have work to do on. |
The move most people never make
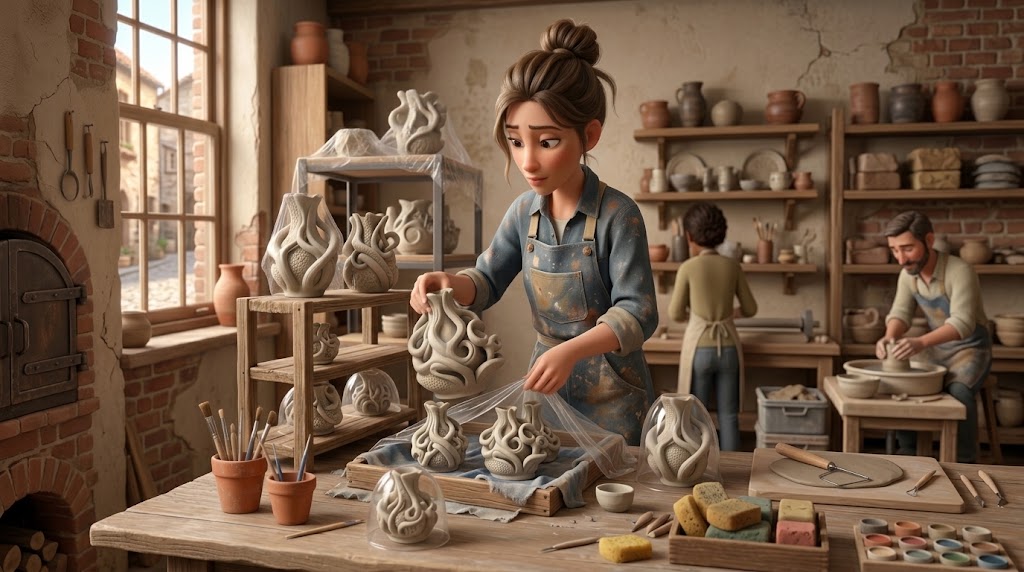
Cover part of the piece. A strip of plastic over a handle. A ring of plastic over the rim of a platter. A scrap tucked over a spout. The rest of the pot stays open and keeps drying, and the part that would have finished first is held until everything else arrives.
It costs nothing, it takes ten seconds, and it fixes more cracks than any other single habit we could teach you. If you remember one thing from this page, remember that cover does not have to be all or nothing.
Come down the ladder, do not jump off it. Going from rung four to open air on a Tuesday morning is the same shock as never covering the piece at all, arriving later. Move down one rung each time you visit, and let the piece spend at least a day at each setting.
Roughly how long, by family
These are the ranges we see in this building, not laws of physics. Thickness, clay body, the weather outside and where the piece is sitting will all move them. Treat them as a starting plan that you adjust by looking at the piece.
| Family | Cover the fast part for | Leather hard | Bone dry |
|---|---|---|---|
| Mug with a handle | 1 to 2 days on the handle | 2 to 3 days | About a week |
| Plate or platter | 2 to 3 days on the rim | 2 to 4 days | 7 to 10 days |
| Slab box or sculpture | 3 to 7 days, all of it | 4 to 7 days | 10 to 14 days |
| Lidded jar or teapot | 3 to 5 days, assembled | 3 to 6 days | 7 to 14 days |
Winter is genuinely slower here, and not only because of the cold. The building drops to 55°F overnight and on weekends, and the valley has a habit of holding storm moisture for days without clearing between systems. Add time in January rather than adding heat.
Wrapping, then checking
An experiment in slowing the drying of thrown pieces by wrapping them: why to wrap, the experiment, a check the next day, a final check, and trimming at the end. The description says to wrap it up so that no air gets inside, which is the closed end of the ladder above (rung four), not the loose wrap most awkward pieces want.
Control rather than speed
Explains the drying process and gives tips for controlled drying, to lessen the stress on rims and large flat areas. Nine minutes, and it goes with the ladder above.
Twelve checks before you walk away
Six checks before you walk away
Tap each one as you do it. Nothing is saved and nothing is sent anywhere, so refresh the page whenever you want a clean list for the next piece.
Where it cracked tells you what happened
Cracks are not random and they are not bad luck. The location is a record of which part of the piece was winning. Find yours below.
Cracks are not random. The location tells you which part of the piece was drying first. Here are the three you are most likely to meet.
A fine crack tracing the edge of a join
A crack through the floor, straight or S shaped
A split opening along a seam
A crack where the wall meets the base
A lid that no longer fits its pot
A rim that has gone oval, lifted, or rocks on the table
Eight cracks, and what causes each
Eight kinds of crack and what causes each one: vertical cracks, shattered bottoms, S cracks, edge cracks, dunting, shivering, crazing and springing. Handy to skim once so that the next time you find one, you recognize it instead of guessing. The chapter at 10:30 is called compression is a myth, which is where our own myths lesson lands too.
What can still be saved
Some of this is fixable and some of it is not. Here is which is which, so an evening does not go into a piece that was gone before you found the crack.
Leather hard, fine crack: usually yes
Open the crack very slightly with a needle tool so you have two clean faces, wet both sides, work in clay from the same body, and compress it hard from both directions. Then cover the whole piece and bring it down the ladder slowly, because the repair is now the wettest part of the pot and it will crack again if you leave it open.
Bone dry crack: usually no
Repairs made on bone dry work sometimes survive the bisque and rarely survive a glaze firing at cone 5½. Pastes made from clay and vinegar, and the commercial patching products, are worth one attempt on a piece you would otherwise lose. They are not worth planning around, and a piece that has been patched should be shown to a staff member at The Clay Hole before it goes into a firing.
A warped rim at leather hard: sometimes
While there is still moisture in the piece you can often ease a rim back and let it set in the corrected position under even cover. Once it is bone dry, the shape is the shape.
A handle that came off completely: no
Re-attaching a dry handle to a dry mug fails almost every time, because there is no shrinking left in either part to lock the join together. Take the handle off cleanly, sponge the scar, and let the piece be a tumbler.
Trying costs you nothing but time. Bisque firing is free here, so an attempted repair that fails has cost you the evening rather than the money. That is a real reason to try. It is not a reason to skip the covering in the first place.
The repair question, tried once
The description gives a short answer of yes, and says the repair was done with a small plaster lump in a tub, used in place of the damp boxes the maker already has, and that it did not work perfectly. We are more cautious in the cards above: a repair on bone dry work is a long shot.
Bringing a platter back flat
According to the description, Cindy Clarke shows how to return a plate lip to its position after the plate has dried too fast and pulled up or warped. Filmed from above.
How this works at The Clay Hole
Everything above is true anywhere. These are the parts that are specific to this building, this shelf and this kiln schedule.
- Cotton sheets are on hand for Purple Level Members and Black Level Members. Green Level Members and Yellow Level Members are very welcome to bring their own, and the thing to look for is one hundred percent cotton with a high thread count. Stacking two or three sheets is a real dial: each layer slows the piece down another notch.
- Bags come in three sizes: 10 by 10, 13 by 14, and 16 by 20 inches. Pick the bag for the piece rather than for the shelf, and leave it loose.
- Plastic storage bats only. Wooden bats pull moisture out of the bottom of a piece at their own pace, which is exactly the uneven drying this whole page is trying to prevent.
- Heat lamps are for brief stiffening, not for drying. If a piece needs to firm up enough to handle in the next few minutes, that is what they are for. Leaving work under one to dry it out will do precisely what the heat gun does.
- We do not have damp boxes for members. A loose bag with a damp cloth inside it, not touching the piece, does the same job and takes up less of your shelf.
- The building cools to 55°F overnight and on weekends. Cold slows drying down, which is usually good news for an awkward piece. It also means a piece you left on Friday has moved less than you expect by Monday.
Shelf space by Level
How much room you have changes how you can dry things, particularly wide flat work that wants to be up on slats rather than lying on the shelf.
| Level | Shelf | What that means for awkward pieces |
|---|---|---|
| Green Level Member | 24 by 12 by 8 inches | Height is the constraint. Slats under a platter eat into it, so plan one wide piece at a time. |
| Yellow Level Member | 24 by 12 by 12 inches | Enough headroom for a bagged lidded jar without the plastic resting on the knob. |
| Purple Level Member | 36 by 16 by 14 inches | Room to raise a platter on slats and still bag it loosely, plus the cotton sheets. |
| Black Level Member | 48 by 16 by 16 inches | Enough space to keep an assembly bagged for two weeks without it being in your way. |
Before it goes to the kiln
We ask for at least a week in open air after a piece comes out from under its cover, before it goes on the shelf for bisque. Awkward pieces routinely need longer than that, and we would much rather you took two weeks than have a lidded jar come apart in the load.
Staff do check pieces before a firing, but that check is a courtesy and not a guarantee. A thick base can feel completely dry on the outside and still hold enough water to blow apart on the way up. You know how thick you made it and when you made it. We do not.
Bisque runs at cone 05 and is free. Glaze firing is cone 5½, which is cone 5 with a twelve minute hold, and costs five cents per cubic inch with a $4.80 minimum.
The general drying guide covers the rest of it in depth: the interactive planner, the eight clay bodies and their shrinkage, the checks for telling how dry a piece really is, and the ten myths worth unlearning. Read how to dry pottery alongside this page.
Asked at the shelf, most weeks
Do I dry the lid on the pot, or off it?
On the pot. The lid and the seat have to end up the same size as each other, and the only way to guarantee that is to let them shrink together while they are assembled. A lid dried on the bench beside its jar is a lid that has finished ahead of the jar and will not fit it. Lift it each time you change the cover, look at the seat, and put it back.
How long does an awkward piece need before it can go in the kiln?
We ask for at least a week in open air once the cover is fully off, and awkward pieces regularly want longer. A slab box or a lidded jar with a thick base is a two week piece far more often than a one week piece. If you are unsure, give it another few days. Nothing bad happens to a piece that is too dry.
Can I speed a thick base up with a heat gun or a hair dryer?
No, and it usually makes things worse. Heat at the surface dries the surface, and the water in the middle still has to travel out through the clay around it. What you get is a shrunken skin over a wet core, which is the same uneven drying you were trying to avoid, concentrated into a much smaller distance. Pieces treated this way often look fine right up until the bisque.
What about a fan?
Moving air is not the problem. Unevenly moving air is. A fan aimed at one side of a pot dries that side first and does exactly what we have spent this whole page trying to prevent. If every face of a piece is genuinely getting the same breeze it is harmless, but that is very rarely what is happening on a studio shelf.
My handle cracked at the bottom join. What did I do wrong?
Almost certainly one of two things. Either the handle and the mug were at different stiffnesses when they met, or the handle was left uncovered and dried ahead of the wall it was holding on to. The lower attachment goes first because it carries the load. Next time, match the stiffness, compress the join edge back into the wall on both sides, and lay a strip of plastic over just the handle for a day or two.
Do you have damp boxes I can use?
We do not have damp boxes for members. You can get the same effect with a loose bag and a damp cloth sitting inside it, not touching the piece. That is rung five on the covering ladder, and it will hold a piece where it is for days.
What if the piece cannot be flipped?
Then do not flip it. Plenty of work cannot be turned over safely: delicate rims, spouts, applied decoration, anything unbalanced. Flipping is a way of giving the sealed underside some air, and when it is not available the answer is to slow the top down instead so the underside is not left so far behind. Slower is always available. Forcing is not.
Should I weight a platter that is warping?
You can, and it sometimes rescues a piece that is already going wrong. But weight treats the symptom. If you find yourself weighting every platter, the drying is uneven and the weight is hiding that from you rather than fixing it. Get air under the piece, cover the rim, and see whether you still need the board.
Why is everything slower in winter?
Two reasons, and only one of them is the cold. The building drops to 55°F overnight and on weekends, which slows drying down on its own. On top of that, the valley tends to hold storm moisture for days at a time without clearing properly between systems, so the air itself is carrying more water. Add days rather than adding heat.
It survived drying and then cracked in the bisque. What happened?
Usually water that was still in the piece. A thick base can be dry to the touch on every surface and still hold moisture in the middle, and once the kiln passes boiling that water turns to steam faster than it can escape. The tell is often a crack that runs from the thickest part outward. The fix is not a kiln setting, it is another week on the shelf.
Pages that pair with this one
Even beats fast, every time
Nobody loses a mug because they dried it slowly. They lose it because one part of it got ahead of the rest and there was nothing holding it back. Once you start looking at a piece and asking which part will finish first, the answer is almost always something you can fix with a scrap of plastic and a day of patience.
Make the awkward things. The handles, the platters, the teapots, the boxes with six seams. They are the pieces worth making, and they are only difficult in a way that has a method.
Find the part that will dry first, cover that part on its own, and give the rest of the pot time to catch up. That is the whole method, and it works on every shape on this page.
There is a much longer version of this page with four shape families, the diagnosis panels, the timings and twelve videos. Switch to Comprehensive at the top whenever you want it.
Which version would you like to print?
Videos come out as a labeled box with the title and channel to search for, since paper does not play them.