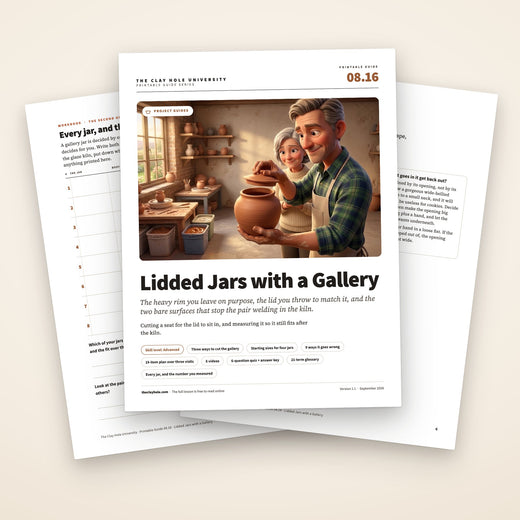
Pottery Date Night
 Bring All Your Friends Free Week
 Give a Month of Pottery
 Private Pottery Parties

 The Welcome Booklet
 Your First Ten Sessions
 The Pottery Process
 Finding the Studio
 Your Classes Never Expire
 The Four Tables
 Who’s Who
 The Rewards Program
 Flux Glazes
 The Calculators
 Kiln Tracker
 Holiday Kiln Deadlines

 Beginner’s Tool Set
 Fingernail Clippers
 Mayco Clay Mender
 Epoxy for Kintsugi
 Applicator Bottles
 Large Bead Rack
 Raku Workshop
 Nighttime Raku
 Horsehair and Feather Raku
 The Clay Hole T-Shirt
 Embroidered Crewneck
 Zip-Up Hoodie
 Pre-Made Bisqueware
 Glaze Catchers
 Kiln Cookies
 Clay Cubby Rental
 The Glaze Bible, Printed
 The Book of Molds, Printed
 Printable Pottery Guides
 Free Printable Trackers
 Gifts for Potters
 Christmas Pottery Ideas
 Mother’s Day Gift Ideas
 Pottery Date Night
 Studio Calendar
 2027 Studio Events
 What Should I Do Today?
 How to Throw on the Pottery Wheel
 How to Make a Pinch Pot
 How to Tap Center a Pot
 The Five Stages of Clay
 Is Pottery Hard to Learn?
 Pottery Wheel Practice Drills
 20 Easy Hand-Building Projects
 Everything That Sounds Wrong

 A Beautiful Piece, Every Time
 Slab Roller Tips
 Any Dish as a Slump Mold
 Slab Roller & Slab Mold Certification
 The Pottery Skill Tree
 Clay & Pottery Calculators
 Logging Your Pottery and Glazes
 The Pottery Dictionary
 Why Did My Pottery Do That?
 The Pottery Cone Chart
 Pottery Myths, Fact-Checked
 Is Handmade Pottery Food Safe?
 Incredible Ceramic Artist Videos
 How Dan Throws Giant Pots
 How to Dry Your Pottery
 The Pottery Wheel Introduction
 Pottery by Zodiac Sign
 Personality and the Pottery Wheel
 Pottery for Engineers
 ADHD, Hyperfocus, and Never Running Out
 Hobbies for Burnout
 Screen-Free Hobbies for Adults
 Every Addiction I Ever Had Lost to Art
 Functional Pottery Is Engineering
 How Do We Compare?
 Pottery Classes by City
 Every Pottery Studio in Utah
 Pottery in Draper
 Featured Members
 The Signature Wall
 Making Friends as an Adult Is Brutal
 The Clay Hole Commandments
 2027 Pottery Contests
 2027 Studio Parties
 Gallery Night

 Scream It Into the Void
 Destroy the Glaze Wall
 Daily Affirmation Cards
 Everything That Can Go Wrong
 Subscribe to Our Newsletters
 Contact The Clay Hole
 Corporate Team Building

 Glaze Combinations
 Glazes We Do Not Carry
 Making Glaze Test Tiles
 The Mega Glaze Tool
 How to Use the Mega Glaze Tool

 Glaze Brushing Techniques
 How to Use Underglaze
 How to Use Dipping Glazes
 Glaze Problems, Causes and Fixes
 The Dipping Glaze Guide

 Making a Glaze Catcher
 Fused or Sharp After Firing
 The Signature Wall
 His Viral Videos
 His Own Ceramics
 Meet Mud
Wheel technique
Lidded Jars With a Gallery
A gallery is a narrow ledge cut into the inside of the rim so a lid has somewhere to sit. It is the difference between a pot and a container, and it is the point where a lot of perfectly good throwers quietly go back to making bowls.
A gallery is a narrow ledge cut into the inside of the rim so a lid has somewhere to sit. Here is the short version: the jar, the ledge, the lid, and the two places the fit dies later.
This page is the whole project rather than the lid alone. The jar, the ledge, the matching lid, the knob, the trimming, and the ten days afterward where most of the failures actually happen. Read it once, watch one video, then keep the plan open while you work.
Jump to a section
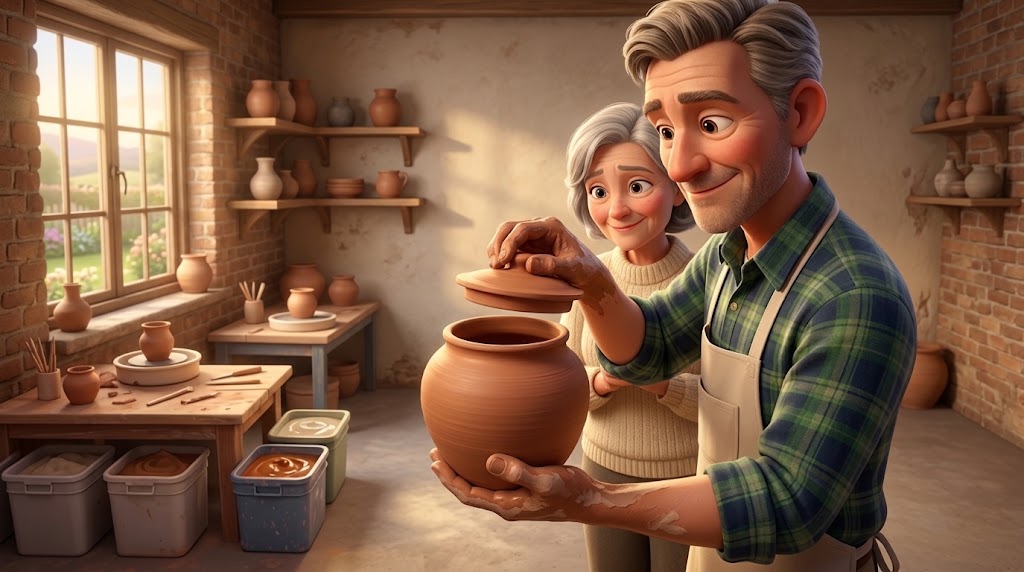
Two pieces, one measurement, and a ledge you cannot add later.
The whole thing, in one go
Six sentences and then your hands
Throw the jar, collar the neck in to the opening you actually want, and leave the rim about twice as thick as the wall because you are going to split it. Press the inside half of that rim down and outward into a level ledge, and leave the outside half standing as a collar. Set your calipers across the inside of that collar before the pot comes off the wheel, and write the number down.
Throw the lid in the same sitting, from the same clay, and stop while the calipers still drag on it. Trim the lid the next day sitting on its own jar. Then keep glaze off the ledge and off the underside of the lid, because glaze is glass and glass welds the two together at cone 5½.
That is the method. The rest of this page is the detail, and the Comprehensive Version has all of it.
01 · Anatomy
A gallery is a step, not a rim
Every part of this pot exists because of one move: you split the rim lengthwise into two halves and push one of them down. The outer half stays up and becomes a collar. The inner half becomes the shelf the lid lands on. Everything else on this page is either preparing for that move or recovering from it.
You split the rim lengthwise into two halves and push the inner one down. The outer half stays standing as a collar. The inner half becomes the shelf the lid lands on.

- The collar. The outer half of the split rim, left standing. It stops the lid sliding sideways and it is the surface you measure.
- The inside face of the collar. What the edge of the lid actually meets. Lumpy here means a lid that only goes in one way round.
- The gallery. The inner half, pressed down and out into a level shelf. Level is the word that matters. A sloped gallery lets the lid choose where it sits, which is a polite way of saying it rocks.
- The lid edge. A hair smaller than the inside face of the collar. That hair is your whole tolerance.
- The underside of the lid. The part that lands on the gallery. It gets trimmed to fit, and it never gets glazed.
- The knob. A handle, which means it gets pulled on with wet hands for years.
- The wall below. Normal thickness. The rim above it was left roughly twice this thick on purpose, because you are about to divide it in two.
The one thing to remember from this drawing: nothing here can be added later. A gallery is made from clay you left behind while the pot was still spinning and still wet. If the rim is already at normal wall thickness, the pot is a vase now. That is not a disaster, it is just a different pot.
02 · Why this page exists
A video plays once. A jar takes ten days.
Watch, then read, then work. One video for the hands, this page for the order, and the plan at the bottom for the days in between.
There are thousands of lidded jar videos and six good ones are further down this page. So it is fair to ask why we bothered writing several thousand words underneath them.
Because a lidded jar is not one skill. It is about a dozen decisions in a fixed order, spread across three or four visits to the studio, and only the first visit is the one a camera is pointed at. Nobody films day four. Day four is when you pick up a lid that has stiffened faster than its jar and have to decide whether to trim it now or wrap it and wait, and there is no scrubbing back to find that part.
A video is also very good at making you feel like you have learned something. You watch a calm person with forty years in their hands press a ledge into a rim in about nine seconds, and you come away certain you understood it. Then you sit down at a wheel and discover that what you actually retained was a mood. The order of operations, the number on the calipers, the reason the rim was left heavy: those went past too fast to stick, because they are not interesting to film.
Reading the same thing, slowly, in your own time, works differently. You control the pace, you can read a step twice without losing your place, and you can put the phone face down with slip on your hands and come back to exactly the same sentence. That is the boring superpower of text, and it is the reason this page is built as short lists rather than as an essay.
So the two are not in competition. Video shows you what hands do, which no sentence has ever managed. Writing holds still, which no video has ever managed. Use both, in that order, and use the second one at the wheel.
03 · The decision
Two questions decide this pot
Answer both before you weigh out clay. They decide the shape, the opening, the amount of clay and the kind of lid, and answering them afterward is how people end up with a beautiful jar that nothing fits in.
Will this jar ever get picked up, tipped or carried with the lid on?
If yes, you want a gallery. A lid sitting in a gallery is held in place by the collar around it, so the jar can be lifted, tilted and handed to somebody without the lid sliding off and finding the floor. Sugar jars, canisters, cookie jars, coffee jars, urns and anything with a handle all belong here.
If no, and the pot is going to sit on a shelf and be admired, a cap lid that simply sits over the top is faster to make, far more forgiving to measure, and nearly impossible to get wrong.
Can the thing that goes in it get back out?
A gallery jar is defined by its opening, not by its belly. You can throw a gorgeous wide-bellied form and collar it in to a small neck, and it will look wonderful and be useless for cookies. Decide what goes in first, then make the opening big enough for that thing plus a hand, and let the belly do whatever it wants underneath.
A rough test: hold your hand in a loose fist. If the jar is meant to be scooped out of, the opening wants to be at least that wide.
This page is about the jar. Its sibling page is about the lid. If what you actually want is the full taxonomy of lid types, the caliper discipline in detail, and twelve separate reasons a lid stops fitting, that all lives on Throwing Lids That Fit. The two pages are meant to be read together, and neither one repeats the other.
04 · Before you touch clay
Weigh out both pieces at the same time
The ratio that works: the lid takes roughly a quarter of what the body took. Weigh both balls before you sit down and put the lid ball under plastic. A lid thrown from a different bag on a different day is a different clay, and no measurement survives that.
A gallery jar is one of the few things on a wheel where the second piece has to be planned before the first piece is finished. That is really the only unusual thing about it. Everything else is throwing you already know.
Three numbers are worth settling in advance. The opening, which you decided in the last section and which controls everything. The height, remembering that the lid adds to it, so a jar thrown to look right on its own comes out taller than you pictured. And the clay, split before you start so the lid is not an afterthought thrown from whatever is left in the bag.
These are four common jars, with the numbers we would start from. They are starting points and not rules. Change one and change the others to match.
| Jar | Body | Lid | Opening | Why |
|---|---|---|---|---|
| Sugar or salt jar | 1 lb | 4 oz | Spoon plus fingers | Small enough that the gallery is quick, big enough to get a spoon in and out |
| Coffee or tea canister | 2 to 3 lb | 8 to 12 oz | A scoop, easily | The classic first gallery jar. Straight sided, forgiving, useful the day it leaves the kiln |
| Cookie jar | 4 to 6 lb | 1 to 1.5 lb | A whole hand | Wide opening or it is a decoration. This is the one people get wrong |
| Apothecary or ginger jar | 2 to 4 lb | 8 oz to 1 lb | Deliberately narrow | The shape is the point. Collar hard, and accept that nothing large is coming out |
Clay weights are wet weights before throwing. If you are unsure which clay body to buy for this, the studio stocks eight, and the Which clay should I buy? chooser in the Clay menu and the front desk will both point you at a smooth stoneware to start with.
05 · The jar
Throwing the body, in eight steps
Throwing the body, in five steps
This is an ordinary thrown form right up until step six, and step six is the only one that is unusual. If you can throw a cylinder and belly it out, you can already do seven eighths of this.
Step six is the whole page. Leave the top half inch of the wall about twice as thick as the rest of it. Every other step here is ordinary throwing.
- 1
Center, and open lower than feels right
A jar carries weight high up in the shoulder, so it wants a floor that can take it. Open down until you are about a quarter inch from the bat and check it with a needle tool rather than guessing.
- 2
Set the floor flat and compress it properly
Flat, not domed, and compressed with a rib or the heel of your hand while the wheel is still fast. A jar spends longer under plastic than a mug does, and an uncompressed floor is a slow S crack waiting for the drying rack. There is a whole page on compressing the floor and the rim if you want the detail.
- 3
Pull a straight cylinder first, all the way up
Resist the urge to shape early. Every inch of belly you put in now is an inch you cannot pull height out of later, and a gallery jar needs its height before it needs its curve.
- 4
Belly it out from the inside, low
Hand inside, rib or fingers outside as backup, and push the widest point roughly a third of the way up from the base. Low bellies read as jars. High bellies read as vases, and they also make the collaring in step five much harder.
- 5
Collar the shoulder in to your opening
Both hands, slow wheel, and squeeze in small amounts over many passes rather than a lot in one. The clay thickens as it comes in, so pull the wall up gently between passes to keep it even. Overdo it and the neck twists. Our page on collaring in covers the whole move.
- 6
Stop pulling and leave the rim heavy
This is the step that separates this pot from every other pot. The top half inch of the wall should end up close to twice a normal wall thickness, and only the top half inch. You are about to split it lengthwise into two halves, and two halves of a normal rim are two things that are each too thin to be anything.
- 7
Make the neck short and straight
Give yourself about half an inch of vertical, untapered wall under the rim. A gallery cut into a wall that is still flaring or still curving inward will not be level, and you will spend the rest of the evening finding out why the lid rocks.
- 8
True and compress the rim, then take the water out
Chamois or a fingertip, wheel slow, until the rim is flat, level and round. Everything in the next section is cut from this rim, so a wandering rim becomes a wandering ledge. Then sponge the water out of the bottom, because you are not going to get another easy chance.
- 1
Open low, set a flat floor, compress it
A jar sits under plastic longer than a mug does, and an uncompressed floor cracks on the drying rack.
- 2
Pull a straight cylinder to full height before you shape anything
Height first, curve second. You cannot pull height out of a belly.
- 3
Belly it out low, then collar the shoulder in to your opening
Widest point about a third of the way up. Collar in small amounts over many passes, pulling the wall gently between them.
- 4
Leave the top half inch about twice as thick as the wall
The one unusual step. You are about to split that rim in two, and two halves of a normal rim are both too thin to use.
- 5
Give it half an inch of straight neck, then true and compress the rim
The gallery is cut from this rim. A wandering rim becomes a wandering ledge and a lid that rocks.
06 · The ledge
Three ways to cut the gallery
Cutting the gallery
All three are done while the pot is still on the wheel, still wet, and still centered. There is no fourth moment. Pick one, get good at it, and only then try the others.
Done on the wheel, wet, centered. There is no second chance at this. Slow the wheel down, wet the rim, and work in small presses.
- Wet the rim and slow the wheel to below throwing speed. Fast enough that the clay comes to your finger, slow enough that you can stop the moment it looks right.
- Rest your index finger on the outside of the rim, thumb inside, and drop the tip of the inside finger straight down into the middle of the rim wall, about an eighth of an inch. It is a press, not a cut. The rim opens into two.
- Press the inner half down and gently outward until it is a level shelf rather than a slope.
- Run a fingertip up the inside of the standing collar to true it. That face is what the lid edge meets.
The two finger split
Start here. Wet the rim, slow the wheel to below throwing speed, and rest your index finger on the outside of the rim with your thumb inside. Drop the tip of the inside finger straight down into the middle of the rim wall, about an eighth of an inch, and let the wheel do the cutting. The rim opens into two.
Then press the inner half down and gently outward until it is a level shelf, and run a fingertip up the inside of the standing collar to true it. Steady hands beat fast hands here. It is a press, not a cut.
The rolled gallery
Bill van Gilder teaches this one and it produces a noticeably stronger seat. Instead of splitting a thick rim, you throw the rim thin, then roll the top of it over and inward onto itself so the ledge is a doubled thickness of clay rather than a thin shelf.
It takes more control and it is worth learning once you have made a few. His video, “How to Throw a Storage Jar with a Rolled van Gilder Style Gallery,” is on our Throwing Lids That Fit page.
The tool cut ledge
A small wooden modeling tool or the flat back of a rib, held against a wet rim at a slow wheel speed, cuts a cleaner and more repeatable step than fingers do. It is also the only practical option on a narrow neck where a finger will not fit.
A tool has no feel. It will happily cut straight through a rim that was thinner than you thought, so check the thickness before you commit.
Then, whichever one you used
- Level the shelf. Look across the rim at eye height with the wheel turning. A gallery that slopes inward drops the lid in too far. A gallery that slopes outward lets the lid creep. You want horizontal.
- True the inside face of the collar. A fingertip or the corner of a small rib, straight up and down. This face is what the lid edge meets, so an uneven one makes a lid that only fits in one orientation.
- Leave it thicker than looks necessary. A gallery is a thin horizontal shelf sticking into open air on a pot that is about to shrink. It is the most crack prone thing on the whole piece.
- Measure now. Calipers across the inside of the collar, at ledge height, before you do anything else. Not after cleaning up, not after taking the pot off the wheel.
- Soften the top outside edge of the collar. One pass with a damp chamois. A sharp collar edge is a chip waiting to happen and it is unpleasant to handle.
If the gallery keeps beating you, there is a way around it. Throw the whole thing as a closed form, let it stiffen, then cut the lid off it with a needle tool while it spins. The two halves are guaranteed to match because they were one pot ten minutes ago. It is a different skill with its own problems, and there is a video for it below.
07 · The number
Measure the collar, not the rim
The whole discipline in one line: measure the surface the lid will actually touch, while the pot is centered and wet, and write the number somewhere that is not your memory.
A caliper is two arms on a pivot. One end reads a diameter and the other end reproduces it. On a gallery jar the diameter you want is not the outside of the pot and it is not the top of the rim. It is the inside face of the collar, taken at the height of the ledge, because that is the circle the lid edge has to slip inside.
- Slow the wheel to a stop. Measuring a spinning rim reads whatever the wobble gives you.
- Open the arms until they just kiss the collar. Not pressing. A caliper pushed into wet clay reads the dent, not the pot.
- Turn the pot a quarter turn and read it again. If the two numbers disagree, the pot is oval and no lid will fix that. Recenter and true the neck now, while it is still possible.
- Write it down. On the bat, on tape, on your arm. Memory holds a diameter for roughly as long as it takes to wedge the next ball.
- Tighten the wing nut and check it again. A caliper that drifted two millimeters is worse than no caliper, because you trust it.
Ignore the advice about throwing the lid bigger for shrinkage. You will read it everywhere. It is wrong, and following it produces lids that rattle. The same clay from the same bag shrinks the same percentage, so a lid that fits the wet pot fits the fired pot. The advice only means anything if you throw the lid days later against a pot that has already dried and shrunk, which is the situation you are avoiding by throwing both in one sitting.
The full caliper method, including what to do when you only own a single ended caliper, is on Throwing Lids That Fit.
08 · The lid
Throw the lid in the same sitting, in seven steps
Throw the lid in the same sitting, in five steps
A drop-in lid for a gallery is thrown right way up, as a very shallow, very wide dish with a short vertical edge. It is closer to throwing a saucer than to throwing anything else, and it takes about four minutes once you have done a few.
- 1
Center the lid ball low and wide
About a quarter of the body's clay, pressed into a flat pad rather than a cone. You want diameter, not height, and starting tall means fighting the clay back down.
- 2
Open it barely at all
Press straight down until the floor is about the thickness of the jar's walls, and no further. This floor is the lid. It does not need depth, it needs to be even.
- 3
Compress that floor like you mean it
A rib, twice, wheel fast. A lid is a flat disc of clay drying on its own, which is the exact recipe for a crack straight through the middle. This is the single most skipped step on the page.
- 4
Open outward toward the calipers, not upward
Push the clay out sideways in small passes, checking against the calipers every few seconds. Let it dome very slightly upward in the middle as it widens. A dead flat lid looks tired and warps more.
- 5
Raise a short vertical edge at the outside
A quarter inch of straight wall at the perimeter, standing up. That edge is what meets the inside face of the collar, and giving it some vertical height is what stops the lid rocking on a gallery that is a fraction off level.
- 6
Stop while the calipers still drag
Pass the arms over the lid with the wheel turning slowly. You want the faintest drag, not free clearance. If they pass over freely, the lid is already too small. Do not try to stretch it. Cut it off and throw another one, it takes four minutes.
- 7
Clean the edge, wire it off flat, set it beside its jar
Chamois the top edge, wire underneath, and lift it onto the same board as the pot it belongs to. From this moment the two pieces travel together and get wrapped together, every time.
- 1
Center about a quarter of the body's clay as a low flat pad
Diameter, not height.
- 2
Press down to a floor the thickness of the jar's walls, then compress it twice
A flat disc drying alone is the classic crack. Do not skip the rib.
- 3
Open outward toward the calipers, doming very slightly
Sideways in small passes, checking every few seconds.
- 4
Raise a quarter inch of straight edge at the perimeter
That vertical face is what meets the collar, and it is what stops the lid rocking.
- 5
Stop while the calipers still drag, wire it off, set it beside its jar
Free clearance means it is already too small. Throw another one. The two pieces now travel and get wrapped together every time.
Small lids are what the hump was invented for. If you are making a set, or the lid is under about eight ounces, throwing them off a hump is faster and wastes less. Our page on throwing off the hump has the method.
09 · The knob
A knob is a handle, and handles get tested
People do not lift a lid delicately. They grab it with wet hands, one handed, while holding a coffee, and they do it several thousand times. Design for that and the knob stops being decoration.
Thrown up from the lid
Leave a lump of clay in the center when you throw the lid and pull it up into a knob right there, wet, in one piece. Nothing to attach and nothing to fall off, which makes it the strongest option by a wide margin.
The cost is that it uses clay you then cannot use for diameter, so weigh out slightly more for the lid if you plan to do this.
Trimmed out of the lid
Throw the lid with an extra thickness in the middle, flip it over at leather hard and trim the knob out of that thickness. This gives you the cleanest shapes and the most control, and it is how most crisp production lids are made.
It also means committing clay before you know what the knob wants to be, and it is the fussiest of the three to trim.
Thrown separately and attached
Throw small knobs off a hump, let them and the lid come to the same leather hard, then score, slip and press one into place. Easiest to get an interesting shape, and easiest to make a set that matches.
It is also a join, which means it is the one that comes off in six months if the scoring was lazy. Our page on scoring and slipping covers doing it properly.
Two tests before you call a knob finished. Can you get a finger underneath it, or is it a smooth dome that a wet hand slides straight off? And is there enough room between the knob and the lid surface for a folded dish towel or an oven mitt? A knob you cannot grip is a lid that gets levered off with a fingernail, and that is how galleries chip.
On steam holes: a lid needs one only if the jar is going to hold something warm, wet or alive, like a fermenting crock or anything that goes in an oven. A sugar jar does not want a hole in the lid. If in doubt, leave it out.
10 · Trimming
Trim the lid on its own jar
This is the part where a nearly right fit becomes a right fit, and it only works if you stop trimming against a number and start trimming against the actual pot.
- Wait until both pieces are the same leather hard. A lid dries faster than a jar because it is smaller and thinner. If the lid is ready and the jar is not, wrap the lid and wait. Trimming a lid to a jar that is still going to shrink is how a good fit turns into a tight one.
- Center the jar on the wheel and use it as the chuck. Lid sitting in its own gallery, wheel slow. Nothing else holds a lid at exactly the right angle, and nothing else lets you test the fit between every pass.
- Take the high spots off first. Spin it by hand and watch where the lid sits proud. Trim those places before you take anything off all the way round.
- Trim the outside edge in small passes, testing between each one. Lift the lid out, drop it back in, feel it. The distance between snug and sloppy is about one pass wide, and you cannot put clay back.
- Aim for a lid you can lift out with one finger. Not a lid you have to wiggle. Clay moves in the bisque and again in the glaze firing, and a fit that is perfect now will be tight later.
- Finish the underside while you are here. Smooth the ring of clay that sits on the gallery. Any ridge on that surface is a ridge that rocks, and it is also a surface that has to stay bare through glazing.
- Mark both pieces before they leave the wheel. A small notch, a dot of underglaze, anything. Most lids have a best orientation, and that information vanishes the moment both pieces are dry and gray. If you made more than one jar, mark which lid belongs to which pot too.
How much play to leave. About the thickness of a business card all the way round, wet. It will feel like too much and it is not. That gap is what absorbs the small oval that every pot picks up in the bisque, and a lid that spins freely in its gallery is a lid that still fits after two firings.
The full trimming method, chucks included, is on trimming and turning.
11 · Drying and bisque
The ten days where most lids die
One rule covers most of it: the two pieces dry together, wrapped together, with the lid sitting in the gallery. Two pieces drying apart become two pieces that shrink apart.
Nothing about the fit is settled when you wire the lid off. It is settled somewhere in the following week and a half, on a shelf, with nobody watching.
- Wrap them as one piece. Lid in the gallery, both under the same plastic. The lid slows the jar's neck down and the jar slows the lid down, and they arrive at leather hard together.
- Lift the lid once a day and put it back. Ten seconds. It stops the two surfaces bonding to each other while the clay is soft, and it tells you how the drying is going.
- Dry the last stage lid on, slowly, out of a draft. A gallery is a thin shelf and a lid is a flat disc, which are the two most crack prone shapes in the studio. Neither of them wants a fan or a sunny window.
- Bisque it lid on. Both pieces go into the bisque assembled, so they move together. Bisque here is cone 05, and bisque firings are free.
- Check the fit the moment it comes out of the bisque. This is your last easy chance to sand a high spot on the lid edge, and it is a wet job: wet sandpaper or a damp sanding sponge, with safety glasses and an N95 or better, never dry, because dry sanding bisque puts silica dust in the air. After glaze it is a wet diamond pad and a bad afternoon.
- Keep the pair together the whole time. Once forty jars are on the bisque shelf, a lid with no jar is a lid nobody can place. The mark you made at trimming is doing the work here.
12 · Glaze
Glaze is glass, and glass welds
Drying, bisque, and not welding it shut
You can do everything else on this page perfectly and still open the kiln to a jar with a lid fused into it. It is the most common way a good gallery jar is lost, and it is entirely preventable.
- Dry them wrapped together, lid in the gallery. Lift the lid once a day so the surfaces do not bond. Two pieces drying apart shrink apart.
- Bisque it lid on, then check the fit the moment it comes out. Bisque firings here are free.
- Two surfaces stay completely bare: the top of the gallery, and the ring on the underside of the lid that lands on it. No glaze, no underglaze, nothing.
- Wax resist or a clean wipe, then check by eye. Wax those two surfaces before you glaze, or glaze normally and wipe them back to bare bisque with a damp sponge afterward. Then hold it up to the light and look, because a wipe that missed a millimeter is a weld.
- Wipe further than you think. Glaze moves when it melts. Leaving a clean margin just past the contact surfaces costs nothing and covers the glaze that runs.
- Fire it with the lid on. Both pieces soften and move at temperature, and firing them assembled means they move together and land fitting. Firing a lid separately is how a lid comes out slightly oval against a jar that went slightly oval the other way. Put a kiln cookie or glaze catcher under the pair, every time, with no exceptions.
- Be careful with the runners. A glaze that moves is a glaze that will find the gallery from an inch above it. If you are using something lively on the outside, keep it well up the shoulder or accept the risk.
- Glaze the inside of both pieces. A jar that holds food wants a glazed interior, lid included, right up to the bare ring. The interior of a lid is easy to forget because it is facing away from you. If the jar will hold food, the glaze matters as much as the glazing: use one its maker rates for ware that holds food. Our food safe glaze lookup says which ones are.
Glaze here fires to cone 5½, which is cone 5 with a twelve minute hold. At that temperature glaze is fully molten glass, and two bare clay surfaces touching are fine while two glazed ones are permanently one object. Price the glaze firing with the firing calculators, and if you are not sure how to measure a two piece form, ask at the front desk before you fill in the kiln ticket.
If it does come out fused, do not force it. There is a page on fixing fused and sharp pottery, and the front desk has seen it many times.
13 · Watch
Six potters, six ways into the same pot
Two videos, then go and make one
None of these are ours, and that is the point. Grouped by what they teach rather than by who made them, so you can watch the one covering the part you are least sure about. Nothing loads until you tap it.
Between them these two cover the whole method. Watch one, then come back to the plan. Nothing loads until you tap it.
Start here
Making a Pottery Wheel Thrown Jar: Lid and Body (Part 1)
Florian Gadsby
The body and the lid in one continuous sitting, which is the order that matters, with a chapter marker for the gallery and one for the lid. Start with this one.
Watch it on YouTubeThe gallery itself
Throwing lids and pots with galleries
John Hasegawa Ceramics
A long demonstration of throwing pots and lids with galleries, starting from preparing the clay. Worth keeping open if your galleries keep coming out sloped or too shallow.
Watch it on YouTubeA whole class
Complete Guide to Throw a Lidded Jar with Hsin-Chuen Lin, PAAC class demo
Hsinchuen Lin
A full class demonstration, the longest of the six, and worth the time on an evening you are not throwing.
Watch it on YouTubeWhen yours keep failing
5 Pro tips for mastering lidded jars
Earth Nation Ceramics
Short, blunt and aimed at the specific things that go wrong rather than at the whole build. Best watched after your first jar rather than before it, when you know which of the five you needed. Whatever any video shows, we sand and grind wet here, never dry.
Watch it on YouTubeThe closed form route
How to throw and trim a closed form with a gallery
Michelle Wen
The other way to arrive at a gallery: a closed form lidded jar thrown in porcelain, about three minutes long, with a gallery the lid sits on. Different skill, different problems, genuinely worth knowing.
Watch it on YouTubeProduction speed
Making a clay pottery storage jar with lid on a potters wheel
Ingleton Pottery
A short demonstration, about six minutes, of a storage jar and its lid on the wheel. Useful once you know the steps, because it is quick enough to watch through twice.
Watch it on YouTube14 · Troubleshooting
Nine ways a gallery jar goes wrong
The three that get you on night one
Every one of these has happened here, most of them more than once. Three of them happen on the first attempt and the rest turn up later, which is why they are worth reading before you need them.
There was nothing to split. The rim was already too thin.
The most common first attempt failure by a distance, and it is decided several minutes before you notice it. Pulling a wall evenly all the way to the top is a good habit everywhere else on the wheel and it is exactly wrong here.
There is no fix on this pot. Either finish it as a vase, or add a coil to the rim, weld it in and rethrow the top, which works and looks like what it is. Next time, stop the last pull a half inch short and leave that clay behind.
The lid rocks.
Almost always the gallery rather than the lid. A ledge that slopes even slightly lets the lid find its own resting place, and it finds a different one every time you put it down.
If the pot is still wet, true the ledge with a fingertip while it turns and check it at eye level. If it is leather hard, trim the underside of the lid flat instead, sitting in its own jar. If it is bisqued, wet sandpaper on the lid edge and low expectations. Sand it wet, with safety glasses and an N95 or better, never dry.
It came out of the glaze firing fused shut.
Glaze got onto one of the two contact surfaces, or ran down onto one from above, and at cone 5½ it became glass between two pieces of clay. This is not a firing problem, it is a wiping problem, and it happens to careful people.
Do not force it or hit it. Take it to the front desk and read fixing fused and sharp pottery first. Sometimes it comes apart. Sometimes it is a very nice vase now.
The gallery cracked off while it dried.
A thin shelf of clay sticking into open air on the fastest drying part of the pot. It was either too thin, or it dried faster than the wall it was attached to, or both.
Leave the ledge thicker than looks right, dry the pot lid on and wrapped, and keep it away from drafts and sunny windows. If it has already cracked at leather hard, score, slip and press a thin coil in, but be honest with yourself about how it will look.
The neck twisted while I was collaring in.
Too much squeeze in too few passes, usually with the wheel too fast. The clay has nowhere to go but around, and once a neck has twisted it will keep twisting in the same place.
Slow the wheel, take less each pass, and pull the wall up gently between passes so the thickening clay gets somewhere to go. There is more on this on avoiding the twist and on collaring in.
The lid is too small and I want to save it.
You cannot. Clay does not stretch back and a lid that drops through its gallery is finished as a lid for that pot. It is the single most reliable four minutes you will ever save by starting again.
Keep it. Small orphan lids become knobs, test tiles, or the right lid for the next jar, and this is exactly why we suggest throwing a spare when you make something you care about.
It fitted perfectly wet and now it does not.
The pieces dried at different rates. A lid is small, thin and exposed on all sides, so it stiffens well ahead of a jar with a thick base, and for a while it has shrunk further than the pot has, so it looks loose until the jar catches up.
The fix is the whole reason we keep saying wrap them together. Lid in the gallery, one bag over both, lifted once a day. If it has already happened and both are still leather hard, do not trim the lid. Wrap the pair together and let the jar catch up before you test the fit again.
The lid went oval.
Usually handling. A lid at soft leather hard picked up by its edge with two fingers is a lid that arrives at the shelf slightly egg shaped, and it will fire that way.
Lift a wet lid flat, from underneath, on a bat or your open palm. If it has gone oval and is still soft, put it back on the wheel, center it and true the edge. If it is dry, check whether it still goes in one way round and mark that orientation.
I cannot tell which lid belongs to which jar.
Four jars from the same session, four lids, all gray, all on the same shelf. Every one of them nearly fits every one of them, which is worse than none of them fitting.
Mark both pieces at trimming, every time, with something that survives a bisque: a notch, a stamp, a dot of underglaze. Right now, sit down with all of them and find the best pairing by feel, then mark them before you stand up.
15 · The plan
The plan to keep open on your phone
A gallery jar is three visits, not one. Tap an item to tick it off. It remembers where you got to, so you can put the phone down, wash your hands, and come back to the same place next week.
At the wheel, one sitting
Both pieces get made today or neither does. This is the rule the whole method hangs on.
A day or two later, at leather hard
Only when both pieces are at the same leather hard. If the lid got there first, wrap it and wait.
Out of the bisque, ready to glaze
This is the session where the piece is most often lost, and it is the shortest one.
16 · Questions
Things members ask about gallery jars
If yours is not here, ask at the front desk. Somebody has made the same mistake and will be pleased to tell you about it.
Nothing here is a rule. These are the answers we give at the front desk, which means they are shaped by what actually goes wrong in this building rather than by what ought to.
Is a gallery jar too hard for a beginner?
No, but it is the first thing you will make where a mistake in minute four cannot be fixed in minute twenty. That is genuinely a new experience and it is worth expecting.
If you can throw a cylinder, belly it out and collar the top in, you have the hands for it. What most people are missing is the order, which is what this page is for. Plan on the first two being practice.
Can I throw the lid on a different day?
You can, and it is harder for a reason that has nothing to do with skill. The jar starts shrinking the moment you finish it, so the number on your calipers is describing a pot that no longer exists by the time you come back.
If you have to, wrap the jar tightly so it barely dries, throw the lid as early as you can, and measure the jar again on the day rather than trusting the old number.
How deep should the gallery actually be?
About an eighth of an inch down from the top of the collar is a good default, with the ledge itself around the same width. Deeper than a quarter inch and the lid is sunk in a well and hard to get a finger to. Shallower than an eighth and the collar is not tall enough to stop the lid sliding.
The number matters less than the ledge being level and the collar being even.
Should I throw a spare lid?
For anything you care about, yes. A lid is four minutes of clay and it is the part most likely to crack, warp or get knocked off a shelf. Throwing two costs you almost nothing and it is much cheaper than throwing a whole second jar later.
Trim both to the same pot. The spare either becomes the lid or it becomes a very good test tile.
Which clay body is easiest for this?
A smooth mid range stoneware with a little tooth. Enough grog to hold a thin gallery without slumping, smooth enough to true a collar cleanly. Very smooth porcelain is beautiful here and much less forgiving, and a heavily grogged sculpture body will tear the ledge as you press it.
The studio stocks eight clay bodies and the front desk will point you at a good starting one for your level.
My first few were all failures. Is that normal?
Completely. Ask anybody teaching here about their early lids and watch them wince. The reason lidded pots are treated as an intermediate form is not that the throwing is harder, it is that two pieces have to agree with each other across ten days and several changes of state.
What shortens the learning is making several in one sitting rather than one at a time, because five galleries in an evening teaches your hands what one gallery a month never will.
One more thing
A lidded jar is the first pot that has to agree with something
Go and throw one. Then throw four more.
Everything up to this point in your throwing answered only to you. A mug is finished when you decide it is. A bowl is whatever width you left it. A gallery jar is the first thing you make that has to match another object exactly, ten days from now, after both of them have changed size twice.
That is why it feels disproportionately hard, and why the first few are usually bad. It is not the throwing. It is that you are now planning across sessions instead of across minutes, and nobody teaches that part because it does not look like anything.
So make several. Throw three jars and five lids in one evening, mark them all, and accept in advance that some of them are practice. The fifth gallery you cut will be better than the first one by a distance that will surprise you, and it will have cost you one session.
Then bring it to the front desk when it comes out of the kiln. We would like to see it, and we would like to hear which part went wrong, because that is how this page gets better.
Throw three jars and five lids in one evening and accept that some of them are practice. The fifth gallery you cut will be better than the first by a distance that will surprise you, and it will have cost you one session.
There is a much longer version of this page with the reasoning, the shapes, the knob options and nine ways it goes wrong. Switch to the Comprehensive Version at the top whenever you want it.
Which version would you like to print?
Videos come out as a labeled box with the title and channel to search for, since paper does not play them.