Pottery Date Night
 Bring All Your Friends Free Week
 Give a Month of Pottery
 Private Pottery Parties

 The Welcome Booklet
 Your First Ten Sessions
 The Pottery Process
 Finding the Studio
 Your Classes Never Expire
 The Four Tables
 Who’s Who
 The Rewards Program
 Flux Glazes
 The Calculators
 Kiln Tracker
 Holiday Kiln Deadlines

 Beginner’s Tool Set
 Fingernail Clippers
 Mayco Clay Mender
 Epoxy for Kintsugi
 Applicator Bottles
 Large Bead Rack
 Raku Workshop
 Nighttime Raku
 Horsehair and Feather Raku
 The Clay Hole T-Shirt
 Embroidered Crewneck
 Zip-Up Hoodie
 Pre-Made Bisqueware
 Glaze Catchers
 Kiln Cookies
 Clay Cubby Rental
 The Glaze Bible, Printed
 The Book of Molds, Printed
 Printable Pottery Guides
 Free Printable Trackers
 Gifts for Potters
 Christmas Pottery Ideas
 Mother’s Day Gift Ideas
 Pottery Date Night
 Studio Calendar
 2027 Studio Events
 What Should I Do Today?
 How to Throw on the Pottery Wheel
 How to Make a Pinch Pot
 How to Tap Center a Pot
 The Five Stages of Clay
 Is Pottery Hard to Learn?
 Pottery Wheel Practice Drills
 20 Easy Hand-Building Projects
 Everything That Sounds Wrong

 A Beautiful Piece, Every Time
 Slab Roller Tips
 Any Dish as a Slump Mold
 Slab Roller & Slab Mold Certification
 The Pottery Skill Tree
 Clay & Pottery Calculators
 Logging Your Pottery and Glazes
 The Pottery Dictionary
 Why Did My Pottery Do That?
 The Pottery Cone Chart
 Pottery Myths, Fact-Checked
 Is Handmade Pottery Food Safe?
 Incredible Ceramic Artist Videos
 How Dan Throws Giant Pots
 How to Dry Your Pottery
 The Pottery Wheel Introduction
 Pottery by Zodiac Sign
 Personality and the Pottery Wheel
 Pottery for Engineers
 ADHD, Hyperfocus, and Never Running Out
 Hobbies for Burnout
 Screen-Free Hobbies for Adults
 Every Addiction I Ever Had Lost to Art
 Functional Pottery Is Engineering
 How Do We Compare?
 Pottery Classes by City
 Every Pottery Studio in Utah
 Pottery in Draper
 Featured Members
 The Signature Wall
 Making Friends as an Adult Is Brutal
 The Clay Hole Commandments
 2027 Pottery Contests
 2027 Studio Parties
 Gallery Night

 Scream It Into the Void
 Destroy the Glaze Wall
 Daily Affirmation Cards
 Everything That Can Go Wrong
 Subscribe to Our Newsletters
 Contact The Clay Hole
 Corporate Team Building

 Glaze Combinations
 Glazes We Do Not Carry
 Making Glaze Test Tiles
 The Mega Glaze Tool
 How to Use the Mega Glaze Tool

 Glaze Brushing Techniques
 How to Use Underglaze
 How to Use Dipping Glazes
 Glaze Problems, Causes and Fixes
 The Dipping Glaze Guide

 Making a Glaze Catcher
 Fused or Sharp After Firing
 The Signature Wall
 His Viral Videos
 His Own Ceramics
 Meet Mud
Wheel technique
Throwing Lids That Fit
A lid is the only part of a pot that has to agree with another part of a pot. That is the entire difficulty, and it is also the entire solution. Two numbers have to match. Everything below is about getting them to match.
Jump to a section
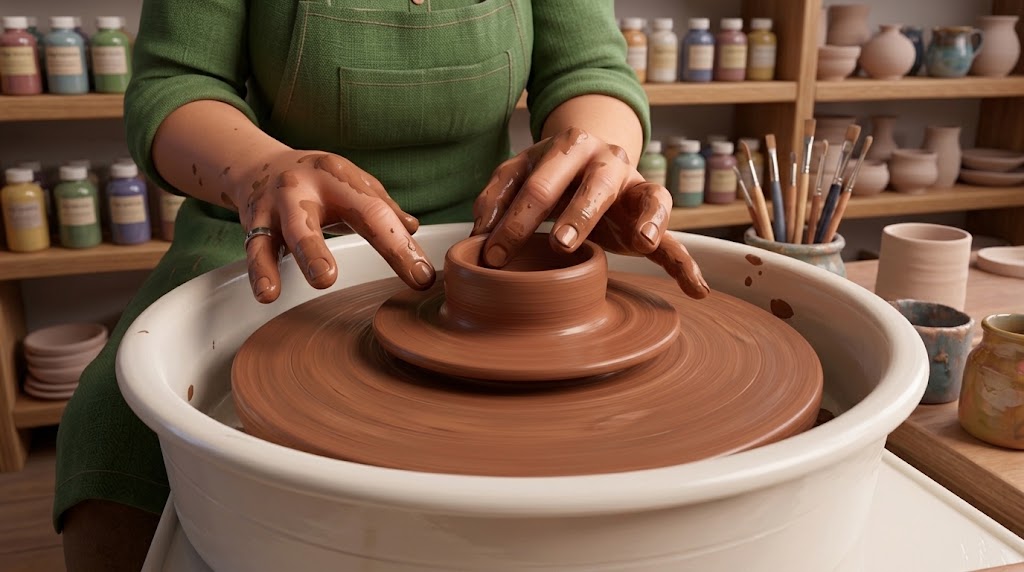
The lid is the small part. The measuring is the big part.
The short version
A lid is two measurements that have to agree
One question decides everything else
Does the lid drop into the pot, or sit over the top of it? Answer that before you touch clay. A drop-in lid needs a ledge cut inside the rim and a lid measured to the inside. A lid that sits over needs no ledge. A cap lid is measured to the outside of the neck, and an overhanging lid has a flange measured to the inside of the mouth. Most lids that do not fit were measured against the wrong surface, or made at a different wetness from the pot.
Throw the pot first and finish its rim, because the pot is the thing the lid has to obey. While it is still spinning, press a small ledge into the inside of the rim for the lid to sit on. Then set your calipers to that ledge, tighten the screw, and take the pot off.
Throw the lid straight away, from the same clay, in the same session. That timing is not a nicety. Clay shrinks by a tenth to a seventh on its way to a finished pot, and two pieces only shrink into each other if they start at the same wetness. Bring the lid out to the calipers a hair generous, never a hair snug, because you can trim clay away and you cannot put it back.
Let the lid stiffen next to its pot under the same plastic. Trim it sitting on the pot rather than against a number. Bisque it in place. Then wax or wipe both surfaces that touch before the glaze firing, or the two become one object forever.
That is the whole method. The rest of this page is the same method with the reasons attached, plus the other two kinds of lid, and every way we have watched this go wrong.
01 · The one idea
You are not making a lid. You are making a pair.
The pair rule
Same clay body. Same bag if you can manage it. Same session. Same drying shelf, under the same plastic, for the whole time they are stiffening. Break any one of those and the fit becomes luck.
Every other pot you throw is judged against your own eye. A lid is judged against a hole. That is a harder standard, and it is also a fairer one, because the hole cannot be argued with and it will tell you the truth immediately.
This is why lids feel disproportionately hard when everything else is going fine. Nothing about throwing a small shallow disc is difficult. Throwing a small shallow disc to a number you took off something else, twenty minutes ago, in wet clay, is a different job, and it is a job most people have never done before.
Once you see it as a pair, the odd rules stop being odd. Why the same clay? Because our clay bodies shrink anywhere from ten percent to about fourteen, depending on the body, so a lid thrown from a different body can be perfectly measured and still miss, and even two bags of the same body can shrink slightly differently. Why the same session? Because a pot that has been sitting for an hour has already given up water, so its measurement is a smaller number than the one your fresh lid is going to shrink from. Why the same shelf? Because two pieces drying at different speeds warp at different speeds.
None of that is fussiness. It is the same idea stated four ways: make both halves live the same life. If you want the numbers behind the shrinkage, the clay and pottery calculators carry the real figure for every body we stock.
02 · Why this page reads like this
A camera cannot show you a number
There are thousands of lid videos and we have linked seven of the best ones further down. So it is fair to ask why anybody would read a page about it as well.
Because the two do different jobs, and lids are the clearest case of it we know.
What the video does better
Hands. Where the fingers brace, how fast the wheel is really going, how much pressure makes a ledge instead of a dent, and the moment a lid comes off a hump cleanly. Nobody has ever written a sentence that teaches those.
What the page does better
The number. The measurement lives on a caliper the lens never reads, and the potter on screen already knows it. You watch them set it, you do not learn what it was, and the next hour of your life depends on it.
There is a second thing text is better at, and it is the boring one: waiting. A video plays at its speed. A page sits still while your hands are covered in slip and comes back exactly where you left it. That is the difference between learning something and being shown something.
The part that actually convinced us
Watching a good potter seat a lid is a persuasive experience and a slightly dishonest one. You are watching somebody who has made a thousand of them, edited, at speed, with the four minutes of measuring cut out because measuring is not interesting to film. You come away sure you understood it. Then you sit at a wheel and find out that what you retained was a feeling rather than an order of operations.
Reading the order once, before or after, is what turns the feeling into something your hands can follow. So this page is written to be read at the wheel, in short lists, on a phone. Every video on it earns its place by showing something the words cannot.
Read it through once. Watch one or two of the videos. Then keep the checklist open while you work.
03 · The three families
Every lid on earth is one of three things
The names vary from studio to studio. The geometry does not. Once you can name which family you are making, you know which surface to measure and which surface to trim, and that is most of the battle.

- The gallery. A narrow ledge pressed into the inside of the rim while the pot is still spinning. This is the surface the lid sits on, and the surface you measure.
- The collar. The outer half of the rim, left standing above the gallery. It stops the lid sliding sideways. Leave it too short and the lid skates off the pot.
- The overhang. On a lid that sits over the rim, the disc is wider than the pot and the edge hangs past it. Measure the outside of the rim for this one.
- The flange. A ring on the underside of that lid, dropping down into the mouth to keep it from sliding. The flange, not the disc, is what has to fit.
- The neck, under a cap. A cap is an upside-down cup that swallows the top of the pot, so the pot needs a plain neck and no ledge at all.
- The skirt. The cap wall that grips the outside of the neck. Its inside diameter is your number, and it is the only family where you measure an inside against an outside.
| Family | What you measure | What it forgives | Where it bites |
|---|---|---|---|
| Drop-in | The gallery, inside to inside | Very little. It is the least forgiving of the three, which is why it is the one worth learning first | A gallery cut too thin cracks off in the drying, taking the fit with it |
| Overhanging | The mouth, for the flange. The outside of the rim, for the overhang | A lot. The overhang hides a few millimeters of error all the way round | A shallow flange lets the lid walk. Deep enough to hold, shallow enough to lift out |
| Cap | The skirt, inside diameter | Most of all, until it is too loose, and then it is comically loose | Nothing stops it turning, so any decoration that has to line up will not |
If you are choosing right now, choose drop-in
Not because it is easier. It is not. But it is the family that teaches you to measure, and measuring is the skill that makes the other two trivial. Learn it on a small jar where a failure costs you fifteen minutes rather than an afternoon.
04 · The tool
The caliper is the whole trick
A caliper is two arms on a pivot. One end reads a diameter, the other end reproduces it. That is all it does, and it is the difference between a lid that fits and a lid you keep on a shelf as a reminder.
How to take the measurement
- Slow the wheel to a stop, or nearly. Measuring a spinning rim reads whatever the wobble gives you.
- Open the arms until they just kiss the two sides of the seat. Not pressing. Kissing. A caliper pushed into wet clay reads the dent, not the pot.
- Measure the surface the lid will actually touch. On a drop-in that is the gallery, inside face to inside face, not the outer rim.
- Tighten the screw and then check it again. Wing nuts drift, and a caliper that drifted two millimeters is worse than no caliper because you trust it.
- Turn the pot a quarter turn and measure again. If the two readings disagree, the pot is oval and no lid is going to fix that. Recenter and true the rim now.
- Write the number down. On the bat, on tape, on your hand. Memory holds a diameter for about as long as it takes to wedge the next ball.
How to use it on the lid
- Flip the caliper. Most have a matched pair of ends, so the reading you took inside the pot comes back out as an outside measurement for the lid.
- Bring the lid out toward the arms while the wheel is turning slowly, checking every few seconds.
- Stop when the arms pass over the lid with the faintest drag. That drag is your tolerance.
- If it passes over freely, the lid is already too small. Do not try to stretch it. Start the lid again, it takes four minutes.
- If a single-ended caliper is all you have, measure the pot, hold the setting, and check the lid against the same two points. It works, it is just slower and easier to knock out of true.
Ignore the advice about throwing lids bigger for shrinkage
Same clay shrinks the same percentage, so a lid that fits the wet pot fits the fired pot. The real rule is to measure and throw at the same wetness.
The shrinkage advice you will hear, and why it is only half right
People will tell you to throw the lid five or ten percent bigger than the pot to allow for shrinkage. Said that way it is wrong, and following it produces lids that rattle. Both pieces are the same clay, so both shrink by the same percentage, and a lid that fits the wet pot fits the fired pot.
The advice exists because of a real trap underneath it. If you measure a pot that has already stiffened for an hour and then throw a fresh wet lid to that reading, the lid has more water left to lose and will finish smaller than the hole. So the rule is not add a percentage. The rule is measure and throw at the same wetness. If you genuinely have to throw a lid for a pot that has already dried, then yes, go generous, and expect to trim.
05 · The seat
Cutting a ledge the lid can actually sit on
The gallery is made on the pot, near the end of throwing it, before the rim has stiffened at all. It is the step most people skip and then wonder why the lid has nowhere to go.
-
Finish the wall and the rim first
Compress the rim properly and get it true and level while you still have plenty of water. Everything you do next depends on a rim that is round and flat, because the gallery is cut from it. If the rim is wandering, the ledge will wander with it.
-
Leave the rim thicker than you normally would
You are about to split it in two lengthwise. A rim thrown at the usual thickness gives you two halves that are each too thin to be anything. Aim for something close to twice a normal wall at the top, and only there.
-
Wet the rim and slow the wheel
Slower than throwing speed, faster than trimming. Fast enough that the clay comes to the tool rather than the tool chasing the clay, slow enough that you can stop the moment it looks right.
-
Split the rim with two fingers
Index finger outside, thumb inside, and drop the tip of one finger straight down into the middle of the rim wall. The rim opens into an outer collar and an inner shelf. Go down a few millimeters, no more. This is a press, not a cut.
-
Push the inner half down and outward
The inner half becomes the ledge. Press it down until it is level and push it slightly outward so it is a true horizontal shelf rather than a slope. A sloping gallery lets the lid find its own resting place, which is a polite way of saying the lid rocks.
-
True the collar
Run a finger or a small rib up the inside of the standing collar so it is vertical and even. That inside face is what the edge of the lid will meet, so a lumpy collar becomes a lid that only goes in one way round.
-
Measure before you do anything else
Calipers across the inside of the collar, at the ledge. Not later, not after you have cleaned up, not after you have taken the pot off the wheel. Right now, while the pot is centered and the number is real.
-
Leave it thicker than looks necessary
A gallery is a thin horizontal shelf sticking into the air on a pot that is about to shrink. It is the single most crack-prone thing on the whole piece. If it looks delicate on the wheel it will be broken by Thursday.
The alternative, if the gallery keeps beating you
Put the ledge on the lid instead of the pot. A flange thrown onto the underside of an overhanging lid does exactly the same job and is cut in open air where you can see it, rather than inside a mouth you are peering into. Plenty of very good potters never make a gallery at all. See cap lids and dome lids below.
06 · The lid itself
Throwing a drop-in lid, in ten steps
Throwing a drop-in lid, in six steps
Thrown right side up, from a small ball, as a shallow flat disc with a raised edge. It is the simplest form on this page and the one people overthink the most.
Thrown right side up, from a small ball, straight after the pot, with the calipers already set.
-
Take about a quarter of what the pot took
For a jar thrown from a pound, four ounces is plenty. Too much clay is the beginner error here, and it produces a lid that weighs more than the pot it is closing.
-
Center it low and wide
Not a cone. A flat pad, no taller than it needs to be. You are making a disc, so start with a disc. Centering a small ball is fiddly precisely because it is small, so take the extra thirty seconds.
-
Open it barely at all
Press down in the middle to a floor about as thick as the pot walls and stop. A drop-in lid is nearly flat. If you find yourself making a bowl, you are making the wrong family of lid.
-
Compress the floor properly
A rib or the flat of your fingers, from the center outward, three or four passes. A lid is a wide thin disc, which is the exact shape that cracks across the middle in the drying if the floor was never compressed.
-
Open outward, not upward
Widen the floor toward your caliper measurement. There is almost no wall to pull here. You are stretching a pancake, not raising a cylinder.
-
Raise a short edge
A few millimeters of vertical wall at the outside. This is what meets the inside of the collar and it is the surface that decides whether the lid drops in or sits proud.
-
Check the calipers, early and often
Stop and measure while there is still clay to move. Checking once at the end means finding out you overshot when overshooting is no longer fixable.
-
Finish generous
Leave the lid so the caliper arms drag very slightly as they pass. Trimming takes a minute. Being two millimeters small takes another four ounces of clay and a fresh start.
-
Compress and clean the top edge
Chamois or a wet finger, once round. That edge will be handled every day for the life of the pot, and a sharp fired rim on a lid is the thing people notice first.
-
Wire it off flat and set it beside its pot
Same board, same plastic. Do not put it on a different shelf because there was room. From this moment the two pieces need identical weather.
-
Center a small pad, about a quarter of the pot’s clay
Flat and wide, not a cone. You are making a disc, so start with one.
-
Press down to a floor the thickness of your walls, then compress it
Three or four passes, from the center out, with a rib or the flat of your fingers. A wide thin disc cracks across the middle if you skip this.
-
Open outward toward the caliper, not upward
There is almost no wall here. You are stretching a pancake.
-
Raise a short vertical edge at the outside
A few millimeters. This is the surface that meets the inside of the collar and decides the fit.
-
Stop when the caliper arms drag very slightly
Generous, never snug. Check early and often, while there is still clay to move.
-
Clean the edge, wire it off flat, and set it beside its pot
Same board, same plastic, from now until the bisque.
The knob comes later, and it is not optional to think about
You can pull a small knob out of the middle of the lid now, or add one when you trim, or throw one separately and attach it. Whichever you pick, keep it small, or keep it hollow with a small vent hole poked through before it dries. A solid lump of clay on top of a thin disc dries at a different rate to everything under it, and that argument ends in a crack.
Pull it now, add it at trimming, or throw it separately. Whichever you pick, keep it small, or keep it hollow with a small vent hole poked through before it dries, because a solid lump on a thin disc cracks.
If the knob is going to be a handle somebody lifts a hot casserole with, make it big enough for two fingers to get under. Test that with your actual fingers before it dries, not with your judgment.
07 · The other two families
Lids that sit over the top
Both of these are thrown upside down, as a shallow bowl, and then flipped. That single fact confuses more people than anything else about lids: the shape you are looking at on the wheel is the shape you will see from underneath.
The overhanging lid, with a flange
Throw a shallow bowl slightly wider than the outside of the pot’s rim. While it is still on the wheel, raise a low ring on what is currently the inside of the bowl, set in from the edge by the thickness of the pot wall. Flipped over, that ring becomes the flange that drops into the mouth and the bowl becomes a domed lid with an overhang.
The number that matters
The flange, not the disc. Measure the inside of the pot’s mouth and set the outside of the ring to it. The overhang can be as generous as you like, because it is decoration. The flange has one job and one tolerance.
The cap lid
Throw a shallow bowl with a genuine wall, deep enough that it can swallow the top of the pot when it is flipped. The inside diameter of that wall is your measurement, and it goes against the outside of the pot’s neck. It is the only family where you measure an outside with a caliper set from an inside, so it is the one where people most often read the wrong pair of arms.
What it costs you
Nothing stops a cap turning. If you have carved, sprigged or painted anything on the lid that is supposed to line up with the pot, it will only line up while somebody is holding it.
Both of these want trimming, and they want a chuck
A lid thrown upside down has a domed top that will not sit flat on the wheel head for trimming. The pot it belongs to is the best chuck you own. Center the pot, sit the lid on it the right way up, and trim the top. Everything is already exactly the size it needs to be, because you are trimming against the actual object.
08 · Doing several
Lids are what the hump was invented for
Why it suits lids specifically
A lid is small, shallow, and needs its underside finished. All three of those are the exact case where centering a fresh ball costs more time than the lid does. Set the calipers once and make five without ever stopping the wheel.
Put eight to ten pounds on the wheel head, center only the top two inches of it, and throw the lid out of that. Wire it off, true the top of the hump again, and the next lid comes off the same lump.
Two things change when you work this way. The first is that the lid is not sitting on a flat bat, so its underside is whatever profile you cut with the wire, and a slight undercut there is free. The second is that a hump gets shorter as you work, which means the last lid of the batch is being thrown at a different height, on a slightly different diameter of clay, with tireder arms. Check the calipers on every single one. The one you throw without checking is the one that does not fit.
If throwing off a hump is new to you, read how to throw off the hump first, because the wiring-off technique is the part that takes practice and it is easier to learn on something that does not have to match anything.
One warning worth having in advance. Making six lids is fast and satisfying, so people make six lids and two pots. Every lid is measured to one specific pot. A tray of unmarked lids that all look identical and fit nothing is a genuinely common way to lose an evening. Scratch a mark into each lid and the same mark into the foot of its pot before either one leaves the wheel.
09 · Leather hard
Trim the lid on the pot, not against a number
This is the step that rescues a fit, and it is the reason to throw generous. A lid that is slightly too big at leather hard is a lid that fits. A lid that is slightly too small at leather hard is clay.
-
Wait until both pieces are the same leather hard
Firm enough to hold a shape under light pressure, soft enough that a trimming tool takes a curl rather than dust. If one is stiffer than the other, they were not stored together, and this is where you find out.
-
Center the pot on the wheel and use it as the chuck
Secure it with three coils of clay against the outside if it is at all tall. Then sit the lid on it and turn the wheel by hand. Any rocking or eccentricity is now visible instead of theoretical.
-
Take the high spots off first
If the lid rocks, one point on its underside is proud. Mark that point, lift the lid, and shave it rather than trimming the whole edge. Trimming all the way round to fix one bump is how a good lid becomes a loose lid.
-
Trim the edge in small passes, testing between each one
Two or three light passes, then set it back on the pot. The temptation is to keep going while the tool is in your hand. Resist it, because the gap between snug and sloppy is about one pass wide.
-
Aim for a lid you can lift out with one finger
Snug is not tight. A lid that has to be levered out with a fingernail while the clay is soft will be a lid that has to be levered out with a screwdriver after glaze goes anywhere near it.
-
Finish the underside while you are here
The edge that meets the gallery is a contact surface for the life of the pot. Smooth it with a rib or a damp sponge, take the burr off, and make sure it is a genuine flat rather than a rounded lump. Round contact surfaces are what make a lid rock.
-
Mark both pieces before they leave the wheel
A dot on the lid and a dot on the rim, lining up. Lids are almost never perfectly round, so most of them fit best one way round, and that orientation is invisible once everything is dry and gray.
How much play to leave
Leave the lid loose enough to move a little in the seat. Two things are going to eat that gap later: any warping in the bisque, and whatever thickness the glaze adds if it gets anywhere near the contact surfaces. A lid that is a perfect friction fit at leather hard is a lid that will not go on afterward.
If trimming generally is the part you find hardest, the trimming and turning guide covers tools, timing and chucks in detail.
10 · Drying and firing
The two places a good fit still dies
You can do everything above correctly and still open the kiln to a lid that does not move. Both remaining failures happen after the throwing is finished, and both are entirely preventable.
Drying and the bisque
- Dry the pieces together, under the same plastic, on the same shelf, for the whole time.
- Dry them with the lid on the pot. Pots go slightly out of round as they dry, and a lid sitting in place goes out of round in the same direction.
- Lift the lid every day or so and set it back down. It keeps the contact surfaces from bonding while the clay is still soft.
- If the lid is drying visibly faster than the pot, which it will because it is thinner, wrap the lid more heavily rather than uncovering the pot.
- Bisque it in place too. We bisque to cone 05, and a lid that rode through the bisque on its own pot comes out matched.
The glaze firing
- Glaze is glass. Any of it left where the two pieces touch will weld them together permanently.
- Keep the gallery and the underside edge of the lid completely bare, or brush wax resist onto both before you glaze.
- Wipe the contact surfaces again after glazing, even if you waxed them. A single bead of glaze sitting on wax is enough.
- Fire the lid on the pot so the pair warps together, with the whole pair on a kiln cookie or glaze catcher. Our glaze firings go to cone 5½, and pots genuinely do move at that temperature.
- Be careful with a runny glaze on the inside of the collar. It does not have to be on the contact surface to run down onto it.
If it does come out fused
It is sometimes recoverable and sometimes not, and forcing it is how a fused lid becomes a broken pot. Fixing fused and sharp pottery after a glaze firing walks through what is worth trying. Come and find a member of staff before you start levering.
11 · Watch it happen
Seven potters, seven ways in. None of them us.
Two videos, then go and make one.
Grouped by what they teach rather than by who made them. Watch the one that covers the part you are least sure about. They load only when you tap them.
Either one of these covers the whole drop-in method. Watch one, then come back to the checklist.
How to Throw Lids: A Beginners Guide to Making Jars
NSG
A good first video. It covers what its maker calls the three most basic lids, the gallery, cap and flange, with chapters for the jar body, the trimming and the cap lid. Watch it on YouTube.
How to Throw a Storage Jar with a Rolled van Gilder Style Gallery
Bill van Gilder
A two and a half pound storage jar thrown with a rolled gallery, then its lid thrown off the hump. The rolled gallery is a slightly different move from the two-finger split we describe. Watch it on YouTube.
How to Make a GALLERY Lid Jar
Earth Nation Ceramics
The gallery type lid, made on a jar. Its chapters run from throwing the cylinder and creating the gallery seat through measuring for the lid and throwing the flat lid to fitting and drying it. Watch it on YouTube.
How to Throw a Dome Lid
Katie Green
Four and a half minutes on throwing a dome or raised lid on the wheel. The description says it was made for high school ceramics students. Watch it on YouTube.
Throwing a One Piece Lidded Jar on pottery wheel
Alchemy Ceramic
A fourth approach we did not cover above, because it is a different beast: throw one closed form, then separate it into a lid and a body later. The fit is perfect by definition, since the two halves were one object a second ago. Watch it on YouTube.
Throwing Small Pots and Their Lids off the Hump
The Clay Teacher - Cindy Clarke Pottery
Small pots and their lids thrown off the hump. The description names jam, honey and garlic pots. Watch it to see the hump method used for pots that have lids. Watch it on YouTube.
How to Throw and Trim an Angular Lidded Jar
Florian Gadsby
The narrated version of a video on an angular lidded jar, with chapters for adjusting the calipers, throwing the lid and trimming the lid to fit the jar. The description says each part acts as a chuck for the other, and the maker explains it in the video. Watch it on YouTube.
Every one of these is somebody else’s work, linked because it is good. None of them are ours and none of them are sponsored.
12 · Troubleshooting
Twelve ways a lid stops fitting
The three that get you on night one
Find the symptom, read the cause. Most of these are decided long before the moment you notice them, which is the annoying part and also the useful part.
The rest are on the comprehensive version. These are the ones that happen the first time.
Three of these are the same failure
A lid that stopped fitting, a gallery that cracked and a pot that went oval are all one problem wearing different hats: two pieces that were not kept together. Storage is not an afterthought to this craft. It is part of the making.
It fit perfectly wet, and it does not fit now
The two pieces were measured or thrown at different wetnesses, or dried in different places. Same clay shrinks the same percentage, so a wet lid measured against a wet pot cannot come out wrong on its own. Something broke the pair. Nine times in ten it is a pot that sat for an hour under plastic before anybody thought about a lid.
The lid rocks
Either the gallery is not level or the lid’s underside is not flat. Sit the lid on the pot and turn it slowly by hand, watching where it lifts. Fix the single high point rather than trimming the whole edge. If it rocks in every orientation, the gallery is sloped and that is a throwing fix, not a trimming one.
It came out of the kiln fired shut
Glaze on a contact surface. Even a bead of it. Wax the gallery and the underside edge of the lid, then wipe both again after glazing. Do not force a fused lid. Come and find a member of staff, and read the fused pottery guide before you try anything.
The lid is too small and there is nothing to be done
Correct, there is nothing to be done, and that is the whole reason for the throw-generous rule. Clay does not stretch back. Throw another lid, which takes four minutes, and this time stop moving outward while the caliper still drags. Keep the small one and put a knob on it. It is a perfectly good coaster and a very good reminder.
The gallery cracked off during drying
It was thrown too thin, or it dried faster than the wall under it, or both. A gallery is a thin horizontal shelf standing in open air on a piece that is shrinking, which is the worst combination in pottery. Throw it noticeably thicker than looks right, and when you wrap the pot, wrap the rim heaviest.
The lid weighs more than the pot
Too much clay to start with, or a floor that never got thinned, or a solid knob. Take about a quarter of the pot’s clay, not a third and not a half. And keep knobs small, or hollow with a small vent hole: a solid lump on a thin disc is also the most common cause of a lid cracking across the middle.
The lid went oval
Almost always from being picked up wrong. A wet lid is a thin disc with no structure at all, so lifting it by one edge deforms it instantly. Wire it off flat, slide it, and if you must pick it up, use two hands under it rather than fingers around it. Lifting it by the knob before the knob has stiffened does the same thing.
The knob snapped off
If it was added rather than pulled from the lid, it was probably attached to clay that was too dry, or scored and slipped too lightly, or it was solid and shrank at its own speed. Attach at soft leather hard, score both faces properly, and keep the join thick where it meets the lid rather than tapering it to a neat point.
It only fits one way round
This is normal and it is not really a fault. Almost no thrown pot is perfectly round, so most lids have a best orientation. Mark it. A dot on the lid edge and a dot on the rim, put there at the trimming stage while you can still see which way is which. Once everything is bisqued and gray, that information is gone.
The lid slides off when the pot is tipped
The collar is too short or the flange is too shallow. Either one needs to be deep enough that the lid has to be lifted rather than pushed. On a teapot or anything that gets poured, this is not a comfort question, it is the difference between a usable pot and an ornament.
The pot went oval in the bisque, not the lid
It was already slightly oval green and the firing made it honest, or it was fired without its lid in place. Fire the lid on the pot from the bisque onward. Two pieces that move together stay a pair. Two pieces that move independently are two pieces.
You cannot work out which lid belongs to which pot
Extremely common and extremely avoidable. Scratch a matching mark into each lid and the foot of its pot before either leaves the wheel, especially if you threw a batch. Three lids that all look identical and fit nothing is a genuine way to lose an evening.
13 · At the wheel
The list to keep open on your phone
In order, from a clean wheel to a fired pair. Tap an item to tick it off. It remembers where you got to, so you can put the phone down, wash your hands, and come back.
14 · Questions
Things members ask us about lids
If yours is not here, ask at the front desk. Somebody will have made the same mistake and will be pleased to say so.
Do I really need calipers, or can I eyeball it?
You can eyeball a cap lid, because a cap lid forgives almost anything until it does not. You cannot eyeball a drop-in lid, and people who tell you otherwise have made several hundred of them. Calipers are inexpensive and the studio has some. Ask at the front and somebody will show you how to hold one.
Can I throw the lid on a different day?
You can, and it is harder, and it is the single most common reason a carefully measured lid comes out too small. If you have to, keep the pot properly wrapped so it loses as little water as possible, take the measurement fresh on the day you throw the lid rather than trusting the old number, and go noticeably generous.
How much gap should there be?
Enough that you can lift the lid out with one finger and feel it move slightly in the seat, and no more than that. A friction fit at leather hard will be a stuck lid after firing, because warping and glaze both eat into the gap and neither of them gives any back.
Should I glaze the inside of the lid?
Yes for anything holding food or liquid, no different from the inside of the pot. Just keep the glaze off the narrow edge that actually touches the gallery, and be careful with anything that moves in the firing, because a runny glaze on the inside of the collar can travel down onto the contact surface on its own.
Which clay is easiest to make lids from?
Whichever one you already throw well, because the fit depends on the pair matching rather than on the body. The only real rule is that both halves come from the same body, since the clays we stock shrink anywhere from about ten percent to about fourteen. The calculators page lists the figure for each one.
My first six lids were all failures. Is that normal?
Completely. Lids are the step where a lot of people find out they have been getting away with approximate work everywhere else, because nothing else you throw is checked against a second object. It gets much faster once measuring becomes automatic. Throw six lids for one pot in a single sitting and you will learn more than from six lids spread over six weeks.
Where to go next
A lid is the first thing you make that has to answer to something else
Go and throw one. Then throw five more.
Which is why it feels so much harder than the throwing in it warrants, and why getting one to seat properly is a bigger moment than it looks. Take the calipers seriously, keep the pair together, and give yourself a batch rather than one careful attempt.
One pot, six lids, one sitting. That is the fastest way through this, and it is more fun than it sounds. If you want the reasoning behind any of it, the comprehensive version at the top of this page has all of it.
Trimming and turning
Tools, timing and chucks. The step that rescues a lid that came out slightly too big.
Throwing off the hump
The fastest way to make six lids that match, without recentering once.
Compressing the floor and rim
Why a pot splits on the shelf, and the few seconds that prevent it.
Collaring in
How a jar gets a shoulder and a bottle gets a neck, and why it is the move that kills more pots than any other.
Throwing by the numbers
Proportions, ratios and wall thickness. How much clay a given form actually wants.
When it comes out fused
What is worth trying on two pieces that fused together, and what will break the pot.
Which version would you like to print?
Videos come out as a labeled box with the title and channel to search for, since paper does not play them.