Pottery Date Night
 Bring All Your Friends Free Week
 Give a Month of Pottery
 Private Pottery Parties

 The Welcome Booklet
 Your First Ten Sessions
 The Pottery Process
 Finding the Studio
 Your Classes Never Expire
 The Four Tables
 Who’s Who
 The Rewards Program
 Flux Glazes
 The Calculators
 Kiln Tracker
 Holiday Kiln Deadlines

 Beginner’s Tool Set
 Fingernail Clippers
 Mayco Clay Mender
 Epoxy for Kintsugi
 Applicator Bottles
 Large Bead Rack
 Raku Workshop
 Nighttime Raku
 Horsehair and Feather Raku
 The Clay Hole T-Shirt
 Embroidered Crewneck
 Zip-Up Hoodie
 Pre-Made Bisqueware
 Glaze Catchers
 Kiln Cookies
 Clay Cubby Rental
 The Glaze Bible, Printed
 The Book of Molds, Printed
 Printable Pottery Guides
 Free Printable Trackers
 Gifts for Potters
 Christmas Pottery Ideas
 Mother’s Day Gift Ideas
 Pottery Date Night
 Studio Calendar
 2027 Studio Events
 What Should I Do Today?
 How to Throw on the Pottery Wheel
 How to Make a Pinch Pot
 How to Tap Center a Pot
 The Five Stages of Clay
 Is Pottery Hard to Learn?
 Pottery Wheel Practice Drills
 20 Easy Hand-Building Projects
 Everything That Sounds Wrong

 A Beautiful Piece, Every Time
 Slab Roller Tips
 Any Dish as a Slump Mold
 Slab Roller & Slab Mold Certification
 The Pottery Skill Tree
 Clay & Pottery Calculators
 Logging Your Pottery and Glazes
 The Pottery Dictionary
 Why Did My Pottery Do That?
 The Pottery Cone Chart
 Pottery Myths, Fact-Checked
 Is Handmade Pottery Food Safe?
 Incredible Ceramic Artist Videos
 How Dan Throws Giant Pots
 How to Dry Your Pottery
 The Pottery Wheel Introduction
 Pottery by Zodiac Sign
 Personality and the Pottery Wheel
 Pottery for Engineers
 ADHD, Hyperfocus, and Never Running Out
 Hobbies for Burnout
 Screen-Free Hobbies for Adults
 Every Addiction I Ever Had Lost to Art
 Functional Pottery Is Engineering
 How Do We Compare?
 Pottery Classes by City
 Every Pottery Studio in Utah
 Pottery in Draper
 Featured Members
 The Signature Wall
 Making Friends as an Adult Is Brutal
 The Clay Hole Commandments
 2027 Pottery Contests
 2027 Studio Parties
 Gallery Night

 Scream It Into the Void
 Destroy the Glaze Wall
 Daily Affirmation Cards
 Everything That Can Go Wrong
 Subscribe to Our Newsletters
 Contact The Clay Hole
 Corporate Team Building

 Glaze Combinations
 Glazes We Do Not Carry
 Making Glaze Test Tiles
 The Mega Glaze Tool
 How to Use the Mega Glaze Tool

 Glaze Brushing Techniques
 How to Use Underglaze
 How to Use Dipping Glazes
 Glaze Problems, Causes and Fixes
 The Dipping Glaze Guide

 Making a Glaze Catcher
 Fused or Sharp After Firing
 The Signature Wall
 His Viral Videos
 His Own Ceramics
 Meet Mud
Technique Guide
Slip casting, from plaster to pot
Liquid clay goes into a dry plaster mold. The plaster drinks the water out. A wall of clay grows itself while you stand there doing nothing. It is the strangest forming method in ceramics and one of the most precise.
Here is how it works, how to do it well, and why not one drop of it happens inside our building.

How to use this page
Watch it once. Read it. Then watch it again.
Why both
A video shows you timing and hands. A list shows you the one line you forgot. You need both, and you need them at different moments.
There is a reason most sections here have a video sitting next to a written procedure, and it is not that we could not decide.
Video is the only way to show timing. You cannot write down what a slip pour sounds like when it starts running thin, or how fast somebody actually tips a mold over. You watch that once and your hands know something your notes never will.
But video is terrible at the second thing. You are standing over a mold with wet hands, you have forgotten whether the gate gets trimmed before or after the piece releases, and the answer is somewhere in the middle of a long video. Scrubbing back through it is miserable. Scrolling to the numbered steps is not.
There is decent evidence that reading and watching together stick better than either one on its own, because they load differently and back each other up. We cannot cite you a study on pottery specifically. What we can say is that everybody who has taught a room full of beginners knows the same thing: they watch the demo, they nod, and then they still want the sheet of paper.
So this page gives you the sheet of paper. Most bands pair a walkthrough you can read at the bench with a video from somebody else who casts. And near the bottom there is a stripped-down list built for exactly one job, which is being open on a phone propped against a bucket.
None of the videos are ours. We do not cast, so we have nothing to demonstrate. Every one is credited to the person who made it, and the video player does not load until you press play. Only the small preview picture comes from YouTube.
Studio rule
We do not allow slip casting at The Clay Hole.
Not in a corner, not as a one-off, not for a workshop. A page this long about a technique usually means the studio teaches it. Ours does not.
It is messy in a way that travels
Casting slip is thin and it runs. It goes off the table, down the leg, across the floor and onto the next person's work. Then it dries into dust and gets walked everywhere. This is a shared room with a lot of tables in it.
It swallows an instructor whole
Learning to cast means somebody stands with you through a full cycle: pour, wait, drain, wait, demold. That is an instructor parked at one mold for most of a class while everyone else on the floor waits for help. The math does not work.
Lost casts are constant
Casts collapse. They tear on demold, crack across the base, slump when the wall came out too thin. Beginners lose a lot of them, and we would be throwing away far more pieces than we ever finished. Nobody enjoys that class.
And we do not pour plaster here
This one settles it. Wet plaster is banned studio-wide, because a few specks worked into a clay bin sit invisible until the glaze firing, then expand and blow a crater out of somebody's pot. Slip casting needs plaster molds. Plaster molds need poured plaster.
Four reasons, short version. It is messy in a way that travels across a shared room. It parks an instructor at one mold for a whole class while everybody else waits. Lost casts are common enough that we would bin more pieces than we finished. And wet plaster is banned studio-wide anyway, because a few specks in a clay bin will blow a crater out of somebody's pot during a glaze firing months later.
The plaster rule is not new and it is not about casting. It is the same rule that says a finished, cured, fully dry plaster sprig mold from your own garage is welcome here and a bag of plaster is not. There is more on that on our sprig molds page. We cannot fire anything cast from bought slip or any outside clay, because outside clay is never allowed in our kilns. Casting is a home kiln project.
So this is a guide to something you are going to do somewhere else. A garage, a spare room, a friend's studio, a school with a casting bay. We wrote you a good one anyway, because members ask about it constantly and half of what turns up in a search is somebody selling you a slip they mixed.
The short version
Slip casting in six sentences.
Plaster is thirsty. Pour liquid clay into a dry plaster mold and the plaster pulls water out of it, so a wall of clay grows inward from the mold face. Leave it ten to twenty-five minutes, until that wall is about an eighth of an inch thick. Tip the rest back out and you are left with a hollow shell in the shape of the mold. As it dries it shrinks a little and lets go of the plaster on its own. Then you tidy the seam, dry it slowly, and fire it in your own kiln like anything else.
Everything else is detail hanging off those six sentences.
The mental model
Plaster is thirsty. That is the whole trick.
Understand this one paragraph and every rule further down the page stops being arbitrary.
Plaster is full of microscopic pores. Put wet clay slurry against it and capillary action starts pulling water into those pores immediately. The clay particles are far too big to follow the water in, so they stay behind and pack themselves against the mold face.
That packed layer is your pot. It starts as a film and thickens for as long as you leave the slip sitting there. Nothing is squeezing it, nothing is spinning, nothing is being pressed. The mold is just drinking.
The wall thickens with the square root of time, not with time. That is the single most useful thing on this page. The first few minutes build wall fast, and every minute after that adds less than the one before it. Doubling your wall thickness takes roughly four times as long, not twice as long.
So if ten minutes gave you a wall that is slightly too thin, eleven minutes will not fix it. Fifteen might. And if you walk away for an hour you do not get a wall six times thicker, you get a mold that is waterlogged and a piece that will not release.
When the wall is where you want it, you pour the leftover liquid back out. The shell stays stuck to the plaster. As the plaster keeps pulling water, the shell shrinks slightly, pulls away from the mold face on its own, and that is your signal it is ready to come out.

- The plaster body. Porous, dry, and doing all the work. A waterlogged one casts nothing.
- The pour gate. The opening you fill through, and the reservoir that keeps the mold topped up as the level drops.
- The casting slip. Still liquid in the middle. This is the part you pour back out.
- The wall. Clay packing against the mold face and thickening inward. This is your pot.
- Water leaving. Pulled out through every face of the cavity into the plaster. When the plaster is full, casting stops.
- The seam. Where two mold halves meet. It prints a faint line onto the piece, and you clean it off later.
The liquid
Casting slip is not the slip you glue handles with.
Slip for joining is clay and water and nothing else. Casting slip has a third ingredient, and that ingredient is the reason the whole technique works.
Here is the problem it solves. If you just keep adding water to clay until it pours, you end up with about as much water as clay by weight. Then it dries, all that water leaves, and the piece shrinks so violently it tears itself apart. A dried mud flat is what that looks like.
A deflocculant fixes it. It is an electrolyte that puts the same electrical charge on every clay particle, so they push each other apart instead of clumping. Charged apart, the same clay flows like heavy cream with water at about forty percent of the dry clay's weight. Less water in means less shrinkage, fewer cracks, and a faster cast.
The two you will actually meet
Sodium silicate, usually paired with soda ash. Cheap, powerful, traditional, and unforgiving. There is very little room between not enough and far too much, and it slowly eats the surface of your plaster molds, which shortens their life. Always dilute it before it goes anywhere near the bucket.
Darvan 7. A polyacrylate dispersant. More expensive, much harder to overdo, needs no soda ash partner, and it is gentle on plaster. If you are casting from the same molds for a long time, this is the one that keeps them alive. A common starting point is around 0.35 grams of Darvan per 100 grams of dry clay, and iron-heavy stoneware bodies may want closer to double that. Sodium silicate, soda ash and Darvan can irritate skin and eyes, so wear safety glasses and nitrile gloves when you measure and mix them, and an N95 or better for the dry soda ash.
Specific gravity, and how to read it
Specific gravity is just the weight of your slip against the weight of the same volume of water. It tells you the ratio of clay to water, and it is the first number to check when anything goes wrong.
Put a measuring container on a gram scale, tare it, fill it to exactly the 100 ml line, level, with the bubbles tapped out, and read the weight. Being 2 ml off when you fill the container moves the answer by about 0.04, which is most of the target range. Move the decimal two places left. 178 grams means a specific gravity of 1.78. You are aiming for somewhere between 1.75 and 1.80.
Below that and there is too much water: the slip level will sink hard in the mold, the wall builds slowly, the mold waterlogs early, and the extra water has to leave, so the piece shrinks more and cracks. Above it and the slip is thick, slow to pour, and traps bubbles.
The rule that saves batches
If the specific gravity is already in range and the slip is still too stiff to pour, do not add water. Water changes the ratio you just got right. Add deflocculant, a few diluted drops at a time, mixing between each one.
Knowing when you have gone too far
Over-deflocculated slip casts slowly, sticks to the mold, leaves hard glassy spots, keeps the molds wet, and produces pieces that come out chalky and soft. Under-deflocculated slip gels solid in the mold and will not pour back out at all.
Both look alike from outside the bucket, which is why the sequence matters. Mix thoroughly first. Then measure. Then adjust. Most problems people blame on chemistry are actually a bucket that was not stirred long enough.
And if all of this sounds like more chemistry than you signed up for, buying premixed casting slip from a ceramic supplier is completely legitimate and what most people do. It arrives at the right specific gravity, already deflocculated, matched to a firing range.
The plaster
Three routes to a mold.
One question decides your mold.
You can buy commercial molds and skip this section entirely. Plenty of good casters never make one. But making your own is where the technique stops being reproduction and starts being yours.
The question
Can you lift the finished shape straight up out of the mold with nothing catching on the way? If yes, one part is enough. If anything overhangs, tucks under, or narrows above its widest point, you need two parts or more. That is the entire decision, and it is worth answering before you mix a single cup of plaster.
The one-part mold
For open shapes that taper outward: bowls, dishes, trays, shallow cups. Build a wall around your form, pour plaster over it, wait, pull the form out. No seam, no keys, nothing to line up. Start here even if it is not the shape you eventually want.
The silicone shortcut
Cast plaster into a silicone baking mold and you get a plaster copy of the shape, which can then be your form for a one part or two part mold. Silicone flexes, so the plaster lets go of it easily. It saves you making the form from scratch, but you still build the mold around that form. The Old Forge Creations video in this section calls it a moderately complicated project.
Two parts and beyond
For undercuts, necks, handles and anything with a belly wider than its opening. You bed the form in clay to a chosen parting line, pour one half, cut keys into it, soap it, then pour the second half against it. Harder, and it opens up every shape.
If the answer is yes, build a one-part mold: wall off your form, pour plaster over it, wait, pull the form out. Sift the plaster powder in an N95 or better and safety glasses, and never rinse plaster down a sink. No seam, no keys, nothing to line up. If the answer is no, you are into two-part molds, which means bedding the form in clay to a parting line and pouring each half separately. Either way the mold has to be completely dry before its first cast, and a good one gives you fifty to eighty casts before the detail starts going soft.
Six things that decide whether a mold is any good
- Use pottery plaster, not hardware store patching plaster. The absorbency is the entire point and the cheap stuff does not have it.
- Sift the plaster into the water and let it slake before you stir. Dumping and stirring immediately is how you get lumps, and every lump prints as a divot on your casts forever. Plaster powder is fine dust, so wear an N95 or better and safety glasses while you sift it, and mix it away from other people and pets.
- Give yourself an inch and a half to two inches of plaster around the form. Thinner and it cracks. Much thicker only makes the mold heavier to lift, which matters more than you think by cast number nine.
- Soap anything plaster will touch plaster against. Mold soap or Murphy Oil Soap, brushed on in thin coats until it comes up to a soft sheen. Miss this on a two-part mold and you have made one solid block.
- Put the parting line on an edge, never across a flat face. A seam along a corner disappears. A seam down the middle of a smooth curve is visible on every single piece you ever cast.
- Dry it completely before the first cast, and completely between casts. Room temperature and time is safest. Keep it off an oven, a radiator and direct sun, because heat ruins the even porosity of plaster.
Run one throwaway cast on any new mold. It clears manufacturing dust out of the cavity and it tells you how fast that particular mold drinks, which is a number no video can give you.
What you need
The whole setup fits on one table.
There is no equipment here that costs real money. The expensive part of slip casting is the mold, and the mold is mostly time.
- A bone-dry plaster mold, bought or made
- Casting slip, premixed or mixed yourself
- Mold straps, or heavy rubber bands cut from an inner tube
- A jug with a real spout, big enough to fill the mold in one go
- A 30 to 60 mesh sieve to catch lumps on the way in
- A bucket to drain into, and two sticks to rest the mold on upside down
- A drill with a paint mixer, if you are mixing your own
- A gram scale and a 100 ml measuring container
- A fettling knife and a soft flexible rib
- A sponge you can wring out almost dry
- A timer, and a notebook you actually write in
- An N95 or better and safety glasses, for any dry sanding, outdoors
The notebook is the one people skip and then regret. Cast time, wall thickness, specific gravity, room temperature, which mold. Six entries in and you stop guessing, because your molds have told you their own numbers. Never pour slip, plaster or rinse water down a sink. Slip and plaster both set hard inside pipes. Let the bucket settle and put the solids in the trash. At the studio, clay water goes over a bucket to The Wash Pit.
The pour
Casting a piece, in nine steps.
Casting a piece, in six steps.
- Check the mold is dry and cleanOpen it, look inside, and clear any dust with a HEPA vacuum. Never blow it out, which puts plaster dust in the air. A damp mold casts slowly and unevenly, and dust prints as a pinhole.
- Assemble and strap itSeat the keys properly, then strap firmly. A gap you cannot see is a gap slip will find, and it will find it two minutes after you walk away.
- Stir the slip properlyTwo or three minutes with a mixer, or a good long go by hand. Slip settles in the bucket and casts badly when it is not homogeneous. This is the step people skip.
- Sieve it into your jug30 to 60 mesh. Every lump you catch here is a lump that does not end up as a bump on the inside of a pot.
- Pour in one steady stream, down the wallAim at the side of the gate, not straight into the middle. A stream that falls into open air folds bubbles in, and bubbles become pinholes. Do not stop and restart.
- Keep the gate fullThe level drops as the plaster drinks. Top it up. If the level falls below the top of the piece you get a ridge, or a thin patch, or both.
- Start the timerWrite down the time you poured. This is the number that makes your second cast better than your first.
- Check the wall at ten minutesCut a small notch through the clay at the edge of the gate and look at the cut face. That is your wall thickness, and it is the only reliable way to know.
- Drain when it reads rightAn eighth of an inch is the default for functional work. Thinner for translucent porcelain, thicker for a planter that has to take a knock.
- Dry mold, strapped tightVacuum the dust out with a HEPA vacuum, seat the keys, strap it firmly. Slip finds every gap.
- Stir two to three minutes, then sieveSlip settles in the bucket. Sieve it into your jug on the way in to catch lumps.
- Pour down the wall, keep the gate fullOne steady stream aimed at the side, never into open air. Top it up as the level drops, and start a timer.
- Notch-check at ten minutes, then drainCut through the clay at the gate edge and look. An eighth of an inch is the default. Tip it upside down over a bucket at an angle, not straight down.
- Wait for the sheen to go, then trim the gateFifteen to thirty minutes inverted. Set it upright, cut the gate flush while the clay is soft leather.
- Let it release itself, then fettleThe clay shrinks off the plaster on its own, usually an hour or more. Lift the mold off the piece, run a rib down the seam, finish with a barely damp sponge.
Wall thickness, in plain numbers
Most functional work wants about an eighth of an inch. Ten to twenty-five minutes gets you there on a healthy mold with slip in range. Remember the square root: if ten minutes was not enough, try fifteen, not eleven.
The patient part
Everything after the pour is timing you cannot rush.
Casters often ruin a piece by opening the mold early to see how it is going.
- Invert at an angle, not straight downRest the mold upside down on two sticks across a bucket, tilted. Straight down lets the last of the slip pool and hang, and it dries into stalactites on the inside of the base.
- Leave it until the sheen goesUsually fifteen to thirty minutes. Wet clay looks glossy. When the surface at the gate has gone matte, the draining is done.
- Set it upright and trim the gateCut the excess flush with the rim while the clay is still soft leather. Cut it, never tear it. A torn gate starts a crack that shows up two firings later.
- Wait for it to release itselfAn hour, often more. The clay keeps shrinking and pulls away from the plaster on its own. You will see a hairline gap open at the rim. That gap is the signal.
- Take the mold off the pieceNot the piece out of the mold. Unstrap, lift each half away, support the piece from underneath. Never lever, never pry, never grab it by the rim.
- Fettle the seamRun a soft metal rib or a fettling knife along the seam line, then go over it with a barely damp sponge. A wet sponge drags the seam back open and softens the detail either side of it.
If two pieces have to fit
A lid and its pot, a jug and its handle. Dry them together, touching, at the same speed. Dried apart they shrink slightly differently and stop matching, and there is nothing you can do about it afterward.
The last mile
Most cast pieces crack in the drying, not in the mold.
A cast wall is thin and it is uniform, which sounds like an advantage and is exactly what makes drying dangerous. A thrown pot has a thick foot and a thin rim, so it dries in a predictable order. A cast piece dries wherever the air happens to reach first, and any part that gets there ahead of the rest puts the whole wall under tension.
So slow it down and even it out. Put the piece on a wire rack or a couple of slats so air can get underneath as well as over. Drape plastic loosely over the top for the first day. Keep it off a sunny windowsill, off a heat vent, and out of any draft coming under a door.
A thin-walled piece may be dry in a day or two in a warm room. Anything large or thick can want most of a week. Nothing about that is wasted time and there is no way to buy it back later.
Plan for shrinkage while you are still making the mold, not afterward. A cast comes out of the plaster at roughly the size of the cavity, then loses ten to fourteen percent of it between there and the finished piece. If a lid has to fit something that already exists, that number decides the mold.
Once it is bone dry, clean the seam properly. A barely damp sponge, or a damp drywall sanding sponge, takes the ridge down. Work over a bucket and away from shared tables. Wear an N95 or better and safety glasses for any sanding. Dry clay dust is silica and it does not leave your lungs. At the studio nothing is sanded dry, fired or not. If a ridge truly needs dry sanding, that is done outside.
From there it is ordinary greenware. At home, in your own kiln, it bisques, glazes and fires on the same schedule as anything else made from that clay body, and it takes glaze about the same way. The smooth uniform surface is actually a gift for anything crisp: decals, tape resist, a clean line of underglaze.
Troubleshooting
Eight ways a cast goes bad.
Four ways a first cast goes bad.
Before you change anything else, stir the bucket properly and measure the specific gravity. It is the answer to more of these than any single other thing.
The cast collapsed or tore coming out
Either the wall was too thin to hold itself, or you opened the mold before the clay had shrunk away from the plaster. Give it more time in the mold on both counts. If it happens on a piece with a narrow neck or a strong undercut, the mold itself may be asking for another part.
Cracks across the base
Almost always uneven drying. The base sat flat on a solid surface and the walls dried faster than it did. Get it up on a rack, cover it loosely for the first day. A gate that was torn rather than cut also starts cracks that only appear later.
Pinholes all over the surface
Air folded into the slip during the pour, dust sitting in the mold, or slip that is too thick to release its own bubbles. Check specific gravity first. Then pour down the wall in one unbroken stream instead of dropping it through open air, and clear the dust out of the cavity before you assemble.
Air folded in during the pour, or dust in the mold. Pour down the wall in one unbroken stream instead of dropping it through open air, and clear the dust out of the cavity before you assemble.
It will not release
Three usual causes. The mold was not fully dry, so nothing is shrinking. The slip is over-deflocculated, which makes casts cling. Or the form has an undercut you did not spot, in which case no amount of patience helps and the mold needs redesigning.
Thick on one side, thin on the other
The mold was not sitting level, or the gate ran low partway through and the top of the piece stopped building. Shim the mold flat before you pour and keep the reservoir topped up the whole time.
The surface is chalky and soft
Over-deflocculated slip, or a mold that is waterlogged from being used again too soon. Molds need to dry all the way out between casts, and in a humid room that takes longer than it feels like it should. Two molds in rotation solves it.
Slip leaked out of the seam
The halves are not seated, the keys have worn round, or the straps were not tight enough. Dry-fit and look along the seam before every pour. Older molds sometimes warp slightly if they were dried unstrapped, which is worth knowing before you blame the strap.
It gelled solid and would not pour out
Under-deflocculated, or simply not stirred enough before it went in. Slip that has stood for weeks flocculates on its own and needs a real mixing, not a swirl. Mix it thoroughly, then measure, then adjust. In that order.
Keep this open
The whole cycle on one screen.
This is the part that is meant to live on a propped-up phone with the screen timeout turned off. No explanations, just the order of operations and the three numbers.
- Mold bone dry, cavity clear of dust
- Keys seated, straps tight
- Stir the slip two to three minutes
- Sieve into the jug
- One steady stream, aimed down the wall
- Fill to the top of the gate
- Top it up as the level drops
- Start the timer, write the time down
- Notch-check at ten minutes
- Too thin? Add five, not one
- Drain at an eighth of an inch
- Upside down over a bucket, on an angle
- Leave until the sheen goes matte
- Fifteen to thirty minutes
- Upright, trim the gate at soft leather
- Cut it, never tear it
- Wait for the hairline gap at the rim
- Lift the mold off the piece
- Rib the seam, barely damp sponge
- Rack it, loose plastic day one
- Lids dry touching their pots
- Damp sponge the seam; dry sanding outdoors only, N95 or better on
Questions we get
The ones that come up every time.
Studio questions that are not about casting are almost certainly answered on our FAQs page, which is the most useful page on this site.
Is slip cast pottery still handmade?
When one person designs the form, carves the model, builds the mold, mixes the slip and finishes every piece by hand, yes. The mold is a tool, in the same way a wheel is a tool. What people are usually reacting to is factory casting, where none of those decisions belong to the person who packed the box. Plenty of serious ceramic artists cast everything they make.
Can I slip cast at The Clay Hole?
No. Not in a corner, not for a workshop, not as a trial. It is messy across a shared room, it ties up an instructor for a whole cycle, lost casts would cost members too many pieces, and pouring plaster is banned in the building regardless. That last one applies to everybody equally and it is not going to change.
Do I have to make my own molds?
Not at all. Commercial molds for mugs, planters, figurines and dishes are cheap and widely available, and a lot of people cast for years without ever pouring plaster. Buying molds is also the fastest way to learn the casting half of this without fighting two skills at once.
Can I use my regular studio clay as casting slip?
You can turn a clay body into casting slip, and there is a good reason to: everything you make then shrinks about the same and takes glaze about the same. It is not as simple as adding water though. You slake bone-dry clay down, mix it smooth, measure the specific gravity, then deflocculate it carefully. Wear an N95 or better when you slake dry clay, because the dust is silica. Rebekah Bogard's video on making a casting slip from your own clay body, linked above, walks through it. It is Part 2 of a two-part series, and Part 1 covers the clay chemistry.
How many casts will one mold give me?
Fifty to eighty is a reasonable expectation from a well-made mold that is looked after. Detail goes soft before the mold actually fails, so the number you get depends on how crisp your piece needs to be. Sodium silicate slowly attacks the plaster surface, so switching to Darvan meaningfully extends a mold's life if you are doing long runs.
What is the difference between a slab mold and a casting mold?
A slab mold is a form you drape a rolled slab of clay over or press it into, so you are shaping solid clay by hand against a shape. A casting mold is hollow and you fill it with liquid. We have a room full of the first kind, and you can read about using them on our slab rollers and slab molds certification page.
What we do have
One technique we said no to. A building full of the rest.
If this page did its job you now know how slip casting works, what it costs you in patience, and where it goes wrong. Go and try it somewhere with a garage floor you do not mind. Meanwhile, here is what is waiting at the studio.
That is the short version. Flip the toggle at the top of the page for the full guide: the chemistry, the mold routes, eight ways it goes wrong, and a longer set of videos.
Videos on this page belong to their creators and are embedded through YouTube's no-cookie player. The video player does not load until you press play. Only the small preview picture comes from YouTube. We are not affiliated with any of these channels, we just think they teach this well.
Which version would you like to print?
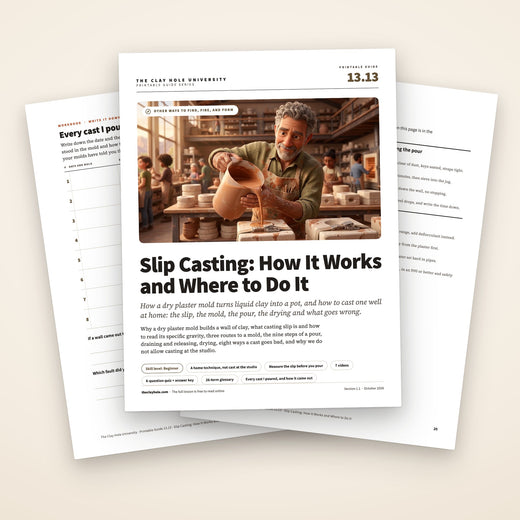
Videos come out as a labeled box with the title and channel to search for, since paper does not play them.