Pottery Date Night
 Bring All Your Friends Free Week
 Give a Month of Pottery
 Private Pottery Parties

 The Welcome Booklet
 Your First Ten Sessions
 The Pottery Process
 Finding the Studio
 Your Classes Never Expire
 The Four Tables
 Who’s Who
 The Rewards Program
 Flux Glazes
 The Calculators
 Kiln Tracker
 Holiday Kiln Deadlines

 Beginner’s Tool Set
 Fingernail Clippers
 Mayco Clay Mender
 Epoxy for Kintsugi
 Applicator Bottles
 Large Bead Rack
 Raku Workshop
 Nighttime Raku
 Horsehair and Feather Raku
 The Clay Hole T-Shirt
 Embroidered Crewneck
 Zip-Up Hoodie
 Pre-Made Bisqueware
 Glaze Catchers
 Kiln Cookies
 Clay Cubby Rental
 The Glaze Bible, Printed
 The Book of Molds, Printed
 Printable Pottery Guides
 Free Printable Trackers
 Gifts for Potters
 Christmas Pottery Ideas
 Mother’s Day Gift Ideas
 Pottery Date Night
 Studio Calendar
 2027 Studio Events
 What Should I Do Today?
 How to Throw on the Pottery Wheel
 How to Make a Pinch Pot
 How to Tap Center a Pot
 The Five Stages of Clay
 Is Pottery Hard to Learn?
 Pottery Wheel Practice Drills
 20 Easy Hand-Building Projects
 Everything That Sounds Wrong

 A Beautiful Piece, Every Time
 Slab Roller Tips
 Any Dish as a Slump Mold
 Slab Roller & Slab Mold Certification
 The Pottery Skill Tree
 Clay & Pottery Calculators
 Logging Your Pottery and Glazes
 The Pottery Dictionary
 Why Did My Pottery Do That?
 The Pottery Cone Chart
 Pottery Myths, Fact-Checked
 Is Handmade Pottery Food Safe?
 Incredible Ceramic Artist Videos
 How Dan Throws Giant Pots
 How to Dry Your Pottery
 The Pottery Wheel Introduction
 Pottery by Zodiac Sign
 Personality and the Pottery Wheel
 Pottery for Engineers
 ADHD, Hyperfocus, and Never Running Out
 Hobbies for Burnout
 Screen-Free Hobbies for Adults
 Every Addiction I Ever Had Lost to Art
 Functional Pottery Is Engineering
 How Do We Compare?
 Pottery Classes by City
 Every Pottery Studio in Utah
 Pottery in Draper
 Featured Members
 The Signature Wall
 Making Friends as an Adult Is Brutal
 The Clay Hole Commandments
 2027 Pottery Contests
 2027 Studio Parties
 Gallery Night

 Scream It Into the Void
 Destroy the Glaze Wall
 Daily Affirmation Cards
 Everything That Can Go Wrong
 Subscribe to Our Newsletters
 Contact The Clay Hole
 Corporate Team Building

 Glaze Combinations
 Glazes We Do Not Carry
 Making Glaze Test Tiles
 The Mega Glaze Tool
 How to Use the Mega Glaze Tool

 Glaze Brushing Techniques
 How to Use Underglaze
 How to Use Dipping Glazes
 Glaze Problems, Causes and Fixes
 The Dipping Glaze Guide

 Making a Glaze Catcher
 Fused or Sharp After Firing
 The Signature Wall
 His Viral Videos
 His Own Ceramics
 Meet Mud
Clay Hole University · Hand Building
Round coils are a stroke length problem, not a patience problem.
Coils come out oval. Or fat in the middle with two pointy ends. Or ribbed like a caterpillar. The usual advice is to practice more, and practice is genuinely not the variable here. Three things are: the shape you start with, what your hands are actually touching, and how far the coil travels on each stroke. All three are fixable in about ten minutes.
Beginner lesson. No wheel, no special tools, and every bit of it works on any table with a bit of tooth to it.
Jump to a section

Start here
A coil stays round only while it keeps turning over.
Every part of the surface has to take a turn against the table. Short rocking strokes bring the same two faces back down over and over, and that is not rolling, that is pressing a rope into a ribbon. Long strokes turn it all the way over and spread the pressure the whole way around.
There is a number attached to it. One full turn covers the circumference, which is about three and a bit times the thickness. A half inch coil needs roughly two inches of travel per stroke. Almost everybody who ends up with flat coils is rolling in strokes half that long.
The one question
Cut the coil in half and look at the end. Is it a circle? That is the only reliable test, it takes two seconds, and it tells you which mistake you are making. A ribbon or an egg means short strokes. A flat bottom means you leaned on it. Everything else on the longer version of this page is a fix for one of those two.
Roll on something with tooth, like canvas or bare wood. Slick surfaces let the coil skid instead of turn, and a coil that skids goes flat no matter how good your hands are.
The model
Why a coil goes flat, and why more practice will not fix it.
A coil is round for exactly one reason: every part of its surface takes an equal turn against the table. Roll it far enough and the pressure gets shared all the way around. Roll it in a short back and forth rocking motion and the same two faces keep coming back down, taking all the load, while the sides never touch anything at all.
That is not a skill problem. It is geometry. A rocking motion cannot produce a circle no matter how many hours you give it, which is why people practice for a month and get slightly smoother ribbons.
One full turn is about three times the thickness
The distance around a coil is a little over three times the distance across it. So a half inch coil has to travel about an inch and five eighths to complete one rotation, and a three quarter inch coil has to travel about two and three eighths of an inch. If your stroke is shorter than that, some part of the coil never reaches the table on that stroke, and the parts that do reach it get pressed twice.
This is the single most useful number on the page, because it converts a vague instruction into something you can actually check. Long strokes stop being a feeling and become a distance.
Pressure thins, travel rounds
Two separate things are happening under your hands and it helps to keep them apart. Downward pressure squeezes clay sideways out from under your hands, which is what makes the coil longer and thinner. Travel is what decides how far the coil rotates while that is happening. People who press hard and travel short get short flat coils fast. People who press lightly and travel long get round coils slightly slower, which is the trade worth making every time.
The shape you start with is mostly the shape you keep
A ball put down on a table and rolled becomes a disc almost immediately, because a sphere has one small contact patch and it flattens before it ever starts turning as a cylinder. A rough log put down on a table is already a cylinder, and rolling it just makes it a longer, thinner, rounder one. More coils are lost to starting from a ball than to anything that happens afterward.
Before you start
What you roll on matters more than what you roll with.
There is no special coil tool and there is nothing to buy. There is a surface, and the surface decides whether the clay turns over or slides.
Roll on this
- Canvas, or a canvas covered board. The tooth is the whole point.
- Bare wood. A wooden table or a plywood ware board both work well.
- Heavy cotton duck cloth laid over whatever you have.
- A plaster slab, if the clay is on the soft side and you want it to firm slightly as you go.
Not on this
- Glass, sealed melamine or any polished top. The coil skids instead of turning.
- Bare plastic sheeting. Same problem, plus the clay sticks in patches.
- Canvas that has gone bone dry in a dry room. It pulls water out of the skin and the coil starts cracking as it lengthens.
- A surface with crumbs of dried clay on it. Every one of them prints into the coil.
The Utah tax
Our air is dry enough that canvas which felt fine an hour ago can be pulling moisture out of your clay by the time you sit down. If your coils crack along the outside as they lengthen and the clay itself feels fine, mist the canvas lightly and try again before you blame your hands.
Worth having on the table
A needle tool or a rib for cutting the ends square. Plastic sheeting or a bin to keep finished coils under. Two strips of wood the thickness you want, if you care about matching them exactly. A ruler. That is the entire list.
A kitchen scale is optional and it is the best fifteen dollars in hand building. Equal weights of clay, rolled to equal lengths, are equal thicknesses, and that removes the guessing from every coil after the first.
How to use this page
Read it, then watch somebody do it.
Most sections below pair a written list with video from other potters. That is deliberate, and it is not belt and braces.
Video carries what words cannot. How light light actually is. What a coil looks like in the half second before it goes oval. The speed of somebody's hands. Write any of that down and it turns to mush, so you have to see it once.
Writing carries what video cannot. A list waits for you. It sits on a propped up phone while your hands are covered, it holds the order in place, and you can read line four again without scrubbing a timeline with a muddy knuckle. A potter on film already knows the order and never says it out loud, which is why watching alone tends to leave gaps you cannot name.
The pairing is what makes it stick. Reading first gives you somewhere to put what you see, and there is decent evidence that pairing words with a demonstration is easier to hold onto than either alone. Watch once to kill the ambiguity, then work off the list. If you only have time for one, read the list.
These videos are other people’s work, embedded with credit, and any one of them may differ from our written steps somewhere. Where a potter does it differently, they are not wrong. Clay tolerates a lot of approaches and seeing two is more useful than seeing one.
Step one of two
Most of the roll happens before the clay touches the table.
Five moves, none of which involve rolling. Get these right and the rolling part becomes almost boring, which is the goal.
-
Wedge it
Air pockets show up as bumps under your hands, as splits when the coil lengthens over them, and as sealed damp spots that are still holding water when the kiln gets there. Wedge the whole amount at once and keep what you are not using under plastic.
-
Divide it, and weigh it if you can
Cut the wedged clay into equal lumps before you roll anything. Eight lumps of three ounces will give you eight coils of about a foot each that match. Eight lumps torn off by eye will not.
-
Squeeze a log in the air
Both hands, turning the clay as you squeeze, until you have a rough fat rope about twice the thickness you are aiming for. It does not need to be pretty. It needs to be a cylinder rather than a ball.
-
Round off the ends now
Pat the two ends in against your palm. Pointy ends only ever get pointier once you start rolling, and squaring them off at the end wastes clay you already rolled.
-
Lay it down along the line you will roll
Straight in front of you, running left to right, with enough clear table either side for it to grow into. A coil that runs out of table gets rolled in short strokes, and short strokes are the whole problem.
The technique
The roll itself, in nine moves.
The roll itself, in six moves.
This is the part people think they are getting wrong. Usually they are getting two of the nine wrong, and it is almost always numbers one and three.
Six moves, from a wedged lump to a coil under plastic.
-
Flat hands, fingers together
Contact runs from the heel of your palm all the way to your fingertips, with your fingers closed. Spread fingers cut grooves down the length. Fingertips on their own cut the coil into segments. Thumbs stay up and out of the way.
-
Start over the middle
Hands side by side near the center of the log, not at the ends. The middle is the thickest part and it needs the most work.
-
Roll the full stroke
Push the coil away from you far enough to turn it completely over, then bring it back. About two inches of travel for a half inch coil. If you can feel yourself rocking rather than rolling, you are making a ribbon.
-
Keep the pressure light
You are steering the clay, not squashing it. The weight goes down through the whole hand evenly. Heavy pressure through the fingertips is how you end up with a coil that is round under your palms and flat under your fingers.
-
Let your hands drift outward
The coil is getting longer underneath you, so your hands have to cover more of it or the middle stays fat. Drift out toward the ends and back in again, slowly, the way you would spread butter.
-
Ease off at the tips
The last inch at each end has nothing beside it holding it up, so it thins faster than everything else. Lighten your hands as they get there, and never let them roll off the end.
-
Lift it and look, every few strokes
Pick the coil up, sight down its length, then roll it a quarter turn in your fingers and sight again. Flats are obvious from the end and nearly invisible from above, which is why looking down at the table tells you almost nothing.
-
Stop at your thickness, not at your patience
Check it against a guide stick, a ruler, or simply against the first coil you rolled. Thinner is not better. A coil thinner than the wall you want leaves you nothing to blend with.
-
Cut both ends square and cover it
A clean cut end joins to another clean cut end. A tapered end traps a hollow at the join every time. Then it goes straight under plastic, because a coil dries far faster than the block it came from.
-
Wedge it, then squeeze a fat log in the air
Never start from a ball. A ball flattens into a disc before it ever starts turning as a cylinder.
-
Flat hands, fingers together
Contact from the heel of your palm to your fingertips. Spread fingers cut grooves, fingertips cut segments.
-
Long strokes, light pressure
About two inches of travel for a half inch coil, so it turns all the way over. Rocking makes ribbons.
-
Start in the middle, drift outward, lighten at the tips
The coil grows under your hands, so your hands have to cover more of it. The last inch at each end thins fastest.
-
Lift it and look down the end
Every few strokes. A flat means your strokes got short. Fix the stroke, not the coil.
-
Cut the ends square and get it under plastic
Roll every coil you need before you start building. A coil stiffens far faster than the block it came from.
How to Roll a Clay Coil
The Pottery Wheel
What to take from it
A whole video about one move, which sounds excessive right up until you watch it. The thing to watch for is the hands: how flat they stay, how far they travel on each pass, and how little downward force is going into the clay.
Watch it once at normal speed to see the rhythm, then again with your own clay on the table. Watch it on YouTube.
How to Roll a Perfect Coil | Pottery Basics Made Easy
The Clay CoOp
What to take from it
Worth watching straight after the first one, because two people doing the same move slightly differently is how you work out which parts are the technique and which parts are just somebody’s habit. The parts that match across both are the parts that matter.
The only reliable test
Cut it in half and look at the end.
You cannot tell a round coil from an oval one by looking down at the table, because from above they are the same width. Cut one and the answer is immediate, and it tells you which mistake you are making rather than just that you made one.

Three cut ends at the same scale. The dashed outline on the second and third is the circle each one should have been.
- A circle. You rolled it. Every part of the surface took an equal turn against the table. Nothing to change. Cut the next one anyway, because the mistake creeps back in as your strokes shorten.
- An oval. Your strokes were too short. The same two faces kept coming back down and the sides never reached the table. Lengthen the stroke until the coil turns all the way over, roughly two inches for a half inch coil.
- A flat bottom. You leaned on it. Heavy downward pressure with very little travel presses the coil into the table rather than rolling it across it. Lighten your hands and let them go further.
Do it once per session, not once per coil
Cutting every coil in half is a waste of clay and time. Cut the first one, fix whatever it shows you, then cut one more halfway through the batch to check the fix stuck. Almost nobody keeps a long stroke going once they get comfortable, so the second cut catches more than the first one does.
Sizing
How thick, and how to make the next one match.
Half an inch is the answer almost every time. It is roughly pinky thick, it is comfortably thicker than the wall you actually want, and blending will thin it. The other sizes are worth knowing because the stroke length changes with them.
Half an inch, roughly pinky thick, is the answer almost every time. It is thicker than the wall you want because blending is going to thin it.
| Coil thickness | What it suits | One full turn |
|---|---|---|
| 3/8 in, about 10 mm | Small pieces, decorative surface coils, tight curves | About 1 1/8 in |
| 1/2 in, about 13 mm | The default. Mugs, bowls, vases, most of what you will build | About 1 5/8 in |
| 5/8 in, about 16 mm | Wider bowls and vases, where you want height a little faster | About 2 in |
| 3/4 in, about 19 mm | Big planters and sculpture | About 2 3/8 in |
| 1 in, about 25 mm | Very large forms and deliberately thick walls | About 3 1/8 in |
One full turn is the distance around the coil, which is a little over three times the distance across it. Anything shorter than that as a stroke cannot roll the coil all the way over.
Matching them is a weighing problem rather than a rolling problem. Equal weights of clay, rolled to equal lengths, come out equal thicknesses. A kitchen scale settles it in about four seconds per coil and removes the guessing from every coil after the first.
1. Weigh them
Equal weights of clay rolled to equal lengths are equal thicknesses. There is no judgment involved and it is the fastest of the three. Divide the wedged clay on a kitchen scale before you roll anything.
2. Guide sticks
Two strips of wood the thickness you want, one either side of the coil. Roll until your hands are riding on both sticks and the coil cannot get any thinner. Slower, but it needs no math and no scale.
3. Cut them from a slab
Roll a slab to the thickness you want, cut strips that same width, then give each strip a few turns by hand to knock the corners off. It is the most consistent method there is, and our slab rollers are open to every level once you have done the slab roller certification.
Coils: Rolling an Even Coil
Rachel Dorn
What to take from it
Evenness along the length is a different problem from roundness across the section, and this one is about the first. Watch where the hands spend their time, because a coil that is fat in the middle is almost always a coil whose middle got the least attention.
Alternatives
Three other ways to make a coil.
Rolling is the one worth learning first because it works anywhere with no setup. It is not the only way, and for a big build it is not always the fastest.
Squeeze them in the air
Pull and squeeze the clay into a rope between both hands without ever setting it down. Much faster, and the coils come out slightly irregular, which matters less than people expect because blending flattens the joins anyway. This is how a lot of large work gets built.
Cut them from a slab
The most consistent coils you will get, because the thickness is set by the slab roller rather than by your hands. Cut strips the width of the thickness you want and round the corners off with a few turns.
Extrude them
An identical cross section every time and a real time saver on a large build. Handheld extruders are available at Purple Level and Black Level. The wall extruder is Black Level only. Hand rolling still earns its place because it works at every level and on any table.
How to make long clay coils quickly
Sae-Won Lee Ceramics
Two kilograms of clay, about four and a half pounds, rolled into a coil a meter long, about three feet. Watch it on YouTube.
4 Coil Pottery Tricks Every Handbuilder Should Know
Andy Ward’s Ancient Pottery
Four coil building tricks. The chapters cover pushing a form out, air bubbles, flared rims and pinches. Watch it on YouTube.
The clay itself
Which clay, and how soft it wants to be.
All eight of our clay bodies will coil. There is no coil clay and no wrong choice here, so use whatever you were going to glaze it with.
Softness is the part that actually matters. Coil rolling wants clay a touch softer than you would want for throwing. Stiff clay cracks along the outside of every bend before it ever gets round, and no amount of hand position fixes that. If your bag has firmed up in a cubby, it is worth putting the water back into it before you start rather than fighting it for an hour.
Grog changes the feel, not the method. A heavily grogged body rolls with more texture and shows small tears along the edges as it lengthens. That is the grog, not your hands, and it disappears once the coil is blended into a wall. A smooth body rolls glassier and shows every finger mark you leave on it, which cuts both ways.
Reclaim is often ideal. Reclaimed clay tends to come out slightly softer and slightly more plastic than a fresh bag, which is exactly what coil rolling wants. If you have a bucket going, this is a good use for it.
Clay Coil Rolling Tips and Tricks
RosenArt
What to take from it
A grab bag rather than a single method, which is useful once you have the basic roll working and are looking for a few more habits to try. Take the ones that suit your hands and ignore the rest.
Batching
Roll them all first, then keep them covered.
Stopping to roll a coil in the middle of a build means your last join is stiffening while you make the next one, and uneven stiffness across a wall is how pots lean and crack. Roll the whole batch before you touch the base.
How many you need
One ring of coil is the distance around the pot at that height, which is a little over three times its width. A pot five inches across eats roughly sixteen inches of coil per ring, so one long coil is about one ring.
For height, reckon on somewhere between two and three rings per inch of finished wall once they are blended down. A six inch pot five inches wide is therefore somewhere in the region of fifteen coils. Roll a couple extra. Nobody has ever regretted a spare coil.
Keeping them workable
A coil is nearly all surface, so it stiffens far faster than the block it came from. Fifteen minutes uncovered in a dry room is enough to change how it behaves.
Lay them straight on a board, or in a loose spiral, and get plastic over them. Do not stack them in a heap, because the ones underneath flatten under the weight of the ones on top and you have undone the work.
Eighteen inches is the practical ceiling
Longer than that and a coil gets unmanageable to pick up in one piece, and the ends start drying before you use them. Two shorter coils joined properly are better than one long one that went leathery halfway down.
Troubleshooting
Eight ways it goes wrong, and what caused each one.
Four ways it goes wrong.
Each of these has a most likely cause, and it is often not the thing people reach for first.
Flat, oval, ribbon-like
Your strokes are too short. The coil is rocking rather than turning over, so the same two faces take every bit of the pressure. Lengthen the stroke until it completes a full rotation, about two inches for a half inch coil.
Fat in the middle, pointy at the ends
Your hands are living at the ends. Whatever is under your hands gets thinner, so the middle stays fat while the tips get worked to nothing. Start over the middle and drift outward, easing off as you reach the last inch.
Cracks along the outside as it lengthens
The clay is too stiff, or the surface is too dry. Clay bends on the outside of every curve, and stiff clay tears there first. Soften the clay, or mist the canvas, before you change anything about your hands.
Grooves running down the length
Your fingers are apart. Every gap between fingers becomes a ridge of clay that had nowhere to go. Close your fingers and roll with the whole flat of the hand, heel to fingertip.
It skids instead of turning
The surface is too slick. A polished or plastic covered top lets the coil slide under your hands, so it gets pushed along rather than rolled over. Move to canvas or bare wood.
One flat side that will not come out
You kept rolling after it went oval. More of the same only moves the flat around. Lift the coil, give it a quarter turn so the flat faces up, lay it back down and use long light strokes until it comes back round.
It sticks to the table
The clay is too wet, or you leaned on it. Slide a wire or a rib underneath rather than peeling it up, since peeling stretches one side and you will be rolling that out for the next two minutes.
Bubbles opening up as you roll
It was not wedged. Rolling stretches the clay over every trapped pocket until the skin splits. There is no recovery mid-coil worth attempting. Ball it up, wedge it properly, start again.
6 Essential Tips for Coiling Clay to Make Sculpture | ERIN FURIMSKY
Ceramic Arts Network
What to take from it
Sculptural work puts more weight on every coil than a mug ever will, so the tolerances are tighter and the habits are more visible. Useful even if you never build anything large, because a problem that is subtle at mug scale is obvious at this one.
Short list
Never do these.
- Do not start from a ball. Squeeze a rough log in the air first. Starting from a ball is one of the most common reasons coils flatten.
- Do not use a rolling pin. A pin has one job and that job is flattening. It cannot make a cylinder.
- Do not roll on bare plastic. It skids and it sticks, sometimes in the same stroke.
- Do not leave rolled coils uncovered while you build with the first one. They stiffen at a completely different rate to the wall you are attaching them to.
- Do not roll a coil longer than you can pick up in one hand. If it sags in half when you lift it, it was too long before you finished it.
Ten minutes
The drill that fixes it faster than a month of building.
One pound of clay, a wire, and a ruler. You are not making anything, which is exactly why it works. Nobody diagnoses their own rolling while they are worried about a pot.
-
Roll one coil to a half inch, however you normally would
No corrections, no thinking about it. This is the control, and it needs to be an honest sample of your current habit.
-
Cut it in three places and look at the ends
Circle, oval, or flat bottomed. Note which. Then check whether all three cut faces are the same size, because that is a separate question and a separate fault.
-
Roll a second one with a ruler on the table
Put the ruler beside the clay and consciously make every stroke two inches long. It will feel absurdly slow and deliberate. Do it anyway.
-
Cut that one in three places too
In almost every case this second coil is visibly rounder, and that comparison is the entire lesson. You have now proved to yourself that stroke length, not practice, was the variable.
-
Roll a third without the ruler and check it
The habit fades within a few minutes, so this last one tells you how much of it stuck. Repeat the drill once at the start of your next few sessions and it stops fading.
Then put the clay back
Everything you just cut up wedges straight back together, so the drill costs you nothing except the ten minutes. Reclaim it if it has dried out at all while you were working.
Questions we get asked
The ones that come up every week.
Do I have to roll on canvas?
No, but you do need something with tooth. Bare wood works just as well and some people prefer it. What you cannot use is anything polished or plastic covered, because the coil slides under your hands rather than turning over, and a coil that slides goes flat no matter how good your technique is.
My coils crack the moment I start rolling. What is wrong?
Almost always the clay is too stiff. Clay stretches on the outside of a curve, and stiff clay tears there before it will bend. Check the clay first by folding a small piece in half: if the fold cracks, that is your answer and no hand position will fix it. The second cause is a bone dry canvas pulling water out of the surface, which is worth a light mist in a dry room.
Can I use a rolling pin, or roll between two boards?
Not a rolling pin. A pin flattens, which is the opposite of what you want, and it cannot produce a cylinder. A flat board pressed on top and moved back and forth does work and some potters like it, because the board keeps the pressure even across the whole length. It is slower than hands and it is harder to feel what the clay is doing, so we teach hands first and leave the board as something to try later.
How thick should a coil be for a mug compared to a big planter?
Half an inch covers a mug and most of what people build. A large planter is easier at three quarters of an inch, mostly because you get height faster and there are fewer joins to go wrong. The thing to remember either way is that the coil should be thicker than the wall you want, because blending thins it.
Do coils need scoring and slipping when I join them?
Yes for anything you want to survive drying and firing, and the rules are the same as any other join. We have a whole page on scoring and slipping that covers how rough is rough enough and how wet is too wet. Rolling well makes this easier, because two round coils meet along a clean line and two flat ones trap a hollow between them.
Can I just use the extruder instead of learning this?
For a big build, an extruder is genuinely faster and gives an identical cross section every time. Handheld extruders are available at Purple Level and Black Level, and the wall extruder is Black Level only, so it depends where you are. It is worth learning to roll regardless, because rolling works at every level, on any table, with nothing to set up or clean afterward.
How many coils should I roll before I start building?
All of them. A ring of coil is a little over three times the width of the pot, so a five inch wide pot uses roughly sixteen inches per ring, and you get somewhere between two and three rings per inch of finished height. Work out a rough number, add a couple, and roll the lot before you touch the base. Stopping to roll mid-build leaves your last join drying while you work.
My coils look fine on the table and wrong in the pot. Why?
Because from above, an oval coil and a round one are the same width. You are seeing the top view on the table and the side view in the wall. This is the entire reason we push cutting one open: it is the only view that shows you the truth, and it takes two seconds.
Where to next
Nobody rolls a round coil by trying harder.
That is the whole thing.
Rolling coils has a reputation as one of those things you either have a feel for or you do not, and it is not that at all. It is a start shape, a hand shape and a distance, and every one of them is a decision rather than a talent. Get those three right and your coils are round on the first afternoon. Then cut one open every so often, because the strokes get shorter as you get comfortable and that is how the flats come back.
Start from a log, not a ball. Flat hands, fingers together. Strokes long enough to turn the coil right over, about two inches for a half inch coil. Then cut one open and look at the end. If you want the reasoning, the sizing table, the alternatives and the ten minute drill, the Comprehensive Version is one tap back up the page.
How to Coil Build Pottery
What to do with the coils once you have a pile of good ones.
Scoring and Slipping
Every coil join is a join, and joins have rules.
Softening Stiff Clay
If your clay cracks as it bends, start here instead.
How to Make a Pinch Pot
The other hand building start.
Slab Rollers and Slab Molds
How to get certified on the slab rollers before you cut coils from a slab.
Clay Hole University
Every lesson we have written, in the order pottery actually happens.
Which version would you like to print?
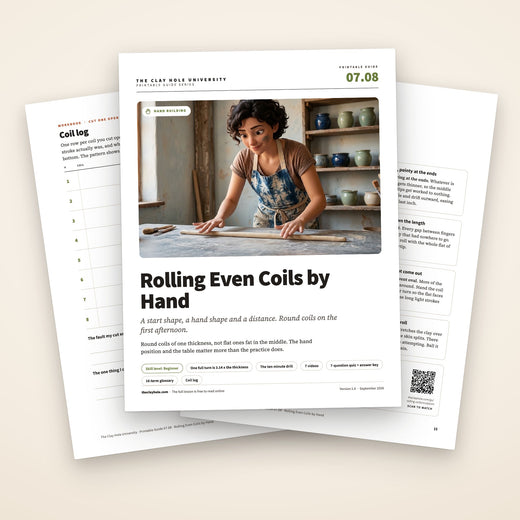
Videos come out as a labeled box with the title and channel to search for, since paper does not play them.