Pottery Date Night
 Bring All Your Friends Free Week
 Give a Month of Pottery
 Private Pottery Parties

 The Welcome Booklet
 Your First Ten Sessions
 The Pottery Process
 Finding the Studio
 Your Classes Never Expire
 The Four Tables
 Who’s Who
 The Rewards Program
 Flux Glazes
 The Calculators
 Kiln Tracker
 Holiday Kiln Deadlines

 Beginner’s Tool Set
 Fingernail Clippers
 Mayco Clay Mender
 Epoxy for Kintsugi
 Applicator Bottles
 Large Bead Rack
 Raku Workshop
 Nighttime Raku
 Horsehair and Feather Raku
 The Clay Hole T-Shirt
 Embroidered Crewneck
 Zip-Up Hoodie
 Pre-Made Bisqueware
 Glaze Catchers
 Kiln Cookies
 Clay Cubby Rental
 The Glaze Bible, Printed
 The Book of Molds, Printed
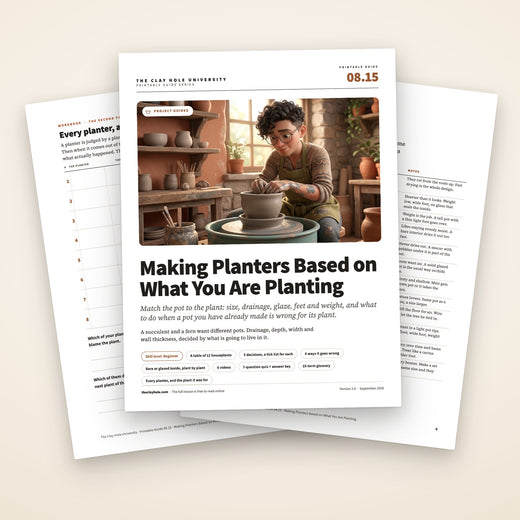
 Printable Pottery Guides
 Free Printable Trackers
 Gifts for Potters
 Christmas Pottery Ideas
 Mother’s Day Gift Ideas
 Pottery Date Night
 Studio Calendar
 2027 Studio Events
 What Should I Do Today?
 How to Throw on the Pottery Wheel
 How to Make a Pinch Pot
 How to Tap Center a Pot
 The Five Stages of Clay
 Is Pottery Hard to Learn?
 Pottery Wheel Practice Drills
 20 Easy Hand-Building Projects
 Everything That Sounds Wrong

 A Beautiful Piece, Every Time
 Slab Roller Tips
 Any Dish as a Slump Mold
 Slab Roller & Slab Mold Certification
 The Pottery Skill Tree
 Clay & Pottery Calculators
 Logging Your Pottery and Glazes
 The Pottery Dictionary
 Why Did My Pottery Do That?
 The Pottery Cone Chart
 Pottery Myths, Fact-Checked
 Is Handmade Pottery Food Safe?
 Incredible Ceramic Artist Videos
 How Dan Throws Giant Pots
 How to Dry Your Pottery
 The Pottery Wheel Introduction
 Pottery by Zodiac Sign
 Personality and the Pottery Wheel
 Pottery for Engineers
 ADHD, Hyperfocus, and Never Running Out
 Hobbies for Burnout
 Screen-Free Hobbies for Adults
 Every Addiction I Ever Had Lost to Art
 Functional Pottery Is Engineering
 How Do We Compare?
 Pottery Classes by City
 Every Pottery Studio in Utah
 Pottery in Draper
 Featured Members
 The Signature Wall
 Making Friends as an Adult Is Brutal
 The Clay Hole Commandments
 2027 Pottery Contests
 2027 Studio Parties
 Gallery Night

 Scream It Into the Void
 Destroy the Glaze Wall
 Daily Affirmation Cards
 Everything That Can Go Wrong
 Subscribe to Our Newsletters
 Contact The Clay Hole
 Corporate Team Building

 Glaze Combinations
 Glazes We Do Not Carry
 Making Glaze Test Tiles
 The Mega Glaze Tool
 How to Use the Mega Glaze Tool

 Glaze Brushing Techniques
 How to Use Underglaze
 How to Use Dipping Glazes
 Glaze Problems, Causes and Fixes
 The Dipping Glaze Guide

 Making a Glaze Catcher
 Fused or Sharp After Firing
 The Signature Wall
 His Viral Videos
 His Own Ceramics
 Meet Mud
Project guides · Planters
Ask the plant what it wants. Then make that.
A planter is a pot with a job, and the job is set by the roots that will live in it. A succulent wants to dry out completely between waterings; a fern never wants to. A snake plant will tip over a light pot; an orchid will rot in a tight one. Once you know what the plant needs, every decision about the pot follows, from the hole in the bottom to whether the inside gets glaze.
This page covers the five things every planter has to get right, then a plant-by-plant table of what to change, then how to build each of those things on the wheel or by hand: the hole, the floor, the feet, the interior, the weight. Six fixes, six videos, and what to know before you fire one here.
This is the short version: the five decisions, the table, then the hole, the feet and the inside. The plant-by-plant reasoning, the questions and five of the six videos are in the comprehensive version.

Read it, then watch it
Why this is written down and filmed, both.
Making a planter is two skills stacked: knowing what the plant needs, which is reading, and making a pot that provides it, which is watching. The table on this page is the reading. Nobody films a table, and a table is exactly what you want on your phone at the wheel. The hole, the folded rim and the attached tray are the watching, and the potters below do those better on camera than any paragraph can.
So read the five decisions, pick your plant from the table, then watch the video that matches the build. Reading first gives you the questions; watching second gives you the hands. People who do both remember the pot they were making and why, which is the whole point of a page like this.
Use both, in this order
The five decisions and the table first. Then the first video, which makes three different planters in eleven minutes. Then the wheel or the slab roller, with the tick list open.
The whole idea
Five decisions, and the plant makes all of them for you.
Every planter answers five questions. How deep and how wide, which the roots decide. How it drains, which is a hole of at least half an inch and a floor that slopes toward it. Whether the inside is glazed, which decides how fast the soil dries. What it stands on, so the hole is never sealed flat against a saucer. And how heavy it is, so a tall plant does not tip it. Answer those for the plant in front of you and the pot designs itself.
Before you touch clay
The five decisions every planter makes, whether you make them or not.
A pot that skips one of these still holds a plant. It just holds it badly, and slowly.
The table
A dozen common houseplants, and what each one wants from the pot.
Six common houseplants, and what each one wants from the pot.
This is the part to have open on your phone. Pot sizes assume a plant that is being repotted into something it will fill within a year or so.
Have this open on your phone at the wheel. Six more plants are in the comprehensive version.
| Plant | Shape | Drainage | Inside | Notes |
|---|---|---|---|---|
| Succulents, echeveria, sedum | Wide and shallow, three to four inches deep | Generous, one big hole or several | Bare clay | They rot from the roots up. Fast drying is the whole design. |
| Cactus | Only slightly wider than the plant, moderate depth | Generous | Bare clay | Heavier than it looks. Weight low, wide foot, no glaze that seals the inside. |
| Snake plant, ZZ plant | Tall, narrow, heavy base | One good hole | Either | Weight is the job. A tall pot with a thin light foot goes over. |
| Pothos, philodendron, monstera | Deeper than wide | One good hole | Glazed | Likes staying evenly moist. A bare interior dries it out too fast. |
| Fern | Moderate depth, wide | One hole, plus a saucer you keep water in | Glazed | Never dries out. A saucer with pebbles under it is part of the pot. |
| Orchid | Narrow, with slots or holes in the walls | Holes in the floor and the sides | Bare clay | Roots want air. A solid glazed pot is the usual way orchids die. |
| Herbs: basil, mint, parsley | Six inches deep at least, wide for several | Generous, with a saucer | Glazed | Thirsty and shallow. Mint gets its own pot or it takes the others. |
| Peace lily, calathea | Deeper than wide | One good hole | Glazed | Moisture lovers. Same pot as a pothos, a size larger. |
| Bonsai | Very shallow, wide, with feet | Two or more holes, plus wire holes | Bare or glazed outside only | Feet lift the floor for air. Wire holes let the tree be tied in. |
| Fiddle leaf fig, rubber plant | Deep and heavy | One or two big holes | Glazed | A big plant in a light pot tips. Thick floor, wide foot, weight low. |
| Aloe, jade | Wide, moderate depth, heavy | Generous | Bare clay | Top-heavy over time and hates wet feet. Treat like a cactus with a wider foot. |
| Seedlings and cuttings | Small, two to three inches | One hole | Either | Temporary homes. Make a set of six the same size and they stack. |
Bare clay means unglazed inside. Ours fires to cone 5½, which is tight enough to be frost resistant if the pot drains, and porous enough at the surface to still breathe a little. A glazed interior on the same clay holds water noticeably longer.
Step one
One to two inches wider than the root ball, and the depth the roots already have.
Bigger is not kinder. Look at the plant out of its nursery pot. The roots are the pot’s brief. A root ball four inches across wants a pot five to six inches across; a root ball three inches deep wants a pot four to five inches deep. The instinct to make something roomy so the plant can grow into it is the instinct that kills it: soil with no roots in it stays wet, and wet soil around a root ball with nowhere to send the water rots from the outside in. Small pot now, repot in a year, is how nurseries do it and why their plants live.
Bigger is not kinder. Roots decide. One to two inches wider than the root ball, the depth the roots already have. Shallow rooters wide and low, taproots and tropicals deeper than wide. Soil with no roots in it stays wet and rots the plant from the outside in, so never size a pot for the plant it might become.
Shallow rooters, which is most succulents and all bonsai, want wide and low, and a deep pot for them is mostly dead soil. Tropicals and anything with a taproot want depth, and a shallow bowl for a monstera dries the top inch while the roots below stay dry too. Depth and width are not style choices on a planter; they are the answer to a question the roots already asked.
On the wheel, throw the pot slightly taller and wider than the finished size, because clay shrinks about twelve percent through drying and firing. Ours is a cone 5½ firing, and the proportions lesson has the shrinkage arithmetic. Measure the root ball, add the shrinkage, add your one to two inches, and throw to that.
For a set, a pinch pot or a slab cylinder is faster than the wheel below four inches across, and matches better. Six seedling pots from one slab, cut with the same template, come out identical.
Step two
A real hole, cut at leather hard, in a floor that slopes toward it.
Half an inch, minimum. The drainage hole is the single most important thing on the pot, and the single most skipped. Half an inch across is the floor for a pot up to about six inches wide; beyond that, go to three quarters, or cut three or four holes spread across the base. Cut it at leather hard with a hole cutter or a drill bit twisted by hand, never at bone dry, when the clay chips, and never before the floor has been compressed, when a hole starts a crack. Bevel the edge of the hole slightly from both sides with a damp finger so it does not have a sharp lip to catch roots.
Half an inch, minimum. A hole at least half an inch across for a pot up to six inches, bigger or several beyond that, cut at leather hard with a hole cutter and beveled with a wet finger. Throw the floor with a slight fall toward the hole, and leave it thick enough to be cut, about three eighths.
The floor should fall gently toward the hole rather than sitting dead flat, because a flat floor holds a sheet of water around the edge that the hole never reaches. On the wheel, that is a rib drawn from the wall to the center with a little pressure at the end; by hand, it is a slab pressed into a shallow dome and turned over. A few millimeters of fall is plenty.
Leave the floor thick enough to take a hole without weakening, which means three eighths of an inch at least. A thin floor with a hole in it is where planters crack in the first frost. Our too-thin bottom lesson is the rescue if you went too far.
Do not put gravel in the bottom of the finished pot, and tell whoever you give it to not to either. Water does not move from fine soil into coarse gravel until the soil above is saturated, so a gravel layer raises the wet zone up into the roots instead of draining it. One of the videos below is a gardener explaining exactly this, and it changed how a lot of potters design floors.
Step three
The hole has to have somewhere to go.
Lift the floor. A perfect hole pressed flat against a smooth saucer or a windowsill is a hole that does not drain. Something has to lift the floor. On the wheel, that is a trimmed foot ring with two or three small notches cut through it so water can escape sideways, or three small feet added at leather hard. By hand, it is three coils or balls pressed on as feet, or a slab cut into a ring and scored on. Three feet always sit flat; four rock.
Lift the floor. A hole pressed flat against a saucer does not drain. Trim a foot ring and notch it in two or three places, or add three feet at leather hard. A saucer wants ridges or a raised center so the pot sits above the water it catches. Three feet sit flat; four rock.
Saucers are their own small design problem. A flat saucer refills the pot from below every time you water; a saucer with three ridges or a slightly raised center keeps the foot above the puddle. Make the saucer an inch wider than the foot of the pot, with a rim tall enough to hold a real watering, about three quarters of an inch. Throw it from the same clay so it shrinks the same amount and they still fit after the firing.
If you would rather the saucer never come off, our attached drip tray lesson is the whole method, including how to keep the tray from cracking away from the pot in the kiln. This page assumes a separate one.
Bonsai pots get feet and also get two extra small holes near the edges of the floor for the wire that ties the tree in. Cut those when you cut the drainage holes.
Step four
Glaze the inside to hold water. Leave it bare to lose it.
The plant decides. Fired stoneware is not a plastic pot. Left bare, the inside surface wicks water out of the soil and evaporates it through the walls, which dries the root zone faster and more evenly than the hole alone. Glaze seals that surface, and the soil stays wet longer. Neither is right; the plant decides. Succulents, cacti, orchids and anything else that hates wet feet get a bare interior. Ferns, tropicals, herbs and anything that wilts the moment it dries get glaze inside. The outside is yours either way.
The plant decides. Bare clay inside wicks water out and dries the soil fast; glaze inside seals it and keeps the soil wet longer. Succulents, cacti and orchids get bare interiors, tropicals, ferns and herbs get glaze. Keep glaze out of the drainage hole, and glaze the outside as you like.
Glazing the inside of a planter is a brush-on job here, coat by coat, and it is easier before the pot is too tall to reach into; three coats, and the brushing lesson covers the coat-by-coat rhythm. Keep the glaze out of the drainage hole and off the foot, or the hole seals and the foot fuses to the shelf. A wipe with a damp sponge round the hole after glazing is a two second habit that saves the pot.
A bare interior does not mean an unfinished one. Burnishing the inside of a succulent pot gives it a soft sheen without sealing it, but the sheen softens in the bisque and is gone in a glaze firing at cone 5½, so it is not worth doing on a planter that is glazed on the outside. A light wash of underglaze reads as color while still breathing, and a damp sponge at leather hard leaves a clean matte. Our burnishing lesson covers the first and the underglaze lesson the second.
Outdoors, a glazed exterior sheds rain and freezes less, and a bare exterior grows moss and looks like it has been there for years. Both survive a Utah winter if the pot drains and is not left sitting full of water when the freeze comes.
Step five
Put the weight low, and give the rim a job.
Bottom heavy, on purpose. A planter carries a plant that grows, and a pot that is stable on the day you make it can be top-heavy in a year. Weight belongs low: a thicker floor than you would leave on a bowl, a wide foot, and walls that taper thinner toward the rim rather than the other way. A tall plant in a tall pot wants the foot at least two thirds of the width of the rim. If a pot feels light in your hands at leather hard, it will feel light with a four foot plant in it.
The rim on a planter gets lifted, knocked, and dragged across a patio. A folded rim, rolled outward at the end of the throw, is stronger than a plain one, gives a grip for lifting, and stops the pot cracking when it is set down hard. Our folded rim lesson is the method, and one of the videos below throws a planter with exactly that rim.
Hanging planters reverse the weight problem: they want to be light. Thin walls, a small foot or none, and three holes just below the rim spaced evenly, cut at leather hard with the drainage hole and large enough for the cord you will actually use. Bevel them like the drainage hole so the cord does not fray on a sharp edge.
Handles on a planter are decorative until the pot is heavy, and then they are structural. If a big pot gets handles, pull them thick, attach them low on the wall rather than at the rim, and dry the whole thing slowly under a sheet so the joins do not open.
Watch it done
Now watch five potters and a gardener make the case.
Watch this one, then go look at the roots.
None of these people work here or know we exist. Between them they cover the wheel, the slab, the folded rim, the attached tray, and the drainage science. The still frames load while you read; the player and its cookies wait until you press play.
Three planters in eleven minutes, holes and feet included. The other five videos are in the comprehensive version.
When it goes wrong
Six things that go wrong, and what each one is telling you.
The three things that go wrong first.
Pick the one that looks like your pot, or your plant. Half of these are the pot not draining, which is the whole subject.
Pick the one that looks like your pot.
Yellow leaves, wet soil, a smell
Water is not leaving. The hole is too small, sealed against a saucer, blocked with glaze, or the pot is far too big for the roots.
Half an inch minimum, feet or a notched foot ring, glaze wiped out of the hole, and a pot sized to the roots rather than the plant’s future.
Repot the plant into something that drains. The pot is not lost: drill the hole bigger with a diamond bit under a trickle of water, with safety glasses on, and add three stick-on feet.
The hole cracked on the way through, or the edge crumbled
Cut too late, at bone dry, when clay chips instead of cuts; or cut before the floor was compressed; or the floor was too thin to take it.
Cut at leather hard, after compressing, in a floor at least three eighths thick, with a hole cutter or a twisted drill bit rather than a push.
A chipped hole is cosmetic on a planter. Bevel it with a damp sponge if it is still leather hard; if it is dry, leave it and fire it.
The plant wilts a day after watering
A bare interior on a plant that wanted glaze, a pot too small for a thirsty plant, or thin walls in a sunny window.
Glaze the inside for tropicals, ferns and herbs. Size up one step for the thirsty ones. Thicker walls hold more water in the clay itself.
A saucer with a little standing water buys a moisture lover time, and a plastic nursery pot slipped inside the ceramic one turns any planter into a cachepot.
A crack after the first hard freeze
Water sat in the pot, froze and expanded. Usually a blocked hole, a saucer that filled, or the pot being left full of wet soil with nowhere to drain.
A pot that drains freely survives a Utah winter at cone 5½. Lift it on feet, empty the saucer before a freeze, and never leave it sitting in a puddle.
A frost crack is done. Epoxy repairs on a planter fail in the next freeze. It becomes a shard for drainage in a bigger pot.
It goes over every time somebody brushes past
Weight too high, foot too narrow, or a light pot under a heavy plant.
A thicker floor, a foot at least two thirds the rim width for tall plants, and walls that thin toward the rim. Throw the base before the plant grows.
Drop it into a heavier outer pot, or set the whole thing in a wide saucer filled with gravel for weight.
The pot is stuck to the shelf, or the hole is glazed shut
Glaze ran down the outside onto the foot, or a brush loaded the hole.
Wax or a damp sponge on the foot before glazing, glaze wiped out of the hole after, and no glaze in the bottom quarter inch of the outside.
Our fused pottery lesson covers grinding it free. A hole glazed shut can be drilled open with a diamond bit under water, with safety glasses on.
How it works here
Planters are a beginner project here, and a popular one.
This page is written for potters everywhere. Here is where our studio stands.
Four things to know here
Throw it or hand build it at any Level; the wheels, slab rollers and slab molds are open to everyone. Cut the hole at leather hard before the bisque, keep glaze out of it, put a kiln cookie or glaze catcher under every pot, and remember that a planter is measured like any piece for the glaze firing: five cents per cubic inch with a $4.80 minimum. Bisque is free.
Any Level
Wheels, slab rollers and slab molds are open to every Level, so a planter is one of the first projects most people here make. The slab tools need the free slab roller and mold certification first. A slab mold makes a shallow succulent bowl in ten minutes, and a pinch pot makes a seedling pot in five.
Cutting the hole
Cut it at leather hard, before the bisque, and bevel the edge. Ask the onsite instructor for a hole cutter if you cannot find one in the tool bins; a drill bit twisted by hand works too.
Firing cost
A planter is measured like anything else for the glaze firing: five cents per cubic inch, $4.80 minimum, capped at $600. A twelve inch pot adds up faster than a mug, so measure before you commit to a giant. Small pieces are the exception: several that fit on one six inch kiln cookie, a quarter inch apart and under 125 cubic inches in total, are charged as one piece, so seedling pots that share a cookie are one firing.
Glaze rules
No glaze on the foot, none in the bottom quarter inch, and the drainage hole wiped clean after glazing. A hole full of glaze is a hole that seals shut in the kiln and a pot that goes on the fused shelf. A kiln cookie or glaze catcher goes under every planter, every time, because a glazed inside sits right over the hole.
Outdoors
Our clays fire to cone 5½, which is tight enough to live outside through a winter if the pot drains. A planter left full of wet soil with a blocked hole will crack in the first hard freeze regardless of the clay.
Cleanup
The usual clean-up instructions apply. Hole cutters go back to their bin rinsed.
Questions people actually ask
The ones that come up at the wheel and at the window.
Does a planter really need a hole?
Yes, if a plant is going to live in it. A pot without a hole is a cachepot: fine for holding a plastic nursery pot, fatal for soil and roots. The only exceptions are semi-aquatic plants and people who are very disciplined about watering, and neither is the plant you are thinking of.
How big should the hole be?
Half an inch across at least, for pots up to about six inches wide. Three quarters, or several holes, above that. A hole the diameter of a pencil looks like drainage and is not.
Should I put gravel in the bottom?
No. Water does not move from fine soil into coarse gravel until the soil is saturated, so a gravel layer lifts the wet zone up into the roots. One hole in a sloped floor does more than any amount of gravel.
Glazed inside or not?
Bare fired clay wicks water out of the soil and dries it faster; glaze seals it and keeps it wet longer. Succulents, cacti and orchids want bare. Ferns, tropicals and herbs want glaze. The outside is yours either way.
Will it survive outside in a Utah winter?
A cone 5½ stoneware pot that drains will. What cracks pots in winter is water sitting inside them and freezing, so the hole, the feet and an emptied saucer matter more than the clay.
Can I throw the saucer with the pot?
Yes, and our attached drip tray lesson covers it, including how to stop the tray cracking away from the pot in the kiln. A separate saucer from the same clay is simpler and lets you empty it.
Why did my plant die in my beautiful pot?
Almost always one of three things: no hole, a hole sealed flat against a saucer, or a pot far too big for the roots so the soil stayed wet. Occasionally the fourth: a glazed interior on a succulent.
How thick should the floor be?
Three eighths of an inch at least, thicker on a big pot, so it can take a hole without weakening and carry weight low. It is one of the few pots where a thick bottom is a feature.
Related lessons
Six lessons that sit next to this one.
Three to read next.
A planter is a bowl or a cylinder with a hole and a job. These are the pages about the bowl, the cylinder and the hole.
That is the whole idea
Roots first. Hole, floor, feet, inside, weight. Then make it pretty.
The pots that kill plants are almost never ugly. They are handsome pots with no hole, or a hole sealed flat on a saucer, or a deep glazed cylinder holding a cactus in permanent swamp. Get the five decisions right and the plant will forgive almost anything else you do to the outside.
If you want the plant-by-plant reasoning, the six fixes and the other five videos, switch to the comprehensive version at the top. Otherwise, go look at the plant and count its roots.
Written for potters everywhere. Where our studio does things differently, the page says so.
Which version would you like to print?
Both print clean, with the videos turned into labeled boxes you can search for later.