Pottery Date Night
 Bring All Your Friends Free Week
 Give a Month of Pottery
 Private Pottery Parties

 The Welcome Booklet
 Your First Ten Sessions
 The Pottery Process
 Finding the Studio
 Your Classes Never Expire
 The Four Tables
 Who’s Who
 The Rewards Program
 Flux Glazes
 The Calculators
 Kiln Tracker
 Holiday Kiln Deadlines

 Beginner’s Tool Set
 Fingernail Clippers
 Mayco Clay Mender
 Epoxy for Kintsugi
 Applicator Bottles
 Large Bead Rack
 Raku Workshop
 Nighttime Raku
 Horsehair and Feather Raku
 The Clay Hole T-Shirt
 Embroidered Crewneck
 Zip-Up Hoodie
 Pre-Made Bisqueware
 Glaze Catchers
 Kiln Cookies
 Clay Cubby Rental
 The Glaze Bible, Printed
 The Book of Molds, Printed
 Printable Pottery Guides
 Free Printable Trackers
 Gifts for Potters
 Christmas Pottery Ideas
 Mother’s Day Gift Ideas
 Pottery Date Night
 Studio Calendar
 2027 Studio Events
 What Should I Do Today?
 How to Throw on the Pottery Wheel
 How to Make a Pinch Pot
 How to Tap Center a Pot
 The Five Stages of Clay
 Is Pottery Hard to Learn?
 Pottery Wheel Practice Drills
 20 Easy Hand-Building Projects
 Everything That Sounds Wrong

 A Beautiful Piece, Every Time
 Slab Roller Tips
 Any Dish as a Slump Mold
 Slab Roller & Slab Mold Certification
 The Pottery Skill Tree
 Clay & Pottery Calculators
 Logging Your Pottery and Glazes
 The Pottery Dictionary
 Why Did My Pottery Do That?
 The Pottery Cone Chart
 Pottery Myths, Fact-Checked
 Is Handmade Pottery Food Safe?
 Incredible Ceramic Artist Videos
 How Dan Throws Giant Pots
 How to Dry Your Pottery
 The Pottery Wheel Introduction
 Pottery by Zodiac Sign
 Personality and the Pottery Wheel
 Pottery for Engineers
 ADHD, Hyperfocus, and Never Running Out
 Hobbies for Burnout
 Screen-Free Hobbies for Adults
 Every Addiction I Ever Had Lost to Art
 Functional Pottery Is Engineering
 How Do We Compare?
 Pottery Classes by City
 Every Pottery Studio in Utah
 Pottery in Draper
 Featured Members
 The Signature Wall
 Making Friends as an Adult Is Brutal
 The Clay Hole Commandments
 2027 Pottery Contests
 2027 Studio Parties
 Gallery Night

 Scream It Into the Void
 Destroy the Glaze Wall
 Daily Affirmation Cards
 Everything That Can Go Wrong
 Subscribe to Our Newsletters
 Contact The Clay Hole
 Corporate Team Building

 Glaze Combinations
 Glazes We Do Not Carry
 Making Glaze Test Tiles
 The Mega Glaze Tool
 How to Use the Mega Glaze Tool

 Glaze Brushing Techniques
 How to Use Underglaze
 How to Use Dipping Glazes
 Glaze Problems, Causes and Fixes
 The Dipping Glaze Guide

 Making a Glaze Catcher
 Fused or Sharp After Firing
 The Signature Wall
 His Viral Videos
 His Own Ceramics
 Meet Mud
Throwing Techniques
Getting the pot off the wheel.
This is the last eight seconds of throwing, and it is where more good pots die than anywhere else in the process. Here is every way to separate a pot from a wheel head, which one to reach for, and the small decisions that settle whether the rim survives the trip to the shelf.
Written for members of The Clay Hole, and useful to anybody with a wheel. Every video on this page belongs to somebody else, all seven are free, and nothing from YouTube loads until you press play.
Jump to a section
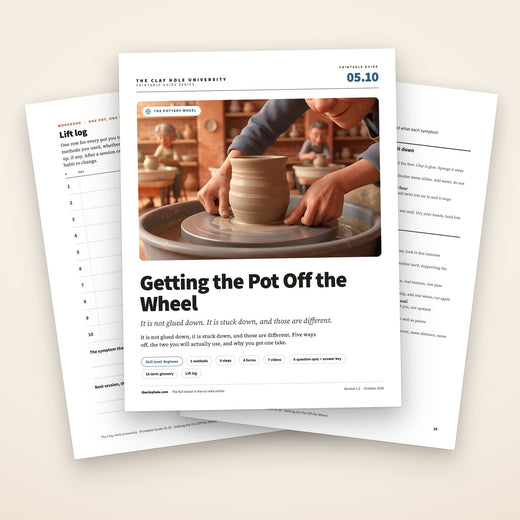
Which version would you like to print?
Videos come out as a labeled box with the title and channel to search for, since paper does not play them.
Start here
The whole idea, in four moves.
A fresh pot is not glued to the wheel head. It is stuck to it, and stuck comes apart. Take the slip away, add water, break the seal, then move it. Everything below this is those four moves, in that order, with the details that make each one work.
First, the one question that decides everything
Can you get a hand on either side of the foot without touching the rim or the walls? If yes, wire it off and lift it, and the six steps below are exactly how. If no, do not lift it at all. Slide it sideways onto a board with a wide metal rib, or throw the next one on a bat and lift the bat instead.
Wide bowls, plates, platters, porcelain and thin flared rims all fail that test, even the ones that look holdable. Reaching for a bat is not cheating and never was. Working potters who sell their pots own stacks of them.
Why this page exists
Read it. Then watch it. Then read it again.
The pot comes off in eight seconds and there is no second try. The words slow those seconds down, the videos play them back at speed. Read it once, then let the videos set the rhythm.
The part nobody explains
It is not glued down. It is stuck down, and those are different.
Nearly every wrecked removal is somebody trying to overpower a bond they could simply have taken apart. Four things are holding a fresh pot to a wheel head. Three of them you can dismantle before you touch the pot, and the fourth is you.

- The slip ring. The wall of thick slop that has piled up around your foot while you threw. That is not water. That is clay, and clay is glue. A sponge takes the whole thing away in one pass, and it is a bigger share of the hold than anybody expects.
- The film of water. A very thin layer of water between two flat surfaces pulls them together hard. A thicker layer does the opposite and lets them slide. That single fact is the reason every water trick further down this page works, and the reason a splash at the right moment does more than pulling harder ever will.
- The seal under the floor. A flat clay bottom on a flat metal disc with no air in between is a suction cup. Lifting straight up asks you to beat the atmosphere. A small twist lets air in at one edge and the seal simply stops existing.
- Your own grip. Not adhesion, but it belongs here, because it is the one that actually ruins pots. Wet fingers stick to a wet wall. The pot moves, your fingers do not, and the panicked correction you make in that quarter second is the dent you will look at forever.
One sentence, if you skip everything else
Take the slip away, add water, break the seal, then move it. In that order. Every method on this page is a variation on those four moves, and every failure on this page is one of them skipped.
The 60-second version
There are five ways off. You will mostly use two.
Most potters learn one method, apply it to everything, and then quietly stop making the forms it does not suit. Here are all five in one place, and none of them is harder than the one you already know.
Method one
Wire and lift
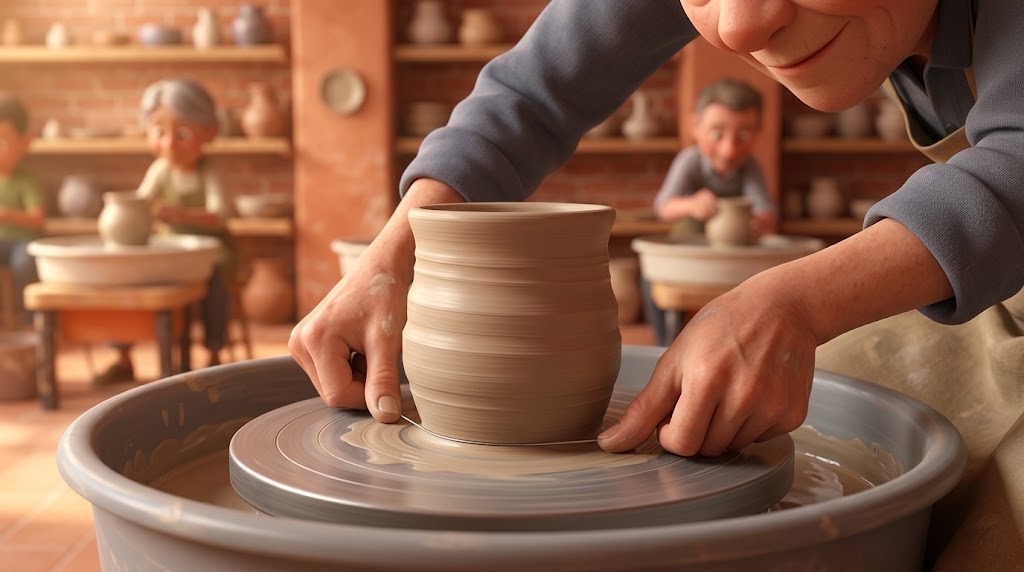
Wire under the pot, dry your hands, pick it up from the foot with both hands. The default for anything you can get two hands around without touching the part you care about.
Best for
- Mugs, cups, tumblers
- Cylinders and small vases
- Small bowls with a real wall
Method two
Wire, wait, wire again
The same thing with a pause in the middle. The pot re-sticks in the seconds after the first cut, so the second pass is the one that actually frees it. This is not really an alternative method. It is the first one, done properly.
Best for
- Everything, every time
- Especially anything that felt stuck
Method three
Float it off
Enough water under the pot that it hydroplanes on the wheel head, then push it sideways onto a board. There is no lifting involved at all, which is exactly why it works on the things you cannot lift.
Best for
- Heavy pots
- Wide bases
- Anything you cannot grip
Method four
Slide it off
Wire it, then transfer it across onto a tile or a board with a wide metal rib, so your hands never touch the wall at all. Slower and fussier than the others, and it saves pots nothing else can.
Best for
- Shallow bowls
- Thin and flared rims
- Porcelain
Method five
Do not take it off
Throw on a bat and lift the bat instead of the pot. Then decide, later and calmly, when to cut it loose. Not a beginner move and not an advanced one. It is a way of not touching something you should not touch.
Best for
- Plates and platters
- Anything wider than two hands
- Matching sets you will trim
The one to remember
Method two is the free win
If you read nothing else on this page, cut twice. Almost every beginner who tells us they cannot get pots off the wheel is cutting once, then fighting a pot that quietly re-attached itself while they dried their hands.
It costs four seconds. It is the single highest return move in this whole guide, and nobody ever tells anybody about it.
Tell us what you made
Reach for
Wire and lift.
The form this method was invented for. A cup has a wall you can hold that is not the rim, it weighs almost nothing, and it is the cheapest possible place to build the skill. Cut twice, dry your hands properly, take it low at the foot.
Reach for
Wire and lift, hands low.
Same as a cup, with one extra warning. Your fingers want to creep up the wall as the pot gets taller, and every inch higher is more leverage on a form that is still soft. Whatever height the pot is, your hands stay at the bottom of it.
Reach for
Wire and lift, wide and underneath.
A bowl has very little vertical wall to hold, so support it from below with your fingers spread rather than pinching the sides. Never by the rim, which is the thinnest part of the pot and will happily keep the shape of your fingers. If the rim is thin or flared, slide it instead.
Reach for
Slide it. Do not lift it.
If you cannot get a hand on either side of the foot, there is no lift available to you that does not go through the wall. That is not a skill problem and more practice will not fix it. Wire twice and transfer it sideways onto a board.
Reach for
A bat, every single time.
A plate has no wall at all. There is nothing to hold that is not the surface you just spent twenty minutes finishing. This is the one form where everybody at every level reaches for a bat and nobody thinks twice about it.
Reach for
Float it off.
Weight plus soft walls means the shape changes on the way to the shelf no matter how good your hands are. Flood the wheel head, cut again so the water follows the wire underneath, and push the pot across onto a board without ever picking it up.
Reach for
A bat, or a slide transfer.
Our #16 Porcelain is the least forgiving body in the building and it keeps every fingerprint you hand it. A thin or flared rim has no structure to resist a grip anywhere on the pot. The rule for both is the same: do not put your hands on it while it is soft.
Reach for
Two dry fingers, or a blade underneath.
Small pots thrown off a hump come away between two dry fingertips once you have undercut the neck with a needle tool. Anything you are less sure about goes onto a square bat, a tile, or a palette knife slid in underneath. The wire does the work, not your grip.
Testing Out Techniques for Lifting Pots Off the Wheel!
Florian Gadsby
He works through hands, bats, tile systems and a splash of water on camera, and he is straight about which ones are harder than they look. If you have already read our bat page you have met this one before. It earns the second appearance, because there is nothing else on the internet that puts the methods side by side this honestly. Watch it on YouTube.
The default method
Wire and lift, in nine steps.
Wire and lift, in six steps.
This is the one worth being good at, because it is the fastest and it costs nothing. It goes badly for beginners for one reason and it is almost never their hands. The pot was still attached when they tried to move it.
This is the method for anything you can safely hold. It goes badly for beginners for one reason and it is almost never their hands. The pot was still attached when they tried to move it.
-
Finish the base while you still can
Compress the floor with a rib, undercut the foot at an angle with a needle tool, and sponge the standing water out of the inside. The moment the pot leaves the wheel, none of those three are available to you again, and two of them decide whether it cracks next week.
-
Stop the wheel. Actually stopped
Not slow. Stopped. Everything from here happens on a still wheel, with the pot in a position you can reach comfortably without leaning across it.
-
Sponge the slip away from around the foot
That ring of thick slop sitting against the base is doing real work holding your pot down, and a sponge takes all of it off in one pass. Skip this and you spend the next two minutes fighting a bond you could have deleted in four seconds.
-
Put a few drops of water at the base
About half a teaspoon, right at the edge of the foot, all the way around. Not a puddle. You are not trying to flood anything yet. You are giving the wire something to drag underneath the pot with it.
-
Pull the wire through, taut and flat
Both toggles, wire pulled tight between your hands, thumbs pressed down so the wire rides flat on the metal, drawn steadily toward you in one pass and all the way out the other side. One confident motion. A wire that stops halfway and restarts leaves a ledge.
-
Clean the wire, add a few more drops, cut again
The second pass is the one that matters. The pot re-stuck itself the instant the first pass finished, and this time the wire drags fresh water under the whole footprint. When you nudge the pot with a fingertip and feel it shift a millimeter, it is floating and it is ready.
-
Dry your hands. Completely
This step feels optional and is not. Wet fingers stick to a wet wall, so the pot moves and your fingers stay, and the grab you make to catch it is the dent. A towel across your lap the whole session is the easiest habit in pottery to pick up.
-
Take it low, at the foot, with a small twist
Both hands, fingers as close to the base as you can get them, even pressure from both sides, and a tiny rotation as you start to move it. The twist lets air under one edge and the last of the suction stops existing. Do not squeeze. Do not go anywhere near the rim.
-
Move it level, and set it down flat
Straight across, not up and over in an arc. Keep it upright the whole way, and have the board or the shelf spot already chosen before you pick anything up. Deciding where to put a pot while holding it is how pots meet doorframes.
-
Finish the base while you still can
Compress the floor with a rib, undercut the foot at an angle with a needle tool, and sponge the standing water out of the inside. The moment the pot leaves the wheel, none of those three are available to you again, and two of them decide whether it cracks next week.
-
Stop the wheel, then sponge the slip away from the foot
Stopped, not slow. Then take that ring of thick slop off the wheel head all the way around the base. It is clay, and clay is glue. One pass with a sponge deletes a bond you would otherwise spend two minutes fighting.
-
A few drops of water at the foot, then pull the wire through
Half a teaspoon at the edge of the foot, not a puddle. Then the wire: taut between both hands, thumbs pressed down so it rides flat on the metal, one steady pass toward you and all the way out the far side. A slack wire bows upward under the drag and scoops a dome out of the middle of your floor.
-
Add a few more drops and cut again
The second pass is the one that actually frees it. The pot re-stuck itself the instant the first pass finished, and this time the wire drags fresh water underneath the whole footprint. Nudge it with a fingertip afterwards. It should shift a millimeter.
-
Dry your hands. Completely
This step feels optional and is not. Wet fingers stick to a wet wall, so the pot moves and your fingers stay, and the grab you make to catch it is the dent you will look at forever.
-
Take it low, with a small twist, and move it level
Both hands as close to the base as you can get them, even pressure from both sides, and a tiny rotation as you start to move it so air gets under one edge and the suction stops existing. Then straight across to a spot you already picked out, not up and over in an arc. Never the rim.
What it feels like when it is right
The pot slides before it lifts. If you feel any resistance at the moment you start to raise it, stop, set it back down, and cut again. Resistance means it is still attached somewhere, and pulling through resistance is how you find out exactly where.
How to Lift Pots Off the Wheel — A Beginner’s Guide
Florian Gadsby
Twenty minutes and worth every one of them. The pace of the wire pull and the exact shape of his hands on the lift are the two things the list above genuinely cannot give you. Watch it on YouTube.
Beginners guide to taking pottery off the wheel
Earth Nation Ceramics
Seven minutes, no filler, nothing assumed. It covers the same ground as the list above, and seeing the speed of the wire pull and the shape of somebody’s hands on the lift is the part writing cannot give you. Watch it on YouTube.
How to Cut a Plate off of the Pottery Wheel With a Clay Wire
Pottery on the Wheel with Steve McDonald
No talking, and it is the best look at the hand position on the wire anywhere. A plate is the widest thing a wire ever has to cross, so if the geometry works there it works on your mug. Watch it on YouTube.
The tool nobody thinks about
Half of this is the wire.
It is two toggles and a length of wire and it costs about as much as a coffee, which is exactly why nobody ever examines it. Three things about how you hold it change what the bottom of your pot looks like.


- Taut, and pressed flat on the metal. Thumbs down on the wheel head, wire under real tension between your hands, drawn toward you and all the way out the far side. If your hands rise even slightly during the pull, the wire climbs and enters the pot at an angle.
- An even floor is the whole prize. A base that is the same thickness across dries evenly, shrinks evenly, and does not crack. It also trims predictably later, which is the part you will appreciate a month from now.
- A slack wire bows upward. Clay drags on it as it travels, so a loose wire lifts in the middle of the pass. Nothing about this is visible while you do it.
- And it takes the middle of your floor with it. If your bottoms keep coming out thin in the center and thick at the edges, and you have already blamed your opening and your compressing, this is the answer. It is a wire problem wearing a throwing problem’s clothes.
Twisted or smooth is not decoration
A twisted wire leaves the familiar shell pattern and saws through slip more aggressively, which is genuinely useful on a stubborn cut. A smooth wire drags less and leaves a clean flat bottom. Plenty of potters carry one of each and reach for the smooth one on anything they intend to leave untrimmed.
Clean it between passes
Pinch the wire between two fingers and run it clean after every pull. Slip that dries on a wire turns it into a rough saw, then into a wire that snaps mid-cut with your hands moving. Ten seconds of care and one wire lasts you years.
Pull it all the way through
Out the far side, every time. A wire that stops under the pot and gets pulled back the way it came leaves a ridge across your floor, and on a wide base it can re-seal the halves back together while you are still holding the toggles.
How to Cut a Plate off of the Pottery Wheel With a Clay Wire
Pottery on the Wheel with Steve McDonald
Thirty-six seconds, no talking, and it is the best look at the hand position anywhere. A plate is the widest thing a wire ever has to cross, so if the geometry works there it works on everything. Watch it three times, which costs you under two minutes. Watch it on YouTube.
When the default will not do
Float it, slide it, or leave it where it is.
Three methods for the pots that punish a grip, and one argument about timing that potters have been having with each other for about a century.
Method three
Float it off
For anything heavy, anything wide, and anything you know in your gut you cannot pick up. The pot never leaves the horizontal, so its walls never have to hold their own weight in a new direction.
- Wire off as normal, twice, exactly as in the nine steps.
- Now flood it. A real puddle of water onto the wheel head all around the foot, considerably more than feels sensible.
- Pull the wire through once more. The water follows it under and the whole footprint comes up onto a film.
- Push, do not lift. Flat hand against the outside of the foot, and move the pot horizontally across the wheel head.
- Have a bat or board held hard against the edge of the wheel head and level with it, and slide the pot straight across onto it.
- It should travel like a glass on a wet bar. If it drags, it is not floating. Stop and add more water.
Method four
Slide it off
For shallow, thin and flared forms, where the problem is not weight but that there is nowhere on the pot your fingers can safely go. Your hands never touch the wall at all.
- Wire off twice. Do not add the flood, because you want grip on the board, not on the wheel.
- Hold a tile, bat or ware board hard against the edge of the wheel head and level with its surface.
- Slide a wide metal rib or a bench scraper under the foot from the far side, keeping it flat on the metal.
- Draw the piece across onto the board in one motion, guiding it with the backs of your fingers on the foot only.
- If it wants to stick halfway, stop pulling and cut again. Never bend the blade to lever it.
Hydroplaning A Large Pot Off the Wheel
Miss Linnea Lark
A minute and a half, and it settles the one thing people get wrong about this method, which is how much water is enough. Watch how much she uses. It is more than you are currently imagining. Watch it on YouTube.
Method five, and the argument
Wait it out, and the fight about when to cut a bat loose.
The oldest trick on the list: do not move it yet. A pot that has firmed up for twenty minutes forgives a grip that soft clay would not, and nothing about waiting requires any skill whatsoever. The cost is a wheel nobody else can use, which in a shared studio is a real cost and the reason bats exist.
Cut it loose now
Especially on a plastic bat. Clay shrinks inward as it dries, and a non-porous surface will not let the base move with it, so the floor tears. Cutting the pot free early lets it shrink freely while it sits exactly where it is.
Leave it alone until it stiffens
The other camp, and they are not wrong either. A soft pot cut free can settle unevenly on its own slip, and a firmer pot handles both the cut and the move far better. On wood, which drinks water and releases on its own, this is usually the right call anyway.
What both camps actually agree on
Do not cut it free and then pick it up while it is at its softest and its heaviest. That is the combination that ruins pots, and it is the one most people default to because it feels like finishing the job. Pick a lane instead: cut loose early and leave it sitting, or leave it entirely and come back when it has stiffened.
Why I don’t wire pieces off the batt immediately after throwing them
Old Forge Creations
Somebody making the opposite case to the one most beginners get told, at length and with reasons. We are including it because we would rather you understood the disagreement than memorized one side of it. Watch it on YouTube.
And the method where none of this comes up
If the base is wider than your two hands together, you should not be lifting it, today or in twenty years. Put it on a bat and lift the bat. We stock round wood and MDF bats, round plastic bats and square bats, they live on the racks, and they are free at every Level with nothing to check out. The whole decision, including how to seat one so it does not fling clay across the room, has its own page.
One table, eight forms
What you made changes the answer.
The same pair of hands should not treat a mug and a platter the same way. This is the whole page in one grid, including the specific thing that kills each form.
| What you made | Reach for | What actually ruins it |
|---|---|---|
| Mug, cup or tumbler | Wire and lift | Squeezing the wall to get a grip on it. Hold, do not pinch. |
| Cylinder or vase | Wire and lift | Fingers creeping up the wall as the pot gets taller. Stay at the foot. |
| Small bowl | Wire and lift, from underneath | Lifting by the rim. The rim is the thinnest part and it keeps whatever shape you give it. |
| Wide or shallow bowl | Slide it, or float it | Any grip at all. There is no safe place on this form for a thumb. |
| Plate or platter | A bat, every time | Deciding to be a hero about it. Nobody is impressed and the plate is oval. |
| Tall and heavy | Float it off | Weight plus soft walls. The shape changes in transit no matter how good the hands are. |
| Porcelain, thin or flared | A bat, or a slide transfer | Fingerprints. Our #16 Porcelain records every one of them and will not let go of it. |
| Something tiny, off a hump | Two dry fingers, or a blade underneath | Squashing it flat between fingertips because it weighs nothing and felt safe. |
How to lift a bowl off the pottery wheel.
Bill van Gilder
Four minutes from a teacher who has been explaining this for decades. A bowl is where most people first discover that their cup technique does not transfer, and this is the clearest fix for it we could find. Watch it on YouTube.
Your clay body has an opinion too
#16 Porcelain is the least forgiving body in the building. Beautiful, and it will show you a fingerprint you did not know you left.
Berlin Gray gets heavy and wants to sag once a piece is big, so it rewards floating and punishes a slow, careful lift.
52 Buff and B-Mix w/Grog take a grip better than anything else we stock, which is part of why 52 Buff is the house starter.
If a pot survived the lift last week and the same shape failed this week, check what you had in the bag before you blame your hands.
Something went wrong
Nine ways this goes badly, and what each one means.
Three things that go wrong.
Find the thing that happened to you. Almost all of these have a single cause and most of them are fixable on the pot you are holding right now.
These are the three that happen on a first night. All three have a single cause, and all three are fixable on the pot you are holding right now.
The rim went oval when I lifted it
Usually not ruined. A slight oval from the lift can ease back toward round as the clay settles, as long as you set it down flat and leave it alone. A clear oval will not, so do not count on it.
The damage almost always comes from the fix rather than the lift. Dry fingers pushing an oval rim back into round leave dents and flat spots that never come out, and now you have a permanent problem instead of a temporary one. Set it down, walk away, look again in five minutes.
I put a dent in the wall
Wet hands, nine times out of ten. Your fingers stuck to the wall, the pot moved without them, and you grabbed to catch it.
On a small dent, let the pot firm up to leather hard and then work it out from the inside with a rib while supporting the outside with your other hand. On a deep one, the wall is thinner there now and it will stay thinner, so decide whether you can live with it before you spend an hour. Next time, dry your hands properly first and hold lower.
The bottom came out domed, thin in the middle
A slack wire. It bowed upward under the drag of the clay and scooped a dome out of your floor, which is the second diagram in the wire section above.
You cannot put that clay back. What you can do is stop it happening again: both hands low, thumbs pressed down on the wheel head, real tension between them, one steady pass all the way out the far side. If a very thin floor is a recurring problem for you, we have a whole page on rescuing bottoms thrown too thin.
It will not come loose no matter how many times I cut
You are cutting the same dry channel over and over. The wire separates the clay and then the two faces press straight back together with nothing between them, so the cut closes behind the wire as fast as it opens.
Water is the answer, not force. Sponge the slip ring away, put real water at the foot, and cut again so the wire drags that water underneath. If it still will not move, flood it properly and float it off instead of lifting.
The pot slid across the wheel head while I was cutting
It was already free and you kept pulling. That is a good sign, not a bad one, and the only real risk is that it slid into your other hand or off the edge.
Steady the pot with a flat palm against the outside of the foot while you draw the wire, and keep your body between the pot and the edge of the wheel. If it has genuinely gone over the side, reclaim it and move on. Every collapsed pot is a free bag of clay you already paid for.
The wire came up through the wall and cut the pot in half
Your hands rose during the pull, so the wire climbed and exited through the side instead of the far edge. It usually happens on the second half of the pass, once you have started thinking about the next step.
Thumbs stay down on the metal from start to finish. Pull toward yourself rather than upward and outward, and follow the wire all the way past the far edge of the pot before you let the tension go.
The base cracked overnight, in a curve or a straight line
Two different cracks with two different causes. A crack around the edge of the floor is usually a base that could not shrink, which means it was left stuck to a non-porous surface while it dried. Cut pieces loose from plastic early and let them sit.
A crack across the middle, particularly an S shape, is usually uneven drying: a thick floor that stayed wet while the thinner walls dried and shrank around it, and those walls pulled its soft middle apart. Compressing the floor after opening still helps, and potters argue about how much, but either way it has nothing to do with the removal. The throwing guide covers that one properly.
It stuck to my hands and came up with them
Wet hands again, and it is worth saying twice because it is the most common single cause of a wrecked lift in this building.
Wet clay against wet skin behaves like glue in exactly the way wet clay against a wet wheel head does. Dry your hands on a towel, not on your apron, and dry the backs as well as the palms because that is what touches a bowl.
The pot twisted out of round as I lifted it
Uneven pressure between your two hands, or one hand higher than the other. One side got more grip than the other and the pot rotated against itself while it came up.
Both hands at the same height, the same distance from the base, the same pressure. And if the pot was already twisting on the wheel before any of this, that is a separate problem with its own page here.
Keep this one open
The version for when your hands are already muddy.
Everything above, cut down to the part you need while the wheel is still in front of you. One step at a time, one big target to tap, and a switch to see all nine at once if you would rather scroll. Nothing is saved anywhere, so it starts clean every time you load the page, which is what you want on a shared studio phone.
Finish the base
Compress the floor, undercut the foot at an angle, and sponge the standing water out of the inside. None of the three is available to you once the pot is off the wheel.
- Finish the base. Compress the floor, undercut the foot at an angle, and sponge the standing water out of the inside. None of the three is available to you once the pot is off the wheel.
- Stop the wheel. All the way stopped, not merely slow. Everything from here happens on a still wheel.
- Sponge the slip away. Take the ring of thick slop off the wheel head all the way around the foot. That is clay, and clay is glue.
- Water at the base. A few drops right at the edge of the foot, all the way around. Not a puddle. You are giving the wire something to drag under with it.
- Cut once. Taut wire, thumbs pressed down on the metal, one steady pass toward you and all the way out the far side.
- Clean the wire and cut again. Pinch it clean between two fingers, put a few more drops of water down at the foot, then cut a second time. This is the pass that actually frees it. Nudge the pot with one fingertip afterwards. It should shift a millimeter. If it does not, cut a third time.
- Dry your hands. Properly, on a towel, backs as well as palms. This is the step everybody skips and it is the one that dents pots.
- Lift low, with a twist. Both hands at the foot, level with each other, even pressure, and a small rotation to break the last of the suction. Never the rim.
- Move it level. Straight across to a spot you already picked out, not up and over in an arc. Set it down flat and then leave it alone.
If the pot is wider than your two hands, heavy, shallow or porcelain, stop after step six and go back up to float it or slide it instead. Steps seven to nine are for pots you can safely hold.
Questions we actually get
The rest of it.
Why do I have to cut the wire under twice?
Because the pot re-attaches itself in the seconds after the first pass. The wire separates the clay from the metal, then the two surfaces settle straight back down together with nothing in between, and a thin film of water between two flat surfaces grips hard.
The second pass drags fresh water across the whole footprint and leaves it there. That is the difference between a pot that slides and a pot that fights you. It costs four seconds and it is the single highest return habit on this page.
How wet is too wet?
For a normal lift, a few drops at the foot. For floating a big piece, a genuine puddle, and more than feels right.
The thing to avoid is water sitting inside the pot on the floor while it dries, which softens the base and warps it. Sponge the inside out before you cut, not after, and then whatever you put on the wheel head stays on the wheel head.
Should I sign the bottom before or after I take it off?
Right after you set it down, while you are still sitting there. Leather hard works fine too, but the number of unsigned pots on a studio shelf suggests that later rarely happens.
Write the clay body on there as well. In three weeks you will not remember whether that was B-Mix or Half & Half, the glaze will behave differently on each, and you will very much want to know which was which.
Is it cheating to use a bat instead of learning to lift?
No, and we would like to retire the idea. Working potters who sell their pots own stacks of bats and reach for one without a second thought. A bat is a decision about the pot, not a report card on you.
The one caution is the reverse: if you use a bat for absolutely everything from day one, you can be two years in and still unable to get a mug off a wheel head. Build the skill on small cups where the stakes are nothing, and use a bat the moment the form deserves one.
Do I need a special tool for this?
A cutting wire, a sponge and a towel. That is the entire kit, and a wire is in every beginner tool set sold.
A wide metal rib or a bench scraper makes the slide transfer much easier, and a palette knife is handy for tiny pots off a hump. There are dedicated pot lifters on the market and they work, but nobody needs one to get started and plenty of potters never buy one.
How long can I leave a pot sitting on the wheel?
Long enough to stiffen is usually a help rather than a problem, and twenty minutes to an hour makes a real difference to how a soft pot handles.
The limit here is social rather than technical. In a shared studio a wheel you are not sitting at is a wheel somebody else could be using, so if you want the waiting strategy, throw on a bat and give the wheel back. That is most of what bats are actually for.
My pot came off fine and then warped on the shelf. Was that the lift?
Possibly, but drying is the more likely culprit. In a climate as dry as ours, assume you are drying things too fast until proven otherwise.
Wide pieces dry faster at the edge than in the middle and go saddle shaped, which is why standing a bowl or plate on its rim once it is firm helps so much. Cover the rim rather than the whole pot, and slow everything down.
Does any of this change on a kick wheel?
Not really. Everything on this page is about what is happening between the clay and the wheel head, and a kick wheel head is the same flat disc with the same water film and the same suction underneath.
The one practical difference is that a kick wheel keeps coasting after you stop pedalling, so give it a moment longer to come to a genuine stop before the wire goes anywhere near it.
I wrecked it. Can I just start again with the same clay?
Yes, and you should. Every collapsed pot is a bag of clay you already paid for, and there is no such thing as a wasted lump.
Wedge it back up properly before you throw it again so the moisture is even through it. A pot that fails and gets reclaimed on the same evening is the cheapest possible practice, and it is roughly how everybody who is good at this got good at it.
Go throw something
Nobody is born good at the last eight seconds.
Every potter you admire has ovalled a rim, dented a wall with their own thumb, and pulled a wire straight out through the side of something they liked. The difference is that they stopped treating it as a mystery and started treating it as four moves in an order.
Take the slip away. Add water. Break the seal. Move it level. Then go and get it wrong a few times on cups that do not matter, which is the only version of this that has ever worked for anybody.
How to Throw on the Wheel
The full guide this page sits inside. Centering, pulling, a hundred tips and a long list of the ways it goes wrong.
To Bat or Not to Bat?
When a bat saves your pot, when it wastes your time, and how to seat one so clay never leaves the wheel without you.
Trimming and Turning
What happens to that base once the pot is off, firm, and back on the wheel upside down.
Tap Centering Practice
Getting a pot true again for trimming, plus a practice wheel that runs in your browser with no clay required.
24 more free pottery videos
Eight core skills, hand-picked lessons, fifteen of the best ceramic artists on YouTube. None of them ours.
Ask the FAQs page anything
Studio rules, firing costs, membership questions, and the things people are a little afraid to ask out loud.
Every video on this page belongs to the potter who made it and we have credited all of them. Nothing loads from YouTube until you press play.
You are reading the Nutshell Version. The switch at the top of the page opens the comprehensive one, which covers four more methods, the wire itself, and what to do form by form.