Pottery Date Night
 Bring All Your Friends Free Week
 Give a Month of Pottery
 Private Pottery Parties

 The Welcome Booklet
 Your First Ten Sessions
 The Pottery Process
 Finding the Studio
 Your Classes Never Expire
 The Four Tables
 Who’s Who
 The Rewards Program
 Flux Glazes
 The Calculators
 Kiln Tracker
 Holiday Kiln Deadlines

 Beginner’s Tool Set
 Fingernail Clippers
 Mayco Clay Mender
 Epoxy for Kintsugi
 Applicator Bottles
 Large Bead Rack
 Raku Workshop
 Nighttime Raku
 Horsehair and Feather Raku
 The Clay Hole T-Shirt
 Embroidered Crewneck
 Zip-Up Hoodie
 Pre-Made Bisqueware
 Glaze Catchers
 Kiln Cookies
 Clay Cubby Rental
 The Glaze Bible, Printed
 The Book of Molds, Printed
 Printable Pottery Guides
 Free Printable Trackers
 Gifts for Potters
 Christmas Pottery Ideas
 Mother’s Day Gift Ideas
 Pottery Date Night
 Studio Calendar
 2027 Studio Events
 What Should I Do Today?
 How to Throw on the Pottery Wheel
 How to Make a Pinch Pot
 How to Tap Center a Pot
 The Five Stages of Clay
 Is Pottery Hard to Learn?
 Pottery Wheel Practice Drills
 20 Easy Hand-Building Projects
 Everything That Sounds Wrong

 A Beautiful Piece, Every Time
 Slab Roller Tips
 Any Dish as a Slump Mold
 Slab Roller & Slab Mold Certification
 The Pottery Skill Tree
 Clay & Pottery Calculators
 Logging Your Pottery and Glazes
 The Pottery Dictionary
 Why Did My Pottery Do That?
 The Pottery Cone Chart
 Pottery Myths, Fact-Checked
 Is Handmade Pottery Food Safe?
 Incredible Ceramic Artist Videos
 How Dan Throws Giant Pots
 How to Dry Your Pottery
 The Pottery Wheel Introduction
 Pottery by Zodiac Sign
 Personality and the Pottery Wheel
 Pottery for Engineers
 ADHD, Hyperfocus, and Never Running Out
 Hobbies for Burnout
 Screen-Free Hobbies for Adults
 Every Addiction I Ever Had Lost to Art
 Functional Pottery Is Engineering
 How Do We Compare?
 Pottery Classes by City
 Every Pottery Studio in Utah
 Pottery in Draper
 Featured Members
 The Signature Wall
 Making Friends as an Adult Is Brutal
 The Clay Hole Commandments
 2027 Pottery Contests
 2027 Studio Parties
 Gallery Night

 Scream It Into the Void
 Destroy the Glaze Wall
 Daily Affirmation Cards
 Everything That Can Go Wrong
 Subscribe to Our Newsletters
 Contact The Clay Hole
 Corporate Team Building

 Glaze Combinations
 Glazes We Do Not Carry
 Making Glaze Test Tiles
 The Mega Glaze Tool
 How to Use the Mega Glaze Tool

 Glaze Brushing Techniques
 How to Use Underglaze
 How to Use Dipping Glazes
 Glaze Problems, Causes and Fixes
 The Dipping Glaze Guide

 Making a Glaze Catcher
 Fused or Sharp After Firing
 The Signature Wall
 His Viral Videos
 His Own Ceramics
 Meet Mud
Throwing Advice
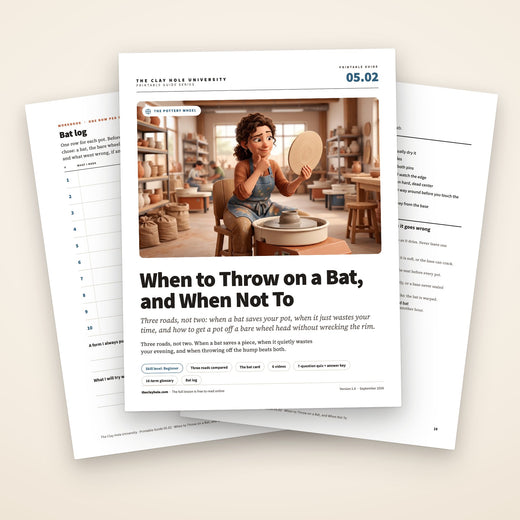
To bat, or not to bat?
Every potter hits this question in their first month, and almost nobody explains it properly. You get told “use a bat for plates” and then you are on your own. So here is the whole thing: when a bat saves your pot, when it just wastes your time, how to seat one so it does not fling clay across the room, and how to get a pot off a bare wheel head without wrecking the rim.
One question decides it, and you can answer it in about half a second by looking at the pot in front of you. After that, here is how to seat a bat so it does not fling clay across the room, and how to get a pot off a bare wheel head without wrecking the rim.
Written for members of The Clay Hole, and useful to anybody with a wheel. Every video on this page is somebody else’s, and every one of them is free.
Written for members of The Clay Hole, and useful to anybody with a wheel. The one video on this page is somebody else’s, and it is free.

The whole decision
One question decides it.
Look at the pot in front of you. Can you get a hand on either side of the base without touching anything you have just finished?
That is the entire question. It takes half a second, the answer changes from pot to pot, and it changes for everybody, forever.
Answer: no
Use a bat
Plates, platters, shallow bowls, anything wider than your two hands, anything heavy. There is nothing to hold that is not the part you would ruin by holding it.
Also use one when you want to trim on the same footprint later, because a bat drops back onto its pins already centered.
Answer: yes
Skip the bat
Cups, mugs, tumblers, small bowls, anything with a wall your fingers can actually grip. Most of what most of us make, most of the time.
Lifting by hand is a real skill, and small pots are the low-stakes place to build it. Practice on the ones you can afford to lose.
Two things before you go
Using a bat is not cheating. Working potters who sell their pots for a living own stacks of them and reach for one without a second thought. It is a decision about the pot, not a report card on you.
There is a third road. Throwing off the hump skips this question entirely, and it is the fastest way to make six of anything. It is in the Comprehensive version above, along with which bat material to grab and five more videos.
Why this page exists
Watch it once. Then read it with wet hands.
There are hundreds of good pottery videos about bats. We have linked six of the best ones below, and you should watch them. But a video alone is a strange way to learn a thing you do with your hands.
A demonstration happens in real time, at the demonstrator’s pace, in the demonstrator’s order. That is exactly right the first time you see something. It is exactly wrong at 8:40 on a Tuesday when your hands are covered in slip, the wheel is still spinning, and you need one sentence you half remember from fourteen minutes into a twenty-minute video.
You cannot skim a video. You can skim a page.
Video teaches the motion
Some things genuinely cannot be written down. How fast a wire should travel. What a properly seated bat sounds like when you drop it on the pins. How gently somebody actually lifts a mug. Watch for that.
Text teaches the name
Watching shows you what it looks like. Reading tells you what it is called. That matters more than it sounds, because you cannot ask an instructor about a thing you have no word for, and you cannot search for it either.
A list survives your hands
Nine steps on a screen you can glance at beats a video you have to unlock, find, and scrub through with a muddy thumb. Prop your phone against the splash pan and work down the list.
Watch, then read
We have no study to wave at you. This is just what we watch happen on the studio floor. People who only watch tend to remember the vibe of a technique. People who watch and then read tend to remember the order of it, and the order is the part that saves the pot. So this page does both, in that order, and every list on it is built to be readable on a phone at arm’s length.
The 60-second answer
There are three roads, not two.
Almost everybody frames this as bat or no bat. That is a false choice, and it is why the question feels harder than it is. There is a third option that solves a whole category of problems the first two do not, and plenty of potters live on it.
Road one
Throw on a bat
Best for
- Plates, platters, anything shallow
- Anything wider than your two hands
- Big, heavy, or very wide work
- Sets that need matching feet
- Thin, flared, or altered rims
Costs you
- A setup step every single time
- A shared bat that has to come back
- A shelf spot until the pot releases
Road two
Throw on the bare wheel head
Best for
- Cups, mugs, small bowls
- Anything you can lift in one motion
- Drilling the same form all night
- Forms with a wall to hold onto
Costs you
- A real skill you have to build
- Some warped rims while you build it
- Fingerprints, until your grip settles
Road three
Throw off the hump
Best for
- Repeats. Six cups in one sitting
- Small forms, quickly
- Never re-centering between pots
- Practicing shape without the reset
Costs you
- Centering a big lump first
- A clean cut-off, which takes practice
- Feet that mostly need trimming later
If you want one sentence to take away
A bat is not a beginner crutch and it is not an advanced tool. It is a way of not touching a pot you cannot safely touch yet. The question is never “am I good enough to skip the bat.” The question is “can I get my hands around this thing without changing its shape.” Sometimes the answer is no even after twenty years, which is why professional potters own stacks of bats.
Testing Out Techniques for Lifting Pots Off the Wheel!
Florian Gadsby
The decision
Reach for a bat when. Leave it on the rack when.
Two lists. Read the left one first, because getting this wrong in that direction costs you a pot, and getting it wrong in the other direction only costs you a minute.
Use a bat
- The base is wider than your two hands together. If you cannot get a hand on either side of the foot, you have no way to lift it. This is the whole rule in one line.
- The form is shallow. A plate has no wall to hold. There is nothing to grip that is not the part you just finished.
- The rim is thin, flared, or altered. Any pressure on the wall telegraphs straight to the rim, and a flared rim has no structure to resist it.
- It is heavy. Weight plus soft walls equals a pot that changes shape on the way to the shelf, no matter how good your hands are.
- You want to trim it on the same footprint. A bat goes back on the pins in exactly one position, so the piece comes back dead centered without you re-centering it.
- You are making a matching set. Same bat, same seat, same foot. Consistency is much easier to hold onto this way.
- You are throwing something that goes floppy. Porcelain and very soft, very wet walls forgive almost nothing on the lift.
- You are still learning to lift. Zero shame in this. Nobody at the studio will notice or care, and a bat has never ruined anybody’s pot.
Skip the bat
- The pot is small enough to lift in one motion. Cups, mugs, tumblers, small bowls. Most of what most of us make, most of the time.
- You are drilling. Ten cylinders in a night means ten bat setups and ten bat cleanups. That is real time, and it is time you could have spent throwing.
- You want to get good at lifting. It is a skill, and a skill you always avoid is a skill you never build. Practice on the pots you can afford to lose.
- The form has a tall wall. A cylinder gives your fingers something structural to hold. That is very different from a bowl.
- You are throwing thick and trimming later. A heavier wall handles a lift much better than a finished one does.
- You need the shelf space more than the convenience. A pot on a bat occupies a bat and a bat-sized footprint until it releases. A pot on a board does not.
Beginner’s guide to Throwing with a Bat.
Earth Nation Ceramics
Throwing dinner plates without a bat! Pottery throwing video
NowWhat?!PotteryWorks
Setup
Seven steps to a bat that stays put.
Five steps to a bat that stays put.
If you have ever watched a lump of clay leave the wheel and hit the floor, or a wall, or a neighbor, it was almost certainly one of the first two steps below. Both take about four seconds.
-
Dry the bat. Actually dry it.
This is the single most common mistake we see in this building, and it is the one that ends with clay across the room. Wipe both faces with a dry towel until they are dry to the touch. A film of water between the bat and the clay is a lubricant, and a spinning wheel will find it every time. A bat straight off the drying rack, or one somebody just rinsed, is not ready.
-
Clear the pin holes.
Dried clay packed into a pin hole holds the bat up on one side. It will look seated and it will rock. Poke both holes out with a finger or a tool, and check the pins on the wheel head are clean too.
-
Drop it flat onto both pins.
Both pins, at the same time, straight down. Not one corner first. You should feel it land rather than settle.
-
Spin it slowly and watch the edge.
Rest a finger just above the rim of the bat and turn the wheel by hand. If the edge rises and falls under your finger, it is not seated, or the bat itself is warped. Take the four seconds. It saves the pot.
-
Slam the clay down hard, dead center.
Gently placing clay is how clay comes loose. Throw it down with real intent, as close to the middle as you can manage. The impact is doing structural work.
-
Pat the base all the way around before you touch the pedal.
Press the bottom edge of the lump down and outward against the bat, working right around the circle. You are sealing the join. Skipping this is the third way clay leaves a bat.
-
Keep the puddle away from the base.
Water pooling around the foot slowly dissolves the seal underneath you, and on a long throw you can lose a piece that was fine ten minutes ago. Sponge the well out as you work.
-
Dry the bat. Actually dry it.
This is the mistake we see more than any other in this building, and it is the one that ends with clay across the room. Wipe both faces with a dry towel until they are dry to the touch. Water between bat and clay is a lubricant, and the wheel does the rest.
-
Clear both pin holes and drop it flat onto the pins.
Dried clay packed in a hole holds one side up, so the bat looks seated and rocks. Poke both holes out, then land the bat on both pins at once rather than one corner first.
-
Spin it by hand and watch the edge.
Rest a finger just above the rim and turn the wheel. If the edge rises and falls under your finger it is not seated, or the bat is warped. Four seconds, and it saves the pot.
-
Slam the clay down hard, dead center.
Gently placing clay is how clay comes loose. Throw it down with real intent. The impact is doing structural work.
-
Pat the base all the way around, then keep water off it.
Press the bottom edge down and outward against the bat, right around the circle, before you touch the pedal. You are sealing the join. Then sponge the puddle out of the well as you throw, because standing water slowly dissolves that seal underneath you.
The one rule, if you remember nothing else
A wet bat is a slip hazard for your pot. Dry bat, hard slam, sealed base. Do those and clay will almost never come off a bat on you. Skip the first one and it is not a question of if.
Which bat to grab, at The Clay Hole
We stock round wood and MDF bats, round plastic bats, and square bats. They live on the racks, they are free, and there is no level gate. Green, Yellow, Purple, Black, first week or third year, take the one you need.
Wood grips while the pot is wet and lets go on its own as it dries, so it is the right default and the best thing in the building for plates. Plastic absorbs nothing, which means it never lets go and it will not let the base shrink, so wire a pot loose off plastic before you leave or the floor can crack overnight.
It came off and flew across the room
Wet bat, wet clay, or a base you never sealed. Occasionally all three. Dry everything, slam it harder, pat the base, and check nothing is pooling in the splash pan against the foot.
The whole bat is wobbling, not the clay
Clogged pin holes nine times out of ten. Lift it, clear both holes, set it back down. If it still rocks on clean pins, the bat is warped. Put it back and take another one.
The pot cracked at the base overnight
Classic non-porous bat problem. The clay shrinks as it dries and the plastic will not let the base move with it, so the floor tears. Wire it off while it is still soft and let it sit loose on the bat.
The pot will not come off the bat
Usually a porous bat doing its job. Wood grips hard while wet and lets go as it dries, so the answer is almost always patience, not force. Leave it another hour and try again.
Choosing one
Wood, plastic, or square.
There is one idea underneath all of this, and once you have it the choice makes itself. A porous bat drinks water, which means it grips hard while the pot is wet and releases on its own as the pot dries. A non-porous bat does neither. It never grips and it never lets go, so you decide when the pot comes off.
Round wood and MDF
The default, and the right answer most of the time. Porous, so the pot releases itself as it firms up. Grippy enough that wide flat work sits down and stays down. Best bat in the building for plates and platters.
Watch out for
- Never leave one soaking in a sink. They warp, and a warped bat is scrap.
- They can hold enough water to keep a base wet. Give a pot on wood a little longer.
- Chewed-up faces leave ridges in the bottom of your pot.
Round plastic
Wipes clean in one pass, will not warp from water the way wood does, and lasts for years if you keep it out of the sun and away from heat. The trade is that plastic absorbs nothing, so the pot cannot release itself and it cannot shrink freely either.
Watch out for
- Wire it off before it stiffens or the base can crack as it shrinks.
- Slicker surface, so the dry-bat rule matters even more here.
- Great for anything you want to move now rather than tomorrow.
Square bats and tile inserts
The productivity option, and the one most people walk past without understanding. Small footprint, fast swaps, and a stack of them takes almost no shelf space compared to a stack of full rounds.
Watch out for
- Built for small work. Do not try to save a platter with one.
- Ideal for throwing a dozen cups and stacking them straight onto a board.
- Check it is properly seated before every single pot, because you are seating it a lot.
At The Clay Hole, specifically
We stock all three: round wood and MDF bats, round plastic bats, and square bats. They live on the racks, they are free, and there is no level gate on them. Green, Yellow, Purple, Black, first week or third year, you walk over and take the one you need. Bring it back when the pot comes off, and put it back dry.
The wheels take bats on pins, so seating one is the drop-onto-two-pins move described above. And the mistake we see far more than any other is a bat that went on wet. Dry it first.
Comparing Different Bats | Throwing on Pottery Wheel | Plastic, Plaster or Masonite | Ep 68
Blue Nose Trading
The skill worth building
Getting a pot off a bare wheel head.
This is the one people quietly avoid for a year because the first ten attempts go badly. They go badly for a reason, and the reason is almost never your hands. It is that the pot was still glued down when you tried to move it.
-
Finish and compress the base first.
Do this before you think about lifting. Once the pot is off the wheel you are not getting a rib in there again. Sponge any standing water out of the inside too.
-
Stop the wheel, then clean the slip off the wheel head around the foot.
Not slow, stopped. Everything from here happens on a still wheel. Slip is glue. That ring of thick slop sitting against the base is a large part of what is holding the pot down, and a sponge takes it away in one pass.
-
Put a few drops of water at the base.
Half a teaspoon, right at the edge of the foot, all the way around. Not a puddle. You are giving the wire something to drag underneath the pot.
-
Pull the wire through, taut and flat.
Both hands, wire pulled tight, held flat against the wheel head, drawn toward you in one steady pass. Slack wire bows upward and cuts a curve into your floor. Then clean the slip off the wire with your fingers.
-
Add a few more drops and cut again.
The second pass is the one that matters, because it drags that new water under the pot. When you feel the piece shift very slightly, it is floating and it is ready.
-
Dry your hands completely.
Wet hands stick to a wet wall and drag it out of shape. This step feels optional and is not. Dry them properly, every time.
-
Take it low, at the foot, with a small twist.
Both hands, fingers as close to the base as you can get, even pressure from both sides. A gentle twist breaks the last of the suction. Do not squeeze, and do not grab the rim.
-
Move it level and set it down flat.
Straight across, not up and over. Keep it upright the whole way and have the board or shelf already within reach before you pick anything up.
-
If the rim went slightly oval, leave it alone.
It usually relaxes back on its own within a minute or two. Poking at an oval rim with dry fingers is how a small problem becomes a permanent one.
-
Compress the base, then sponge the slip away from the foot.
Compress while you can still reach it, because once the pot is off you are not getting a rib back in there. Then clear that ring of thick slop off the wheel head around the base. Slip is glue, and it is a large part of what is holding the pot down.
-
A few drops of water at the base, then wire through taut and flat.
Half a teaspoon right at the edge of the foot, not a puddle. Both hands, wire pulled tight and held flat against the wheel head, drawn toward you in one steady pass. Slack wire bows up and cuts a curve into your floor.
-
Clean the wire, add more water, cut again.
The second pass is the one that matters, because it drags that new water under the pot. When you feel the piece shift very slightly, it is floating and it is ready.
-
Dry your hands completely.
Wet hands stick to a wet wall and drag it out of shape. This step feels optional and is not.
-
Take it low at the foot, even pressure, small twist.
Both hands, fingers as close to the base as you can get, even pressure from both sides. A gentle twist breaks the last of the suction. Do not squeeze, and do not grab the rim.
-
Move it level, set it down flat, then leave it alone.
Straight across rather than up and over, and have the board within reach before you pick anything up. If the rim went slightly oval it usually relaxes back on its own. Poking at it with dry fingers is how a small problem becomes a permanent one.
How to Lift Pots Off the Wheel — A Beginner’s Guide
Florian Gadsby
The third road
Off the hump, where the question stops mattering.
Center one big lump. Throw a pot off the top of it. Cut that pot free, and the lump is still centered and waiting. Throw another. You are not using a bat and you are not lifting off a wheel head, because you never put anything on the wheel head in the first place.
It is the fastest way to make six of anything, and it is the single best way to practice a shape, because the reset between attempts is well under a minute instead of five.
-
Wedge a big lump and cone it up.
Considerably more clay than one pot needs. Slam it down hard and cone it into a tall mound. Some potters put the whole hump on a bat. In our hump lesson it goes straight onto a dry wheel head.
-
Center only the top few inches.
This is the part that surprises people. The bottom of the mound does not need to be centered at all. You are only truing up the amount of clay you are about to use.
-
Open and throw the pot from that top section.
Exactly like normal throwing, just higher off the wheel. Keep the pot small. Off the hump is for cups, small bowls, lids, and test shapes, not for platters.
-
Undercut the base with a needle tool.
Cut a groove in under the foot while the wheel turns, so the pot is sitting on a narrow neck of clay. This is what makes the cut-off clean, and it is also where you shape the beginnings of a foot.
-
Wire it off just below the base.
Hold the wire taut and slice through the neck. Some people cut with the wheel spinning slowly, some stop it first. Both work. Start with it stopped.
-
Lift with dry hands, or slide it onto something flat.
Small pots come off between two dry fingers. Anything less confident goes onto a small square bat or a palette knife slid in underneath.
-
Re-true the top and go again.
Thirty seconds of re-centering the new top few inches and you are throwing pot number two. Then three. Six cups in the time one careful bat setup would have taken you.
The rounded underside
Everything off the hump comes off with a rounded underside and a base thicker than you meant, so most of those pots need trimming later. If you dislike trimming, off the hump will not feel like a shortcut. If you were going to trim anyway, it is close to free.
Throwing off the Hump | POTTERY 101
Mae Ceramics
Keep this one open
The pocket checklist.
Everything above, condensed to the part you need while your hands are busy. Tap a line to cross it off. Nothing is saved anywhere, so it starts fresh every time you load the page, which is exactly what you want on a shared studio phone.
Before you sit down
Setting a bat
Lifting off a bare wheel head
Before you walk away
Questions we actually get
The rest of it.
Is using a bat cheating?
No, and we would like to retire this idea entirely. Working potters who sell their pots for a living own dozens of bats and reach for one without a second thought. A bat is a way of not touching something you should not touch. That is a decision about the pot, not a report card on you.
Should a total beginner start with a bat or without one?
Without, for your first stretch, and then a bat the moment you attempt something wide or flat. Lifting is a genuine skill and the small cups you make early on are the perfect low-stakes place to build it. If you use a bat for absolutely everything from day one, you will be two years in and still unable to get a mug off a wheel head, which is a strange gap to carry around.
Why did my clay fly off the bat?
The bat was wet. That is the answer well over half the time, and it is the most common bat mistake in this studio by a wide margin. Water between the bat and the clay is a lubricant and centrifugal force does the rest. The other two causes are placing the clay gently instead of slamming it, and never patting the base down to seal it.
How long do I leave a pot on the bat?
On wood or MDF, until it releases on its own, which is usually somewhere around leather hard. Do not force it. On plastic, wire it loose fairly soon after you finish, because plastic will not let the base shrink and a stuck base is how a floor cracks. Either way, once the pot is off, the bat belongs back on the rack for somebody else.
Can I trim on a bat?
Yes, and it is one of the real advantages. A bat only goes back onto its pins one way, so a pot still on its bat returns to the wheel already centered. For a set of matching bowls that alone can be worth the setup, because re-centering a leather hard pot by eye is fiddly and it is where a lot of good pots pick up wobbly feet. That is trimming right way up, on the lower wall and the outside of the base. A foot ring is usually cut with the pot upside down, so it comes off the bat and gets centered again.
Do I need to bring my own bats to The Clay Hole?
No. We stock round wood and MDF bats, round plastic bats, and square bats, they live on the racks, and they are free to every member at every level. There is no gate and nothing to check out. Take what you need, bring it back clean and dry.
My pot went oval when I lifted it. Is it ruined?
Usually not. A soft rim that ovals on the lift often relaxes back within a minute or two if you set it down flat and leave it alone. The damage tends to come from the fix, not the lift, because dry fingers pushing an oval rim back into round leave dents and flat spots that do not go away. Set it down, walk off, and look again in five minutes.
What is the actual difference between a bat and a ware board?
A bat mounts to the wheel and you throw on it. A ware board is just a flat board your finished pots sit on to dry and travel. They get confused constantly because both are flat and both hold pots. If it has two holes for pins, it is a bat.
Go throw something
The bat is not the decision. The pot is.
Stop asking whether you are the kind of potter who uses bats. Look at the thing in front of you and ask whether you can get your hands around it without changing its shape. That is the entire question, it takes half a second, and the answer changes from pot to pot for everybody, forever.
Then go and be wrong about it a few times. That is how the answer stops needing a page.
That is the short version. There is a much longer one behind the toggle at the top, with five more videos, the third road, which bat material to grab, and every way this goes wrong.
How to Throw on the Wheel
The full guide this page sits beside. Centering, pulling, and a long list of the ways it goes wrong, all written to be read.
24 more free pottery videos
Eight core skills, hand-picked lessons, fifteen of the best ceramic artists on YouTube. None of them ours.
Ask the FAQs page anything
Studio rules, firing costs, membership questions, and the stuff people are a little afraid to ask out loud.
Which version would you like to print?
Videos come out as a labeled box with the title and channel to search for, since paper does not play them.